WordPress WooCommerce Marketplace USPS Shipping module provides USPS (United States Postal Service) Shipping method to the customers.
USPS shipping service calculates the shipping rates according to the seller’s product weight, seller’s origin address, and the delivery location.
Using this module, the sellers can provide convenient and affordable shipping service to their customers.
The USPS shipping services ship the products to more than 180 different countries all over the world
Note:
- WordPress WooCommerce Marketplace USPS Shipping is an add-on of WordPress WooCommerce Multi-Vendor Marketplace Plugin.
- Sellers located outside the United States are not permitted to ship orders to U.S. addresses. However, sellers based in the United States are allowed to ship both domestically and internationally.
To use this plugin you must have installed first WordPress WooCommerce Multi-Vendor Marketplace Plugin.
We provide a production version of the plugin. If you want a development version then you can get it at an additional cost. Please contact [email protected] for it.
Note – This plugin is now compatible with WooCommerce’s latest High-Performance Order Storage (HPOS) and Cart and Checkout block.
Watch the video to understand the extension workflow:-
Features
- The admin can enable or disable the marketplace USPS shipping method for checkout.
- The sellers also can enable or disable the USPS shipping method for their products.
- The admin can select allowed shipping methods to display on checkout.
- The seller also can select allowed shipping methods for their products to be enabled on checkout.
- The admin can mention container size as regular or large.
- The admin can define if want the package to be processed by Postal Service equipment or not.
- Real-time shipping method for freight calculation via API.
Installation
The user will get a zip file which he has to upload in the “Add New” menu option in the WordPress admin panel.
For this login to WordPress Admin Panel and Under the Dashboard hover your mouse over the “Plugins” menu option which brings out a Sub-Menu and then select the “Add New” option.

Afterward, you will see an option on the top of your page that is “Upload Plugin”, click the option to upload the zip file.

After clicking on the “Upload Plugin” option, below that you will see a button “Choose File” click on the button to browse for the zip file as per the snapshot below.

After browsing the file, click the “Install Now” button to install the plugin as per the snapshot.

Now when the plugin is installed correctly, you will see the success message and an option to activate the plugin. Click on “Activate Plugin” to activate the installed plugin.

Activate and Update Plugin
Check out how to activate the WooCommerce Plugin through the purchase code and get updates on Webkul Modules directly on the Plugins page
How to create USPS Shipping account?
The user must create a USPS Shipping Account before configuring the shipping method.
After creating an account the user will get a mail with all the details like User ID, Password, link to the USPS test server.

After submitting the form successfully, the user will see a confirmation message as shown in the image below.

Now the user will get an email with all the credentials to access the USPS server as shown in the image below.

Module Configuration
After the installation, the admin can easily configure the module settings. For this, you have to navigate to Marketplace > USPS Shipping as per the below image.
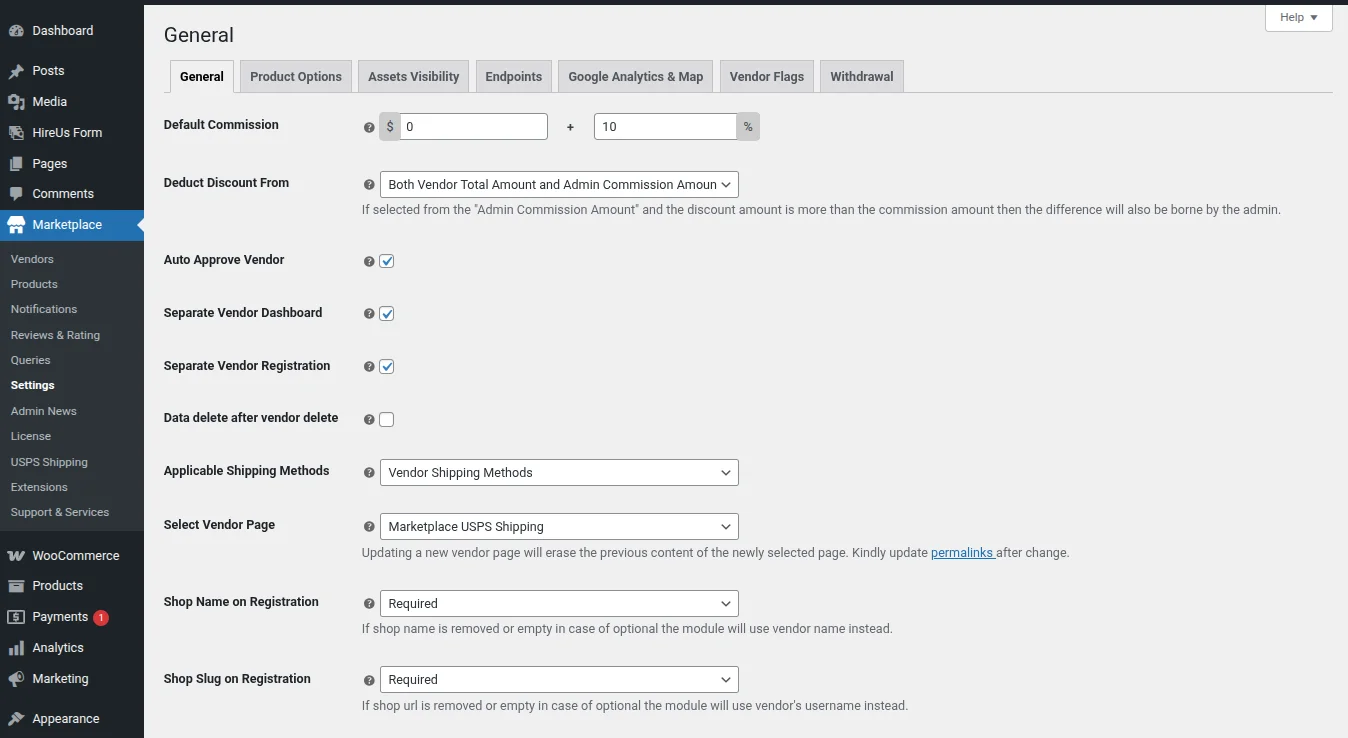
Admin can also navigate by tapping on WooCommerce>Settings>Marketplace USPS Shipping.

Here, the admin will:
- Enable/Disable: enable/disable the module.
- USPS Username: enter the USPS username received after creating the USPS account.
- USPS Password: enter the USPS password received after creating the USPS account.
- Select USPS Domestic Services: Choose the domestic services provided by the USPS.
- Select USPS International Services: Choose the international services provided by the USPS.
- Machinable: Select Yes if want the package to be processed by Postal Service equipment. Else, select No.
- Container Size: Configure the package container size
And, lastly hit the Save Changes button to save the configuration successfully.
NOTE: The admin must create a USPS Shipping Account before configuring the shipping method.
Seller End – WooCommerce Marketplace USPS Shipping
Now, the sellers need to configure the Marketplace USPS Configuration details. For this, the sellers will log in to their account.
The sellers will click on the menu option “Marketplace USPS Shipping” as per the below image.
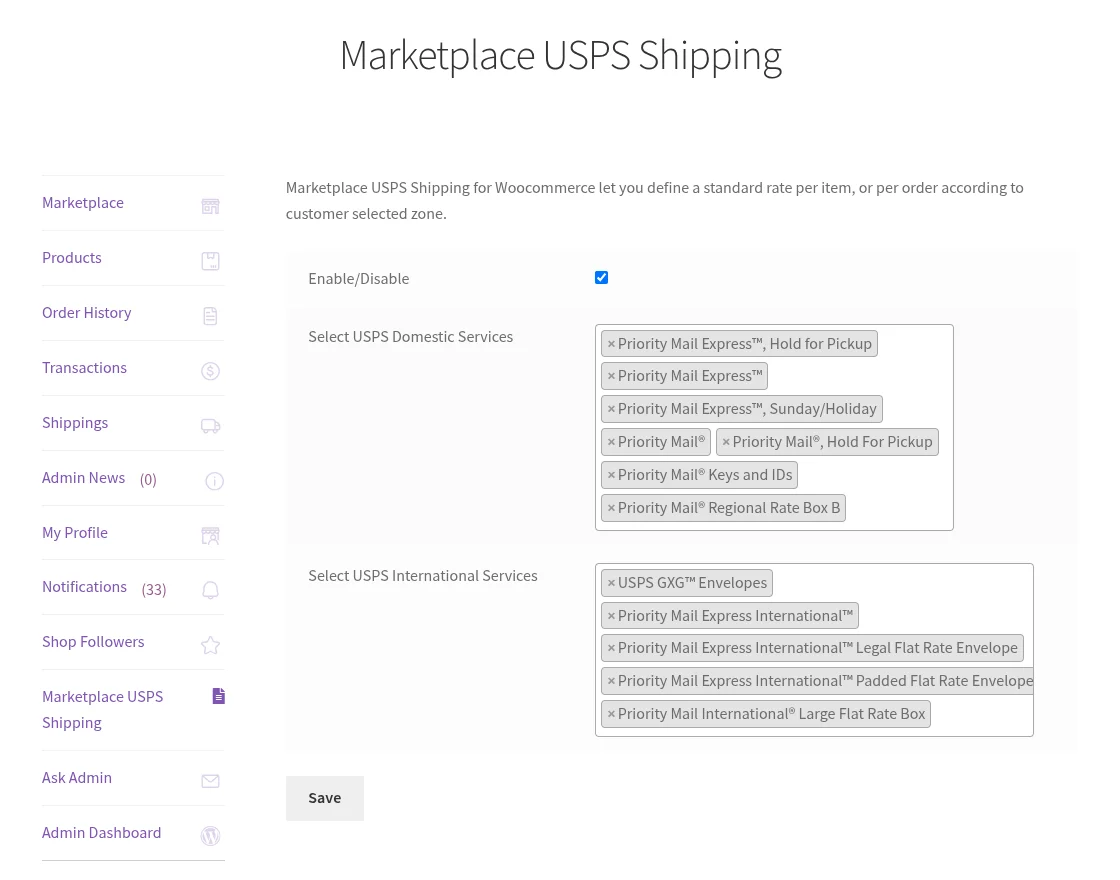
Here, the seller will:
- Enable/Disable: enable/disable the module.
- Select USPS Domestic Services: Choose the domestic services provided by the USPS.
- Select USPS International Services: Choose the international services provided by the USPS.
And, lastly hit the Save button to save the configuration successfully.
Front-End – WooCommerce Marketplace USPS Shipping
The customer can easily use this shipping method for their purchases.
When the customers add the product to cart, they can see USPS Shipping method at the shopping cart page like the below snapshot.
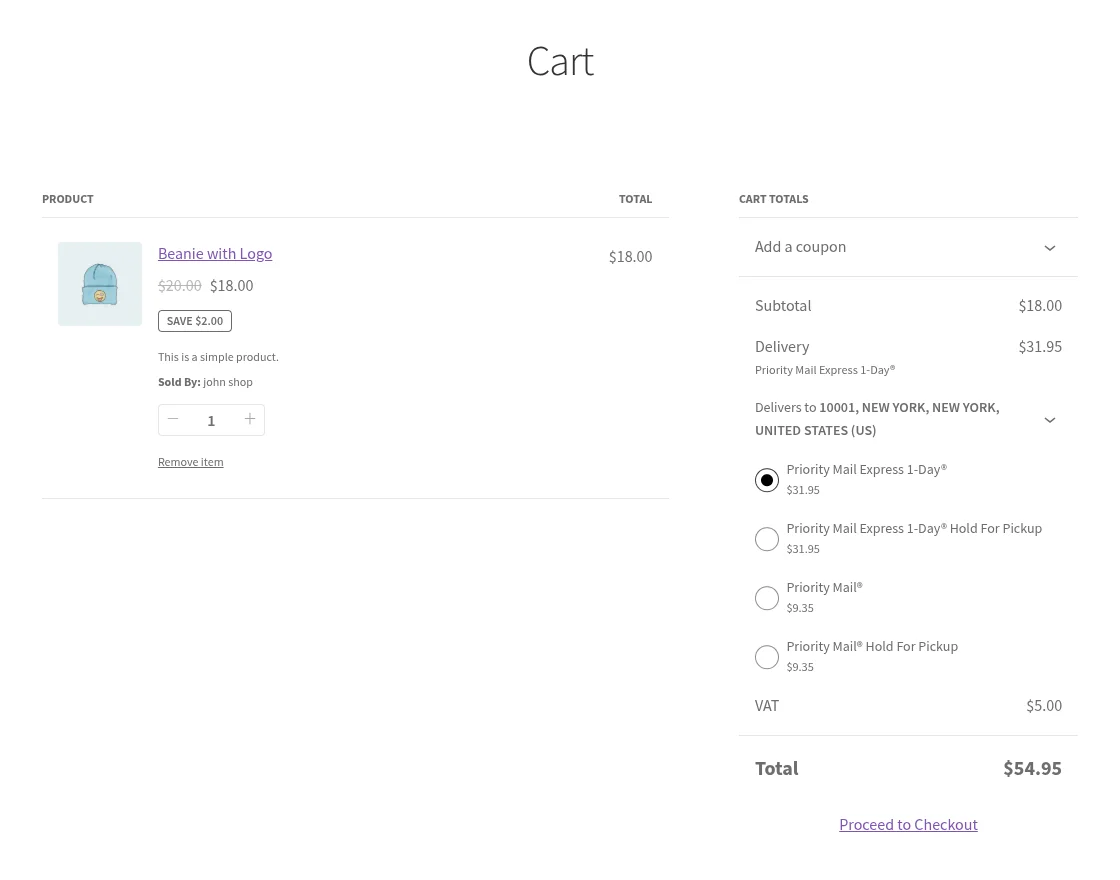
The buyer will select the USPS shipping method as per the choice.

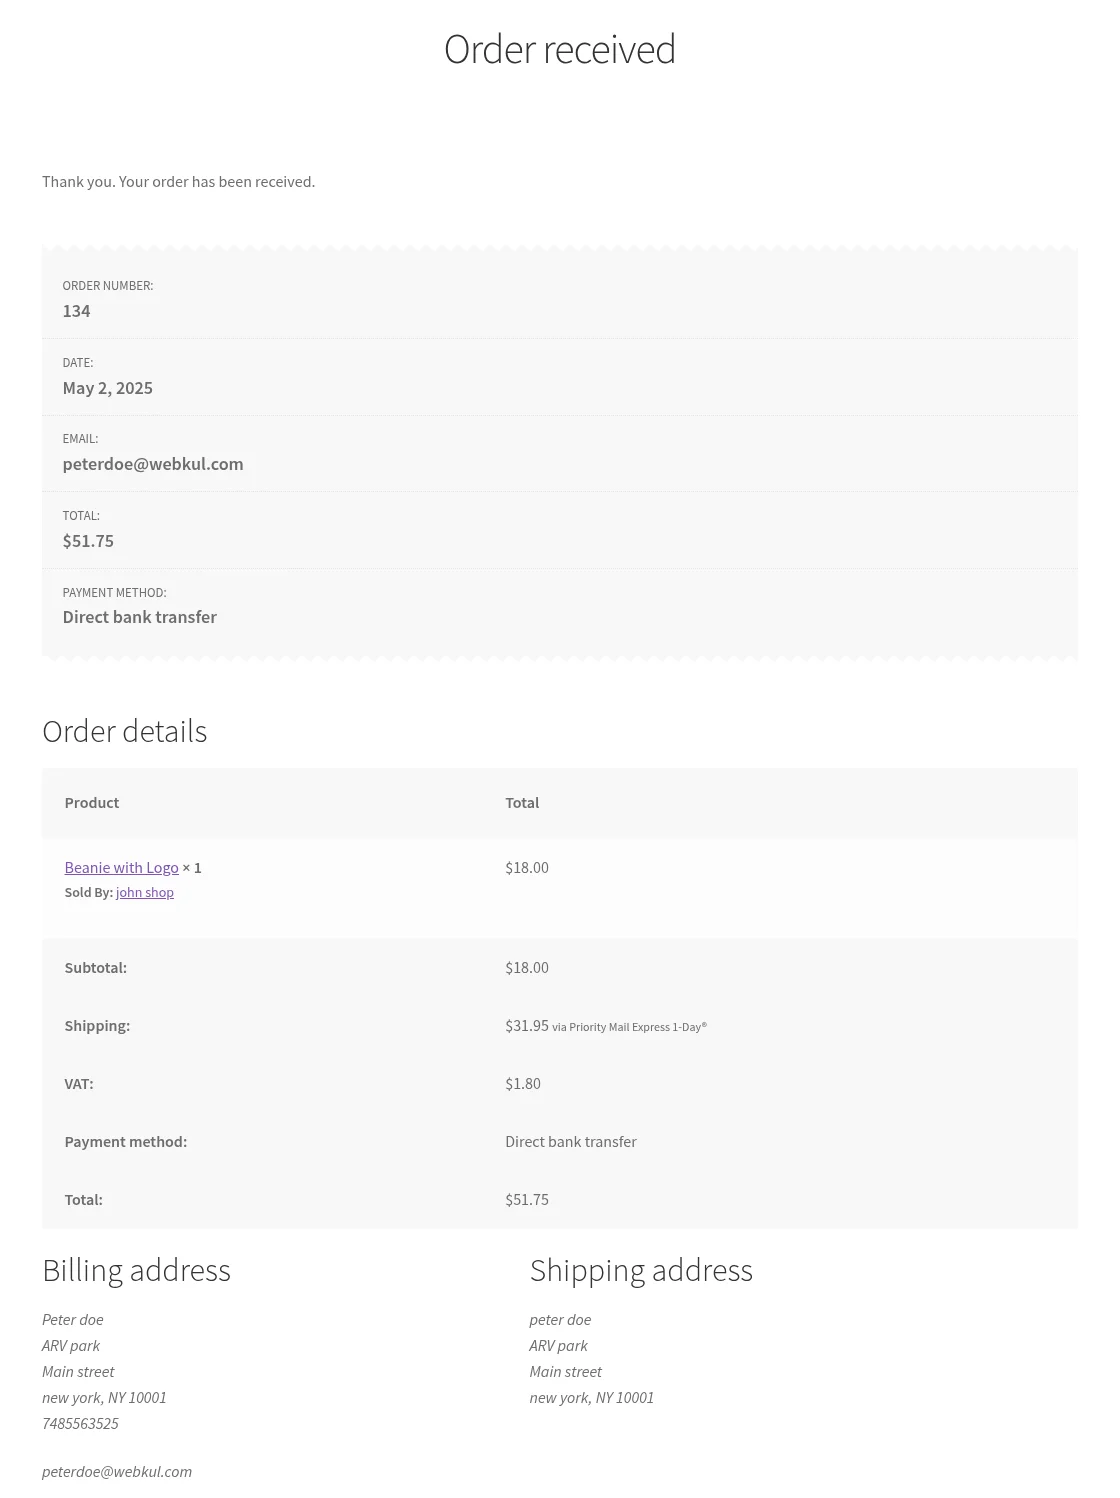
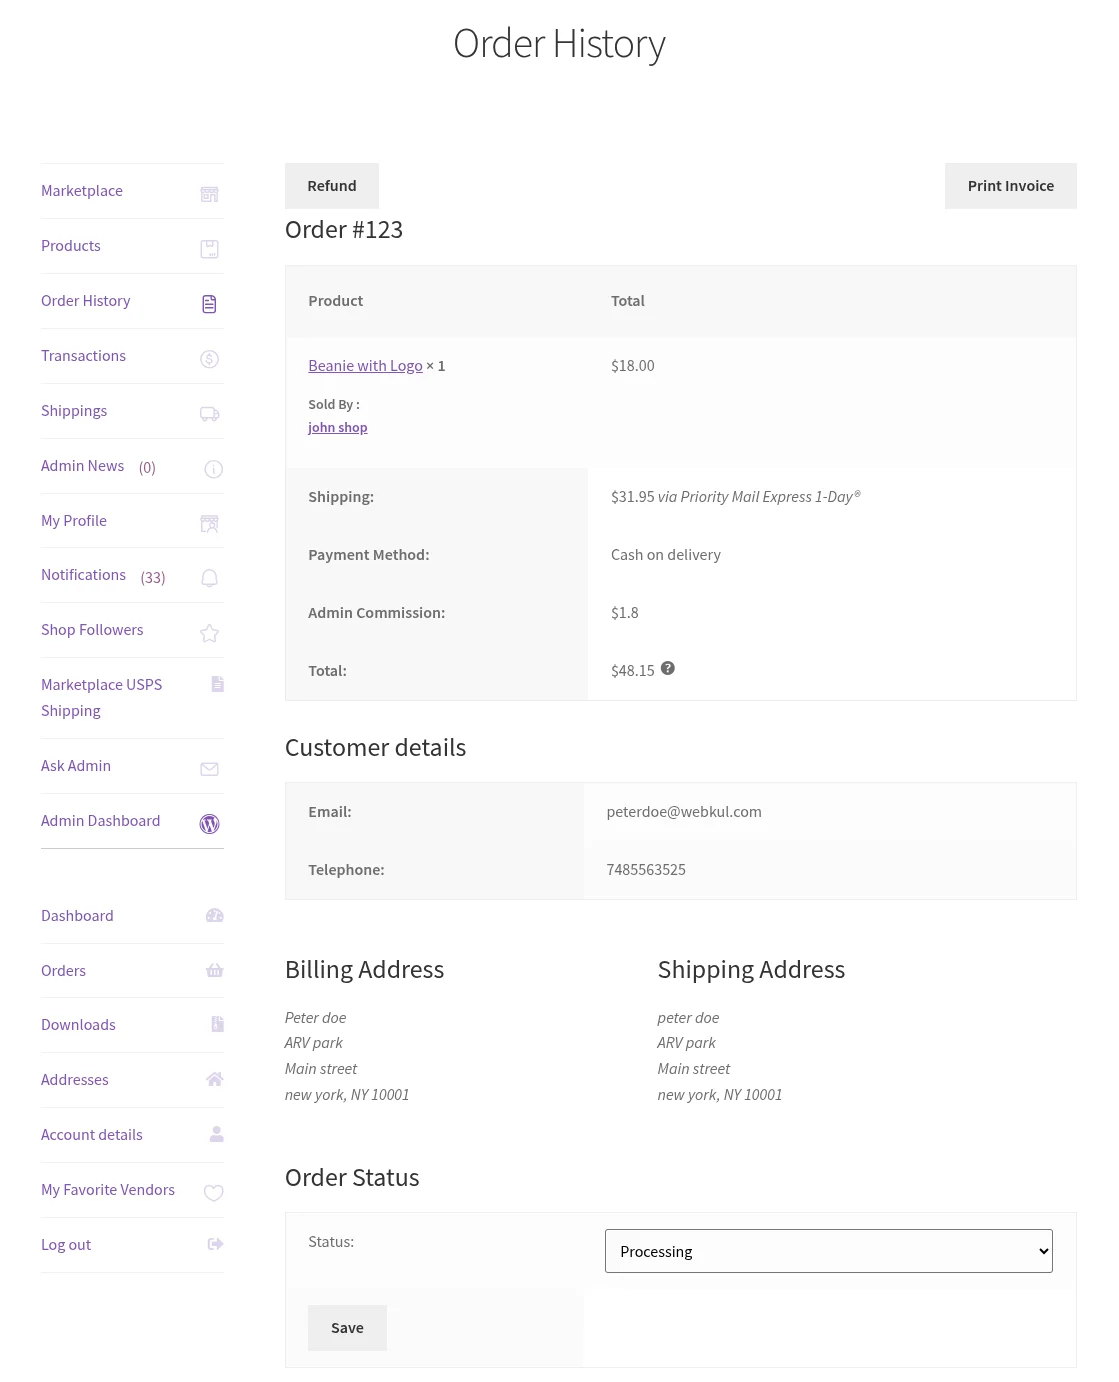
The buyer can see selected shipping method in order details.
Note: In WordPress WooCommerce Marketplace USPS Shipping module, the Shipping rate will be calculated according to the Seller’s Origin Zip Code, Product Weight and the Buyer’s Destination Zip Code.
If you are looking to streamline custom eCommerce shipping methods, Check out our WooCommerce Shipping Method Development Services
Orders
The seller can also view and manage the orders for their products sold.
That’s all for the WordPress WooCommerce Marketplace USPS Shipping module. Still have any issue feel free to add a ticket and let us know your views at webkul.uvdesk.com
Current Product Version - WooCommerce marketplace USPS Shipping: 1.2.0
Supported Framework Version - WordPress: 6.8.1 WooCommerce: 9.8.5, WooCommerce Marketplace::6.1.1

Be the first to comment.