WooCommerce Marketplace Tax Manager module allows the admin to choose the order tax amount will be credited to the admin or seller on each sale.
With this module, the admin can configure whose tax either seller or admin will be applied for WooCommerce Marketplace orders.
The seller can define the tax rate(Standard, Reduced Rate, Zero Rate) for their products. Also, the seller can insert, delete, export, or import tax rate table as required from their seller panel.
This module is an add-on of WooCommerce Marketplace. So to use this module you have to install WooCommerce Multi-vendor Marketplace.
We provide a production version of the plugin. If you want a development version then you can get it at an additional cost. Please contact [email protected] for it.
Watch the below video tutorial to understand the extension workflow:
Features
- The order tax amount will credit either to the admin or seller as defined by admin.
- When the admin sets Seller then the seller configured tax will be applied to the WooCommerce Orders.
- The seller can also define the tax rate for their products.
- The seller can create a CSV file of locations based on Post/Zip Code and import them into WooCommerce Marketplace.
- A create tax table row can be deleted by the seller.
- Handle the tax sale amount effortlessly.
- This module will help to reduce the admin sales tax burden.
Installation
First, the user will get a zip file that will upload in the “Add New” menu option in the admin panel.
For this login to WordPress Admin Panel. Then, in the Dashboard, hover your mouse over the “Plugins” menu option select the “Add New” option.

Following this, the user will see an option on the top of the page that is “Upload Plugin”. Click the option to upload the zip file.

Next, on clicking the “Upload Plugin” option, the user will see a “Choose File” button. Click on the button to browse for the zip file as per the image below.
After browsing the file, click on the “Install Now” button so as to install the plugin as per the snapshot.

Furthermore, Once the user installs the plugin, a message “Plugin installed successfully” displays and an “Activate Plugin” is visible to activate the plugin.
In the end, the user needs to click on the “Activate Plugin” button to activate the plugin.

Plus, on activating it, Under the Marketplace tab, the admin will see one additional field added to select tax based on the seller or admin sale.
Forthwith, update Permalink under “Settings > Permalinks” as “Post name” as shown in the below snapshot.

Module Translation
And, to know how to translate the module, you can click here.
Admin Configuration
Henceforth, after the successful installation of WooCommerce Marketplace Tax Manager, the admin can navigate to “Marketplace > Settings”.
Apply Tax Amount to Seller
The seller’s configured tax will be applied to WooCommerce orders and the tax amount will be credited to the seller for each sale if the admin selects the Seller shipping/seller Tax option.
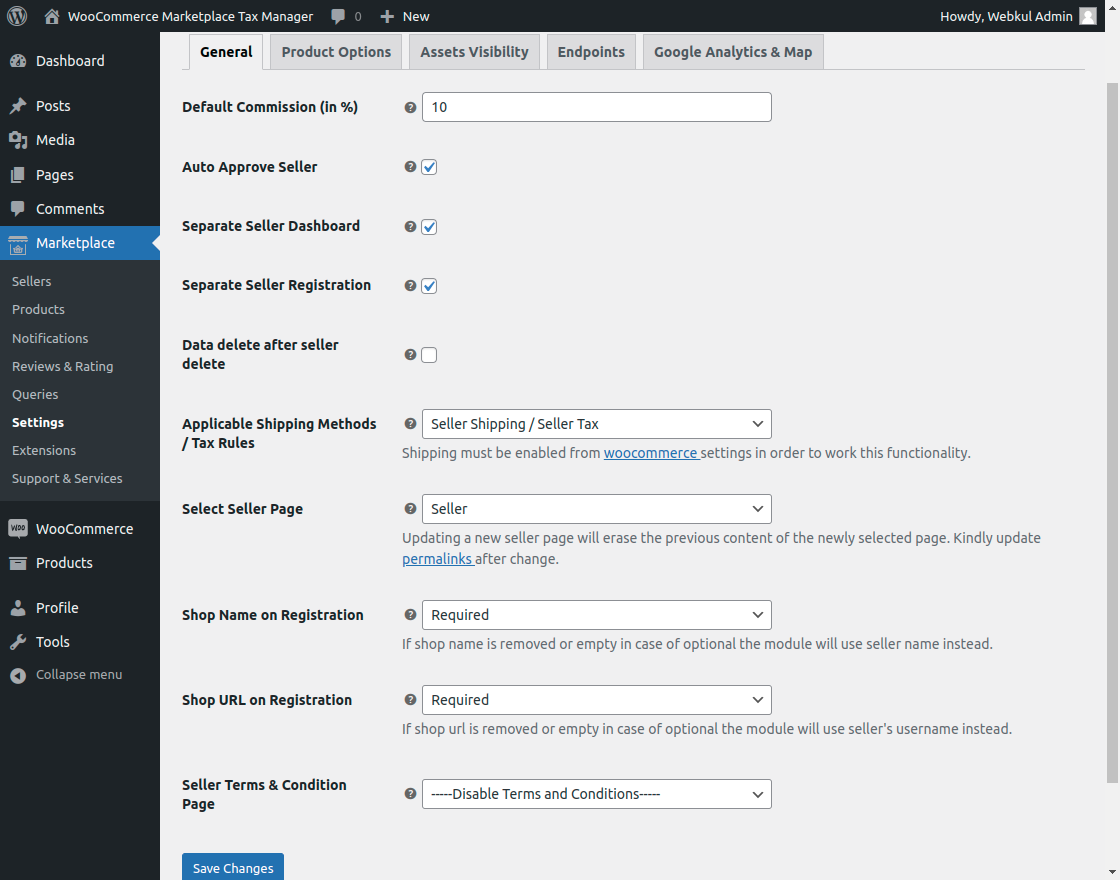
For instance, if the seller tax is selected and the order is made for a different seller’s products then tax will be credited to each seller according to their configuration.
Apply Tax Amount to Admin
Under the marketplace configuration page, the admin will get the Applicable Shipping Methods/Applicable Tax class field.
The admin’s configured tax will be applied to WooCommerce orders and the tax amount will be credited to the admin for each sale if the admin selects the Admin shipping/Admin Tax option.

Seller Configuration: Manage Tax
If tax is enabled for the seller, then the seller can manage Tax from their seller panel. To do so, navigate to Dashboard –> Tax.
Under Tax the seller will find Tax rates(Standard, Reduced rate, Zero rate). Seller can configure tax rate from here.

Define Tax Rates
In the tax rates table, the seller can define their new tax. To do so they need to click on Insert Row.
Insert Row
Once you will click on Insert Row, a row will appear to define the tax rate. Each tax rate has below attributes:
- Country Code – Use 2 digit country code for the rate else leave blank (*) to apply to all countries.
- State Code – Use 2 digit state code for the rate else leave blank (*) to apply to all states. For the US refer 2 digit abbreviation.
- ZIP/Postcode – Here seller needs to enter postcodes for the rate. The seller may separate multiple values with a semi-colon (;).
- City – Semi-colon separated list of cities for the rate. Leave blank (*) to apply to all cities.
- Rate % – Enter the tax rate in percentage.
- Tax Name – Enter the name of your tax, e.g. VAT
- Priority – Choose a priority for this tax rate. Only 1 matching rate per priority will be used. To define multiple tax rates for a single area you need to specify a different priority per rate.
- Compound – If this rate is compound (applied on top of all prior taxes) check this box.
- Shipping – If this rate also applies to shipping, check this box.
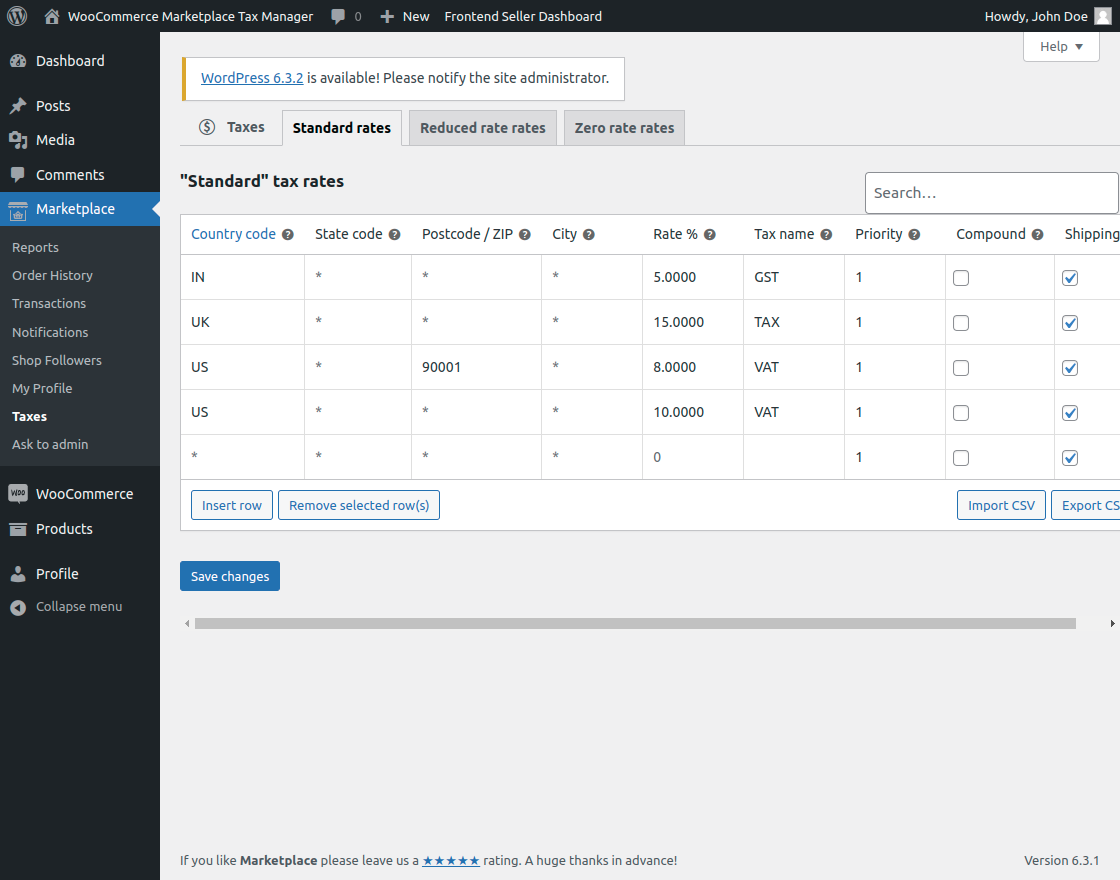
After defining the tax rate, the seller needs to click on Save changes.
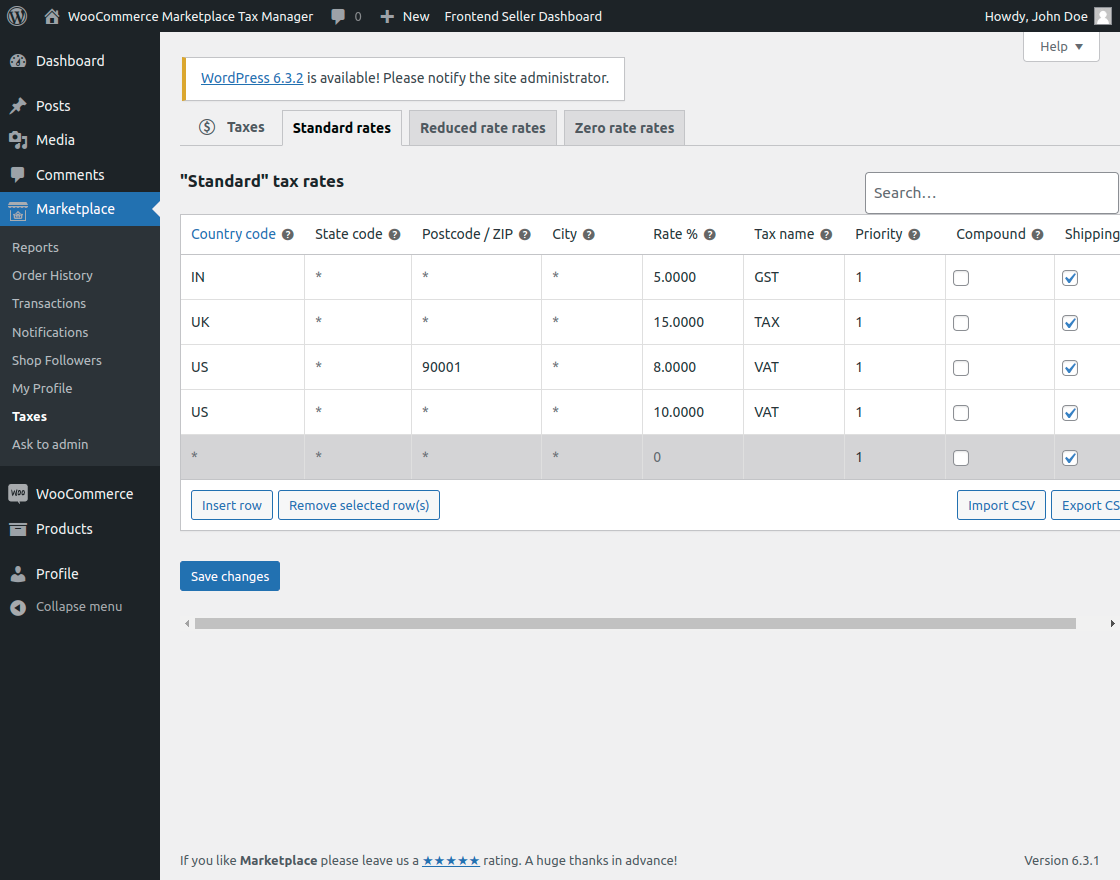
Remove Selected Row’s
The seller can also remove the selected tax line if added incorrectly by using Remove selected row’s button as shown below:
Export CSV
Below the tax table, the seller will find export CSV option. The seller can export the table in CSV file and make the changes if needed.

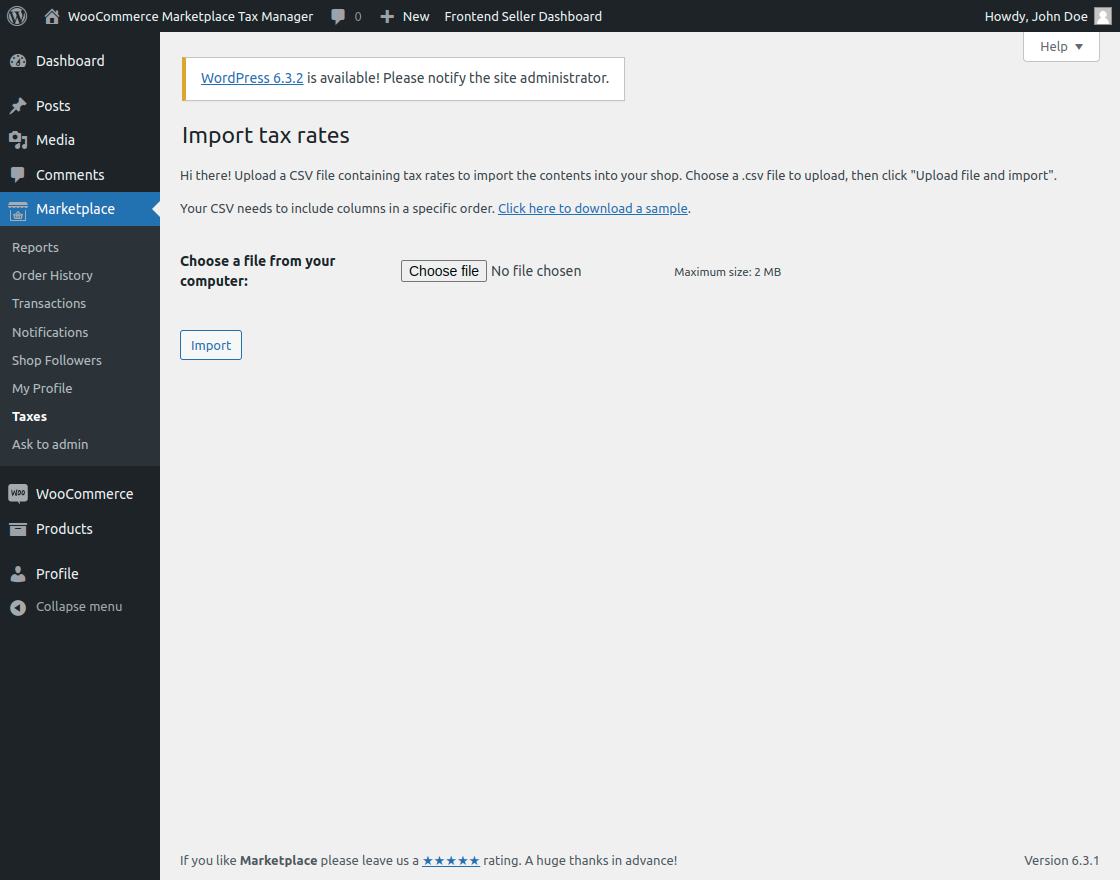
Import CSV
If the seller has the tax data in bulk like having a list of locations and want to add in tax rate. Then, the seller can use the Import CSV button to import multiple tax table rate.

Tapping on the Import CSV button will bring you the Import Tax Rate page. Here the admin can select the CSV file to upload into your store.
The seller can also download the sample CSV file and update it to import as shown below:
Search
The seller can use the search bar to search tax rate by tax name as shown below:

Tax Rate on Checkout
The customer can check the tax rate on the checkout page as defined by the seller/admin as shown below:

Tax Details
Under order history, the seller can view the applied tax amount for an order as shown below:

Support
That’s all for the WooCommerce Marketplace Tax Manager.
Furthermore, in case of any query, you can create a ticket at webkul.uvdesk.com or contact us at store.webkul.com/contacts/ to let us know your views to make the plugin better.
Current Product Version - 1.0.4
Supported Framework Version - WordPress: 6.3.1 WooCommerce: 8.1.1 WooCommerce Marketplace: 5.3.1

Be the first to comment.