WooCommerce Google Shopping Feed: With this extension, Woocommerce merchants can easily sync and submit the store product data to Google shopping feeds. Users can view Woocommerce store products on the Google search page.
Admin can map the store product categories and attributes to Google shopping product categories and feeds. After the configuration of this module, the feed gets synced to a Google Merchant Center account.
Feeds are supported in XML(Extensible Markup Language) or text that contains product information.
We provide a production version of the plugin. If you want a development version then you can get it at an additional cost. Please contact [email protected] for it.
Watch the below video tutorial to understand the plugin workflow:
Features of WooCommerce Google Shopping Feed
- Store products added to Google Feed using content API.
- Products get updated on Google Feed once synced on the store.
- Dynamic Attributes mapping.
- This module supports variable products but doesn’t create variations.
- Map store category with Google shopping feed categories.
- Export products in bulk or in selection.
- The admin can add unique shopping feed product value for each product.
- Supports Simple and Downloadable products.
- Option to Authenticate the Merchant account of the use.
- Feeds are supported in XML(Extensible Markup Language) or text.
- The admin can manage multiple feeds to display on Google Shopping Feed.
- Site verification on Google merchant center through HTML code.
Installation of Google Shopping Feed
The user will get a zip file which he has to upload in the “Add New” menu option in the WordPress admin panel. For this login to the WordPress Admin Panel and Under the Dashboard hover your mouse over the “Plugins” menu option which brings out a Sub-Menu and then select the “Add New” option.

Click on the option “Upload Plugin” at the top of your page to upload the zip file.

After clicking on the “Upload Plugin” option, below that you will see a button “Choose File” click on the button to browse for the zip file as per the snapshot below.


After browsing the file, click the “Install Now” button to install the plugin as per the snapshot.

Now when the plugin is installed correctly, you will see the success message and an option to activate the plugin. Click on “Activate Plugin” to activate the installed plugin.
Now, run the below-mentioned command in the respective directory (Likewise: domain/wp-content/plugins/wk-google-shopping-feed) via the terminal.
composer install
Make sure that you have installed Composer on your server else follow this instruction to install Composer – Composer Installation
How to get the Credentials – Client ID and Client Secret
Create an APP, Get the Client ID and secret:

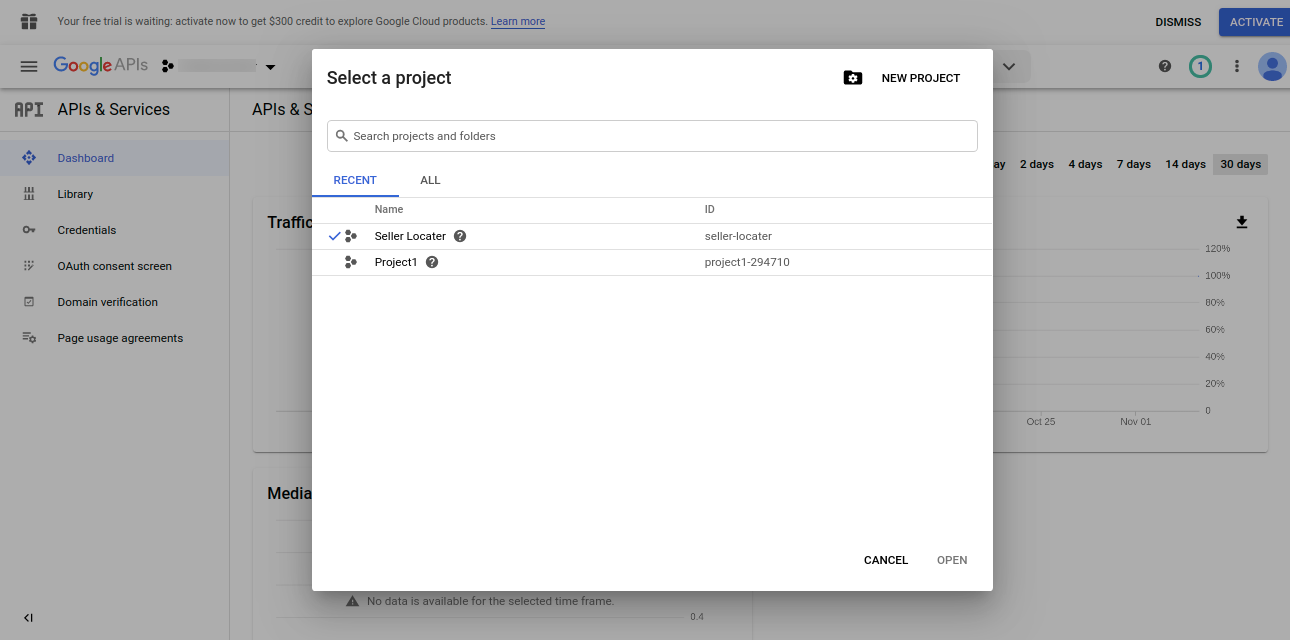
1: Go to console.developers.google and log in using your Gmail ID. After login click a dropdown arrow for the Select a Project option.
2: Click the NEW PROJECT option.
3: Enter your project name select the location and click the Create button.

4: Select your created project and then click the ENABLE APIS & SERVICES button.

5: Now in the search box type in Shopping.

6: The results will populate and then select – Content API for Shopping.

On clicking the same, another page, Content API for Shopping will become visible as shown below.
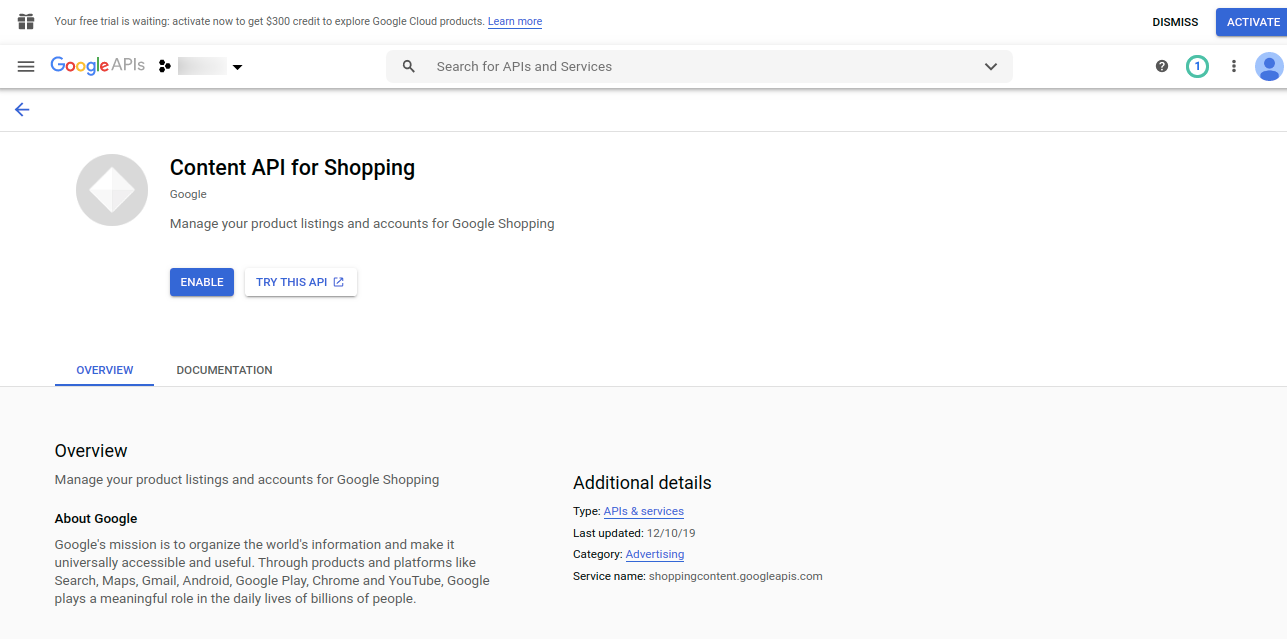
7: After clicking on the “Enable” button select the created app and then click on the Create Credentials button.

8: Now select the OAuth client ID as shown below in the snapshot.

9: Now on the next screen to create an OAuth client ID, you must first set a product type on the consent screen. For that, the admin will click on the “Configure consent screen”.

Configure And Register The App
After that from the OAuth consent screen, the admin will choose how you want to configure and register your app, including your target users. You can only associate one app with your project.

After selecting the user type click on “Create.“
Click on the Create, now on the next screen, the admin needs to configure the consent screen for all applications in this project.
- The name of the app asking for consent.
- An image on the consent screen that will help users recognize your app.

After adding details under the OAuth consent screen, click on Save and Continue. This takes you to the Scopes section.
Here, you can Add or Remove Scopes and further Save and Continue.

This takes you to the Optional Info Section, under which one can add the details necessary, and click on Save and Continue.

This navigates to the Summary section, under which all the details are visible as shown in the image below.

The one needs to click on the Back to Dashboard button. It navigates to the OAuth consent screen and displays the App name its Verification Status and User Type.

After that move to the credentials section again.

The admin will click on the OAuth client ID as shown below in the snapshot.
10: Under Application, type select the Web Application, under the Authorized redirect URIs enter the redirect URL
Now, click the Create button.
Note-
- The authorization URL should be in this format: https://wordpressdemo.webkul.com/wc-google-shopping-feed/wp-admin/admin.php?page=wk-settings-feed

11: Now you can see the client id and the client secret key. Copy them into the module configuration settings.

Sign Up for Google Merchant
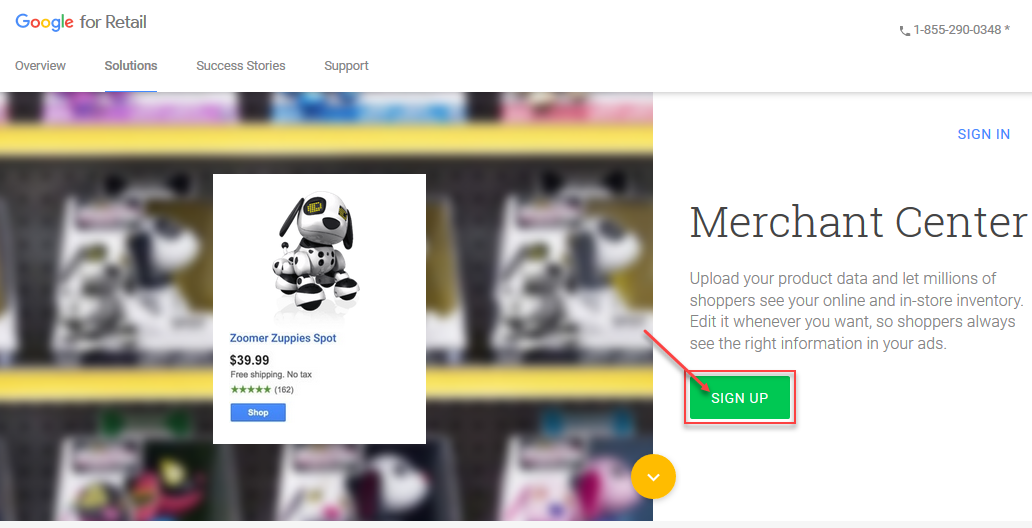
Step1: Go to Merchant Center and click on the Sign-Up button.
Step 2: Log in with the Gmail address that you have used for creating the credentials and click the Next button.


Step3: On the Terms & Conditions page check the checkbox to agree to the terms & conditions and click the Continue button after that.
Step 4: Now, you need to verify and claim your website URL as shown in the image below.

After the above steps click Verify URL button.
Step5: After clicking the verify button a pop-up will appear. Click Continue to proceed further for verification.

Step 6: After clicking the Continue button in the image above, you can see that the website is verified and claimed. Lastly, click the Finish button.

Now, you can see the Google Merchant Center dashboard.

Configuration of Google Shopping Feed
After successful installation, the admin can configure WooCommerce Google Shopping Feed under “Woo Google Feed> Settings”

Here, Admin will be able to see Four settings:
- Credentials
- Map Category
- Shipping
- Taxes
1. Credentials
- Client ID: Under Credentials, The admin needs to enter the Client ID credentials that the admin has received after registering at console.developer.google.com.
- Client Key ID: Next, The admin needs to enter the Client Key ID credentials which the admin has received after registering at console.developer.google.com
- Merchant ID: Enter the Merchant Id that the admin has received from the Google Merchant Center Dashboard after registering at https://merchants.google.com
- Redirect URL: Here, Admin needs to enter the Redirect URL. For example – https://www.example.com/admin/googleshoppingfeed/oauth/index
- Google Verification HTML Code: Enter the Google verification code here.
Now, the admin can click on the Generate Access Token link shown in the image below:
Note: Generate Access Token link will be expired within 15-20 minutes, Admin needs to regenerate this link by clicking on the Refresh Access Token link if want to upload a single product on Google merchant center account.
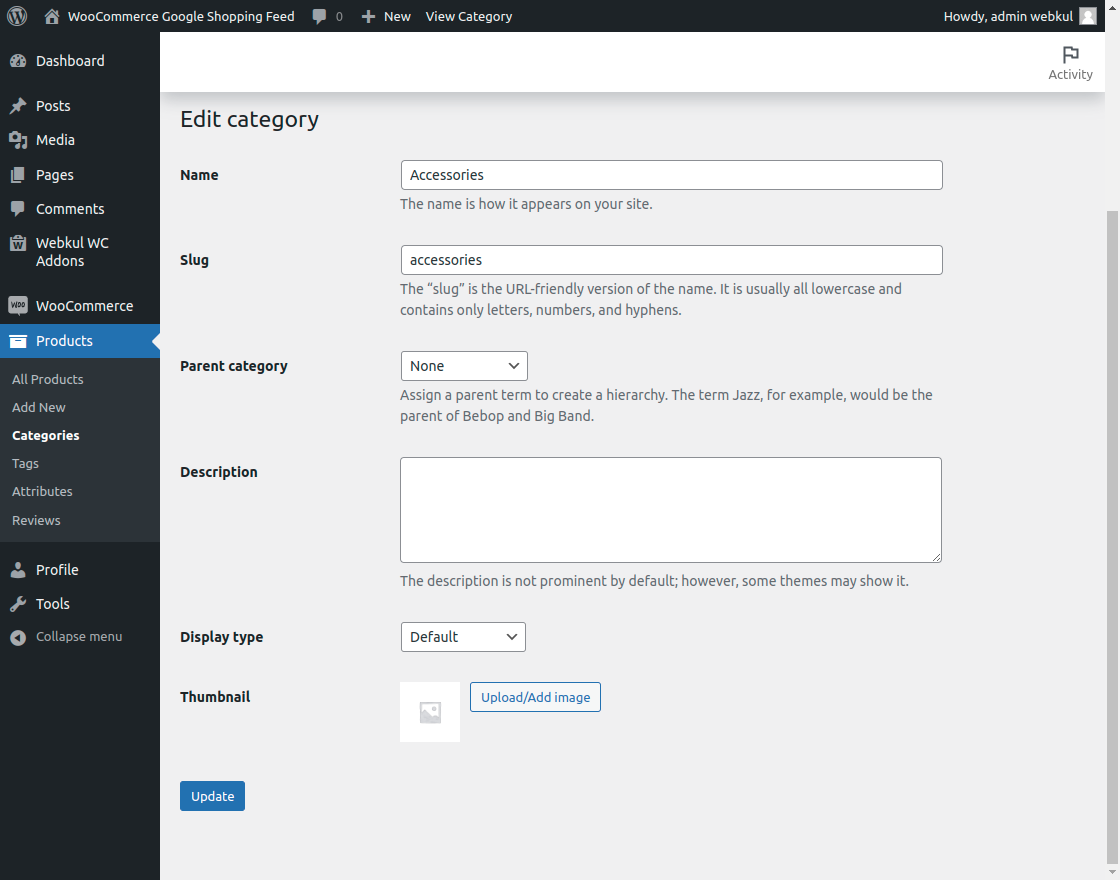
2. Map Category
Under this section, the admin will be able to find a list of all mapped categories, their details, and can map the categories of his Woocommerce store with the Google Merchant Account categories.

To map a new category click the Add New button in the snapshot below and this brings up the section to map the store categories with the Google Feed Category.
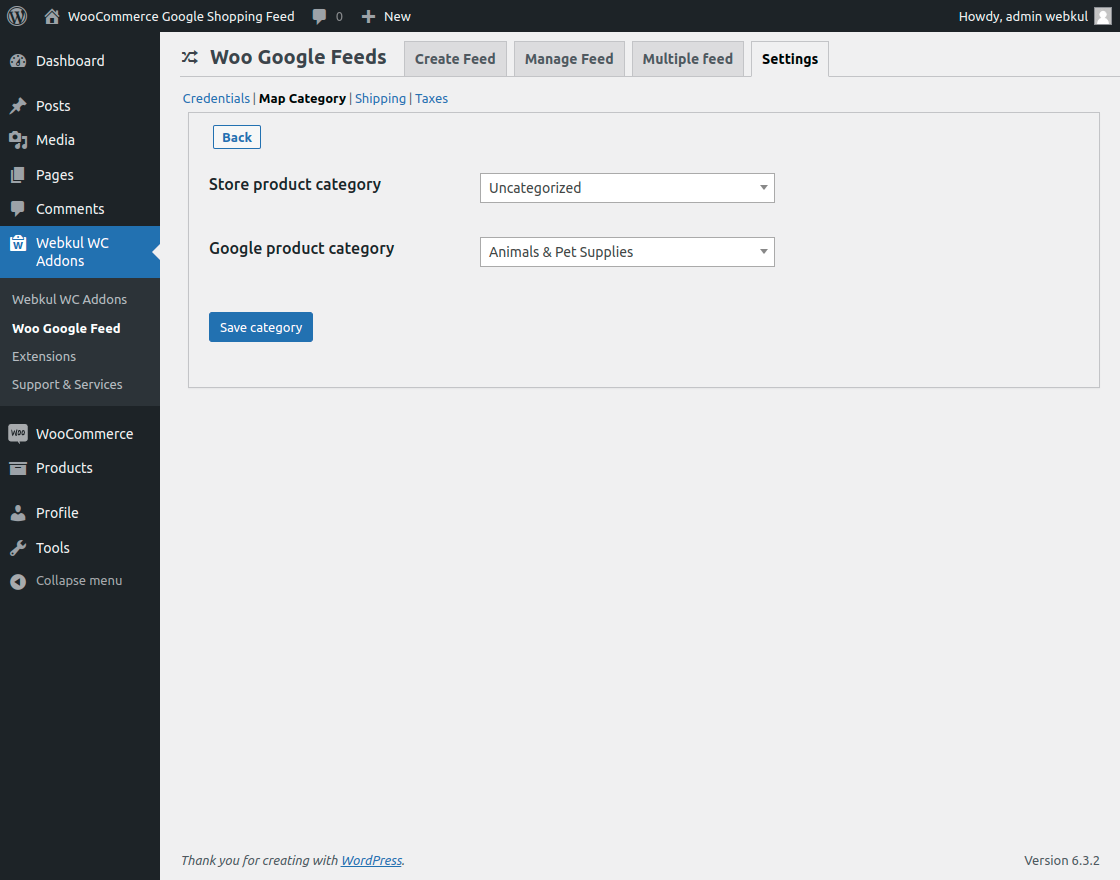
To map, select store product category and after that select the corresponding Google product Category, it’s sub-categories if any as required.

Lastly, click the Save Category button to save the mapping and admin can also see a success message for the same.
The admin can edit any mapped category.

The admin can also delete the mappings as required by first checking the mapping and then choosing the delete option from the actions drop-down.
3. Shipping

- Shipping country: The admin can select shipping country name of the item on Google Shopping Feed.
- Shipping region: The admin needs to write the shipping region to which a shipping rate applies.
- Shipping price currency: Enter the currency of the shipping price of the item on Google feeds.
- Shipping price: Enter the shipping price in a number of the item on Google feeds.
- Shipping service: The admin can set the shipping service of the item on Google feeds.
- Shipping postal code: Enter shipping zip code which is to be displayed on the item on google feeds.
After, setting up shipping configuration admin needs to hit on “Save shipping” and can add more shipping information by clicking on “Add more” likewise in the above-attached image.
4. Taxes

The admin can set the taxes under the following entity.
- Tax country: The admin can set the Tax country in which the product feeds are to be displayed.
- Postal code: Enter Tax zip code, which is to be displayed on the item on Google feeds.
- Rate: Admin can set the Tax rate in a percentage that applies to the item on Google feeds.
- Region: The admin needs to write the Tax region to which a shipping rate applies.
- Tax Taxship: Select Tax Taxship as true or false. Admin can set it to true if the tax is charged on shipping else set it to false.
After, setting up the tax configuration the admin needs to hit on “Save tax” and can add more tax information by clicking on “Add more“.
Google Shopping Feed Workflow – Admin’s End
Create a Google Feed Product

After the successful configuration of this module, the Admin needs to create a Google Feed product by navigating through Woo Google Feed >>Create Feed to sync store product feed with google feeds.
There are a few below required feeds Google Product should include:
Product: Select the product name that the admin wants to display on Google Shopping Feed.
Channel: Admin can set the channel as Online or Local.
Target country: Define the target country to distribute your products across the web.
Content-Language: The admin can set the language in which the product content will be displayed.
Condition: The admin can set the default conditions of the products like New, Used, and Refurbished.
Brand: Enter the Brand name of the product.
Apart from this admin may include additional attributes on the product likewise attached in the image below to get a better result on the SERP page. For more information about these attributes refer to the Google shopping doc from here.

The admin will add additional information like Google product category, age group, adult, availability date, energy efficiency class, max energy efficiency class, max handling time, min energy efficiency class, and min handling time.

Furthermore, they will add an expiration date, gender, Gtin, identifier exists, Is bundle, Item group ID, Material, Mobile link, multipack, pattern, etc.

They can also add other information like sizes and more.

Here they can add the cost of goods sold.
Manage Google Feed Product

The admin can view the product list of created Google Feed by navigating through Woo Google Feed >>Manage Feed as shown in the image below.
Here, the admin can perform bulk actions on the product like “Delete” and “Upload to merchant” and can add new feeds by clicking on “Add New“, even The admin can even upload product feed to Google Merchant separately by clicking on “Upload” button for the respective product.
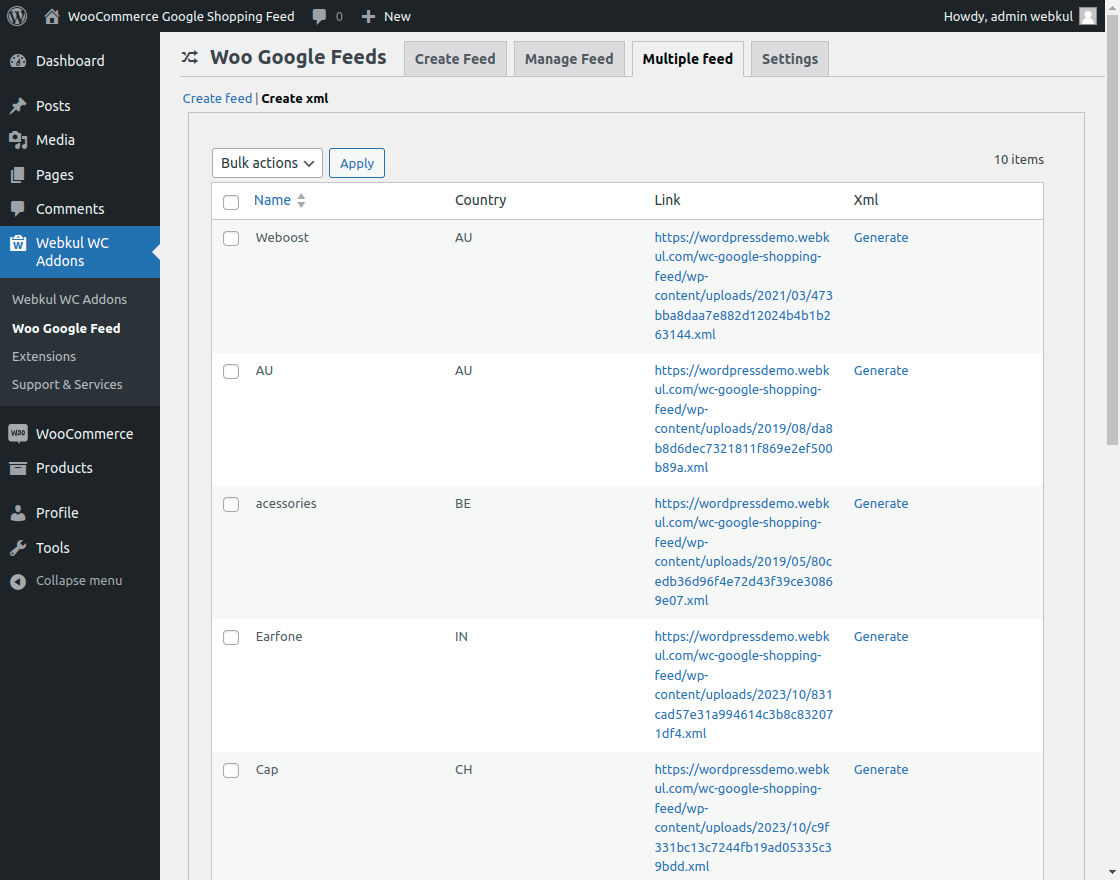
Manage Multiple Google Feed Product

The admin will be able to create multiple feeds by navigating through Woo Google Feed >>Multiple Feed as shown in the image below.
Create Feed :
Here, the admin will be able to see three fields that the admin needs to fill in order to create a Google shopping feed.
Title: Here, the admin can write a product title that will be applicable to the items on Google feeds.
Select country: The Admin needs to define the country name in which the product feeds are to be displayed.
Select category: Here, the admin can select the mapped product category to be displayed on Google shopping feeds.
After, creating feeds admin needs to hit on “Create Feed” and click on “Create XML” to upload multiple feeds to the Google merchant account as an XML file.
Tapping on “Create XML” will bring out to the next page where the admin can view the list of created feeds and generate an XML file by clicking on the “Generate” button and copying the generated XML link to be uploaded to the Google merchant account likewise in the image below.
Now, open the Google merchant center account and go to product feeds by navigating through Product>Feeds and click on “+” (add new icon) as shown in the image below:

It will bring you to the next page, Here admin needs to choose the country name from the dropdown and can select the language and click on the continue button likewise the attached image below:

Name and Input Method:
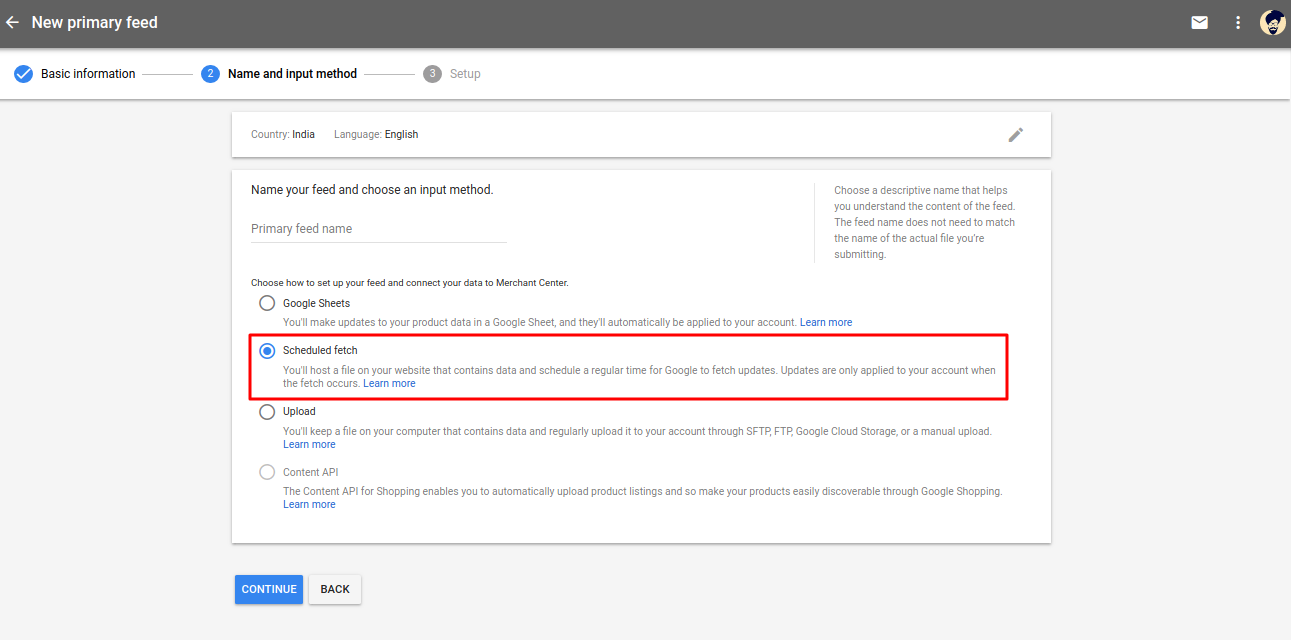
Tapping on the Continue button will bring out to the next steps, Here the admin needs to select the “Scheduled fetch” option and proceed by clicking on the “Continue” button similar to the image below:
Setup:
In the final step, the admin needs to enter the name of feeds and paste the generated XML URL into the File URL field then proceed similarly to the image below:

Workflow At Google Merchant Account
After the admin has configured the extension, mapped the attributes, and categories, and exported the products to Google’s Merchant Account, the exported products will be visible under the Products>List section.
List:

Final Attributes:

The admin can select any product and can view the details of the respective products under the Final Attributes section as shown in the image below.
Note: The updates may take up to 2 hours to get visible on the Merchant Account.
That’s all for the WooCommerce Google Shopping Feed. If you have any queries or doubts get back to us at [email protected] or raise a ticket at webkul.uvdesk.com.
Current Product Version - 1.0.3
Supported Framework Version - WordPress: 6.3.2 WooCommerce: 8.2.0

2 comments
Many thanks for your appreciation and kind words!!
Stay tuned with us for more articles.
Thanks & Regards
Himani Gupta