WooCommerce Customers Verification plugin allows the store owner to sell the products to only verified customers for the security purposes of the content.
For verification and customer authentication, customers need to upload their identity proof while registering on the website.
Furthermore, the customer can also upload their document from their customer dashboard under the “Account details” menu.
The store admin verifies customer identity and can approve or reject the customer to do shopping from the website.
The customer can upload the identity directly from the website or through mobile as well.
If WordPress WooCommerce users can register or log in to the WooCommerce Store using WhatsApp OTP Authentication, they can check WooCommerce WhatsApp OTP Login.
Note –
- The identity must be in JPEG, JPG, PNG, DNG, DOC, DOCX, or PDF format.
- Guest users can place orders by verifying their email address, without the need to upload any identity documents, when the email verification setting is enabled in the general configuration of the plugin.
Note: This module is now compatible with WooCommerce’s new High-Performance Order Storage (HPOS) feature.
If you require expert assistance or want to develop custom unique functionality, Hire WooCommerce Developers for your project.
We provide a production version of the plugin. If you want a development version then you can get it at an additional cost. Please contact [email protected] for it.
Watch the below video tutorial to understand the extension workflow:
Features
- Authenticate and verify the customer identity proof.
- The customer can also upload the document from their customer account under the “Account detail.”
- The customers can re-upload the verification document if rejected by the admin.
- The admin can Enable/Disable the module status in the configuration Login menu page.
- The admin can select the products, categories, and product types for which the product should be purchased without document verification.
- Limit unauthorized customers to place orders from the website.
- The admin can change the verification document status like pending, approved, rejected.
- The customer can upload the document while creating an account.
- Option for admin to set a Verification Message for first-time login customers (e.g., Your document is pending).
- Option for admin to set a Document Not Uploaded message for customers who haven’t submitted documents.
- Hide Uploaded Document option — admin can control whether customers can view their uploaded files.
- Supports JPEG, JPG, PNG, DNG, or PDF format for verification documents.
- Maximum File Size setting to limit document upload size
- Allowed File Types setting to specify permitted formats for uploads.
Installation
The user will get a zip file which needs to be uploaded in the “Add New” menu option in the WordPress admin panel.
For this login to WordPress Admin Panel and in the Dashboard hover your mouse over the “Plugins” menu option select the “Add New” option.

Thereafter, the user will see an “Upload Plugin” option at the top of the page, click the option to upload the zip file.

On clicking the “Upload Plugin” option, the user will see a “Choose File” button. Click on the button to browse for the zip file as per the image below.

On browsing the file, click on the “Install Now” button so as to install the plugin as per the snapshot.
Once the user installs the plugin, the user can activate the plugin. The user needs to click on the “Activate Plugin” button to activate the plugin.

Note –
Check how to activate your WooCommerce plugin through the purchase code.
How do you get updates on Webkul Modules directly on the Plugins page?
Admin Settings for Existing Customers: admins can choose if current customers are automatically approved or need manual approval, helping to manage things smoothly and with control.

Existing Customers Verification: allows admins to set up rules to verify the details of current customers before they can complete certain actions or purchases.
Initial Admin Configuration
After installing the plugin, the admin navigates to Customer Verification > Configuration option, in order to do the basic plugin configuration.

Now the admin under the Customer Verification option will click on “Configuration” & will redirect to the configuration settings of the plugin.
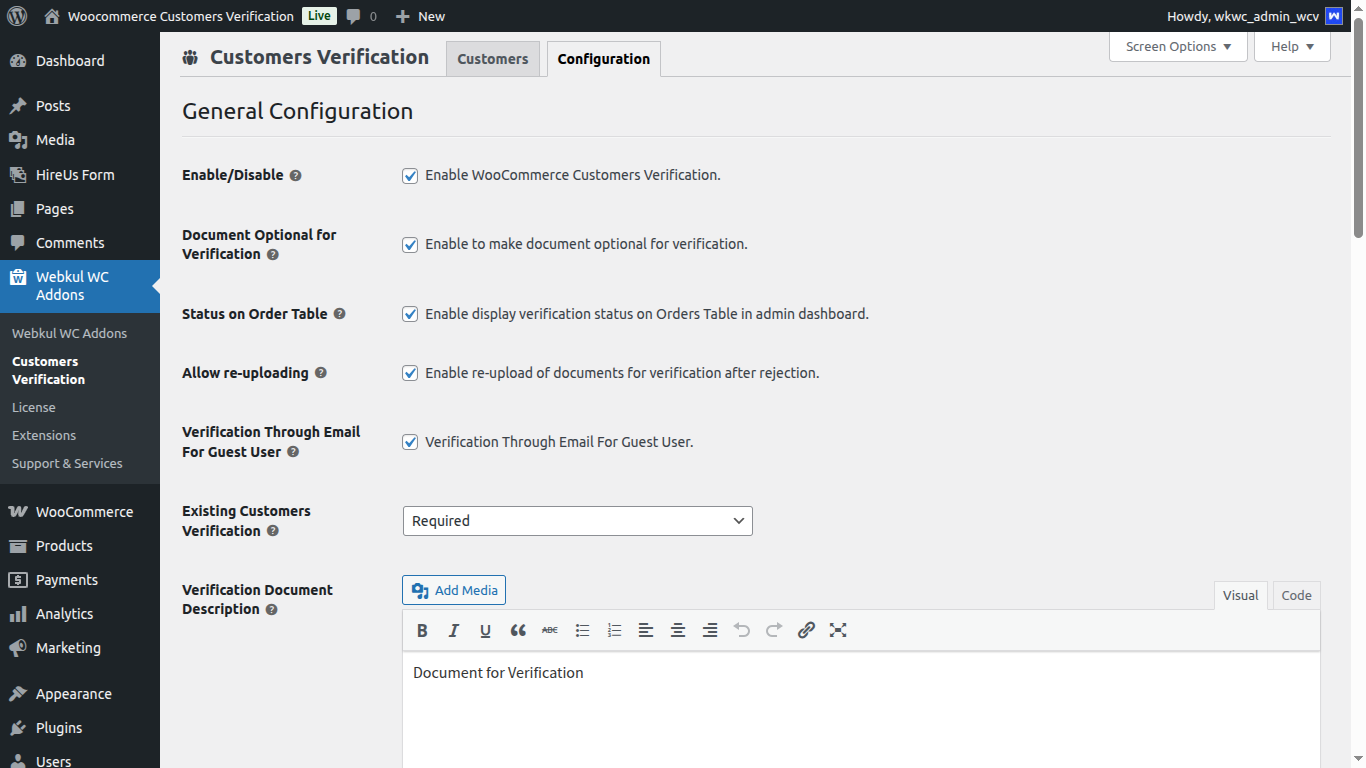
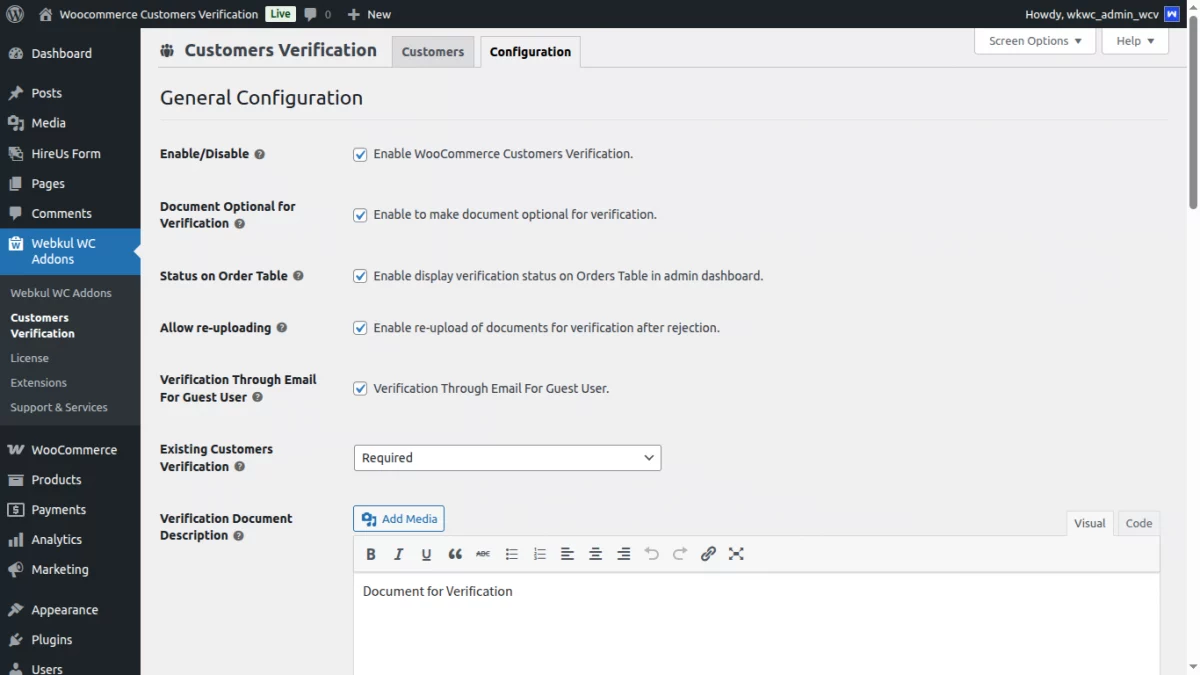
The admin from here will-
- Enable Customer Verification: By clicking on the Enable/Disable checkbox.
- Document Optional for Verification: By enabling this feature the admin can allow a document optional for verification.
- Status on Order Table: By enabling this checkbox the admin can check the verification status on their order section list.
- Enable re-upload of documents for verification after rejection: By clicking on the Enable/Disable checkbox for customers.
- Verification through email for guest users: By enabling this option, guest users can place orders by verifying their email address, without the need to upload any identity documents.
- Existing Customer Verification: Confirm the identity of registered customers to ensure their information is accurate and secure.
- Verification Document Description: Here, the admin can describe the type of verification document. This will be visible to the users on the front end.
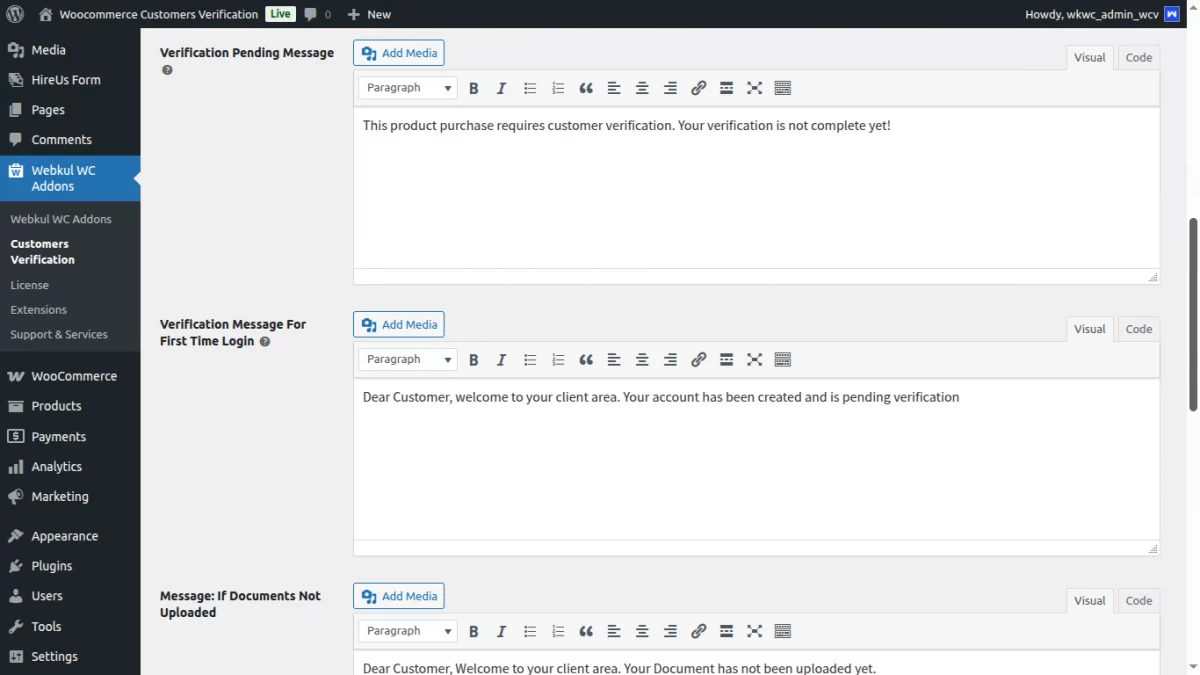
- Verification Pending Message: This message allows the admin to define what customers will see after submitting their documents. It informs users that their verification is under review and they must wait for approval.
- Verification Message for First-Time Login: Here, the admin can set the message that will appear when a customer logs in for the first time. It notifies them that verification is required before accessing their account or store features.
- Message: If Documents Not Uploaded: This option lets the admin specify the message shown when customers haven’t uploaded any documents. It reminds users to upload the required files to continue with the verification process.
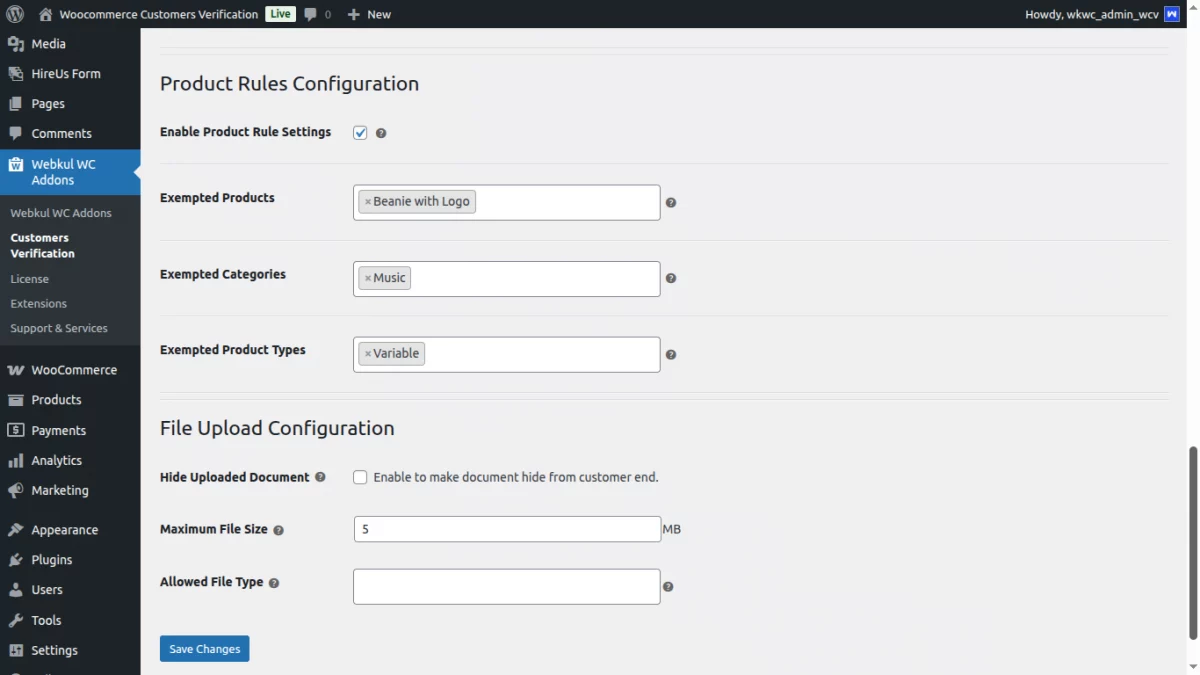
- Enable Product Rule Setting: Admin can enable the product rule settings to use product, categories, and product type-based restrictions to purchase the product without documentation verification.
- Exempted Products: Here admin can enter the products that can be purchased without document verification.
- Exempted Categories:- Admin can enter the categories that can be purchased without document verification.
- Exempted Product Types:– Admin can enter the product types, and that product can be purchased without document verification.
Note: This plugin is not used for group-type products.
After configuring the plugin, the admin clicks on the Save Changes button to save the configuration.
Frontend – Customers Verification
The customer needs to upload their identity document while registering for the first time, or from the customer’s My Account section.
Only after uploading the correct identity proof and getting it authenticated by the admin, the customer can purchase the items and goods from the website.
Uploading Identity Document While Registration
The customer can upload the identity document as proof during the registration process. As shown in the below screenshot.

After clicking on the “Upload” button, the customer needs to select a file from the system media storage and add it & click on Register.

Uploading Identity Document From Account Details Section
The customer can also upload the identity document from the Account Details section.

Now after uploading the file, the customer can click on the uploaded files and can also preview the file.
In order to preview the file the customer will click on the uploaded file button & on next screen, the customer can view the document.

Identity Document Customer Verification Management
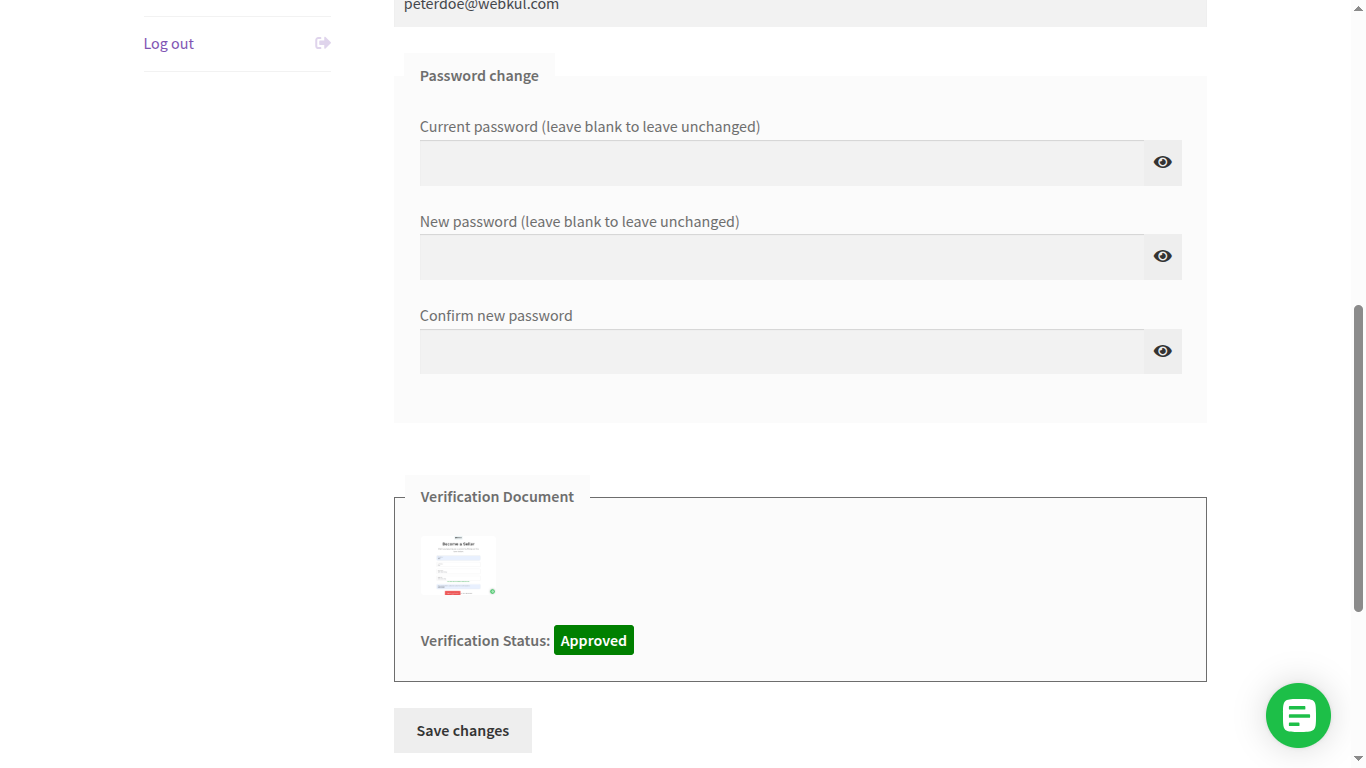
After the customer uploads the document for verification, the admin from Customers option under Customer Verification option present inside menu can manage the docs.
When admin enable Status on Order Table , then in order page also showing customer verification status and uploaded document.
Furthermore, the admin can view the uploaded file by the customer, can verify it manually. The admin can change the status of the identification document to pending, approved or rejected.
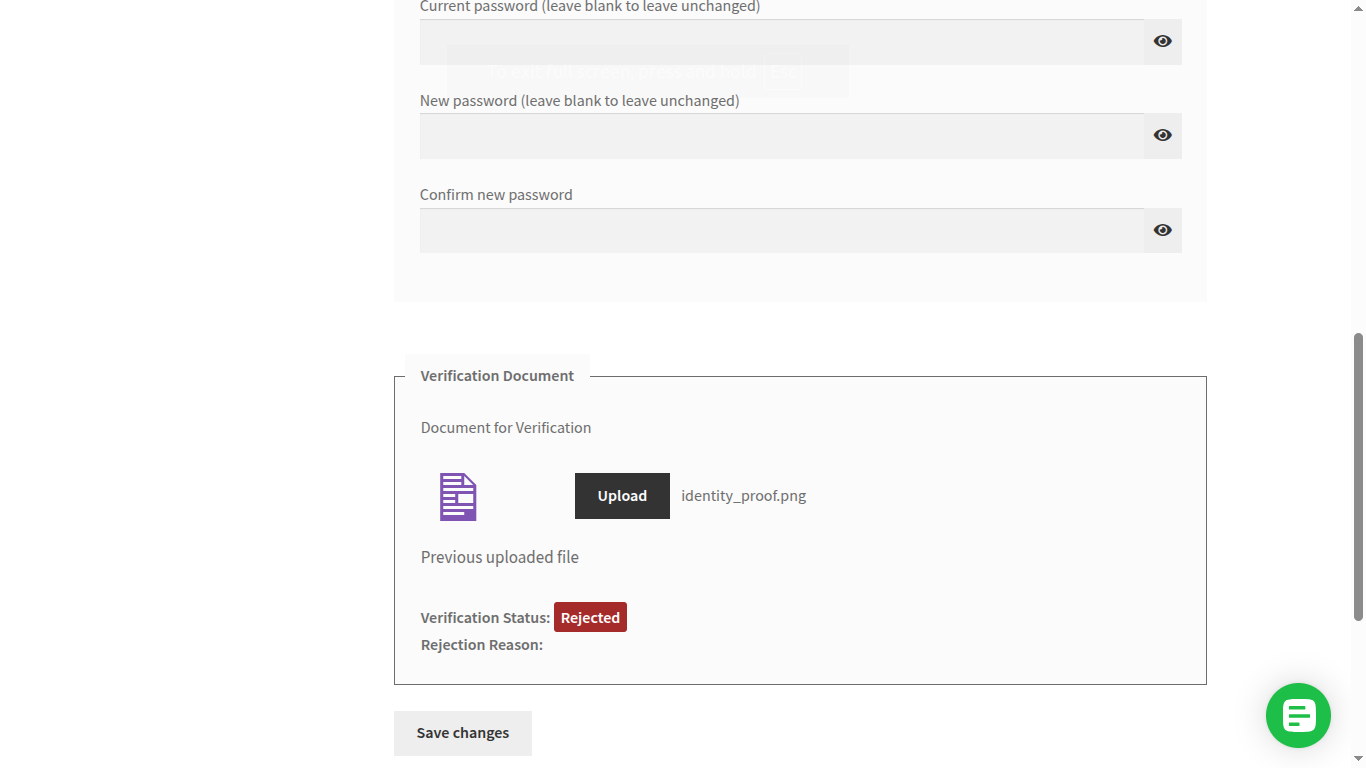
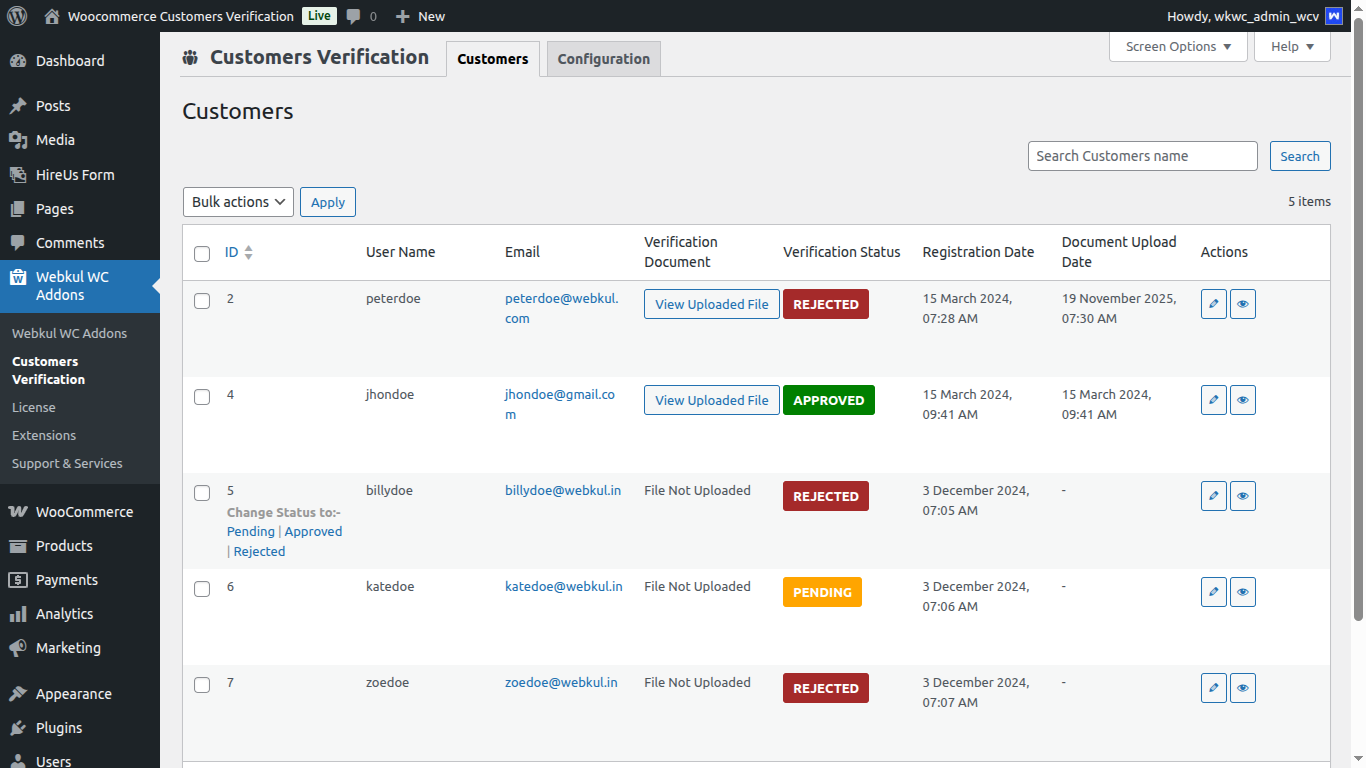
In case the document is rejected then the customer needs to again upload the document from the account details section.
Moreover, the customer will receive an email if the uploaded document gets rejected.

The verification status will change from pending to rejected with the rejection reason.
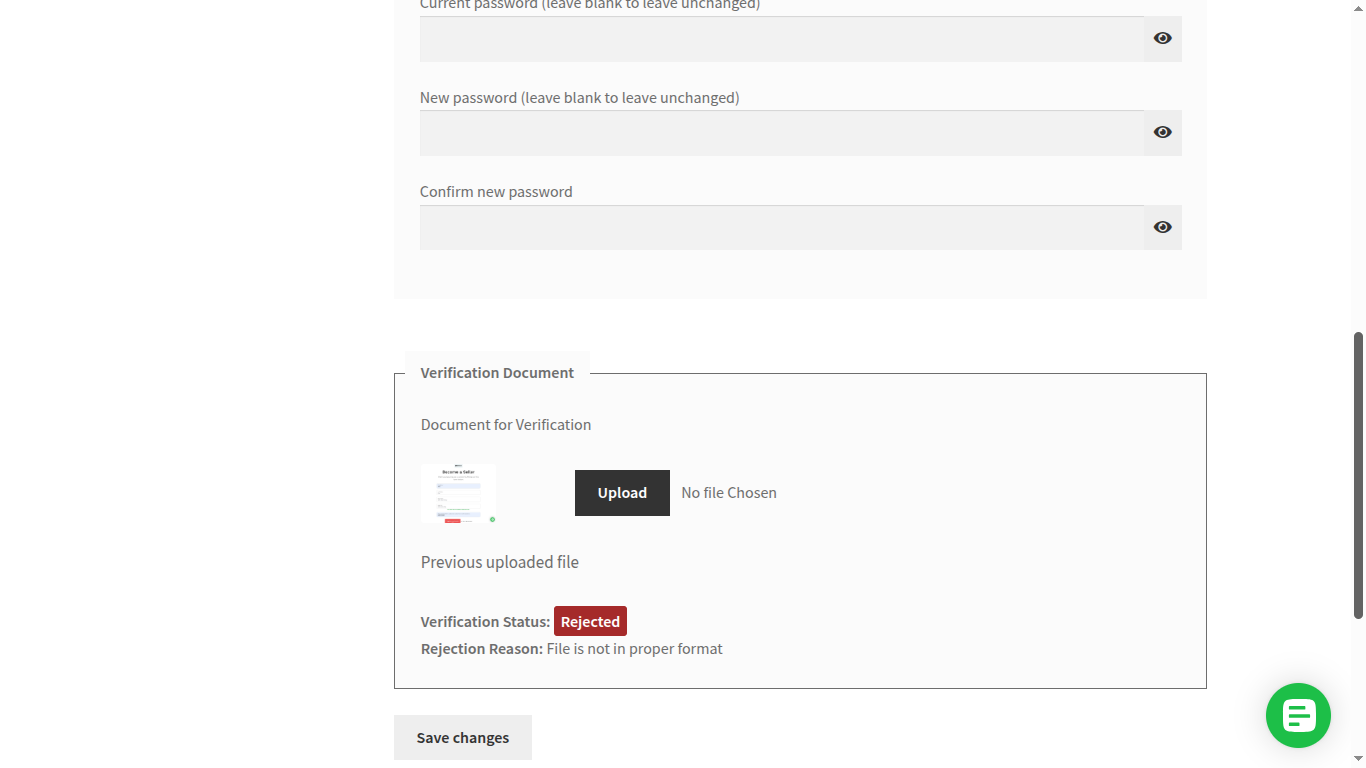
As soon as the customer now again upload new file & its been now approved by the admin, the customer will receive an email.

The verification status changes from pending to approved & the customer is now eligible to do purchase on website.
If the verification will reject by the admin or in pending status then the customer can purchase only those selected products, categories that are exempt by the admin as shown in the below screenshot.

That’s all for the WooCommerce Customer Verification.
For any technical assistance please raise a ticket or reach us by email at [email protected]. Thanks for Your Time! Have a Good Day!
Also, discover various solutions to add more features and enhance your online store by visiting the WooCommerce plugins.
Current Product Version - 2.0.0
Supported Framework Version - WordPress: 6.8.3 , WooCommerce: 10.3.5

14 comments
We have updated the demo and it is working fine now. If you are getting the same issue in the plugin please email us at [email protected]
Regards,
The documents uploaded by the customer can be seen by the admin only under the customer verification option & as per the verification only the admin can approve it or reject it.
In case you want have any other query, kindly email us at [email protected]. So, we can assist you out faster & better.
Thanks
The team is working on it. If you want to purchase this module before it release, then you can mail us at [email protected]. So,we will assist you accordingly.
Thanks
Is there a GDPR consent?
As per the plugin workflow there is no such option from where the customer can delete their details. But we can make it as per the GDPR by the help of customization.
For customization and related queries, kindly email us at [email protected]. So, we can assist you faster and better.
Thanks,
Team Webkul
this plugin is compatible with woocommerce 4.3.0?
THX
Yes, this plugin is compatible with the WooCommerce 4.3.0.
Thanks
The team is already working on it. If you are want to purchase this module then you can mail us at [email protected] and we will assist you accordingly.
Thanks
You can get this module from our store link: https://store.webkul.com/woocommerce-customer-verification.html
Also,you will need to do some changes to the core of the default Woocommerce to use this module.
For further queries, you can drop a mail at [email protected] and for sure we will assist you.
Thanks