Introduction
Odoo Headless E-commerce allows you to separate the front end and back end of the eCommerce website.
Odoo Headless E-commerce means decoupling the front end and back end of the E-commerce platform.
This user guide will walk you through the steps to utilize this functionality effectively.
Check the video mentioned below for a brief introduction about the module:
Features:
- It helps in creating a unique brand-based interface for the Odoo E-commerce websites.
- The users can customise the Odoo E-commerce store design and features with the help of Odoo Headless E-commerce.
- Provides the flexibility to design and develop a unique user interface that aligns with branding and user experience requirements.
- Easily integrates with various payment methods, enhancing the shopping experience for customers.
- Helps in Enhancing user interfaces of E-commerce websites without overhauling software infrastructure using Headless technology.
INSTALLATION
- Once you purchase the App from the Webkul store, you will receive the link to download the zip file of the module.
- Extract the file on your system after the download finishes. You will be able to see a folder named- ‘odoo_headless’
- Copy and paste this folder inside your Odoo Add-Ons path.
- Now, open the Odoo App and click on the Settings menu. Here, click on Activate the Developer Mode.
- Then, open the Apps menu and click on ‘Update Modules List.’
- In the search bar, remove all the filters and search ‘odoo_headless’
- You will be able to see the module in the search results. Click on ‘Install’ to install it.
Frameworks
To create a unique Odoo Ecommerce NextJS Theme, we employed Rest API storefront API development to establish a seamless connection between the Odoo backend and the front end.
Apart from that, we have made use of the below frameworks to create this E-commerce Headless theme:
- Next.JS(React Js)
- Typescript
- Tailwind CSS
Header Request
You must allow Request Origin as well as Request headers to make it work with the theme. Please follow the below instructions.
# For Apache
Header set Access-Control-Allow-Origin “https://your-theme-url.com/ “
Header set Access-Control-Allow-Headers “Accept, Content-Type, Authorization, Authenticate, lang, currency”
# For Nginx
add_header ‘Access-Control-Allow-Origin’ ‘https://your-theme-url.com/‘;
add_header ‘Access-Control-Allow-Headers’ ‘Accept, Content-Type, Authorization, Authenticate, lang, currency’;
Installation Procedure
Headless Theme Installation
Prerequisites
Node >=16.0.0
NPM >=8.1.0 OR YARN >=1.22.0
Customers can install the theme via two methods:
- Vercel
- Manual Installation
1. Vercel
Vercel is the native Next.js(ReactJs) platform, designed to enhance the Next.js experience. It is the best way to host the next js (framework).
You can import the Git Repository from GitHub, GitLab or BitBucket.
Login using Git, you can also log in with your email but need to link with Git. Now follow the steps mentioned below for logging in:
1: Go to Vercel Dashboard and click on Add New.
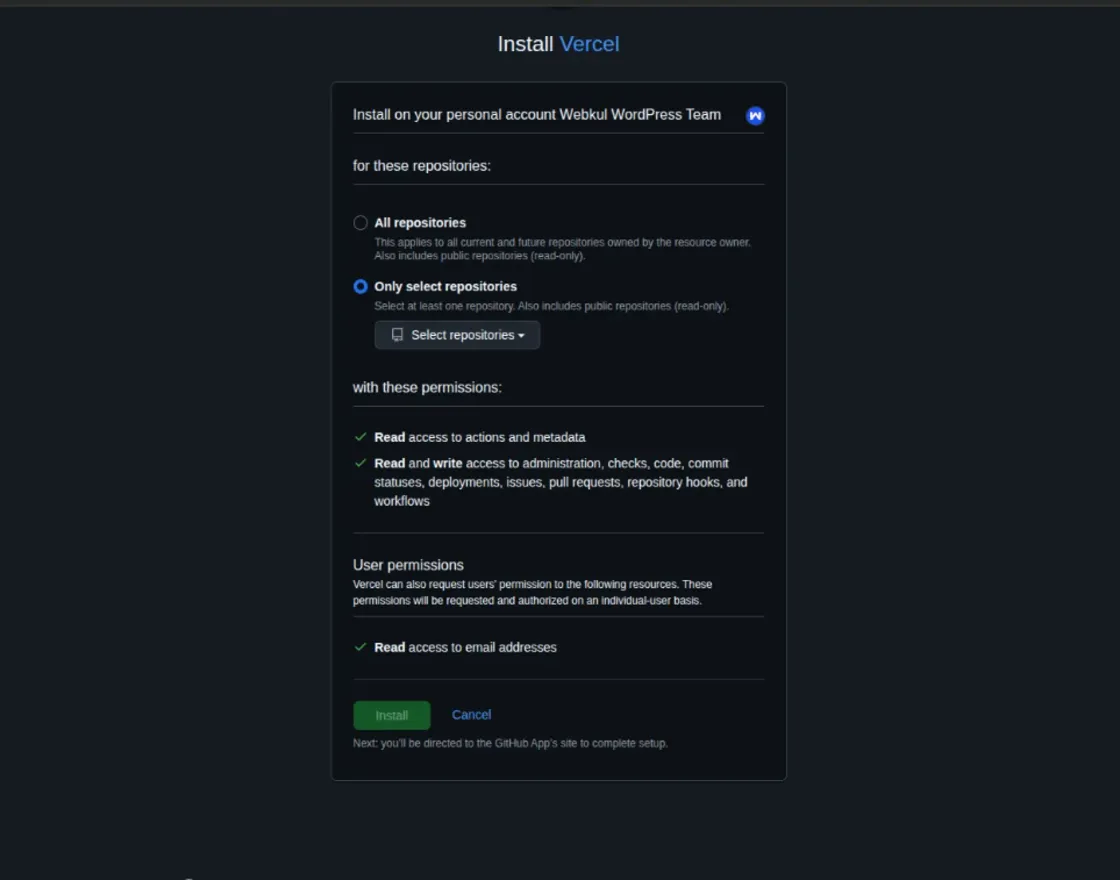
2: Select a Git provider to import an existing project from a Git Repository.
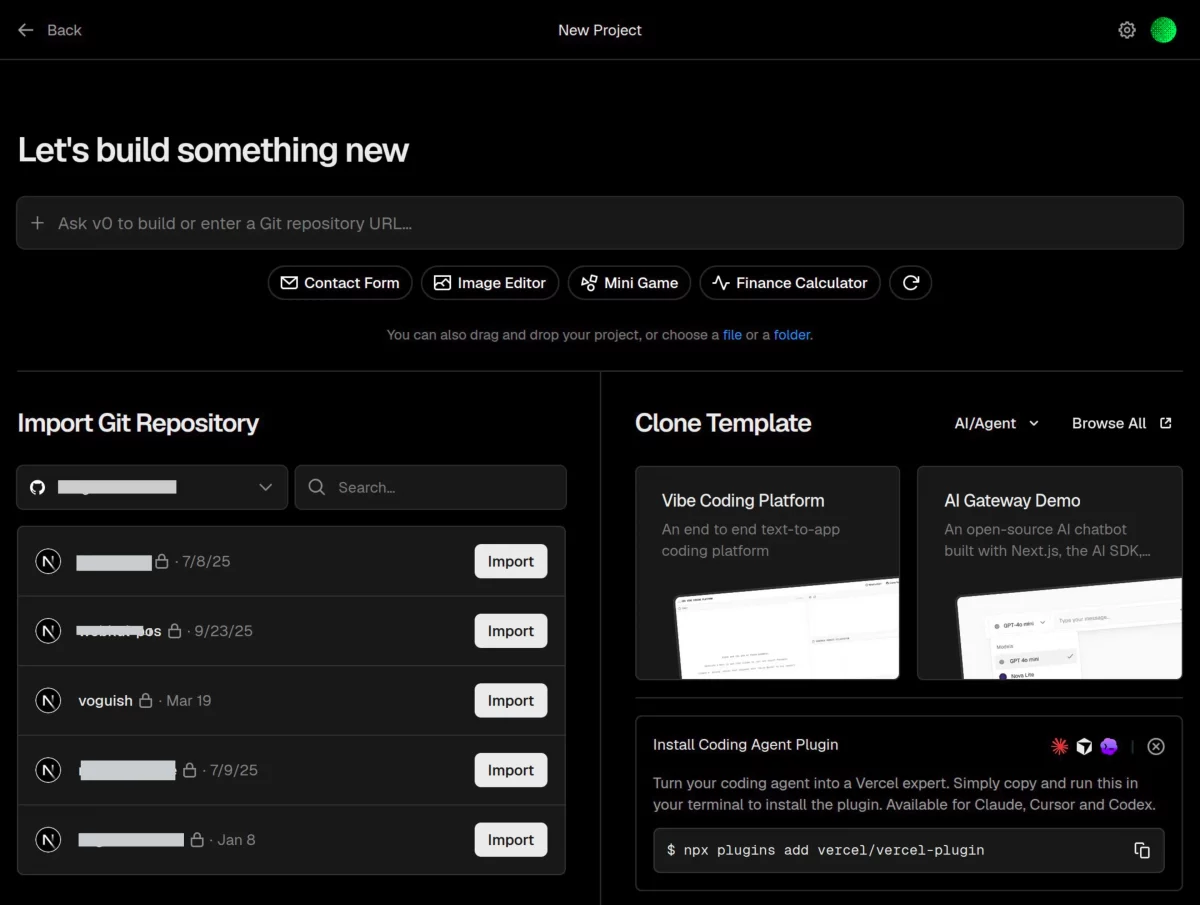
3: Now click on the import option as mentioned below in the snapshot:
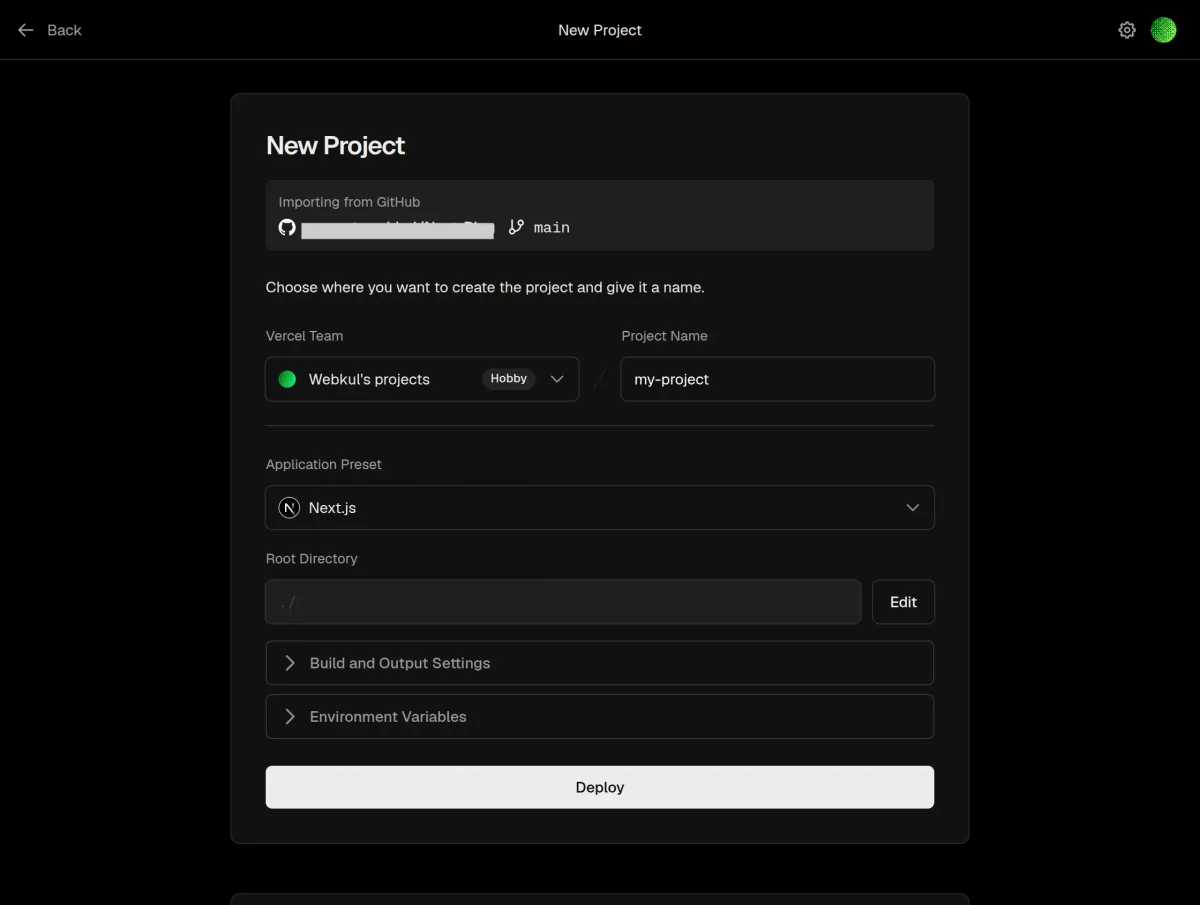
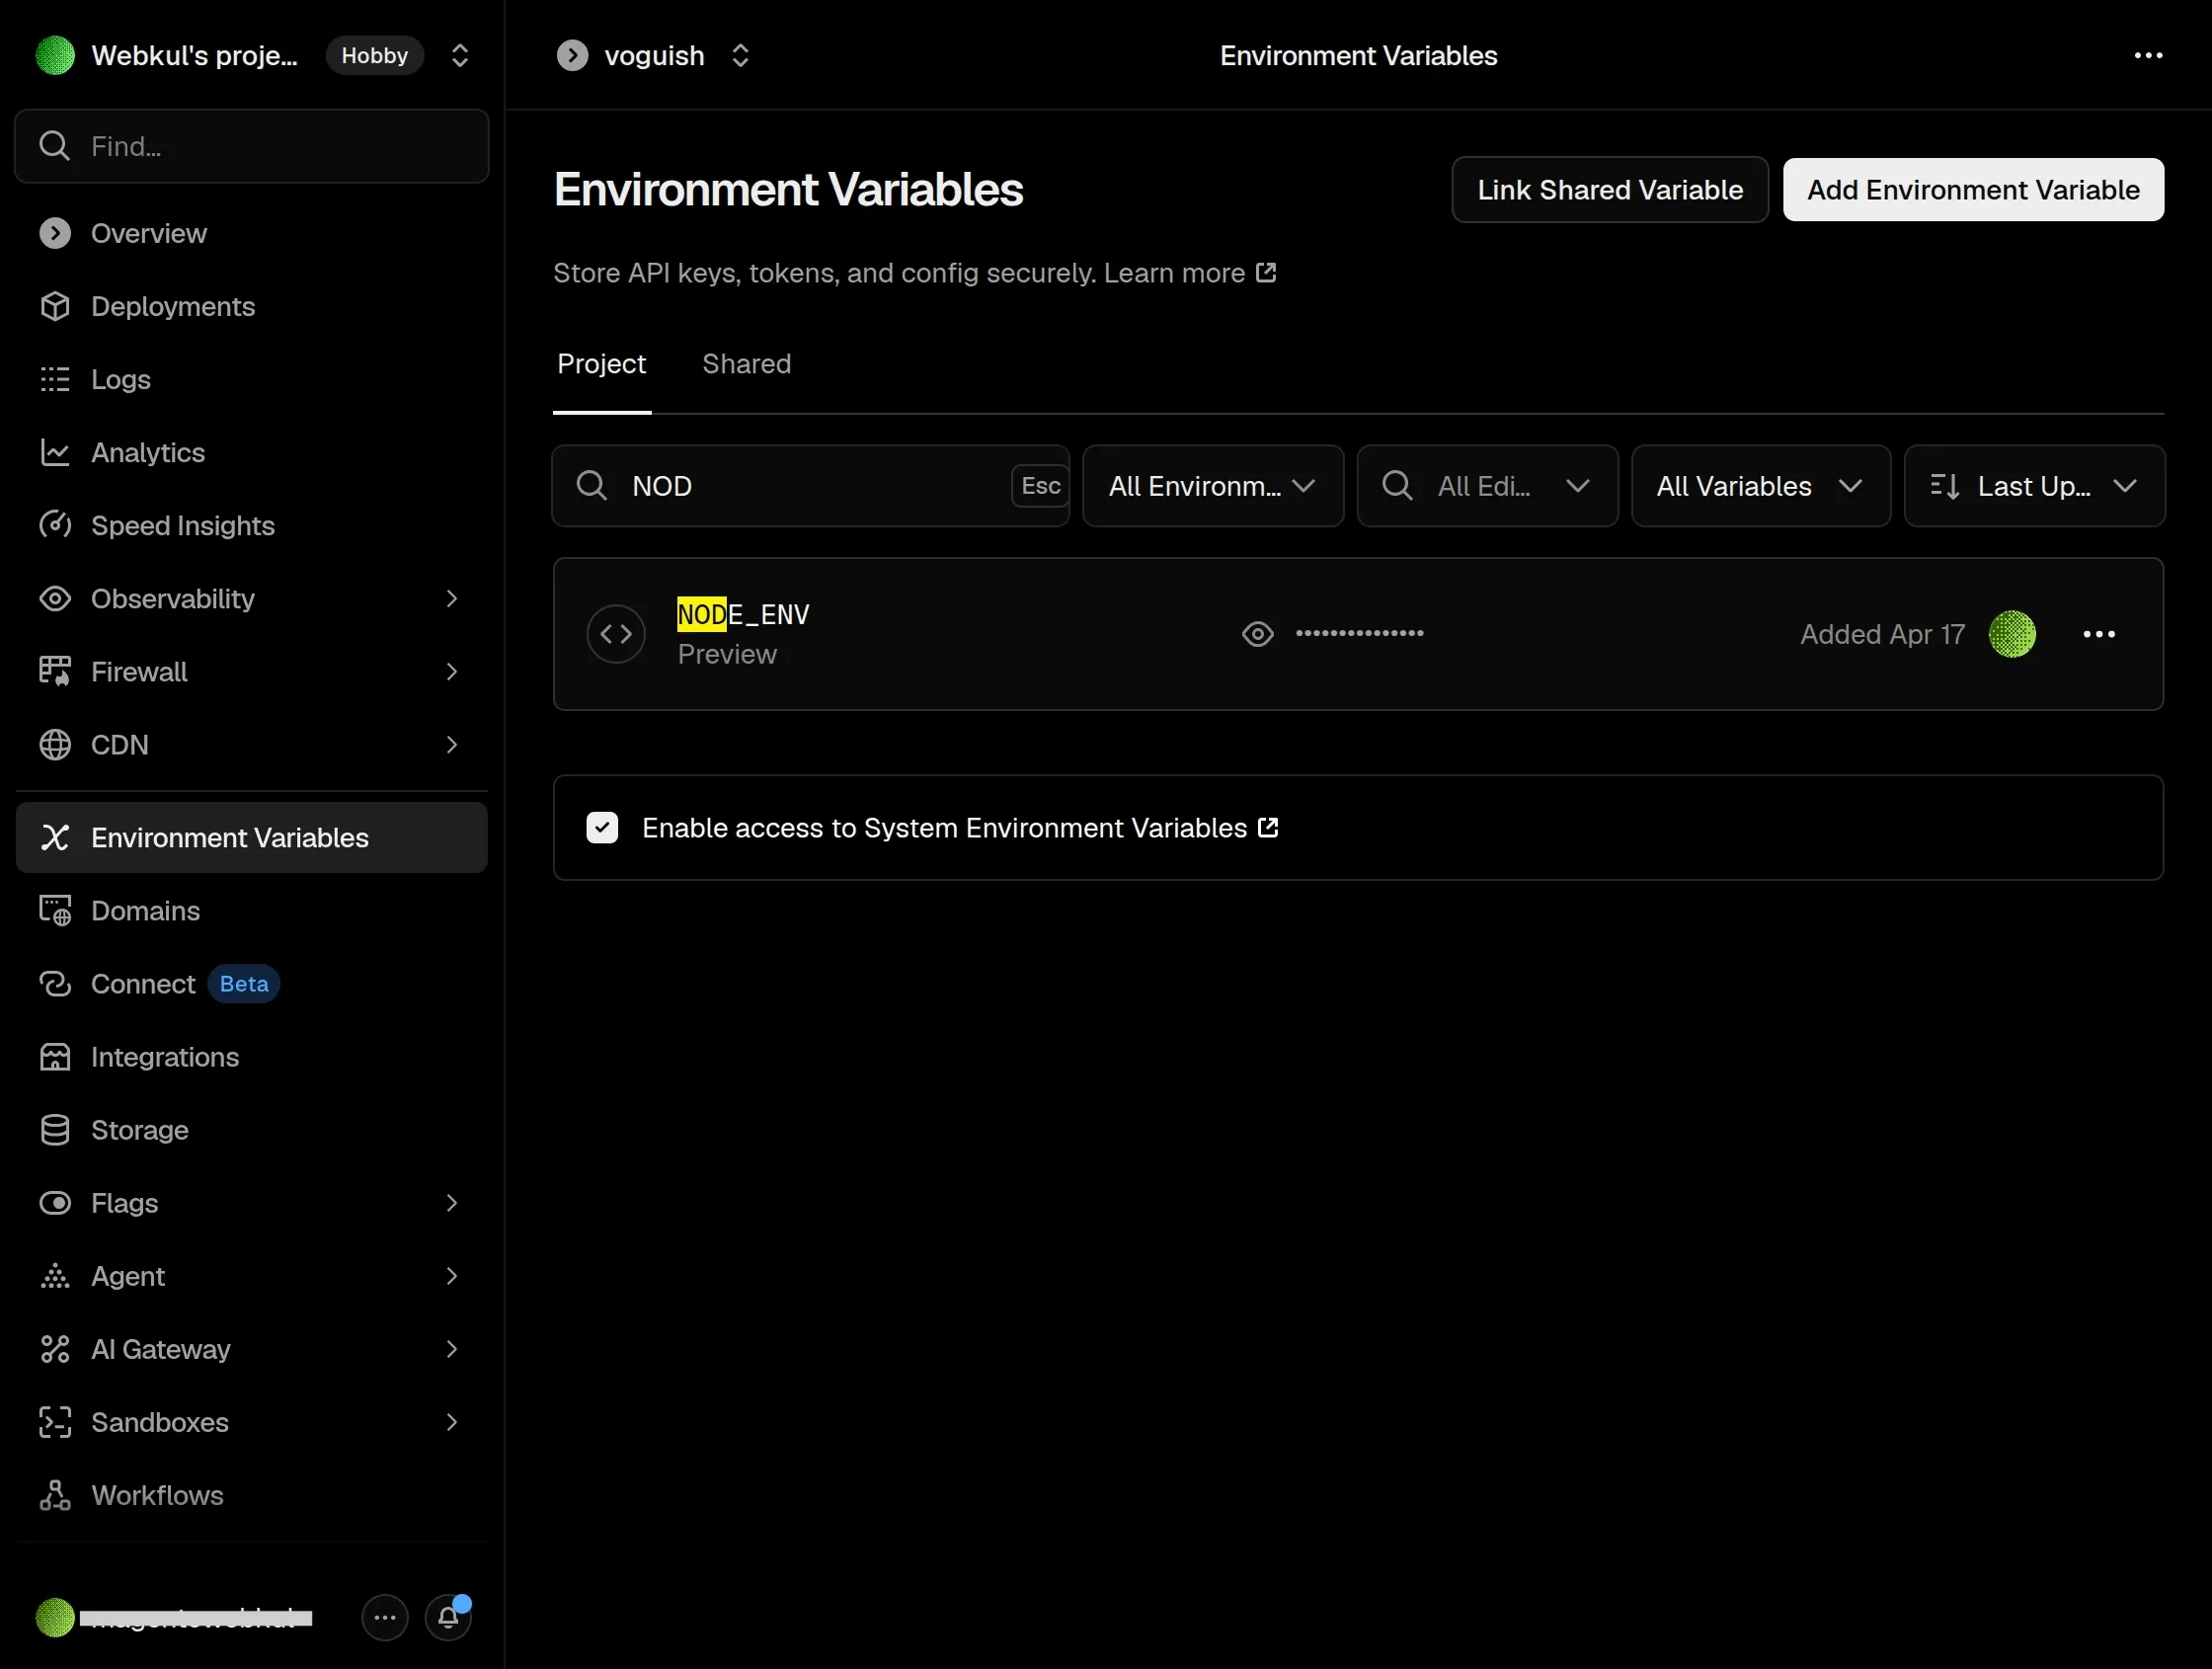
4: Here you have to enter the environment variables with their values, which you will get after extracting the zip file in the .env.template.
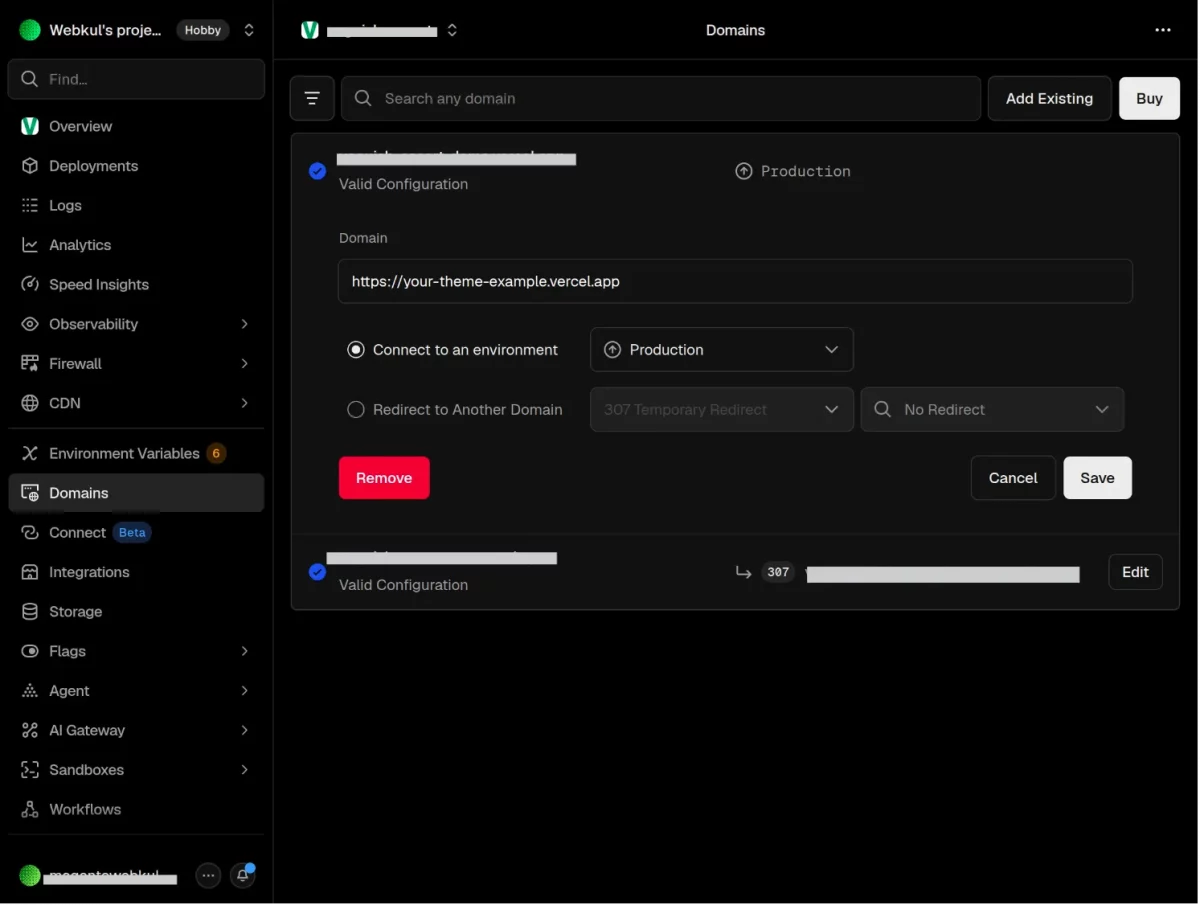
5: Once you click on deploy you will get the URL from Vercel also you can manage your domain from Vercel > Settings > Domain.
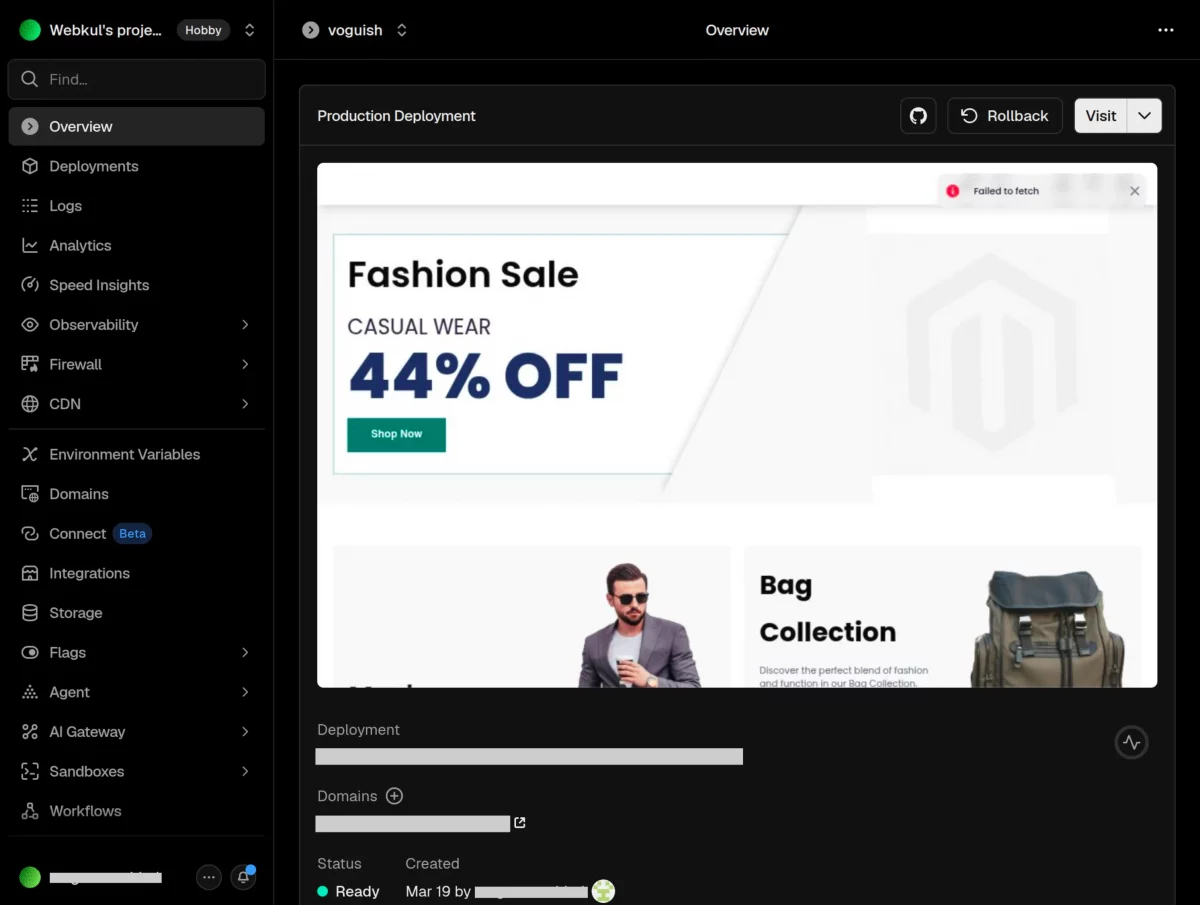
After clicking on Voguish Theme You can check the project Dashboard as mentioned below in the snapshot:
2. Manual Installation
- The Customers will get a zip folder and they have to extract the contents of this zip folder on their system. The extracted folder has a NextJs folder, move the folder into the directory where you want to install it.
- Setup env – Duplicate env.template rename the duplicate to .env. Now update the values mentioned below in the env file:
- NO_SECRET=TEST_VOGUISH
- NEXTAUTH_SECRET=TEST_VOGUISH
- MODE=PRODUCTION
- NEXTAUTH_URL=http://localhost:3000/
- APP_URL=<App_URL>
- CLIENT_TOKEN=<ODOO_API_TOKEN>
- API_URL=<ODOO_API_URL>
- API_VERSION=<API_VERSION>
- IMAGE_DOMAINS=<ODOO_API_URL>
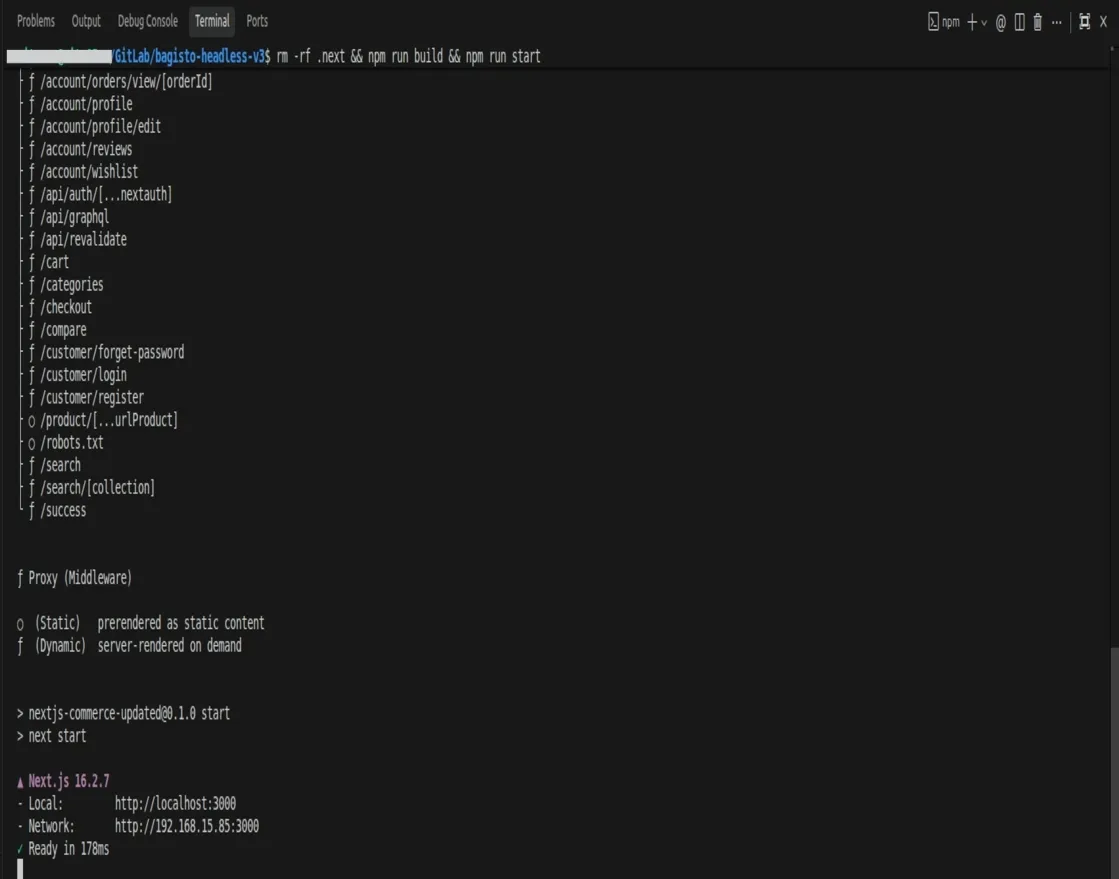
- Run the following command via the terminal:npm install OR yarn installnpm run build OR yarn buildnpm run start OR yarn startIn case you want to change the value of any of the messages then open the locale folder go to message.po file inside en. Enter the value in msgstr in respective to the msgid. Then run the command of build and start.
- It will serve on a 3000 port to your server for eg: http://localhost:3000/.
- You can access Odoo Headless E-commerce Theme by using your-serverip:3000 and also you can ask your server team to map your 3000 port to any dedicated domain.
Storefront View
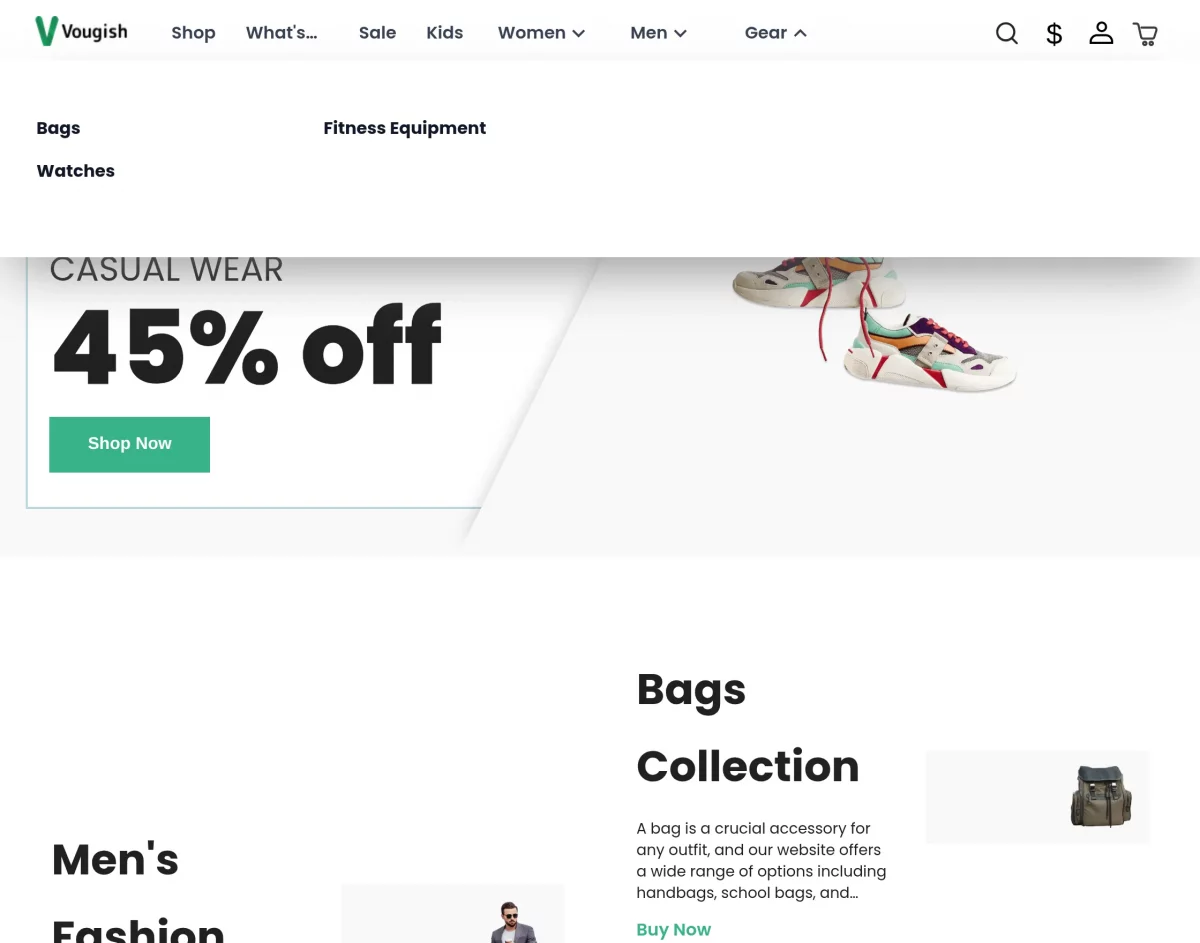
The Odoo E-commerce NextJS Theme looks as shown in the below snapshots.
The view of the customer public page on the website.
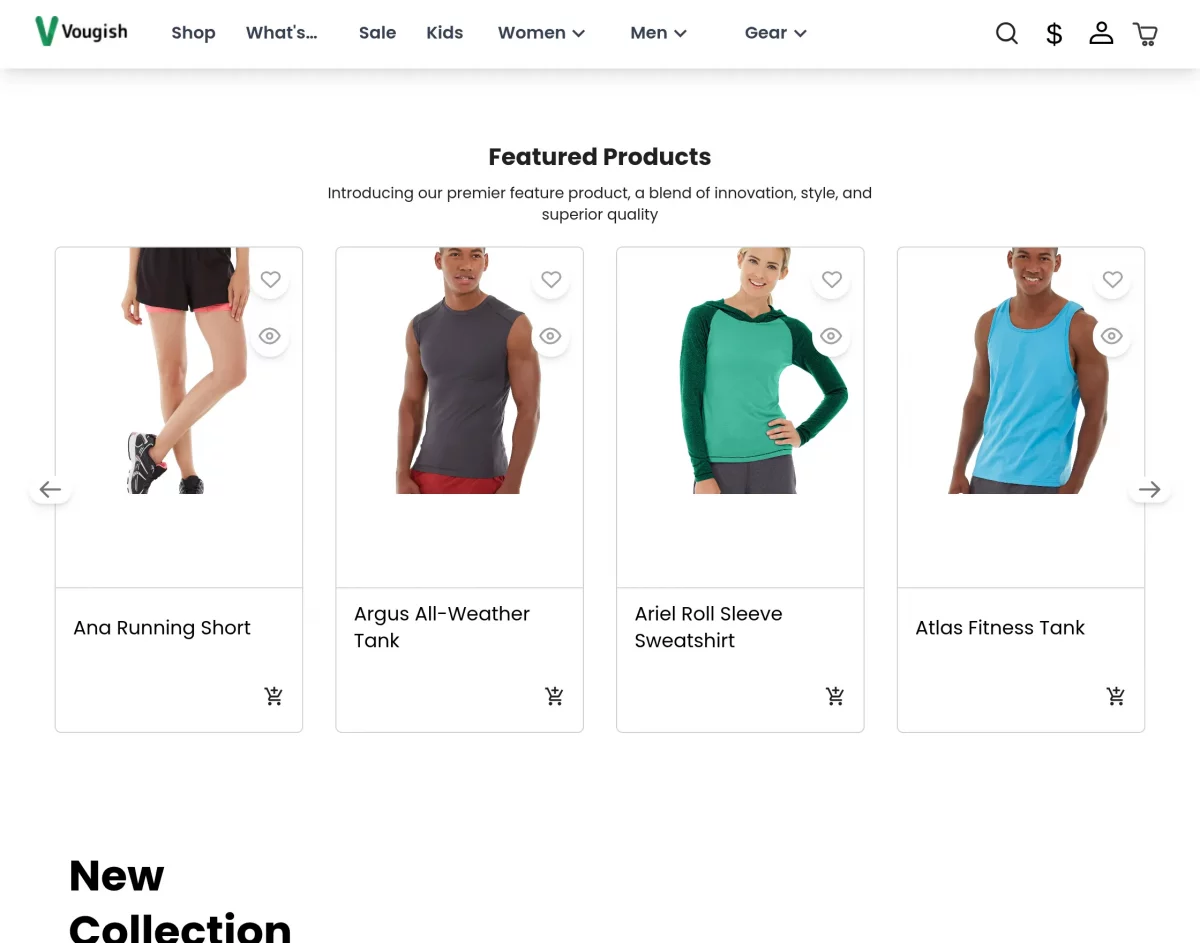
Home Page
A well-organized home page with a navigation menu, categorized pages, featured products, a special offer section, banner with a call-to-action button.

Organize and display a collection of products or services for users to browse and potentially purchase using the catalog.
Add featured products on the home page and make it more enhancing and visually appealing for visitors.
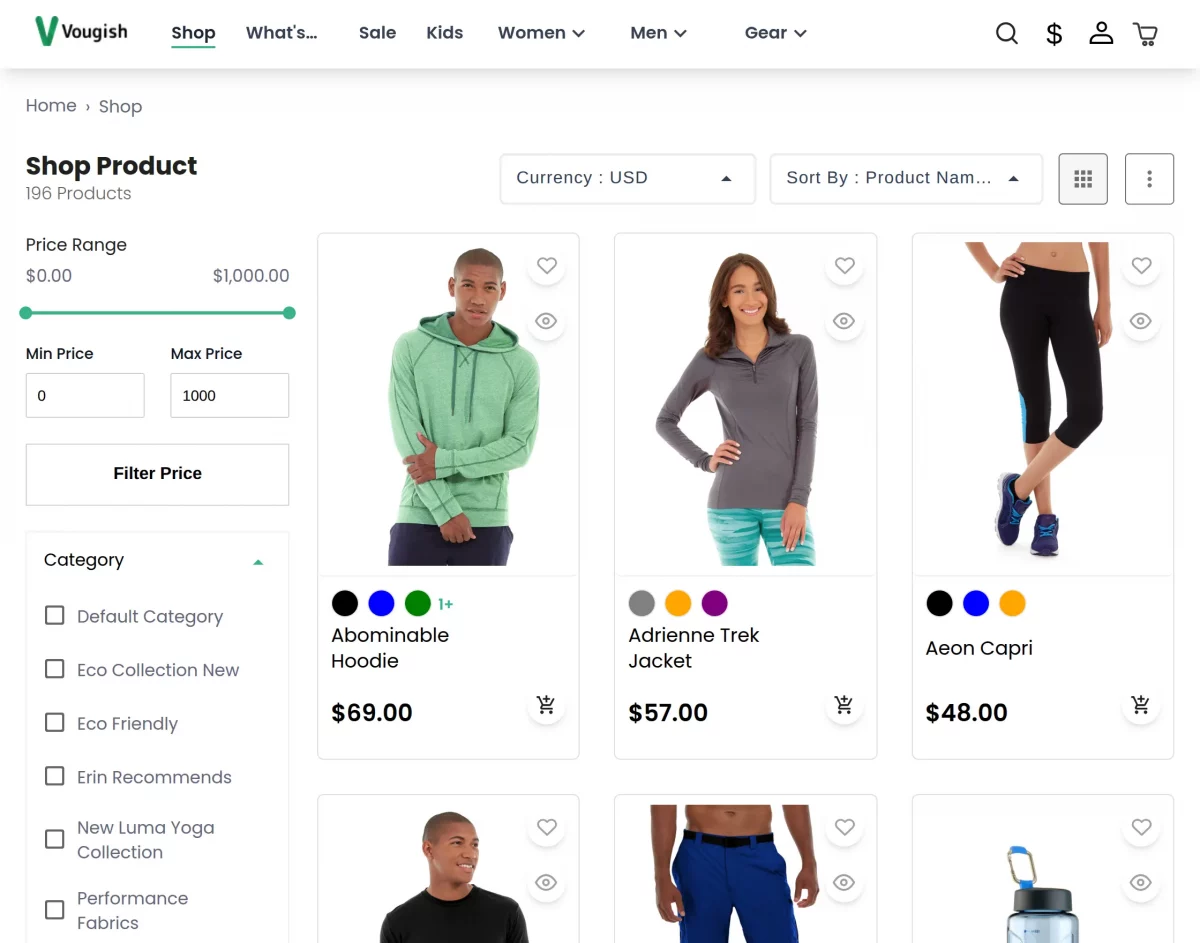
Category Page
Display a collection of products that belong to a specific category with layered navigation, making it easier for visitors to find and filter products in which they are interested.
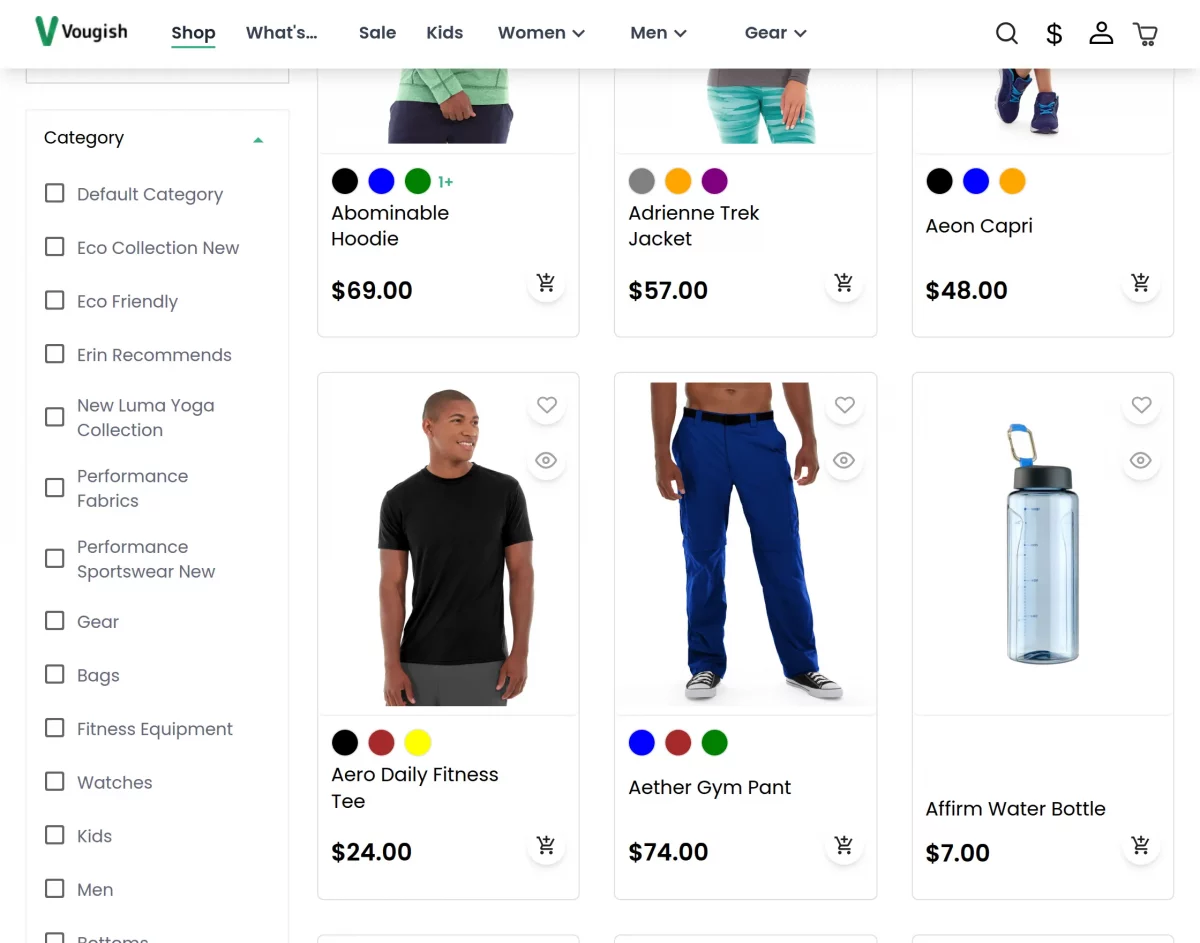
Catalog Listing
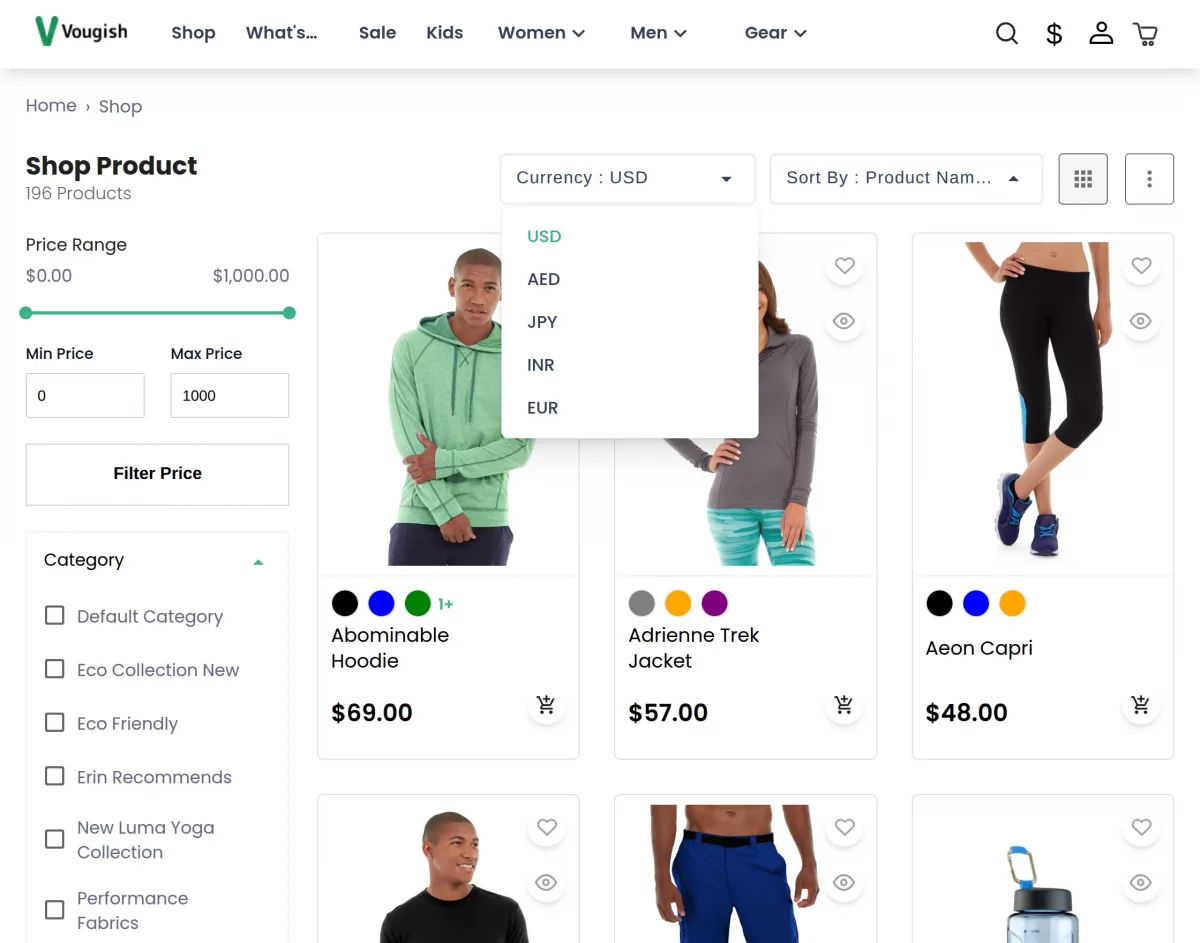
Users can easily categorize the products by using various filter options on the top right-hand side. Users can sort products by using any option shown in the below screenshots.
The users can also change the currency as required for the products being displayed.
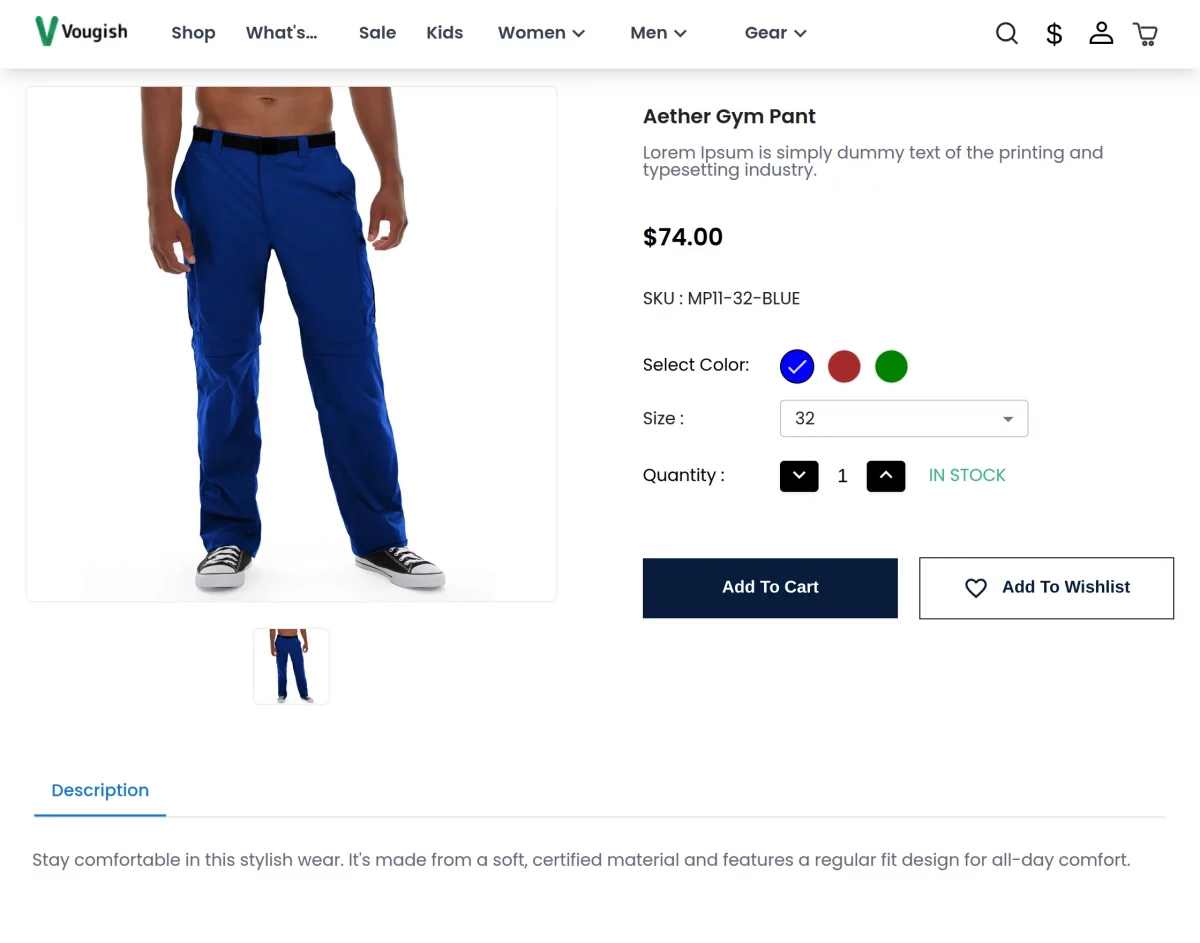
Product Page
Create fascinating product pages by adding descriptions, respective related products, and enabling product reviews.
Also, the visitors can find the related products added to the product.
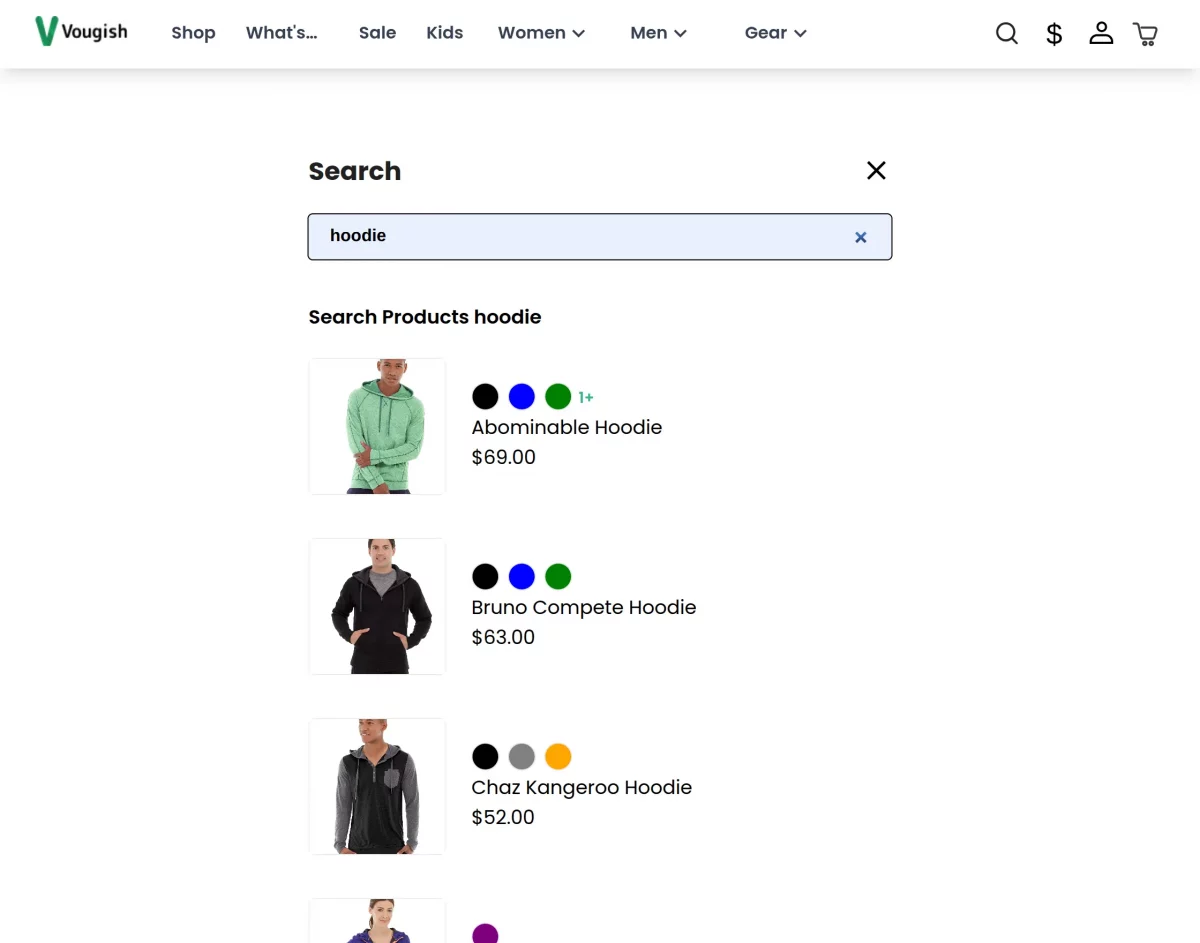
Search option:
Using the search option on the right side of the menu, visitors can find products quickly and easily.
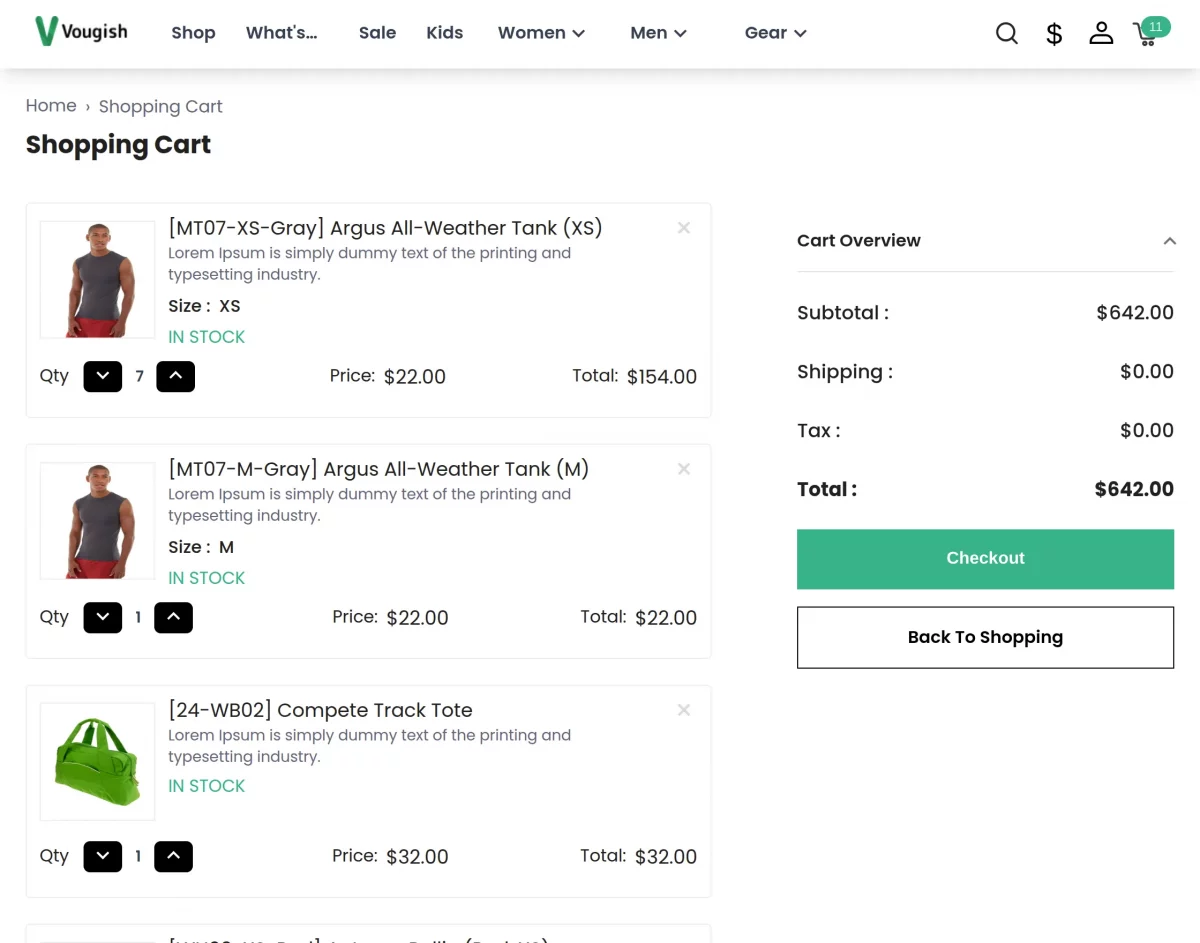
Cart page
A shopping cart icon or symbol at the right top of the website’s layout indicates to customers that they can view their cart at any time.
Also, provide a prominent “Checkout” button that initiates the process of completing the purchase.
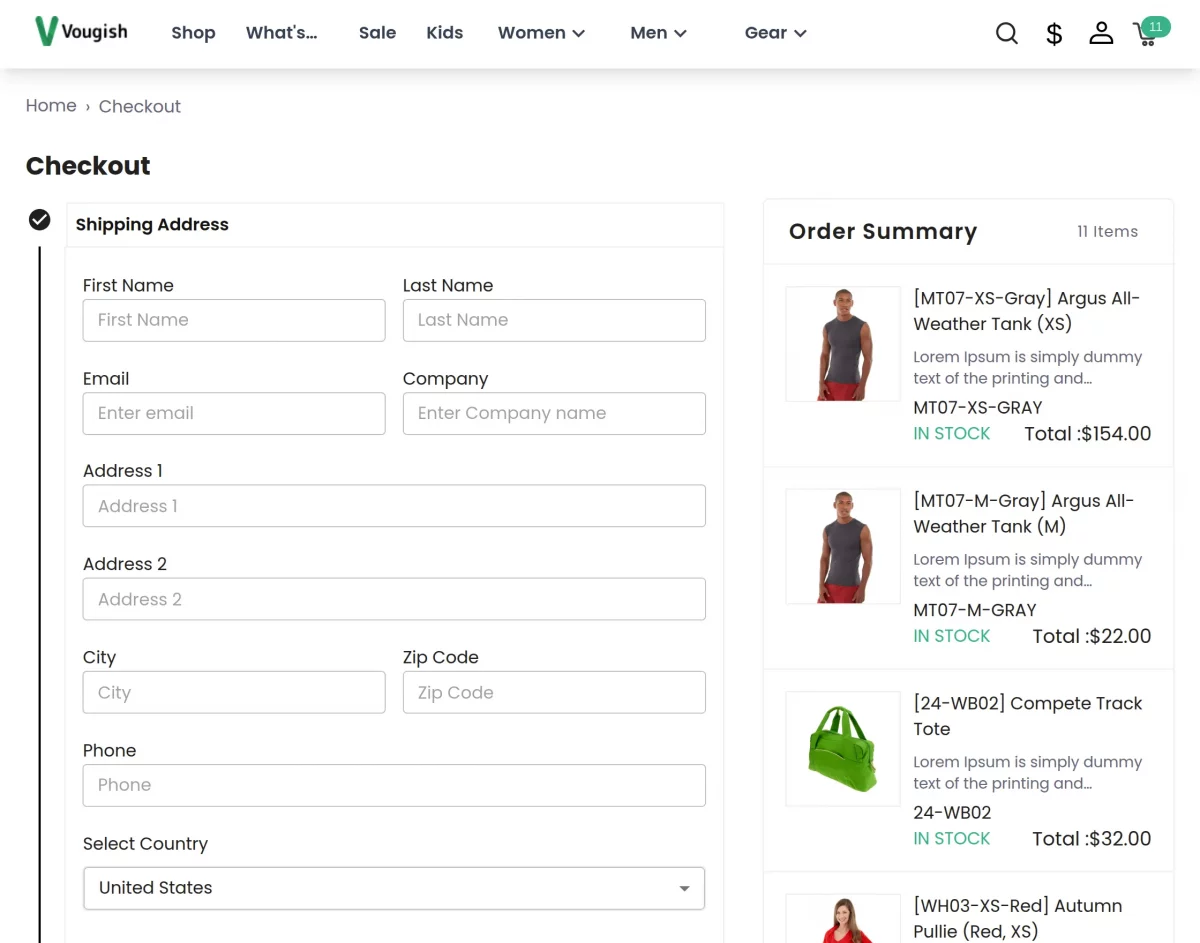
Checkout page
Here, the users can find a smooth and efficient checkout page with shipping address, shipping method, billing address, payment, and review order.
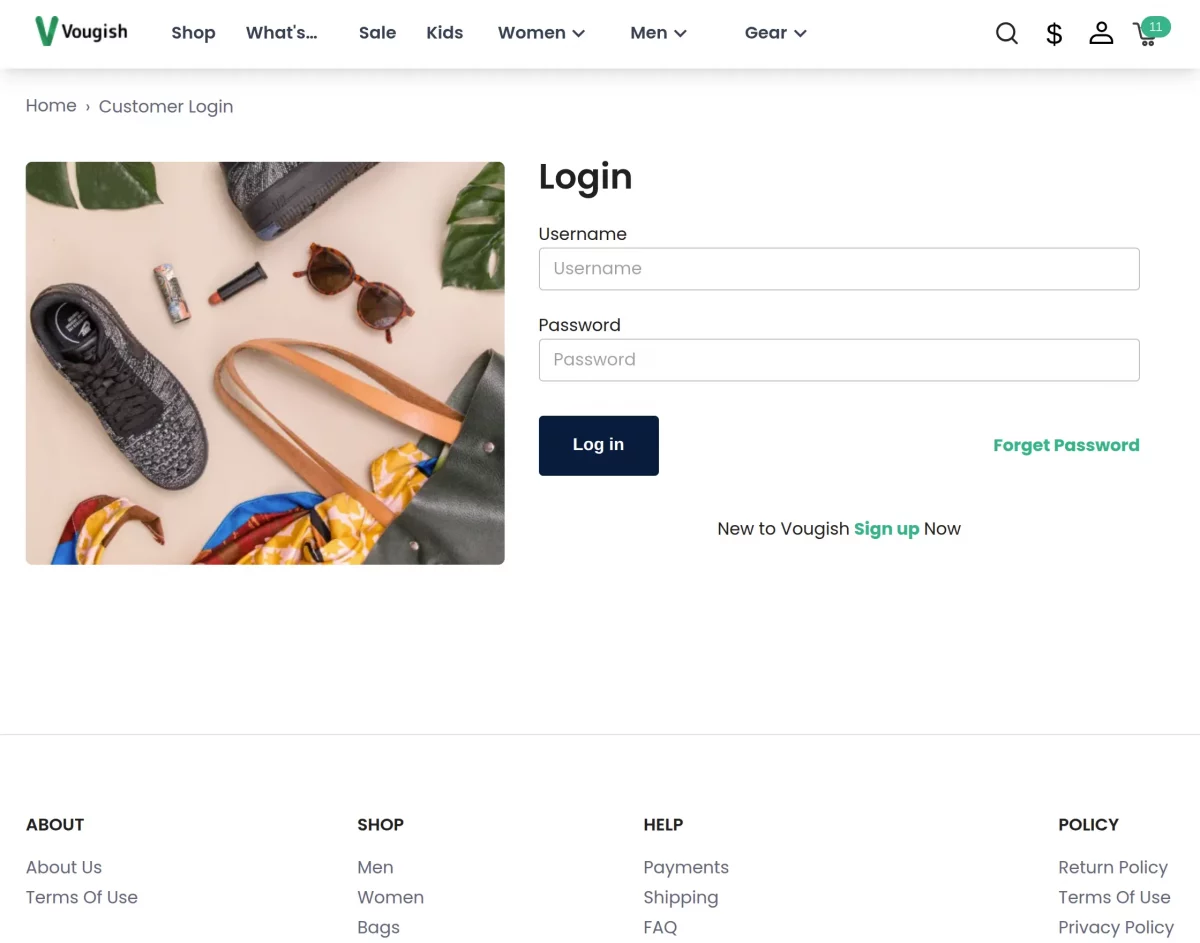
Login/Sign Up Page
If you’ve already an account on the Odoo Headless E-commerce Theme then enter the below details to log in to your account.
To register yourself to Vougish click on the sign up option as shown in the below screenshots.
NEED HELP?
Hope you find the guide helpful! Please feel free to share your feedback in the comments below.
If you still have any issues/queries regarding the same, please raise a ticket at the UV Desk.
I hope this helps. In case of any further queries, contact us at our support mail.
Thanks for paying attention!!
Current Product Version - Odoo 19,18,17
Supported Framework Version - 1.0.0

Be the first to comment.