Introduction
Odoo Power BI Connector seamlessly integrates Odoo with Microsoft Power BI, enabling advanced data export and visualization for better decision-making.
Odoo Power BI Connector ensures top-tier security, safeguarding your data with reliable and encrypted handling during exports.
With support for multiple workspaces, table relationships, and dynamic dashboards, Odoo Power BI Connector empowers businesses to transform raw data into actionable growth strategies.
You can also check the newly released Odoo 19 migration to explore its latest functionalities.
NOTE: Odoo Power Bi Connector uses https://pypi.org/project/msal/ library. Therefore, You need to install this library for the proper functioning of the module.
Important Points: Odoo Power BI Connector
- For Odoo online(SAAS) users, You first need to install Odoo.sh tool before installing Odoo Power BI connector because Odoo restricts third-party software installations on Odoo online(SAAS).
- Power BI/Fabric capacity is required for our module. Since our module has been migrated to the latest Real-Time Intelligence (RTI) features.
- We utilize Fabric components like Eventhouse and KQL database. Therefore, the workspace must be assigned to a capacity.
- Please note that the dataset published from Odoo to Power BI and the semantic model in Power BI are closely linked—they essentially function as the same entity. Once a dataset is published from Odoo to Power BI, you cannot add or remove tables from it.
- If you need to change or reduce the number of tables, the dataset must first be unpublished. Upon republishing with changes, Power BI will treat it as a new semantic model. Even if two datasets have the same structure, Power BI treats them as independent semantic models. Therefore, it’s important to ensure all required tables are included before publishing.
- To Know More about capacity assignment kindly check the Documentation.
Features
- Odoo Power BI Connector seamlessly integrates Odoo with Power BI for streamlined data management.
- Create and export datasets with multiple tables for detailed reporting.
- Build table relationships to derive actionable insights.
- Apply filters to focus on specific data for accurate analysis.
- Automate data exports using cron jobs to ensure up-to-date reports.
- Ensure secure data handling with encrypted transfers to Power BI.
- Manage multiple Power BI workspaces for better organization.
- Build and publish Eventhouses and KQL databases for advanced analysis.
- Odoo Power BI Connector enables the creation of interactive dashboards for clear and actionable insights.
- Export dataset directly using secure web URL
- You can connect both Power BI Service and Desktop.
Check the video mentioned below for an overview of the workflow of this Connector:
Installation
- Once you purchase the App from the Webkul store, you will receive a link to download the module’s zip file.
- Extract the file on your system after the download finishes. As a result, you will be able to see a folder named- ‘power_bi_connector’
- Copy and paste this folder inside your Odoo Add-Ons path.
- Now, open Odoo App and click on the Settings menu. Here, click on Activate the Developer Mode.
- Then, open the Apps menu and click on ‘Update Modules List.’
- In the search bar, remove all the filters and search ‘power_bi_connector’
- You will be able to see the module in the search results. Click on ‘Install’ to install it.
Workflow
1. After installing Odoo Power BI Connector, log in to Odoo instance and go to Power BI Connector > Configuration > Connection.

2. Select the Access Method and After that, add the Credentials which include Power BI Username and Password.

3. Navigate to App credentials, here fill in Client ID, Tenant ID, Redirect URL, and Client Secret. you get all these from Azure Portal.

4. Now click on the test connection. Connection Successful.

5. In Workspace tab, you can see Workspaces, Datasets, and Tables.

6. In Settings, Enable Microsoft Fabric
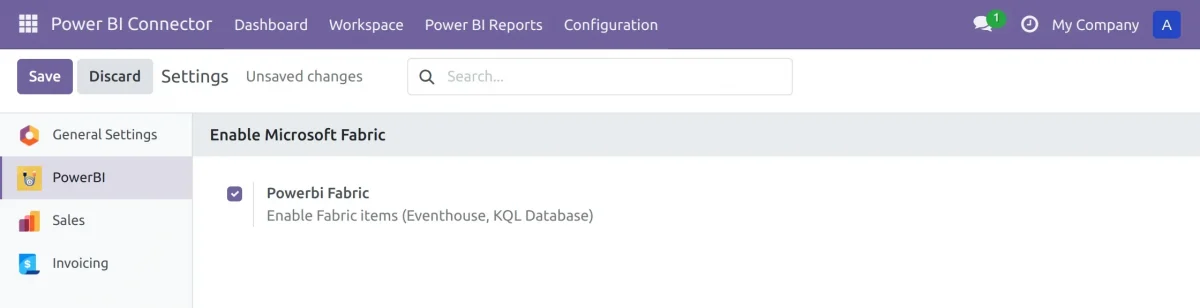
7. Now Workspace, Eventhouse, KQL Database, and Tables tab are available.

8. Once done, click on the Workspace tab. Go to the workspaces menu and create a Power BI workspace by adding workspace name and publishing it.

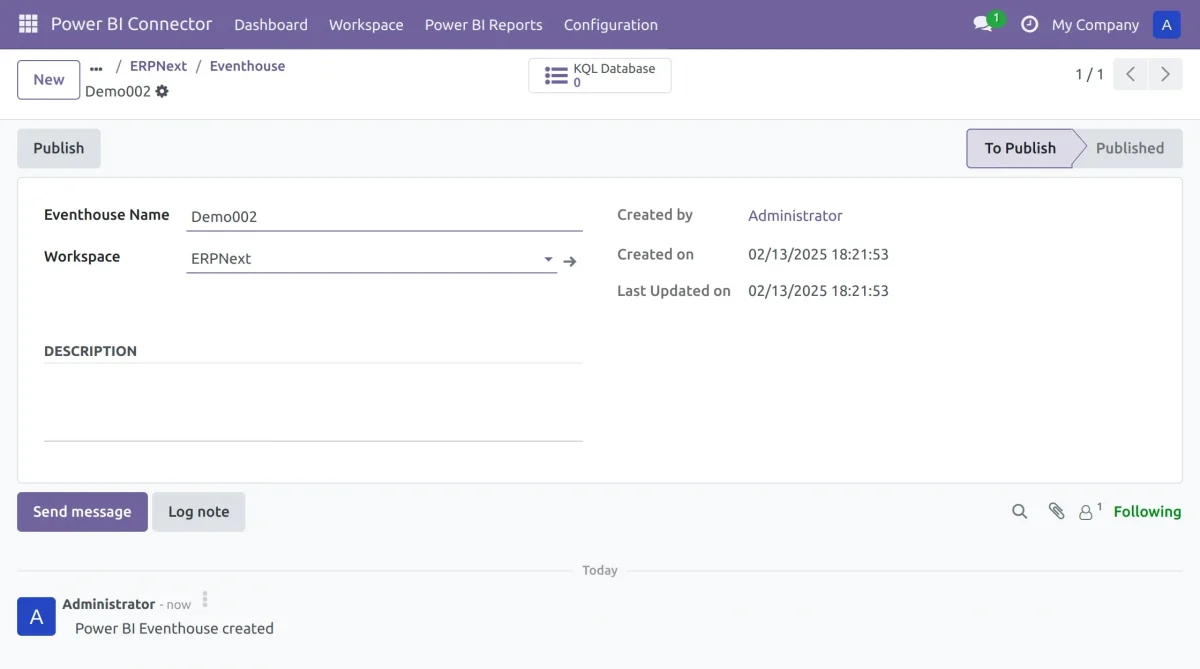
9. Now, create Eventhouses for each workspace. Click on the Workspace tab, go to Eventhouse menu, and create an Eventhouse.
10. Click on the Workspace tab and go to KQL Database menu, where you can create KQL Databases.

11. Click on the Workspace tab and go to the Tables menu, where you can create Tables to store data in databases.

12. Navigating to Publish, You can publish and validate the Power BI table.

13. Now disable Power BI Fabric.

14. Now you can see dataset instead of KQL Database.

15. Create a new dataset by selecting workspace. Now set dataset type to Push.

16. Create a new table inside the dataset and publish the dataset.


17. Now you can export table data by opening the table and clicking on export.

18. You can also directly export dataset tables using the import option in Dataset type while creating the dataset.

19. You can export a dataset using a web URL. Add tables to dataset, set Dataset Type to Import, and Web Auth Type to Web Token. Then click Generate Token to create the URL and token.

20. Publish the dataset and copy the URL. Open Power BI Desktop or service and select data source as web. Click on connect to proceed further.

21. Enter the copied URL from the instance and paste it in the URL box. Click OK to load data


22. You can Import Reports and Dashboards from Configuration Tab.

23. In Power BI Reports tab, Open Dashboards menu.

24. Here you can see list of Power BI Dashboards.

25. Here, you can see Power BI Dashboard of ‘demo dash’.

26. In Power BI Reports tab, Open Reports menu.

27. Here you can see list of Power BI Reports.

28. You can see an insightful Power BI Report.

OTHER CONFIGURATION-RELATED VIDEOS
Data Import from Power BI to Odoo
Data Synchronization from Odoo to PowerBI
Connect your Odoo with Business Intelligence PowerBi!
Need Help?
Hope you find the guide helpful! Please feel free to share your feedback in the comments below.
If you still have any issues/queries regarding the same, please raise a ticket at the UV Desk.
I hope this helps. In case of any further queries, contact us at our support mail : [email protected]
Thanks for paying attention!!
Current Product Version - 3.2.0
Supported Framework Version - Odoo V19,Odoo V18,Odoo V17

10 comments
Thank you for your kind words! We’re delighted to hear that the Power BI Connector is now working smoothly for you.
Our team at Webkul always strives to ensure seamless integration and support, and it’s great to know that we could help you get everything running perfectly.
We truly appreciate your feedback and look forward to assisting you with any future needs!
Best regards,
WEBKUL-TEAM
How can I increase the size of the report displayed in this module? Is there an option to adjust the width and height, or can this be done through custom code?
Additionally, how can we add the Power BI dashboard to the Odoo dashboard module? I would like to embed the report/dashboard directly within Odoo for easier access. Could you guide me on how to do that?
Looking forward to your guidance.
Connector Provider Team,
I hope you are doing well.
We are interested in understanding how your connector facilitates data transfer between Odoo and Power BI. Specifically, we would like to know:
Odoo Version: 18
How the connector works in real-world scenarios.
The steps required to enable automatic data fetching from Odoo to Power BI.
Any configuration, setup, or maintenance considerations.
To clarify these aspects and address any additional queries, we would appreciate a live demo or a meeting with a concerned expert. Please let us know your availability for the same.
Looking forward to your response.
We are interested in connecting Odoo 16 to Power BI for our business analytics needs. Could you please arrange a demo to showcase the integration process and capabilities?
Looking forward to your response.
Greetings of the day
Excuse us for the delayed response.
We have created a ticket on your behalf. Please refer to the below link for further information.
Ticket Link: https://webkul.uvdesk.com/en/customer/ticket/view/545556
Thanks and regards
Webkul-Odoo Team.
Greetings of the Day!!
Thank you for contacting Webkul, and we will surely assist you.
Kindly refer to the below-given ticket for further updates.
Ticket Link: https://webkul.uvdesk.com/en/customer/ticket/view/517850
Regards
Odoo-Team
When we run cron finsihed, It show data duplicated on power BI.
Is Cron delete old data or have process replacement data ? Our company I user Odoo.sh
Thanks.
Greetings for the day!!
I hope you are doing well.
The already synchronized data should not be duplicated. You have created a ticket with us for this issue, and our team is assisting you on the ticket.
Kindly refer to ticket 514753 for further details.
I hope you understand.
Thanks and Regards