Introduction
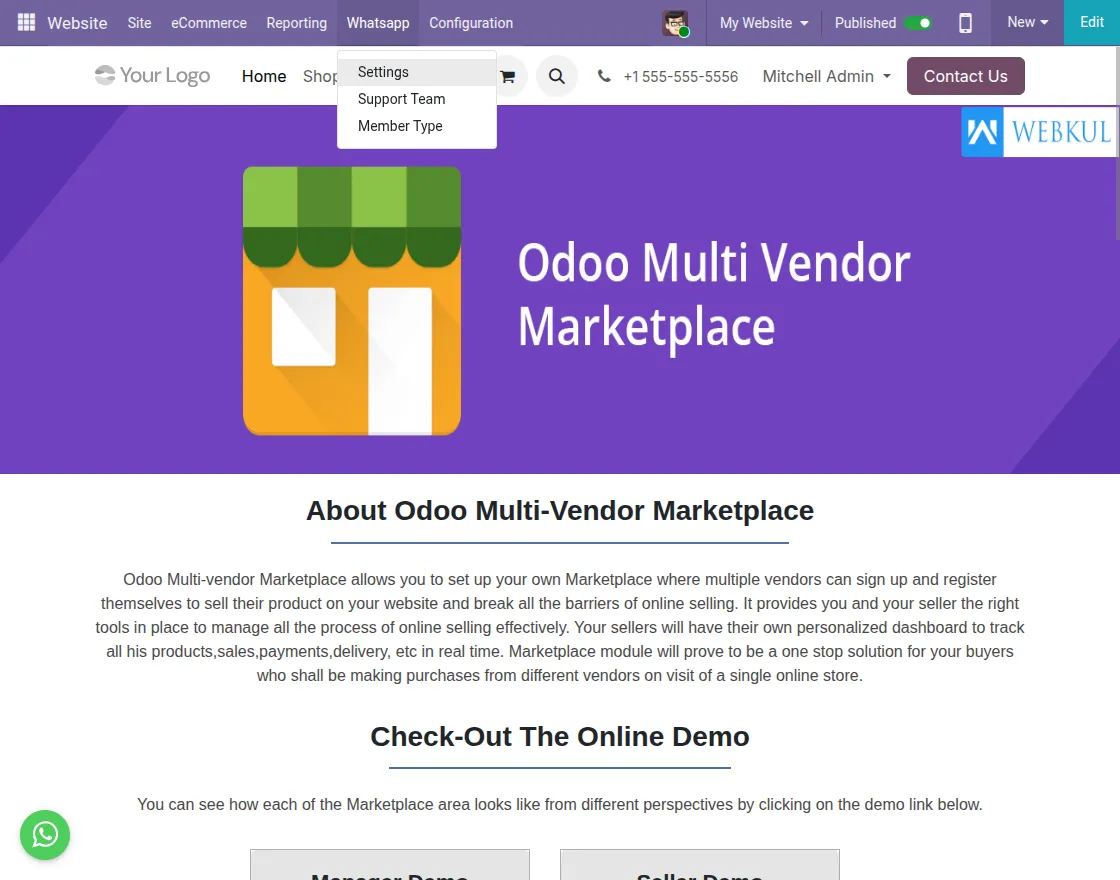
Connect with your customers using Odoo Marketplace Whatsapp Live Chat!
Chatting with customers solves most of their queries quickly. Moreover, you can explain things to them more easily and accurately through direct conversation.
But how can you connect to your customers without much effort or installing any new chatting app?
To allow you to communicate with customers and vice versa, we have created Odoo Marketplace Whatsapp Live Chat.
It enables you to chat with customers in real-time. Further, the module uses WhatsApp, which most people use worldwide for chatting, so you don’t have to install any other chatting app.
Customers can easily ask their queries, and sellers can answer them briefly. Moreover, you have control over everything means you can enable or disable any sellers’ chat anytime from the Odoo backend.
Prerequisites for using Odoo Marketplace Whatsapp Live Chat
The Odoo Marketplace Whatsapp Live Chat module works in conjunction with the following module:
Odoo WhatsApp Chat Integration
You must install the above-mentioned module to use Odoo Marketplace Whatsapp Live Chat.
Features
- Add a WhatsApp live chat option to the Odoo Marketplace website.
- Sellers can attend to customers’ queries and questions through the live chat on the Marketplace website.
- The module adds a WhatsApp chat widget to the Odoo Marketplace website pages.
- This widget shows all the sellers providing chat support over WhatsApp.
- Customers can select and send their queries to any seller via WhatsApp web.
- Seller receives the WhatsApp message on their registered number.
- Sellers can configure their WhatsApp accounts during marketplace registration.
- Admin can enable or disable WhatsApp configuration option for sellers during registration.
- Widget shows only the relevant seller on specific product pages.
- Marketplace WhatsApp chat widget shows the list of all sellers.
- You can also display sellers’ availability time to customers.
- Customers can choose a relevant seller to ask their query over chat.
- From the Odoo backend, you can enable or disable the chat support of a seller.
- Only active sellers will appear on the WhatsApp chat widget on the Odoo Marketplace.
- Sellers can manage their WhatsApp settings from their seller dashboard.
- Also, you can customize the UI of the Chat widget from the backend.
- Further, set the background colors, opening message, tile, etc., of the WhatsApp chat widget.
Installation
- Once you purchase the App from Webkul store, you will receive a link to download module’s zip file.
- Extract the file on your system after download finishes. As a result, you will be able to see a folder named- ‘marketplace_whatsapp_live_chat.’
- Copy and paste this folder inside your Odoo Add-Ons path.
- Now, open Odoo App and click on the Settings menu. Here, click on Activate Developer Mode.
- Then, open Apps menu and click on ‘Update Modules List.’
- In the search bar, remove all the filters and search ‘marketplace_whatsapp_live_chat.’
- You will be able to see module in the search results. Click on ‘Activate’ to install it.
Workflow
Configure WhatsApp Settings
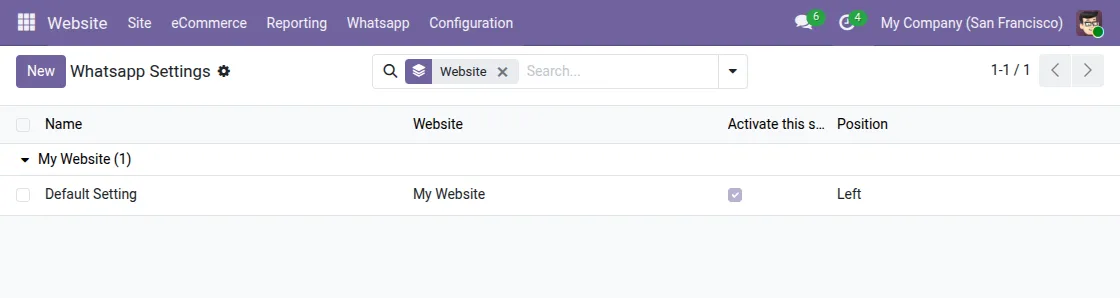
- After Installing Odoo Marketplace Whatsapp Live Chat, Open the Odoo backend and go to ‘Website > WhatsApp > Settings’.
2. Then, on the new page, click on the ‘New’ button.
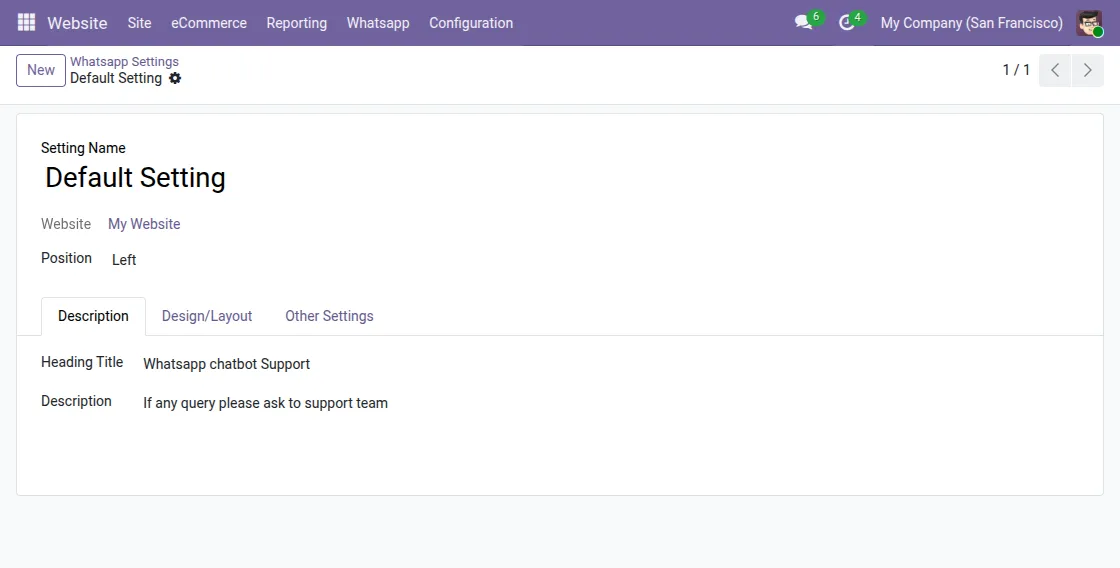
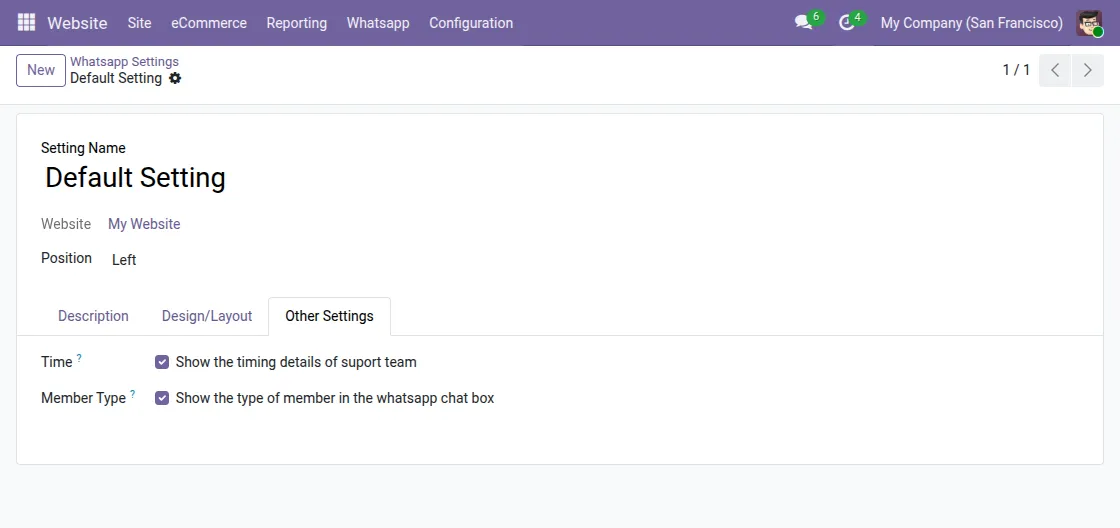
3. Next, fill in the details like position, heading title, and description in the ‘Description’ tab.
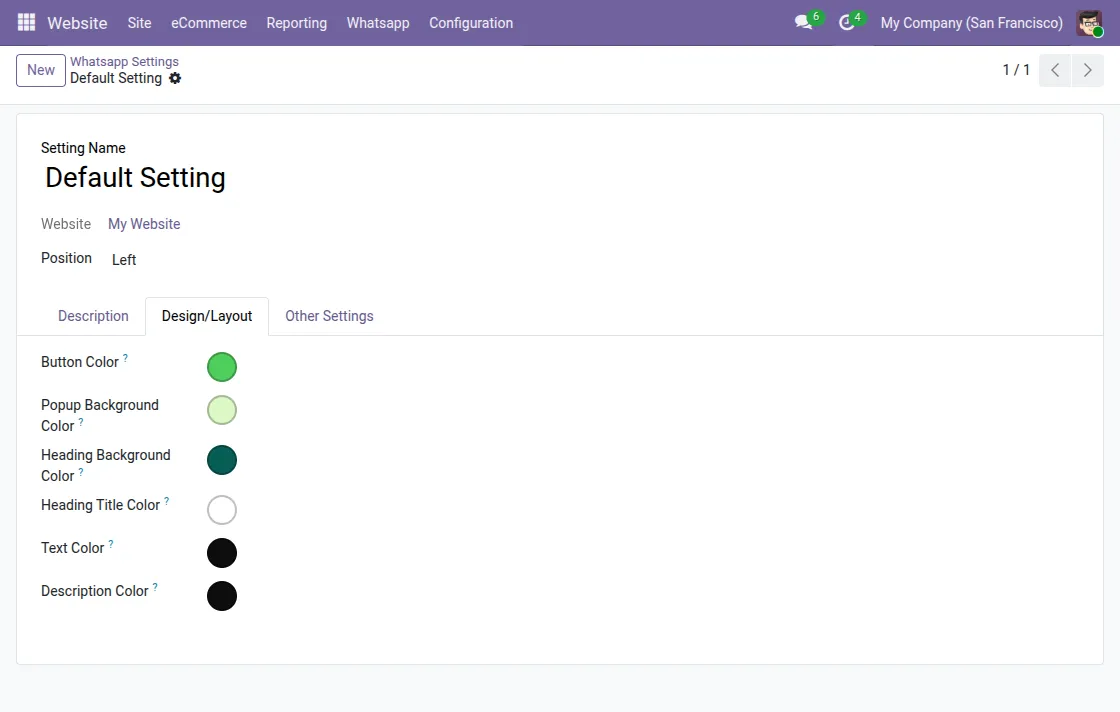
4. After that, in the ‘Design/Layout’ tab, choose the colors for different sections.
5. After ‘Design/Layout’, configure ‘Time and Member Type’ in the ‘Other Settings’. Once done, click the ‘Save’ button.
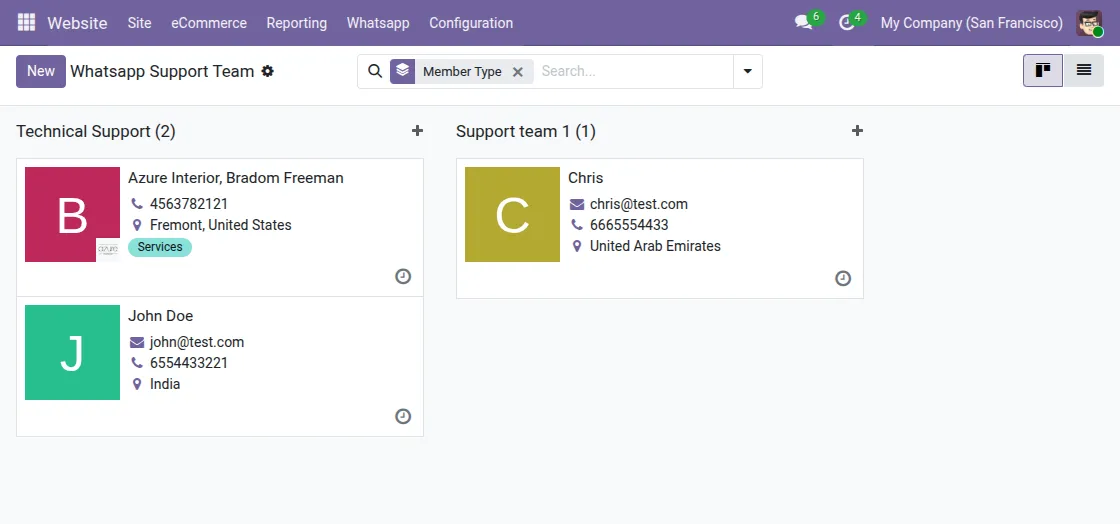
6. Following this, navigate to ‘Whatsapp Support Team’ by clicking on ‘Whatsapp> Support Team’ to view all members of the Whatsapp support team.
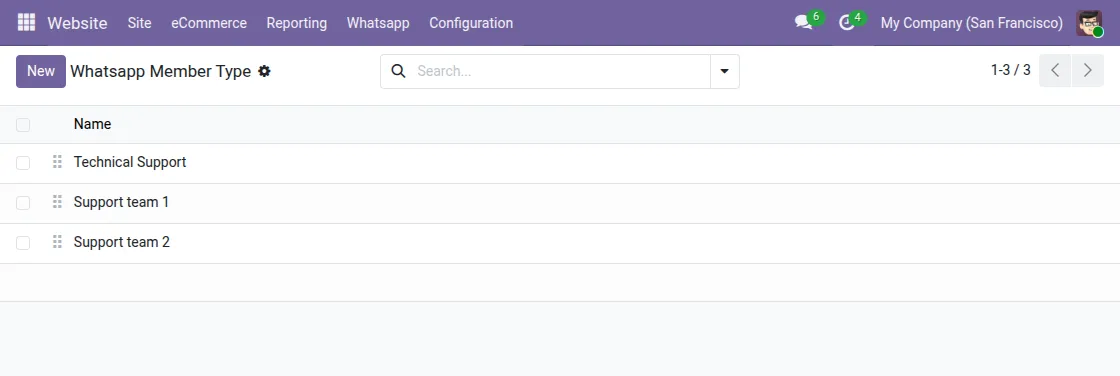
7. Then, go to ‘WhatsApp > Member Type’ and click on the ‘New’ button to create a new member type.
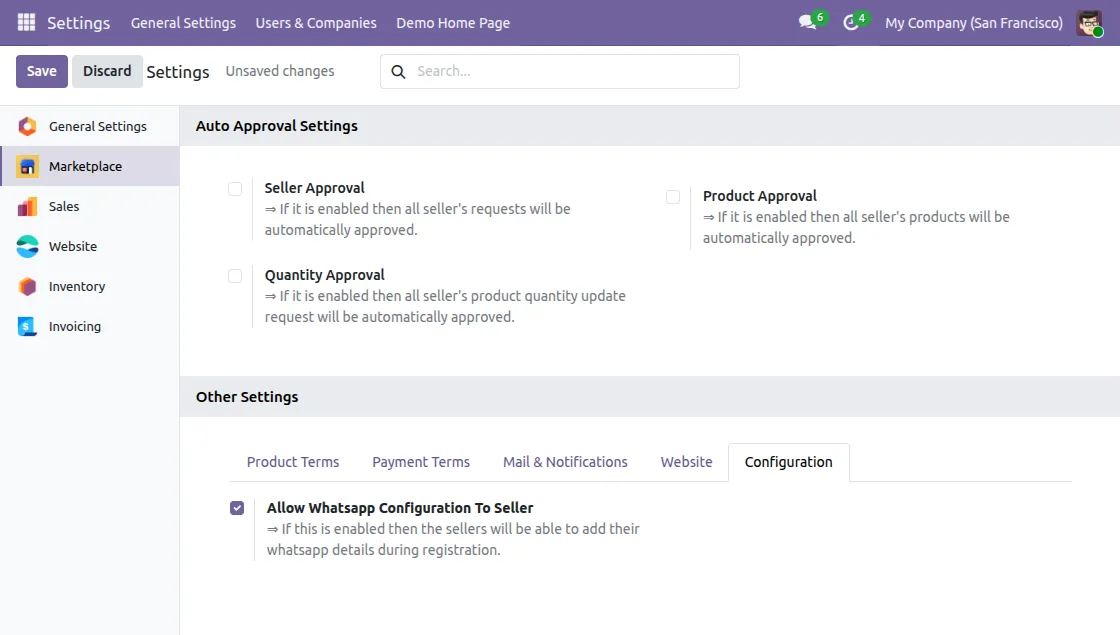
8. After that, go to ‘Settings > Marketplace > Other Settings > Configuration’ and enable the option ‘Allow WhatsApp Configuration to Seller’. Click ‘Save’ to apply the changes.
- When this option is enabled, sellers will see the WhatsApp configuration section during marketplace registration.
Seller View
Configure WhatsApp During Registration
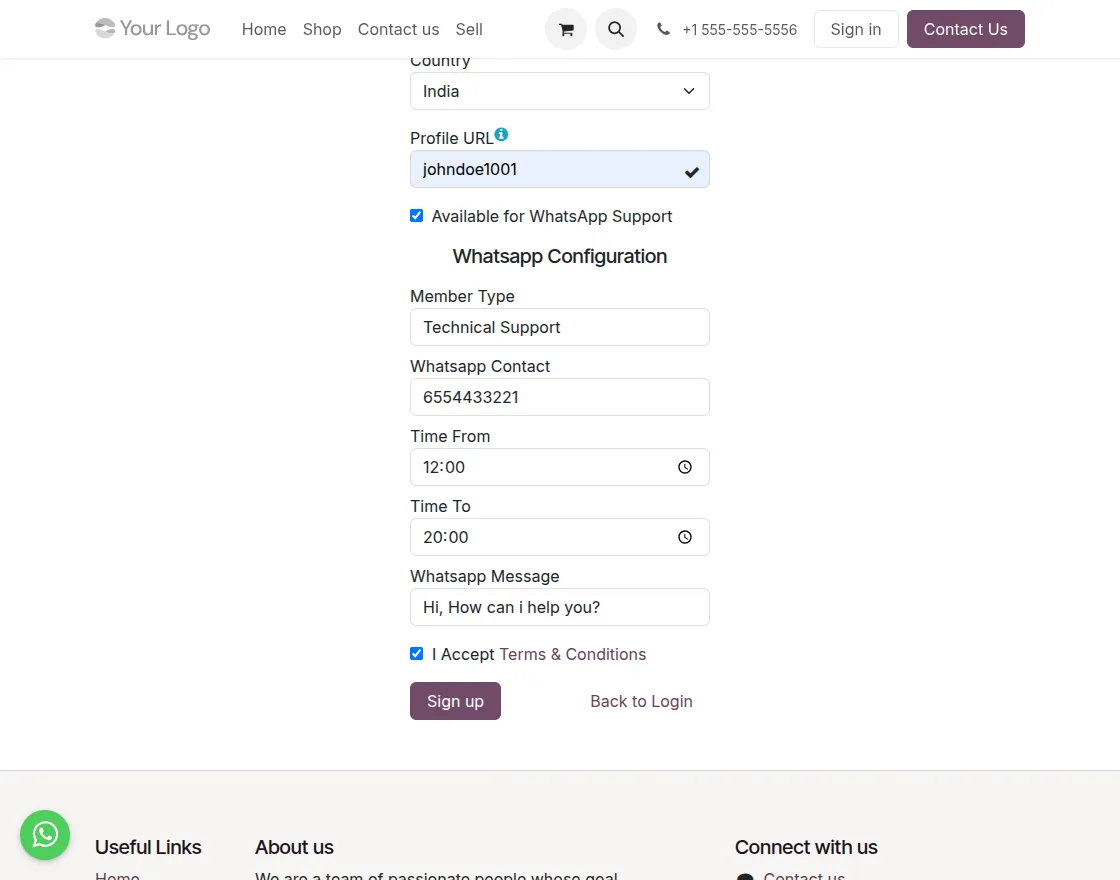
9. During seller registration on the marketplace, the ‘Available for WhatsApp’ option will be visible if the admin has enabled it in the settings.
- To configure WhatsApp during registration, click on the ‘Available for WhatsApp’ checkbox.

10. Once you check this option, the ‘WhatsApp Configuration’ section will appear below on the registration form.
- Sellers fill in the following details:
- Welcome Message
- WhatsApp Contact Number
- Member Type
- Availability Time From and To
Configure WhatsApp from Seller Dashboard
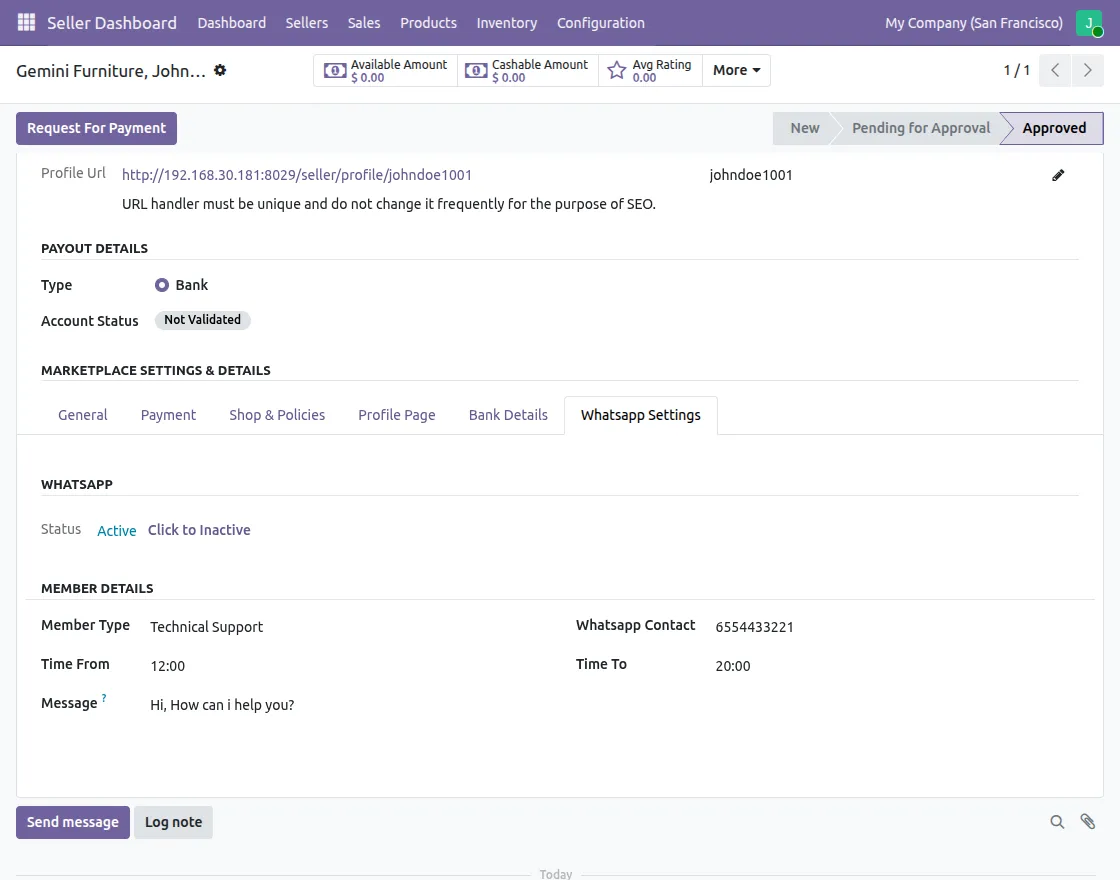
11. Sellers log in to their seller dashboard. Navigate to Sellers > My Profile > WhatsApp Settings.
- Fill in or update the WhatsApp configuration details:
- WhatsApp Contact Number
- Member Type
- Support Hours (Time From – Time To)
- Welcome Message
- Status (Active/Inactive)
Click ‘Save’ to apply the changes.
Website View
WhatsApp Widget on Marketplace Pages
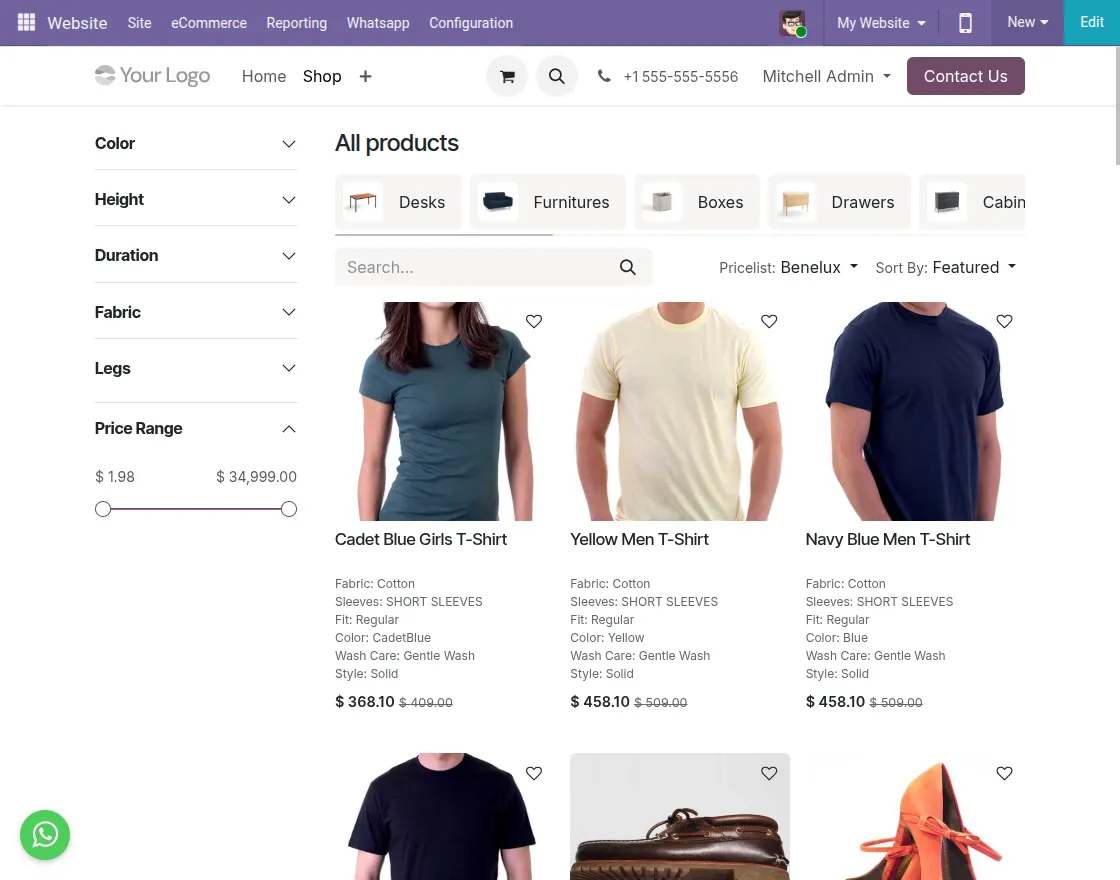
- At first, open the Odoo Marketplace website, and you will see the ‘WhatsApp’ chat icon on the left or right side as configured by the admin in the settings.
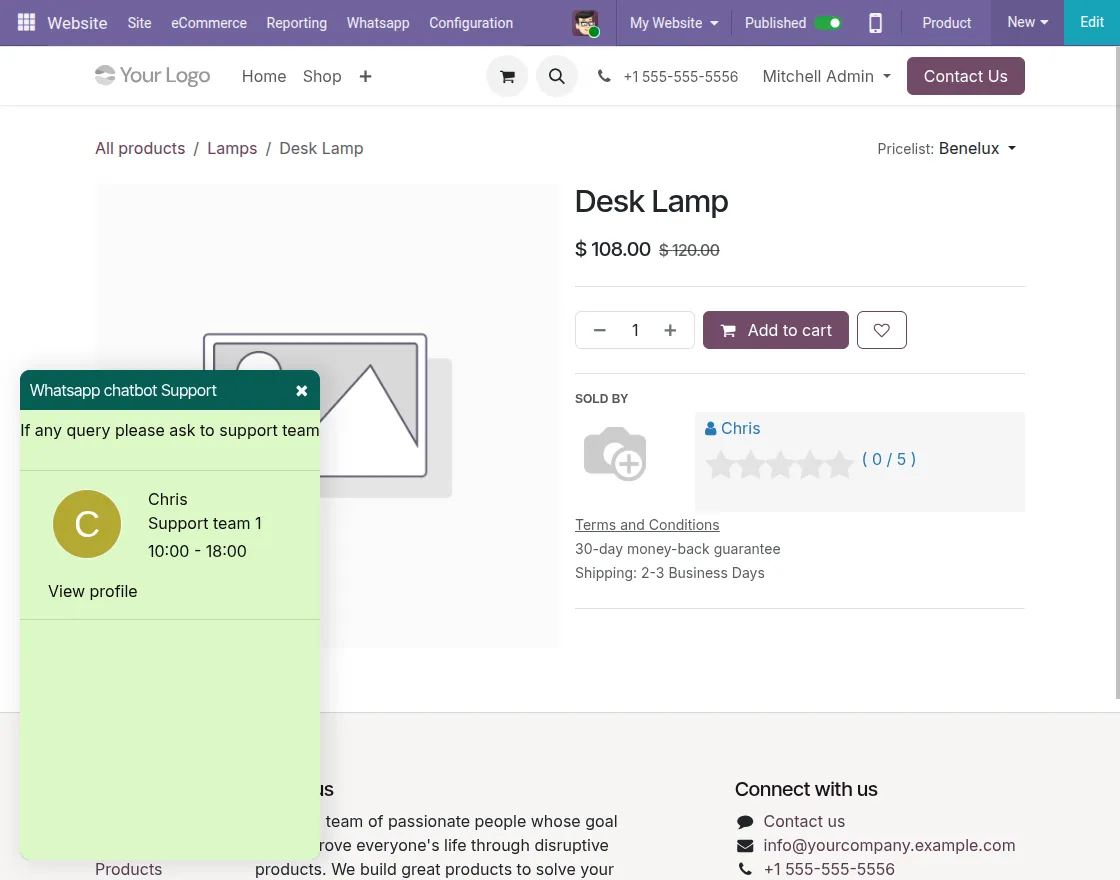
View All Sellers on Normal Pages
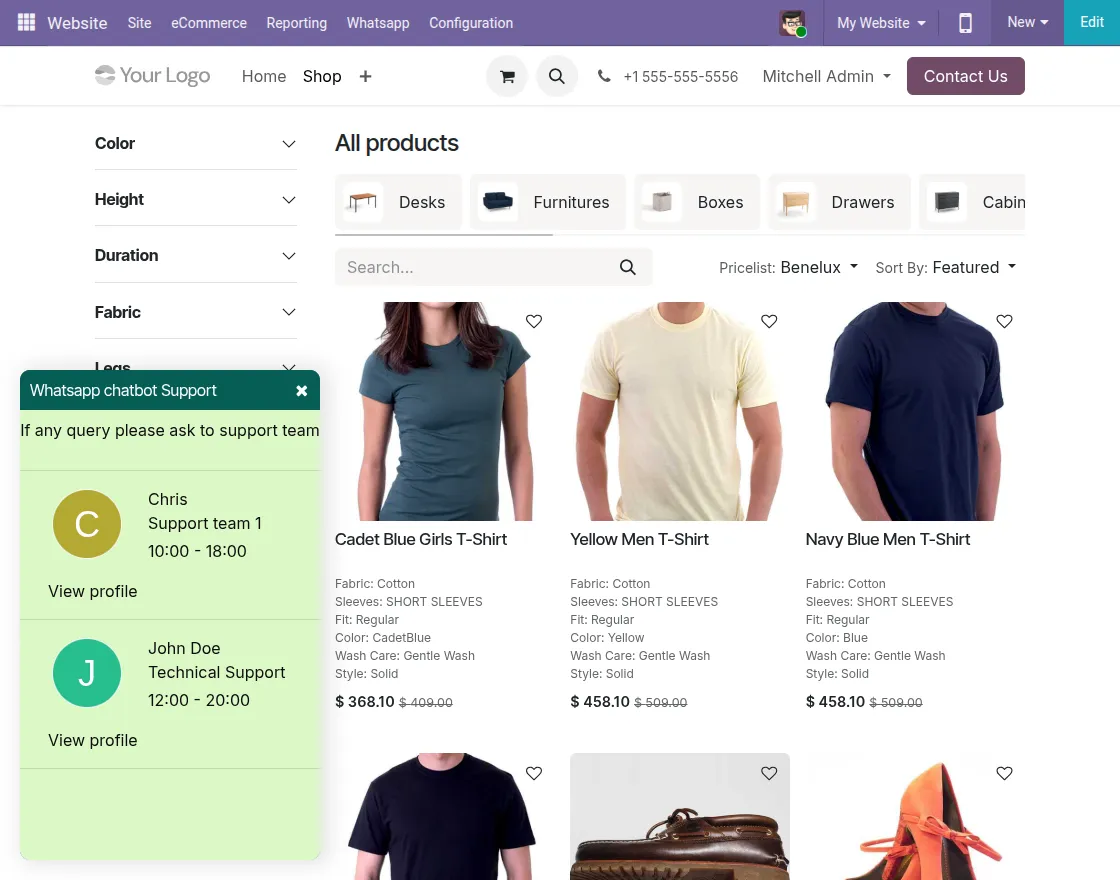
- Then, Click on the WhatsApp icon to open the chat widget. The widget will display a list of all active sellers who are available for WhatsApp support.
- Each seller listing shows:
- Seller Name
- Member Type
- Availability Timings
- Profile Picture (if configured)
Product-Specific Seller Display
14. Now, navigate to any product page on the marketplace. Then, click on the WhatsApp icon on the product page.
- As a result, the widget will display only the seller associated with that specific product.
- This ensures customers connect directly with the right seller for product-related queries.
Start WhatsApp Conversation
15. Finally, click on any seller from the widget to initiate a conversation. This will open ‘WhatsApp Web’ in a new tab with a preset welcome message. Then, log in to your WhatsApp account to start chatting with the seller.

OTHER ODOO MODULES
- Odoo Marketplace Buyer Seller Live Chat
- Odoo Social Commerce Chat
- Website Product Size Chart
- Odoo Display Discount In Cart
- Odoo Create Product From POS
- POS Change Product View
- Odoo POS Customer Cart Screen
- Odoo POS WeChat Payment Acquirer
- POS Change Cashier
- Odoo Website Cart Settings
- Odoo POS Change Logo
- Marketplace Seller Product Size Chart
Need Help?
Hope you find guide helpful! Please feel free to share your feedback in the comments below.
If you still have any issues/queries, please create a ticket at the UV Desk.
I hope this helps. In case of any further queries, contact us at our support mail.
Thanks for paying attention!!
Current Product Version - 1.1.0
Supported Framework Version - Odoo V17, V18, V19

Be the first to comment.