INTRODUCTION
Manage your Lazada store from Odoo with Odoo Lazada Connector for Multichannel.
Lazada Odoo Connector for Multichannel connects your Lazada store with Odoo. It helps you manage products, categories, customers, orders, and stock from one place.
The connector lets you import data from Lazada to Odoo. You can also export product data from Odoo to Lazada. Use filters to import the records you need and cron jobs to run imports automatically.
The connector uses OAuth 2.0 to create a secure connection with Lazada. You can also connect stores from supported Lazada regions and manage them from Odoo. It also syncs stock updates in real time to keep inventory data current across Odoo and Lazada.
With this module, you can reduce manual data entry and keep your Lazada and Odoo data up to date.
NOTE: Odoo Lazada Connector for Multichannel works in conjunction with the following module:
First, you must install this module for the Odoo Lazada Connector for Multichannel to work correctly.
For Odoo online(SAAS) users, you first need to migrate to the Odoo.sh platform before installing Odoo Lazada Connector for Multichannel because Odoo restricts third-party software installations on Odoo online(SAAS)
FEATURES
- Connect Odoo with Lazada using secure OAuth 2.0 authentication.
- Import products, categories, shipping methods, and orders.
- Export product templates, variants, SKUs, prices, and images.
- Update existing Lazada product listings from Odoo.
- Filter imports by All, By ID, or By Date.
- Connect multiple Lazada regions from one Odoo setup.
- Run automatic imports with cron jobs.
- Set cron jobs for categories, products, and orders.
- Sync stock quantity changes from Odoo to Lazada in real time.
- Sync order cancellation status and reasons with Lazada.
- Map order states between Odoo and Lazada.
- View import and export history in Odoo.
- View mapped data from the Mappings menu.
- Track sync data from the Odoo dashboard.
INSTALLATION
- Once you purchase the App from Webkul store, you will receive the link to download the zip file of the module.
- Extract the file on your system after the download finishes. You will be able to see a folder named- ‘lazada_odoo_connector.’
- Copy and paste this folder inside your Odoo Add-Ons path.
- Now, open the Odoo App and click on the Settings menu. Here, click on Activate Developer Mode.
- Then, open the Apps menu and click on ‘Update Modules List.’
- In the search bar, remove all the filters and search‘lazada_odoo_connector.’
- You will be able to see the module in the search result. Click on ‘Install’ to install it.
WORKFLOW
Without further ado, let’s begin the configuration of the Odoo Lazada Connector for Multichannel.
GENERATING APP ID AND SECRET ID IN LAZADA
1. Open the URL- https://open.lazada.com/ and click on the ‘Sign In’ option. If you don’t have an account, click the ‘Create Account’ button and follow the process.

2. On the Lazada home page, click the ‘App Console,’ click the ‘Create’ button and follow the steps.

3. Once done, open the created app, and under the ‘App Overview’ tab, copy the ‘App Key and App Secret.’ Also, enter the ‘Callback URL’ generated at the Odoo end mentioned in point 4.

CONFIGURATION AT ODOO END
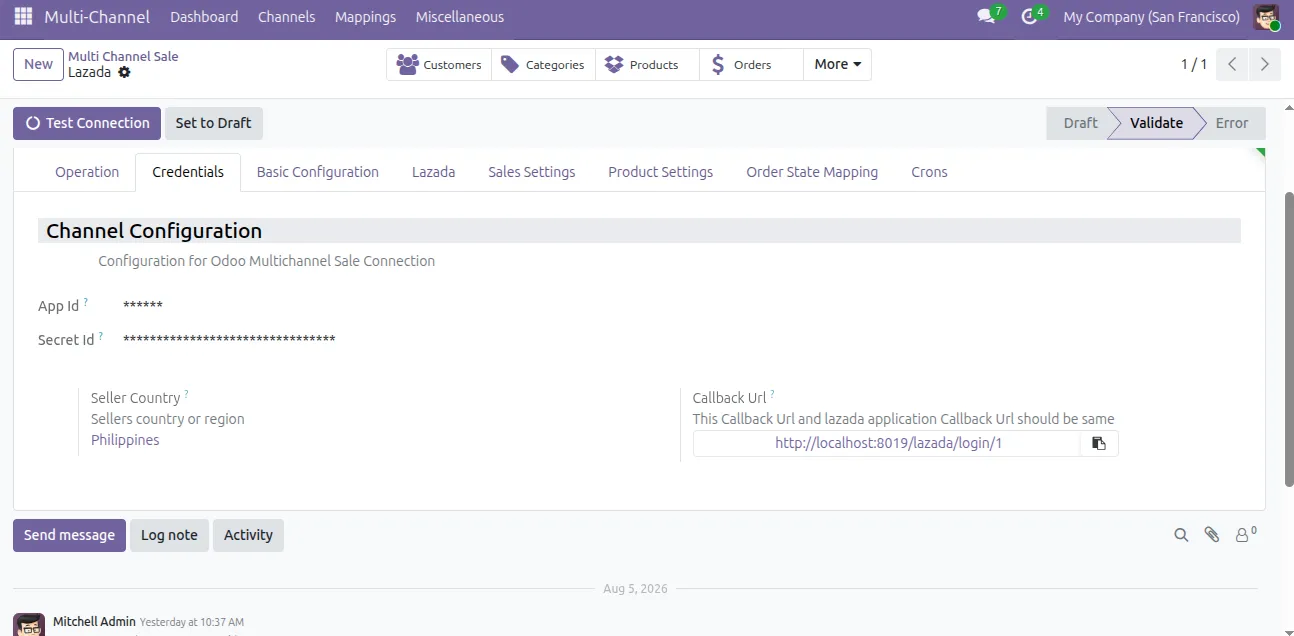
4. Firstly, log in to your odoo backend, and move to ‘Multi-Channel> Channel> Instances> Create.’ Further, add the ‘App id and Secret id’ generated at the Lazada end. Once done, click the ‘Save’ button to save the connection details and generate the ‘Call Back URL.’
NOTE: The callback URL is created when you save the Lazada connection, once generated you have to enter this link in the ‘Call Back URL’ box in Lazada to establish the connection.
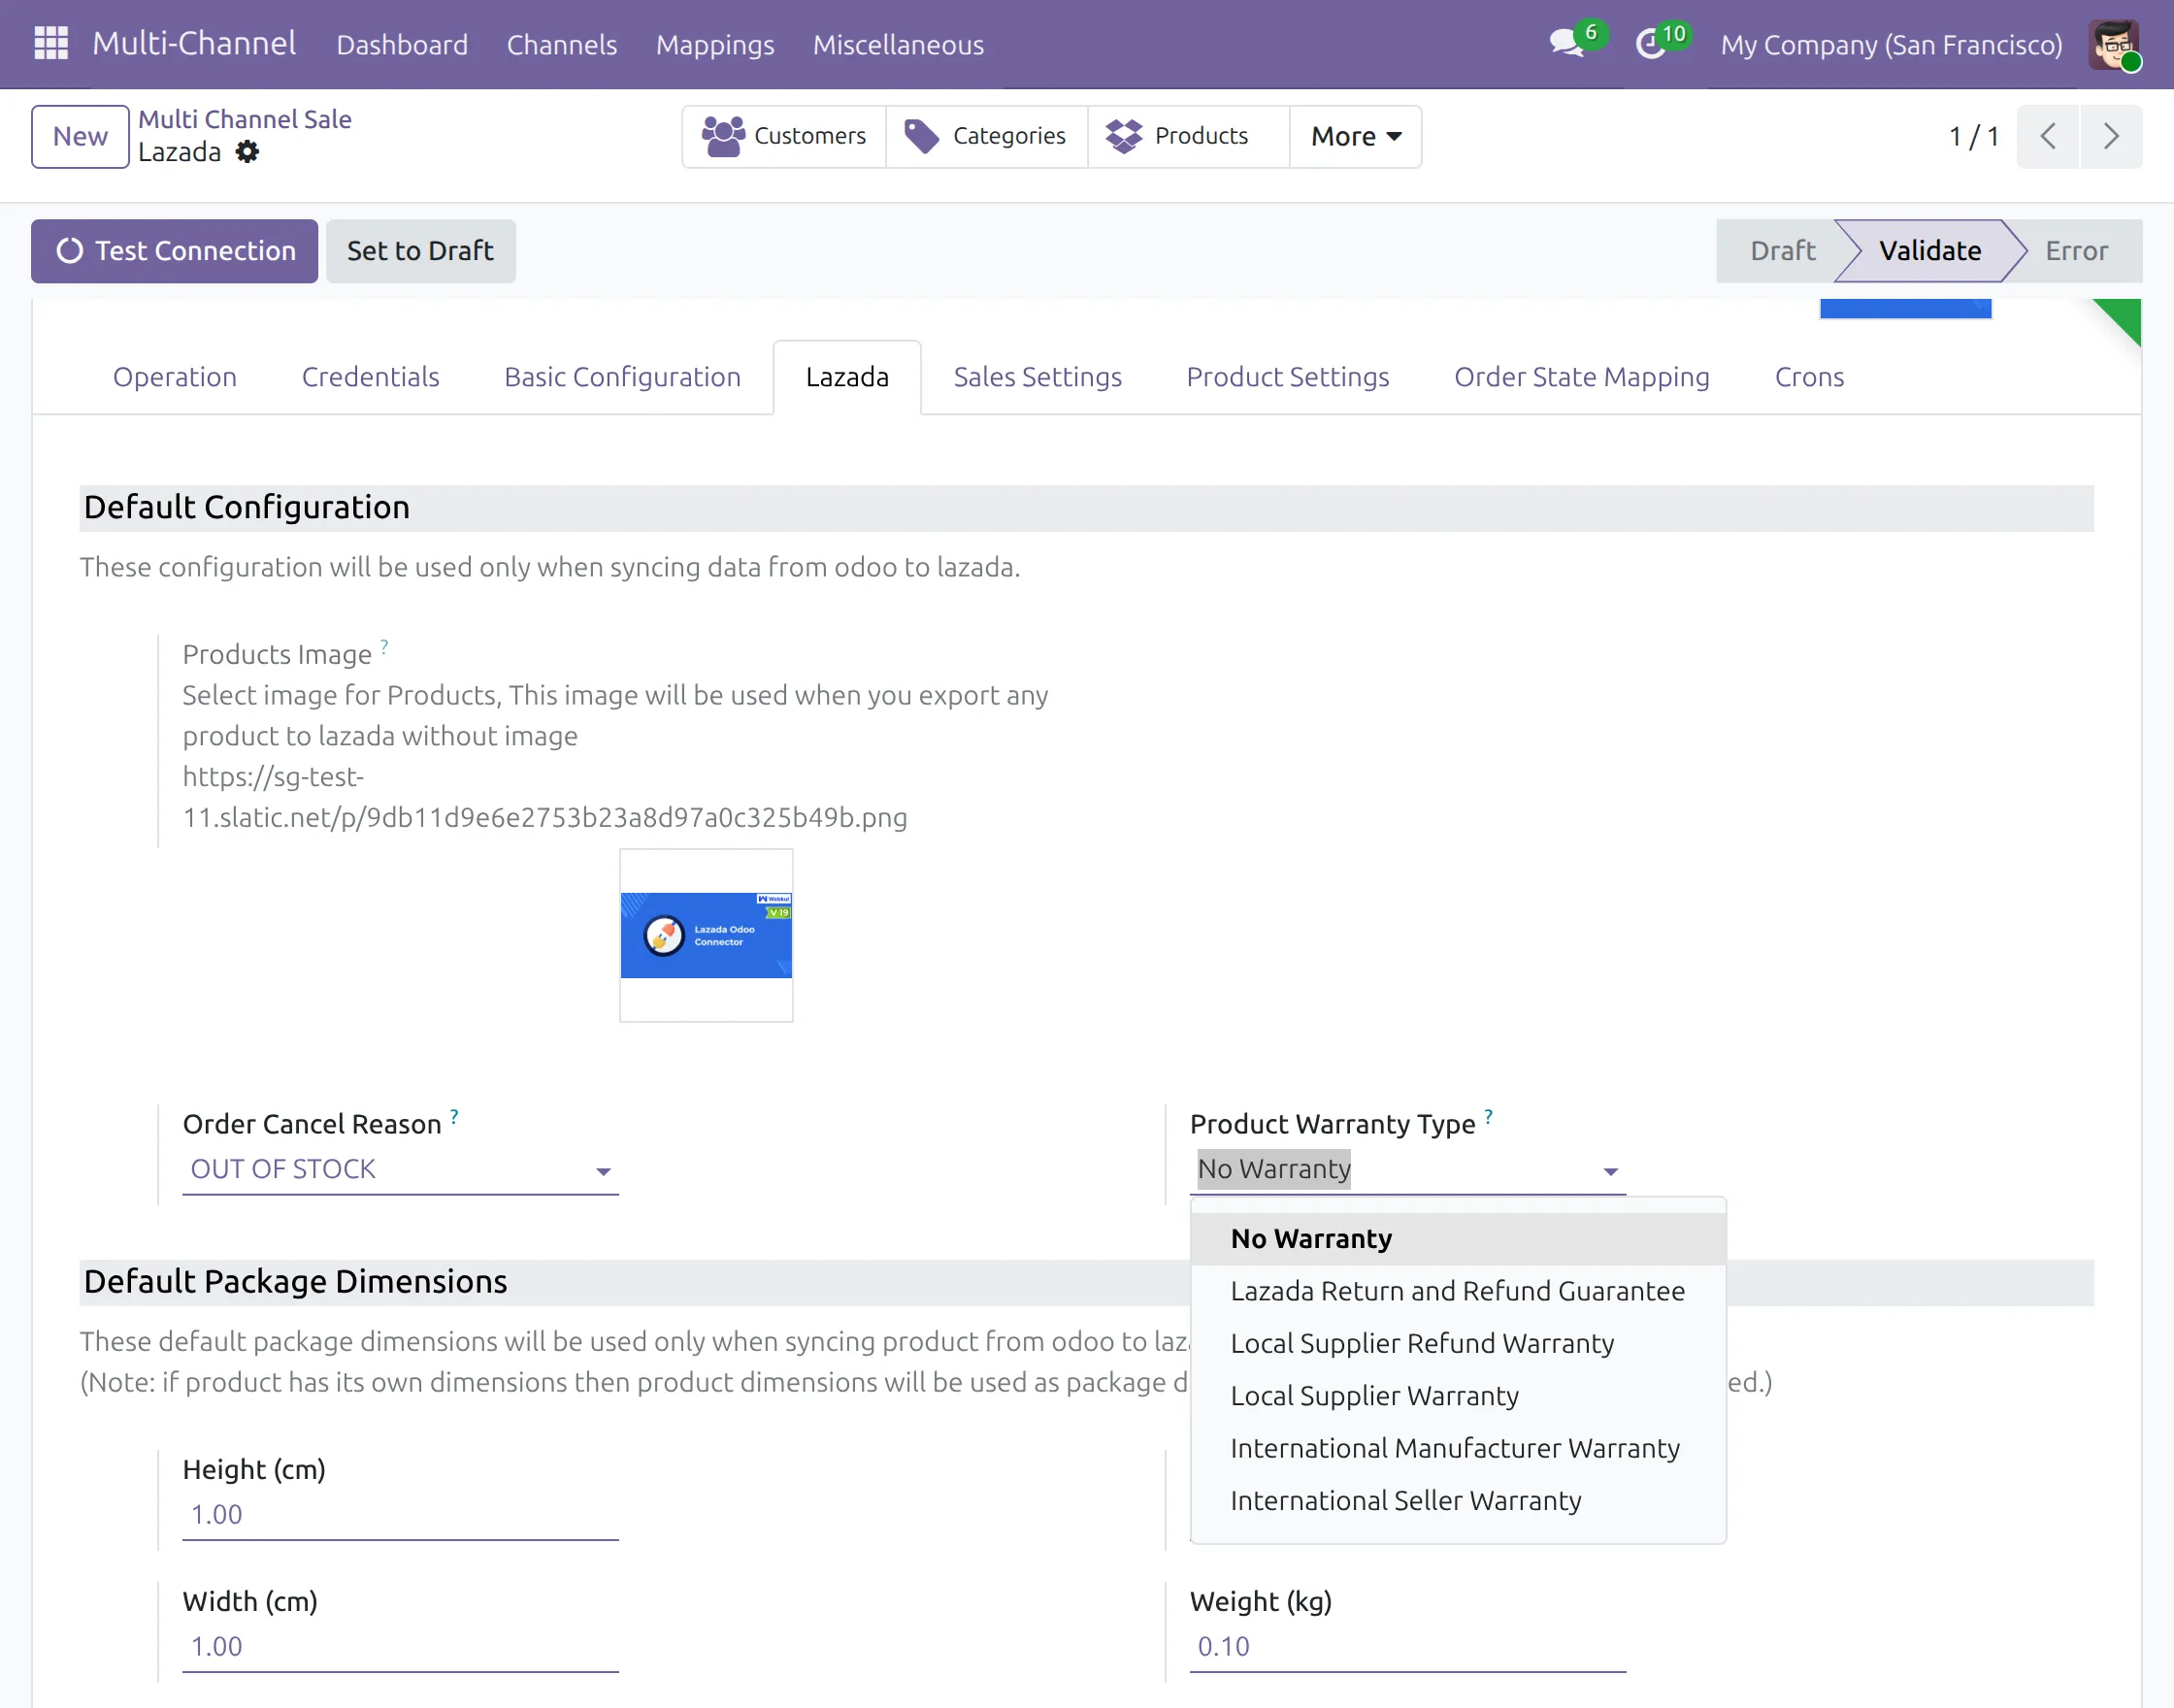
5. Next, move to the ‘Lazada’ tab, and under ‘Default Configuration,’ you can set the ‘Order Cancel Reason and Product Warranty Type (if any).’
Also, under the ‘Default Package Dimensions,’ you can enter the default dimension, which will be followed in case there are no specified dimensions.
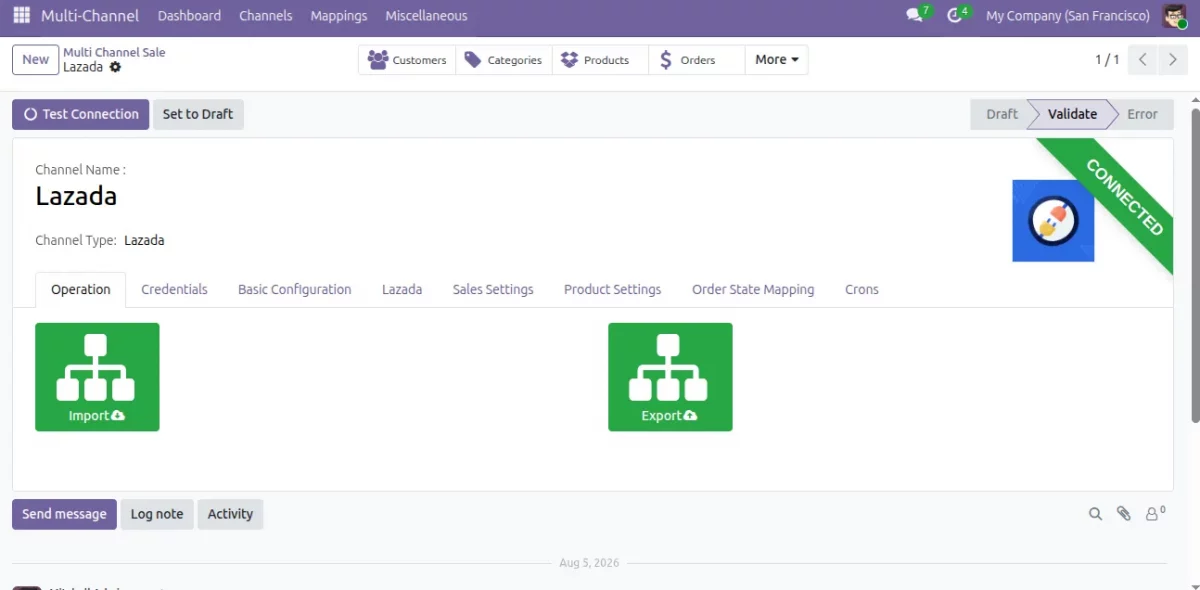
6. Go to the ‘Opeartion’ tab to Import and Export data.
7. After that, move to the ‘Product Settings’ tab and from here you can set the ‘Default Settings’ for import and ‘Stock Settings’ for auto stock, stock action, warehouse, and location.

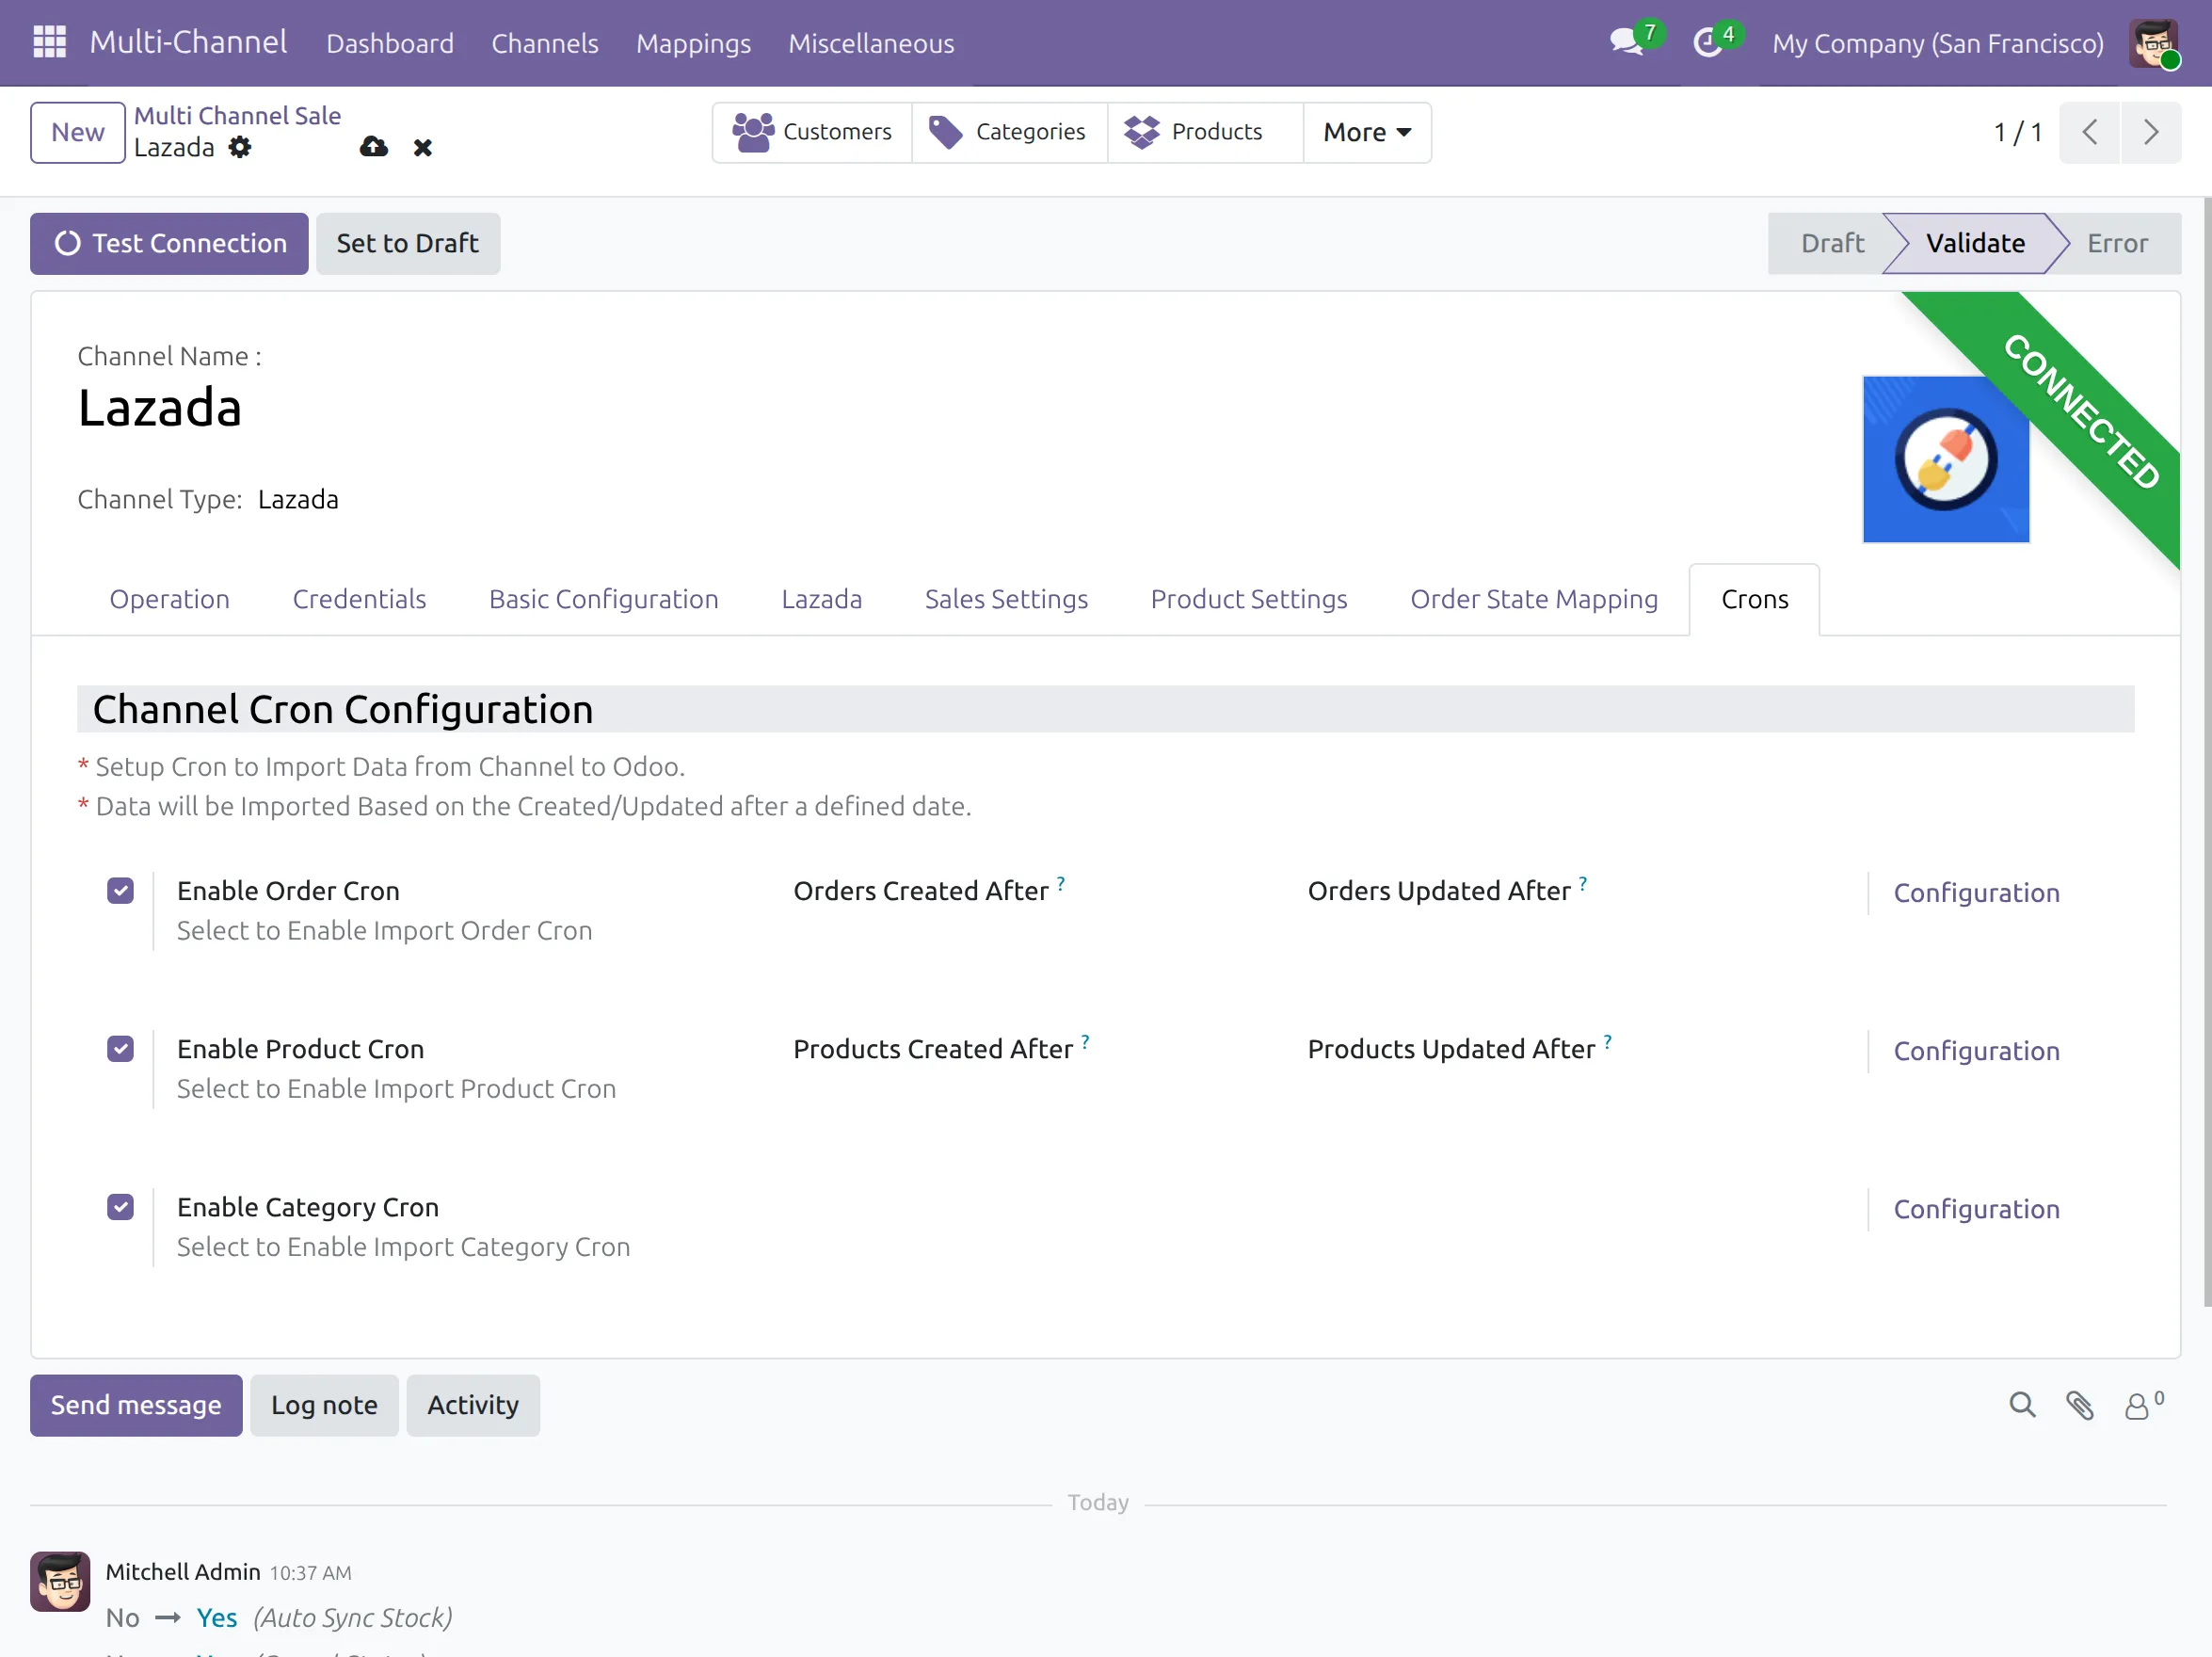
8. Now, open the ‘Crons’ tab, and tick the boxes next to the options you want to import. After configuring, click the ‘Save’ button.
GLOBAL IMPORT SETTINGS
9. After configuring, move to ‘Miscellaneous> Global Configuration,’ this will allow you to configure a default setting for data import, whether you have a single connection or multiple.
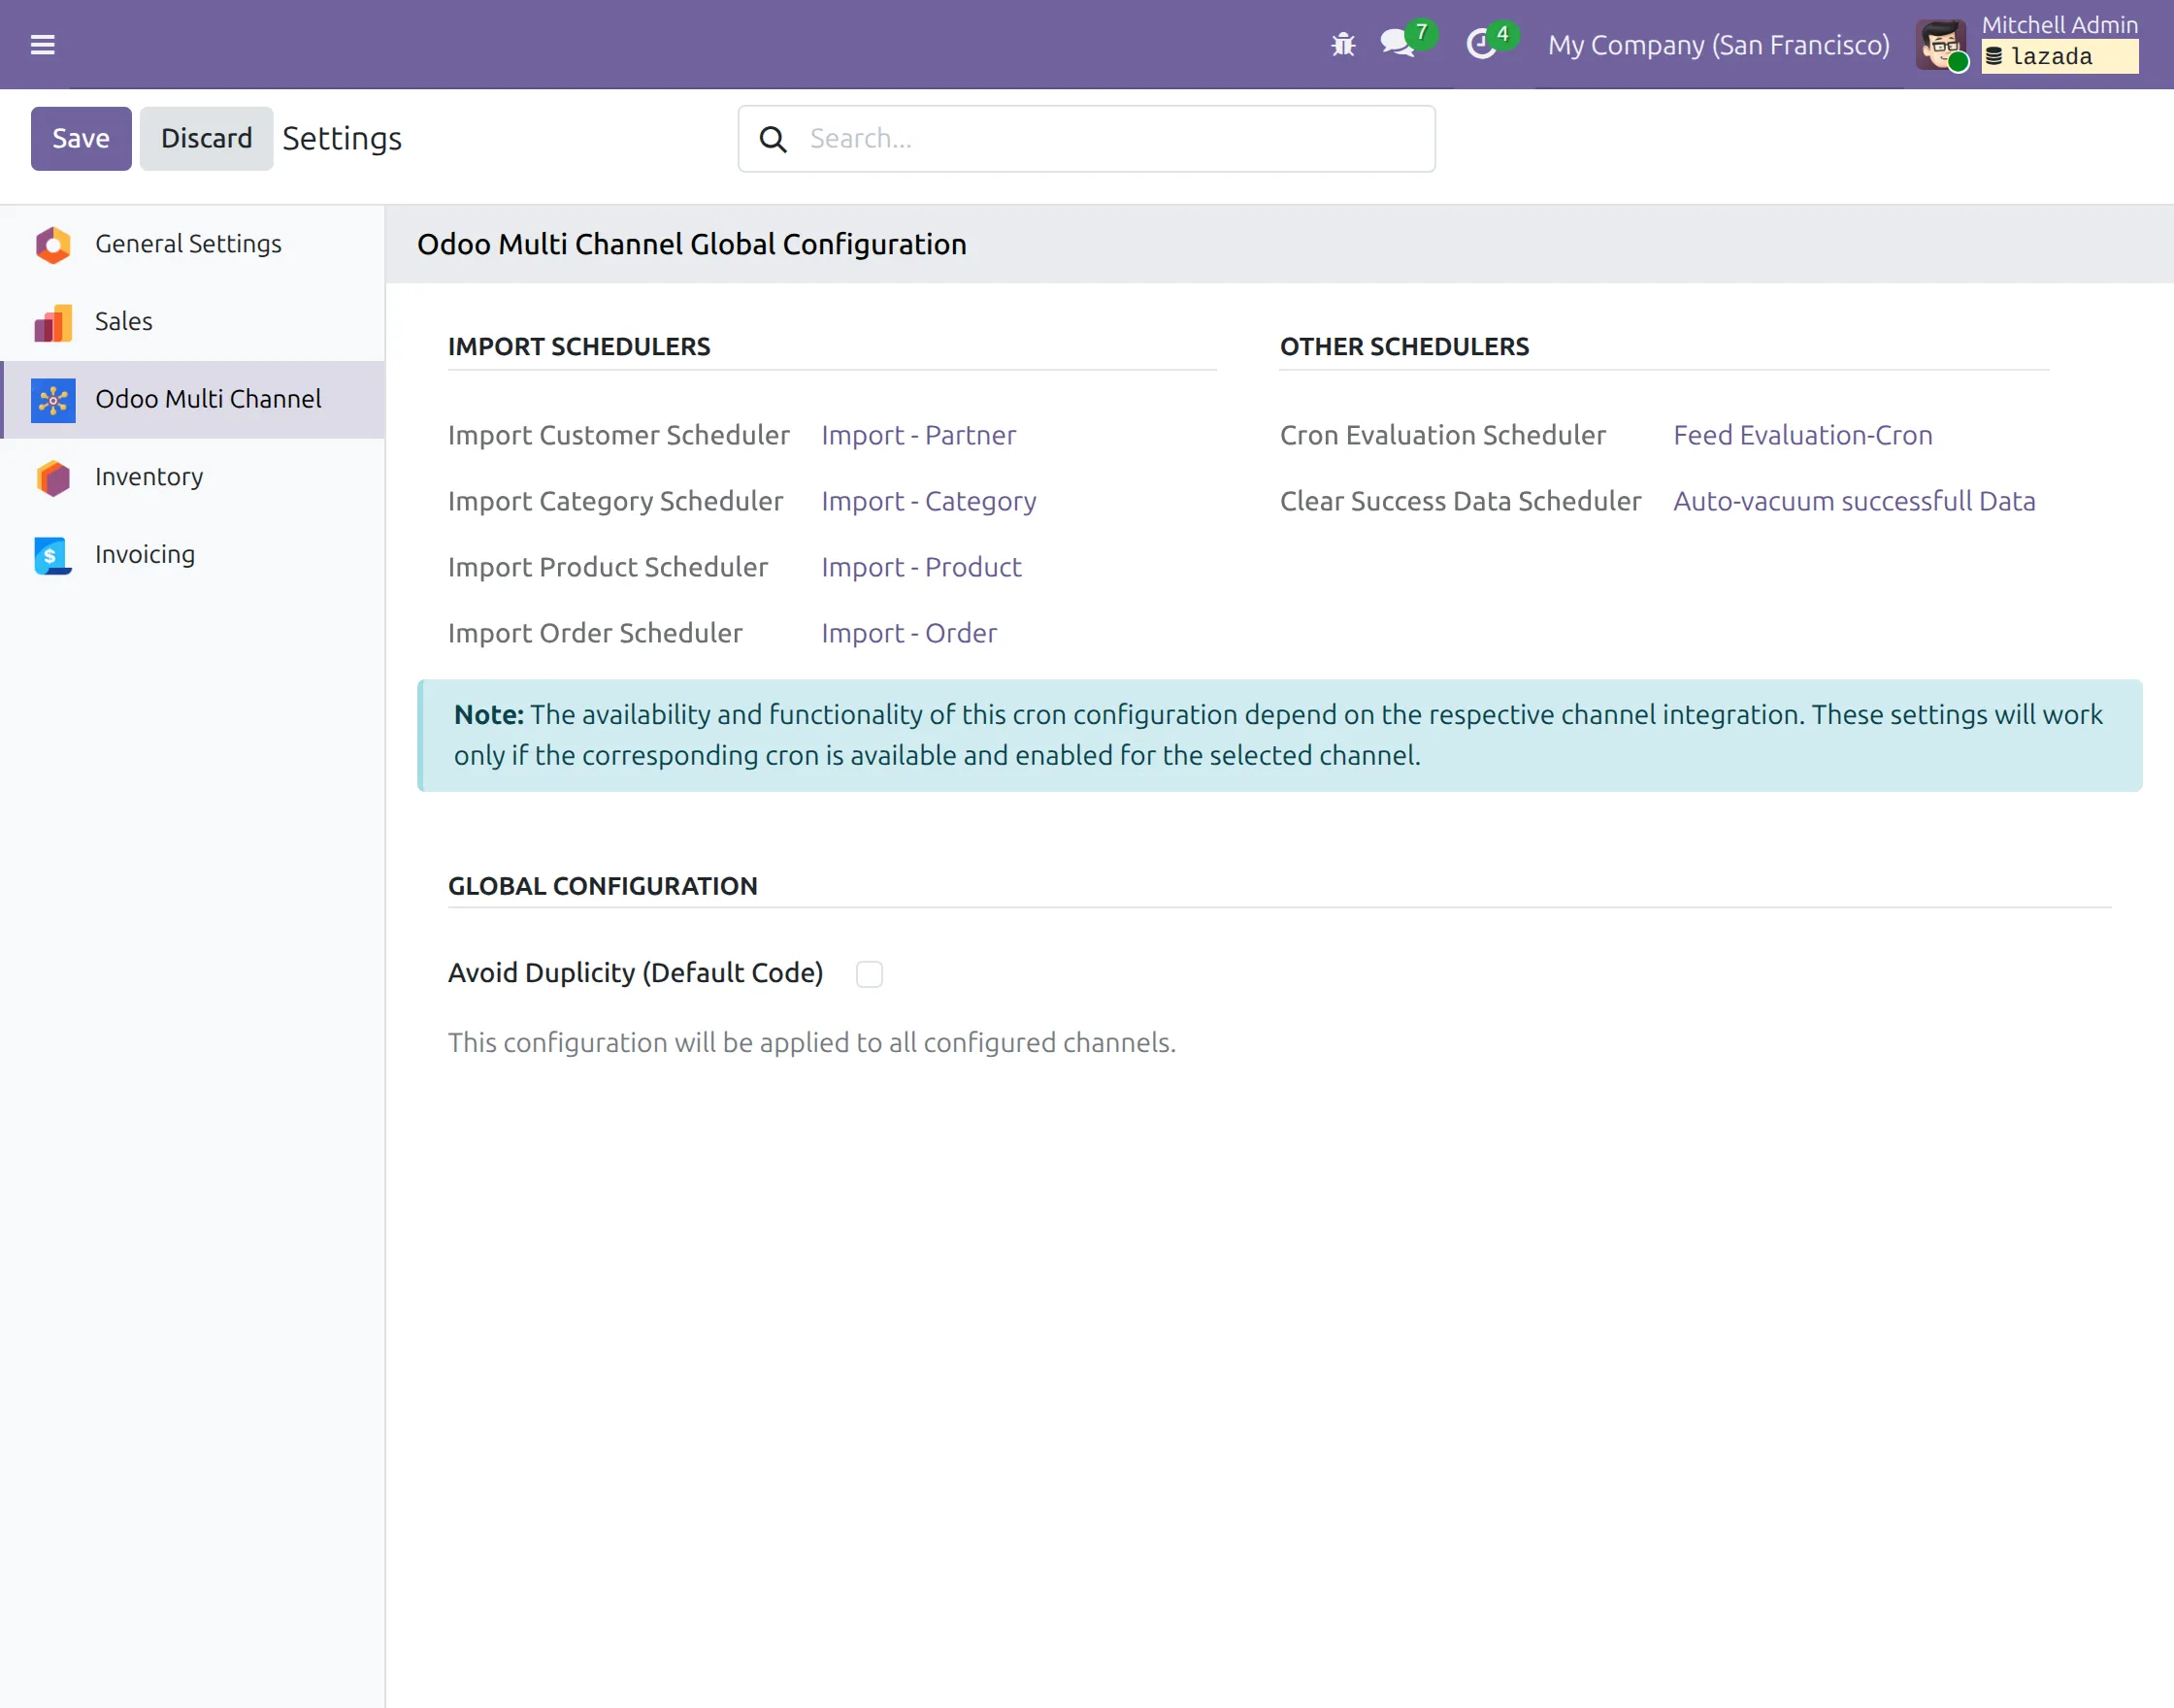
10. You can also check the ‘Synchronization History’ from the ‘Miscellaneous’ menu for all the import and export data. Clicking on any of them will show its details.

11. Next, move to the ‘Feeds’ and open any options to view its data.
Feeds are created when you import any data from Lazada to Odoo. It helps you know all the data which have been imported.

Data Import and Export
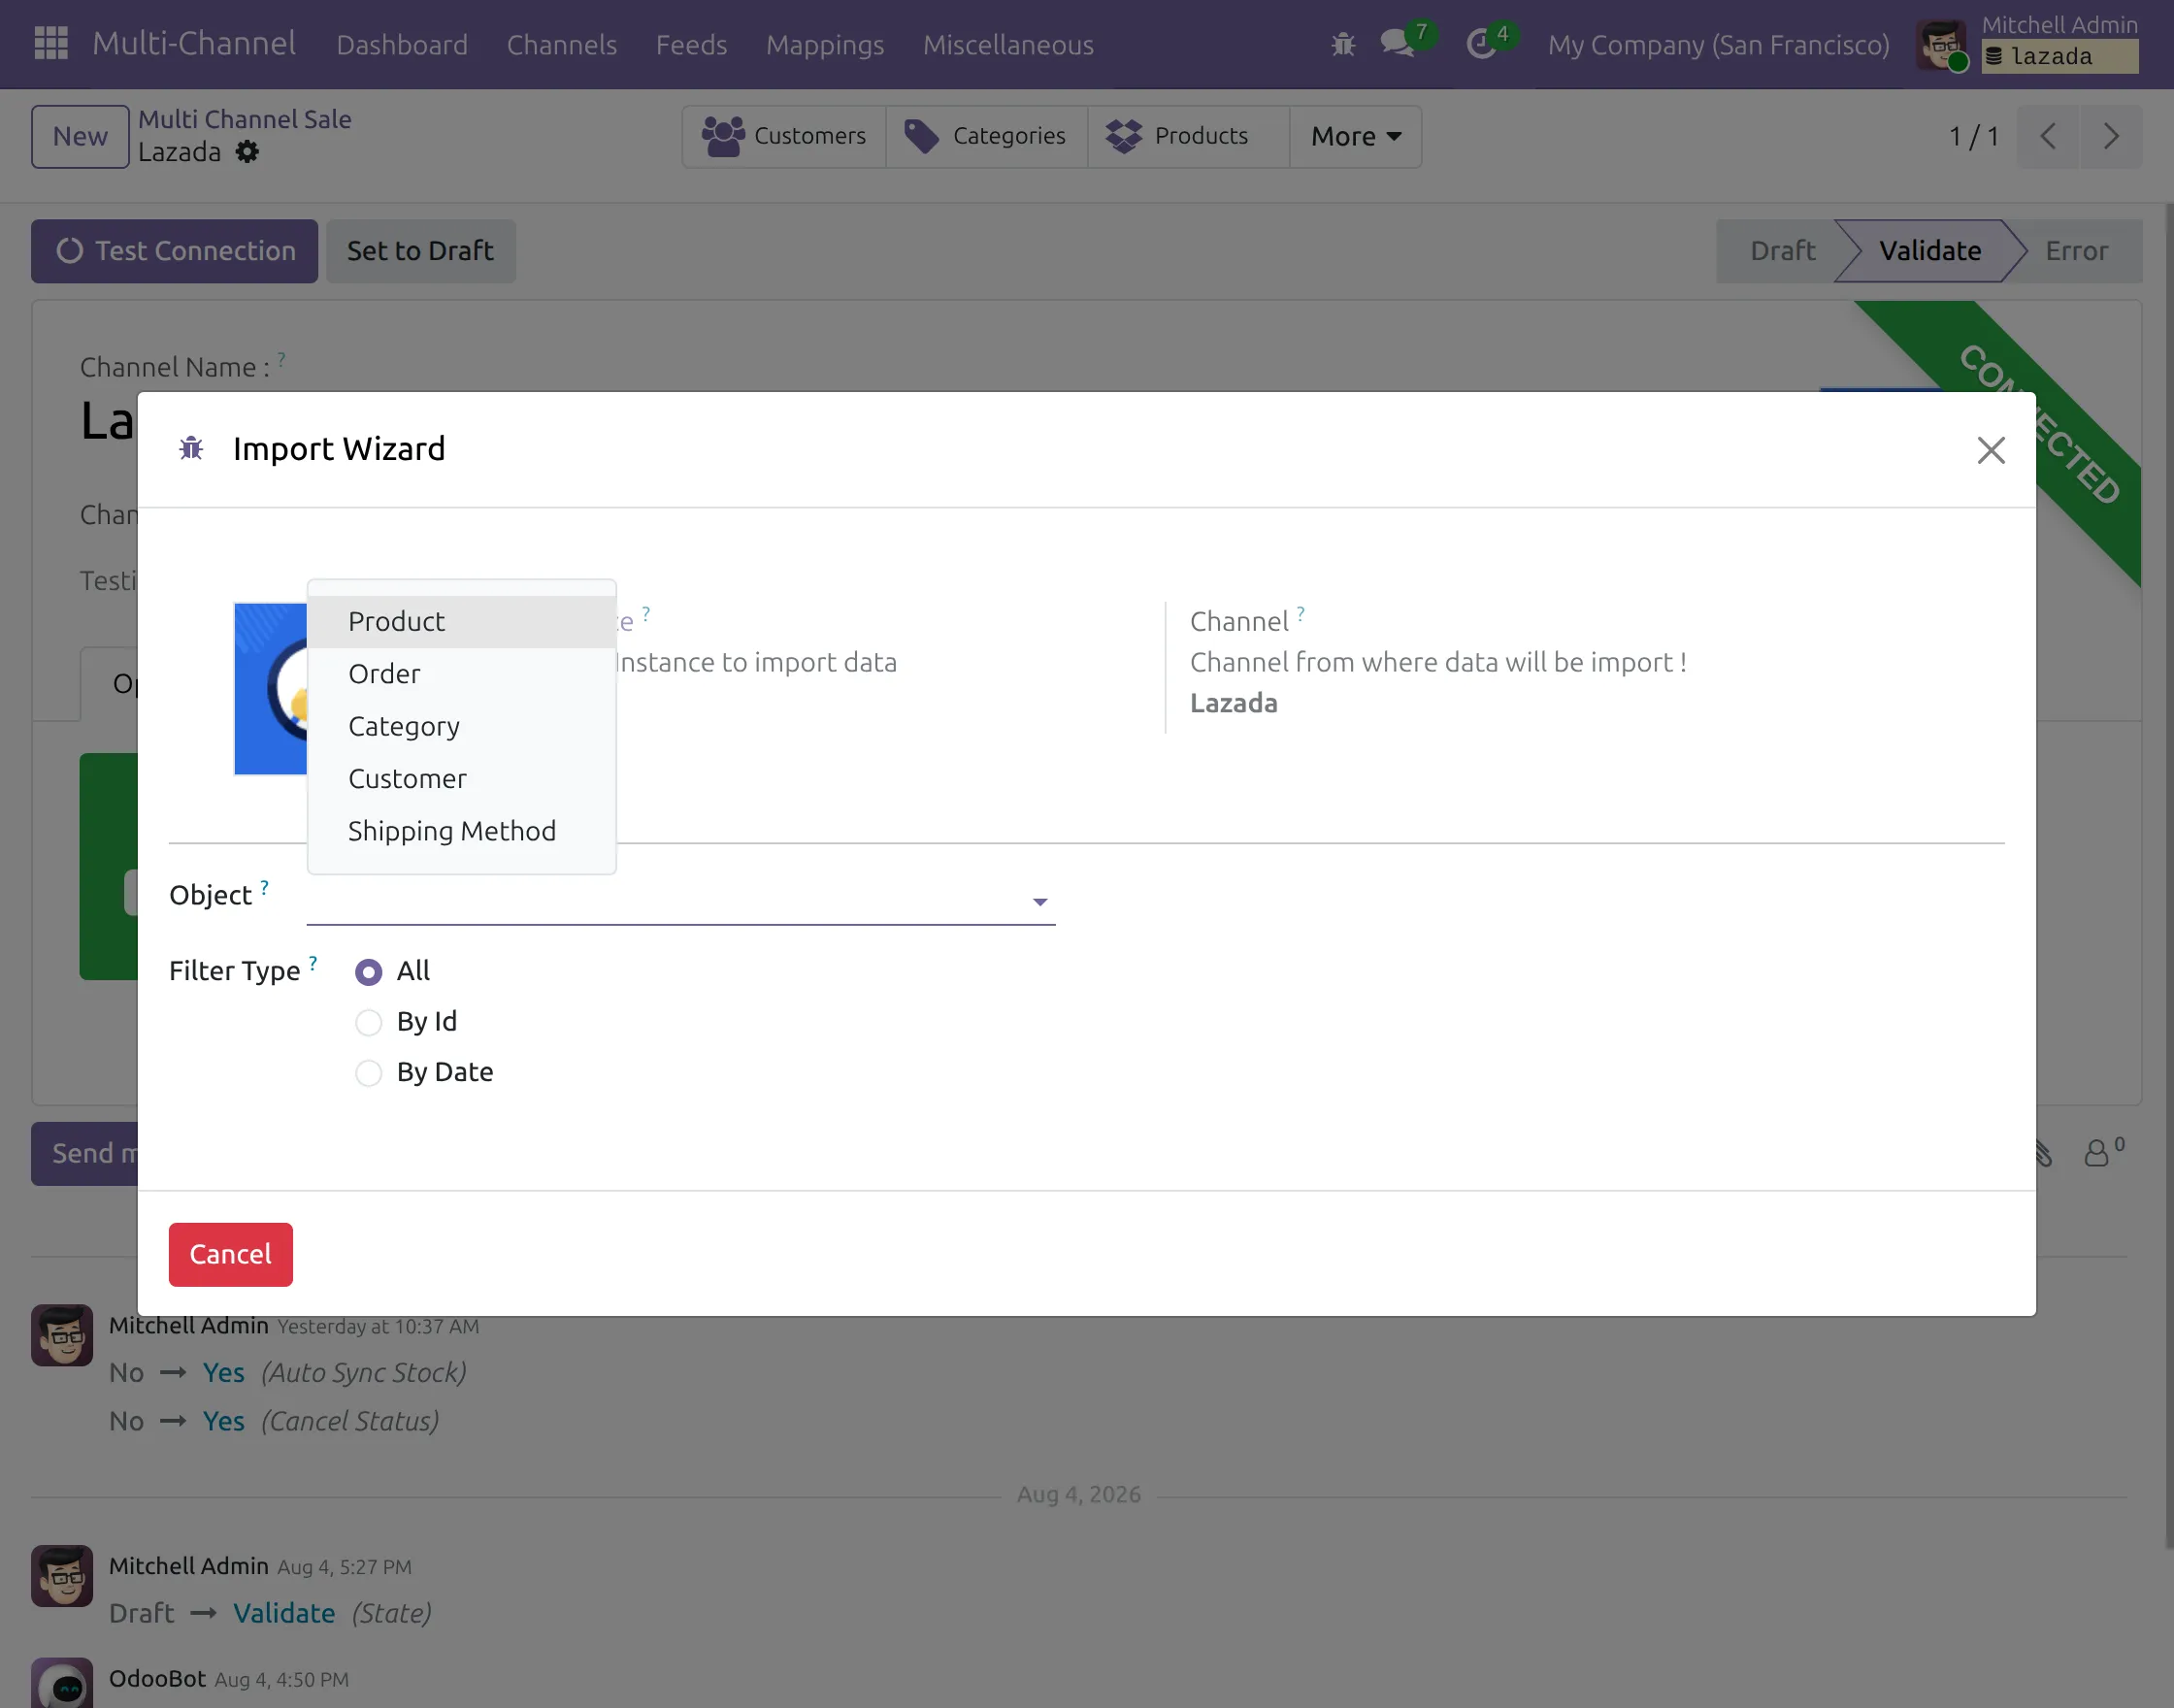
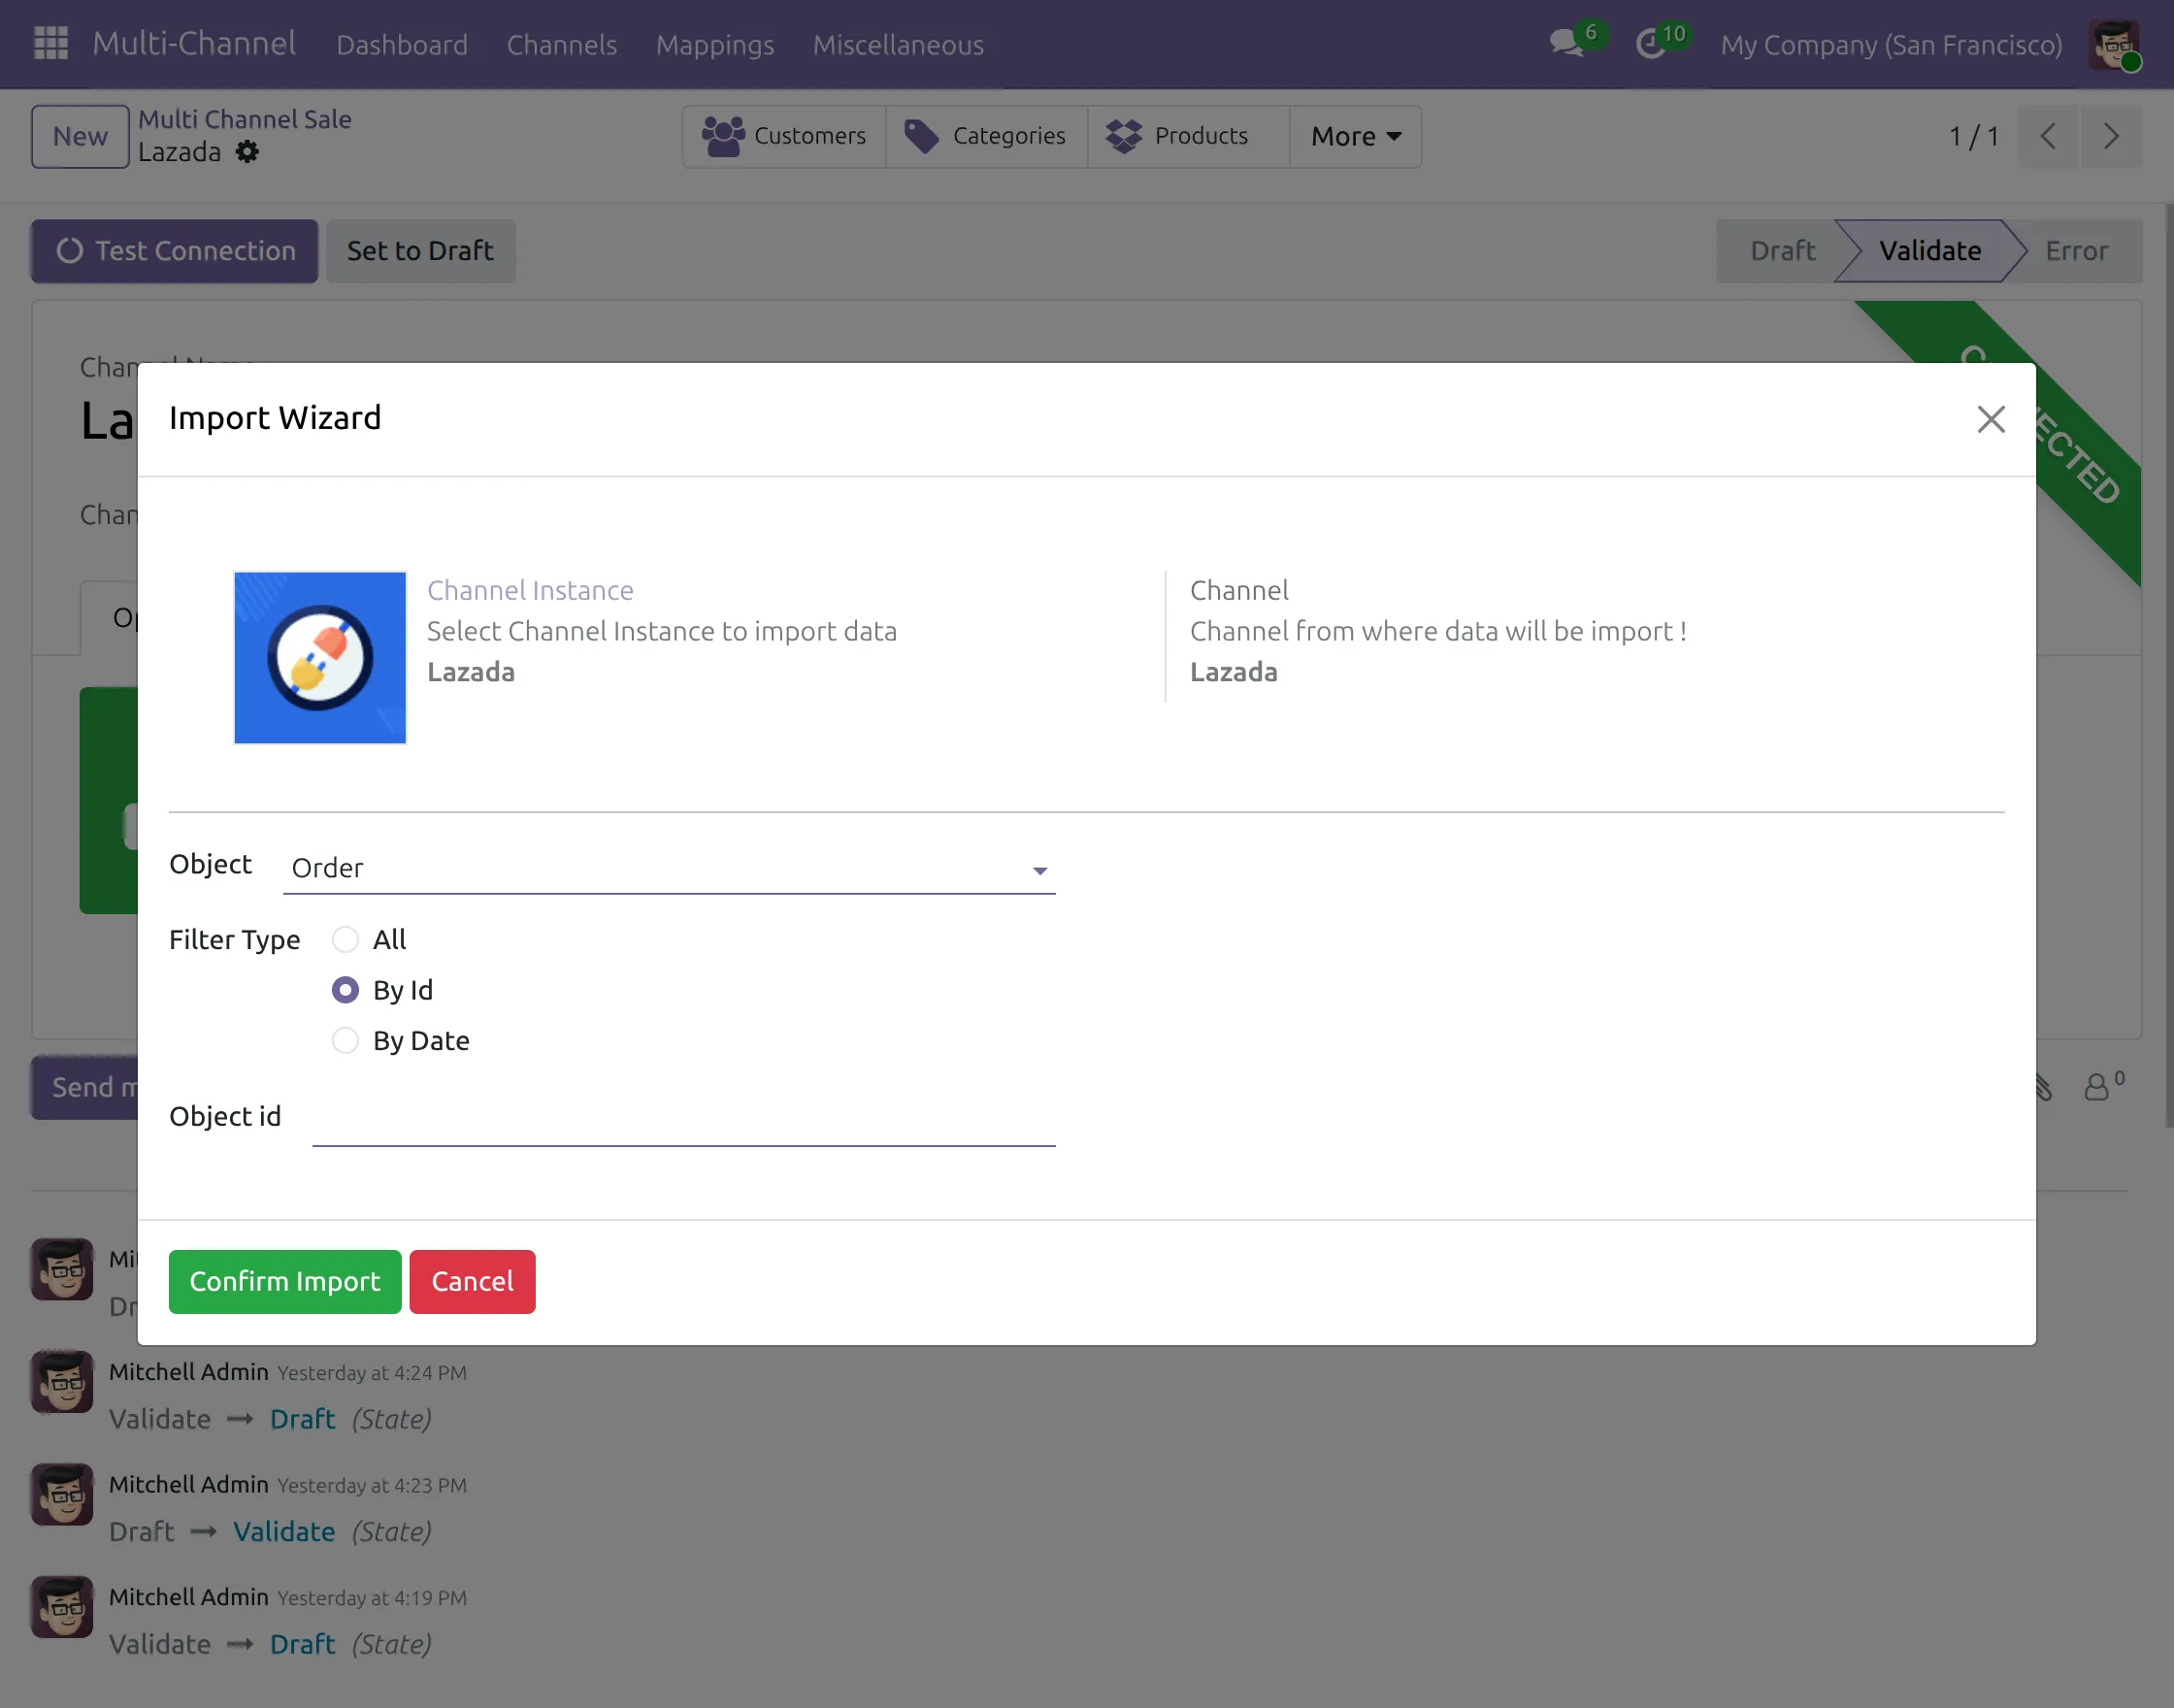
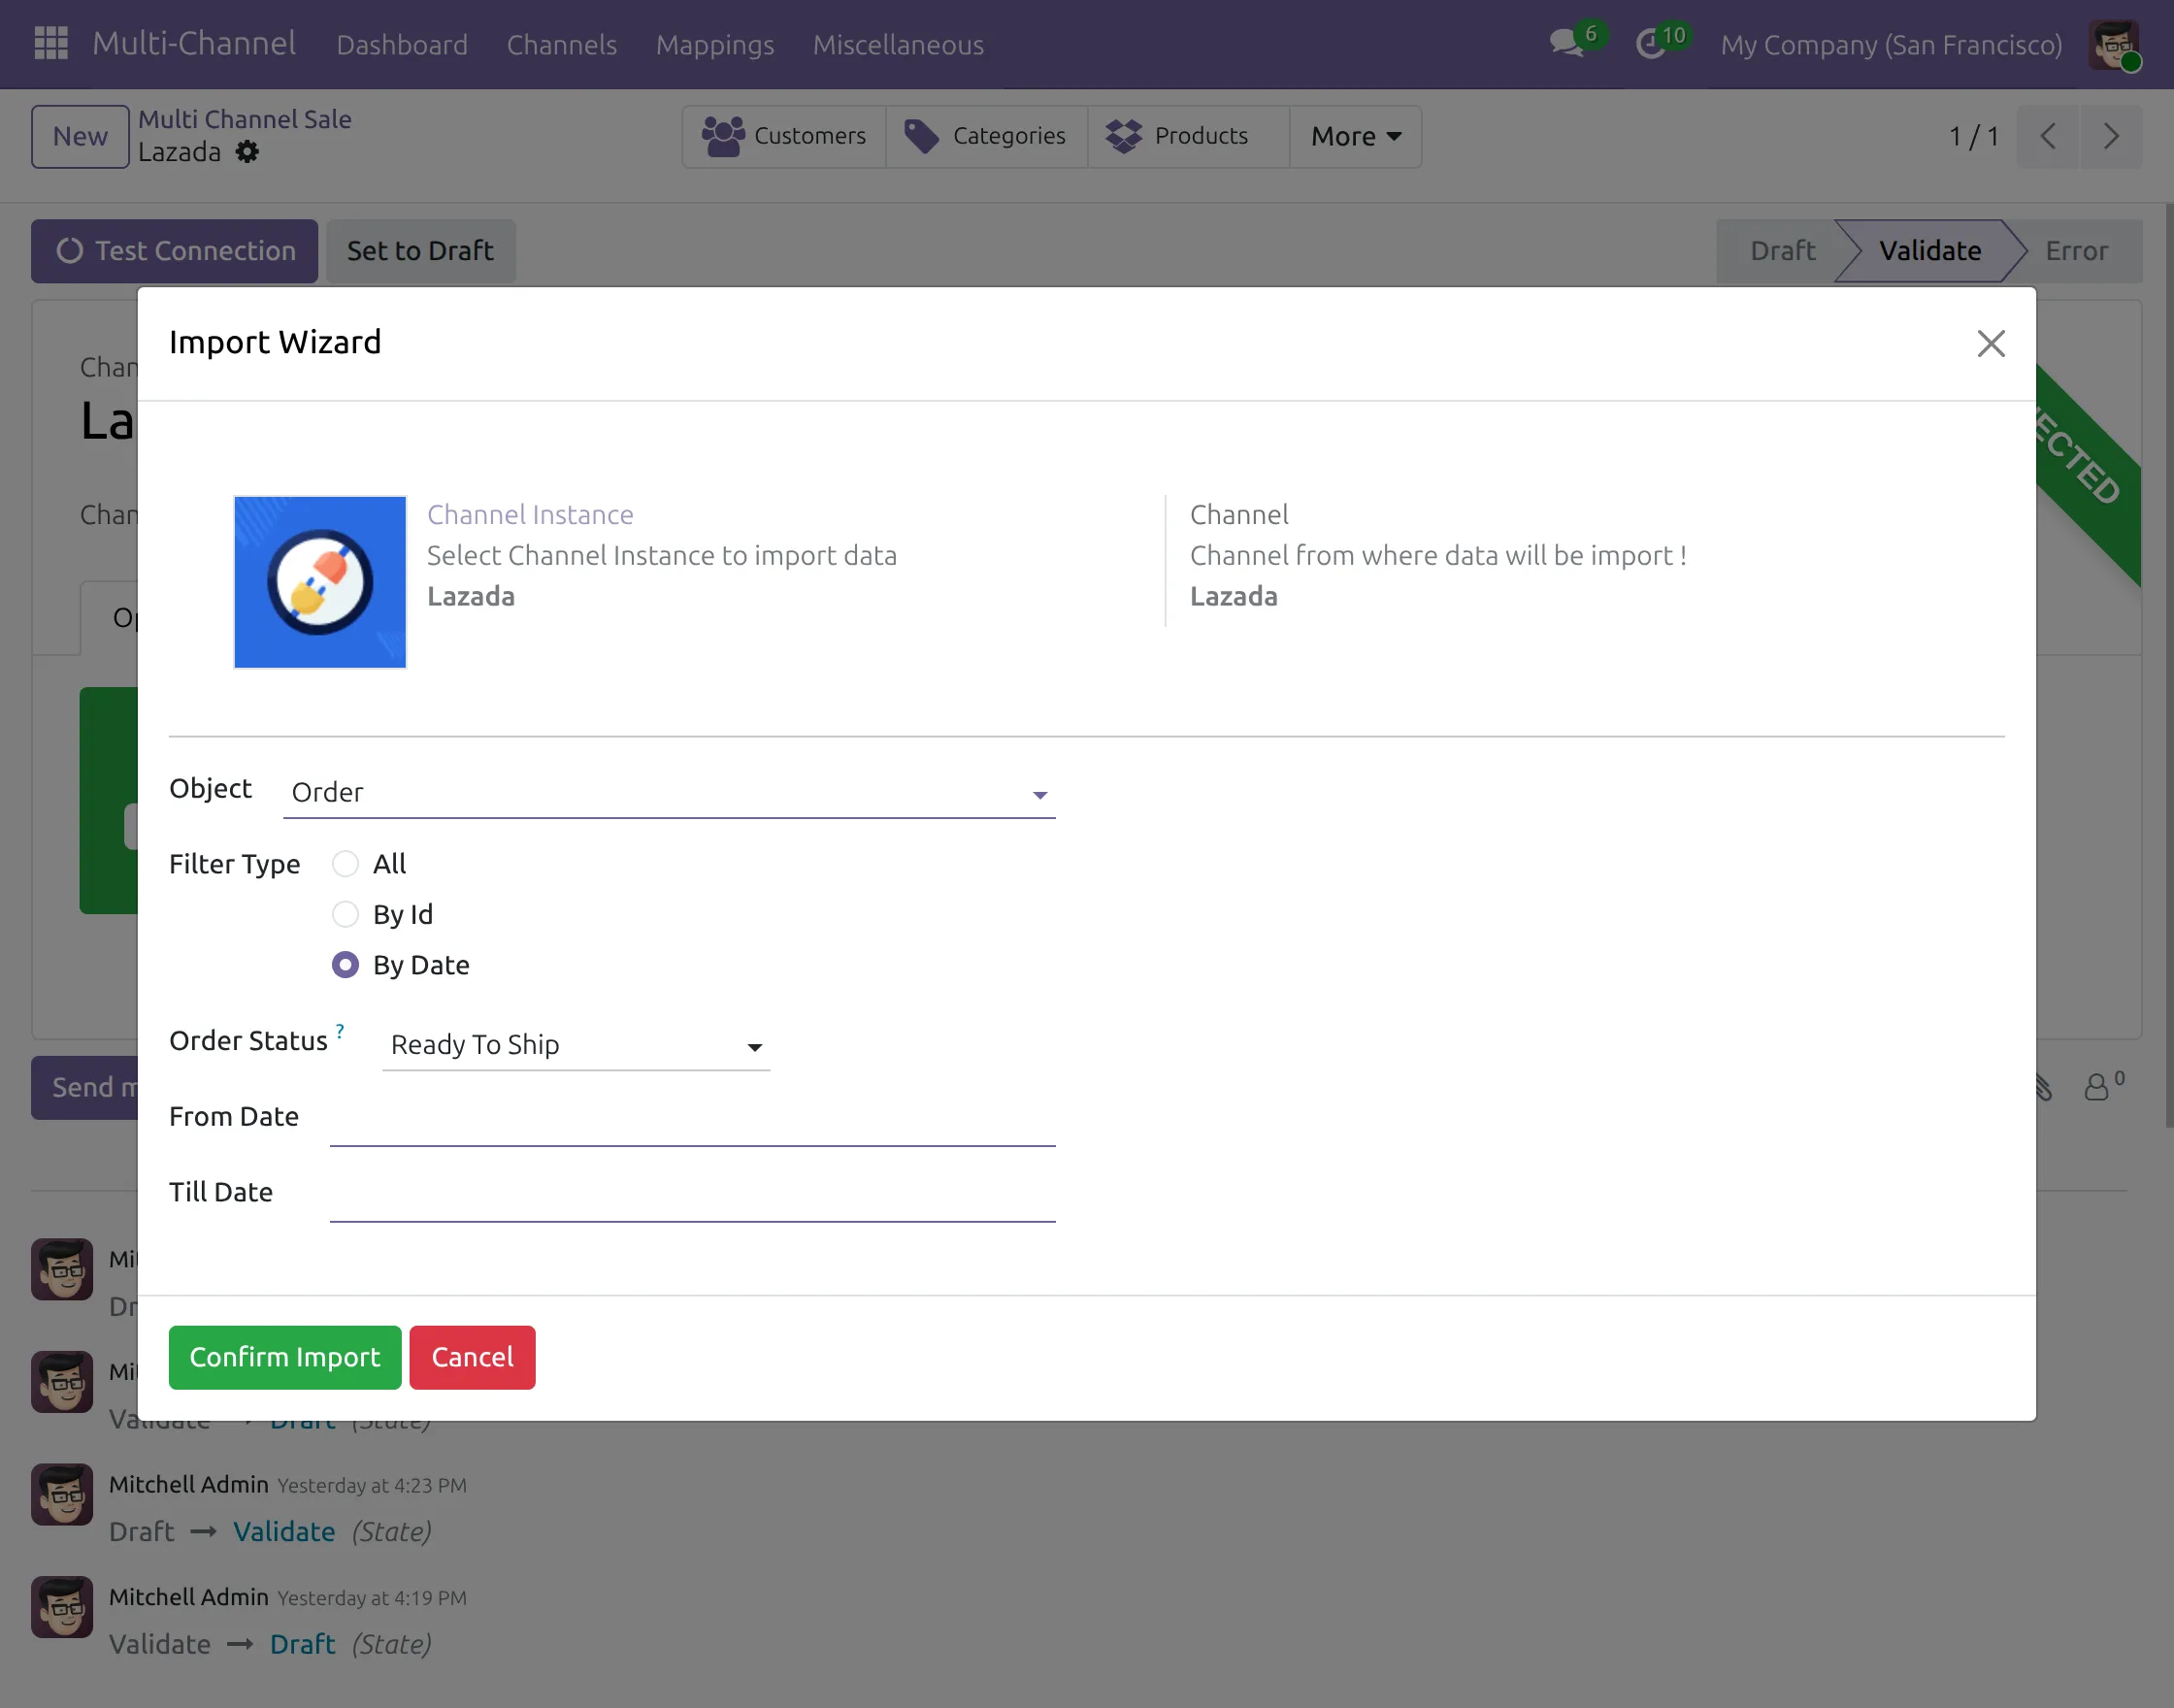
12. You can import data like orders, products, shipping methods, and categories. When you import products, you can do it in three ways:
All- This option will let you import all the data according to the set limit (API limit).
By Id- On selecting this option, you need to provide the Object id to import all the data to Odoo.
By Date- Here, you have to select the date from which you want to import data, like 5th October 2022.
13. On successful import, you will see a similar message shown in the screenshot below.
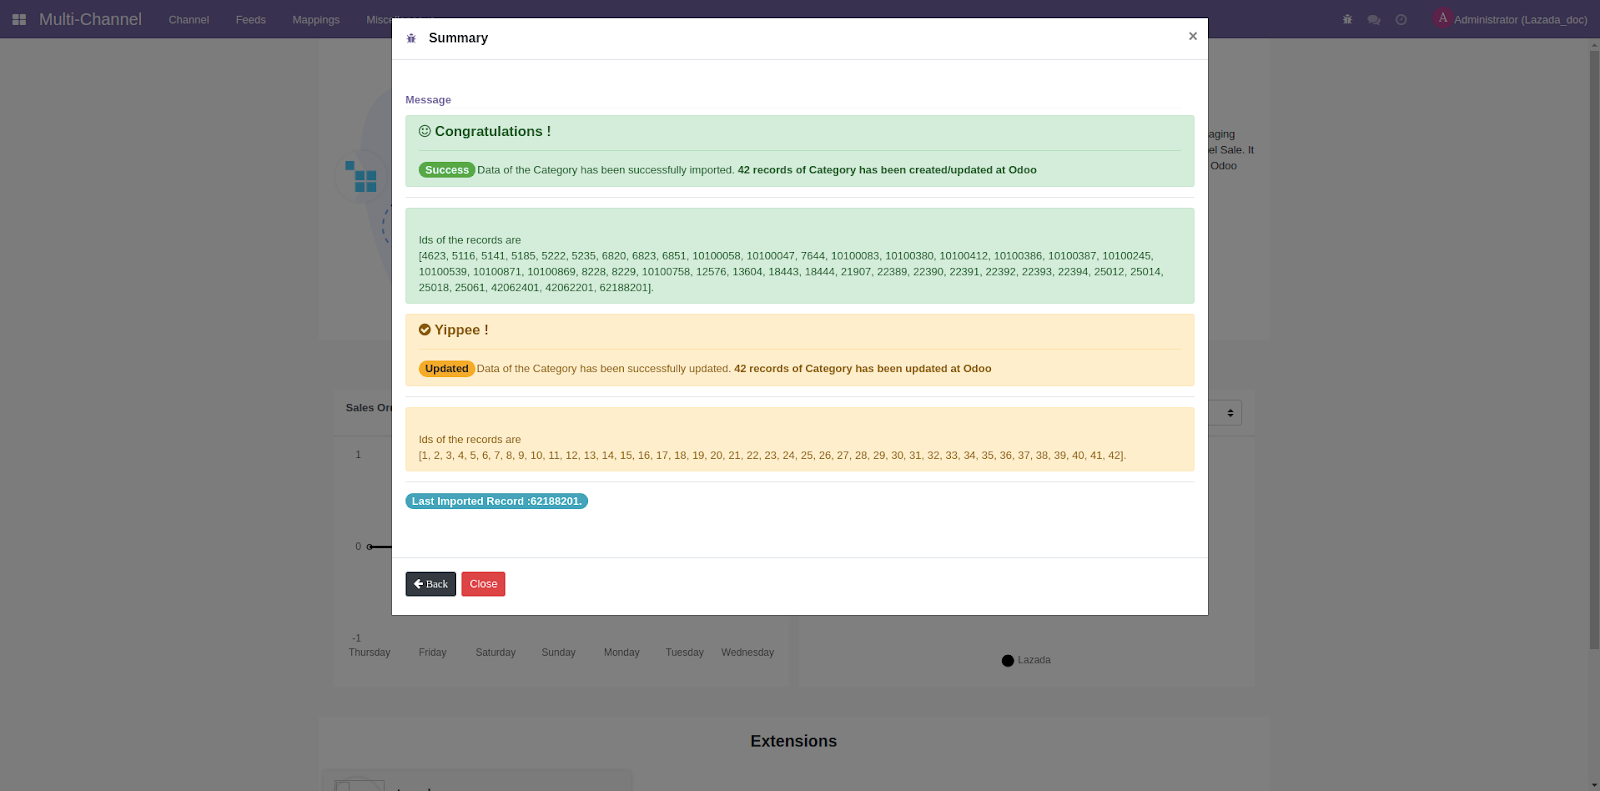
14. On selecting ‘Category’ in the object section, you have to choose the categories you want to import to Odoo.

15. After that, you will see a success message, as shown below.

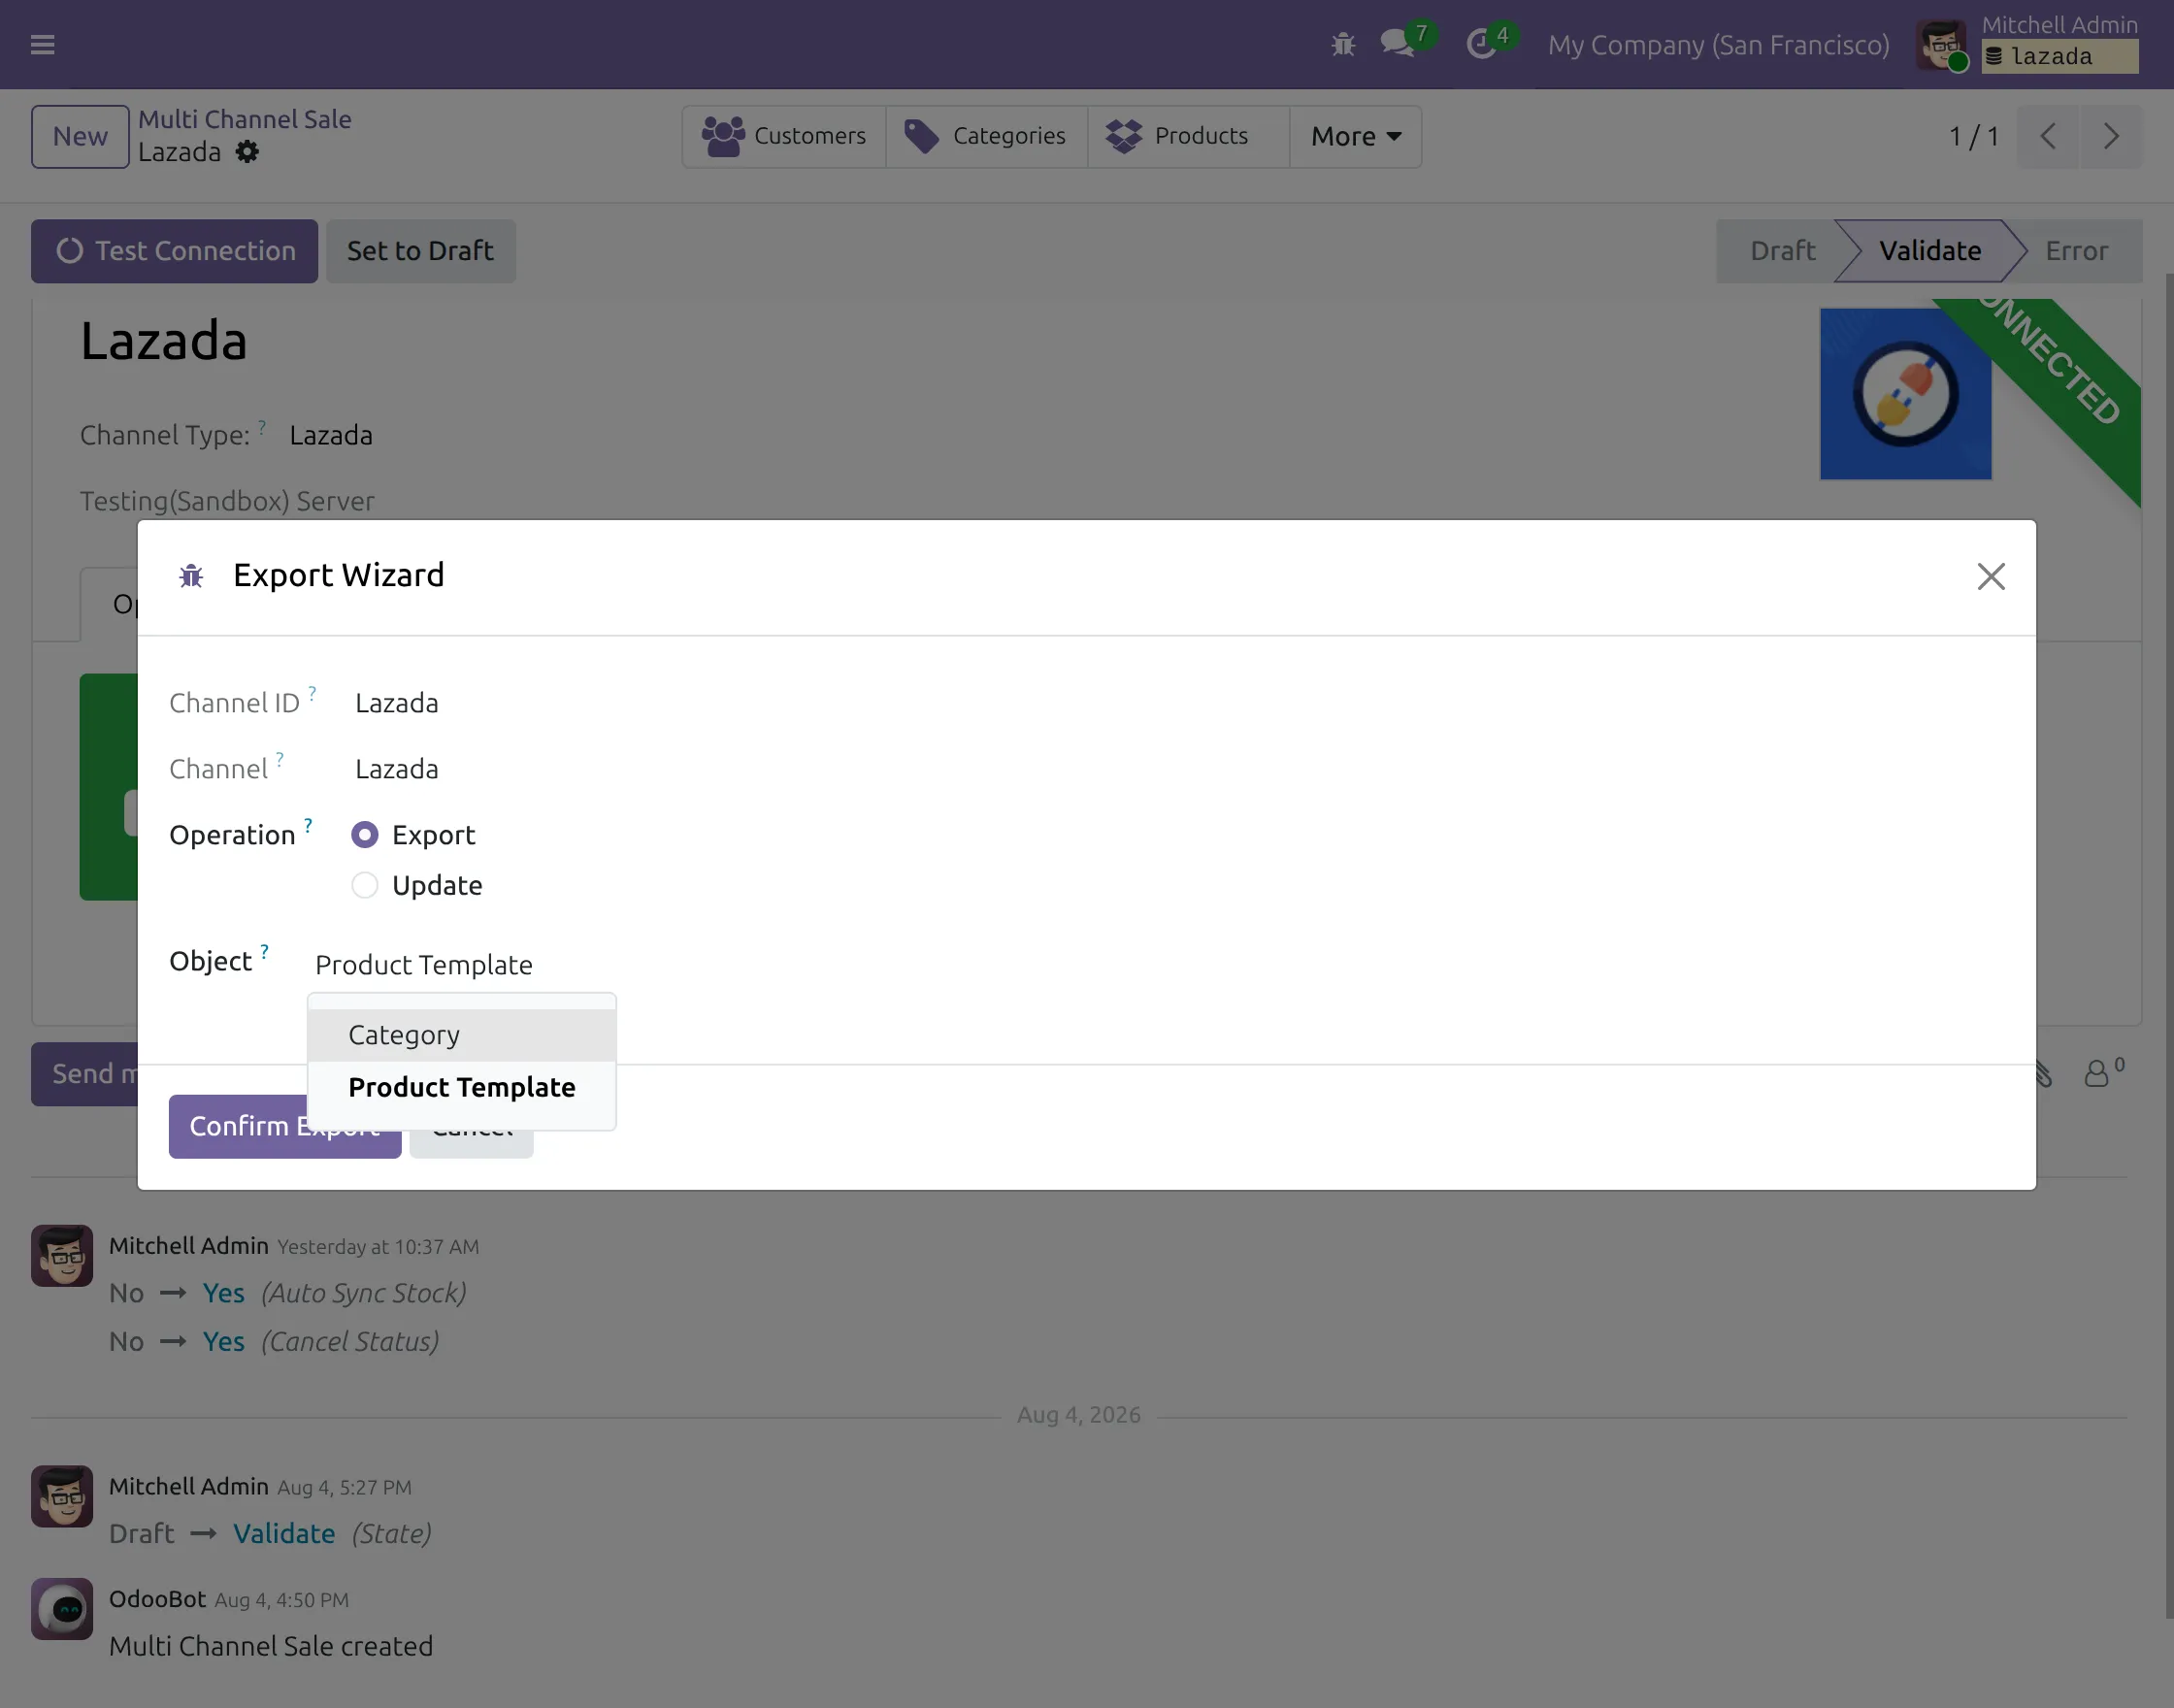
16. You can export and update product template from Lazada. Hence, select what you want and click the ‘Export’ button to export products to Lazada.
VIEWING DATA MAPPING
17. From the ‘Mappings’ menu, you can view all the mapped data in the Odoo backend. Clicking on any options will show you the list of all the mapped data. Also, clicking any specific data will display its details.

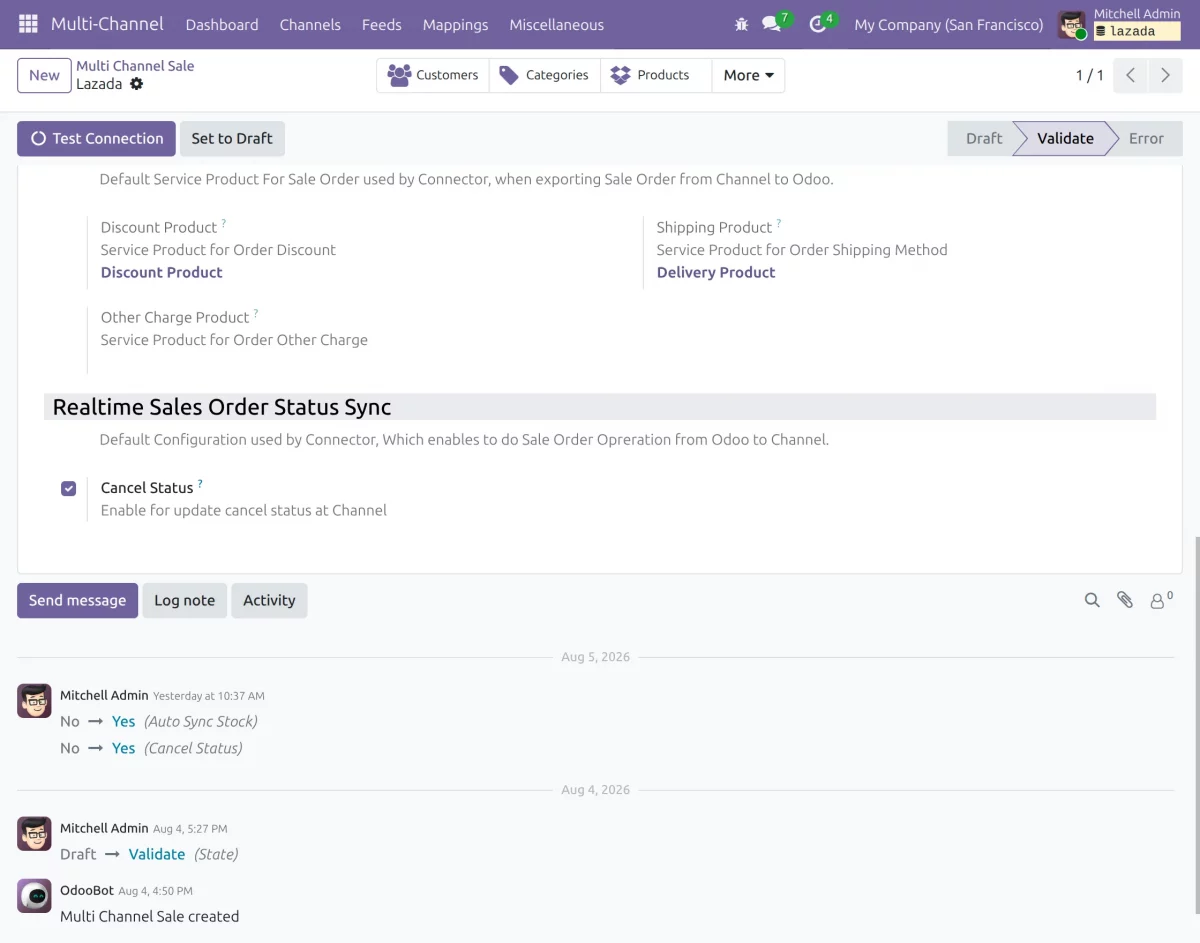
18. You can also check the Real-time stock sync and cancel status from “Sales Settings”, then scroll down to reach ” Real-time Sales order Sync”.
OTHER ODOO CONNECTOR MODULES
- Odoo QuickBooks Desktop Connector
- Multichannel Amazon SaaS Connector
- Odoo Multi CRM Intercom Connector
- Odoo Easyship Connector
- ClickUp Odoo Connector
- Odoo Shipstation Connector
NEED HELP?
Hope you find guide helpful! Please feel free to share your feedback in the comments below.
If you still have any issues/queries, please create a ticket at the UV Desk.
I hope this helps. In case of any further queries, contact us at our support mail.
Thanks for paying attention!!
Current Product Version - 1.1.2
Supported Framework Version - V19, V18, V17, V16, V15

Be the first to comment.