Salesforce Smart Multi Weather Information app is a weather exhibit application that unveil weather of default selected city, Leads, Accounts, Contacts and Contracts in a very beautiful manner.
There is a multiple theme concept that can be managed according to your need from the admin panel. Here, weather of different cities can be pomped at user’s view page.
Features
- It manages the weather views of multiple cities on user screen.
- Multiple weather show is only available at default setting at user end.
- Can easily track the present weather status of a particular city.
- The feature is available in Leads, Accounts, Contacts and Contracts.
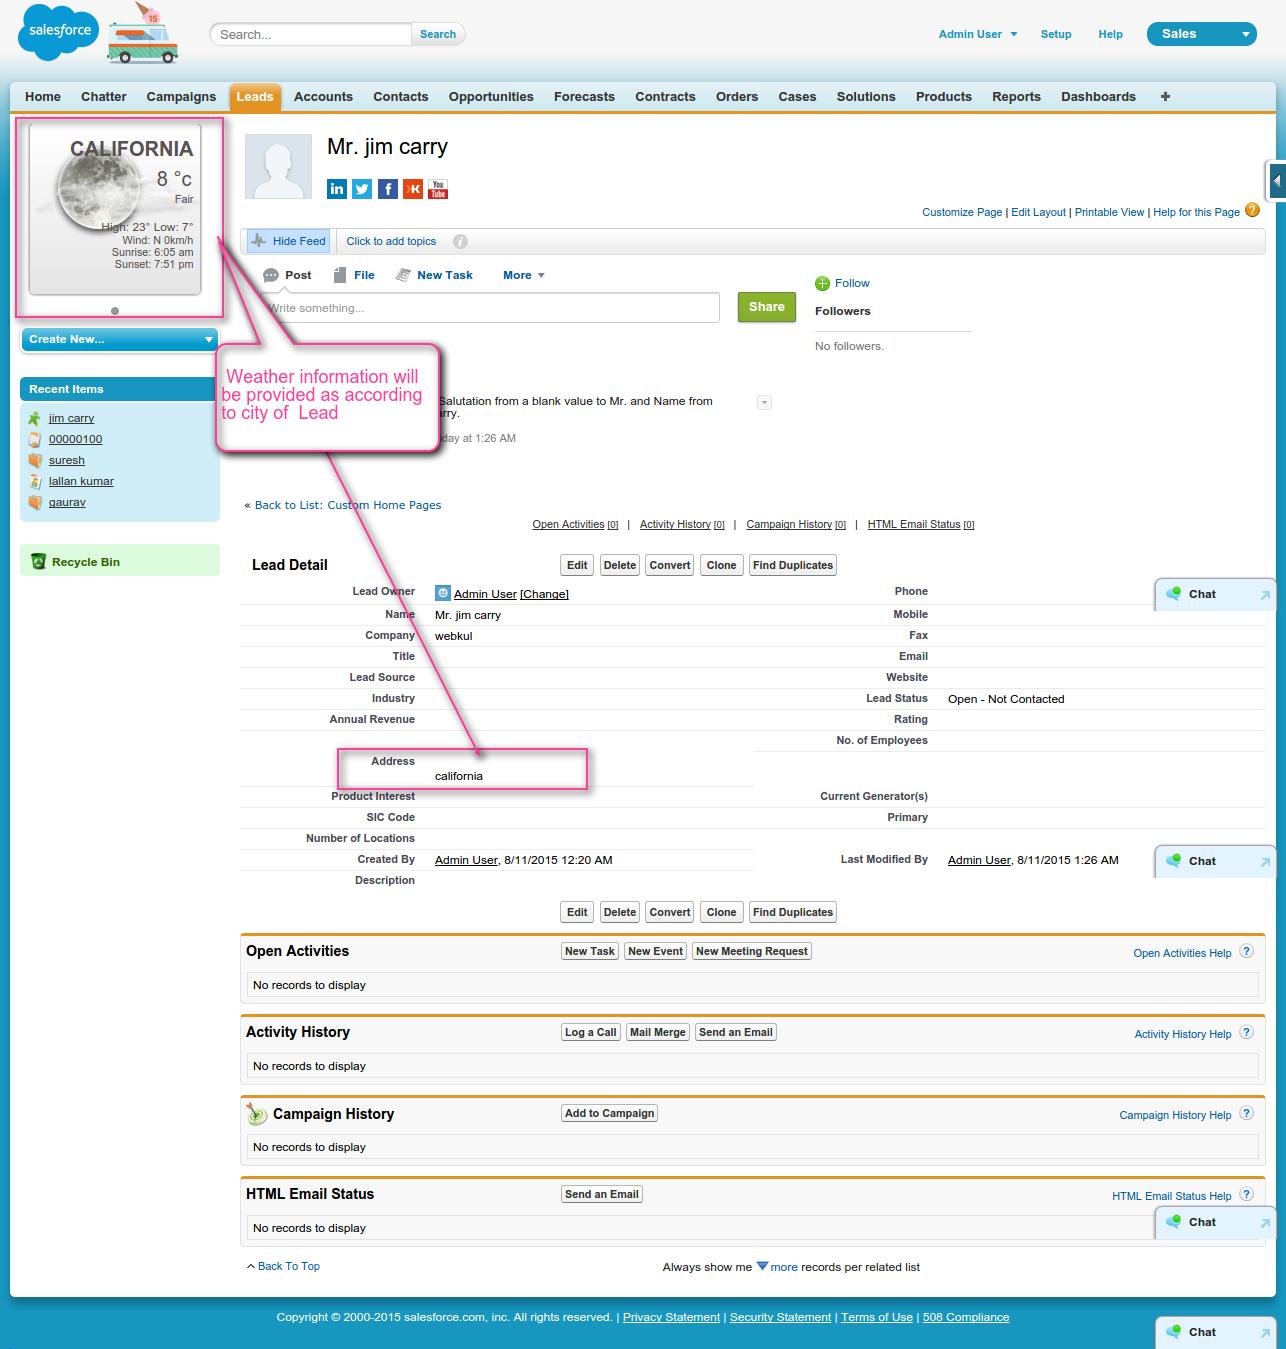
- Based on City Name provided, the weather of Lead, Accounts, Contacts and Contracts will be displayed.
- Advanced features and easy to use.
Smart Multi Weather Configuration Tutorial
Smart Multi Weather Configuration in Classic View
After Installation you need to go to the Home Page Layouts and click on Default Layout.
Now Click on Edit Button.


Before you proceed with its configuration, please make sure that custom tabs related to Smart MultiWeather should be Default On.
Follow the steps to verify or update it : From Setup | Manage Users | Profiles | Select Profile and click Edit to verify as mentioned in the screenshot below.
Go to the ‘Multi Weather Configuration‘ Page and configure it properly. You need to set all parameters mandatory like City name, Width , Weather Theme, Temp Unit otherwise Application will not be working properly.

Check the Multi Weather Info by clicking on the ‘Show Multi Weather’ tab.
Contacts Weather Information

Accounts Weather Information

Contracts Weather Information

Lightning Experience View
To use the application at Lightning end, it is required to register the domain first. Kindly go through the article: How to register your Domain in Salesforce.
Once you get registered with your Domain, please follow the steps below to configure this application at lightning end.
Step2: Click on ‘ Multi Weather‘ Tab.
Configuration of Multi weather tab.

Step5: Go to ‘Accounts’ tab and click on any account record.
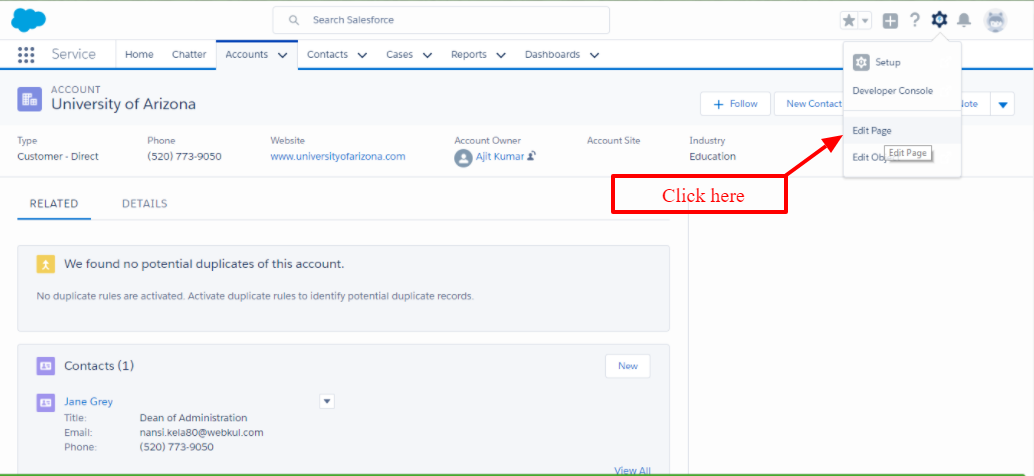
 Step 6: Click on ‘Edit Page’ as shown below:

Step7: Add visualforce page by drag and drop concept as shown below in the snapshot.

Step8: Now select the ‘Account SMW’ option from the VisualForce Page Name dropdown menu. Set the height and other details as per requirement.
Step9: Click on ‘Save’ to activate the account.

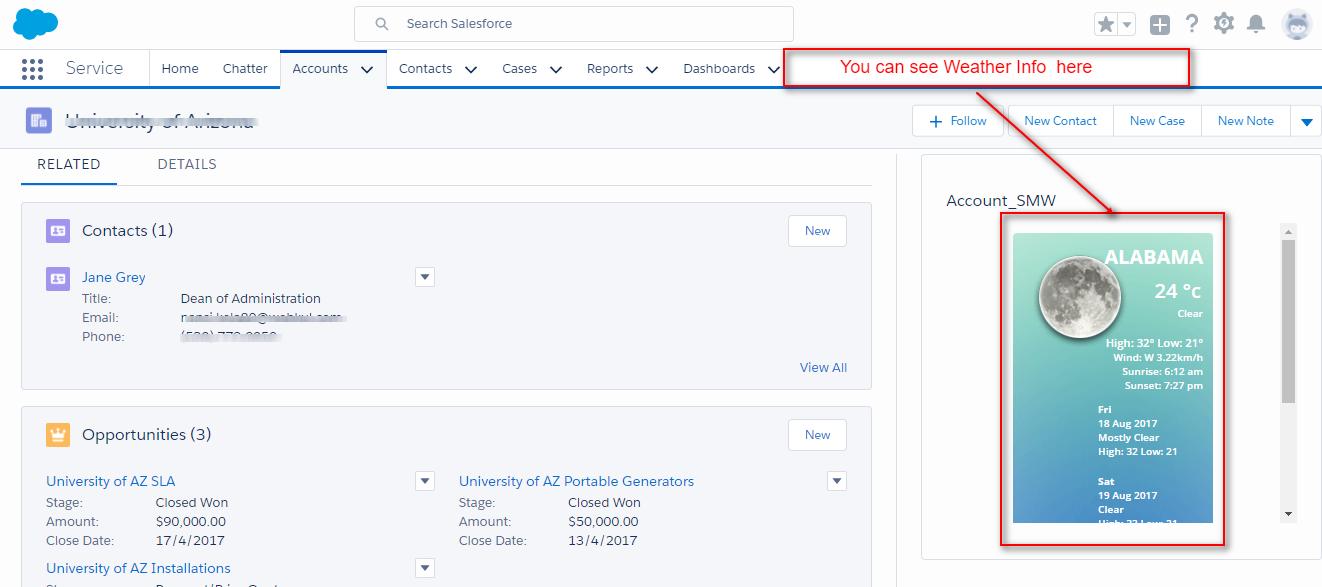
Accounts Weather Information View.

Step10: Same process will be applicable for Leads and Contacts as well.
Salesforce1 Mobile App Settings
Smart Multi Weather Mobile View
FAQ’s
Question: How to make Contact_SMW info visible in Contact page layout?
Answer: Go to Edit layout option and select Visualforce Pages option to add Contact_SMW field to contact page layout.
Select and drag Contact_SMW field to the desired location in the layout and click Save.
Now, it would appear right next to the location where you placed it, as shown below:
Same goes for Leads, Accounts and Contracts as well.
Question: In case, a user wants the number of upcoming days to be reduced, say 2, and make sure that the area occupied by this app also gets reduced as per the number of upcoming days, then how can he proceed?
Answer: To achieve this, follow the steps below:
Click on the tab Multi Weather Configuration.
Now, go to Home Page Components and then click on ‘New’.
Create a new Home Page Component as shown below and select the radio button Visualforce Area and click on ‘Next‘.
Select the Component position, Visualforce Page name and set the height as per your requirement as shown below and click on ‘Save’.
Now, you just need to add this component to the home page layout. Check mark the newly created component and click on ‘Save’.
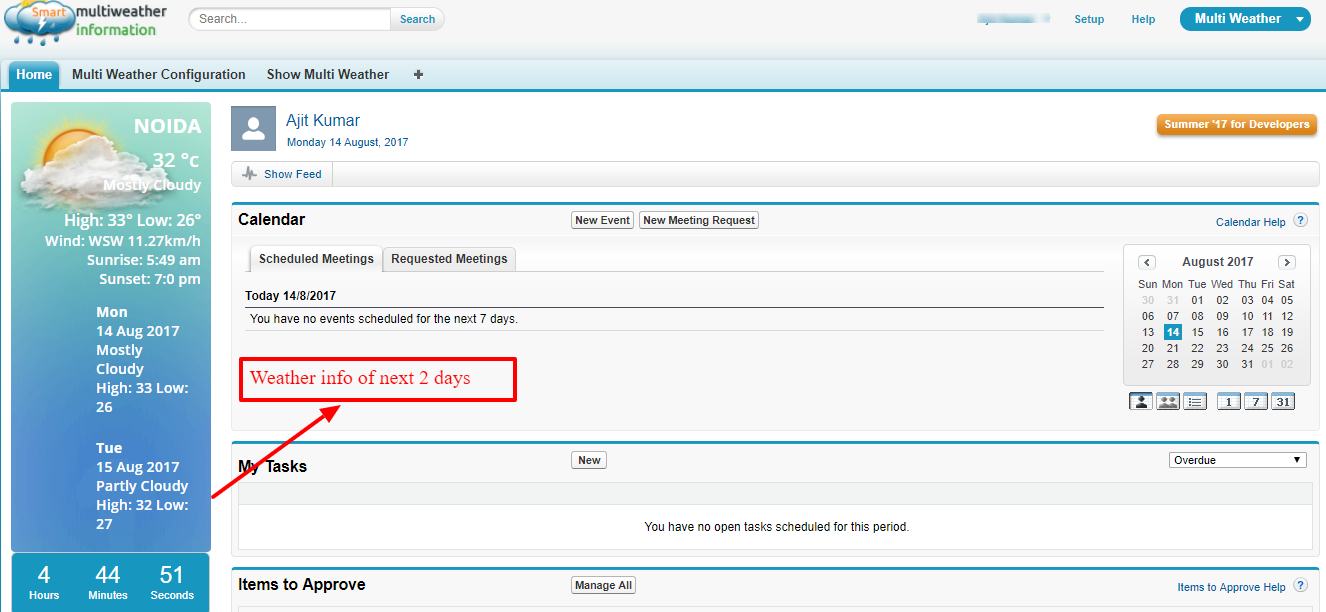
You can now see it visible on the home screen with complete weather info of next two days without occupying extra space as shown below:
Installation Link
You can visit the link below to install this Application from Appexchange https://appexchange.salesforce.com/listingDetail?listingId=a0N3000000DXzYeEAL
Support
Still have questions? If yes, feel free to Create a ticket and contact us https://webkul.uvdesk.com/en/customer/create-ticket/


Be the first to comment.