Introduction
Qlo Odoo Connector acts as a bridge between QloApps and Odoo, helping you keep hotel business data synced across both platforms.
It reduces manual work by keeping records updated automatically in Odoo.
The module syncs customers, room categories, room types, bookings, taxes, payment methods, and other hotel-related data from QloApps to Odoo.
Qlo Odoo Connector also supports real-time booking sync, automatic mappings, and manual mapping management for better sync control.
Features
- Qlo Odoo Connector Syncs customers from QloApps to Odoo with customer mapping.
- Sync customer addresses and link them with the correct customer in Odoo.
- Sync room categories and room types between QloApps and Odoo.
- Sync bookings in real time or manually with customer, payment, tax, and room details.
- Sync taxes, payment methods, and currency records for booking processing.
- Support automatic booking status sync for cancellation and payment confirmation updates.
- Create and maintain automatic mappings for synced records across both platforms.
- Manual mapping support for managing records whenever required.
Installation
Odoo End Installation
- Once you purchase the App from Webkul store, you will receive a link to download module’s zip file.
- Extract the file on your system after download finishes. As a result, you will be able to see a folder named- ‘qlo_odoo_connector(you can get the technical name from odoo app of the respective module)’
- Copy and paste this folder inside your Odoo Add-Ons path.
- Now, open Odoo App and click on the Settings menu. Here, click on Activate Developer Mode.
- Then, open Apps menu and click on ‘Update Modules List.’
- In the search bar, remove all the filters and search ‘qlo_odoo_connector’
- You will be able to see module in the search results. Click on ‘Activate’ to install it.
QloApps End Installation
a.) To install the module on QloApps, go to “Module Manager” in the ‘Modules’ menu
b.) Click on the ‘Add a new module’ icon in the top right corner.
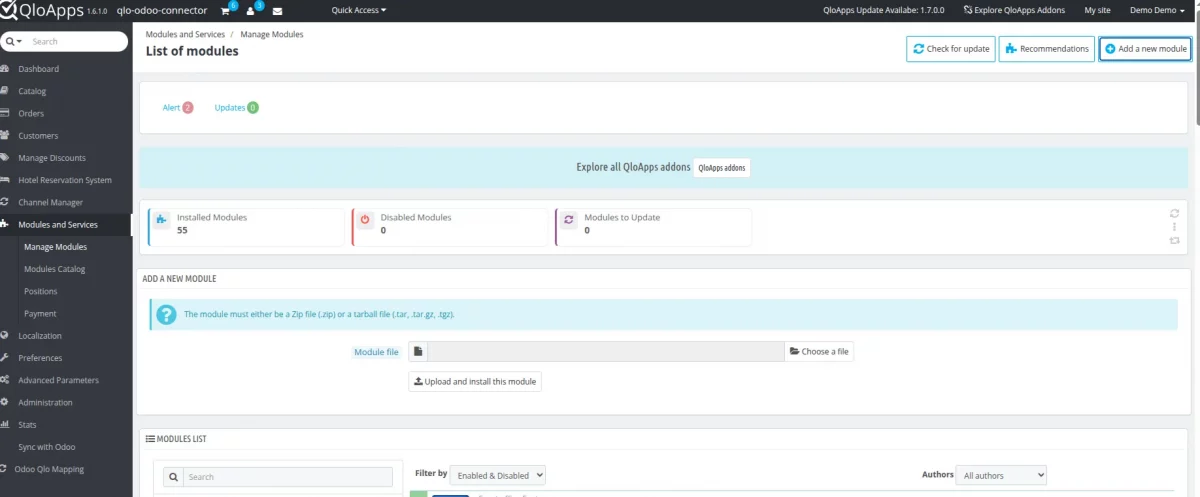
c.) Upload the ‘wkqlodoo’ module that needs to be installed at the QloApps end.
d.) Once uploaded, search the module in the Modules list. You will see the module in the search results. Click on the ‘Install’ icon to install it.
Workflow
Configuration on Odoo End
1. First, access the Qlo Odoo Connector by clicking on the icon in the top-left corner of the page, then select Ecomm Odoo Bridge.

2. Then, the Connection page will open.
Fill in the credentials for ECOMM API SETTINGS, like Base URL, select your Ecomm platform, and enable the Show Credential tab.
Also, fill in the API credentials.

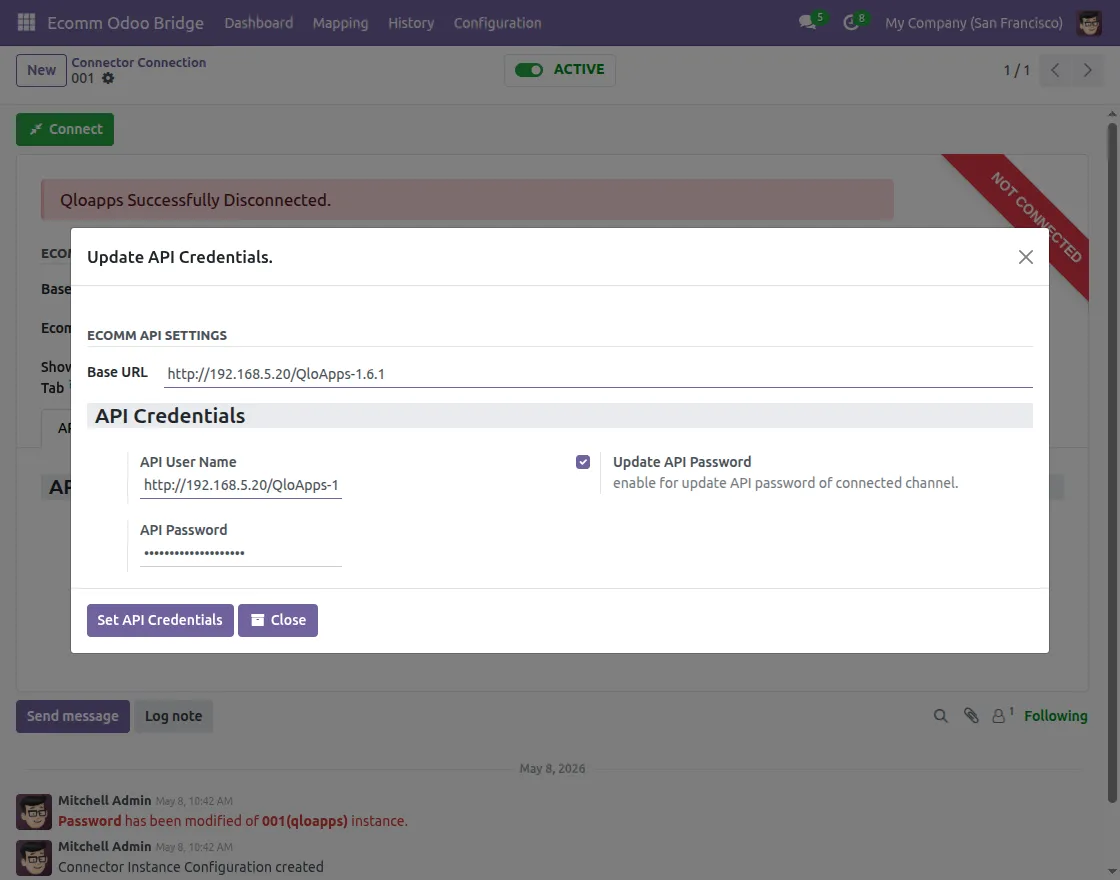
3. To update your API credentials, click on Update API Credentials.
Then, a pop-up will appear where you need to enter the Base URL, API User Name, and API Password, and after that, click on Set API Credentials.
4. To generate an API key, open QloApps and navigate to Webservice inside Advanced Parameters. Here, you can generate the API key for connecting QloApps with Odoo.

5. After completing all these configurations, the connection between QloApps and Odoo is successfully established from the Odoo side.

Configuration on QloApps End
6. To connect Odoo from the QloApps side, open QloApps and navigate to Odoo Qlo Configuration inside Odoo Qlo Mapping.
Then, fill in all the required fields in the Odoo Connection Configuration, such as URL, Port, Database, Username, Password, and set the Odoo Bulk Export Limit.

7. Then, open Odoo Booking Settings inside Odoo Qlo Configuration.
Enable options like Real-time Booking Sync, Automatic Booking Status Update, Automatic Booking Confirmation, and Automatic Invoice Generation according to the need.

Synchronization of Items
8. After successful connection, navigate to the Orders page and select the orders you want to sync with Odoo. Then, click Sync with Odoo from the bulk action dropdown menu.

9. Then open Order Status to configure manual booking status mapping.

10. Then, to sync customers with Odoo, select Customers inside Odoo Qlo Mapping, choose the customers you want to sync, and click on Sync.

11. After that, you can also sync the customer addresses you want from QloApps to Odoo.

12. To sync products with Odoo, open the Product page and select the products you want to sync. Then, click Sync with Odoo from the Bulk Action menu.

13. After that, open Product Categories and select the product categories you want to sync with Odoo.

14. After that, open the Taxes page to sync tax records from QloApps with Odoo.

15. To sync currency types with Odoo, open the Currency page, select the currency records, and sync them with Odoo.

16. Then, to sync payment methods with Odoo, open the Payment Methods page, select the payment methods you want to sync, and click on Sync with Odoo.

Need Help?
Hope you find guide helpful! Please feel free to share your feedback in the comments below.
If you still have any issues/queries, please create a ticket at the UV Desk.
I hope this helps. In case of any further queries, contact us at our support mail.
Thanks for paying attention!!
Current Product Version - 1.6
Supported Framework Version - Odoo V18

Be the first to comment.