PrestaShop Web to Print module allows your customers to customize the products as per their requirements.
From T-shirts to rubber stamps, to online ads and business cards – the user can personalize it all.
The Web to Print module provides various custom options to customize the product as per the need. You can choose to provide the following custom options to customize the product.
- Text
- Number
- Image
The module also facilitates the import of images from Facebook to customize the product. Customers can choose to use these features as well.
Features of the PrestaShop Web to Print module
- Offer your customers various options to create their own personalized products.
- Wide range of custom options engages customers on the store which reduces the website’s bounce rate.
- A customer can add image to customize the product.
- Customers can also add text on a personalized image to get the personalized product.
- A customer also gets to preview the product they have designed by applying various custom options.
- Customers can also download the customized product image.
- Ask your customers to upload the customized image and then proceed to purchase to get the personalized product.
- Social import allows customers to add images to the products directly from their Facebook accounts.
How to install the PrestaShop Web to Print module
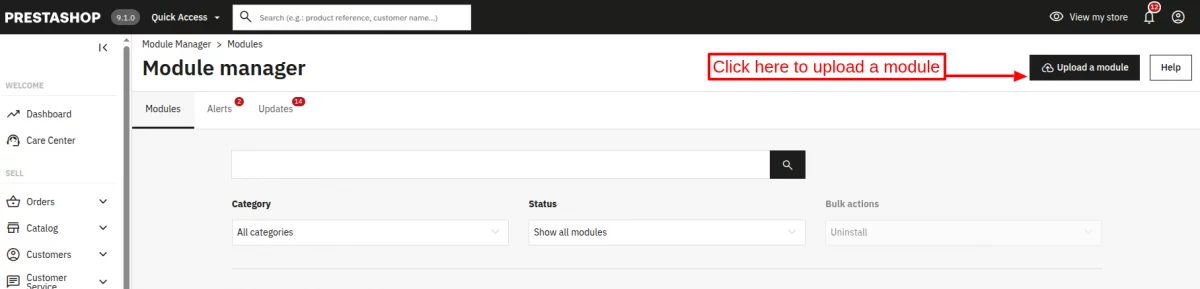
- Firstly, go to the module manager in back office and click on ‘upload a module’.
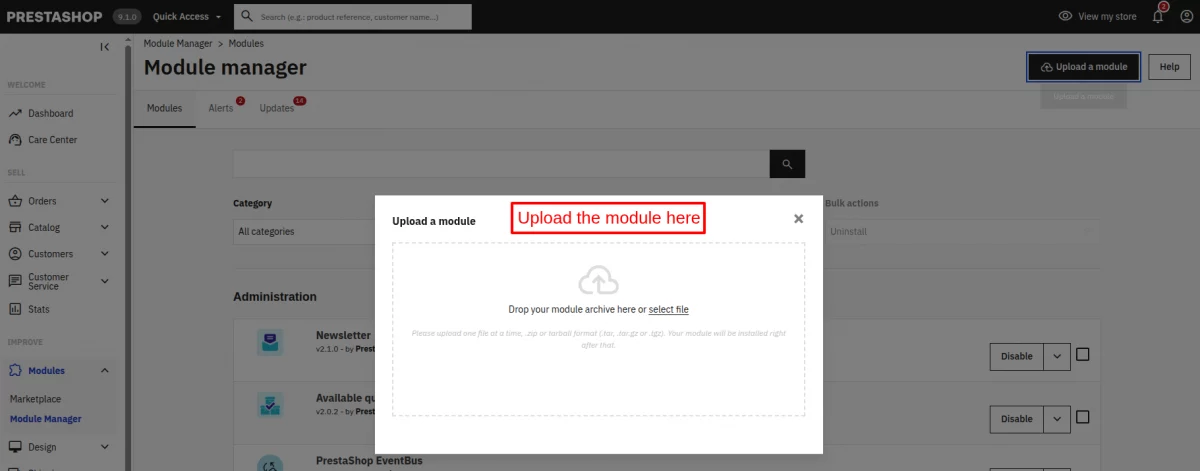
- After that, drag and drop the module file or select the file from the system.
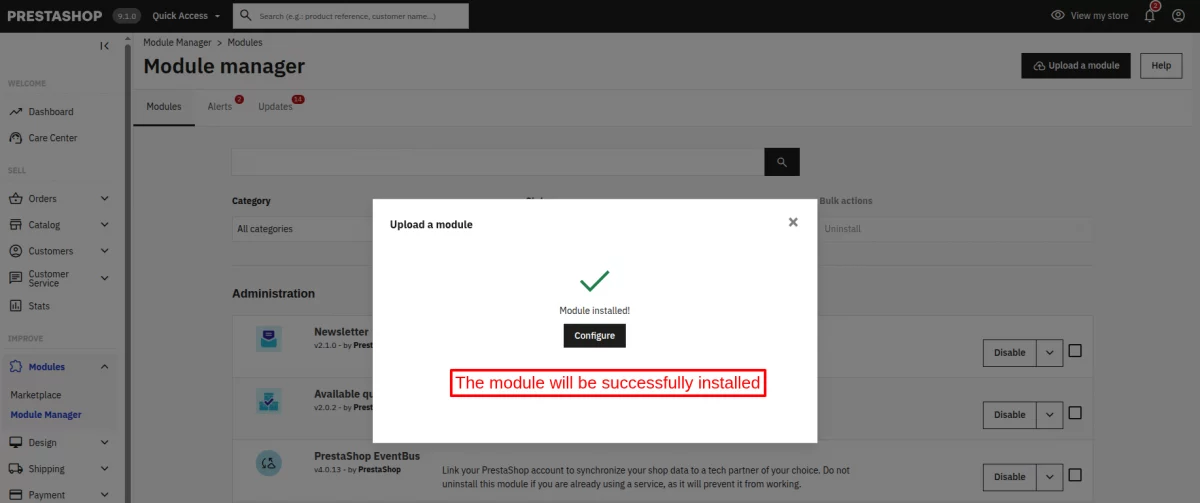
- In this way, the module installation will be successful.
How to configure the PrestaShop Web to Print module
After the successful installation of the module, an admin needs to configure the module.
On the configuration page, there’s a option to configure image import settings. An admin can allow import via Facebook.
To allow import via both Facebook, an admin will need the API keys. The process to get the API keys are available in the next section.

Suppose an admin allowed the import of images from Facebook, then the customers can fetch the images from their own Facebook account.
Social import offer customers to add the images directly from their Facebook account to customize the product.
How to Generate Facebook Credentials
Create Facebook Credentials
First of all, an admin needs to create an account on the Facebook developer site.
After creating the account, navigate to My Apps->Add New App.

After clicking on the Add New App button, the following page will open. Here, enter the display name and contact email to add a new App.

Now, go to the Basic section under Settings. Here, on this page, you’ll find your App ID & App secret required to configure the module.

How to add product customization fields to a product
After the installation of the module, an admin can customize products. To do so, navigate to Catalog->Products->Edit Product->Web to print.

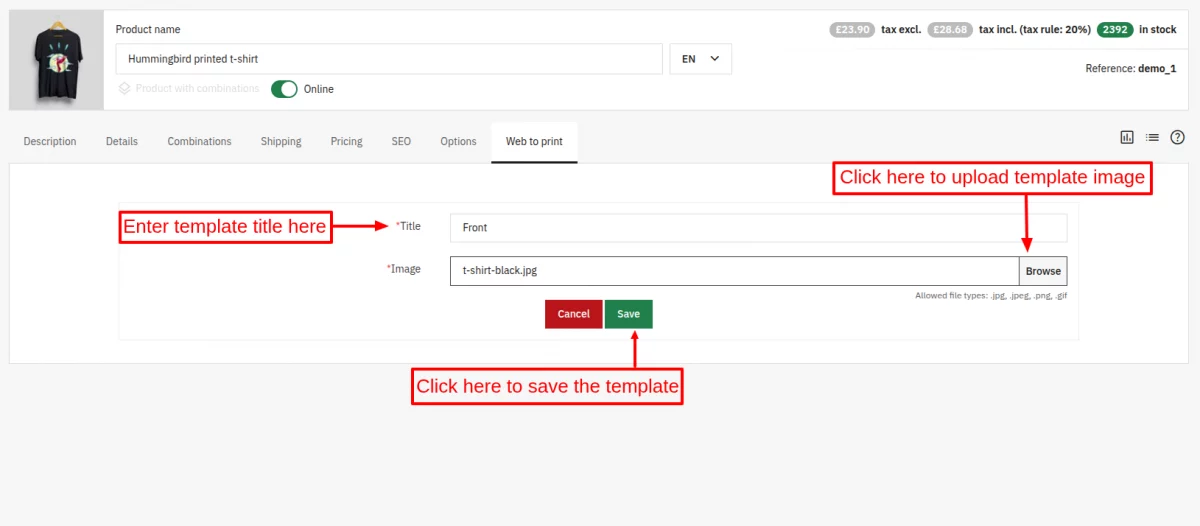
After clicking on the “configure” button, you will land on the following page. Here, click on the “Add New Image” button to add the template title and image.

Enter the “Title” & add the “Image” of a template and save the details.
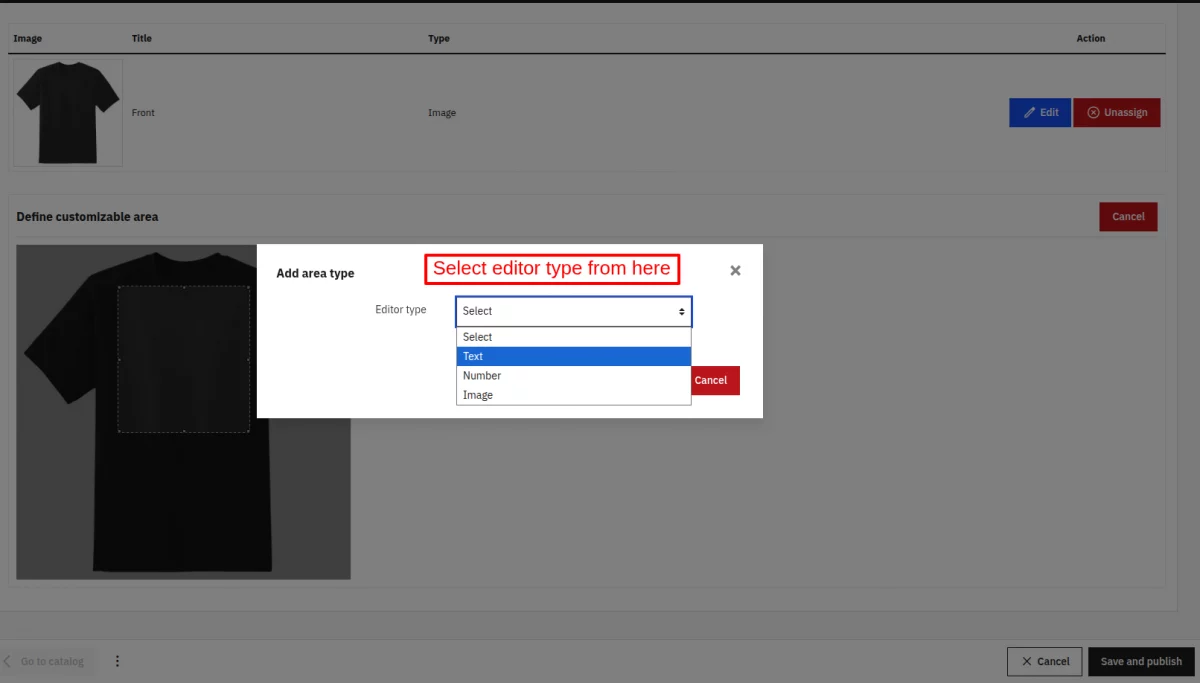
After saving the template, you need to select the customizable area on the product. On selecting the customizable area, you’ll need to click on the “Add Area” button.

Click on the “Add Area” button & a popup will appear on the screen. Now, proceed to select the area type.
There are three types of editor types available under the area type available with the module.
- Text
- Number
- Image
Text Editor
On selecting the text editor, you need to enter the area name. Now, click on the Save button to add the customizable area to the product.

In the following image, you can see a new customizable area is now added.

For your information, the title & type fields are editable. You can just click on them to edit the details.

How Web to Print helps a customer to customize the product
On the product page, a customer can now see a “Customize” button.

After clicking on the “Customize” button, a popup appears on the screen. This popup contains all the options to helps customers customize the product.

When a customer clicks on the customization section(area), an editor open just like the image below.


Once a customer finishes customizing the product, he/she can preview it by clicking on the “Preview” button.

Image Editor in Web to Print
An admin can also add an image area type in the same way as explained above.
In case, if he adds an image area, a customer gets an option like in the image below at the front end.
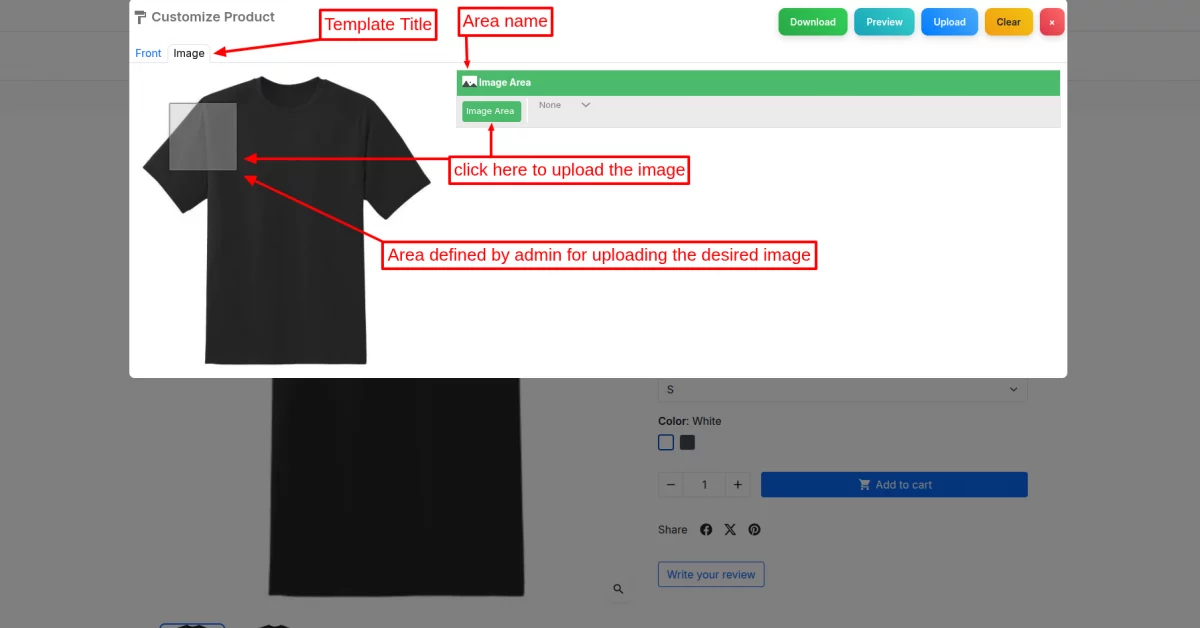
After uploading the image, a customer can choose to change, delete, or adjust the image.

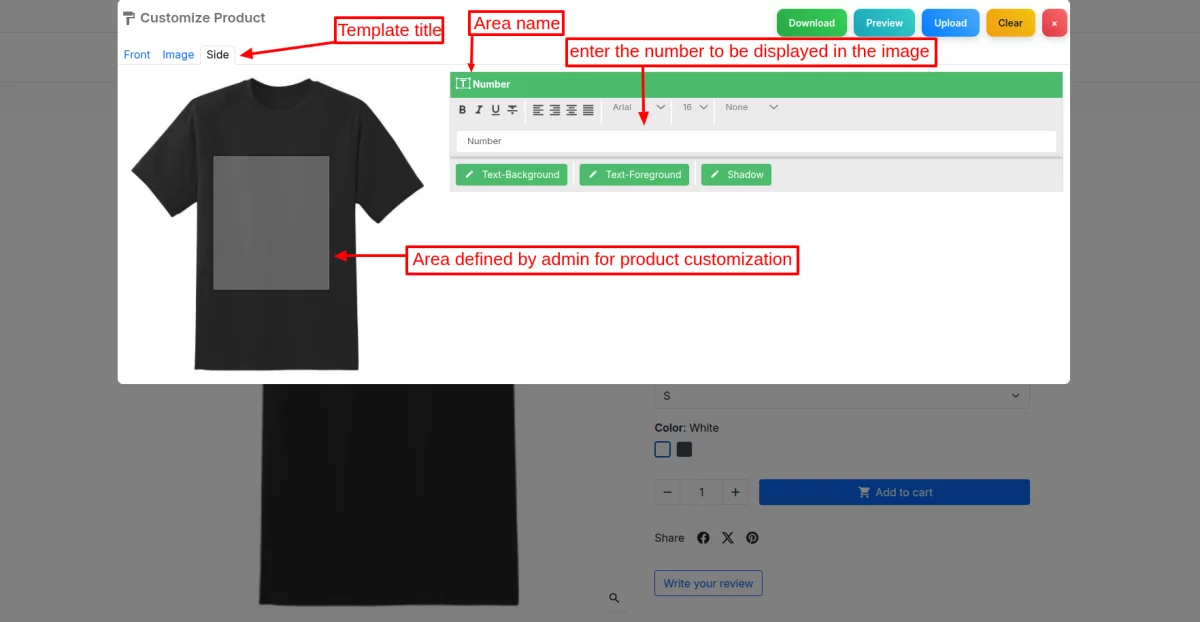
Number Editor in Web to Print
Now, let’s see what options a customer will get on the front end if an admin adds the number area type.
As you can see in the image below, a customer can now add the number to the customizable area. Additionally, he/she can also customize the look of the number.
After adding the number, it’ll look something like in the image below.
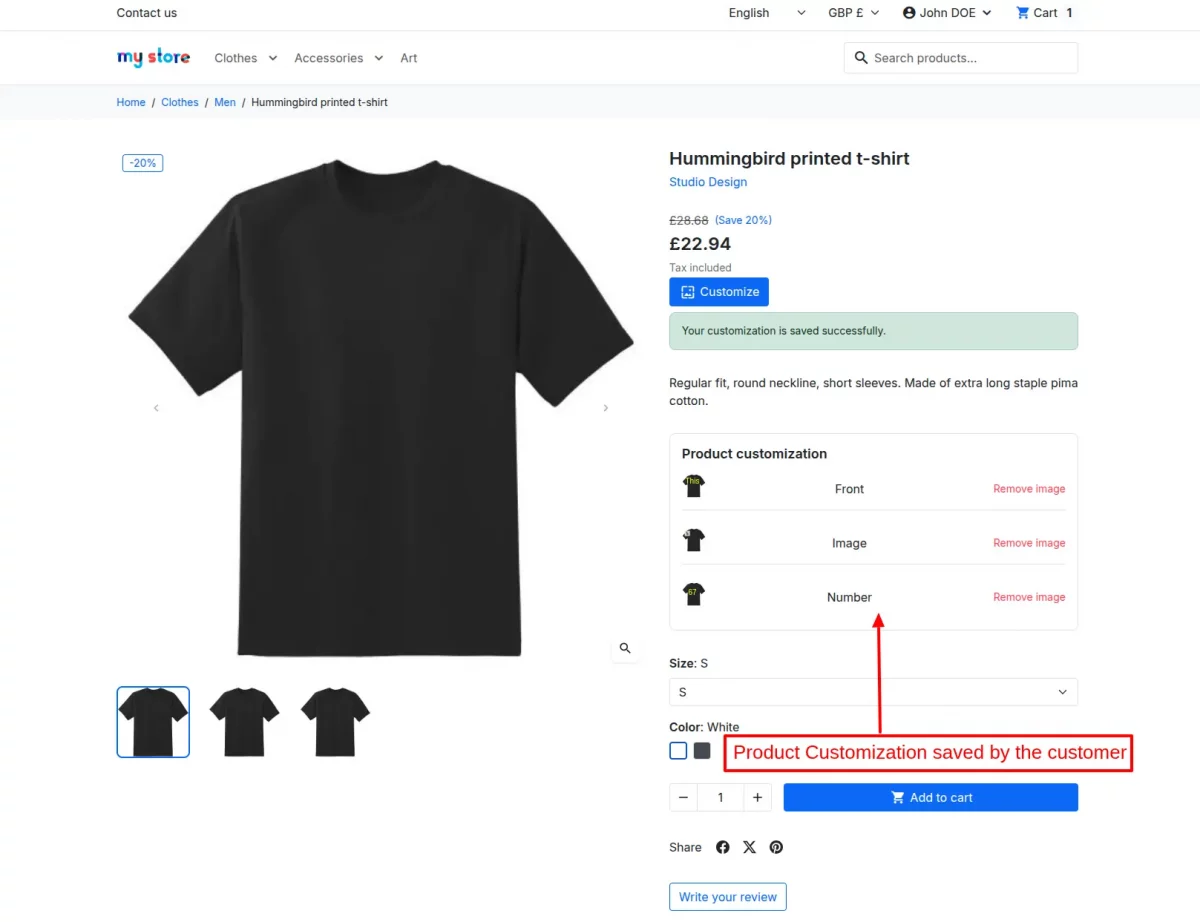
After customizing the product, a customer can download the customized product image. Thereafter, he/she can also upload the image by clicking on the “Upload” button.

On uploading the customized image successfully, it’ll appear on the product page too.
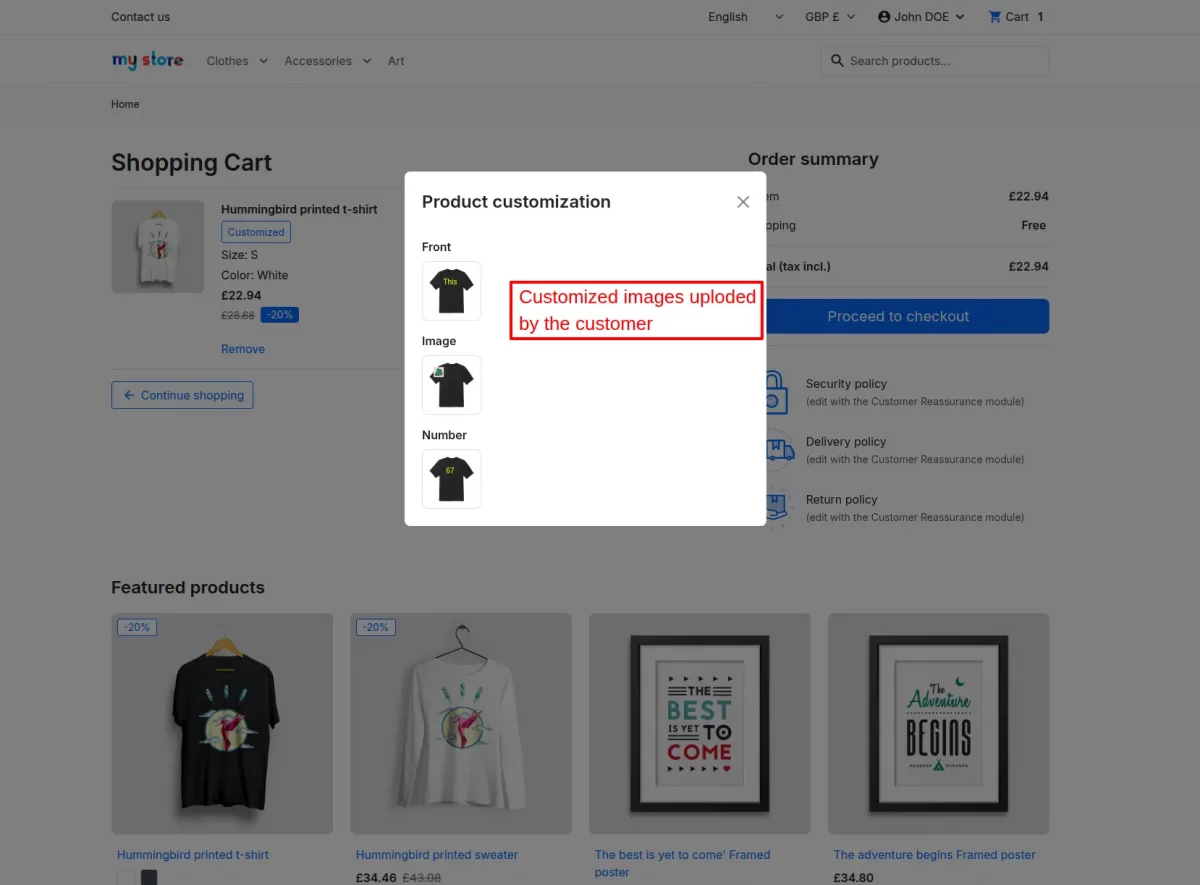
Cart Page
A new link named “Product Customization” is also available on the cart page to view the customization details.

When a customer clicks on the “Product Customization” link, a popup appears on the screen with details of customized product images.
After placing an order, a customer can view product customization details on the order confirmation page.

A customer can also view product customization details on the “Order Details” page.

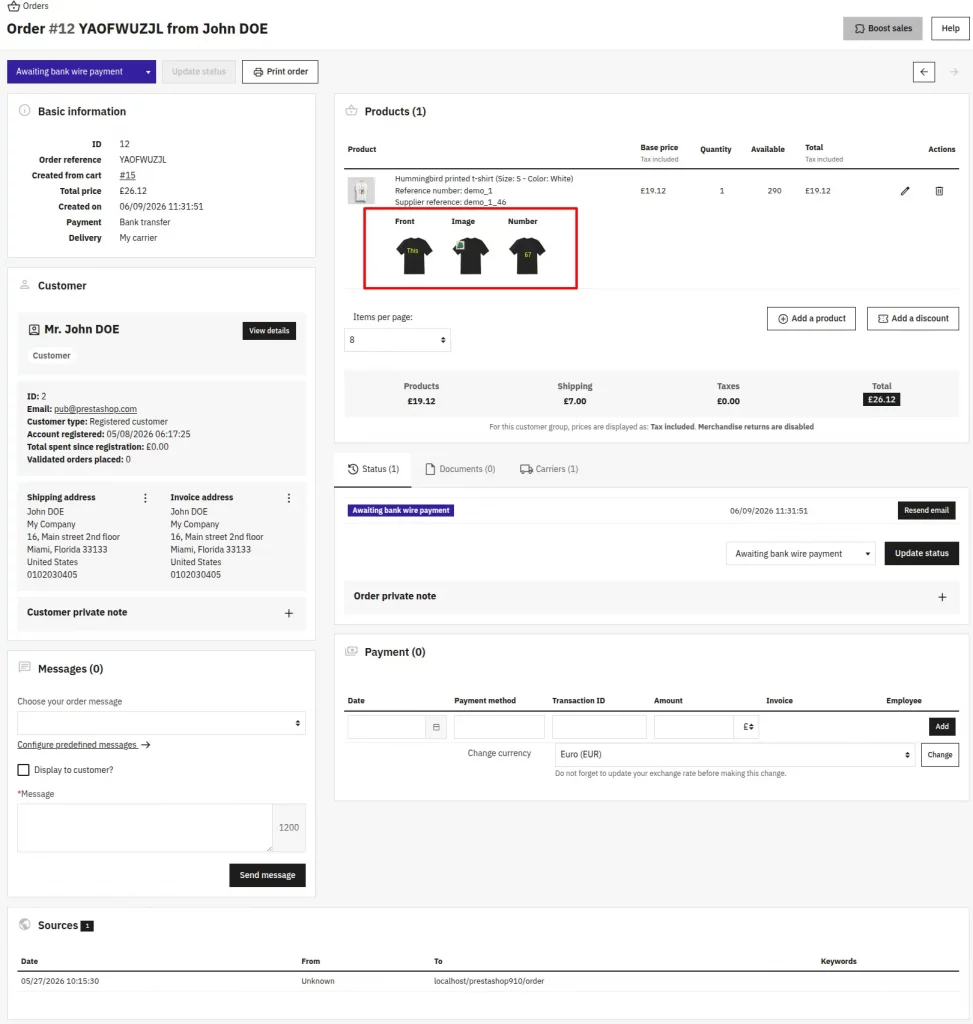
Product customization details at the admin’s end
The details of the product customization i.e., images uploaded by a customer is also available on the admin order details page.
So, this was all about the PrestaShop Web to Print module. I hope this document will help you in checking the functionality of the module in a better way.
Also, do let us know about your views in the comments.
In case, if you are also looking for a module with similar functionality for your marketplace, then do check out the blog.
Support
For any kind of technical assistance or query, please raise a ticket at http://webkul.uvdesk.com or send us a mail at [email protected]
Also, please explore our PrestaShop development services & vast range of featureful PrestaShop Addons.
Current Product Version - 4.2.4
Supported Framework Version - 9.x.x, 8.x.x, 1.7.x.x

Be the first to comment.