PrestaShop Warranty Management module helps shop owners to offer a warranty on the products of the store. There are basically three types of warranties that a shop owner can choose to offer customers.
- General Warranty: It is the warranty that a shop owner can offer to customers directly on buying the product at no extra cost.
- Extended Warranty: It’s the type of warranty a shop owner can offer customers to buy along with the product at some extra cost.
- Manual Warranty: It is the type of warranty that a customer can add manually using the warranty serial number.
After buying the product either with a general or extended warranty, the warranty becomes active only after the order reaches the configured order state.
In the case of a manual warranty, it becomes active just after the customer adds it.
The warranty card available for each kind of variety also becomes available to download only after the order reaches the configured order state.
Also note that in the case of a manual warranty, the time period of the warranty is the same as the general warranty.
Note: Prestashop Warranty Management module is compatible with the multi-store feature and product combination page V2.
Features of the PrestaShop Warranty Management module
- Offer warranty on the products to your customers.
- Provide general warranty i.e. along with the product for a certain time period at no extra cost.
- Offer extended warranty to buy along with the product for a certain time period at some extra cost.
- Allow extended warranty on previous orders.
- Also, choose to offer some discount in the price of extended warranty too.
- Let customers add the warranty of their already bought product manually.
- Provide them with the product warranty serial number in order to add the warranty manually.
- Assign general and extended warranty to bulk products via CSV file.
- Add serial keys to multiple products and combinations at a time via CSV file.
- Add prefix for the warranty ID of the various warranty types like general, extended & manual.
- Set the order status after which you want to activate the warranty of products.
- Choose to customize the content of the warranty card.
- The time period of the general warranty of the product is visible on the product page.
- Set the time period of extended warranty.
- Send email notification to customer for warranty creation, activation, and expiration.
- Also, the customers can add the manual warranty only if the general warranty is active on the product.
- A list of all the warranty products & types of their warranty is available to the customers.
- A list of all the warranty products, the type of the warranty & the customer who bought is available to the admin too.
- Show QR code on warranty card.
- Show signature on warranty card.
- Add Cron to send email on expiry and start of warranty.
- View and download the PDF warranty card from Order detail page.
- Choose to extend the warranty of previous orders from product page.
- Extend the warranty of product from the order detail page in back office.
How to install the PrestaShop Warranty Management module
- Firstly, go to the module manager in back office and click on ‘upload a module’.
- After that, drag and drop the module file or select the file from the system.
- In this way, the module installation will be successful.


Custom Hook Information
If ‘new product page’ is enabled, then add the following hook.
{{ renderhook('displayWkAdminProductsCombinationBottom', { 'wkData': combinationForm }) }}
Path:
on src/PrestaShopBundle/Resources/views/Admin/Sell/Catalog/Product/Combination/edit.html.twig file.
Place:
If PrestaShop 8.x.x: Line 37 under the {% block content %} block and just before {% endblock %}.
If PrestaShop 1.7.8.x: Line 50 under the {% block content %} block and before the closing {% endblock %}.
Note: There is no need to add a hook in case you are not using new product page V2.
PrestaShop Warranty Management Configuration
After the successful installation of the module, you need to configure it.
General Settings
In the General configuration settings, there are multiple options. So. let’s just see each of the options one by one.
- Order Status: Add order status on which you want your customers to get their warranty active.
- Show register product warranty to customer: Enable this option if you want to show the warranty registration form on the front end.
- Allow extended warranty on previous order’s: Enable the option to all extended warranty on previous orders.
- Warranty Prefix: Enter the prefix for the warranty ID of general warranty.
- Extended Warranty Prefix: Enter the prefix for the warranty ID of the extended warranty.
- Manual Warranty Prefix: Enter the prefix for the warranty ID of manual warranty.
- Signature: Add signature to show it on the warranty cards.
- Write warranty terms and conditions: Choose to display terms and conditions on warranty cards.
- Terms & Conditions: Write your terms and conditions.
- PDF Template: View the preview of the warranty card & choose to customize the content.
- CRON: Add cron to send email automatically to customers regarding the activation and deactivation of the warranty.

CMS page for terms and condition
Select CMS page that you want to display as terms and conditions in the warranty.

QR Setting
This section is added to give an option to admin to display the QR code on the warranty cards.
If the admin choose to show QR code, then further settings need to be configured like height and width of the code etc.

Warranty Import
Under Warranty Import tab, you can upload a CSV file to add warranty on multiple products at once.

In the CSV file, you need to specify product id, warranty limit, warranty period, and extended warranty product id.

Serial Key Import
Under this tab, you can upload a CSV file to add warranty serial key for multiple products and combinations at once.

Mail Settings
Under this tab, the admin can configure the events for which he wants to send email to customers.
The admin can choose to send email for customers when the warranty is created, activated, or expired.

Mail Templates
Under this, you can add various email templates.

Click on ‘Add new email template’ button to add customer’s email template.

General Product Warranty
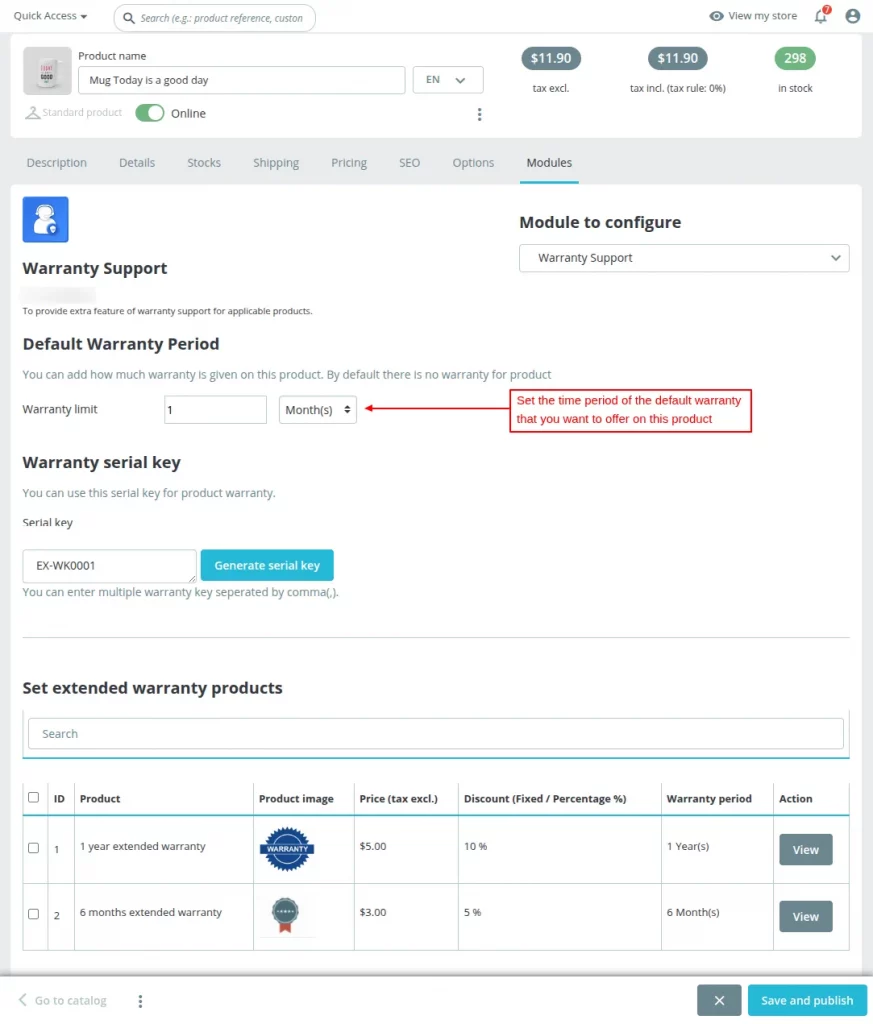
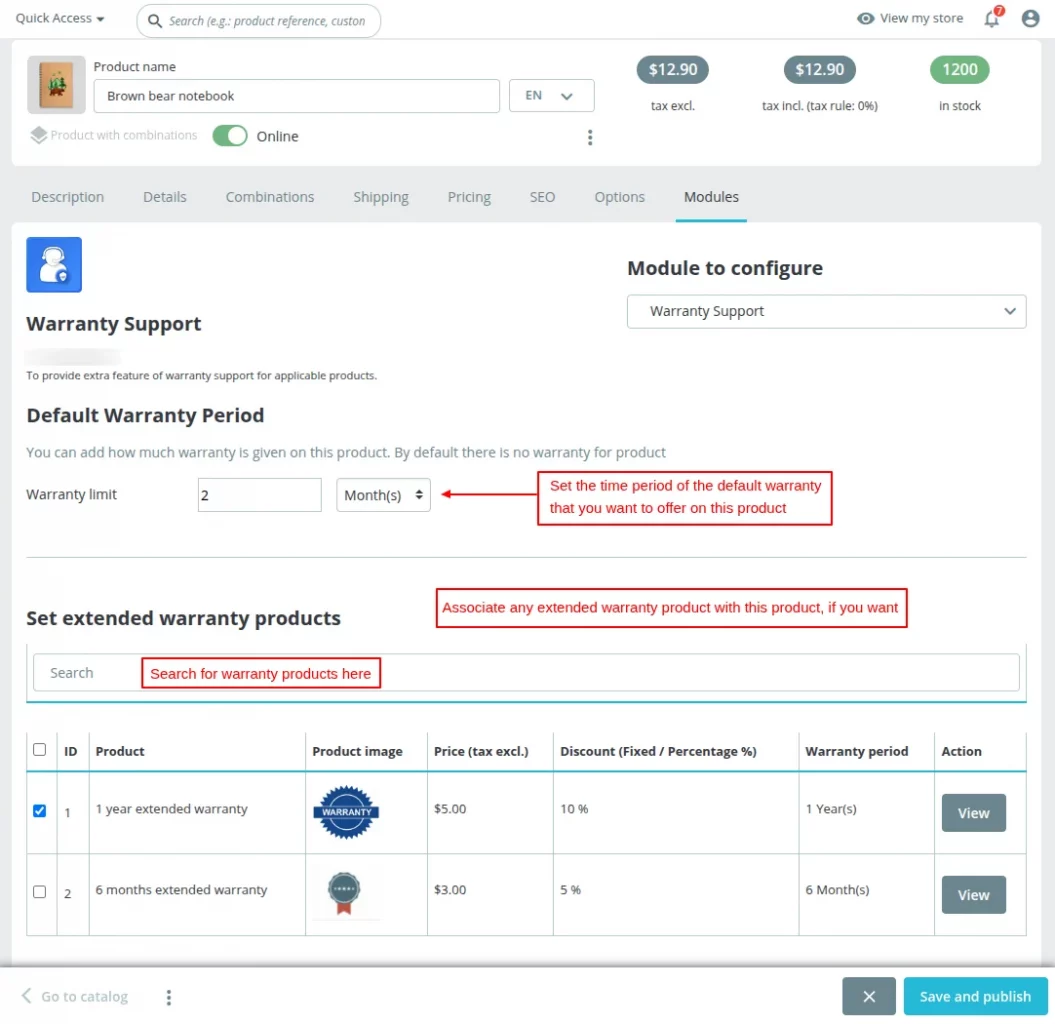
After configuring the module, you can add the general warranty on the product. You will need to add the general warranty for each product individually.
Now, set the general warranty period for the product.
A customer can also view the general warranty period of the product on the product page that the store is offering.

If a customer proceeds to buy the product, the general warranty will be automatically offered along with the product.


On the customer dashboard, a customer can find the following two new tabs.
Register Product Warranty: Click here to proceed to register the warranty of the product manually.
We’ll see the process of adding the warranty manually in a separate section later in this document.
Warranty Product List: Under this tab, you can view all the products & the warranty available on them.

Note: The warranty will be activated once the customer order reaches the configured order status (i.e. payment accepted – configured by admin in the back office).

After updating the order status, a customer will be able to view the product as well as its warranty card.
In order to download the warranty card, click on the “PDF” button.

A view of the warranty card that a customer will get in case of a general warranty.

Extended Product Warranty
In order to offer the functionality to customers to get an extended warranty on the product, you need to create an extended warranty product first.
In this module, we are managing the extended warranty as another product(Virtual).
After the installation of the module, a tab to manage/add extended warranty products becomes available under the catalog section.

Extended Warranty Product
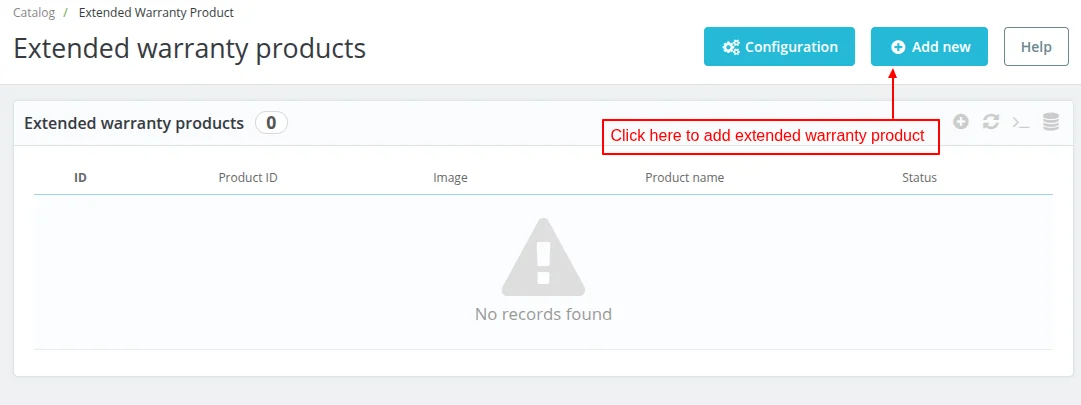
Add New extended warranty product:
Add the details of the extended warranty product & save the details. Additionally, you can also offer some discounts to customers on the extended warranty.
It means that if a customer chooses to get the extended warranty, then he/she can get some discounts on the extended warranty price.
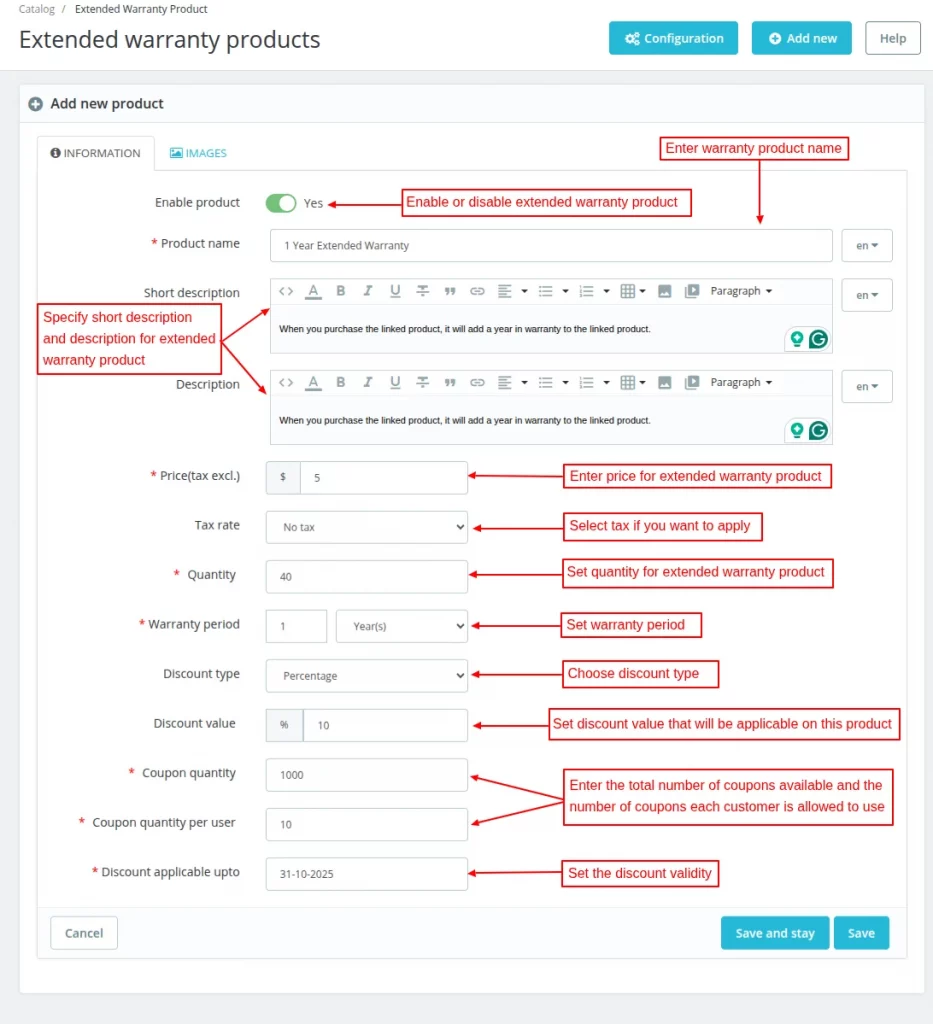
Also, you can choose to add an image to this product.
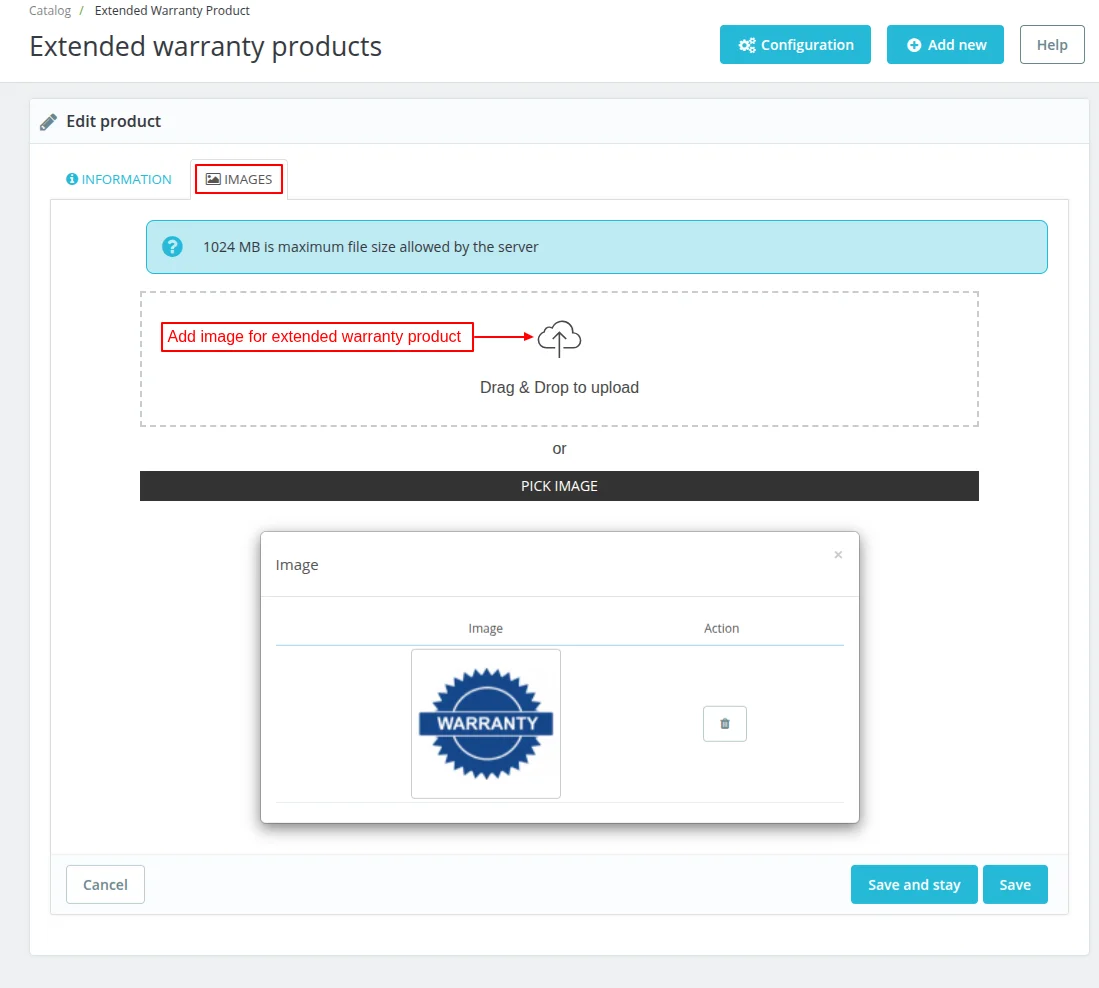
Once added, the admin can view under “Extended warranty products” tab.
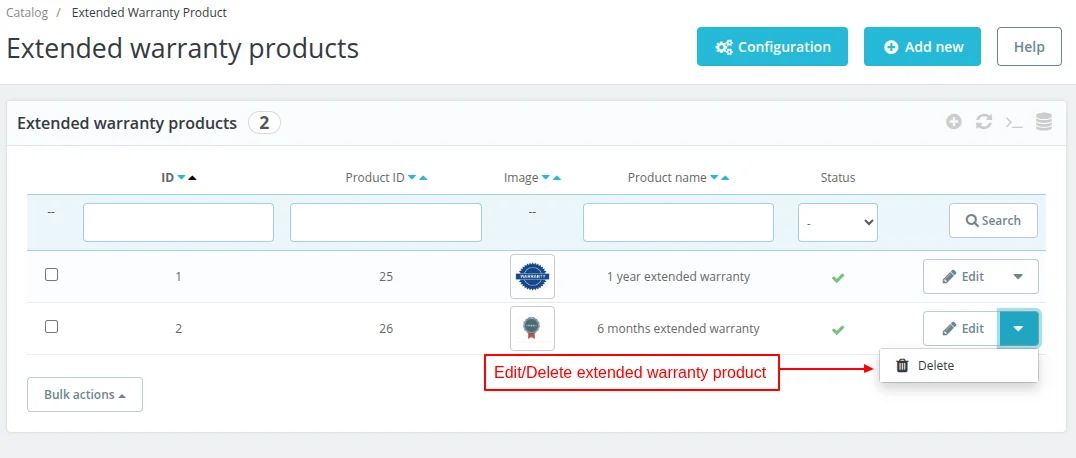
After creating the extended warranty product, a new product named “Extended Warranty” becomes available in the product list.
Note: Please don’t edit or delete this product for the proper functioning of the extended warranty feature.

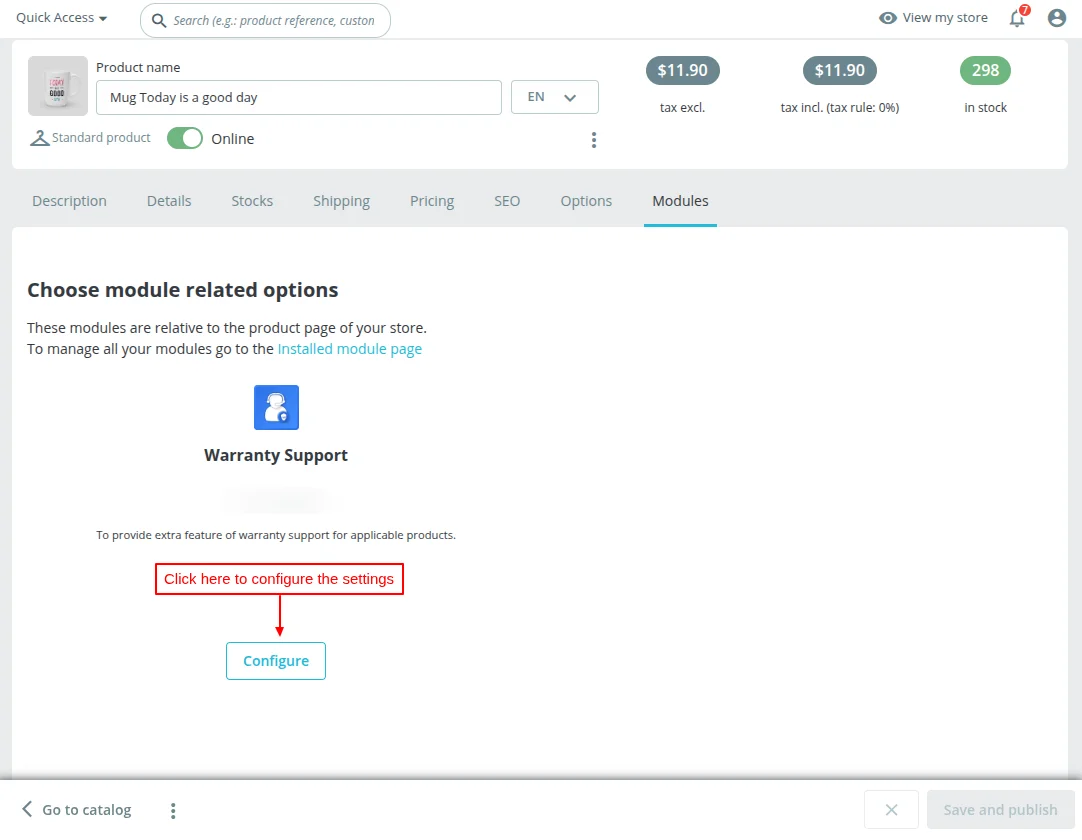
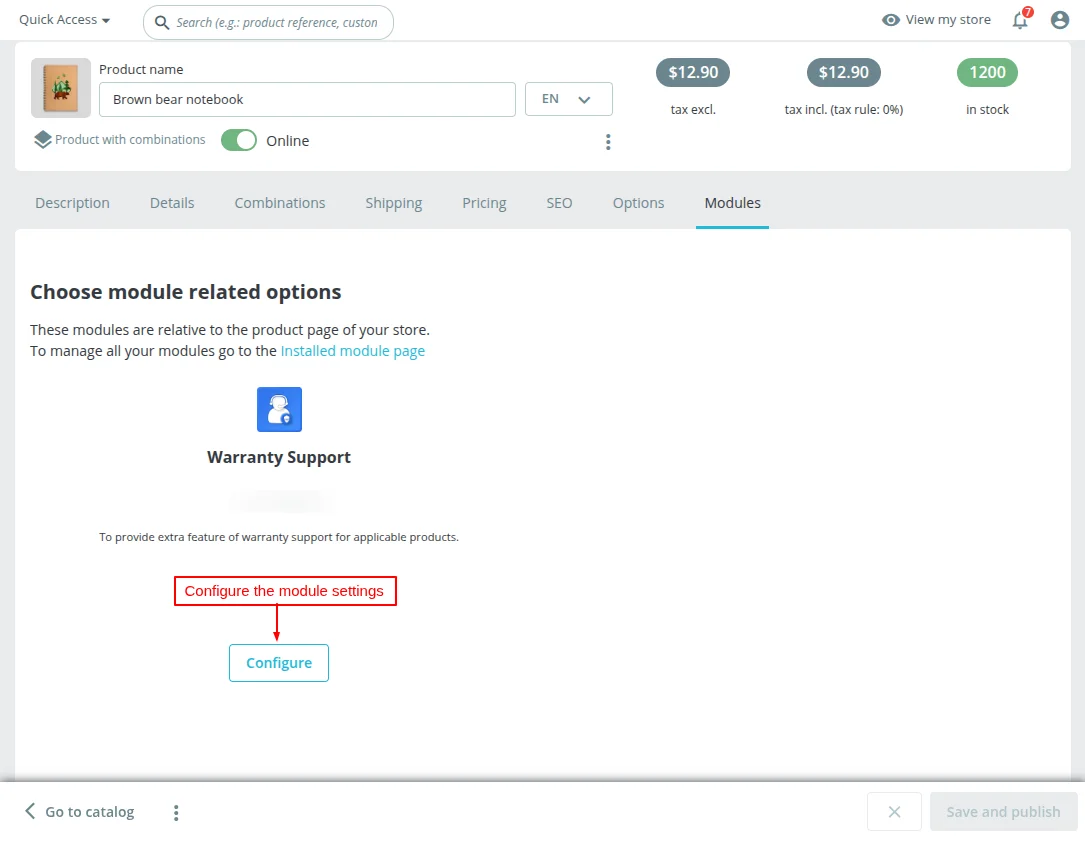
Offer extended warranty on the products
Now, after adding the extended warranty product, you can now offer an extended warranty on the existing products.
The process to buy along with the extended warranty
A customer will now get the following two options on the product page.
- The first is to buy the product along with a general warranty only.
- And the second option is to buy the product along with the extended warranty.
An option to add the product along with the extended warranty to the cart is also available.

After adding the product & extended warranty, the extended warranty is added as a separate product to the cart.
It is happening in this way because we are managing the extended warranty as a separate product.
The discount available on the extended warranty will also be applicable on the cart.

Note: You can not update warranty product quantity in cart.
Reason being, if same warranty product is added for two different products then if you will increase the quantity of warranty product then for which product the increased warranty will be considered.
So, we have restricted the increase of warranty product quantity.


You can also extend the product warranty from the order detail page in the backoffice.
Simply, select the extended warranty and click on Add.
New order will be created and on accepting the payment of that order, it will be added to your warranty list.
Coming back to the order, after the update of the order status, the option to view and download warranty card will become available.
NOTE: The option to view and download warranty card is also available on customer’s order detail page.
Here is a view of the warranty card that a customer will get in case of an extended warranty.

Extend warranty on previous order
If the product is ordered previously, then on the product page, you will get an option to select any previous order and extend the warranty of the same.
The list of orders that has this product (the product which is open), will only appear here.

Manual Product Warranty
On the customer dashboard, a customer gets an option to register the product warranty manually. Also, the same option is available in the footer section of the website.
This functionality proves to be useful when a customer buys the product from an offline store. And, later chooses to claim the warranty manually.
At Footer:

Customer account section:

In order to let customers register the warranty manually, an admin needs to provide a warranty serial number to the customer.
Important Note: You must add the general warranty first on the product & then add the manual warranty serial number on the product/product combination.
Also, make sure the general warranty on the product is in an active state. Then only a customer will be able to add the manual warranty using a serial number.
To add a warranty serial number, firstly go to the combinations section. After that, click on the edit button available against each combination.
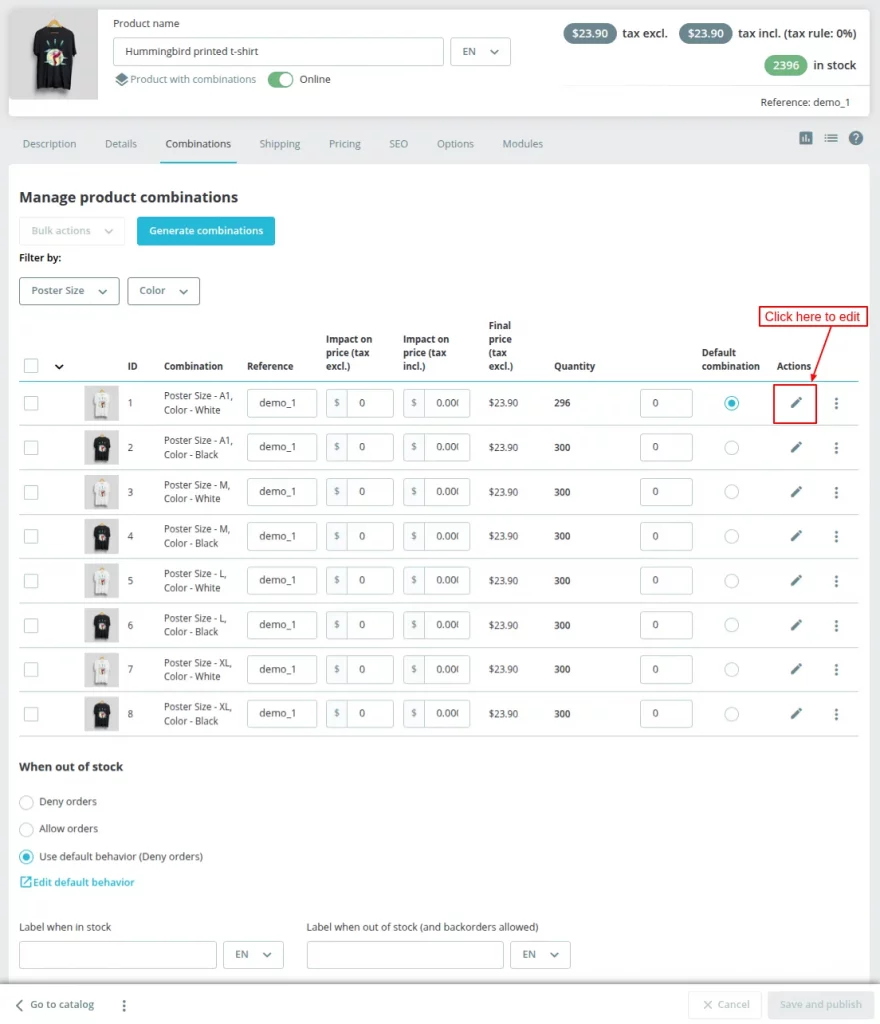
After clicking the button, the following page will open. Here, you will find an option of “Warranty Serial Number” at the end of the page.
Add the warranty serial number for the combination & then save. You can add multiple serial keys separated by comma.

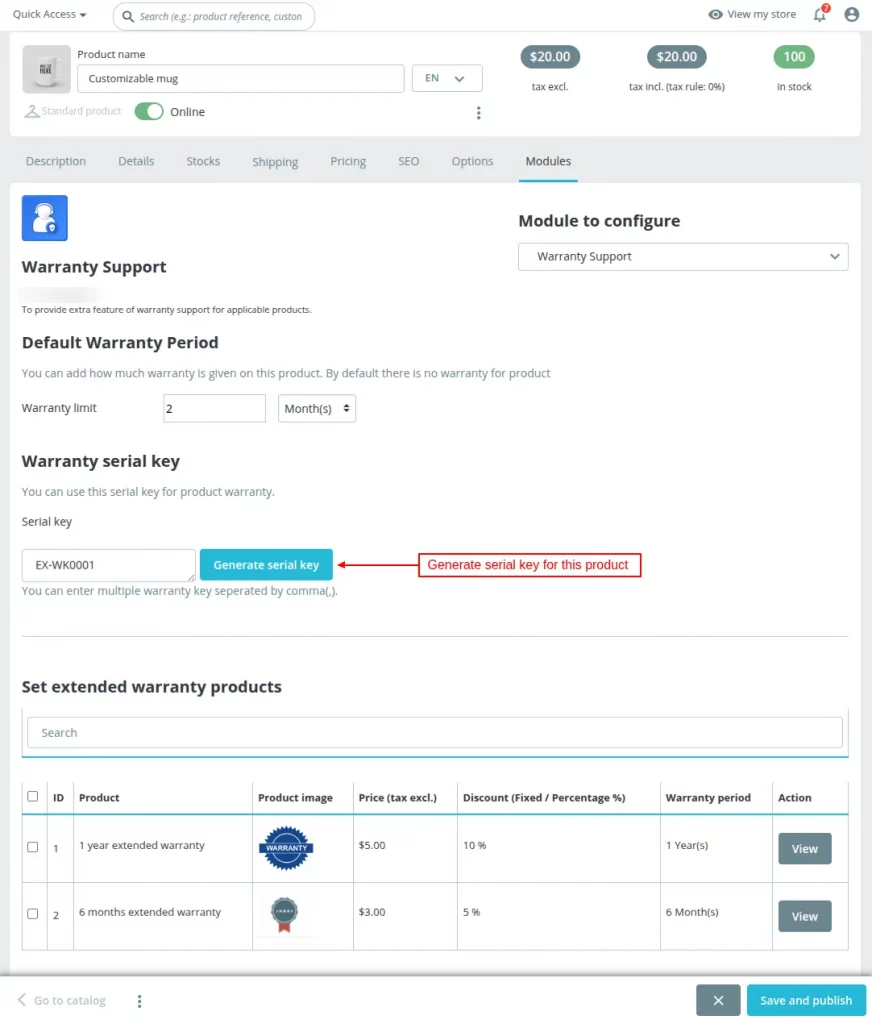
Similarly, for the product without a combination, you will get an option to add a warranty serial key in the module tab under Catalog.
On the product warranty registration form, a customer just needs to add the warranty serial number of the product combination he/she bought.
Also, they need to add some other details like product purchase date, order ID etc to register the product warranty manually.

Now, under the warranty product list, a new entry will appear. The type of the new warranty will also show as Manual.

Here is a view of the warranty card that a customer will get in case of the manual warranty. The payment type in the warranty card will also show as “Manual“.

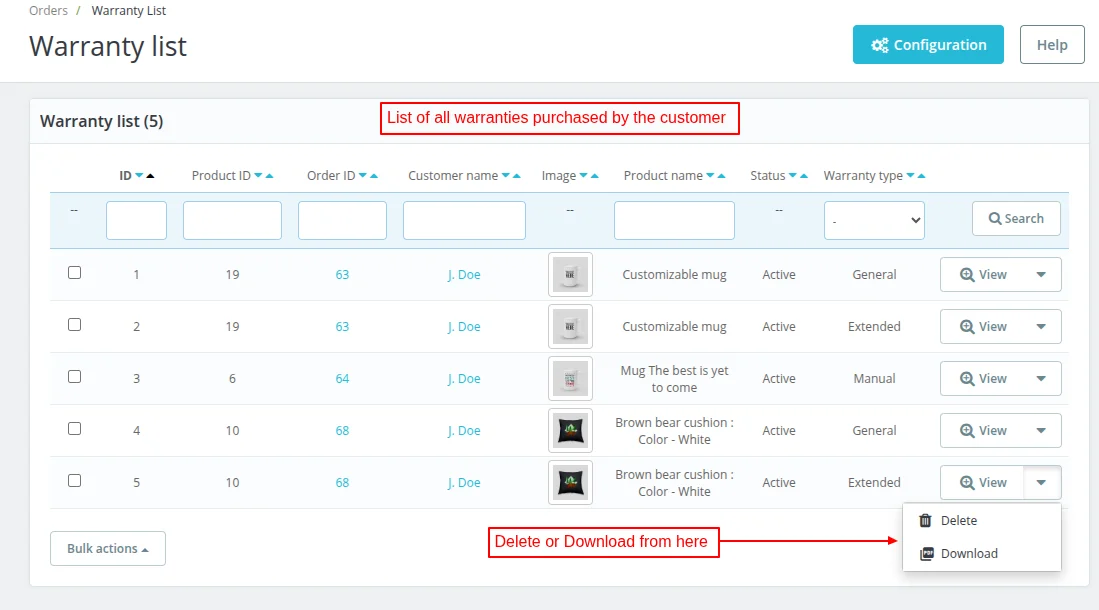
Warranty List
A new tab under the catalog section to view all the warranties bought by customers also becomes available.

So, this was all about the PrestaShop Warranty Management Module. I hope this document will help you in checking the functionality of the module in a better way.
Also, do let us know about your views in the comments.
Support
For any kind of technical assistance or query, please raise a ticket at http://webkul.uvdesk.com or send us a mail at [email protected]
Also, please explore our PrestaShop development services & vast range of featureful PrestaShop Addons.
Current Product Version - 5.2.1
Supported Framework Version - 9.x.x, 8.x.x, 1.7.x.x

Be the first to comment.