Prestashop Shop The Look: Cross-selling is an effective tool to increase eCommerce profits. It helps customers discover additional products they need and provides a positive shopping experience.
With Prestashop Shop The Look, you can create custom looks from the products you sell and showcase them on a single page.
Customers now don’t have to visit the individual product pages to view and add the complementary products to the cart.
Displaying the combinations in a single image lets customers visualize how the products look and make their purchase decision faster.
Letting customers purchase multiple products from a single page will increase your average order value, enhance user experience, and boost conversions.
Check the overview of the plugin in the video mentioned below –
Features of Prestashop Shop The Look
- Create collections and associate multiple looks with each collection to display them on the Lookbook page.
- Show the listing of collections on the homepage.
- Set the position of looks to be displayed on the collection page.
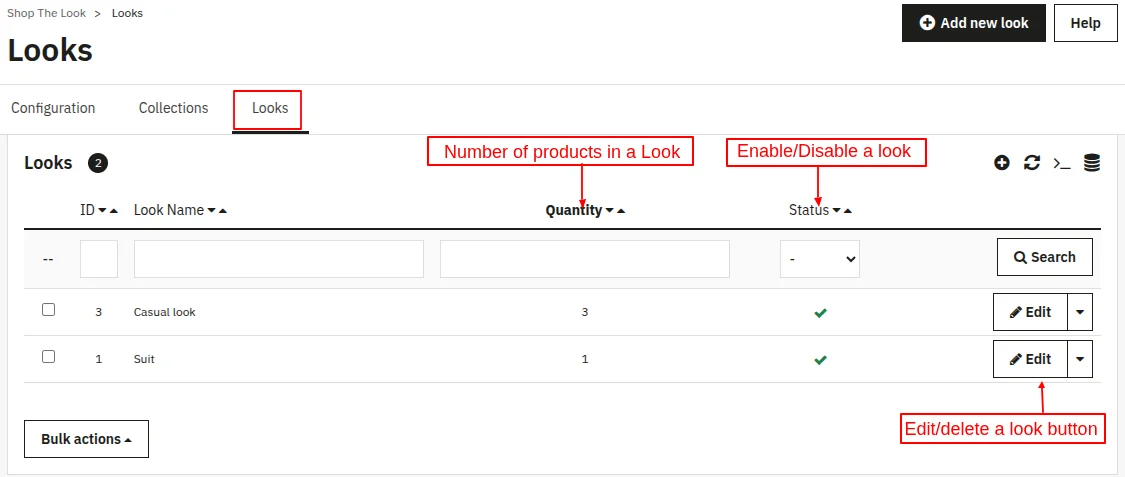
- Enable/disable, preview, or edit/delete the collection and look independently.
- Six type of views in the module for displaying collections on the Lookbook page.
- A separate tab Lookbook under which customers can view all the collections and looks added by admin.
- Create looks and associate them with multiple collections to link each look with different collections.
- Add customizable products to the looks
- Add multiple products in a look, set their positions, and manage looks independently from the dedicated Looks section.
- Create multiple hotspots on the look image and display selected products on the hotspots.
- Associate a look with one or more collections or use it independently without any collection.
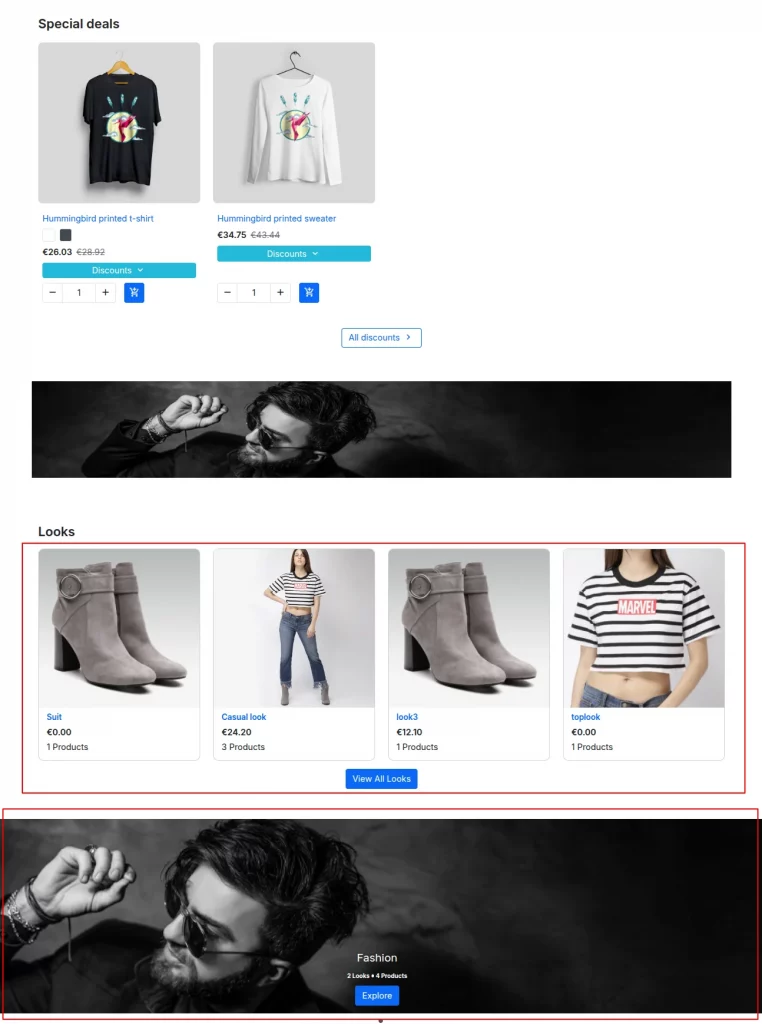
- Choose to display the looks section on the Home Page, Product Page, and Cart Page.
- Customers can view all looks that the admin adds to a collection.
- View products in a look by hovering over the look image.
- Customers can purchase either complete look or individual products from the look.
- The module is multi shop compatible.
Installation
- Go to back office ->modules.
- Upload the module zip file.
- The module will automatically get installed on your Prestashop.


Configuration: Shop The Look
After the installation of module, a new tab “Shop The Look” gets added under Catalog where admin can configure the module settings.

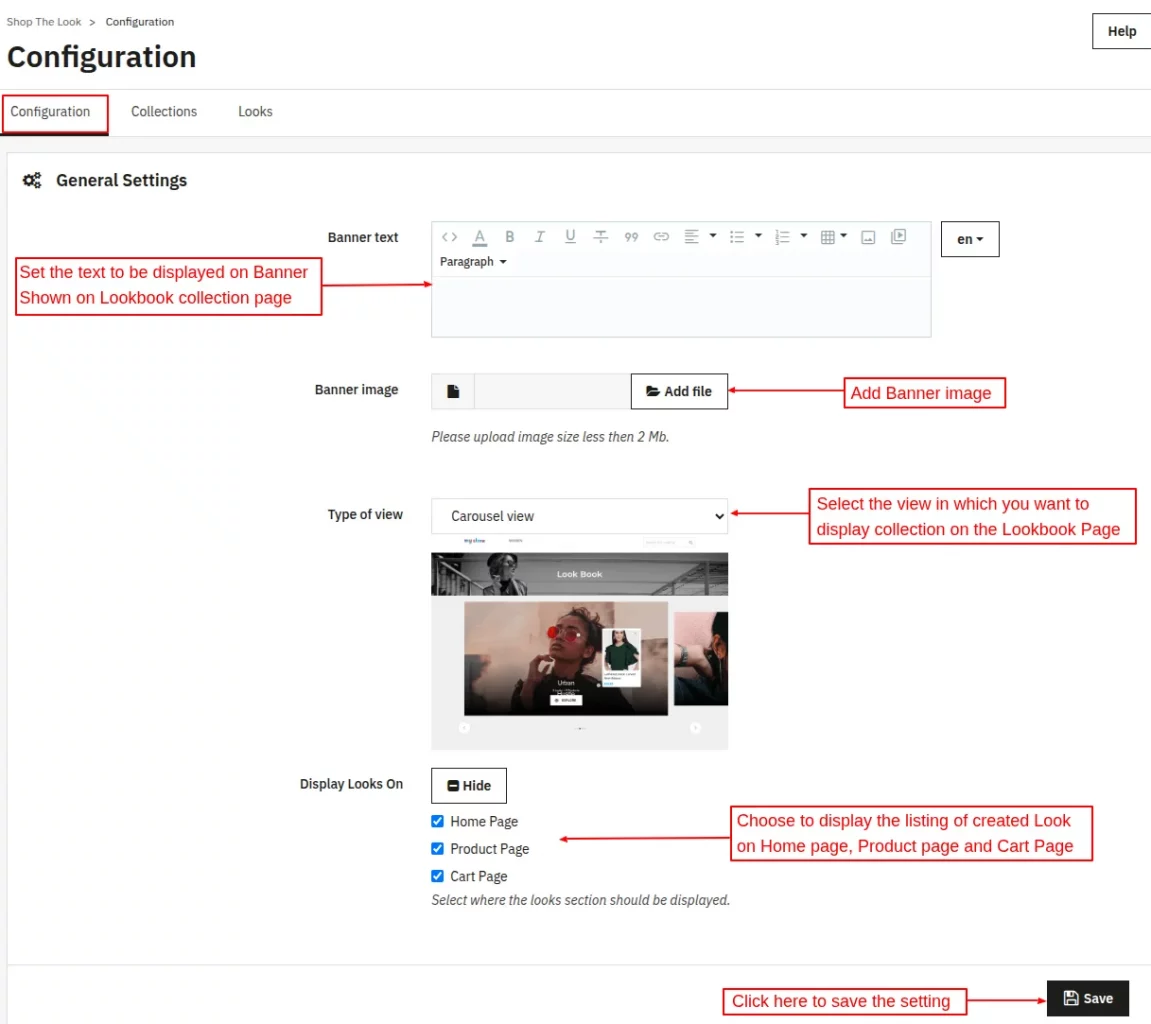
While configuring the module settings, admin needs to upload banner image and its text to be displayed on Lookbook collection page
Admin can select the view in which he wants to display the collections on Lookbook page and can also choose to display the looks section on the Home Page, Product Page, and Cart Page.
Type of View
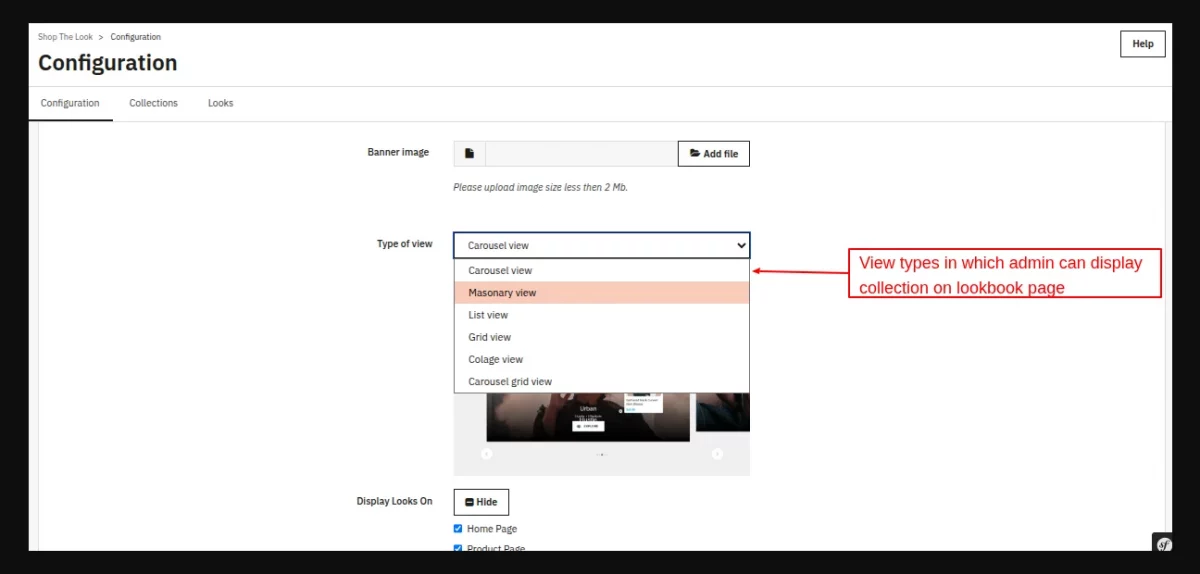
Admin can select the view in which he wants to display the collections on the Lookbook page. There are six view types available in the module:
- Carousel Grid View
- Masonry view
- List View
- Grid View
- Collage View
- Carousel View
Adding The Collections
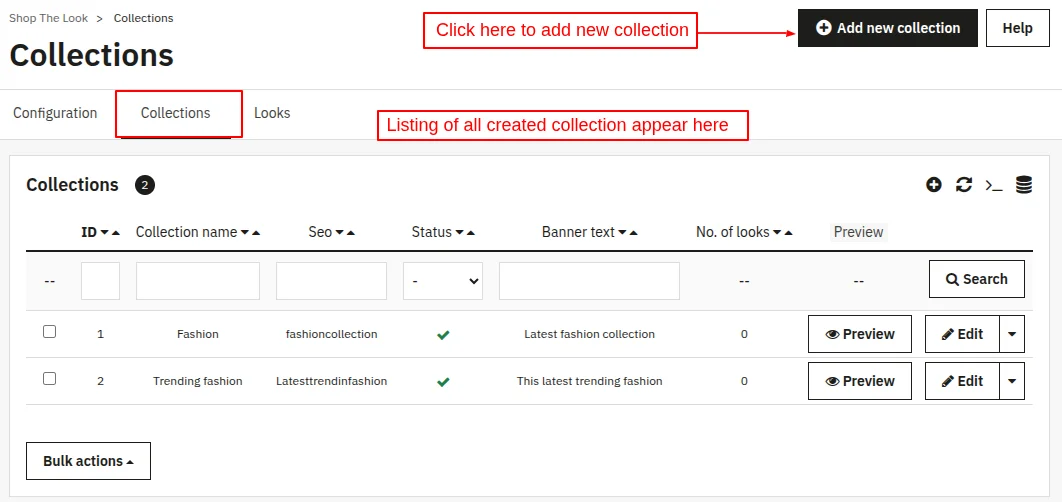
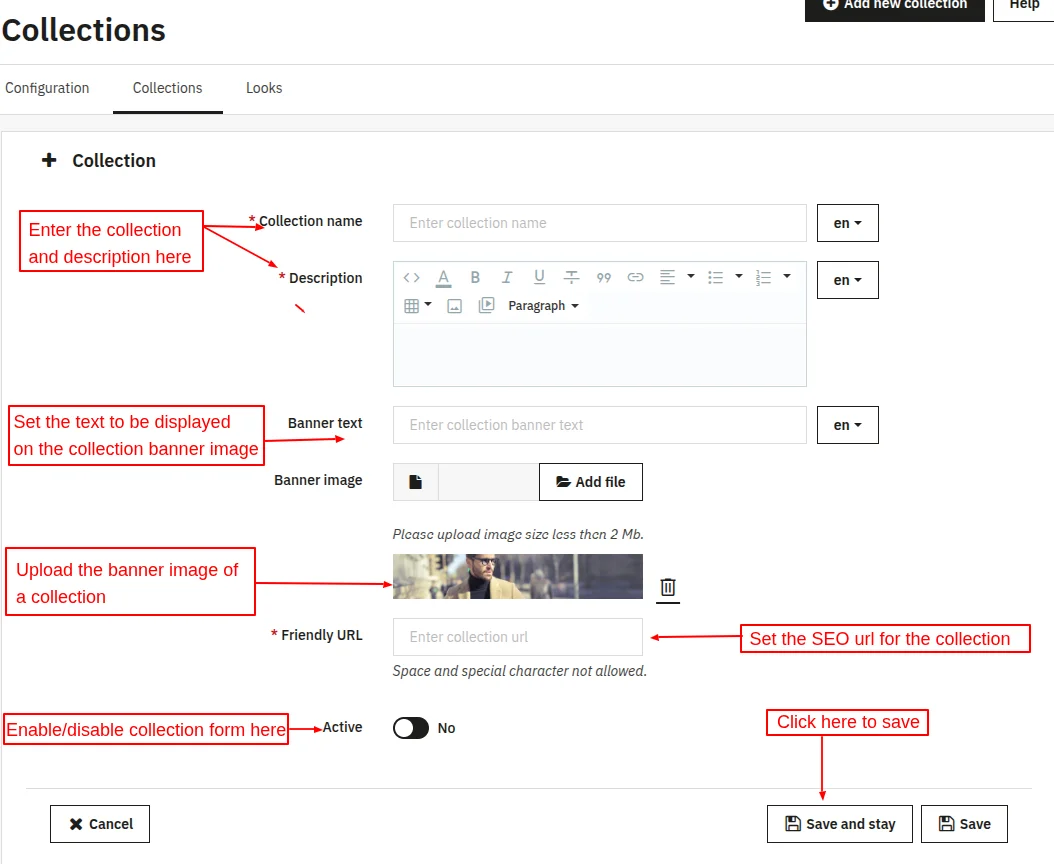
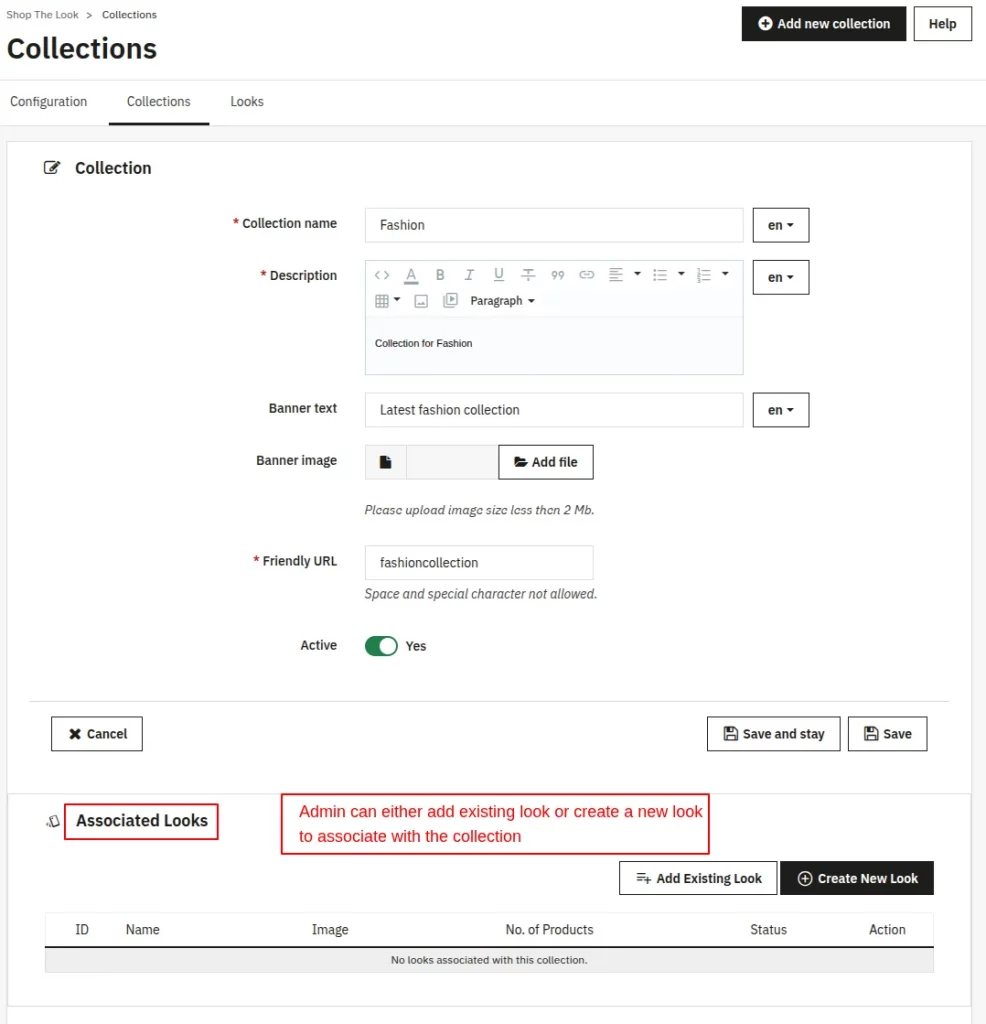
Let’s now see how admin created “Fashion” (a collection).
While creating a collection, admin has to set
- Set its name and description
- Upload banner image of collection
- Set banner text
Associating Looks with a Collection
Add Existing Look
A new page will appear where admin can enter the look name and select the look.When saved, the selected look will be associated with the particular collection.
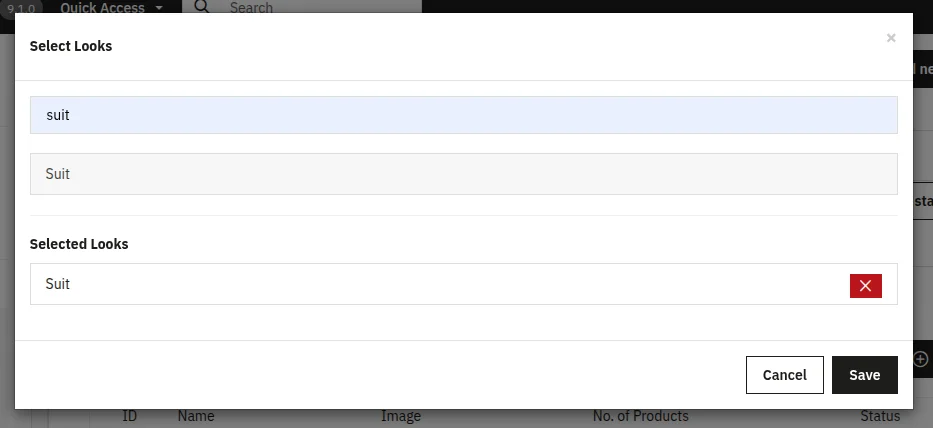
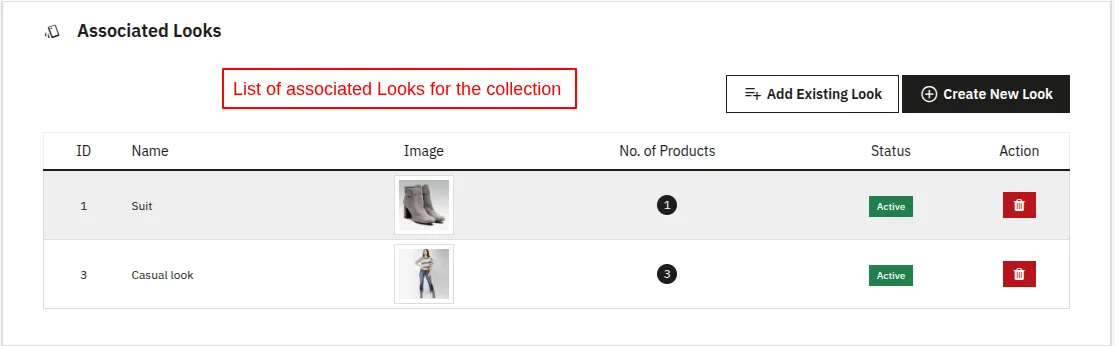
Admin can add multiple looks in a collection and view the list of associated look for a collection.
Admin can also choose to create a new look for a collection
Once the collection is created, admin can enable/disable it, preview collection, edit and delete it.

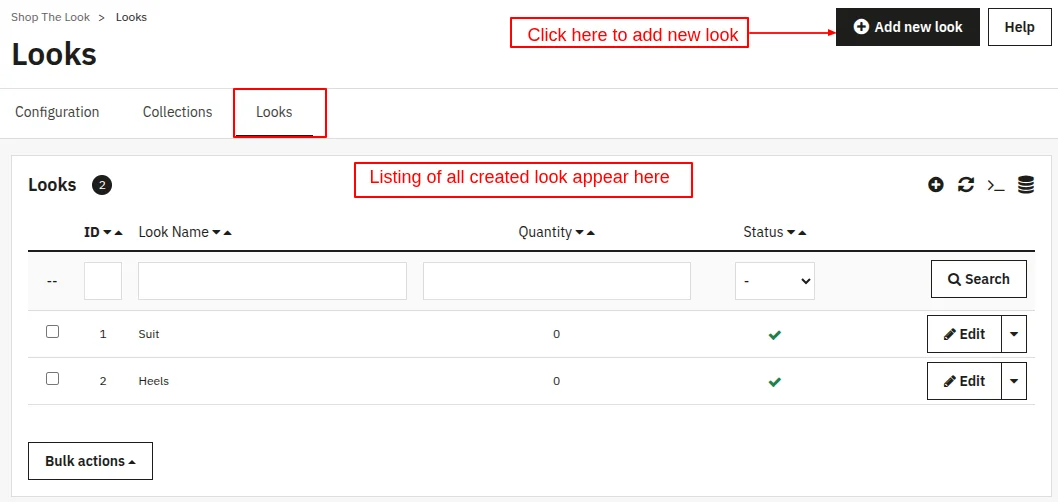
Adding The Look
For creating a look, admin has to upload the image, add related products, and then set the hotspot of the products in an image.
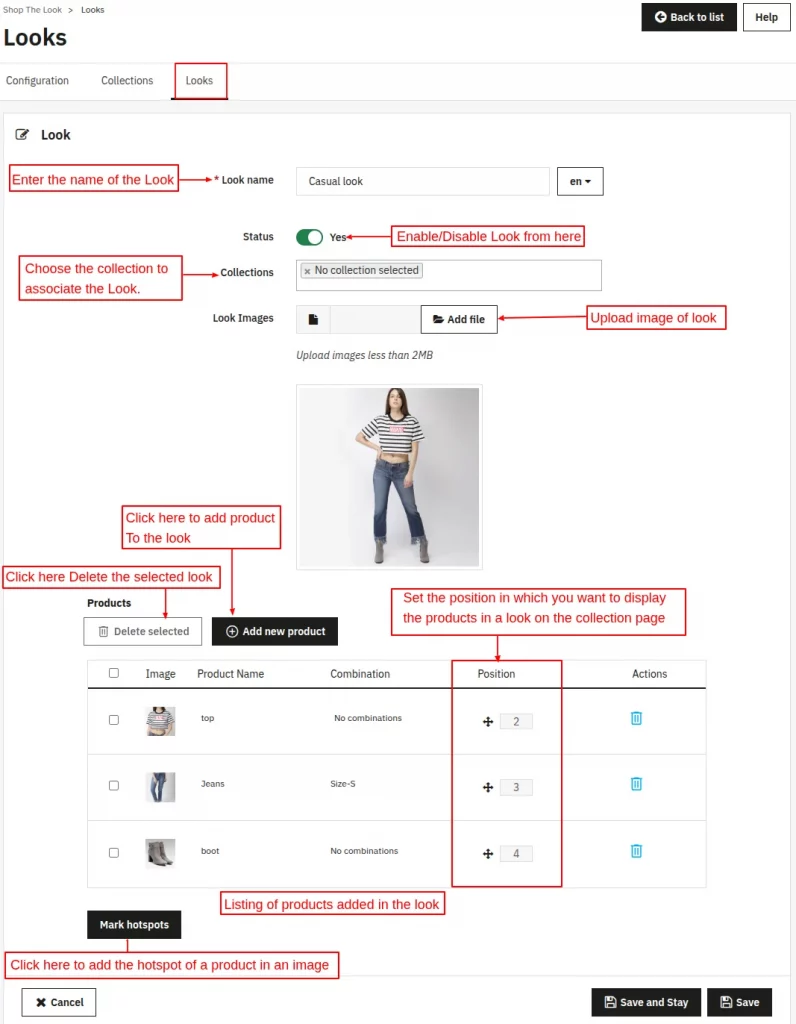
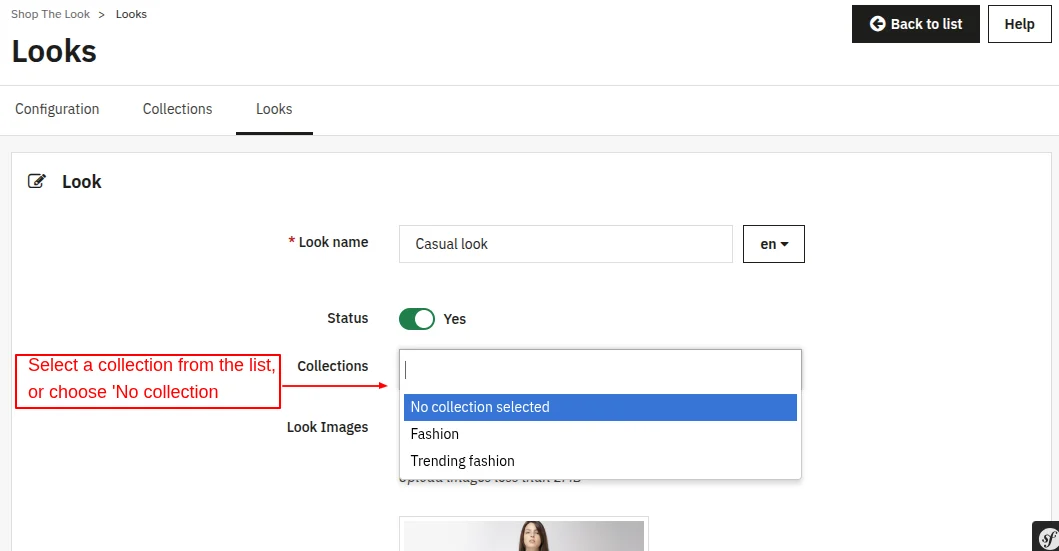
The admin can select a collection from the list, or choose ‘No collection
After setting the look name and image and collection, admin has to add the products in a look.
When admin clicks on “ADD NEW PRODUCT” button, a popup appears on screen from where he can search the products and add them in a look.

After selecting the products and their combination, click on “Save” button to add the products in a look.
After adding products in a look, admin can set hotspot of the products in an image as shown below:

For adding a hotspot, admin has to double click on the image and then select the product which he wants to display on that hotspot. Also, admin can remove the hotspot by clicking on it.
Once the collection is created, admin can enable/disable it edit and delete it.
Shop The Look – Front End View
After the installation of the module, a new tab “LOOKBOOK” gets added on the front end from where customers can view all the collections added by admin.
Also, customers can view both collections and looks added by admin from backend in a carousel view on the Lookbook page and Home page
Lookbook page


Home page
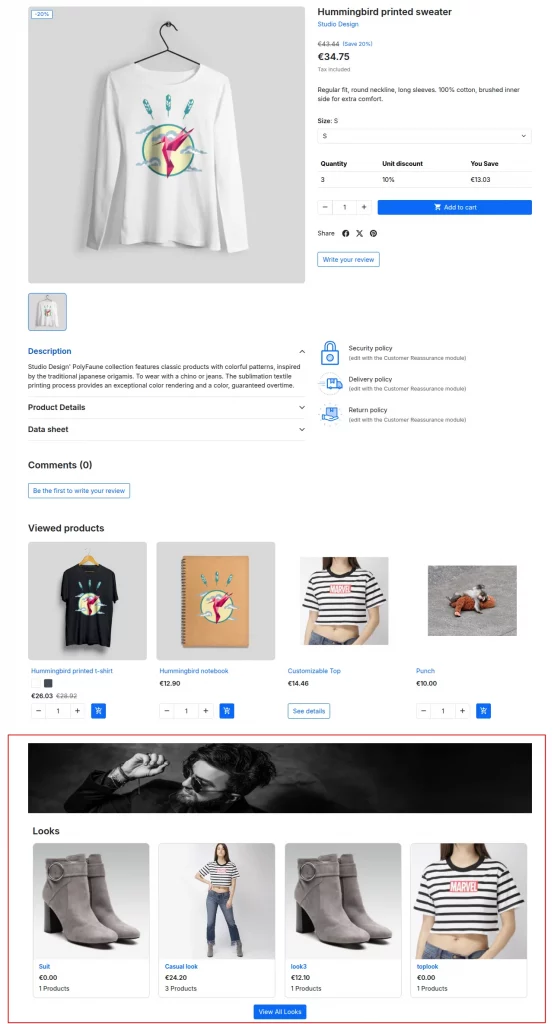
Product page
Customers can view the looks added by the admin from the back office on the product page.
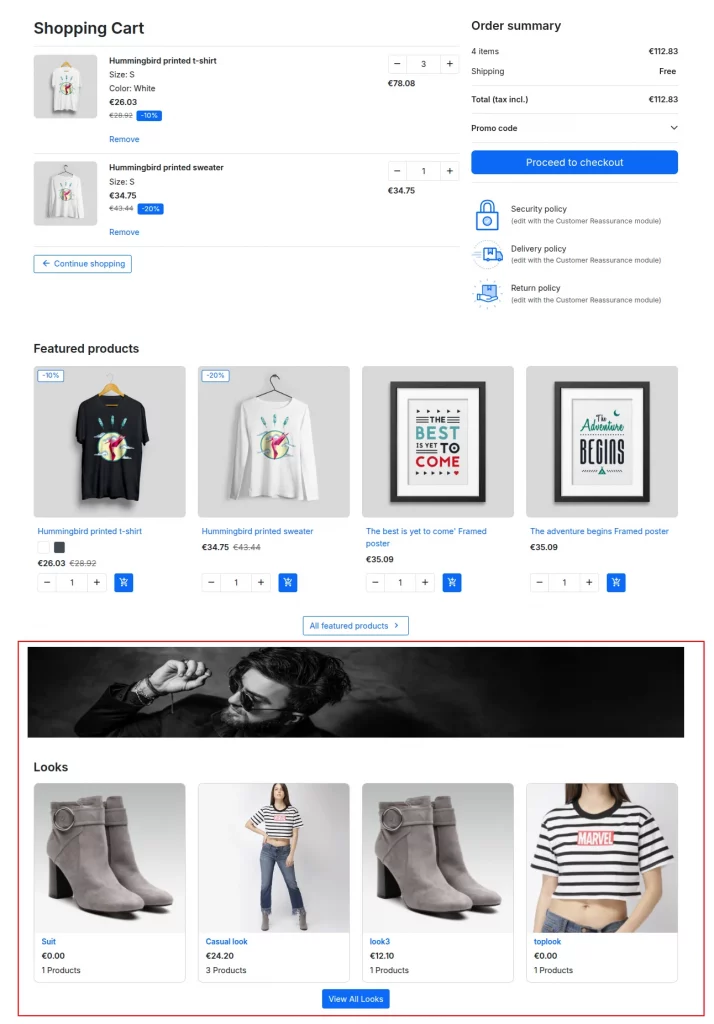
Cart Page
Customers can view the looks added by the admin from the back office on the cart page.
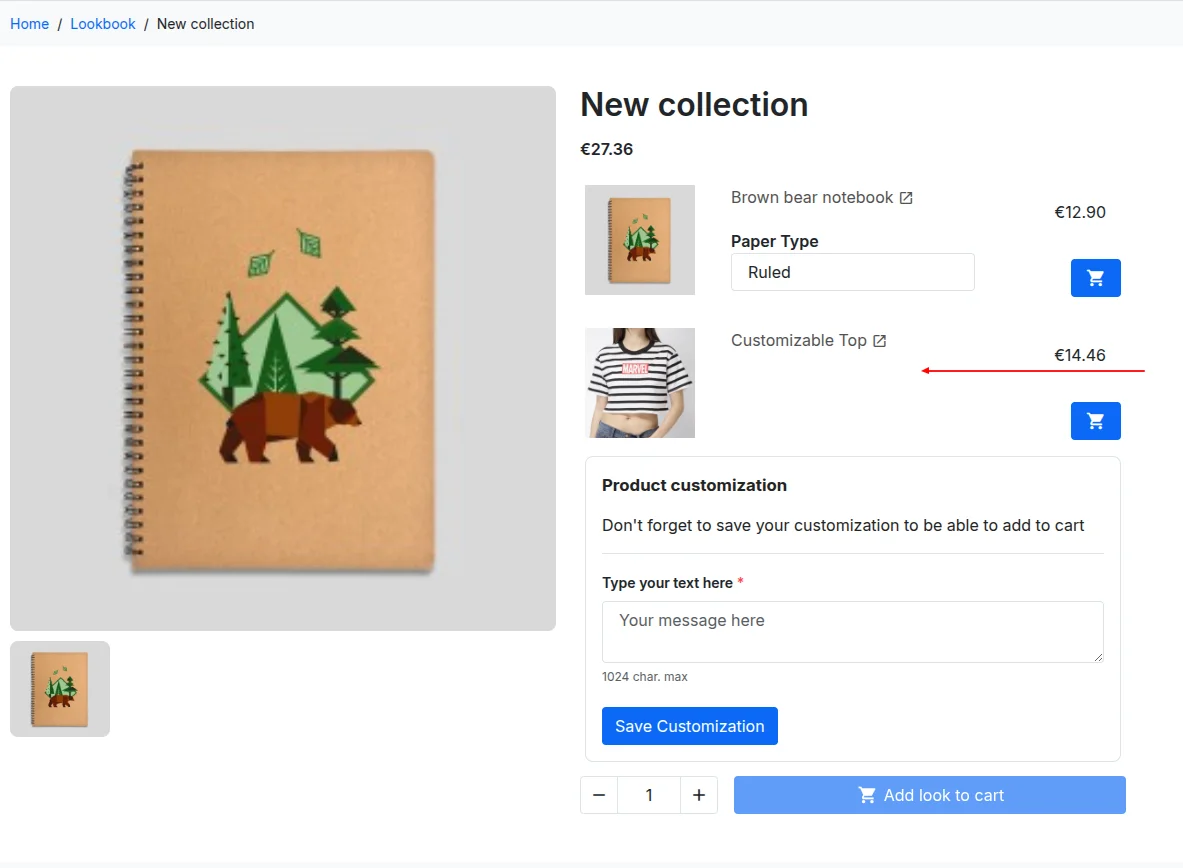
Looks in a collection
When a customer clicks on a collection, he can view all the looks added by admin in a collection.
Moreover, the collection page also displays related products.
The customer can even buy a single product from the look separately.

When a customer hovers on the image he can view the products set by admin on the hotspots as shown below:

Look with a customizable product
Type of View of Collections on Lookbook page
- List View

- Grid View

- Carousel View

- Masonry View

- Carousel Grid View

That’s all for the Prestashop Shop The Look Extension.
Support
For any kind of technical assistance or query, please raise a ticket at http://webkul.uvdesk.com or send us a mail at [email protected]
Also, please explore our Prestashop development services and vast range of quality Prestashop addons.
Current Product Version - 4.1.0
Supported Framework Version - 9.x.x, 8.x.x, 1.7.x.x

Be the first to comment.