Prestashop Custom Form Maker : Allows admin to add custom form on the website for the customers. Now admin can add custom fields to the form according to his requirement.
With the help of this module, customers can now send important details to the admin by filling up these custom forms.
Custom fields such as textbox, textarea, radio button, checkbox, dropdown menu or uploading of file can be made available in the custom form by the admin.
Admin can choose different positions to display the form on the website.
Features
- Add custom form on the website.
- Admin can change the text color, form and field background color.
- Admin has the option to change the radio/checkbox/file button color. File button background color can also be changed.
- Select submit button text, background and hover color.
- Admin can add image to custom form. Also set the position of the image.
- Option to choose between horizontal or vertical form type for custom fields.
- Admin decides if customer has to log in to submit the form or not.
- Admin can choose different positions to display the form on the website.
- Add custom fields to the form.
- Different types of custom fields i.e. textbox, textarea, radio button, checkbox, dropdown menu and file upload are available for admin to choose from.
- Admin gets the option to make custom fields mandatory.
- Admin can set the label names for custom fields in multi-language.
- Available in Arabic(ar), Spanish(es), German(de), French(fr), Italian(It), Russian(ru), Japanese(ja), Dutch(nl), languages.
Installation
- Go to back-office ->modules ->Module Manager.
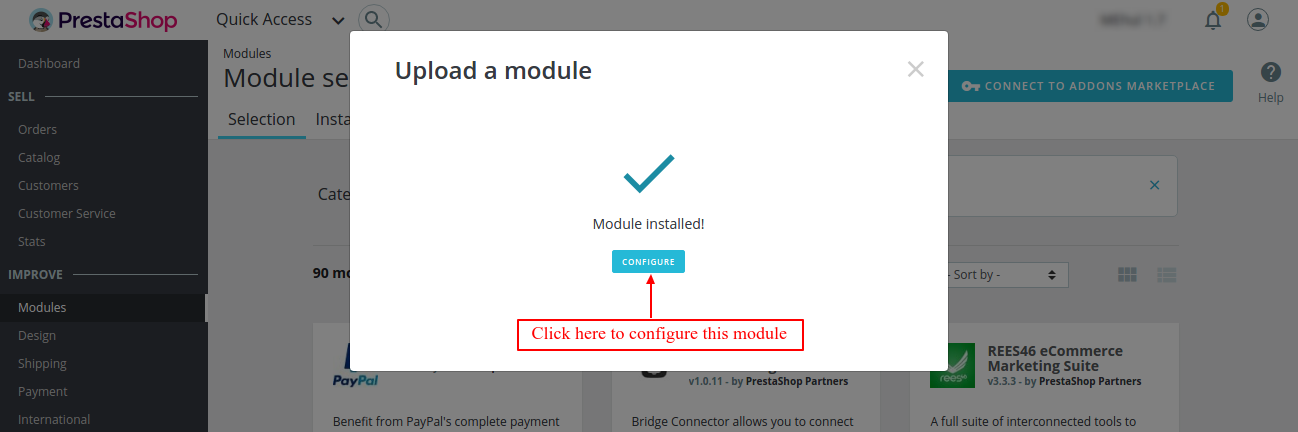
- Now, click on “Upload a module” button and select the module’s zip file.
- In this way, the module gets install on Prestashop.


Configuration
Once the module has been installed successfully, admin need to configure the module.
Configuration :
Here admin can change the text color, form and field background color.
Option to change the radio/checkbox/file button color and file button background color and also set the submit button text, background and hover color of the custom form.

Workflow
A new tab “custom form” gets available under design tab in back office.

Click on add custom form to create a new custom form.

Admin need to fill in all the details as per requirement of his form.
Admin can enter Form title and submit button text in multi-language as well. Click on save to implement the necessary changes and create a custom form.
Admin can choose between 8 different position to show the custom form on the front end.

Once the custom form is created, a list will be displayed showing all the custom forms that have been created.
Also a new button “add custom field” will be available. Now admin can create necessary custom fields required in his custom form.

Custom Field
Six types of custom fields are available :
- Text box
- Text area
- Radio Button
- Check box
- Drop down
- File
Admin need to now configure these custom fields as per requirement in the custom form.
Text Box
For adding a Text Box field in the custom form, select the form from the drop down menu and then select text box in the input type.
Fill all the details as per requirement and click on save to add this custom field on the custom form. Refer to the screenshot below :

This is how the admin can add text box custom field to a custom form.
Text Area
For adding a Text Area field in the custom form, you need to select the form from the drop down menu and then select text area in the input type.
Fill all the details as per requirement and click on save to add this custom field on the custom form. Refer to the screenshot below :

Text area custom field is added to a custom form.
Radio Button
To add a Radio Button field in the custom form, select the form from the drop down menu and then select radio button in the input type.
Fill all the details as per requirement and click on save to add this custom field on the custom form. Refer to the screenshot below :

Radio button custom field will be added to a custom form.
Check Box
To add a Check Box field in the custom form, select the form from the drop down menu and then select check box in the input type.
Fill all the details as per requirement and click on save to add this custom field on the custom form. Refer to the screenshot below :
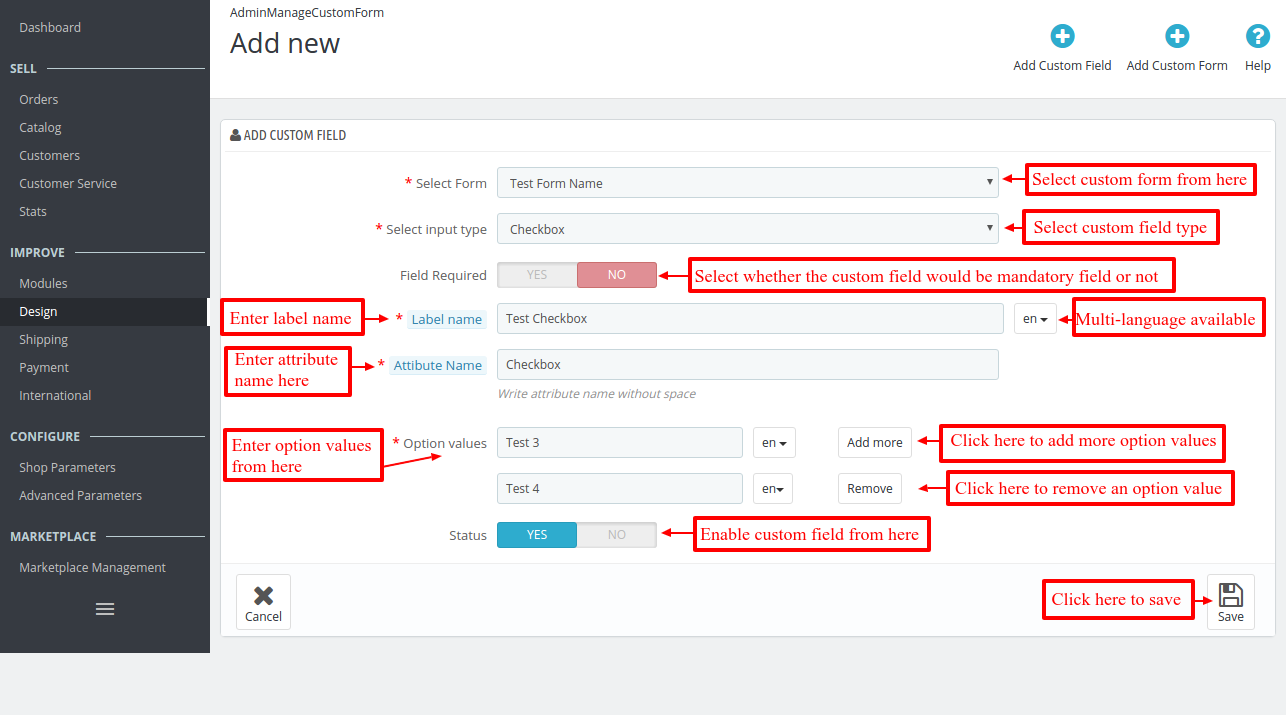
This is how admin can add check box custom field to a custom form.
Dropdown
To add a Drop Down field in the custom form, select the form from the drop down menu and then select drop down in the input type.
Fill all the details as per requirement and click on save to add this custom field on the custom form. Refer to the screenshot below :

This is how the admin can drop-down custom field to a custom form.
File
To add a File field in the custom form, select the form from the drop down menu and then select file in the input type.
Fill all the details as per requirement and click on save to add this custom field on the custom form. Refer to the screenshot below :

This is how a file custom field can be added to a custom form.
Once admin has added all the required custom fields for the custom form, a list of all the custom fields added to that particular form can be seen.
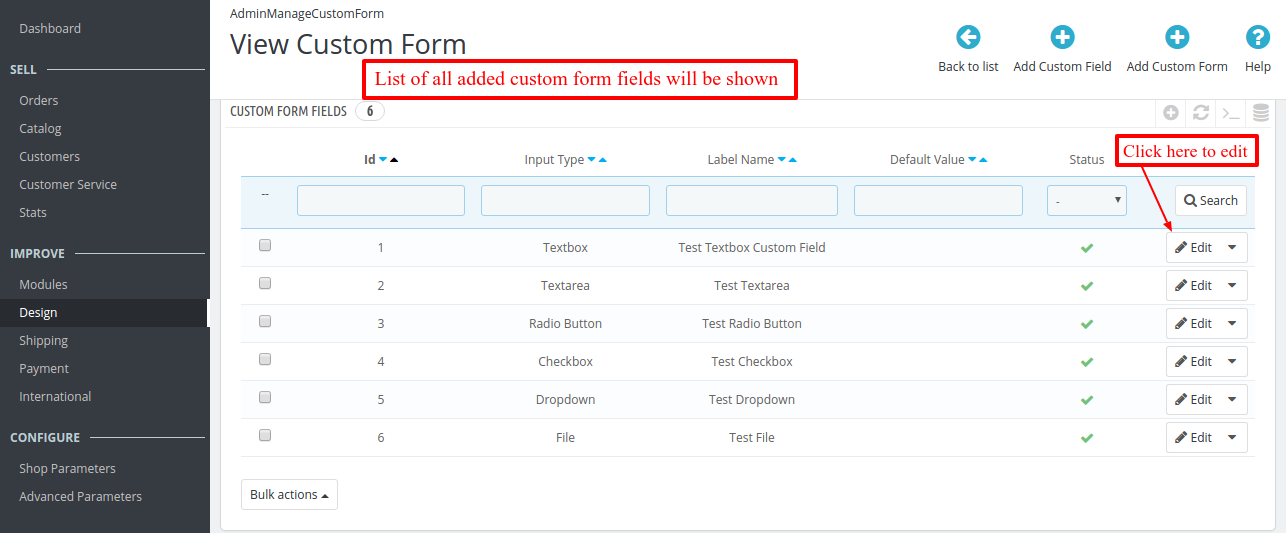
List of all the custom fields applied on the selected custom form can be seen. Admin can also edit or delete any custom field from here.
Front-end
Custom form will display to customer on the selected pages of the website as per the layout.

For vertical type :

Customers can fill the required details and send the form to the admin directly from here.
Admin-end
Once the customers send in the forms, admin can view all the forms for a particular custom form under the view tab.

Here a list of all the submitted forms will be shown.

Click on view button to open the form and see the details.

So this is how information from customers can be taken by adding custom forms on the website.
Support
For any kind of technical assistance or query, please raise a ticket at http://webkul.uvdesk.com or send us a mail at [email protected].
Also, please explore our Prestashop development services and vast range of quality Prestashop addons.
Current Product Version - 4.1.2
Supported Framework Version - 8.x.x, 1.7.x.x

Can we make a different form for each product?
The aim is to capture different data based on the product AFTER order completion
Thanks