Prestashop Crowdfunding Program: Is shortage of funds stopping you from achieving your dream goal? not anymore.
With this module, you can start multiple crowdfunding campaigns and raise funds you require for your needs/projects.
Prestashop crowdfunding program allows you to display your target, number of backers, and backers name along with the amount contributed by them to back your campaigns.
Note: Prestashop Crowdfunding Program module is compatible with PrestaShop multi-store feature.
Check the overview of the plugin in the video mentioned-below –
Features
- Start multiple crowdfunding campaigns and get your dream projects funded.
- Set the target price and validity of a campaign.
- Assign products to the campaign and collect money from the sale of the products.
- Option to display the number of backers and days for which the campaign is valid on the front end.
- Display the name of backers along with the amount contributed by them for the campaign on the front end.
- Show news and updates for a campaign or various running campaigns.
- The store admin can view all the comments added by the customers on the campaign page and also add comments on behalf of the customers.
- List of backers along with total amount paid will be visible to store admin at back office.
- View total funds raised, target to be achieved, and the number of times backers backed from all the campaigns.
- Allow guest customers to back the campaign.
- Option to select order status for sales calculation.
- Hide or Show Promo Code at Cart page.
- Option to send emails to managers.
Installation
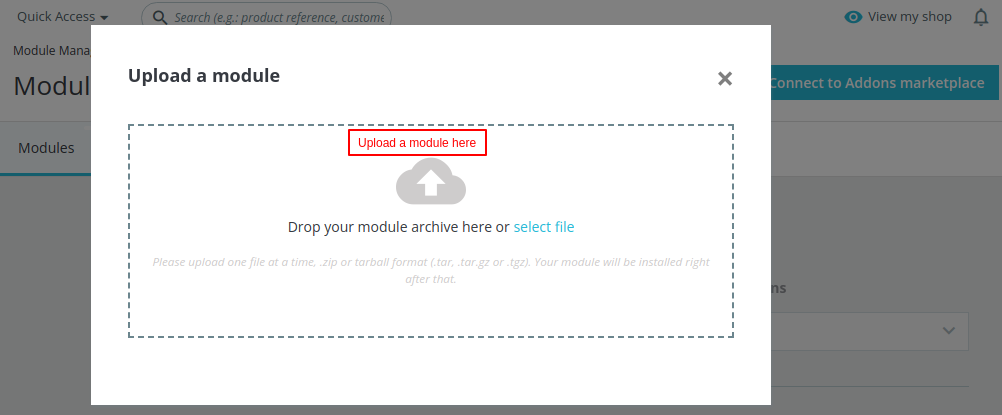
- Go to the back office-> modules -> modules & services -> Upload a module.
- Upload zip file of “Crowdfunding Program” module.
- The module will automatically get installed on your Prestashop.

Module Configuration
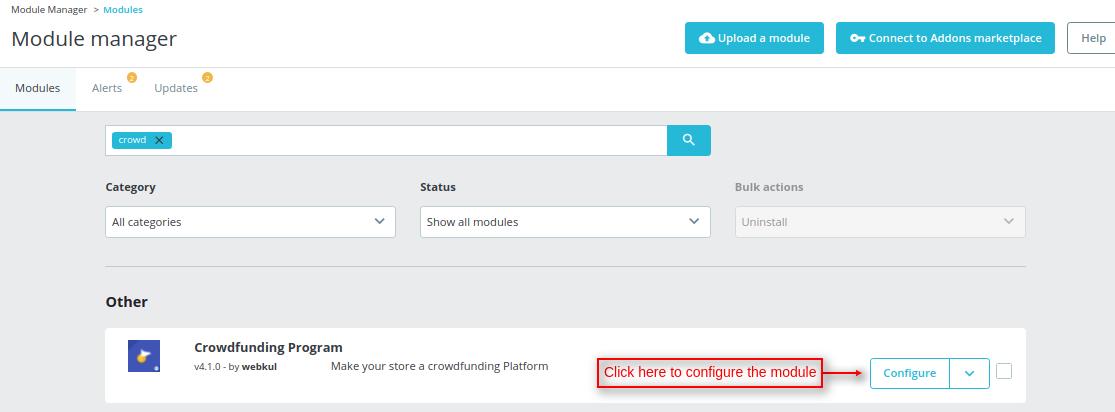
After the installation of the module, you will need to configure the module.
Here are the configuration settings.

Also, a new tab “Crowdfunding Campaign” gets available from where admin can further access the module functionalities.

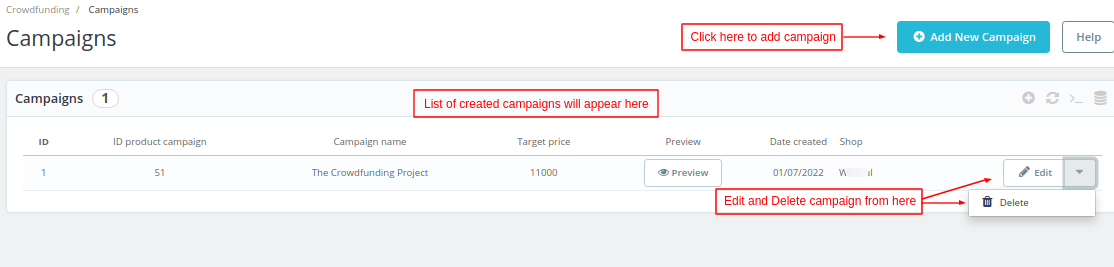
Admin can add a new campaign by clicking on “Add New Campaign” button under “Campaign” tab.
Information
Under ‘Information’ tab, admin can set the target price and validity of the campaign. Admin can also add a manager to supervise the campaign.

After clicking on ‘Save’ button, admin can view it under “Campaign”.
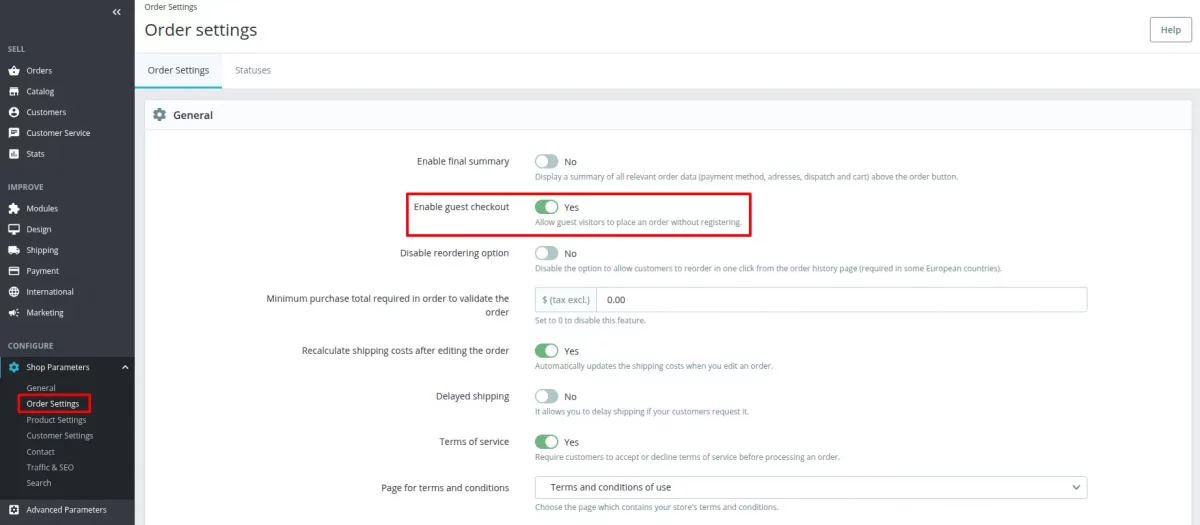
Allow guest customers to back campaign
Admin can allow guest customers to contribute to the campaign. Guest checkout should be enabled under the “Order Settings” tab of the Shop Parameters section for this functionality to work.
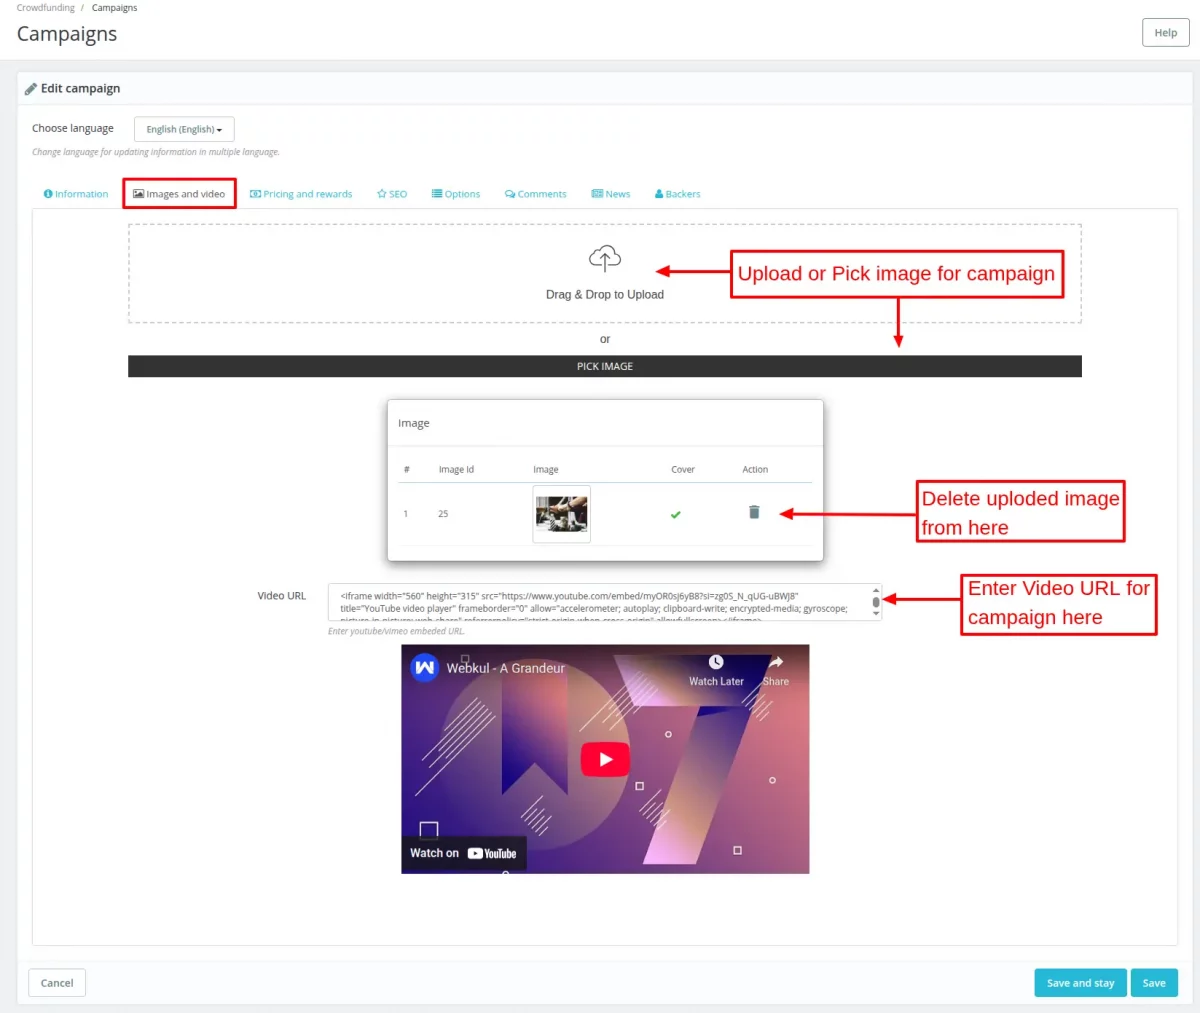
Images and Video
After saving the campaign information, admin can upload an image and video for the campaign to be displayed at the front end.
Pricing and Rewards
Under “Pricing and Rewards”, admin can choose whether the customers can contribute for the campaign by entering the desired amount or not.
Products can be assigned to the campaign so that if the customers purchase those products, then the amount earned from the sale of the products will be contributed to the campaign.

SEO
Admin can set the meta title and meta description for the campaign to improve its rankings and making it easily searchable for the customers.

Options
Admin can set the EAN-13/JAN, UPC and ISBN of campaign.

Comments
Admin can add comments on behalf of customers which will be displayed at the front end on the product page.

When admin clicks on “Add New Comment” button, a pop-up appears on the screen where admin has to select a customer and enter the comment.

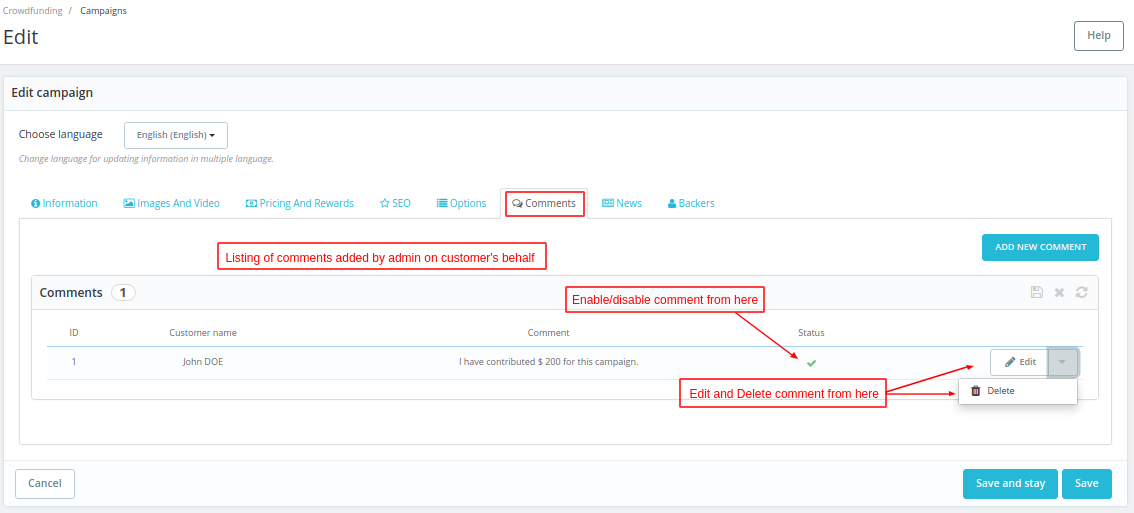
Once admin has saved the comment it will be visible on the campaign page under ‘Comments’ at front end.
Front End View

News
Under “News” tab, admin can add news and updates regarding this campaign or other campaigns running on the store.

Once admin has saved the news feed, then it will be visible to the customers at the front end.

Front End View
Once admin has created a campaign by setting target price, campaign validity, campaign image etc, then the customers can view it on front end as shown below:

When a customer clicks on “BACK THIS CAMPAIGN” button, a pop-up appears on the screen where a customer has to confirm the amount he/she is contributing for the campaign.

When a backer completes the payment, then admin can view its details under “Backers” tab.

The number of backers, their names and the amount contributed by them to back the campaign will also be visible on the campaign page at the front end.

Manager Details
Admin can add a manager for the campaign by navigating through Crowdfunding Campaign-> Manager Details. Add New Manager:

After saving, the admin can upload the Manager’s profile image.

Managers Listing:
Once admin has assigned a manager to the campaign then the manager’s name, image, and fund raised by the manager will be visible at the front end.
Statistics
Under “statistics”, admin can view total funds received, the target of a campaign, and the number of times the customers have contributed for the campaign graphically.

Support
For any kind of technical assistance or query, please raise a ticket or send us a mail at [email protected]
Also, please explore our Prestashop development services and vast range of quality Prestashop addons.
Current Product Version - 4.1.3
Supported Framework Version - 9.x.x, 8.x.x, 1.7.x.x

Be the first to comment.