Prestashop Add Sub-User Account for Buying allows customers to add multiple sub-users under them.
So that a customer can allow multiple sub-users to create multiple orders and the main user can accordingly place those orders.
Also, sub-users can assign cart to the parent user, modify, or delete the cart.
Note: Prestashop Add Sub-User Account for Buying is compatible with PrestaShop multi-store feature.
Features of Prestashop Add Sub-User Account for Buying
- Let customers register as parent user or sub-user in your store.
- Allow parent user to assign cart to the sub-users.
- Allow parent user to add, edit or delete the sub-user.
- Send email to parent user when a sub-user assign him cart.
- Parent user can delete the cart assigned to sub-user.
- Choose to make account approval & verification mandatory for a sub-user account.
- Choose whether you want to delete the customer account of the sub-user on deleting the sub-user or not.
- Enable sub-users to assign cart to the parent user.
- Allow sub-users to modify or delete the assigned cart.
- Parent/Sub-user user can view the cart details from account.
- Parent user can delete the cart.
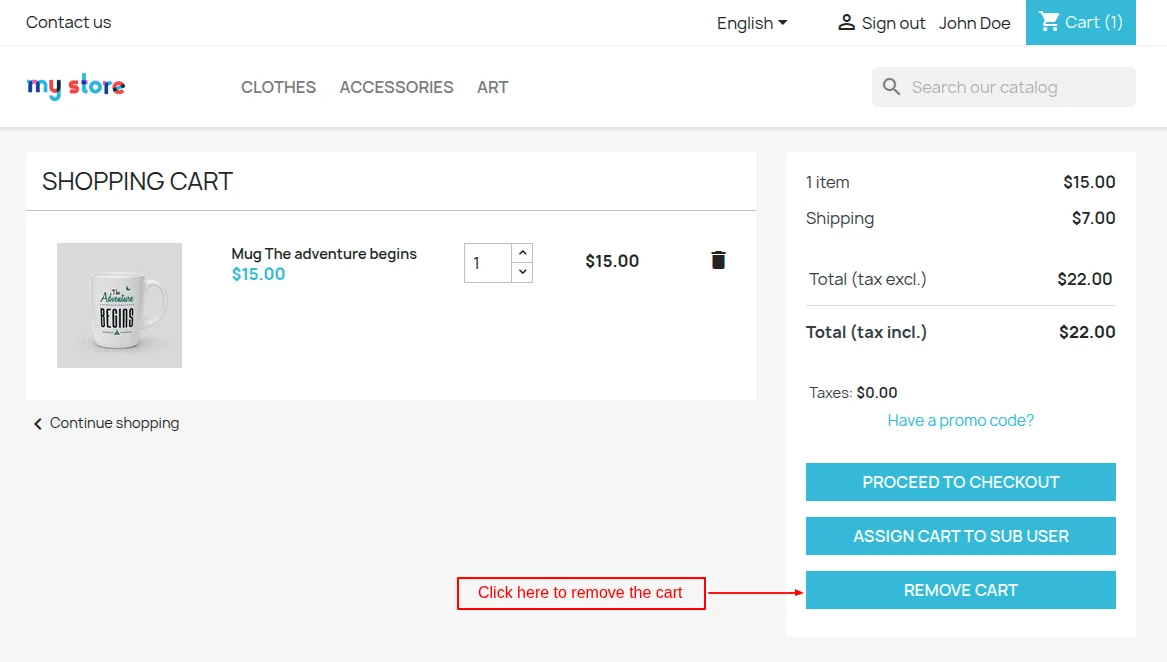
- A parent user can remove the cart assigned by the user on cart page.
- Allow or restrict the sub-user to create an order.
- Send notification to the sub-user when cart is assigned to him by parent user.
How to Install Prestashop Add Sub-User Account for Buying
- Firstly, go to the module manager in back office and click on ‘upload a module’.
- After that, drag and drop the module file or select the file from the system.
- In this way, the module installation will be successful.


Prestashop Add Sub-User Account for Buying Configuration
After the successful installation of the modulea, the admin needs to configure the module.
In the configuration, there are multiple option, which allows admin to manage the user & sub-users account.

General Settings

Under General Settings, the admin can enable users to register as a parent or sub-user.
Front End View
As enabled by the admin in general settings, a user will get an option to register as parent or sub-user on the registration page.


Main/Parent User Configuration

Under Main/Parent User Configuration, the admin can:
- Allow parent users to assign cart to the sub-users.
- Enable parent users to add, edit, or delete sub-users.
- Choose to send notification to main user when a cart is assigned by the sub-user.
- Allow parent user to delete assigned cart.
Sub/Child user configuration

Under Sub/Child user configuration, the admin can:
- Choose to manually approve sub-user accounts or make it auto-approved.
- Make email confirmation mandatory for sub-user account.
- Choose to delete sub-user’s customer account if sub-user account is deleted by parent user.
- Allow sub-users to create order, assign cart to the main user, and modify/delete assigned cart.
- Send email notification to sub-user when cart is assigned by the main user.
Create Parent User
After the installation of the module, two new options add on the customer registration page at the back end.
- Manage Sub User: If enabled, then the customer will register as a parent user. And, the admin can also add some sub-users under this parent user afterwards.
- Is Sub-User: If enabled, then a new user will register as a sub-user on the shop.

While creating a sub-user, the admin can select under which parent he wants to keep this sub-user.

The admin can create or update both customer as a parent and sub-users from the customer page.
Create sub-user from Store Front
Parent users can create sub-users from their accounts. Also, users can register as sub-users from the registration page.
After signing in to the account, a parent user can see two new tabs Sub-Users and Assigned Cart in his account.

On clicking the Sub-Users tab, following page will open. In case, if the parent user has no Sub-Users then the list will be empty.

The admin can create a sub-user by clicking on ‘Add New Sub User’ button. On clicking the button, a form opens on the page where a parent user needs to fill in the details to create a sub-user.

After saving the details, sub-user gets added on the shop. The parent user can edit the details or delete the sub-user.

After the parent user creates a sub-user, the sub-user adds to the list of inactive sub-users at the admin’s end.
The new sub-user is added to the inactive sub-user list only when their account approval & email verification is made mandatory. Else, these sub-user accounts will be approved automatically.

The following screenshot shows the template of the email that sub-user receives to verify his/her account.
A sub-user can verify his/her account by clicking on ‘Verify Account’ button.

After the approval of account, the name of the sub-user gets removed from the list.

Parent User’s Account
As allowed by the admin under Main/Parent user configuration tab, the parent user can assign cart to the sub-user.

On clicking ‘Assign Cart to Sub User’ button, a popup appears on the page where the parent user can select the sub-user to whom he wants to assign the cart.

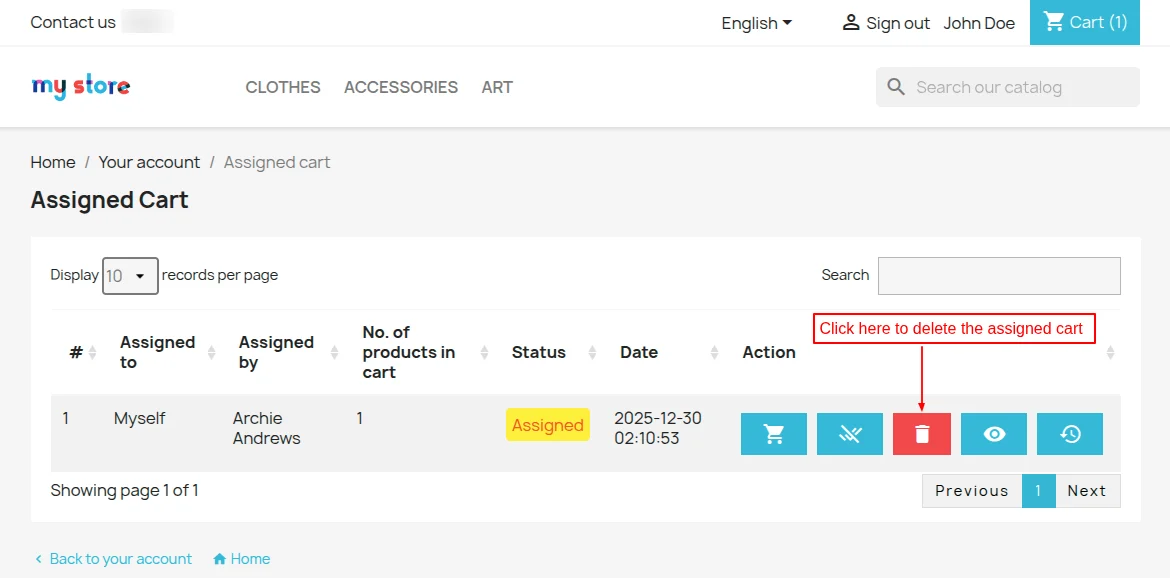
On clicking the save button, the parent user gets redirected to Assigned Cart. Under ‘Assigned Cart’, the parent user can:
- Proceed to checkout and place the order.
- View cart details.
- Delete the cart.
- View cart history.

View cart details
On clicking the ‘eye’ button, a popup appears on the page where the parent user can view cart details.

View cart history
On clicking the clock button, a popup appears on the page where the parent user can view name and email id of a sub-user to whom the cart is assigned.

After clicking on the “Proceed to Checkout” button, the process will be same as placing the order on PrestaShop.
After successfully placing the order, the status gets updated under ‘Assigned Cart’.

Cart history
As the order has been placed by parent user, his name and email id will also show in cart history.

Parent users can also view a list of orders placed by the sub-users under order details page.

Sub-user’s Account
A new tab ‘Assigned Cart’ gets available for sub-users in customer’s tab.
Here, the sub-users can view the carts assigned to them by parent user and carts they have assigned to the parent user.

If enabled by admin from the back office, sub-users can:
- Assign cart to the parent user.
- Modify the assigned cart.
- Delete assigned cart.

On clicking the ‘Assign Cart to Parent User’ button, sub-user gets redirected to Assigned Cart page.

Once assigned, the parent user can view the cart assigned by the sub-user and also delete the cart.
Sub-user can also view order history on order details page.

The sub-user can proceed to checkout and place the order if the parent user allows him from his account.

Once allowed by the parent user, the sub-user can proceed to checkout and place an order.

So, this was all about Prestashop Add Sub-User Account for Buying Module. I hope this document will help you in checking the functionality of the module in a better way.
Also, do let us know about your views in the comments.
Support
For any kind of technical assistance or query, please raise a ticket or send us a mail at [email protected]
Also, please explore our Prestashop development services and a vast range of quality Prestashop addons.
Current Product Version - 4.1.1
Supported Framework Version - 9.x.x, 8.x.x, 1.7.x.x

Be the first to comment.