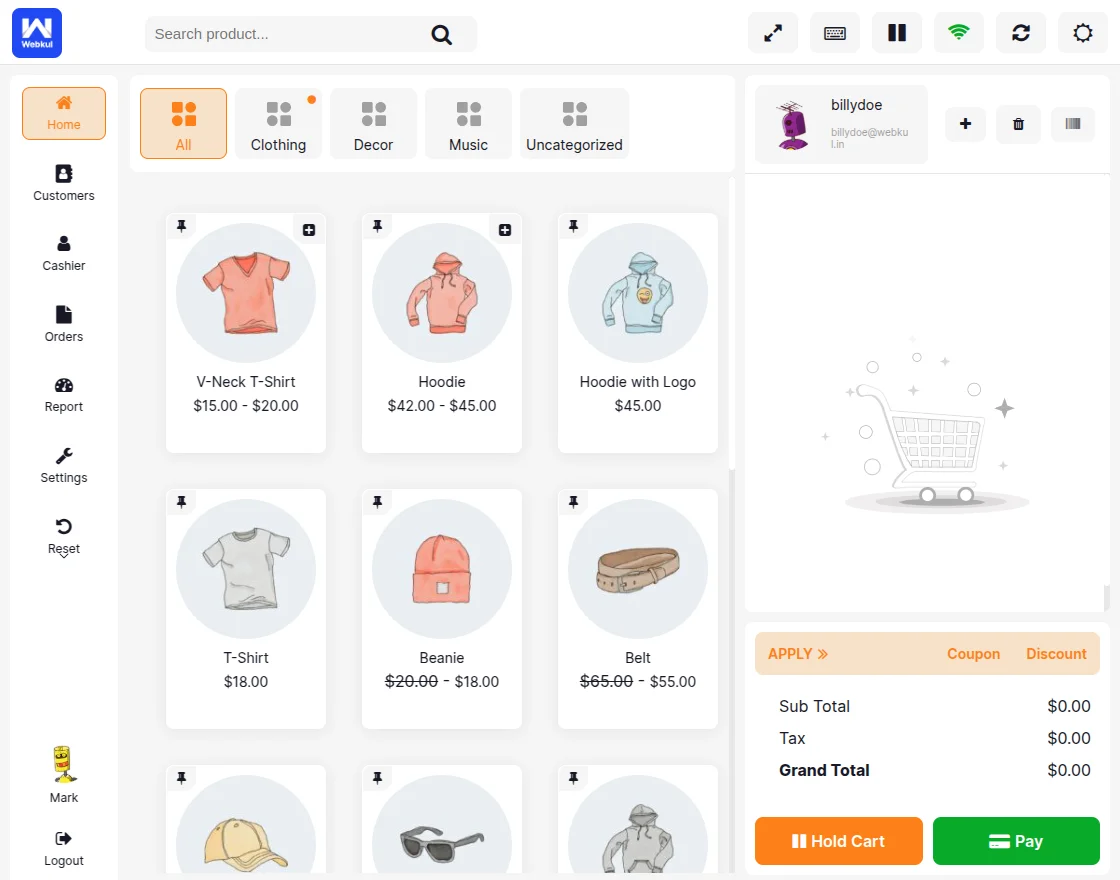
POS Barcode Inventory Management for WooCommerce is quite beneficial for the admin as it reduces the workload of the admin.
The admin can directly scan the product and manage the inventory likewise.
This way the admin will not have to manage the inventory manually which saves time.
The merchants or store owners can now manage the stock products in a more convenient way.
Note: POS Barcode Inventory Management for WooCommerce is an add-on to the Point of Sale System for WooCommerce Plugin.
The user must first install the WooCommerce POS system to make use of POS Barcode Inventory Management for WooCommerce.
We provide a production version of the plugin. If you want a development version then you can get it at an additional cost. Please contact [email protected] for it.
Note – 1: This plugin is now compatible with WooCommerce’s latest High-Performance Order Storage (HPOS) feature.
Note-2: Checkout how to Activate the WooCommerce Plugin through the purchase code and get updates on Webkul Modules directly on the Plugins page
Check the feature workflow in the video below –
Features
- Manage the inventory of the products directly.
- Scan the product through a barcode scanner.
- Assign master stock for products.
- Assign product stock to the outlet.
- Can work with the POS centralized Inventory as well.
- POS addon was compatible with a dark theme according to your system settings.
- Admin can enable/disable product stock Management feature at POS end.
- Functionality to add product stock Management at the POS end.
- Now the admin can manage a particular user’s inventory.
- Admin can allow POS inventory management for particular POS user .
Installation
The user will get a zip file that needs to be uploaded in the “Add New” menu option in the WordPress admin panel.
For this login to WordPress Admin Panel and in the Dashboard hover your mouse over the “Plugins” menu option and select the “Add New” option.

After this, the user will see an option on the top of the page that is “Upload Plugin”, click the option to upload the zip file.

On clicking the “Upload Plugin” option, the user will see a “Choose File” button. Click on the button to browse for the zip file as per the image below.

After browsing the file, click on the “Install Now” button so as to install the plugin as per the snapshot.

Once the plugin is installed, the user can see a “Plugin installed successfully” message and an option to activate the plugin.
The user needs to click on the “Activate Plugin” button to activate the plugin.
Enable WooCommerce Stock Management
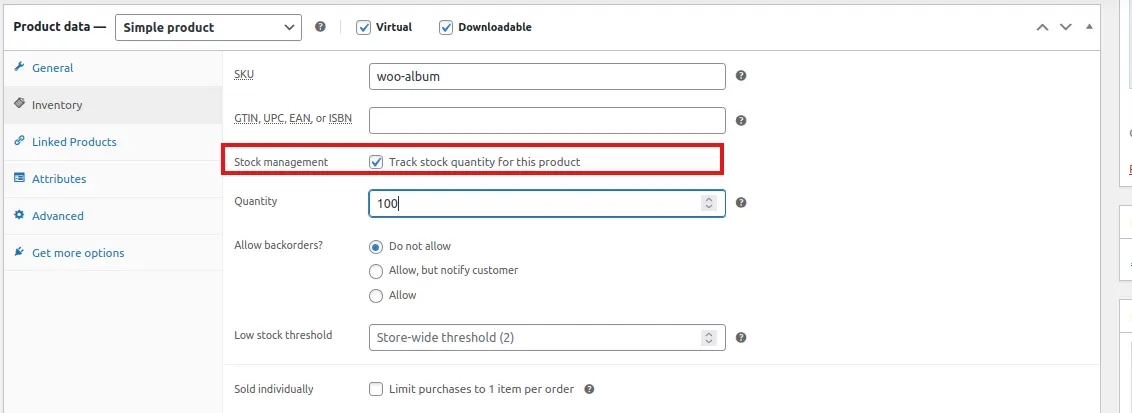
Important: Before using the POS Barcode Inventory Management plugin, you must first enable stock management in WooCommerce. This is a foundational requirement for the plugin to function correctly.
Follow the steps below:
Navigate to WordPress Admin Dashboard → WooCommerce → Settings → Products → Inventory
Check the box for “Enable stock management”
Scroll down and click “Save changes”
Note: This enables WooCommerce’s native stock tracking. The POS Barcode Inventory plugin will then sync with and extend this stock management system for your POS outlets
Plugin Workflow
The admin can view the outlets in the admin panel. Thus, for this, the admin follows the navigation as Point of Sale>Outlet.

In POS we have two inventory types,
- “Master Stock Inventory” and
- “Centralized Stock Inventory”.
Thus, the admin can configure the same under “Point of Sale > Settings > Select Inventory Type”.

However, the product can be added using a barcode scanner under “Point of Sale > outlet > add new> general”.
Click on save outlet to add the outlet for the POS user.

After adding an outlet for POS users the outlet, the admin can see the outlet list on the Point of sale > outlet list.
To assign the stock click on the edit option under the outlet name.

By clicking on Assign Stock, the product can be assigned using a barcode scanner or in SKU.

Master Stock Inventory :
By clicking “Assign Stock to Product” a popup will open to search for a product.
Thus, the Admin can search for a product using product SKU or using the barcode scanner.
However, in POS if the admin has configured “Master Stock Inventory” in the POS configuration then the popup will be displayed as below.


A user can assign a master stock quantity in the “Product Master Stock” option and also assign the quantity in the “Product POS Stock”.
Thus, once details are successfully saved, the inventory will be updated for the respective product.

Centralized Stock Inventory :
However, if the admin has configured the “Centralized Stock Inventory” in the POS configuration then the popup will be displayed as below.

Hence, the system will update the inventory for the respective product accordingly.

Variable Products
However, in the case of variable products the quantity the admin needs to specify the Inventory stock for its variations.
Master Stock Inventory
Configure the variable product the same way as the simple product.
Thus, the store owner clicks on Assign Stock to Product.
However, in the case of the “Master Stock Inventory” in the POS configuration, the admin will enter details in the below popup.

Variation 1

Variation 2

Again here the admin can assign a master stock quantity in the “Product Master Stock” option.
Additionally, the admin can define the quantity in the “Product POS Stock”.
Henceforth the admin can view the update in stock in the Manage Product Section.
Wherein, the POS owner can search for the main Variation product and click on Set Variation Stock.
This opens up a pop-up where the Assigned POS Quantity, Master Stock, and Available Stock are visible.

POS Barcode Inventory Management
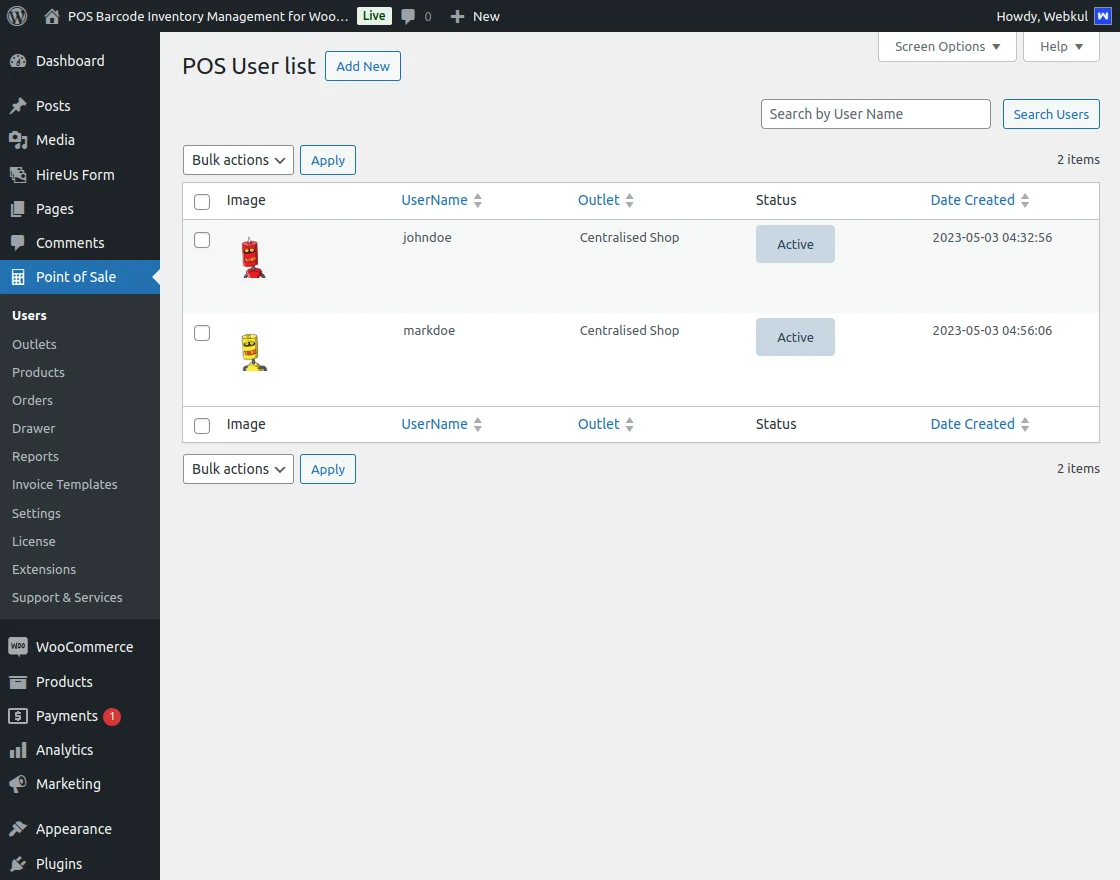
Now the admin can manage a particular user’s inventory.
POS User List
The image below shows a list of users, where the admin can check each user’s status.
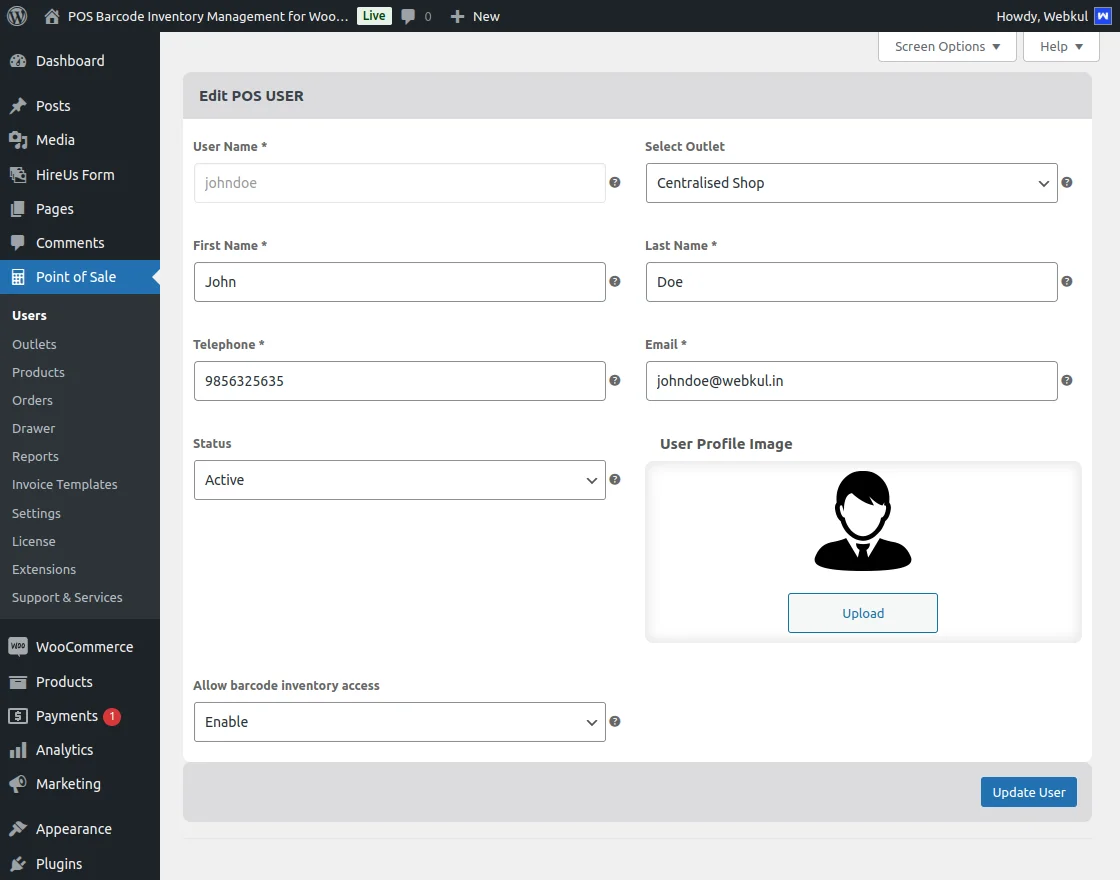
Barcode Inventory Access Enable
The image below displays the details of the user “johndoe,” where the admin can enable barcode inventory access.
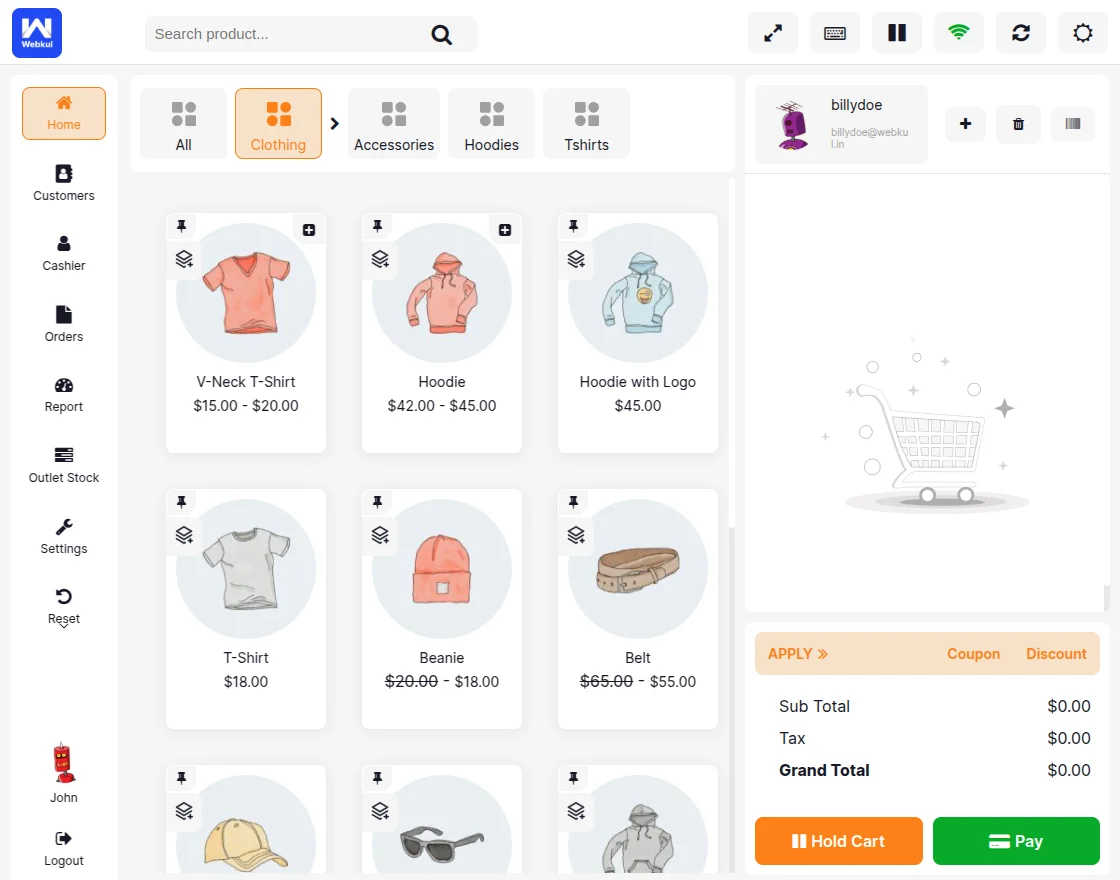
Outlet Stock
Since barcode inventory is enabled for POS user Johndoe, the store displays the “Outlet Stock” option in the sidebar, and each product shows an inventory icon.
Barcode inventory access is Disable
The admin disables barcode inventory access for POS user Markdoe, as shown in the image below.

Storefront of POS
The image below shows Markdoe’s store, where products lack the inventory icon, and the sidebar does not include the outlet stock option .
This POS user does not have barcode inventory access.
POS Configuration
The admin can enable/disable the product stock Management feature at the POS and navigate through the
point of sale > settings > barcode inventory configuration.  After enabling the product barcode inventory on POS, the barcode is visible on each and every product.
The outlet stock option is also available as shown in the below image. 
To assign the master and POS stock to the product, click on the outlet stock, and then search the product by its name to assign the stock as shown in the below screenshots.

When the admin disables the product barcode inventory on the POS, the system hides it and turns off the outlet stock.

Support
So that’s all for the POS Barcode Inventory Management for Woocommerce.
If you still have any issues, feel free to add a ticket and let us know your views on our Webkul Support System.
You may also check our quality WooCommerce Plugins.
Current Product Version - 3.3.0
Supported Framework Version - WooCommerce : 9.6.0,WordPress: 6.7.1

2 comments
Are you using any third-party plugin to enter the UPC code? Currently, there are no such options available in the plugin. But if you want it can be done through customization. Please email us your complete requirements at [email protected] and we will get back to you accordingly.
Thank you,
Webkul Team