eBay is one of the largest online marketplaces in the world. It facilitates online consumer-to-consumer and business-to-consumer sales. It connects buyers and sellers around the globe. eBay marketplace allows sellers to offer thousands of product and services to their customers.
OroCommerce eBay Integration allows you to integrate OroCommerce with eBay store. Import products, categories, and orders from eBay to OroCommerce. The admin can map their OroCommerce categories with the imported eBay categories. Products will be imported with the eBay condition, specification, and variations.
Features
- Import products from eBay to OroCommerce.
- Import categories from eBay to OroCommerce.
- Import orders from eBay to OroCommerce.
- Mapping of eBay categories from OroCommerce.
- Mapping of eBay products fromOroCommerce.
- Import product attributes from eBay to OroCommerce.
- Product synchronization with eBay condition, specifications, and variations.
- Sandbox mode is available for testing and development.
Installation
Customers will get a zip folder and they have to extract the contents of this zip folder on their system. The extracted folder has webkul folder. You need to transfer this webkul folder into the OroCommerce src folder on the server as shown below.

After that, you have to install EBAY-SDK-PHP to your server. You can download it from here.
After the successful installation, you have to run below two commands on OroCommerce root directory.
php app/console c:c
php app/console c:c --env=prod
Now, run this command in OroCommerce root directory.
php app/console oro:platform:update --force
How to get eBay connector credentials?
After the successful installation of OroCommerce eBay Integration module, you will need to fill your eBay developer keys (app id, cert id, dev id, user id, auth token) you can get these credentials from eBay account. If you don’t have an account then create an account and get the required keys.
Step1: To create a new account go to developer.ebay.com and click on the sign in/Join link.

Step 2: Now, create a Username and Password for your account and then click the Join button.

Step 3: After the above step, you need to create an app. Enter the app name and choose the environment to generate your key set. Note that app name is not saved until you generate the keys set.

Step 4: After clicking on the Create a Keyset link(for the environment you choose), you need to confirm the primary contact for this account first and then you can click Continue to Create Keys button.

Step 5: Now you can see your selected environment key. For creating the production keys just click on the “Create a Key Set” and you will get your production keys.

Step 6: For generating the User Token go to your Application keys page. In the App IDrow of the Sandbox keyset, click the User Tokens to access the Tokens page for your Sandbox keyset.

Step 7: After you click on “User Tokens” in the snapshot above, you will see a “Sign in to Sandbox” button. Click it to access the sandbox account.

Step 8: Now, enter your Sandbox Username and Password.

Step 9: After clicking on the “Sign in” button, you will see another page where you have to click the “Agree” button.

Step 10: lastly, you will be redirected back and will get the App Token.

Configuration
After successful installation, you have to configure the module. You can configure it under “System > Integrations > Manage Integrations”.
Now, click on “Create Integration” to create eBay integration and enter the details collected from eBay.

- Type – Choose Webkul Ebay from the dropdown list.
- Name – Enter a name for the integration for identification like Webkul Ebay Connector. You can choose any of the name as per your requirement.
- API Mode – Choose API Mode whether it is Sandbox or Production.
- End Point URL – Enter End Point URL collected from eBay.
- User Id – Enter the eBay login user id here.
- App Auth Token – Enter the App Auth Token collected frm eBay.
- Dev Id – Enter Dev Id here.
- App Id – Enter App Id here.
- Cert Id – Enter Cert Id here.
- Default Category – Select default category for imported products.
- Order Status – Select default order status for iported orders.
- Sync Start Date – Enter the date from which you want to start the synchronization.
- Connectors – Choose connector for which you want to synchronize between Order Connector, Product Connector, and Category Connector.
- Default Owner – Choose owner for this integration.
Now you have to save the integration by clicking the Save button.
Categories import and mapping
After configuration of OroCommerce eBay Integration, you can import categories of the eBay. Move to “System > Integrations > Manage Integrations”.

Here select Category Connector in Connectors and hit Schedule Sync to schedule the synchronization.
After that you have to run below command to initiate the category import :
php app/console oro:message-queue:consume -vvv
You can check the status of category import under Statuses.

After successful category import, you can find all the imported categories under “Webkul > Webkul Ebay Connectors > Category”.
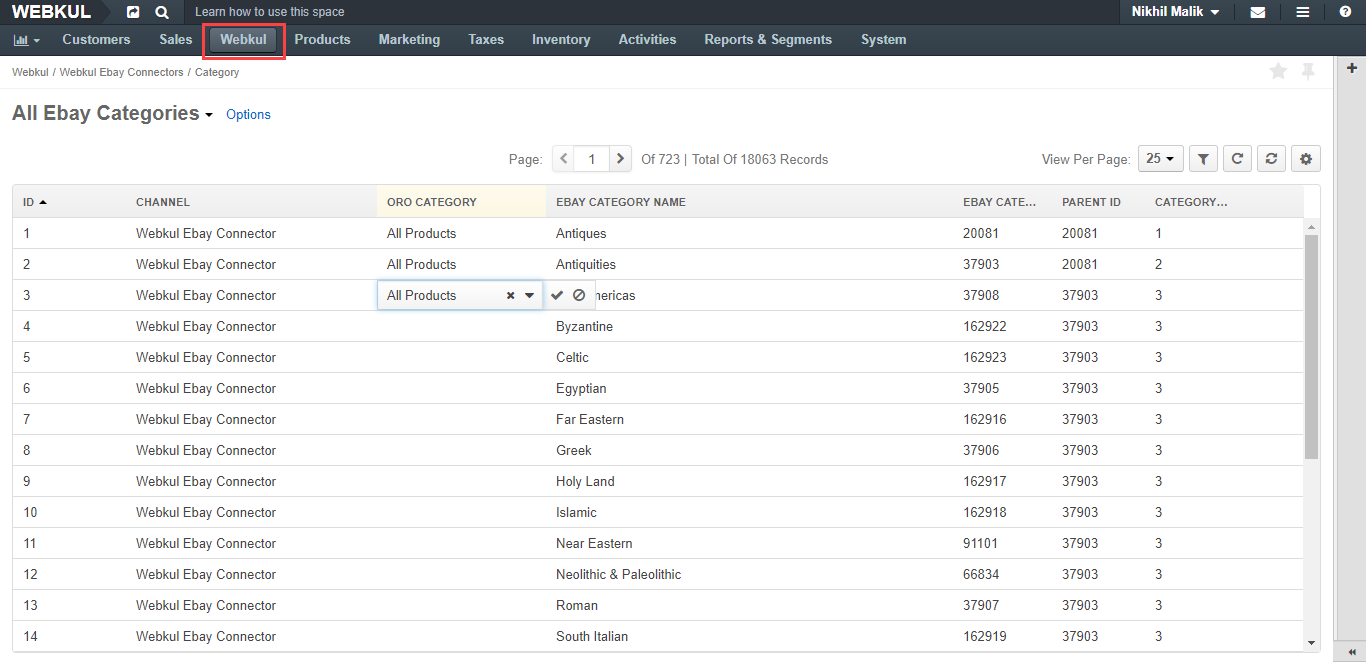
Under ORO CATEGORY you can map an imported eBay category with the existing OroCommerce category as well.
Product Import
After importing categories you can import eBay products under “System > Integrations > Manage Integrations”. 
Here select Product Connector in Connectors and hit Schedule Sync to schedule the synchronization.
After that you have to run below command to initiate the product import :
php app/console oro:message-queue:consume -vvv
You can check the status of product import under Statuses.
 After successful product import, you can find all the imported products under “Webkul > Webkul Ebay Connectors > Product”.

Order Import
After successful import of categories and the products, you can import orders of the eBay. You can import orders under “System > Integrations > Manage Integrations”.

Here select Order Connector in Connectors and hit Schedule Sync to schedule the synchronization.
After that you have to run below command to initiate the order import :
php app/console oro:message-queue:consume -vvv
You can check the status of orders import under Statuses.
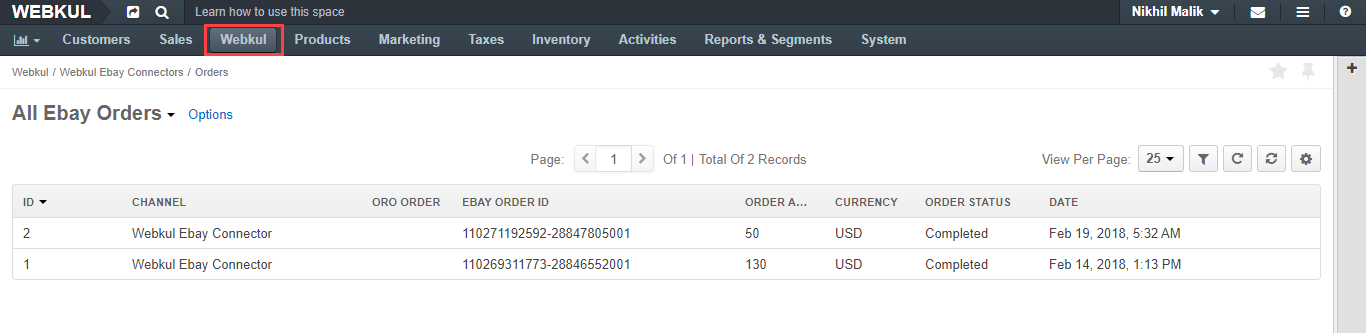
 After successful orders import, you can find all the imported orders under “Webkul > Webkul Ebay Connectors > Orders”.
That’s all for the OroCommerce eBay Integration, still have any issue, feel free to add a ticket and let us know your views to make the plugin better at webkul.uvdesk.com.

Be the first to comment.