OpenCart Refer and Earn module allows you to set up referral scheme in your store.
The users can earn reward points for referring other users to sign up to your store and invite customer to buy product from referral link.
The admin can customize the reward points for the referral users.
Because of the referral program, the users are encouraged to invite other people to sign up and earn rewards points in exchange.
It is one of the means to increase the user traffic into your store.
As more number of people will come and register to your website for earning reward points.
The admin can also configure the social login where the users can enter their existing details from a social networking website.
Such as Facebook, Twitter, Google, and Linked In, to sign into your store instead of creating a new account.
The admin can also customize reward points for users who uses social login.
Note:
- The user has to use their own credentials to check the social login working in the available demo.
Watch the below video tutorial to understand the extension workflow :
Features
- The admin can display information about the referral on the frontend.
- Set the title of the referral panel for the frontend.
- Rewards points can be customized for new user sign up and the referrals.
- The customer will be notified by email on getting the reward point.
- Product and registration reference through reference id.
- Admin can set Referral link validity.
- Earn reward points by purchasing product from purchase Referral Link.
- Earn Reward Point by inviting customer to sign up through customer Referral Link.
- Description about the referral offer is visible.
- Customized label for the Register link can be set.
- The admin can stop with disable and start with enable the referral program from the backend.
- Social Login using Facebook, Twitter, Google, and Linked In accounts.
- The users can check their earned reward points from the My Account section.
- The module supports multiple languages translations.
Installation Process
Installation of this module is very simple. First, extract the downloaded zip file and then select the correct Opencart Version Folder according to Opencart Software Version installed in your system. Then, after opening the correct Opencart Version folder, you need to upload admin, system, image and catalog folders to the root directory of Opencart.

Now login to your admin backend and navigate through Extensions->Extension Installer. Click the Upload button and browse the XML file, this file is in the ocmod folder. Please select the correct ocmod folder according to your Opencart version installed in the system.
Click Continue after uploading the XML file.

After uploading the XML file, please navigate through Extensions->Modifications->Modification List. Now click Refresh button as shown in below screenshot. Once you have refreshed the modification cache you will get a success notification message on top.

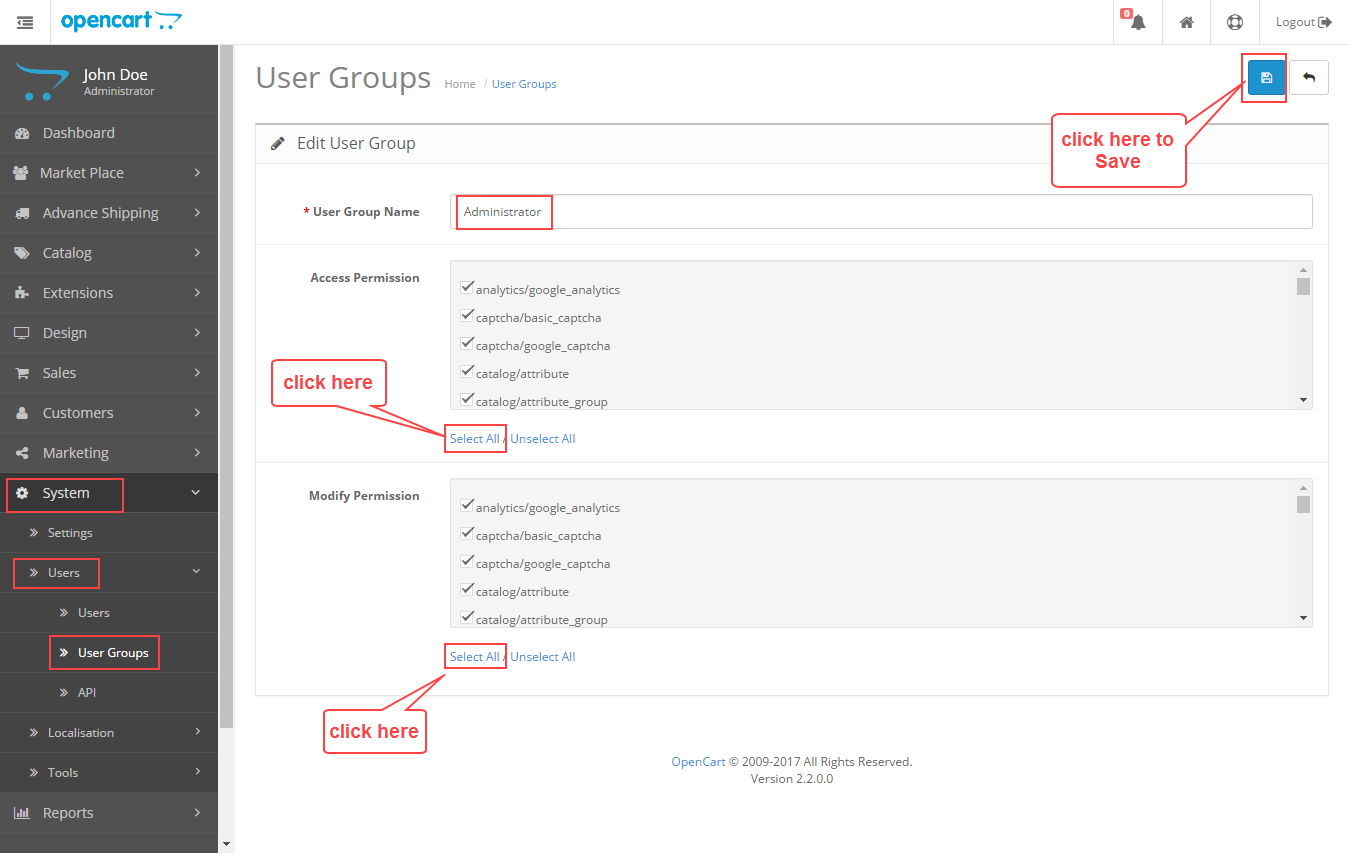
After that, go to System->Users->Usergroups and edit ‘Administrator’ and click Select All for both Access Permission and Modify Permission and Save it.
Now navigate through Extensions->Modules->Module List and find Refer and Earn from the list. Click the Install button as shown in the screenshot below.

Language Translation
Opencart Refer and Earn module supports multiple languages, please click here to read about Opencart language installation and translation.
How to set up Facebook Login
To set up Facebook Login for your users, you need to obtain Application Id and Secret key from Facebook. First, you need to create an App on Facebook, please click here to setup App and get your credentials.

Now after successfully creating an app, please click the Get Started link for Facebook Login.

Please choose the Web platform link as shown in the screenshot.

Enter the Site URL of your store and click Save.

Continue and complete all the steps one by one.

Click the Advanced settings link and set the Native or desktop apps? options as Yes.

Click the Basic settings link. Enter your store URL in App Domains and then finally copy your App ID and App Secret credentials.

How to set up Twitter Login
To allow users to Login using their Twitter accounts, please click here to set up and get credentials for the Twitter. After logging into your Twitter account, create a new app.

Enter all the necessary details and click the Create your Twitter application button.

Now your Twitter app has been created, you need to click the Update Settings button to continue to next step.

Now you can copy your Twitter credentials by clicking the Keys and Access Tokens tab.

How to set up Google Login
To create a Google Login, you need to obtain credentials from here. Create a new project and enter the project name.

Search for Gmail API from the Library and click the Gmail API result.

Click Enable, to continue to the next step.

Now click the Create credentials button.

Now select the Gmail API, Web browser(Javascript) and User data menu options. Click the what credentials do I need? button.

Enter the Product name shown to users and click Continue.

Click the Done button.

Click the Credentials button and then click the Edit button to view your Google credentials.

Now you can finally copy your Client ID and Client secret.

How to set up Linked In login
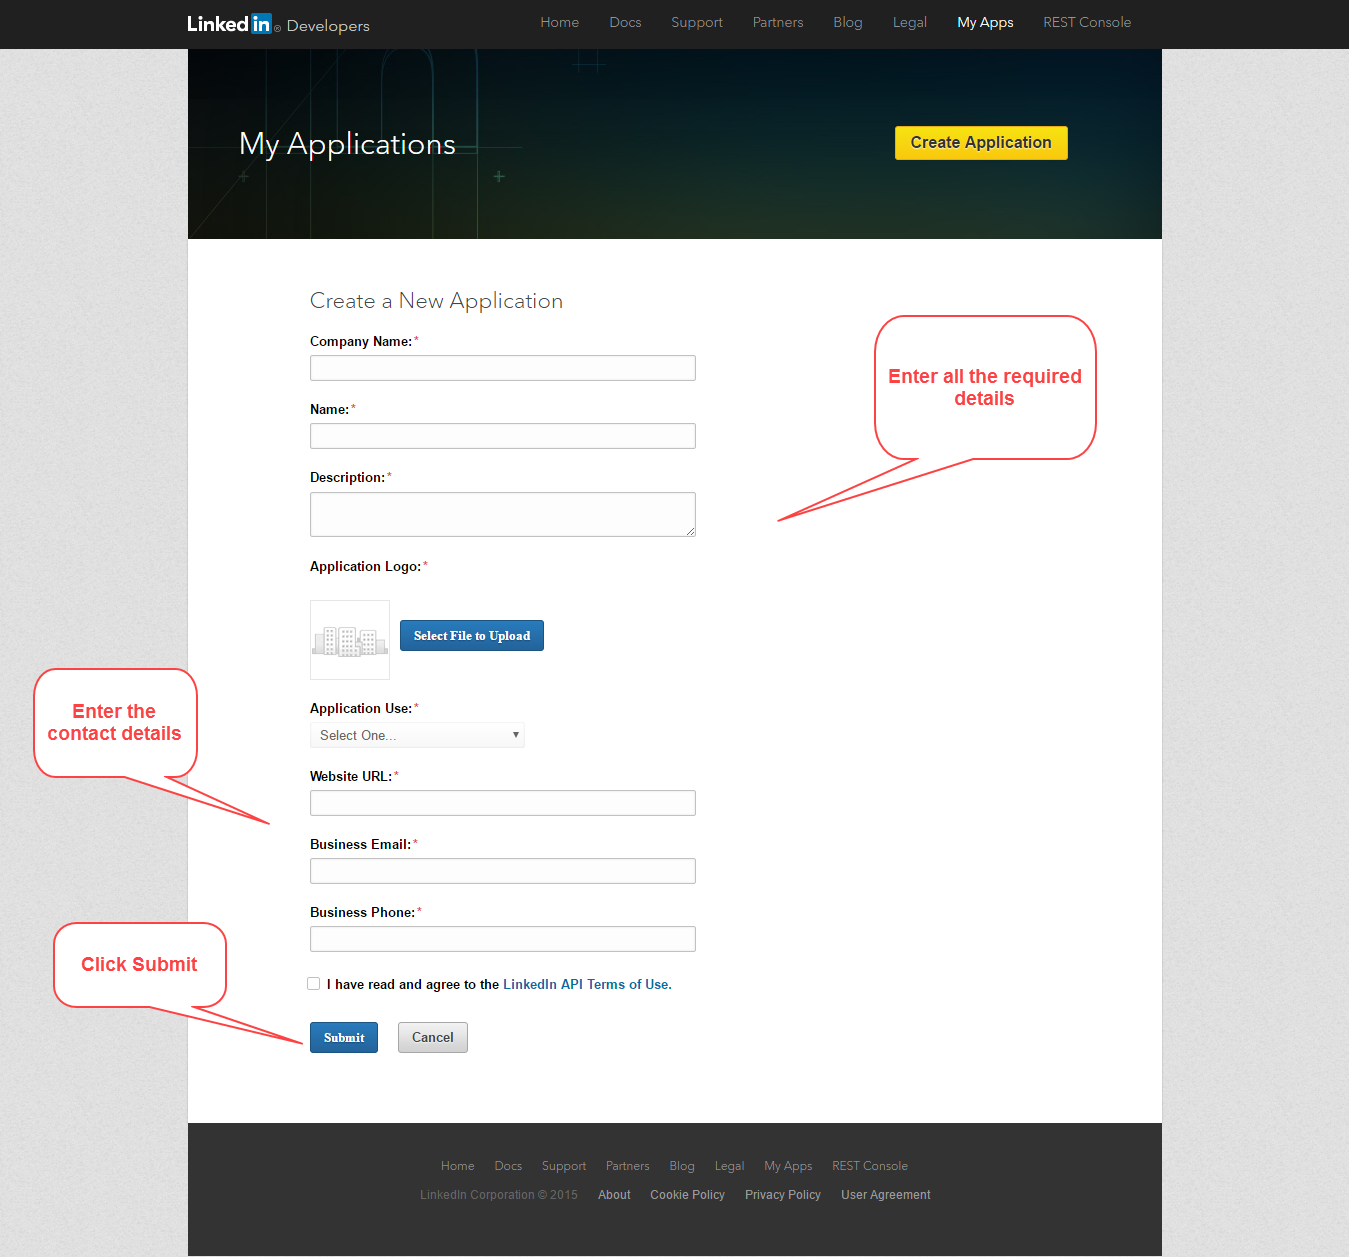
To get Linked In credentials please click here. You need to create an application first.

Now enter all the required details and click the Submit button.
Now enter the Redirect URLs and then you can copy your Client Id and Client Secret. Click the Update button.

Module Configuration
To configure this module, navigate to Extensions>Modules>Refer and Earn. Click the Edit button.

Refer & Earn Configuration

Title – Enter the title for the referral panel which will appear on the front end.
Reward Points – Enter how much reward points will be earned after the new user sign up and purchase referral product.
Description – Enter a description with the attachment of image or edit fields for the referral panel.
Text for Link – You can customize the register button label in the referral panel.
Status – Set the module status as either enabled or disabled.
Referral Status – Select enabled to give reward points to referral users or select disabled.
Referral Reward Points – Set how much reward points will be received by the referral users.
Reference Validity- Set the validity days for referral link.
Enable/Disable All Social Login –
Select enabled if you want to use Social Login from Facebook, Twitter, Google, and Linked In else select disabled.
Status – To use Facebook Social Login select enabled, else select disabled.
Application Id – Enter the Facebook Application Id.
Secret Key – Enter the Facebook Secret Key.
Reward Point – Set how much reward points will be earned by the users who uses the Facebook Login.
Status – To use Twitter Social Login, select enabled, else select disabled.
Consumer Key – Enter Consumer Key.
Consumer Secret – Enter Consumer Secret.
Reward Point – Set how much reward points will be earned by the users who uses the Twitter Login.
Status – To use Google Social Login, select enabled, else select disabled.
Client Id – Enter Client Id.
Secret – Enter the secret key.
Reward Point – Set how much reward points will be earned by the users who uses the Google Login.
Status – To use Linked In Social Login, select enabled, else select disabled.
Consumer Key – Enter consumer key.
Consumer Secret – Enter consumer secret.
Reward Point – Set how much reward points will be earned by the users who uses the Linked In Login.
User Front-End View
The users will see a referral panel on the store where they view some information about the referral offer.
The users can simply click the Refer and Earn button to create a referral link.
Earn Reward points through promoting people to sign up by sharing Customer share Links to the referrals.
Through sharing a Product share Link with your friends you can also get rewards points.
When other people purchase a product through a shared reference link you will be rewarded.

How user Earns reward point through registration & referral product purchase?
Registered user will navigate to the refer and earn section.
Here, add a product and generate the link for the same that can be share to another user for product purchase.
Apart from that, you can also share the referral link to onboard another user and thus get the reward points for both the product purchase and registration of a new user.

New user registration and product purchase via respective referral links.
New registration:
The other user will open the link to register.

After registration, new customer gets an email for reference customer registration.

Now, this user will purchase the product using the product referral link.
The main user who shared the registration referral link receives an email after successful on boarding via referral link.

The referral sharer receives an email after successful on purchase of product via referral link.

Now, if we check the reward points of the main user who shared the referral links we can see the earned reward points for registration and product purchase via referral links.

Also, the user receiving the referral links also gets the reward points.

Social Login
The new users can use their existing social login credentials to Login to store.
The users can use their account information from Facebook, Twitter, Google, and Linked In.

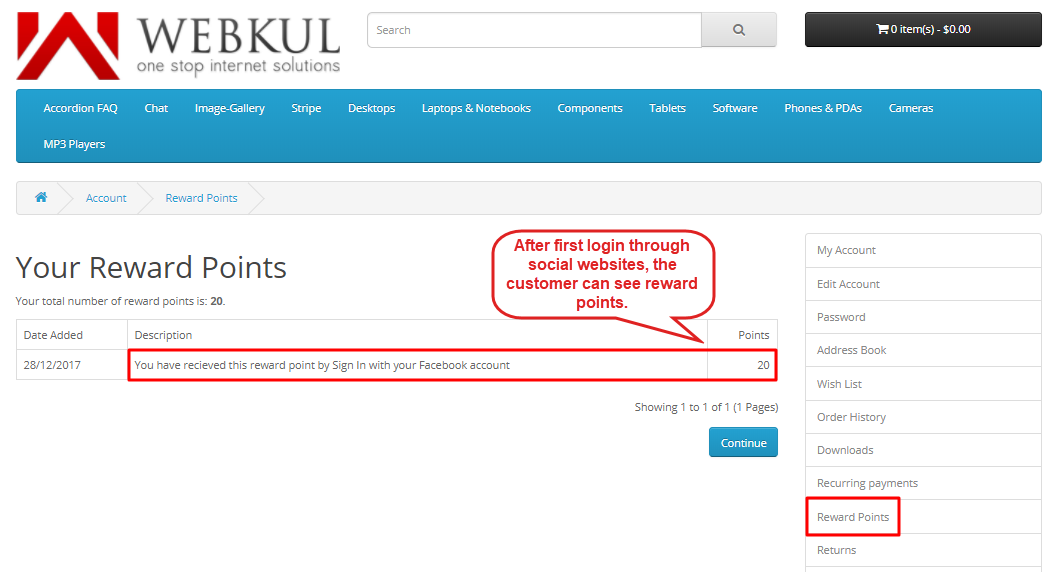
Reward Point After Social Login:
The customer can also see reward points after their first successful login through Facebook, Twitter, Google, and Linked In.
The users can check their earned reward points from their My Account section. Click the Reward Points link to view the information.
Thank you for viewing OpenCart Refer and Earn blog. If you need more information regarding this module, please contact us [email protected]
Current Product Version - 3.6.0.0
Supported Framework Version - 3.x.x.x

1 comments