With the Opencart order follow up, the admin can send repetitive emails for the orders within a certain time interval.
The store owner can create follow-ups for multiple orders and can assign different templates to different orders. Also, the admin can share follow up on define time intervals and frequency.
Watch the below video tutorial to understand the extension workflow :
Features
- Multiple custom email template generation for order follow up.
- The store owner can set the number of days in which the follow up will be sent.
- The store owner can subscribe or unsubscribe for the order follow-up.
- The store owner can set a variable frequency of the number of follow up.
- Order followup emails of all the customers can be review from the admin panel.
- The store owner can add custom comments along with the follow-up.
- The admin can view the list of the unsubscribed follow-ups.
- Send follow up automatically through cron.
- The module supports multiple currencies, multiple languages
Installation
Upload Files
Firstly, extract the downloaded zip file. After that, open the correct Opencart Version Folder.
According to Opencart Version installed in your system upload the admin, catalog, and image to the Opencart root directory.

Once you have uploaded the file then login to admin and then go to Extensions> Extension installer and upload the XML file.
The XML file can be found on the ocmod folder under the module directory. Under the ocmod folder, you will find order_followup.ocmod.xml file.

Refresh Modifications
The user can then navigate to Extensions > Modifications and click the Refresh button as visible in the below screenshot.

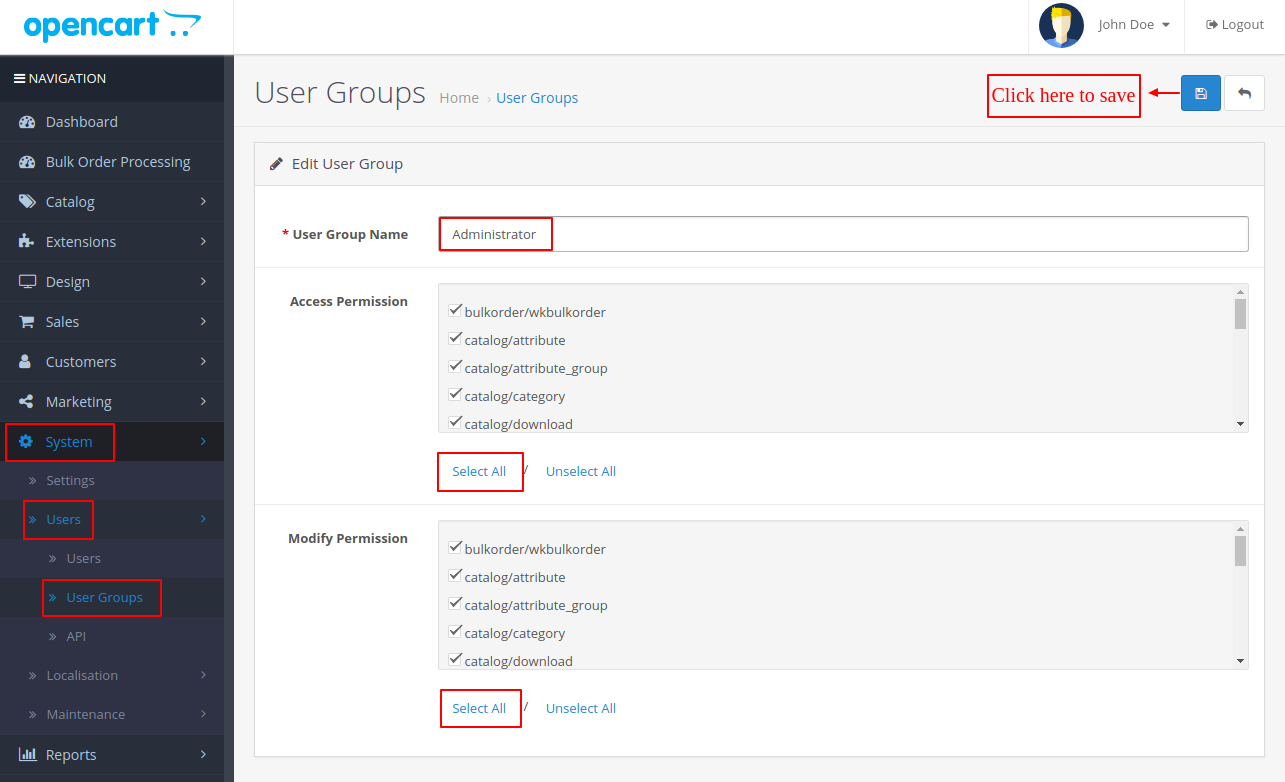
Edit User Groups
After that, go to System > Users > Usergroups. And then edit ‘Administrator’. Click Select All for both Access Permission and Modify Permission and Save it.
Install
Now navigate to Extensions > Extensions > Modules. Find the Webkul Order Follow Up Module from the list. Click the Install button as visible in the screenshot below.

Note: You need to add the cron job, the admin needs to add the path.
For example, domain.com/index.php?route=wk_follow_up/order_followup_cron where domain.com is the main website.
Admin Configuration – Opencart Order Follow Up
After the module installation gets completed, you need to navigate to Extensions > Extensions > Module > Webkul Order Follow Up to configure the order follow up by clicking on the Edit option.

Firstly, the admin needs to configure the following options as mentioned below.
- Status: The admin can set the status as enable or disable for the module.
- Followup Will Consider Complete: To add the number of days until which the follow up will set as complete. You can set the maximum value as 60 Days only.
- Total FollowUp: It is the total count of the follow-ups that will be sent to the customer for a single order.
- Specified Time Periods: You can set the period of days after which the follow up will be shared with the customer.
For Example: Consider an order placed on the 1st day of the month and you have set the Followup will consider complete as 30 Days and the total follow up as 5 and the specified time period of follow up as 5, 15, 10, 25, 27 Days.
So the follow-ups will be shared on 6th,11th,16th, 26th and 28th of the month.
FollowUp Order Template
The admin can view and create custom templates for the order follow-ups. The admin can find the list of the template by navigating the Follow-up order> FollowUp Order template section as shown in the image below.

New templates can be created by clicking on the plus option and you can create a custom name and content of the template as shown in the image below.

Opencart Follow Up Email
The store owner can view the list of all the emails shared to the customer for the order follow up as shown in the image below.

The store owner can view any email and can check the content shared over the email as shown in the image below.

FollowUp Unsubscribed List
The admin can view the list of unsubscribed customers and can even add the customer to the subscribe list by tick marking the customer and then clicking on subscribe button.

Moreover, the admin can also filter the customer based on their email, id, and unsubscribed date.
Config Setting
The admin will also be able to configure the settings from the following config setting as shown in the image below.

Order Section
After the order is placed, the admin can add the follow up in the respective order by selecting the follow-up button as shown in the image below.

After clicking on the follow-up button, a pop up will appear in which the admin can view the customer name, email address, and product order details.
The admin can also edit the following details as mentioned below.

- Select Template for Follow Up: Select any template that the admin wants to share with the customer for the order follow up.
- Comment: The admin can even add the custom comment that will also be shared along with the order follow-up.
Moreover, the admin can also send mass follow-up for all the orders by clicking on the Mass Follow Up button.
On selecting the Mass Follow Up button, the admin can send follow-up on various options. The admin can select the order status, template, and add a comment for a mass follow-up.

Customer End – Email

The customer will get the order follow-up via email over which the customer will be able to get the update regarding the order and its status. Moreover, the customer will receive an email as mentioned in the image below.

The buyer can unsubscribe from the follow-up by clicking on the unsubscribe button.
That’s all for the Opencart Order Follow Up module. Further, if you have any issues feel free to add a ticket and let us at https://webkul.uvdesk.com/
Current Product Version - 2.0.0.2
Supported Framework Version - 3.x.x.x

Be the first to comment.