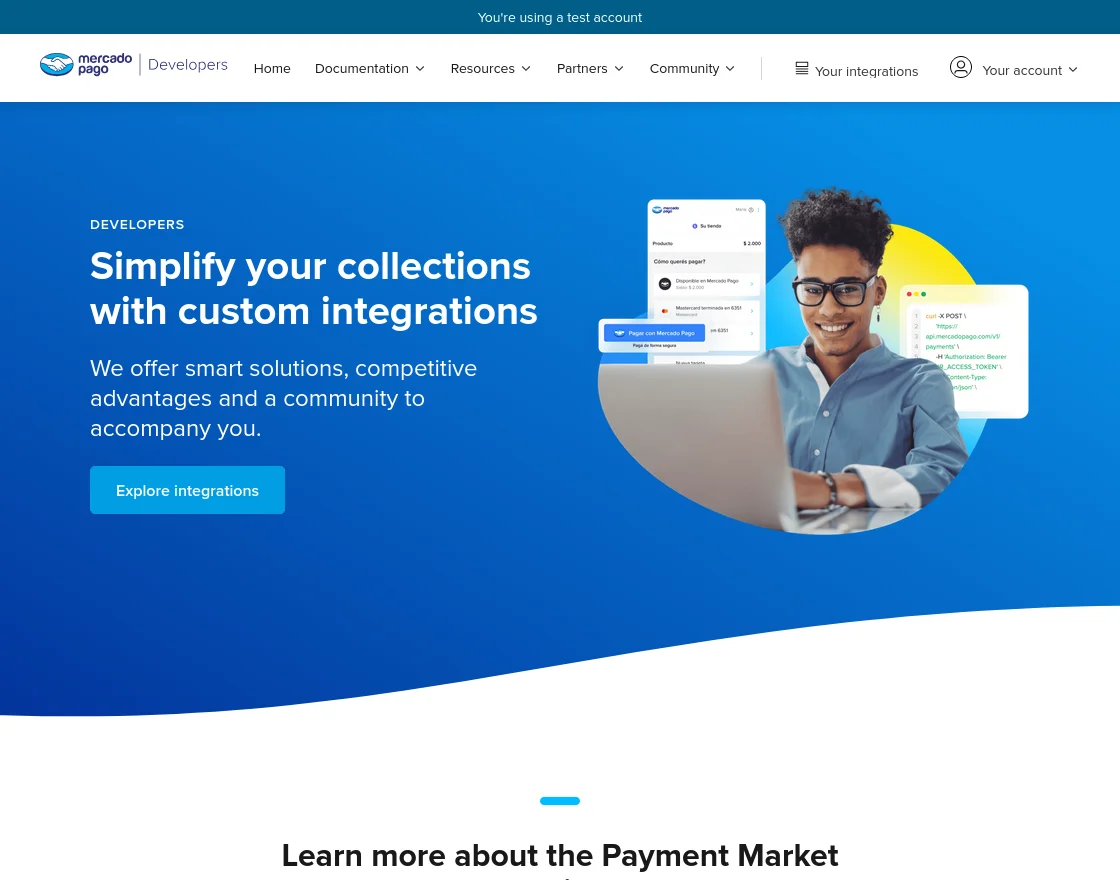
Opencart Marketplace Mercadopago Connect Payment Gateway module allows the sellers to provide the Mercadopago payment method to their customers and receive payments within the marketplace.
Mercadopago is a payment method. This is a well-known payment service provider in Latin America. Mercadopago is a faster, reliable, and secure payment gateway.
Now it’s integrated with our Opencart Marketplace extension.
Also, this enables the customers to select the Opencart Marketplace MercadoPago Connect on the checkout page and make a payment.
The customers will be able to make use of their Credit Card for making online payments.
This module lets your customers to conveniently shop with their credit card without any hassle.
Also, It boosts your sales providing an ultimate payment method to your customers. This extension will be able to provide split payment for the sellers of the marketplace.
**Mandatory: Due to the limitation of the Mercadopago API, a split payment is only possible using the Split Cart Marketplace Add-on.
So, if you want to have split payment among sellers during checkout then Split Cart Marketplace Add-on is a must.
Also, this extension is an add-on of the Webkul’s Marketplace. To make use of this add-on you must have first installed Webkul’s marketplace.
Note:
1. This module supports all templates and themes including the Journal theme.
2. Opencart Marketplace Mercadopago Connect Payment Gateway supports the Multi-Store feature of default Opencart.
Features
- Provide split payment to the sellers for your Marketplace store.
- The admin can configure his Mercadopago application from the module backend.
- Enable/disable payment method from the admin panel.
- Can set the order status for those orders placed through the Mercadopago payment method.
- Set the Minimum order total for enabling the Mercadopago payment method.
- It can set the areas for which the admin wants to allow the Mercadopago payment method.
- Credit Cards Payment option for making the purchases.
- Accept credit card details with greater security and reliability.
- Provide secure, trusted, and fast payment to your customers.
- No need to navigate to the Mercadopago gateway window to make the payment.
- Seller’s Mercadopago account authorization.
- The seller can link their Mercadopago account to their marketplace account.
- Also, the admin and the sellers can manage their orders placed through the Mercadopago payment method.
- The admin can refresh the Mercadopago account access tokens for the sellers.
- Also, the source code is 100% open for customization.
- Supports multiple language translations.
Opencart Marketplace Mobile App
This is a technology-based era where everything is simplified even online shopping. We all know about shopping apps and its advantages-how it reduces and makes our shopping experience hassle proof.
So it is very important for all the Store owner to have a shopping app for providing a more convenient way to shop from their online stor.
And now Webkul’s has launched its new app Opencart Marketplace Mobile App
Opencart Marketplace Mobile App converts your marketplace store for Opencart into a mobile app.
Your customers can easily purchase products on the go. Also, they don’t need to have a laptop or desktop, they can easily explore your store through their smartphones.
Also, It will not only benefit the store owner and customer it will benefit the sellers too. Sellers can see their dashboard, order history through the mobile app.
So what are you waiting for, you must now have an Opencart Marketplace Mobile App to be a step ahead.
- Seller list.
- The Seller Collection.
- Seller Profile.
- The Seller Dashboard.
- Seller Order History.
- The customer can contact the seller.
- Market Place Sell Page.
- The user can review the seller.
- Seller Location is mentioned on the map.
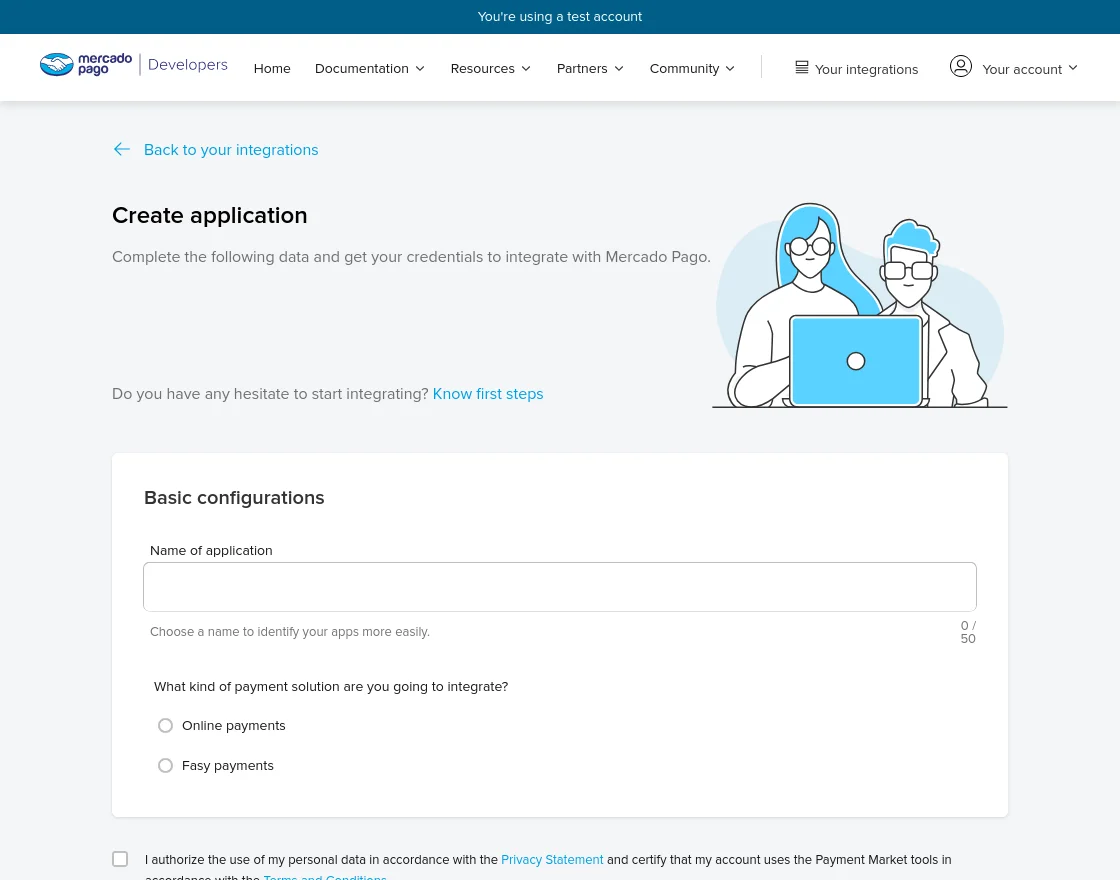
How to Create your Application?
Step 1:
Go to this link and login to your account – MercadoPago Connect to create your first application and then click the “Your Integrations” button.
**Note: The admin should have an account at Mercadopago.
Step2:
You will now be able to create your application by clicking on “Create Application”.

Step 3:
Clicking the “Create Application” brings up a new page to create the application.
Here, enter all the required information for creating the application and click “Create Application” to create one for you.
 Also, After you have created an application you can find it in the “Your Integrations page” under “Implementation“.
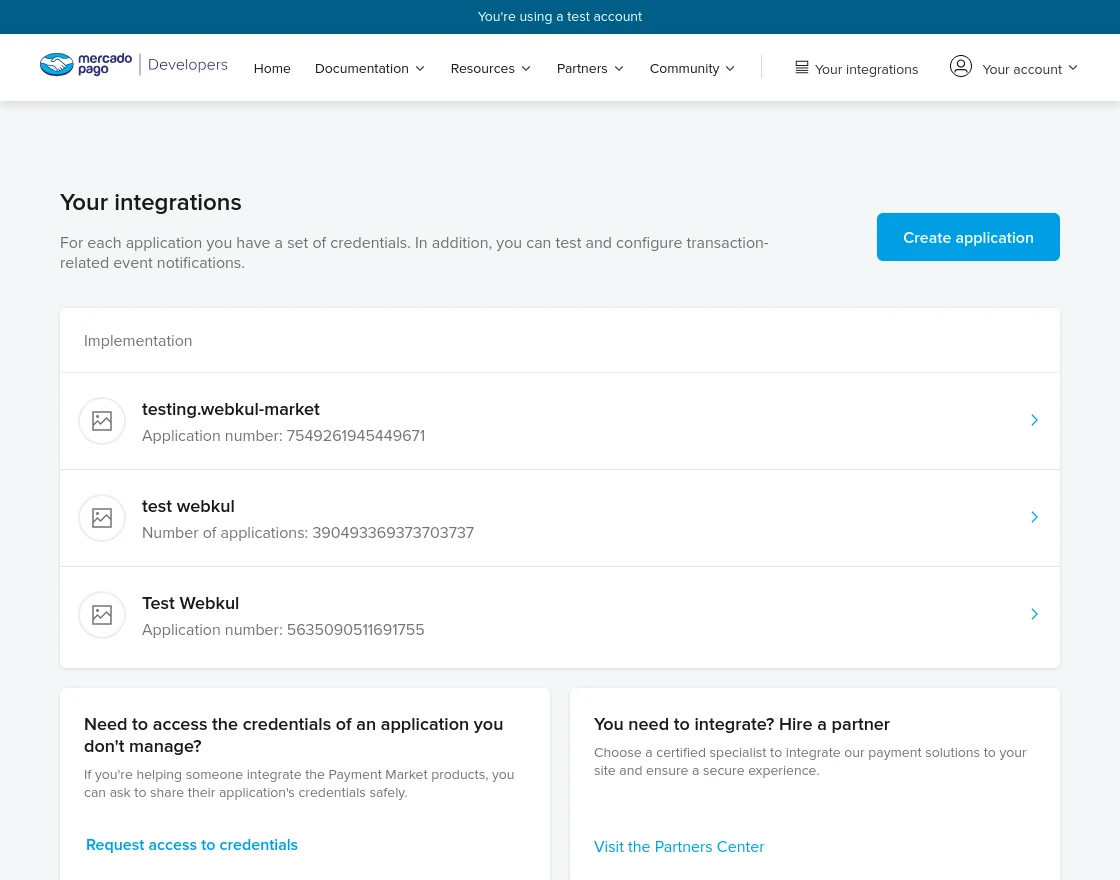
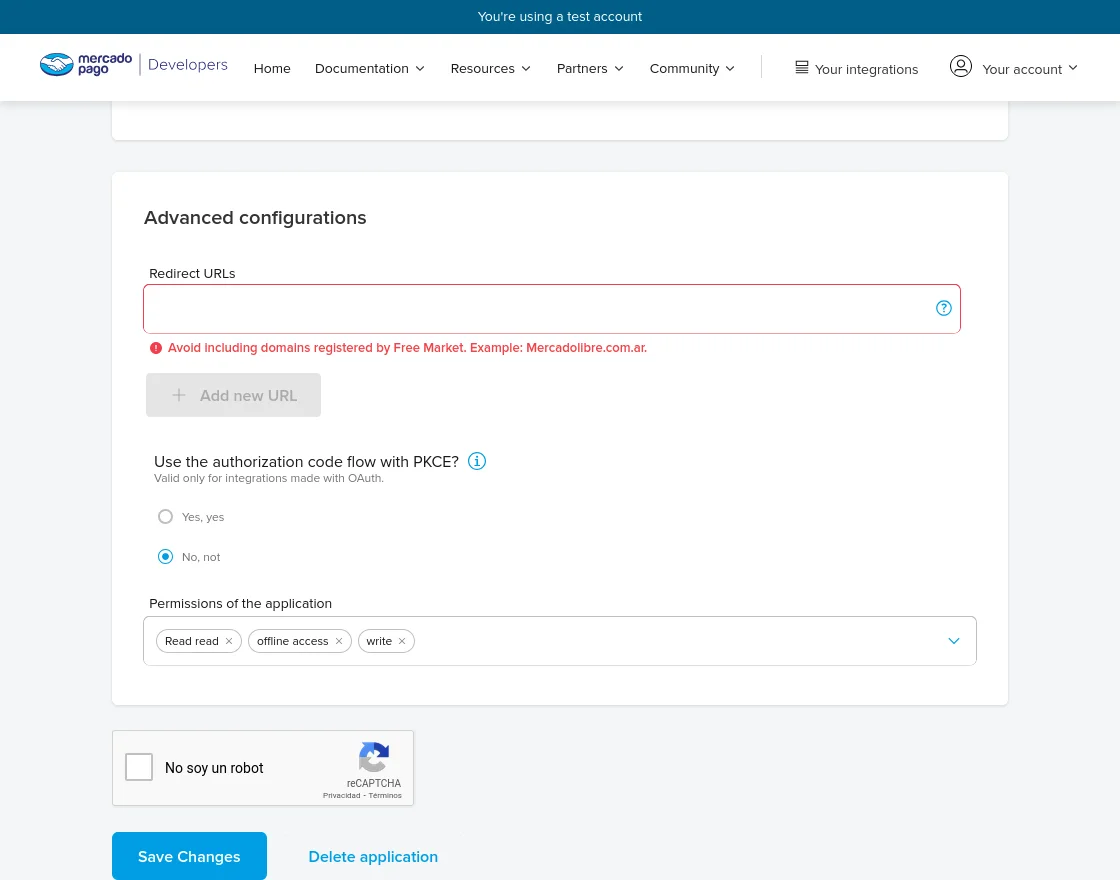
To edit the details of your application, Click on Application under Implementation.
- Locate the “Editing” option in the “Test application details” section.
- Click on “Editing” to modify the desired fields in the application.
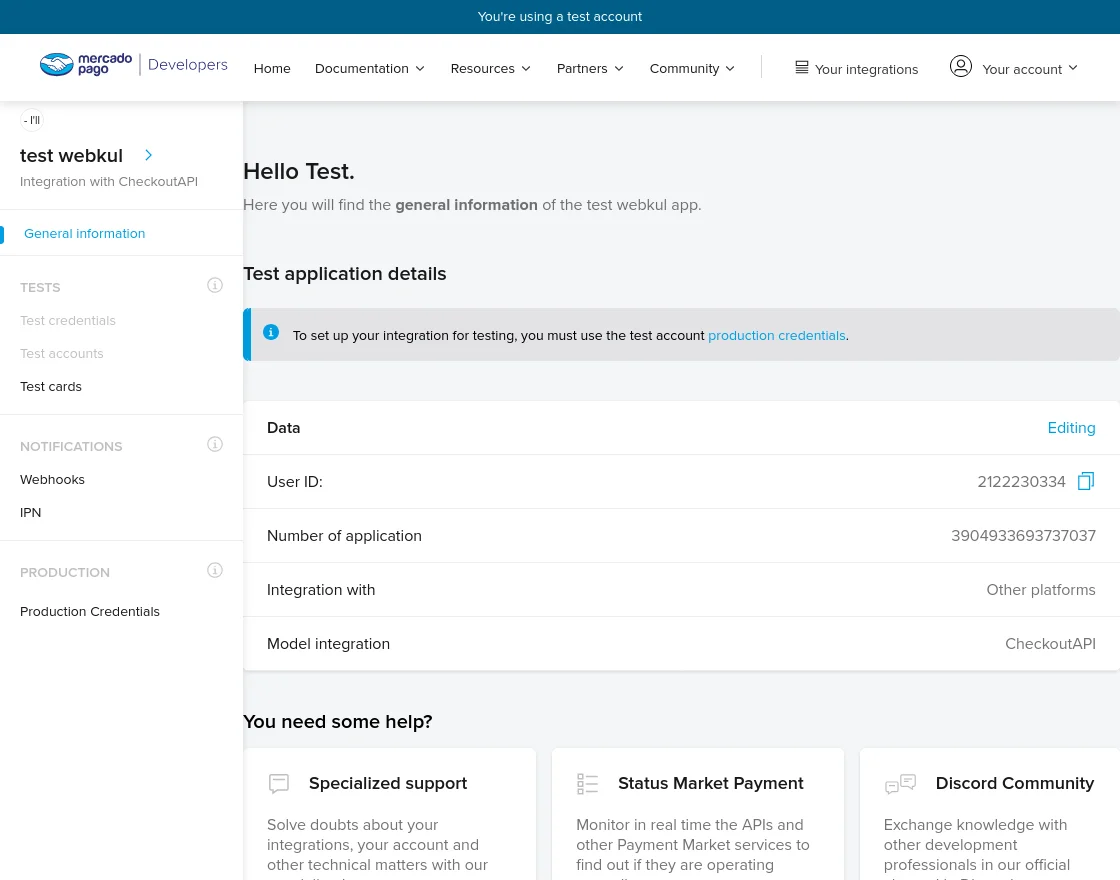
** Note: The re-direct URL should be –
your website URL?route=account/customerpartner/wkmercadopago/callback
**Note: To obtain the Public Key, Access Token, Client ID, and Client Secret.
Simply navigate to the “Production” section in the side panel and click on the Production Credentials button.
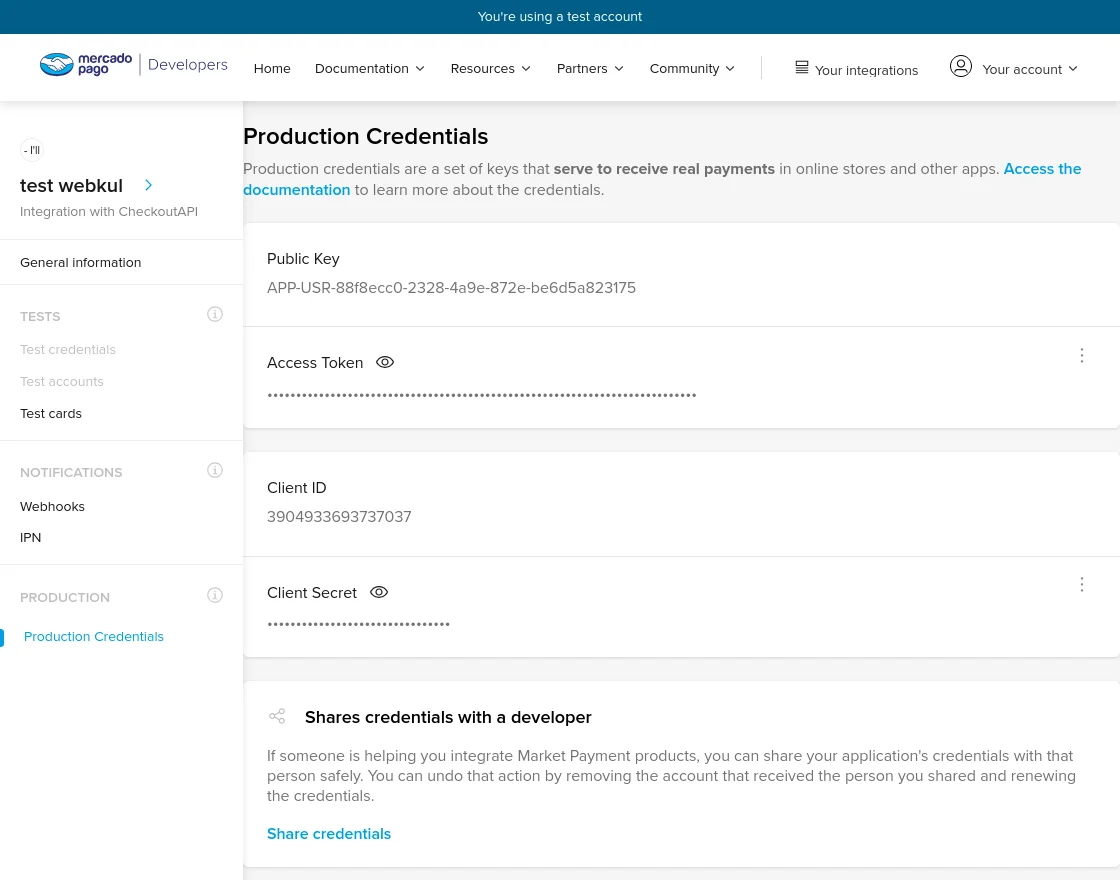
You can find the Application ID on “Your Integrations page” under “Implementation“.

If you are using the application with test account, use the production credentials – Public key and the Access token.
Else if it’s in the production mode use Production mode – Public key and access token.
Installation of Opencart Marketplace MercadoPago Connect
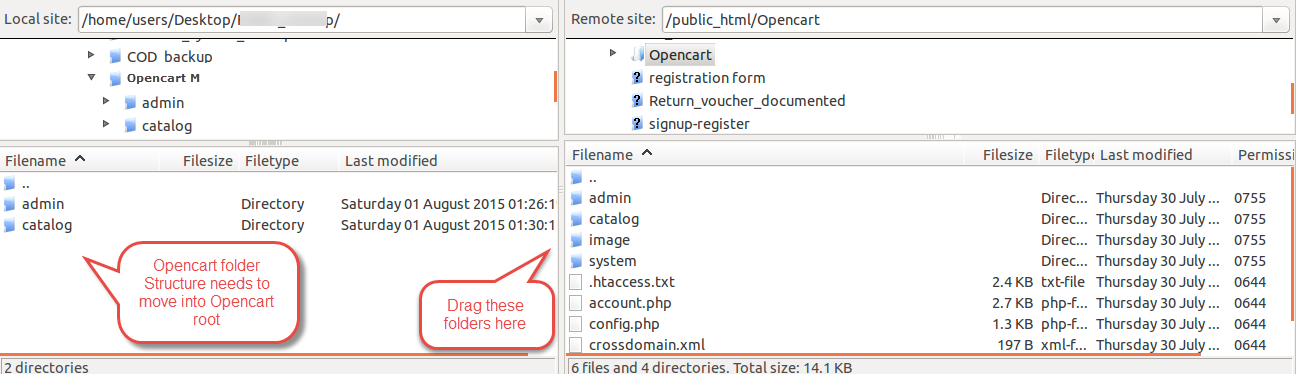
For the installation of the Opencart Marketplace Mercadopago Connect Payment Gateway module, you have to drag your admin, catalog folders in the Opencart root folder as per the below image.
Also, You can install the Opencart Marketplace Mercadopago Payment by uploading the admin & catalog files through extension installer.

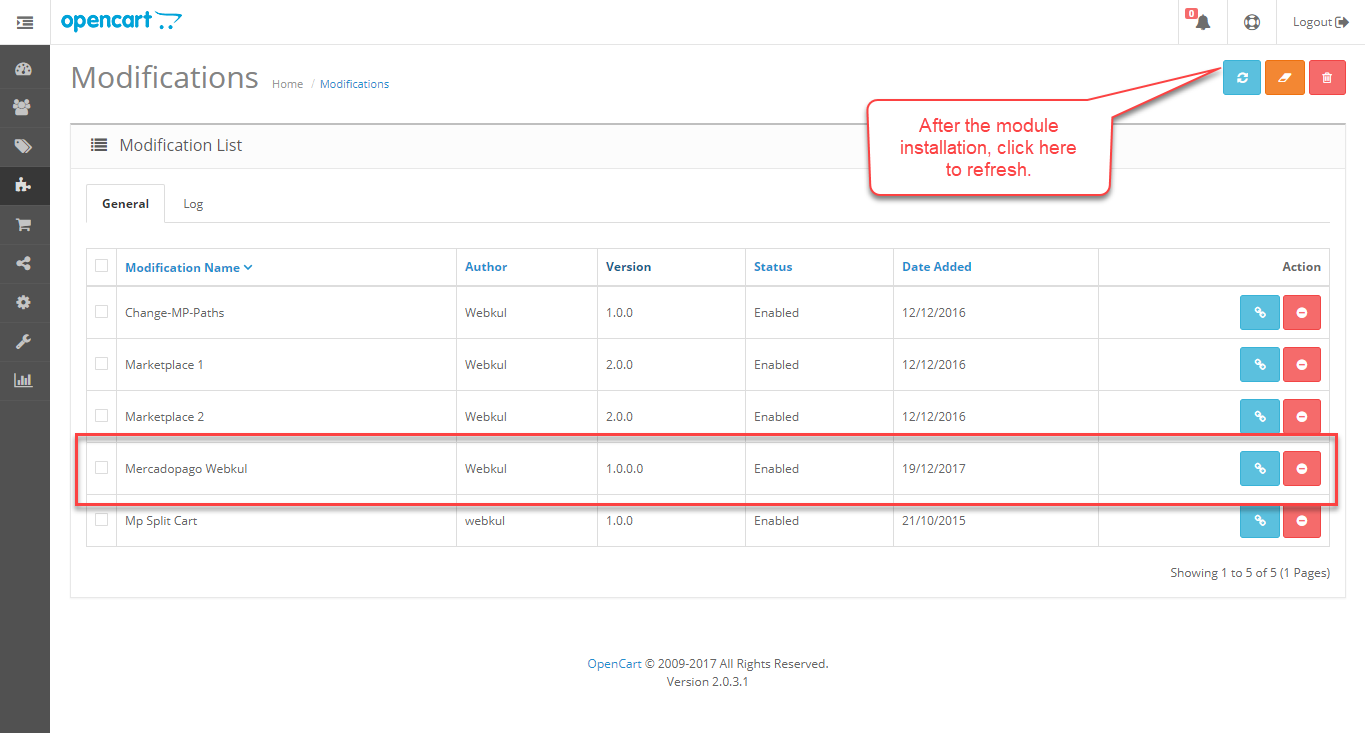
Now admin will go to Extensions > Modifications and then click on refresh button like the image below.
After that under Extension > Payment menu install Mercadopago Payment Method.

Also, After the installation, edit this Payment method and add your data as per the below screenshot.

To configure the extension, the admin will –
- Choose the Payment method mode as a Sandbox mode or the Production mode.
- Enter the App Id, Client Id, and the Client Secret Key.
- Also, Enter the Public key and the Access Token.
- Choose your country in which you are going to manage your application.
- Order Status – after payment is processed by the Mercadopago payment method, the order status will be changed as per this configured order status.
- Set the Minimum order total for enabling the Mercadopago payment method.
- Geo Zones – select the areas for which you want to allow the Mercadopago payment method.
- Set the payment method as Enabled or disabled.
Module Translation
As this Marketplace module supports multiple languages so this section will describe how to make the module work in different languages. Please check this link for language translation
Seller Configuration
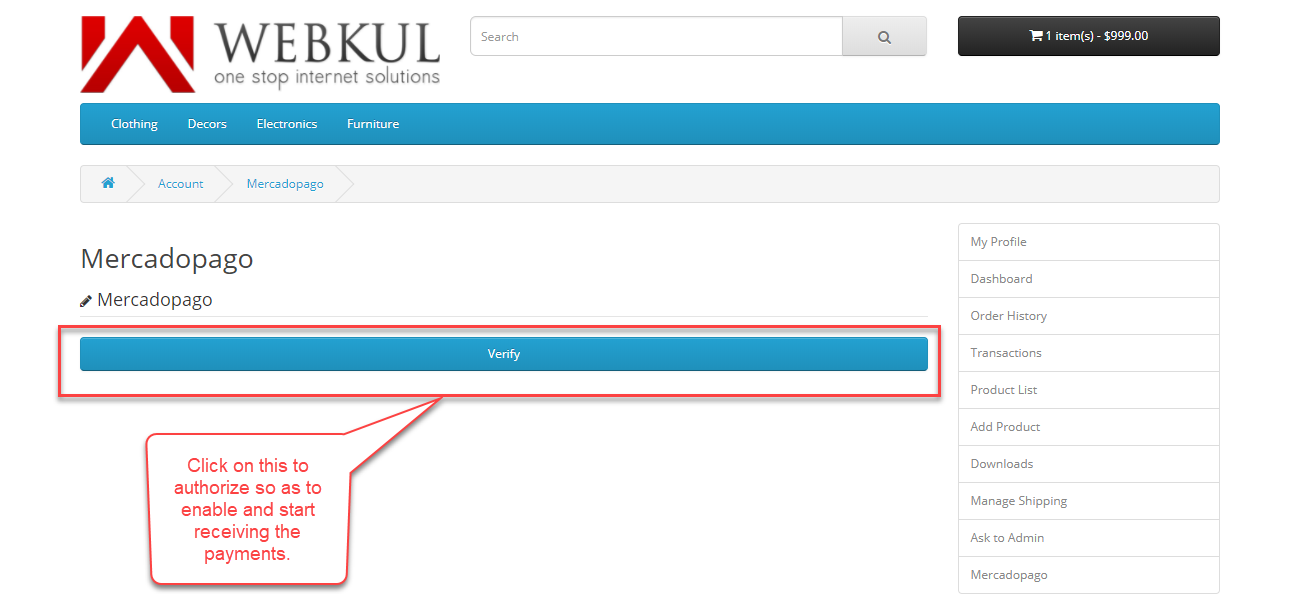
After login, the Vendors will have a new menu option with the name Mercadopago as per the below image.

Now, when a vendor clicks on the “Mercadopago” tab, the vendor will see a button “Verify” as per the below image. Also, this will allow the seller to start receiving the payments.
After clicking the “Verify” button, you will see a screen for the login to Mercadopago. If you have an account at Mercadopago.
Enter the Email or the username to continue else tap the “Create Account” link to create one and then proceed further. 
Also After login, you need to tap the “Allow” button to start receiving the payments as per the below image.

After authorization, the vendor will see a success message for the same and can now start receiving the payments easily.

Note: The origin address of the admin and the seller should belong to the same country. Otherwise, this payment method will deny the transaction.
Frontend
After adding products to the cart, the customer will go to the checkout page.
On the checkout page, the customer can see the Mercadopago payment method under the payment methods as per the below image.

Also, After selecting the Mercadopago payment method, the customer will confirm the order as per the below image.

Here, without navigating to the Mercadopago gateway window the customer can fill all the payment details and proceed further by clicking on the Pay button.
The customer will get the success message as per the image.

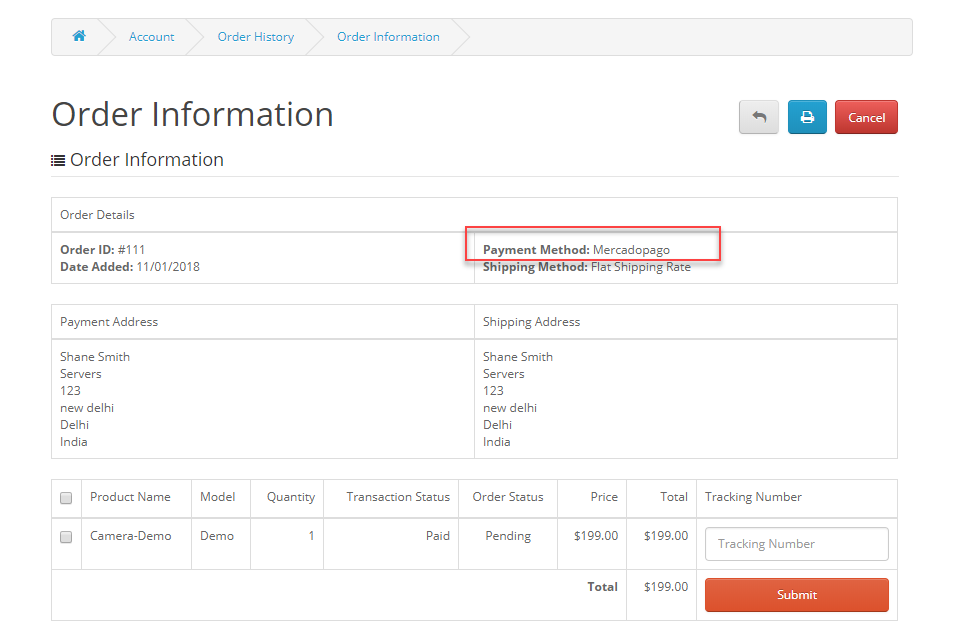
After payment is complete and the order is placed, the customer can see the payment method in the order like this.

Seller End
The sellers can view and manage the orders placed for their products through the Mercadopago payment method. For this, the sellers will navigate to Order History as per the below image.
 Here, the seller can view the complete list of orders. And can select the order to view the order details.
Admin End
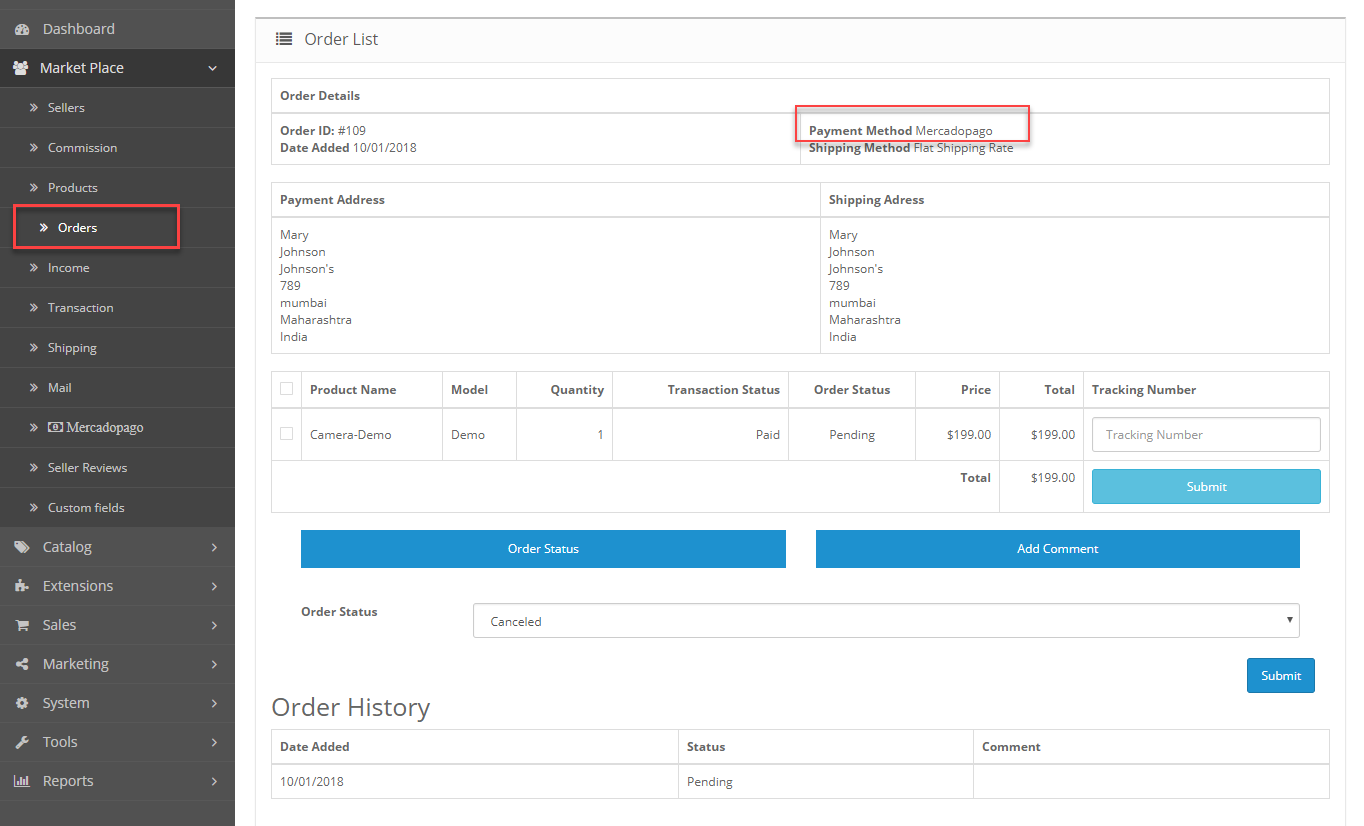
The admin can easily view and manage the orders placed through the Mercadopago payment method. For this, the admin will navigate to Orders as per the below image.

Here, the admin can view the complete list of orders. And can select the order to view the order details.
Transaction:
The admin can also view the transaction details of Mercadopago Payment method of all the sellers by navigating to Transaction as per the image.

Access Token
The users get the 6 months time period to access their Mercadopago accounts. This module allows the admin to refresh the access token of Mercadopago accounts for the sellers.
Also, this will extend the access period for Mercadopago accounts and the sellers can access their Mercadopago accounts longer.
For this, the admin will navigate to Mercadopago as per the below image.

That’s all for the Opencart Marketplace Mercadopago Connect Payment Gateway module.
If you still have any issue, feel free to add a ticket and let us know your views to make the module better https://webkul.uvdesk.com/.
Current Product Version - 3.0.0.6
Supported Framework Version - 3.x.x.x

2 comments
You can share the issue which you are facing at [email protected]. Our team will look into the same and assist you in a better way.