Opencart Event Manager Version2 is a very useful application using which you can create multiple events and display them on the calendar for viewing purposes by the customers. Using this application for opencart you can easily add and manage your events.
Check a brief overview of the plugin –
FEATURES Of Opencart Event Manager Version2
- For creating, managing, and configuring events.
- Display the events created on the calendar.
- Any number of events can be created.
- You can use this extension on multiple places within a single page.
- Supports all current browsers.
Installation Of Opencart Event Manager Version2
Installation-
Customers will get a zip folder for installing the module. They will unzip this folder on their system. This folder has 3 folders namely- admin, catalog & ocmod. Now transfer the admin and catalog folder into the opencart root folder as shown below in the screenshot.

After that using the Extension Installer upload the XML file Eventheader.ocmod.xml which you will find within the ocmod folder.

After that in Admin panel go to System -> Users -> Usergroup and edit ‘Administrator’ and ‘Select All’ for both Access and Modify Permission and save it.

Now navigate through Extensions->Modules->Event Manager and install the module as shown below in the screenshot.

Admin Configuration Of The Module
Admin will configure the module by navigating through Extensions->Modules->Event Manager. Here the admin will click on the edit button and will “Enable” the module. After that click “save” to save the settings as shown below in the screenshot.

Admin Event Manager Settings
Now the admin will go to his panel and can see the event manager on the left-hand side. After click-in on the event manager, he can see the event manager page where new events can be added.

To create a new event click on the insert icon and a new page will open up. Here admin will put the details regarding the event like – Event Name, Date for the event, and Description of the event. Click save on top to save this event as shown below in the screenshot.

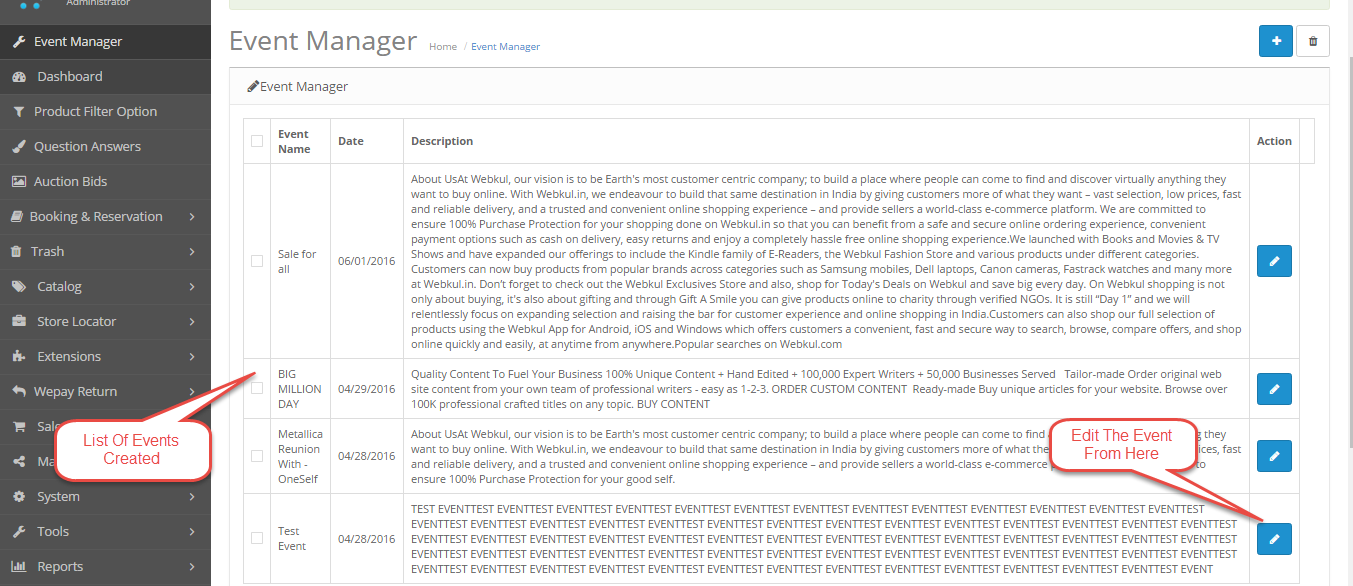
After save you can see the list of events displayed where you can edit the created events also as shown below in the screenshot.

To edit an event admin will click on the edit button next to the event he wants to edit, he can change the name of the event, date of the event, and the description of the event and after that, he will click save to save the settings as shown below in the screenshot.

After editing the event you can see the event as updated as shown below.

The user can navigate through System> Design> Layout >Product> Event Manager to display the event manager on the product page through the design layout.

How Events Will Appear In The Calendar View
On the front-end, the events created for the current month will appear on the calendar as shown below.

Customers can click-in on the date with the event to check the description for that event as shown below.


That is all for the Opencart Event Manager Version2 If you still have any issue feel free to add a ticket and let us know your views to make the module better http://webkul.uvdesk.com/
Current Product Version - 2.0.0.0
Supported Framework Version - 2.x.x.x, 3.x.x.x
Be the first to comment.