Odoo Zoho Inventory Connector syncs your inventory data from Zoho to Odoo, which helps you save time and reduce errors.
The team doesn’t have to do double entry between the two systems. Now, import records from Zoho Inventory and export updates from Odoo in just a few clicks.
This kind of Odoo Zoho integration keeps every order accurate and saves your team hours of manual work every single week.
In this guide, we’ll walk you through the prerequisites, installation, and full setup of this module.
So that you can connect your Zoho instance with Odoo and manage your inventory data efficiently.
Prerequisites For Using Odoo Zoho Inventory Connector
Before moving further, remember Odoo Zoho Inventory Connector works in conjunction with the following module:
You must install this module first for Odoo Zoho Inventory Connector to work.
Features
- Import Products, Categories, Customers, and Orders from Zoho Inventory using filters.
- Export and update Products and Categories from Odoo to Zoho Inventory.
- Auto-create and link every imported order with its matching Odoo customer.
- Import complete order details: products, taxes, shipping, payment, and status.
- Configure the Zoho connection using Client ID, Secret ID, Organization ID, and Domain.
- Map Zoho order statuses to Odoo sales order states during import.
- Schedule Imports of products, categories, customers, and orders via cron jobs.
- Sync inventory using Quantity on Hand, Free Quantity, or Forecasted Quantity.
- Sync product quantities from the warehouse configured in the channel, with real-time order status updates.
- Track and view import history in the synchronization history tab.
Installation Process of Odoo Zoho Inventory Connector
- Once you purchase the app from the Webkul store, you will receive the link to download the module zip file.
- Extract the file on your system after the download finishes. Further, you will be able to see a folder named:
'zoho_inventory_connector’ - Copy and paste this folder inside your Odoo Add-Ons path.
- Next, open Odoo App and click on the Settings menu. Here, click on Activate Developer Mode.
- Then, open the Apps menu and click ‘Update Modules List.’
- In the search bar, remove all the filters and search ‘
zoho_inventory_connector’ - You will be able to see the module in the search results. Click on ‘Install’ to install it.
Workflow
1. After completing the installation of Odoo Zoho Inventory Connector, log in to your Odoo account and open the multichannel module.
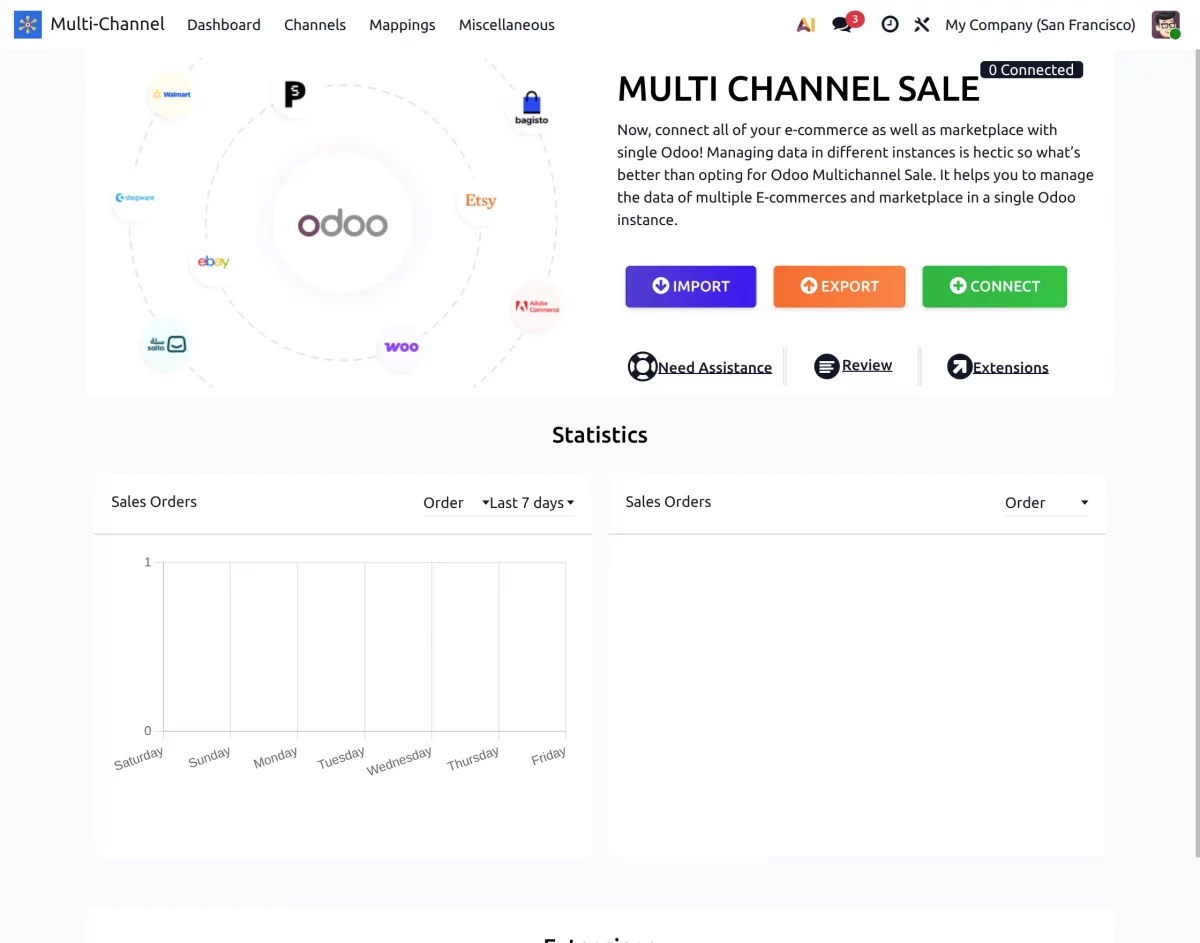
2. Go to the Channel tab and click on the “New” button to add the connection.
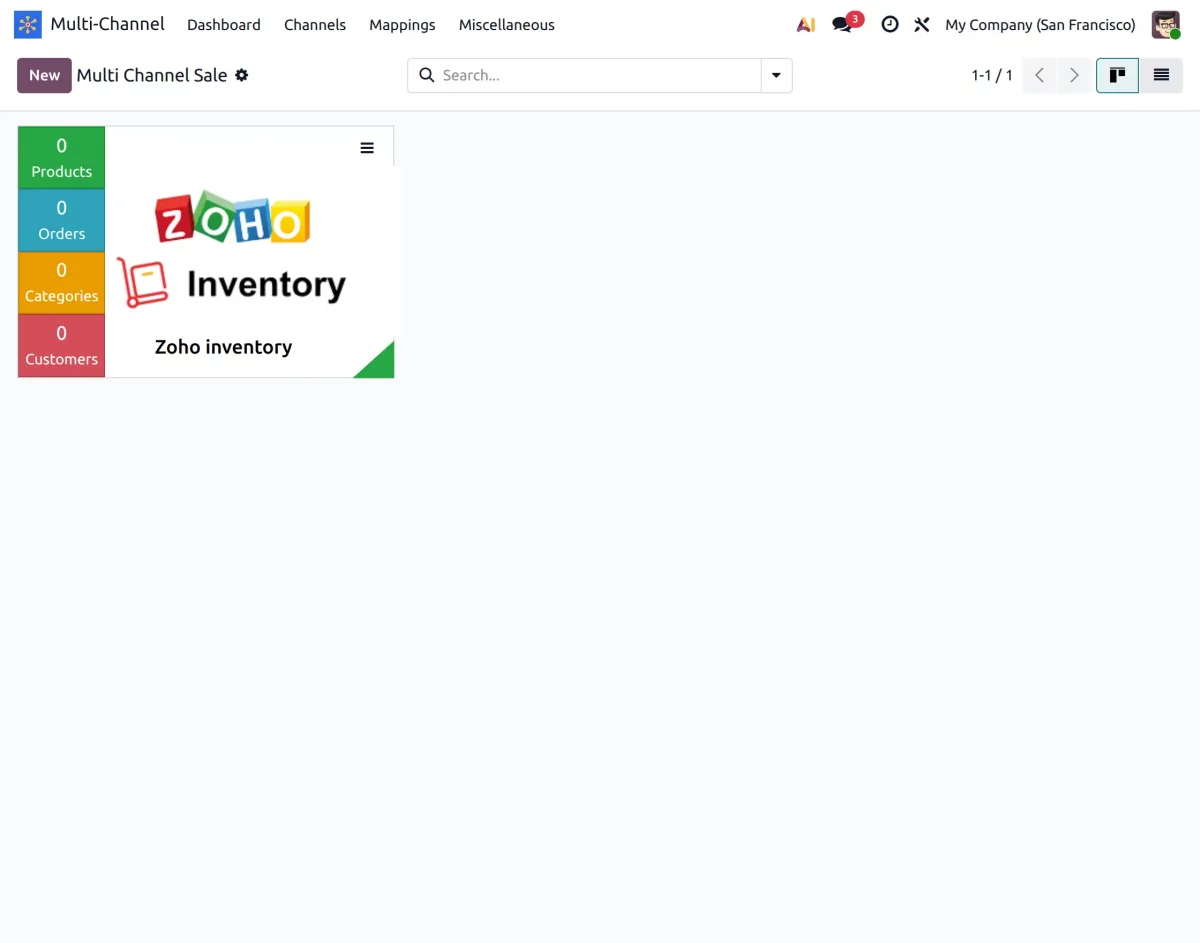
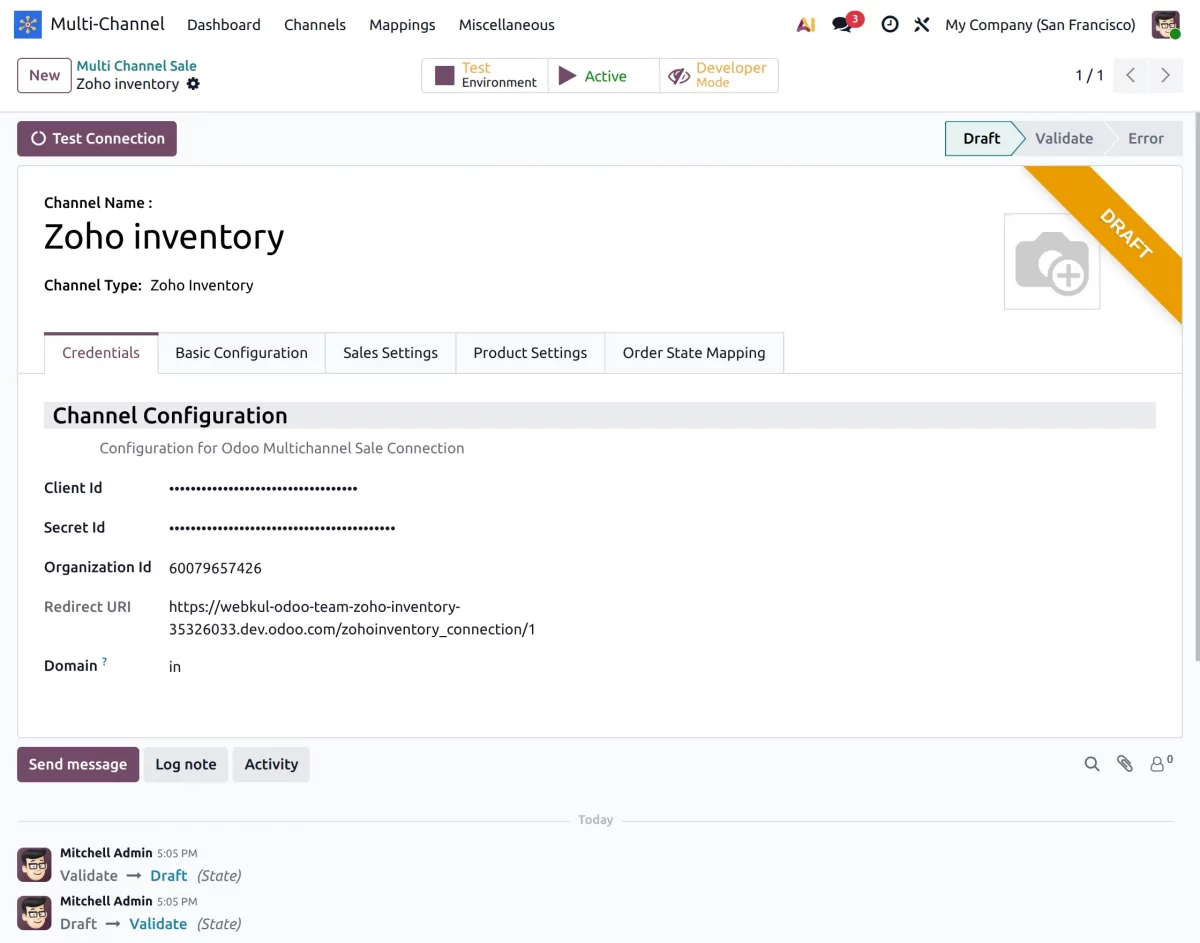
3. Firstly, in this window you have to fill in the details like the Instance name and select the Instance type.
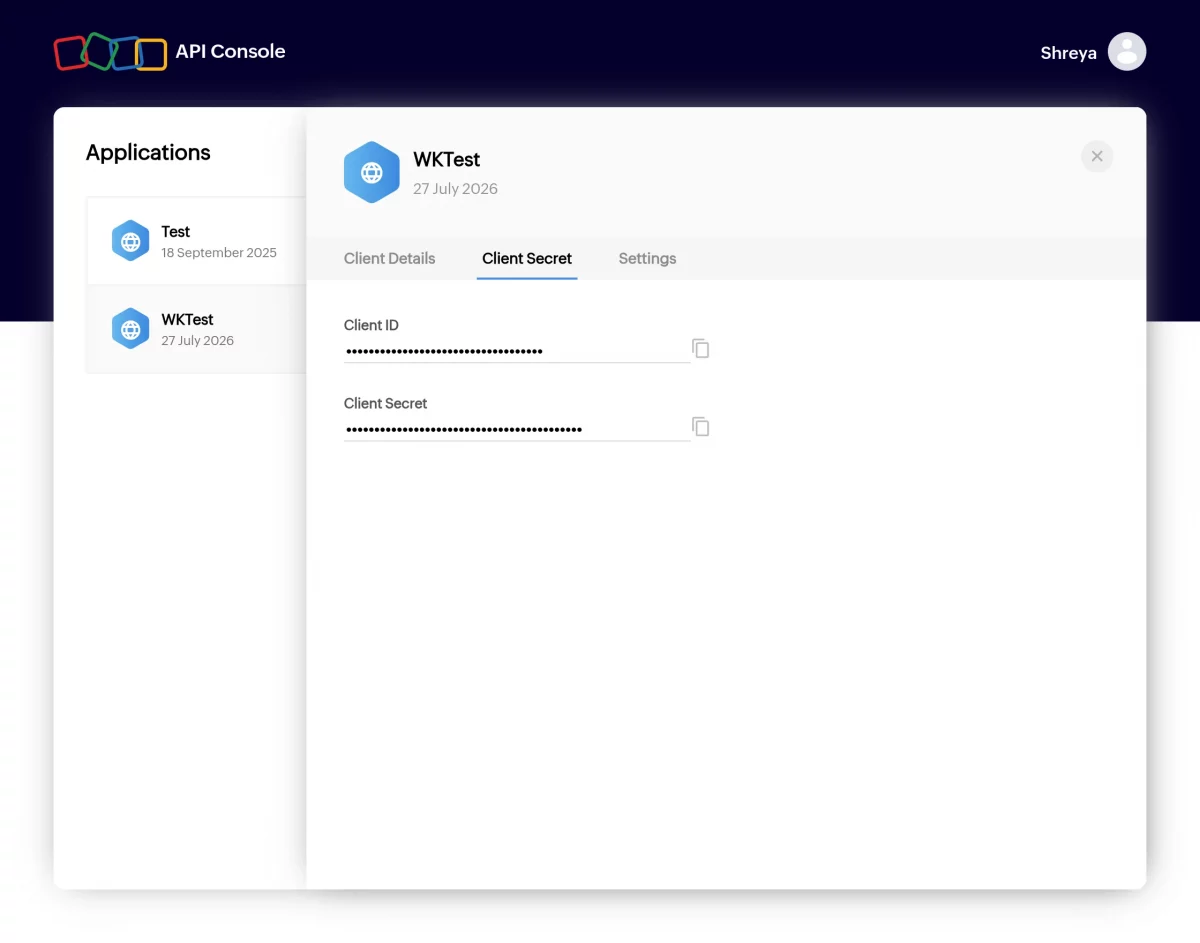
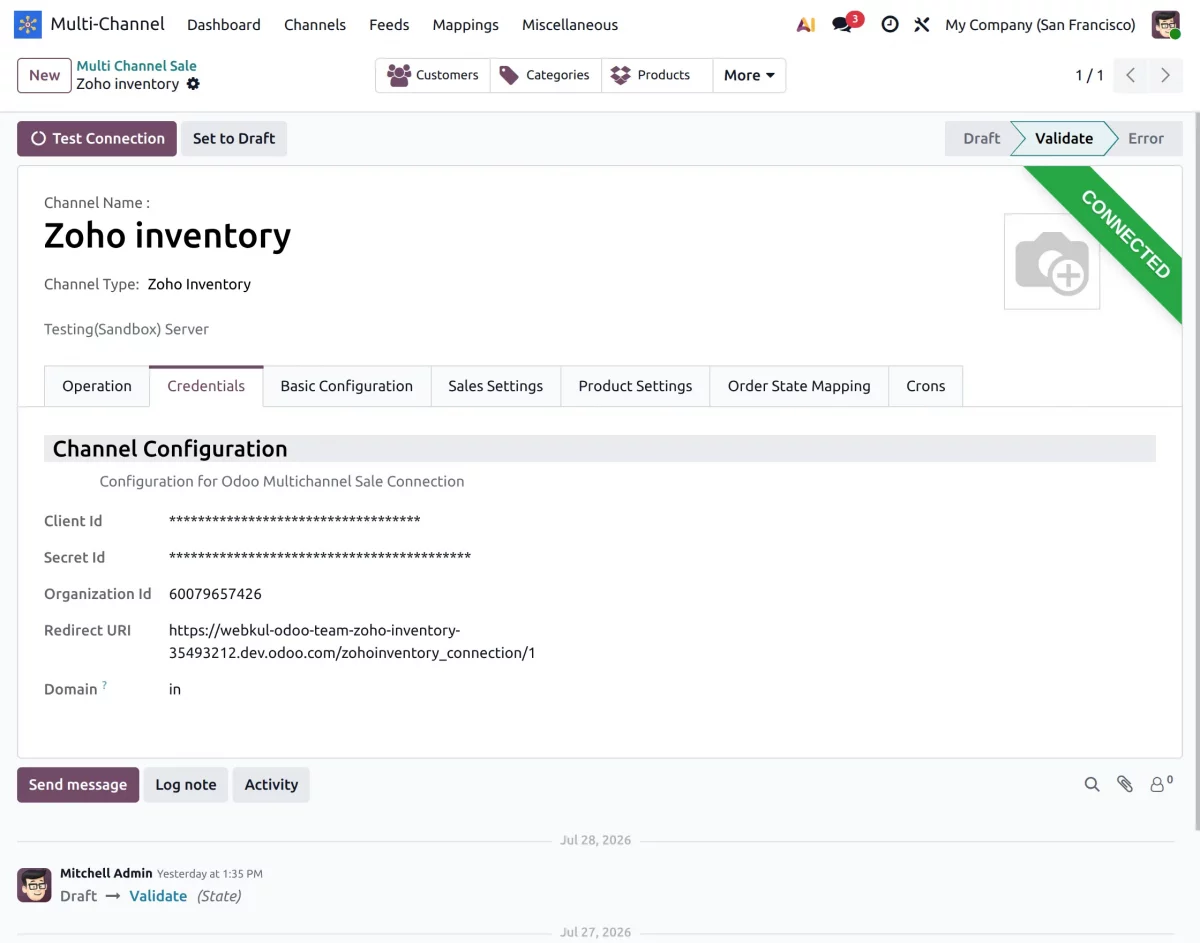
Then add the credentials information, including Client ID, Client Secret Key, and Organization ID. Get all this information from your Zoho Instance.
Afterwards, the redirect URL will be fetched automatically, connecting the Zoho instance with Odoo on successful connection.
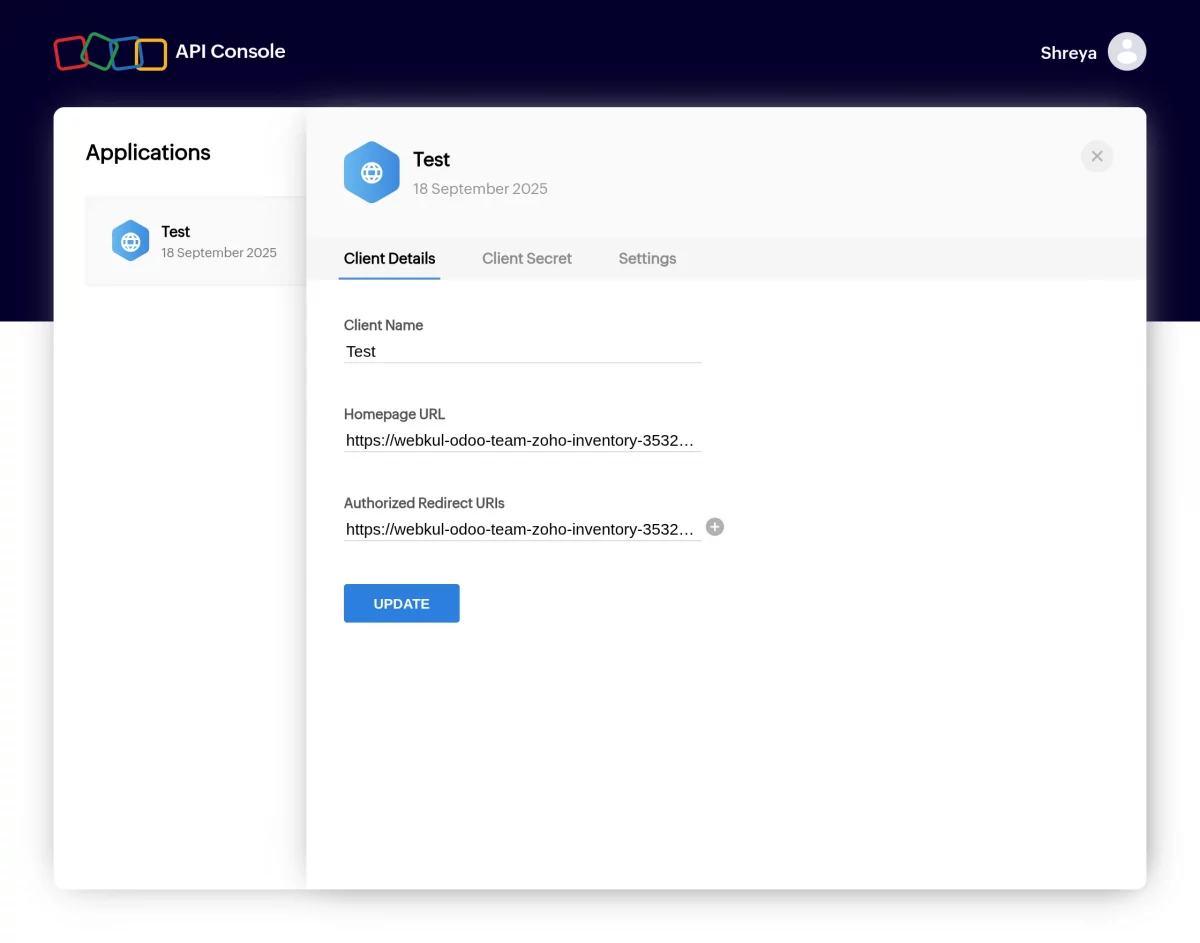
4. To obtain the Zoho credentials, go to Zoho. Log in to the API Console in Zoho. Click on ‘Add Client’ and then select Server-Based Application as a client type.
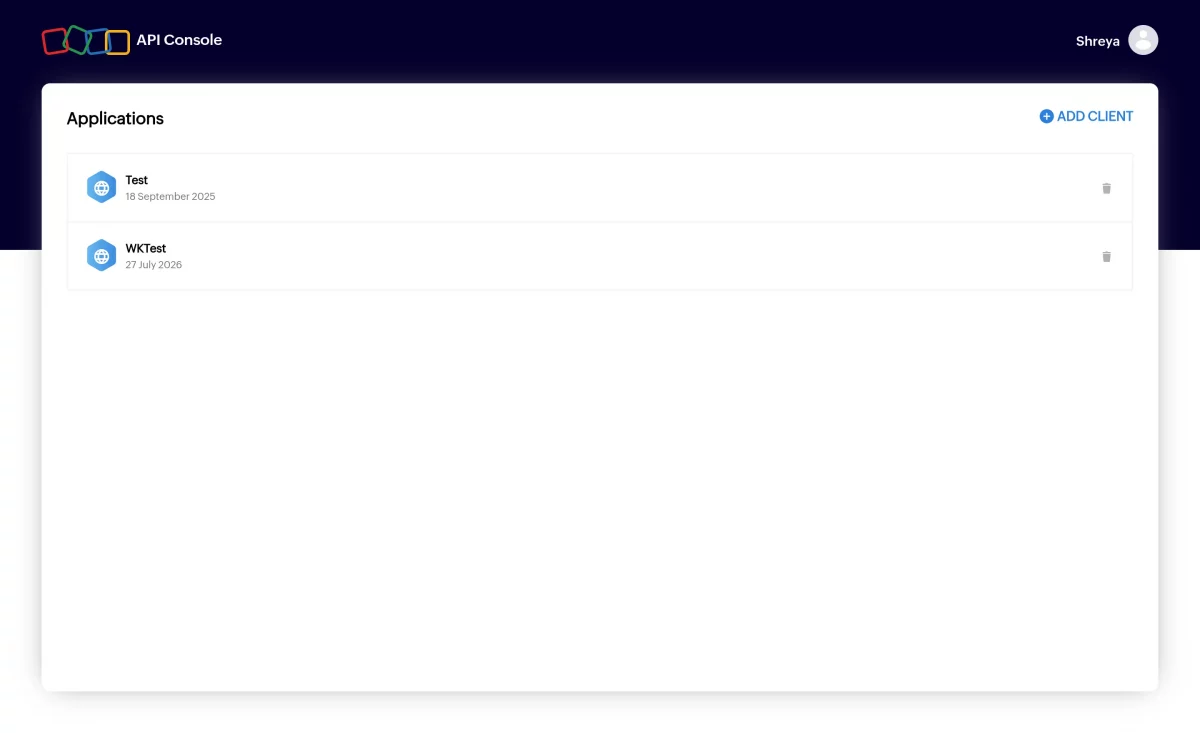
5. Enter the client name, Home Page URL, and Authorized Redirect URL, then click on Update.
6. Further, copy the “Client ID” and “ secret key” for configuring the Zoho Inventory connector instance.
7. After filling in all the details on the Odoo end, click on the test connection.
Soon, the connection between Odoo and Zoho Inventory via the Odoo Zoho Inventory Connector will show as connected.
Also, check out our Zoho Odoo Book connector to integrate your Zoho Book with Odoo.
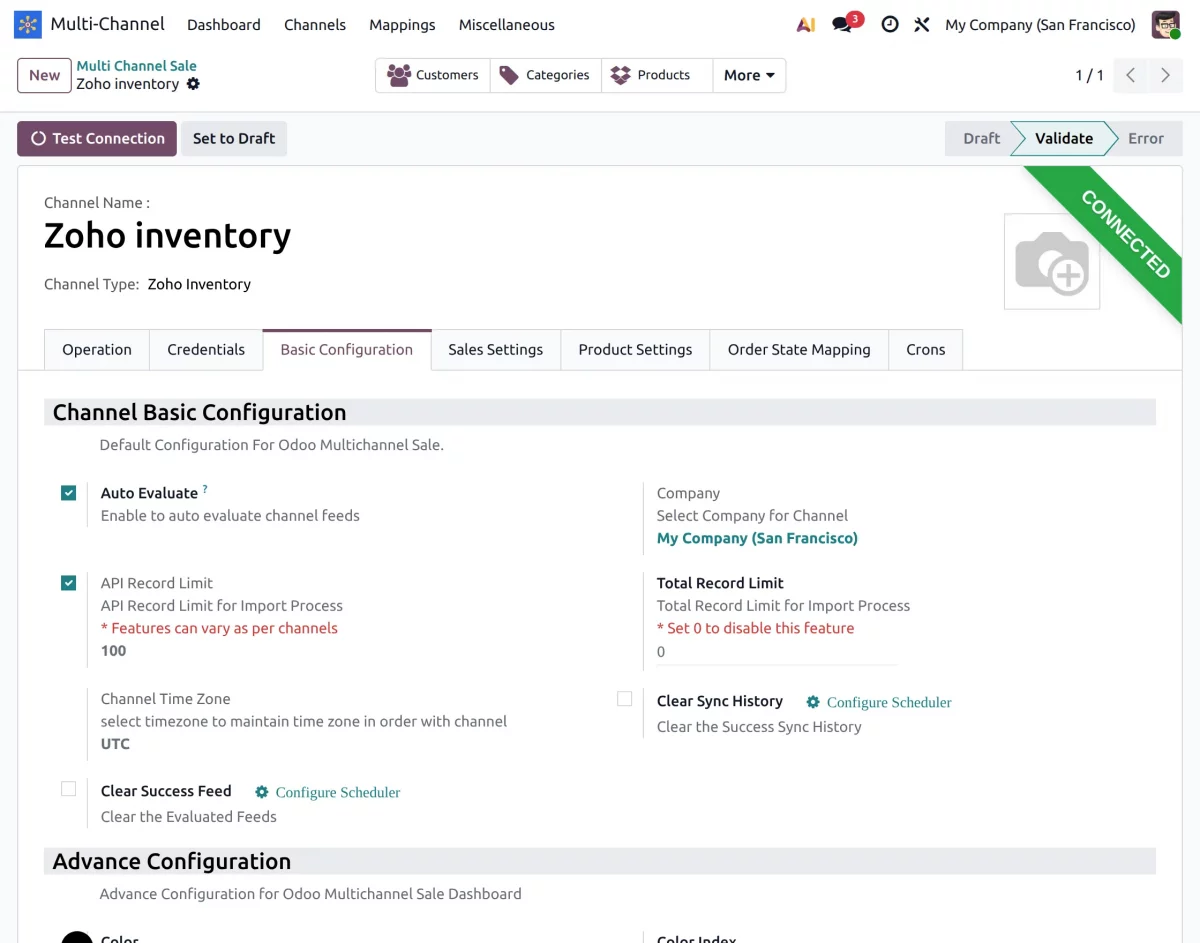
8. Afterwards, shift to the ‘Basic Configuration’ tab and configure the settings as per your preferences.
9. Then, go to the ‘Sales Settings’ tab. Here you can configure channel sales order, channel order default product, and real-time sales order status sync.
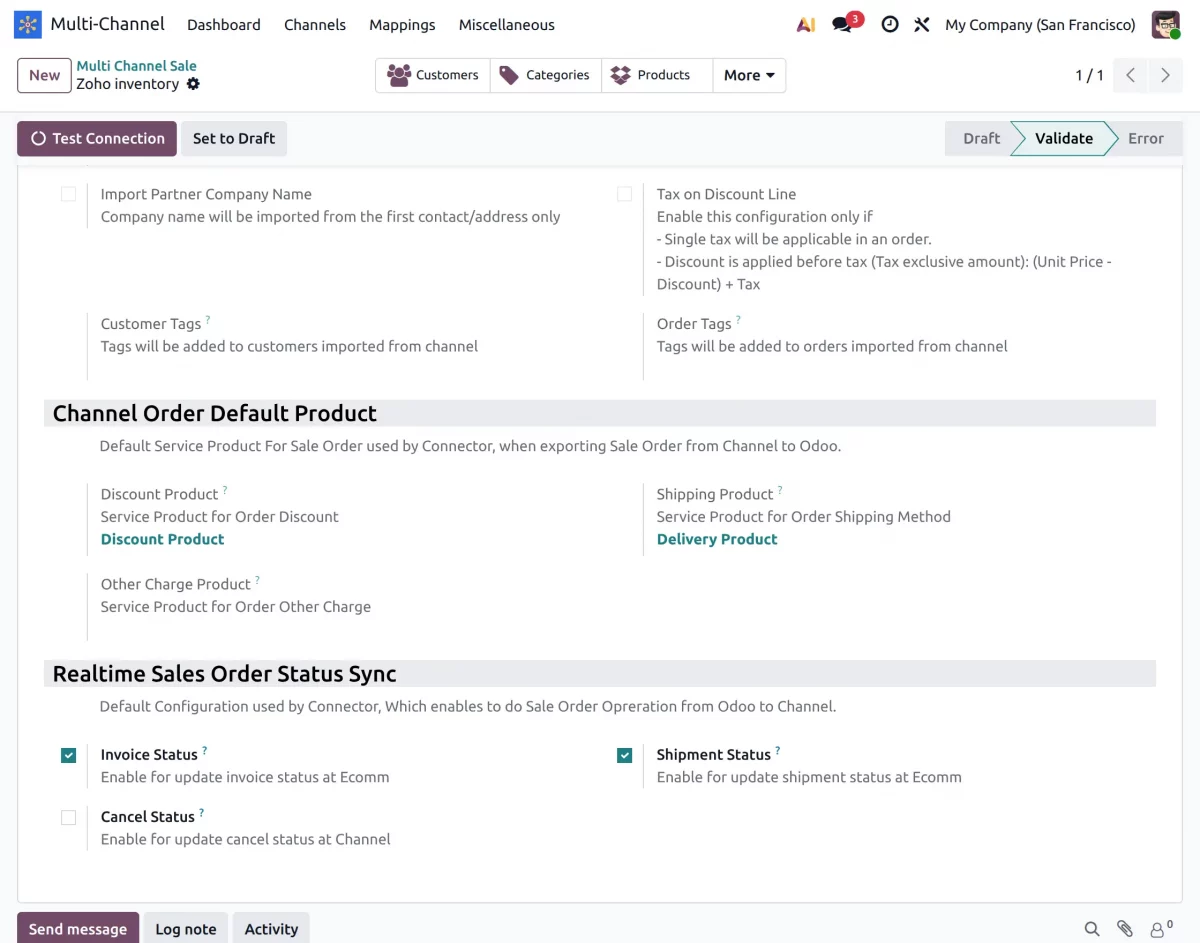
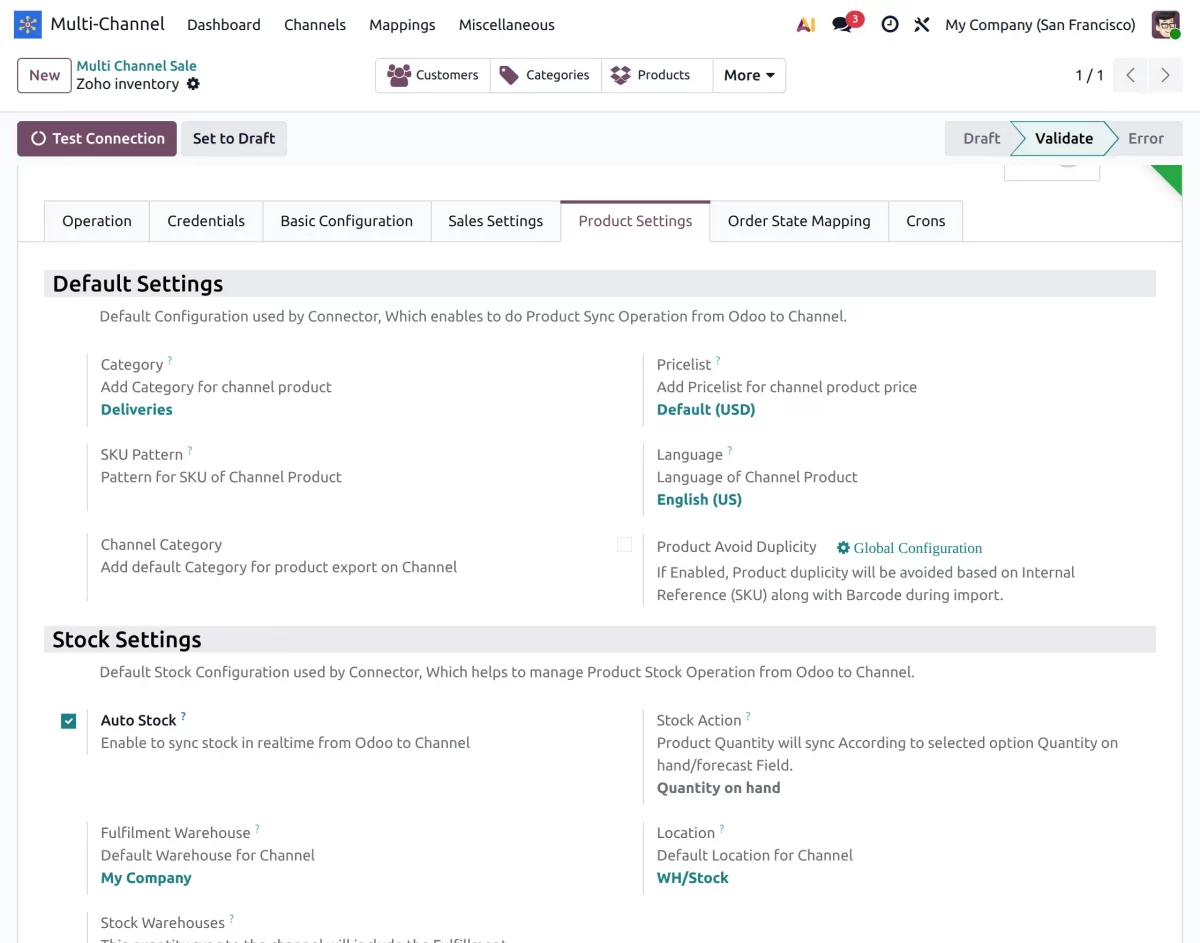
10. Further, in the Product Settings tab, set category, price list, language, SKU pattern, and enable product avoid duplicity under the Default Settings section.
Meanwhile, in the In Stock Settings, configure auto stock, stock action, fulfillment warehouse, and location.
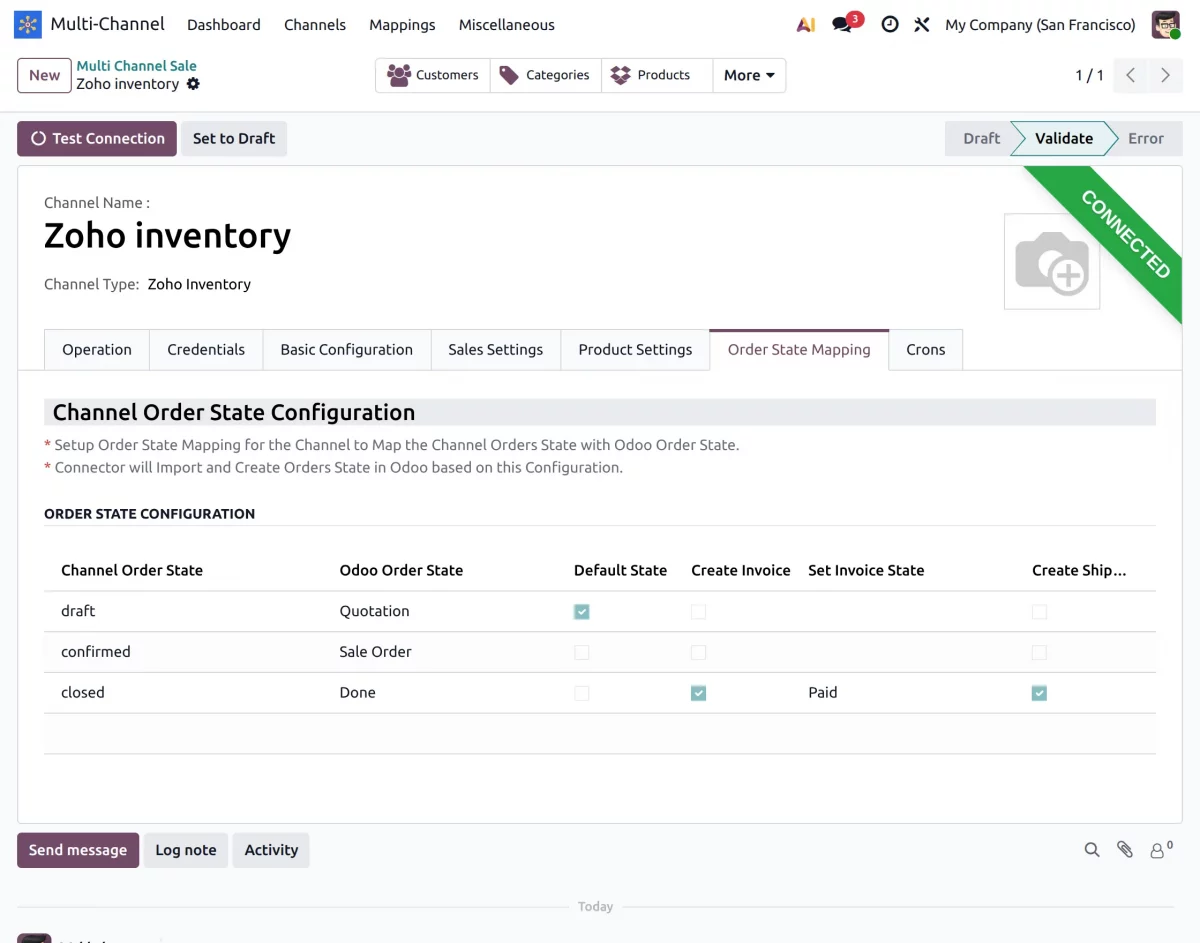
11. Here you can map the order status of Zoho Inventory with the order state of Odoo. You need to enter the same name of order status in channel order status.
You can also configure the default state directly from here. Additionally, the creation of invoices and shipments (both paid and open) can be handled.
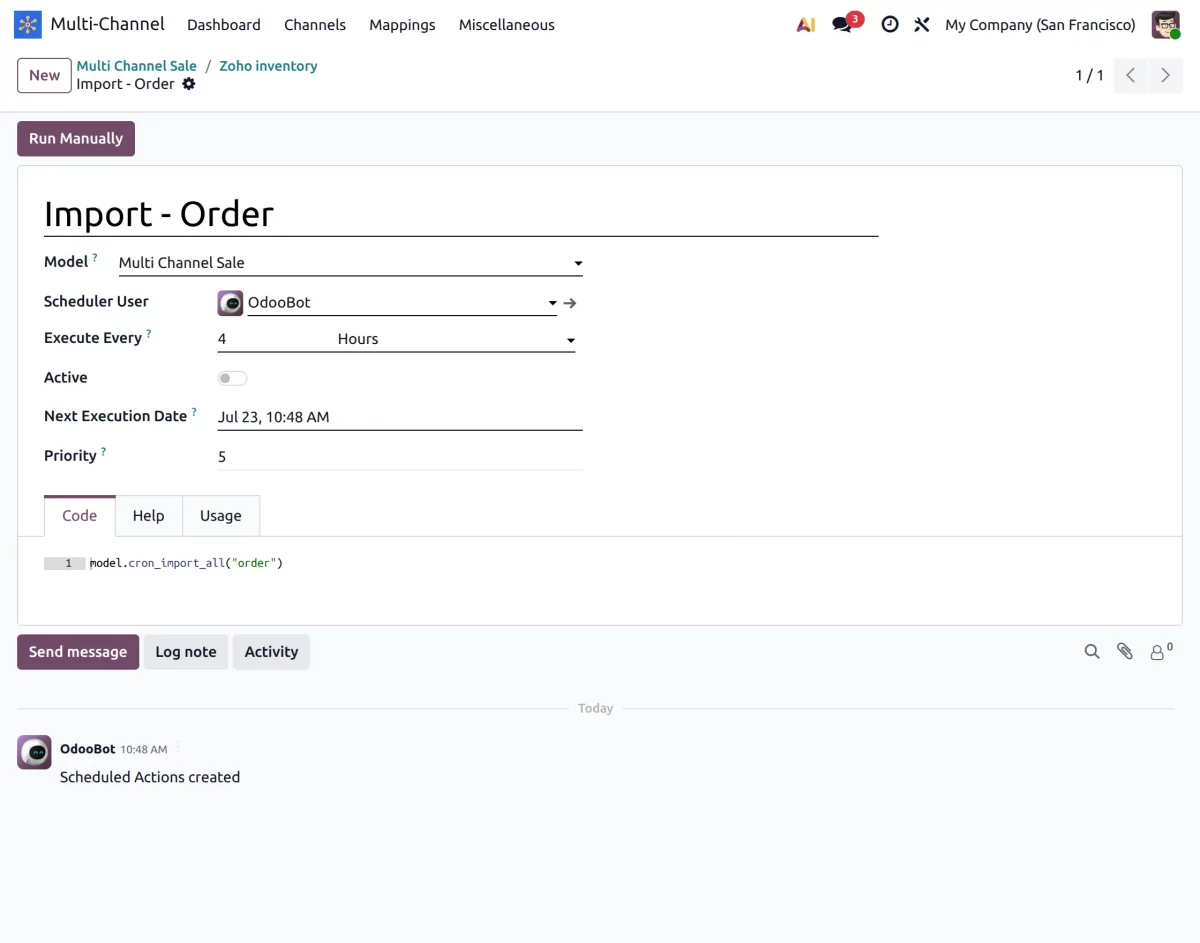
12. Finally, in the Cron tab, we have provided cron features that will import data from Zoho Inventory to Odoo by scheduling the cron jobs.
Enable and set the order’s created/updated status and schedule date and time to import data.
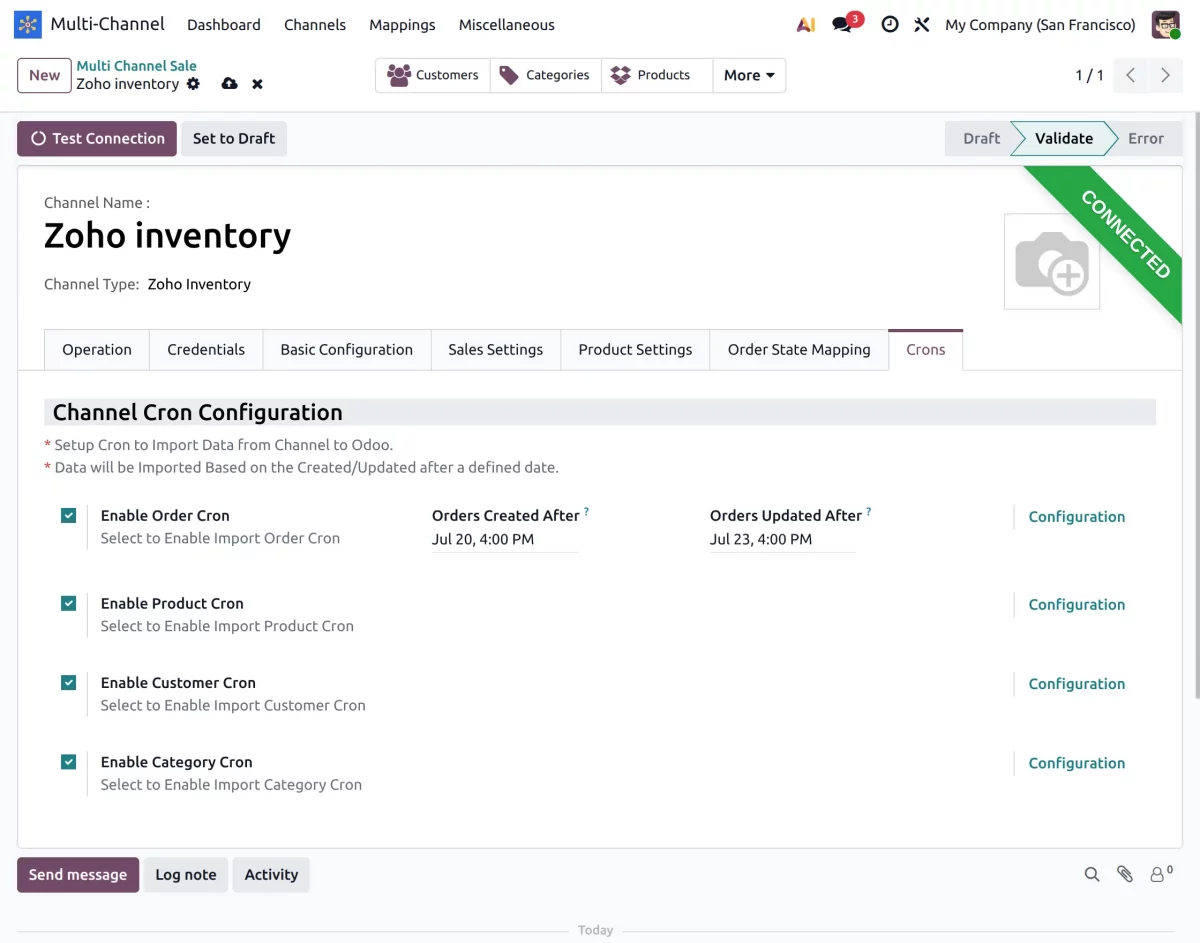
13. Moreover, to configure Odoo Zoho Inventory Connector cron based on objects, click on the configuration button to select the object you want to configure.
In the meantime, you will find the order, product, customer, and category cron. The data will be imported automatically based on the Created/Updated status after a defined date and time.
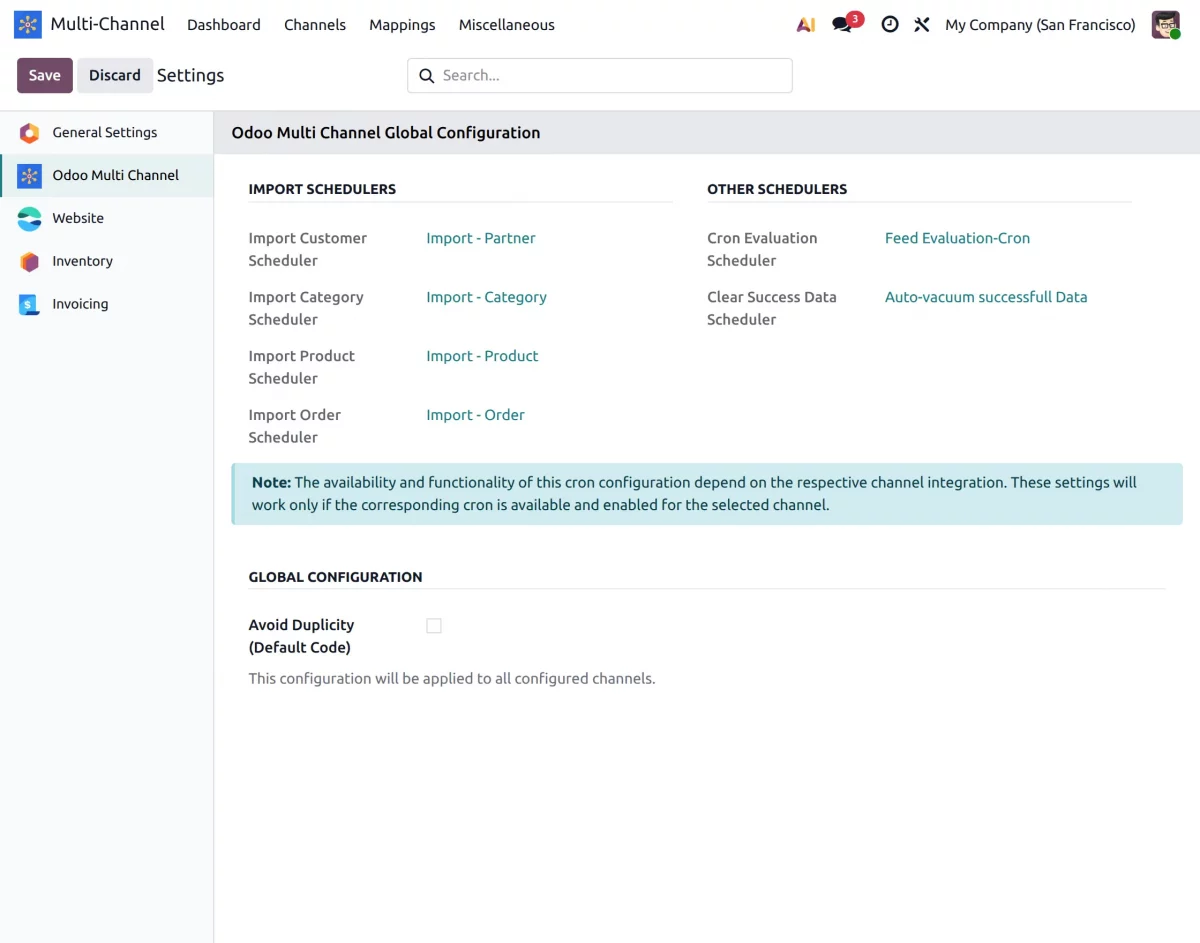
14. At this point, go to the Miscellaneous tab> Global Configuration.
From here, you can configure the import scheduler and enable ‘Avoid Duplicity (Default Code)’ thus avoiding double imports of unchanged data.
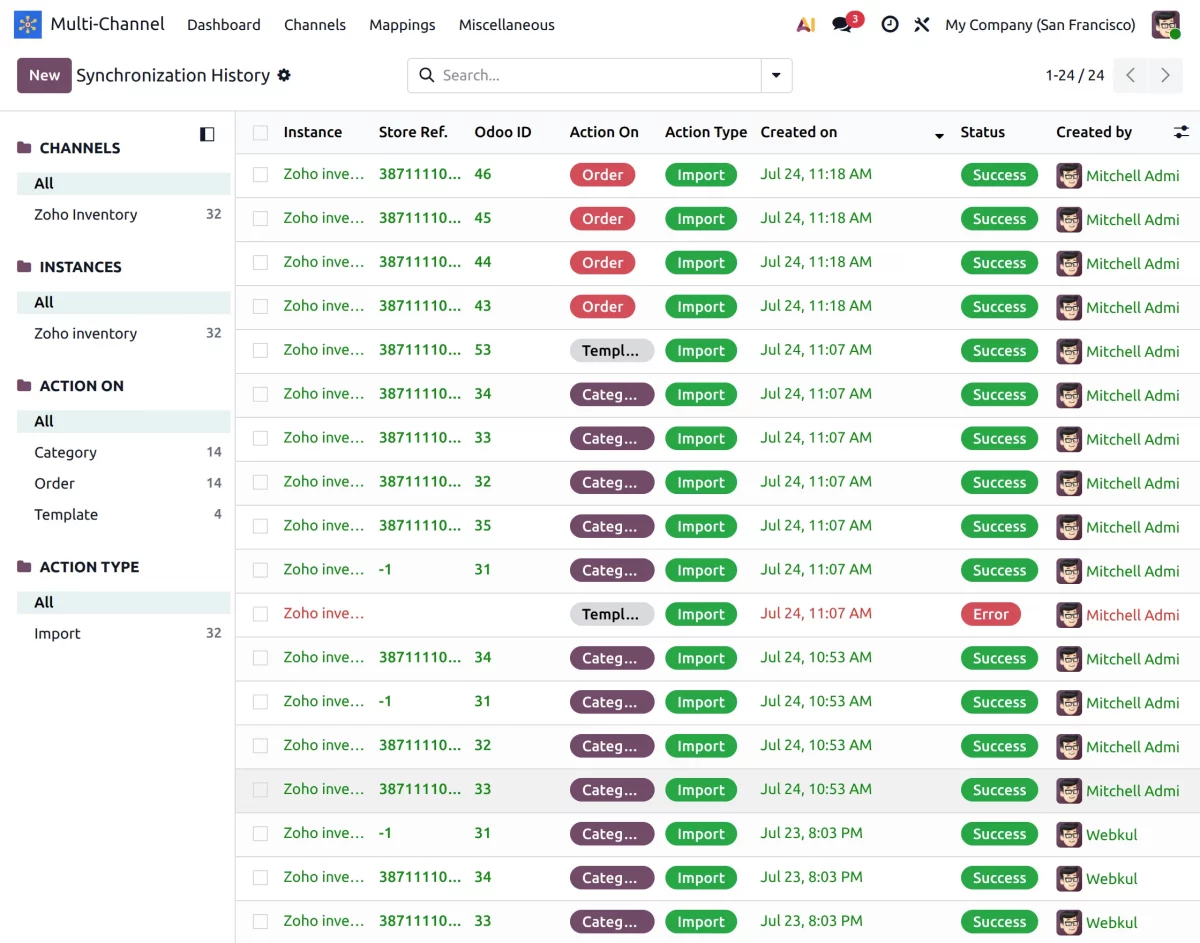
15. In the ‘Synchronization History’ option under the Miscellaneous tab, you can view the entire history of every sync done via Odoo Zoho Integration.
If you click on the record, you can see all the details of the history sync.
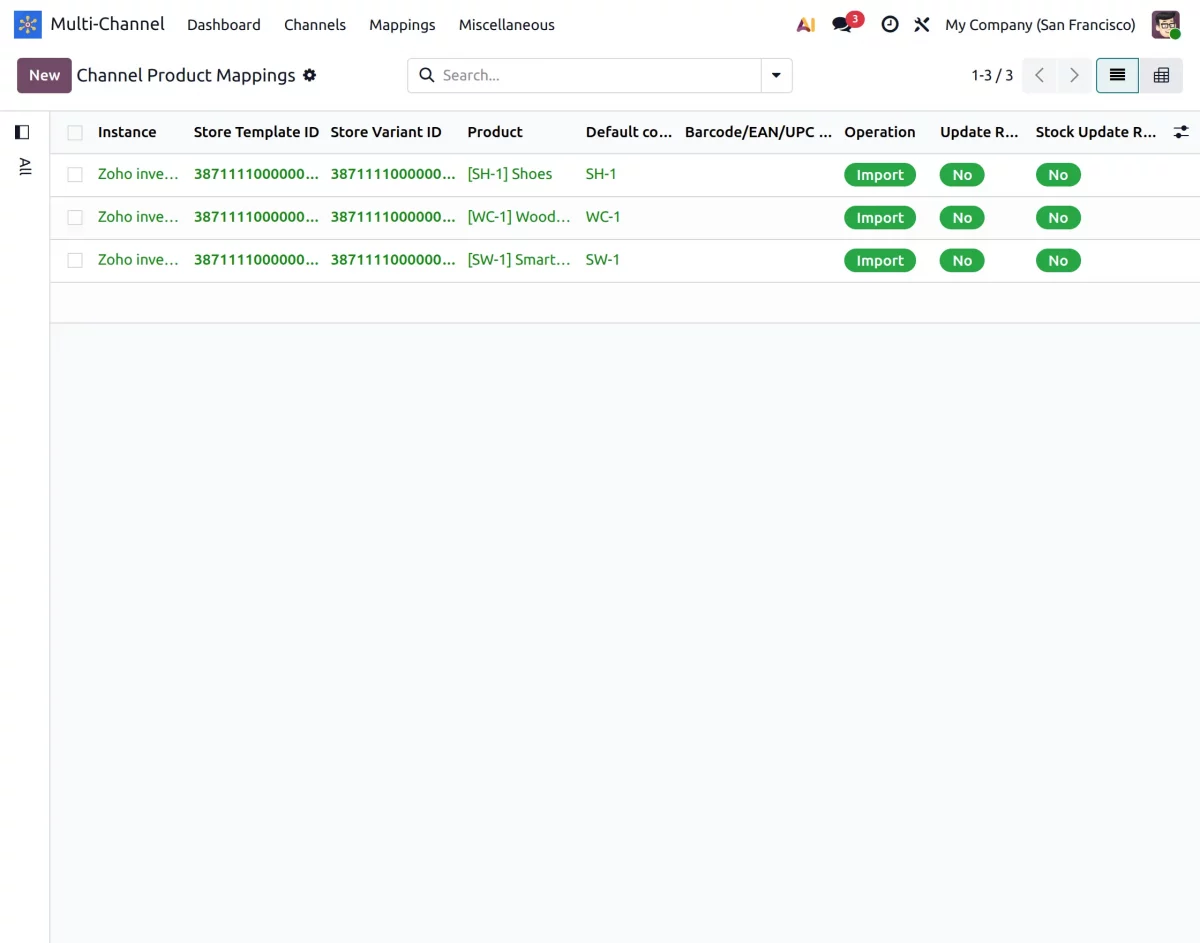
16. Furthermore, go to the mapping tab and view the mapping of all the imported data, such as products, categories, orders, customers, and shipping methods, in Odoo.
By opening any page in the mapping menu, such as product, you can view the list view of every product mapping. By clicking any, you can view the details of that particular mapping.
17. Now that you have successfully configured the connector, you can import and export data between the two platforms.
Further, to import data from Zoho Inventory to Odoo, go to the Operations tab and click on the Import button.
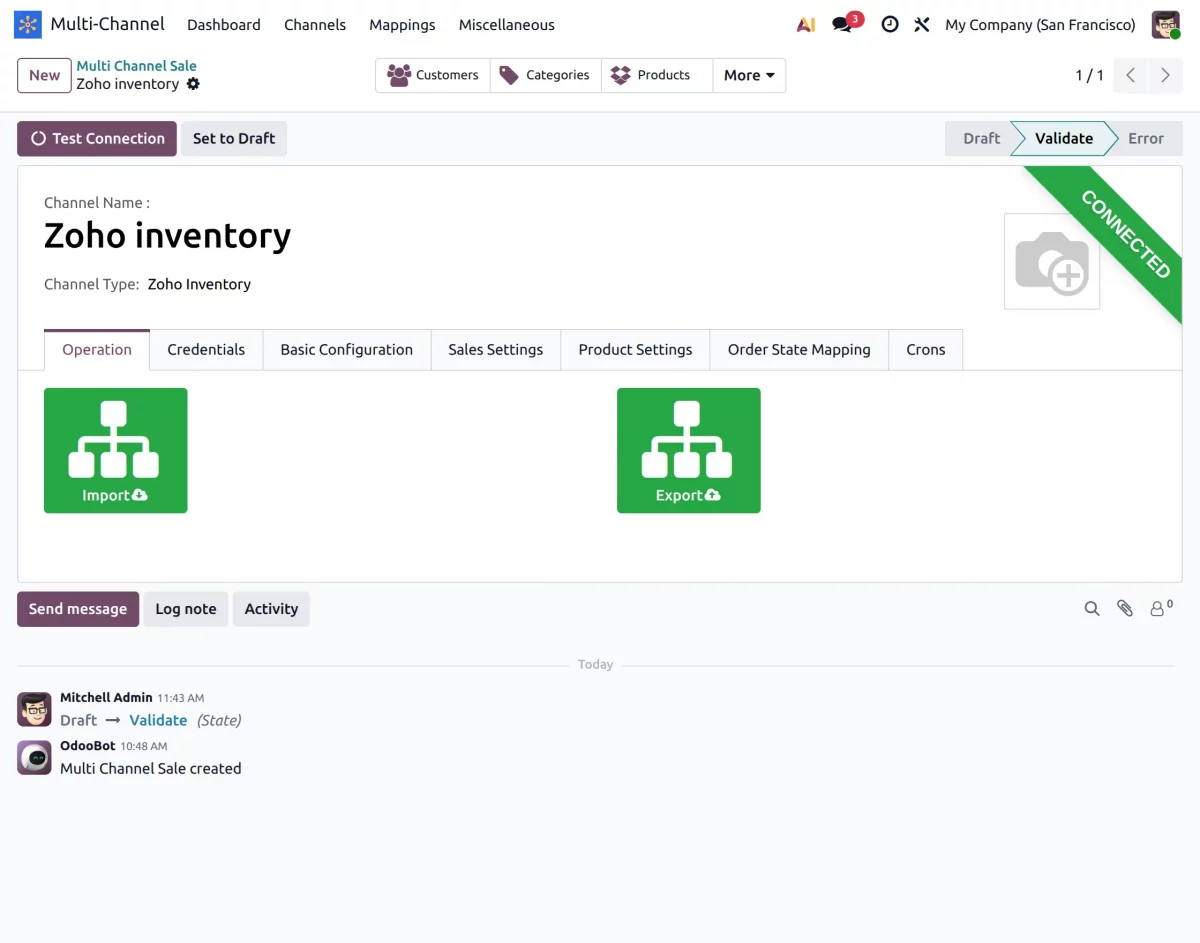
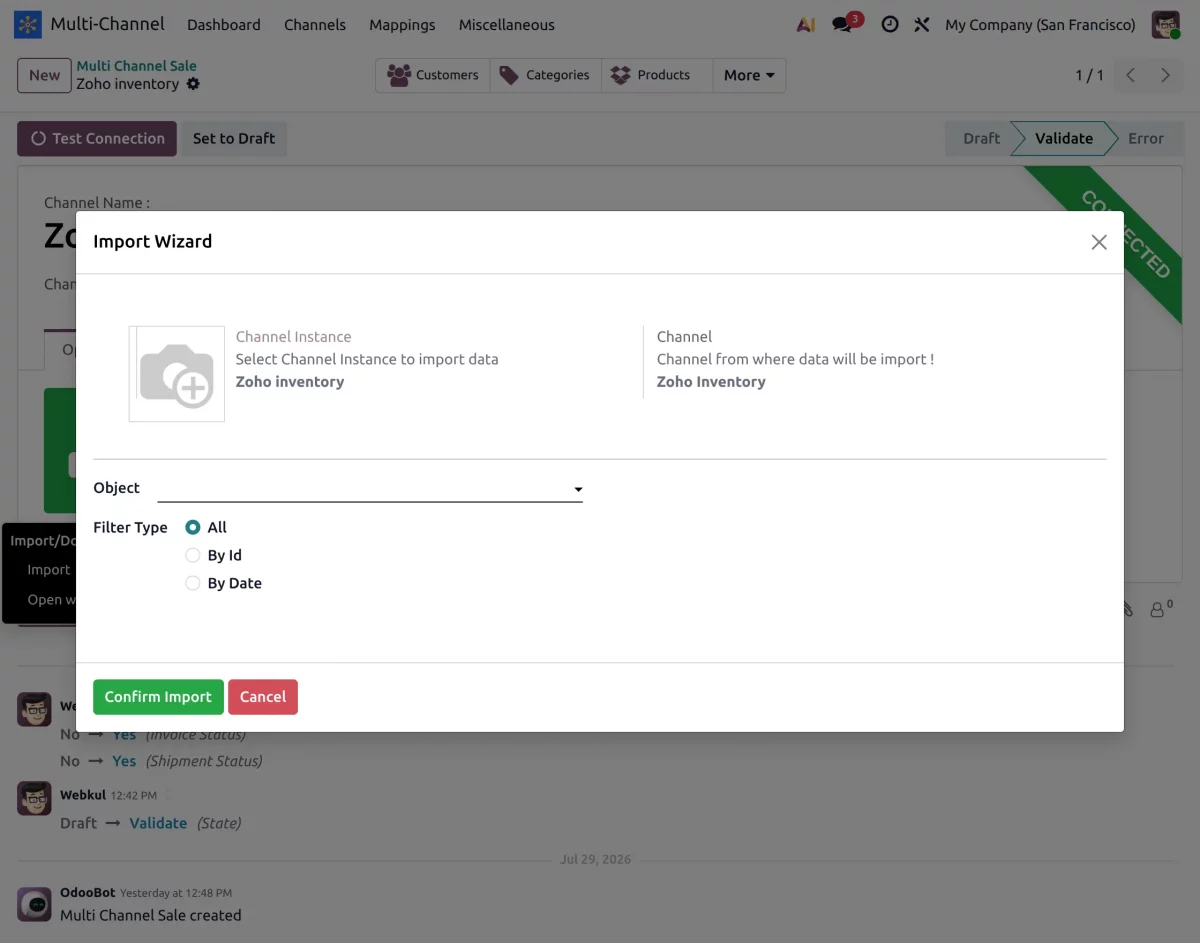
18. Then a pop-up window will open. Select the object you want to import, and apply a filter to import filtered data.
After that, click on the Confirm Import button. A new window will open showing a success import message.
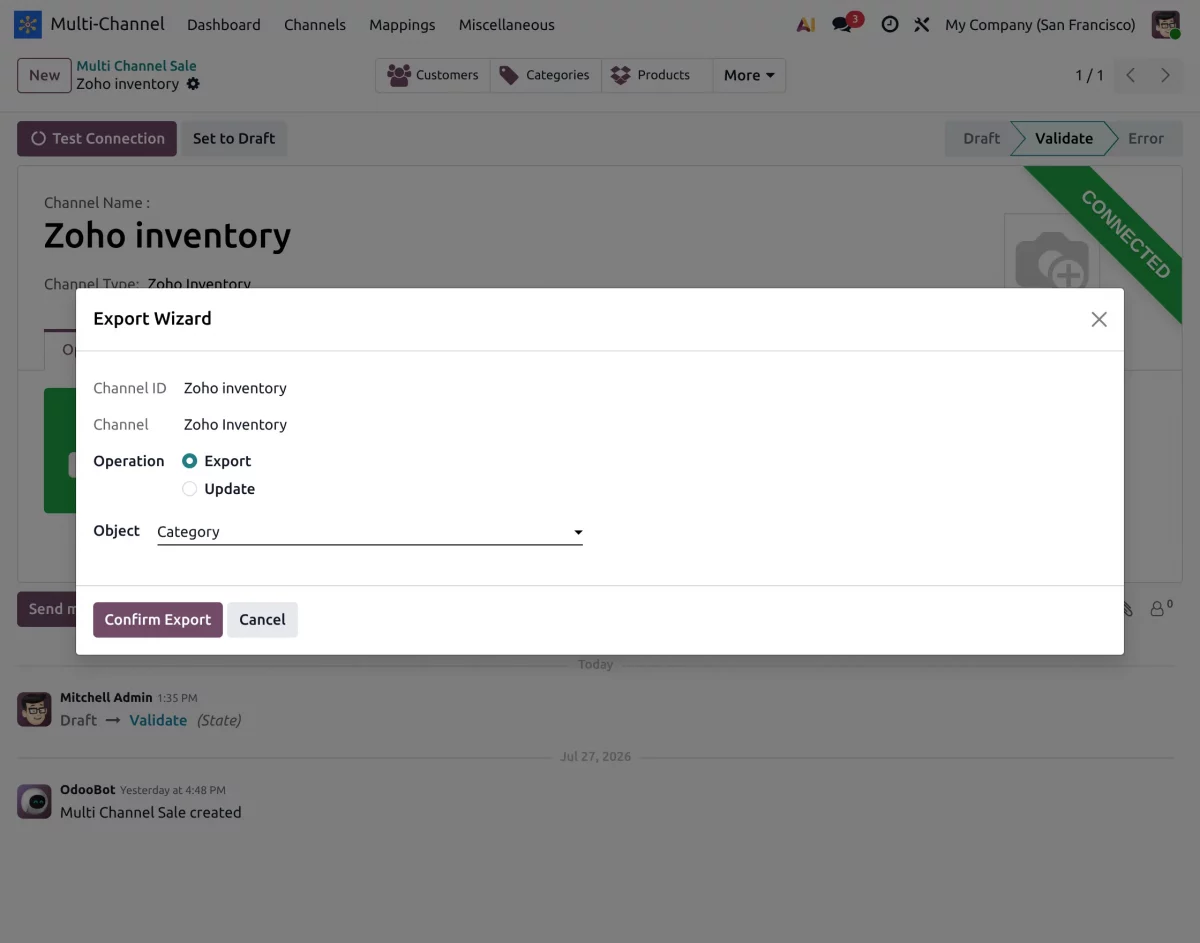
19. Next, to export and update product and category data from Odoo to Zoho Inventory, click on the export button. After that, a pop-up window will open.
Select the object you want to export, apply a filter, and click Confirm Export. Then the records will be exported and updated to Zoho.
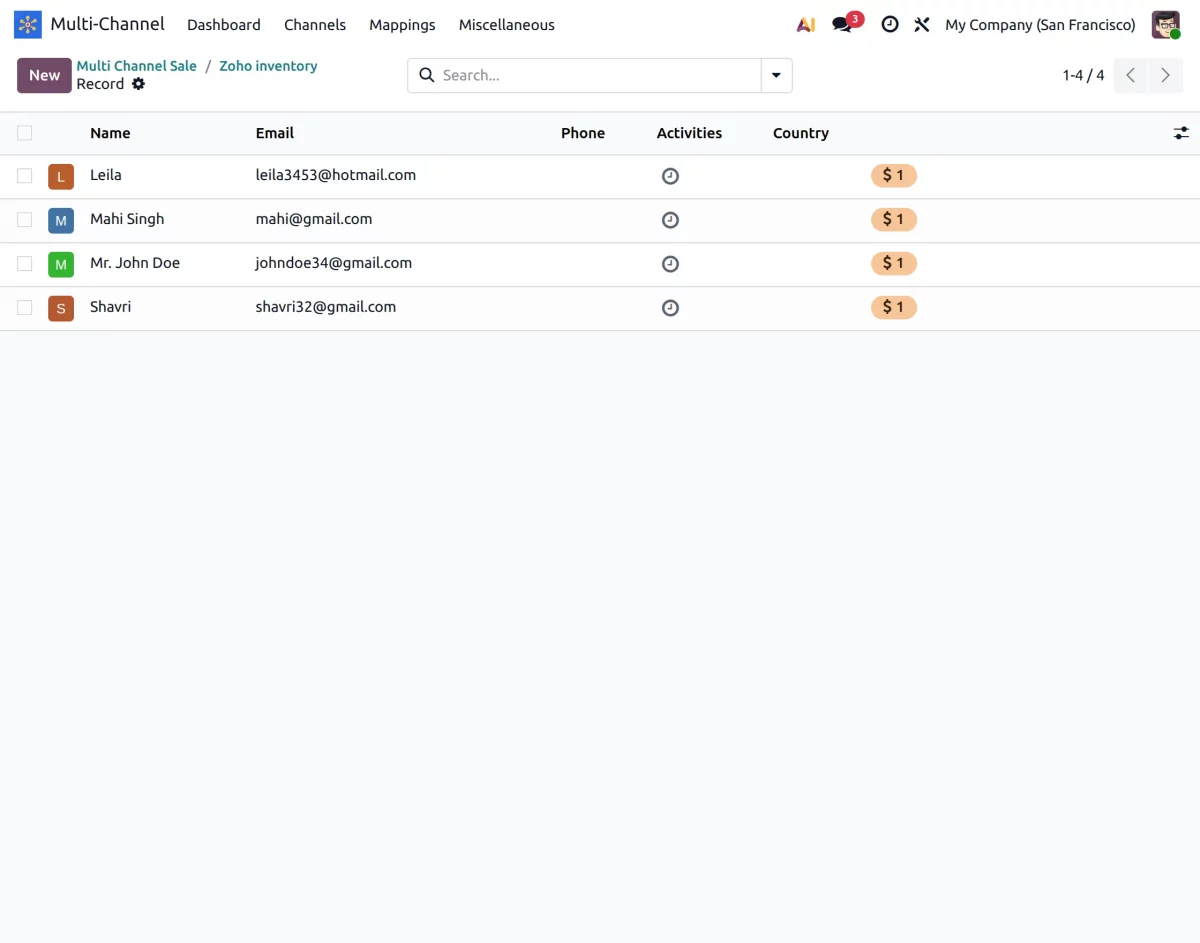
20. Now, view your imported records through the Customer, Category, Product, and Order tabs.
View Customer Records: Click the Customer tab to view the imported customer records from Zoho Inventory in Odoo.
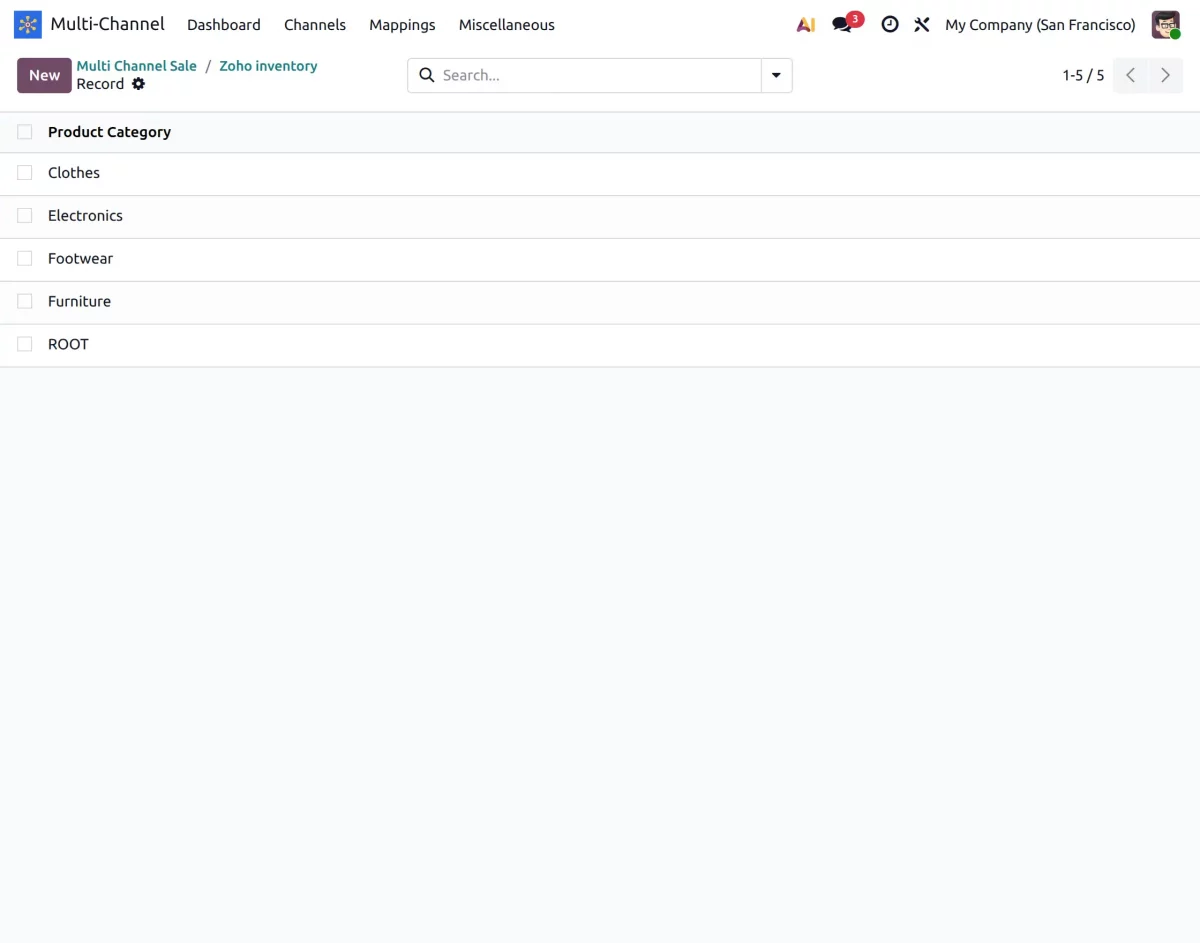
21. View Category Records: Click the Category tab and view imported category records from Zoho in Odoo.
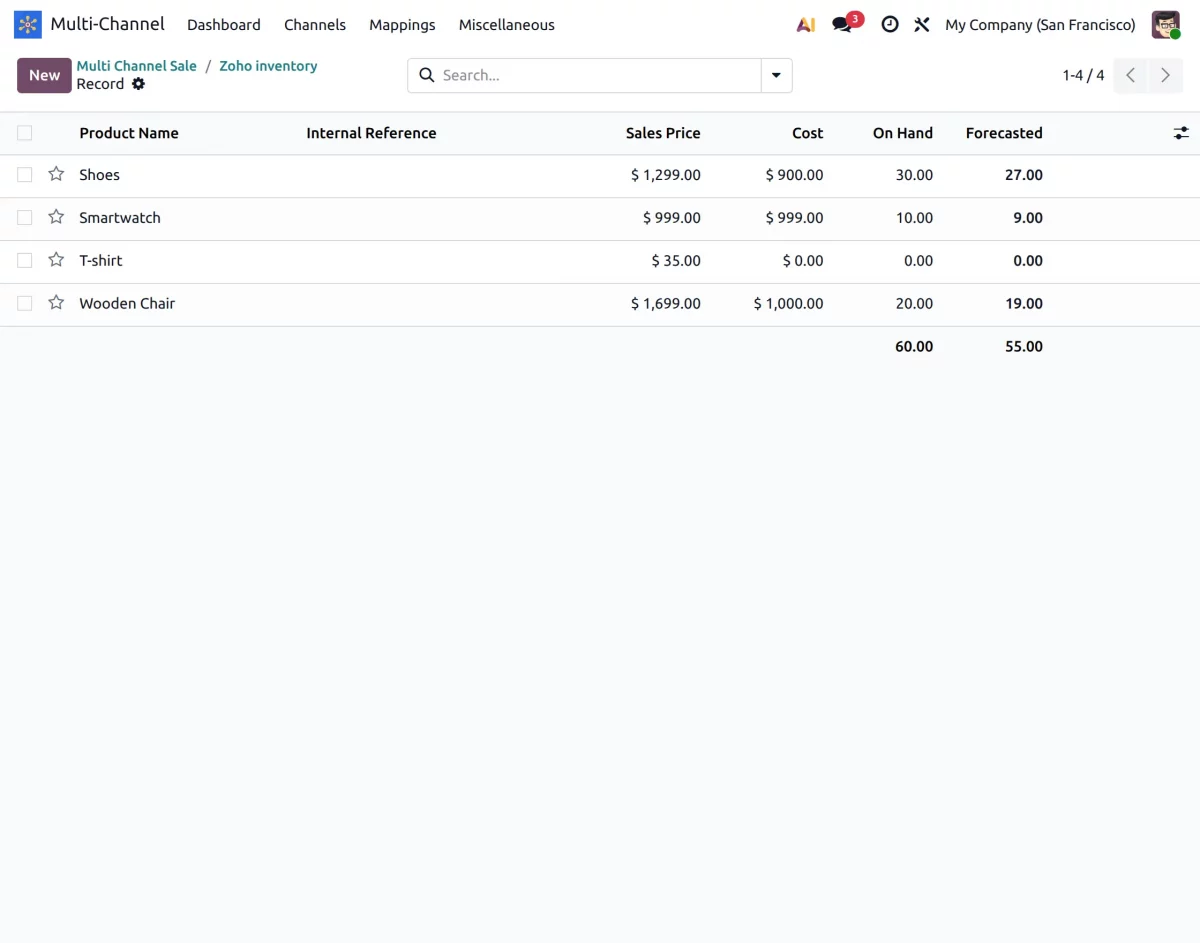
22. View Product Records: Click the Product tab to view imported product records from Zoho in Odoo.
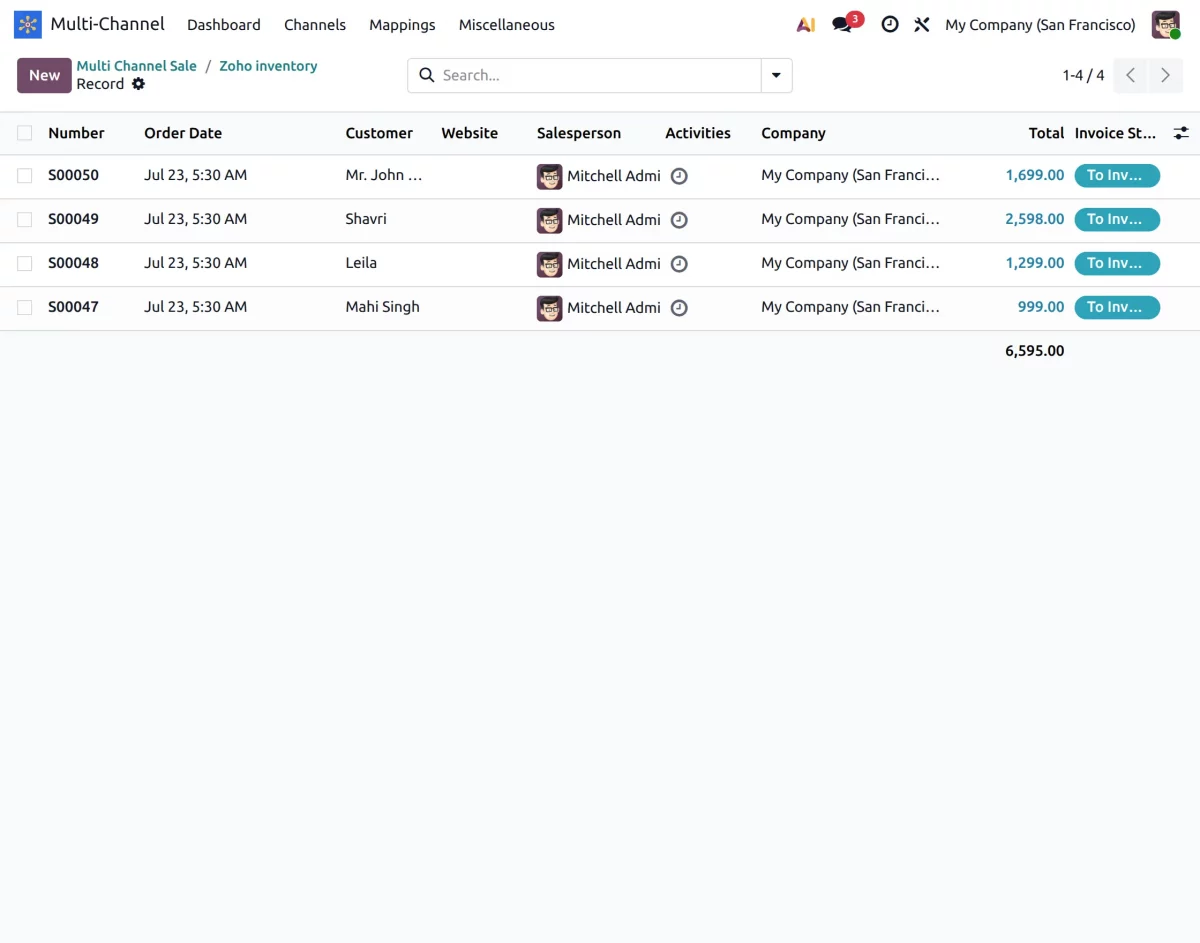
23. Order Import: Go to the Order tab and view imported Zoho Inventory order records in Odoo.
Note: In Odoo Zoho Inventory connector, the shipping method is not imported.
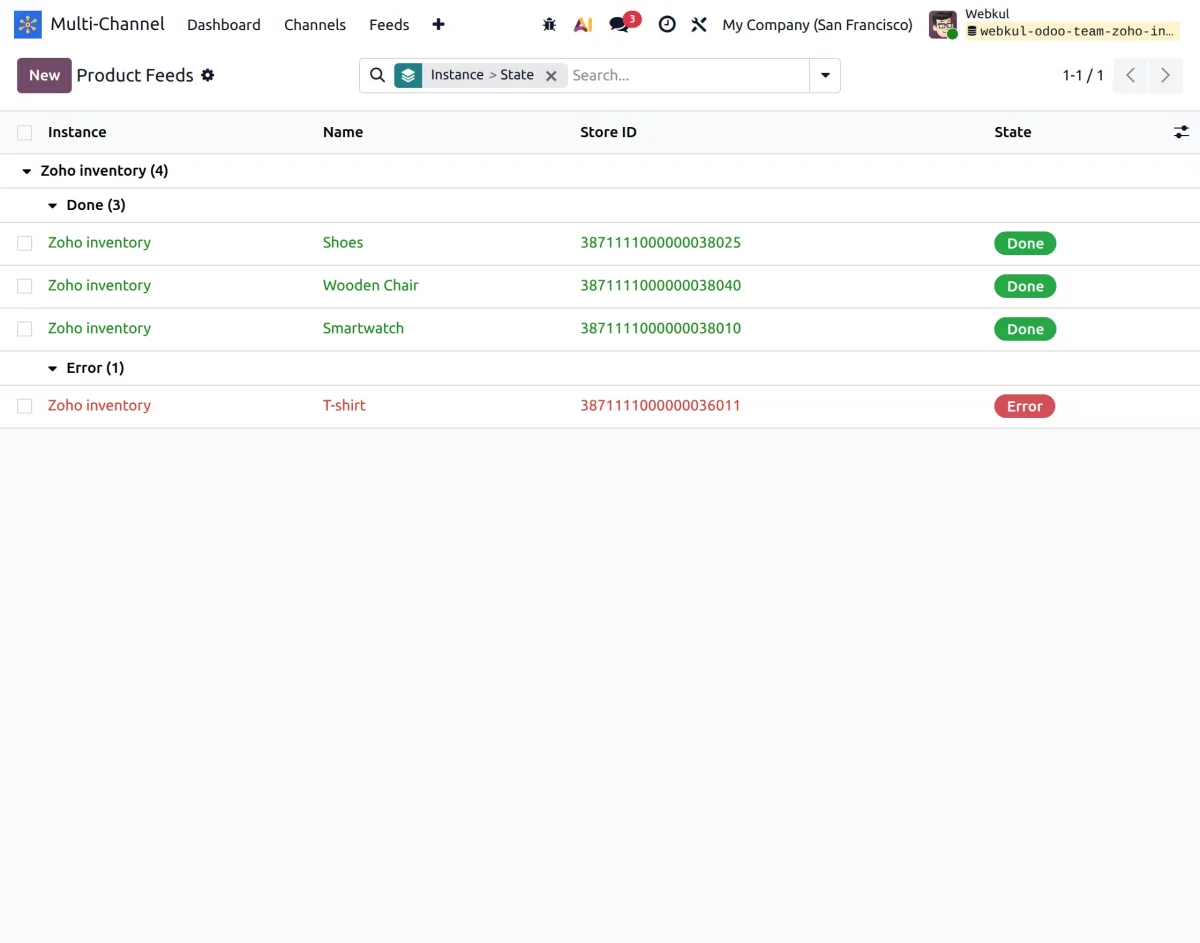
24. Finally, if any errors come up during the data synchronization process, you can simply activate developer mode and check the Feed tab.
To activate, go to Settings and scroll down to the Developer Tools section. After that, click Activate Developer Mode.
The Feed tab will be visible; click on the failed data and view the error message.
Need Help?
Hope you find the guide helpful! Please feel free to share your feedback in the comments below.
If you still have any technical queries or need a custom feature, please raise a ticket or contact us at [email protected].
Current Product Version - 1.1.1
Supported Framework Version - 19, 18 and 17

Be the first to comment.