INTRODUCTION
Integrate Google Tag Manager with Odoo using Odoo Google Tag Manager!
Tags appear as an essential tool to analyze and monitor the behavior pattern of the visitors to your website. They can help the marketing team to draw valuable conclusions regarding products, website visitors, and cart abandonment.
But manually assigning tags to the web pages can be tricky and laborious. Any mistyped code snippet can lead to problems. Managing multiple tags also requires time-consuming scrutinization. Google Tag Manager helps you by putting all the tags in one place.
Odoo Google Tag Manager allows you to use the Google Tag Manager for your Odoo website for running data on Google’s Marketing Tools. It integrates Odoo with Google Tag Manager. Once configured, you can create tags and deliver the required data to Google Analytics, Google Adwords, etc. This data can be used for marketing analysis and study.
FEATURES
- It integrates Odoo with Google Tag Manager and allows you to configure Google Tag Manager for your Odoo Website.
- The admin can add website tags to the Odoo Website for data gathering and analysis without complex coding.
- Third-party Tags can also be integrated into the Odoo website with Google Analytics and Adwords.
- Add various tags for Measuring Product Impressions, Product Clicks, Views of Product details, Additions to a Shopping Cart, Checkout & Purchases. (If you need the integrate any additional tags within the Odoo app, please contact our Support Team)
- Implement Universal Analytics Enhanced eCommerce features.
- Compatible with GA4 (Google Analytics 4) for a seamless experience.
- Once installed, you can create & configure tags in the Google Tag Manager panel for tracking website data.
INSTALLATION
- Once you purchase the App from Webkul store, you will receive the link to download the zip file of the module.
- Extract the file on your system after the download finishes. You will be able to see a folder named- ‘odoo_google_tag_manager.’
- Copy and paste this folder inside your Odoo Add-Ons path.
- Now, open the Odoo App and click on the Settings menu. Here, click on Activate the Developer Mode.
- Then, open the Apps menu and click on ‘Update Modules List.’
- In the search bar, remove all the filters and search ‘odoo_google_tag_manager.’
- You will be able to see the module in the search result. Click on ‘Install’ to install it.
WORKFLOW
The module inherently integrates the Google Tag manager Javascript code with your Odoo website eliminating the need to code and paste it into every source code of your website page.
Configuring Odoo with Google Tag Manager
1. The first step is to register your website with Google Tag Manager. Visit https://tagmanager.google.com/ to create an account. Then create a container for your website to obtain a container ID. The container holds your created tags. To follow the steps for setting up the account, follow the step mentioned in the support section.

2. Once you have the container ID, go to the ‘Website’ menu in Odoo. Then, click on settings (Website> Settings).
3. Here, tick on the checkbox next to the ‘Google Tag manager’ field and enter the container Key i.e. GTM-XXXX.

4. Once done, your Odoo website is integrated with Google Marketing tools.
Creating Tags for the Google Analytics
1. Now, you need to configure Tags and triggers in the Google Tag Manager so the tags can fetch the data.
2. Log in to your Google Tag Manager account. Here, click on the website account name at the top.

3. Click on the google tag manager icon and then select the website container for which you wish to create the tag.
4. Click on Tags on the left side and click on ‘New.’

5. The configuration to trigger or tag is given on the following google webpage: https://developers.google.com/tag-manager/enhanced-ecommerce. Currently, the Odoo Google Tag Manager configures the following tags- Product Impressions, Product Clicks, Views of Product Details, Additions to a Shopping Cart, Checkout & Purchases.
6. On the page, two layouts are visible- the ‘Tag Configuration and Triggering’ template. Click on ‘Tag Configuration.’

7. Now, select the tag type. Then, choose the Google platform you wish the integrate the tag with. In this case, Google Analytics- Universal Analytics since we are integrating Google Analytics with Odoo.

8. To configure the tag, refer to the enhanced e-commerce guide of Google> https://developers.google.com/tag-manager/enhanced-ecommerce.

9. For example- to fetch data for the ‘Product Impression’ tag- the following configuration needs to be put in while Tag creation:
Tag type: Universal Analytics
Track type: Pageview
Enable Enhanced E-commerce Features: True
Use Data Layer: True
Trigger: event equals gtm.dom
10. Using the above settings, you must ensure all the fields mentioned above have the displayed values to configure the tag correctly.
11. Tick the field- ‘Enable Overriding settings in this Tag’ to open advanced settings.

12. Expand the tab ‘More settings,’ look for ‘E-commerce,’ click on it, and set the field- ‘Enable overriding settings in this Tag’ to TRUE. Similarly, set the ‘Use Data Layer’ field to TRUE.

Setting the Trigger Event
1. Now, move to set the trigger event and click on the ‘Triggering Template.’ The trigger event tells the tag to send information when a specific condition is met.
2. Click on ‘New> Trigger Configuration> Custom Trigger.’


3. Copy & paste the trigger event from the configuration settings- (In this case: gtm.dom) for the field Event Name and hit Save and Done.

4. You can create various tags according to the need, such as Product impression.
Integrating Google Analytics with Google Tag Manager
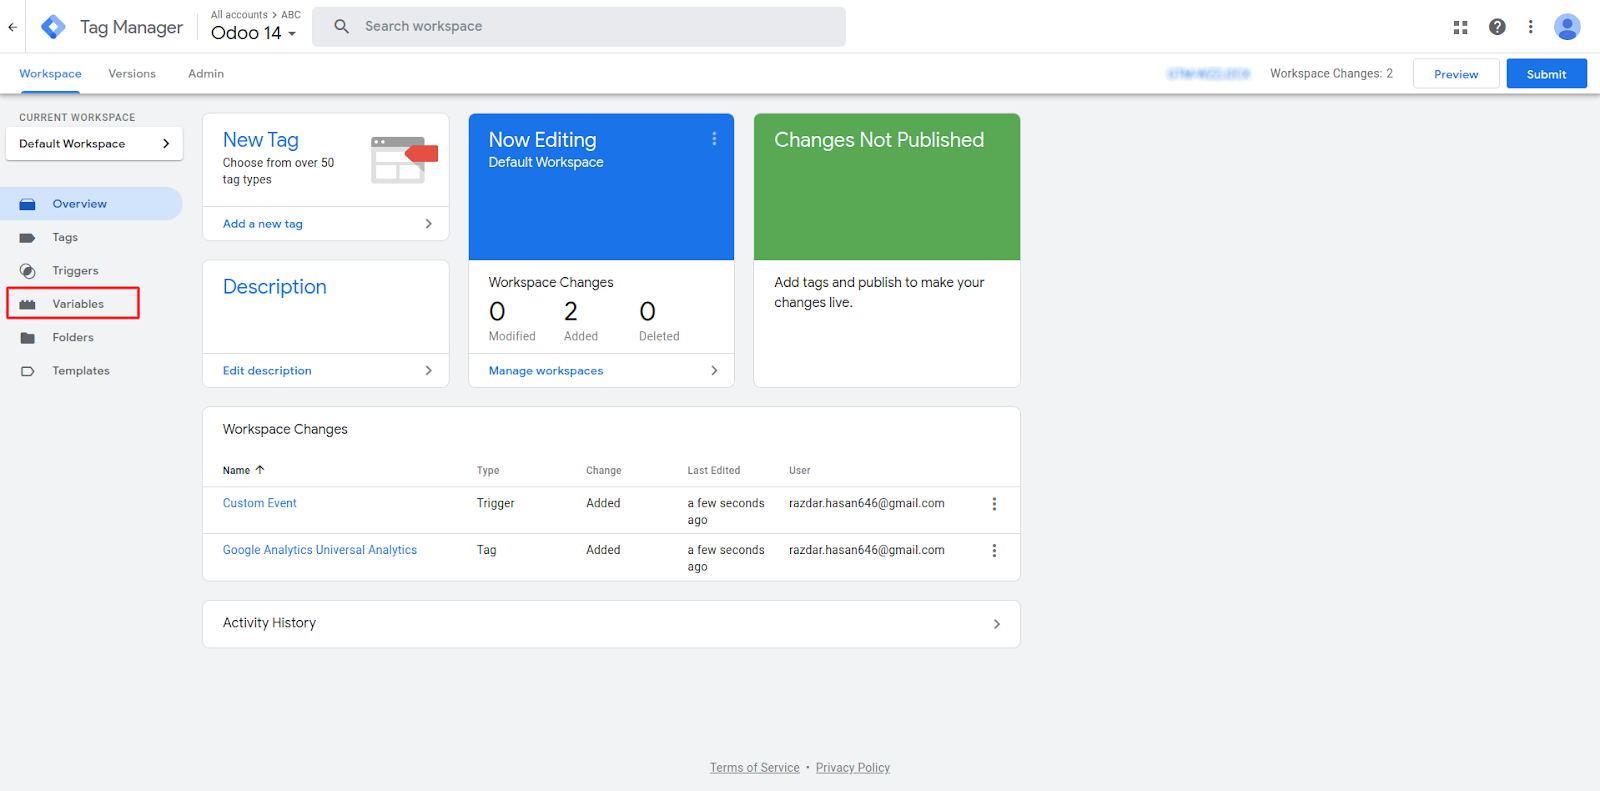
1. Once all the Tags are configured, you must integrate Google Analytics with the Google Tag Manager. Click on the ‘Variables’ Tab.
2. Here, click on ‘New’ under user-defined variables. Then click on the ‘Variable Configuration’ template.

3. Now look for ‘Google Analytics Settings’ and click on it.

4. Here, copy & paste the Tracking Id of your Google Analytics account. (Tracking ID is generated when you make an account in Google Analytics, just like the Google Tag Manager Container ID)

5. Now, look for E-commerce in more settings and tick on ‘Enhanced E-commerce Features’ and ‘Use Data Layer’ and then Done.

Fetching the Data
1. Open Google Analytics, and the data would start reaching the analytics.
2. The data can be used to study the behavior pattern of your shoppers, navigation trends, track clicks on a particular product, etc.
3. Similar tags can be made for other marketing platforms of Google, such as Goog Adwords with their Tag configuration guide. All you need to do is create the tags and trigger events for the particular tag.
OTHER ODOO MODULES
- Odoo News Ticker
- Sales Order Total Discount
- Odoo News Ticker
- Odoo SMS Opt-Out
- Email Marketing Theme
- Odoo RSS Feed Reader
NEED HELP?
Hope you find the guide helpful! Please feel free to share your feedback in the comments below.
If you still have any issues/queries regarding the module, please raise a ticket at https://webkul.uvdesk.com/en/customer/create-ticket/.
Also, please explore our Odoo development services & an extensive range of quality Odoo Apps.
For any doubt, contact us at [email protected].
Thanks for paying attention!!
Current Product Version - 1.0.0
Supported Framework Version - Odoo 16, 15, 14

Be the first to comment.