The customers/buyers can easily visit your store by using the Mobikul WooCommerce mobile App on the go.
Moreover, it is not necessary to have desktops/laptops to shop from your store.
So, the mobile application has a better user experience with splendid features and functionalities.
Furthermore, the app follows the latest technology of Flutter wherein one can use Dart to build a mobile app.
Further, it is fully compatible with your default WooCommerce Store.
The mobile application provides a user-friendly experience and enhances the customers’ engagement over the mobile platform.
Note:- Marketplace Mobile App – If you are using Webkul Marketplace Plugin, then please use the Multi-Vendor Mobile App for the WooCommercesolution.
Additional Information:
To view the admin panel web demo click here.
Check the Mobile App Configuration Video –
Check the Android mobile app workflow for the flutter application –
Support
Dear Customers, if you have a question/query, please raise a ticket at webkul.uvdesk.com. We will do our best to answer as quickly as it is possible.
Don’t give us a low rate without contacting support on the issue you’ve faced with. We are always happy to help you.
Features Of Mobikul Woocommmerce Mobile App
- Integrated with Existing WooCommerce Store
- Unlimited Push Notifications
- All product types supported – Simple, Grouped, Downloadable, Virtual, Variable, and External products.
- Compatible with Mobile & Tablet
- Various Shipping Supported
- Real-Time Synchronization
- Flutter based application
- Offline Mode
- Checkout at one page
- New and Featured Product Carousel
- All the Major Payment Gateway Supported
- Social Login*
- One Time Password*
- Mobile Number Login*
- The features with Asterix mark (*) are the paid features.
Installation of WooCommerce mobile App
For installation, the user will get a zip file which he has to upload in the “Add New” menu option in the WordPress admin panel.
For this, login to WordPress Admin Panel, and Under the Dashboard hover your mouse over the “Plugins” option inside the menu which brings out a Sub-Menu.
then select the “Add New” option.

After this, you will see an option on the top of your page that is “Upload Plugin”, click on that option to upload the zip file.

After clicking on the “Upload Plugin” option, below that you will see a button “Choose File” click on the button to browse for the zip file as per the snapshot below.
Post browsing the file, click the “Install Now” button to install the plugin as per the snapshot.

Now, when the plugin is installed correctly, you will see the success message and an option to activate the plugin. Click on “Activate Plugin” to activate the installed plugin.

Admin End Configuration of WooCommerce mobile App
Mobikul Application Woocommerce Admin-End Configuration is a facility for the store owners to manage and configure the app from the backend.
So, the admin can manage the app easily from the backend in easy steps.
From the admin panel, the admin can manage the home page, banner images, featured products, featured categories, and notifications.
Hence, from the admin dashboard, the admin can navigate to Mobikul, where the admin can manage the settings.
Banners
From the Banner Image section, the admin can manage or add new banner images for the Mobikul WooCommerce Mobile App. The admin can even manage the images in bulk to move the images in the trash.
So, the admin can click on the edit button to edit the existing image.
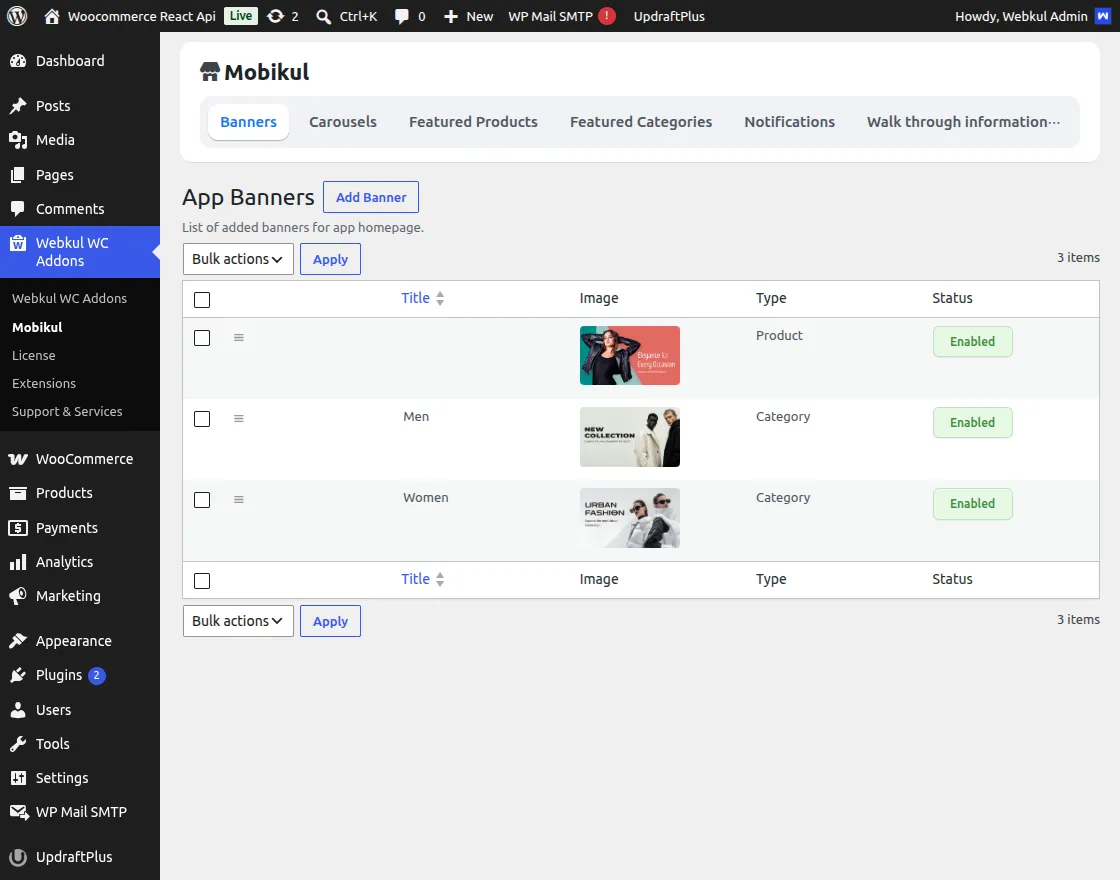
Now, by clicking on the Add Image button the admin can add the Banner Images as shown in the image below-
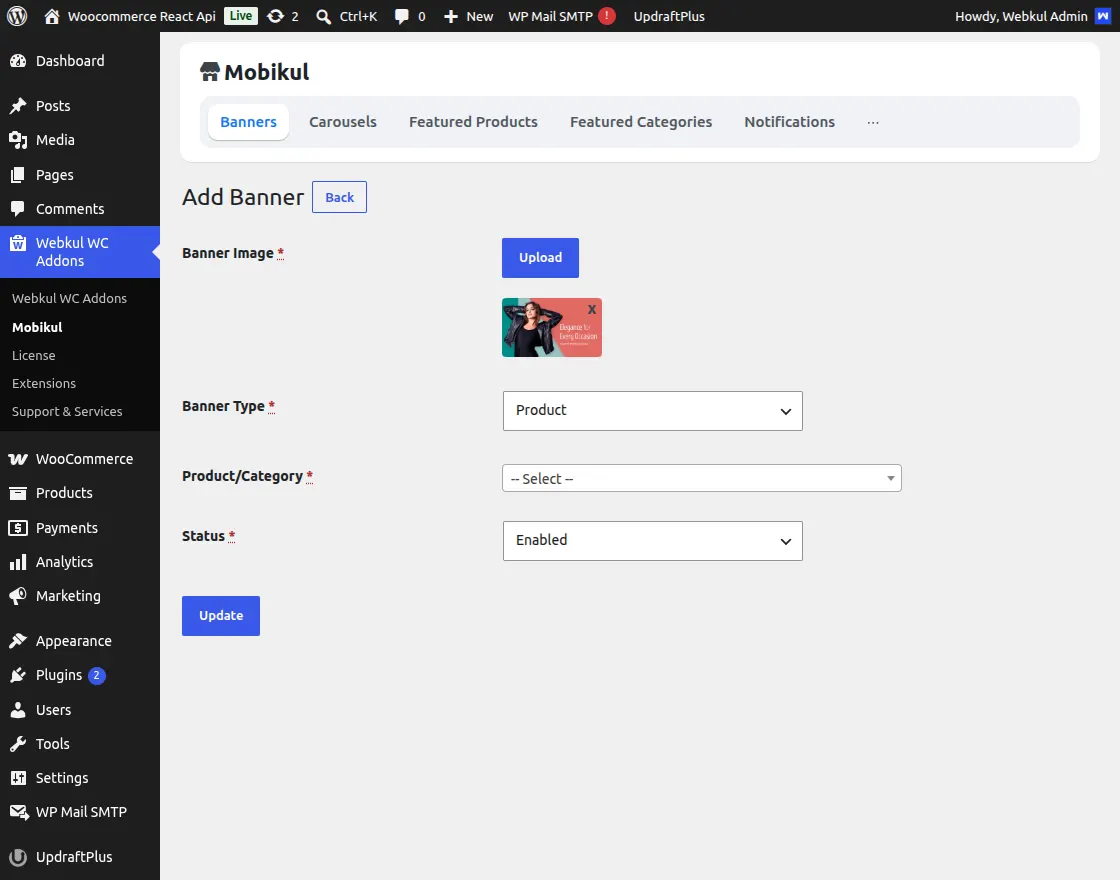
Here, the admin will need to upload the banner image, manage the sorting of the banner, select the type of the banner, select the product/category id status of the banner image.
To show on the mobile app and then click on save.
Carousels
The WooCommerce mobile App application also consists of attractive carousels of products and categories.
So, the admin can click on the Carousel tab under the admin panel to check the carousel list.
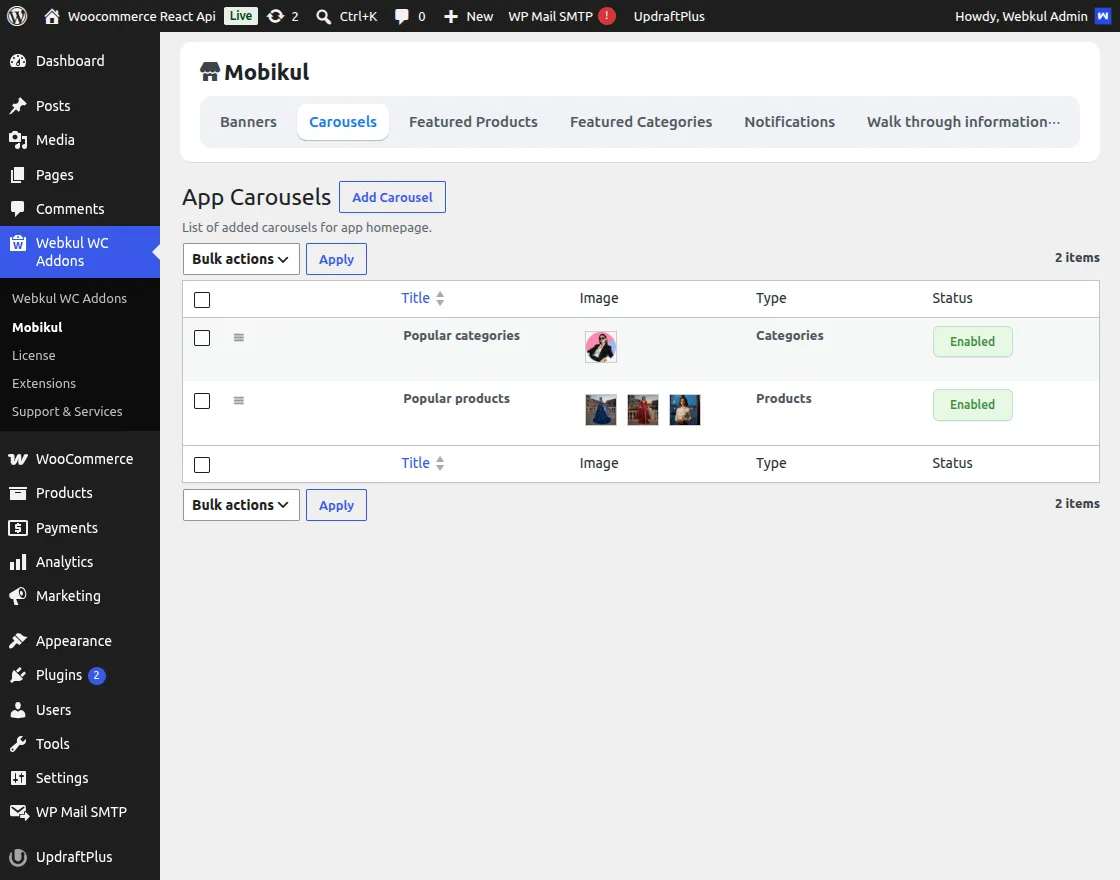
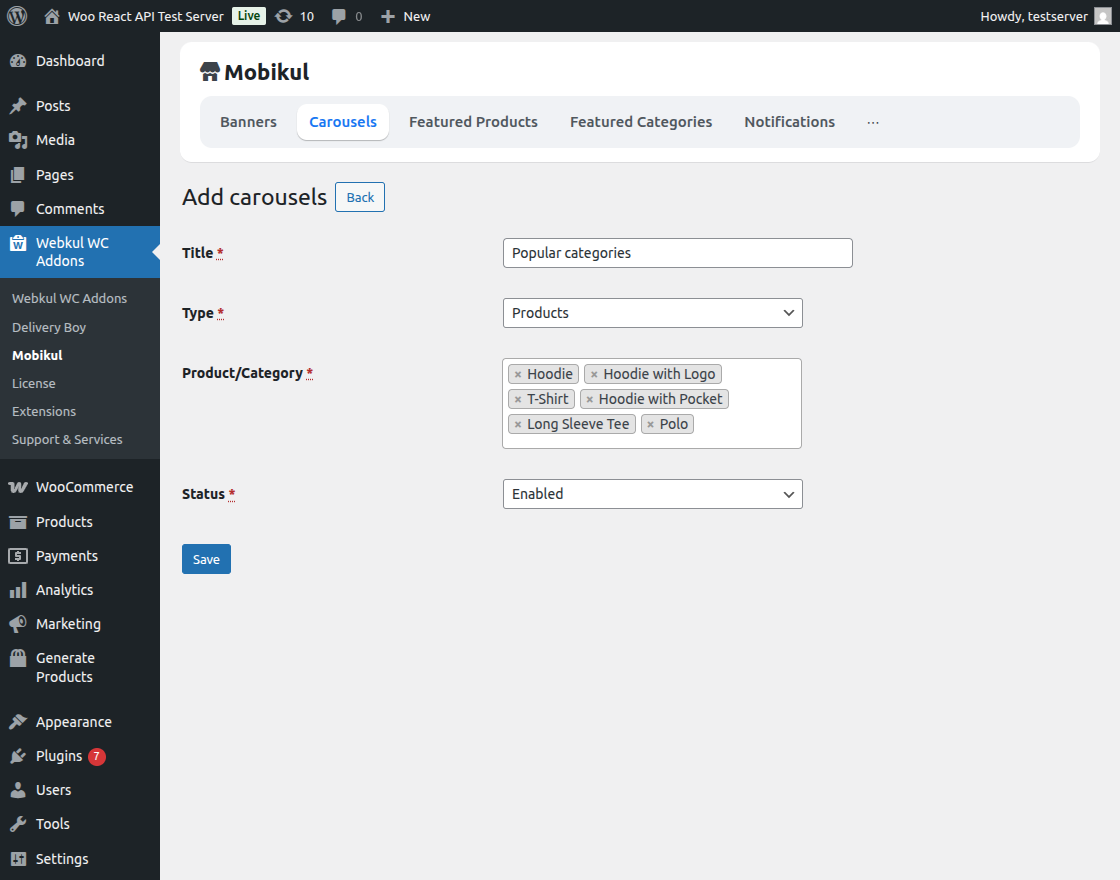
To add the new carousel the admin will click on the Add Carousel button. After that, the following form will appear including the title, type, product/ category, and status.
Finally, the admin will save it to display it to the mobile application.
Featured Products
The admin can manage the featured product list from the admin panel and manage the featured product in bulk to move the products in the trash.
So, the admin can also click on the edit button to edit the existing product and click on the “Add Featured Product” button to add the more featured product to the app.
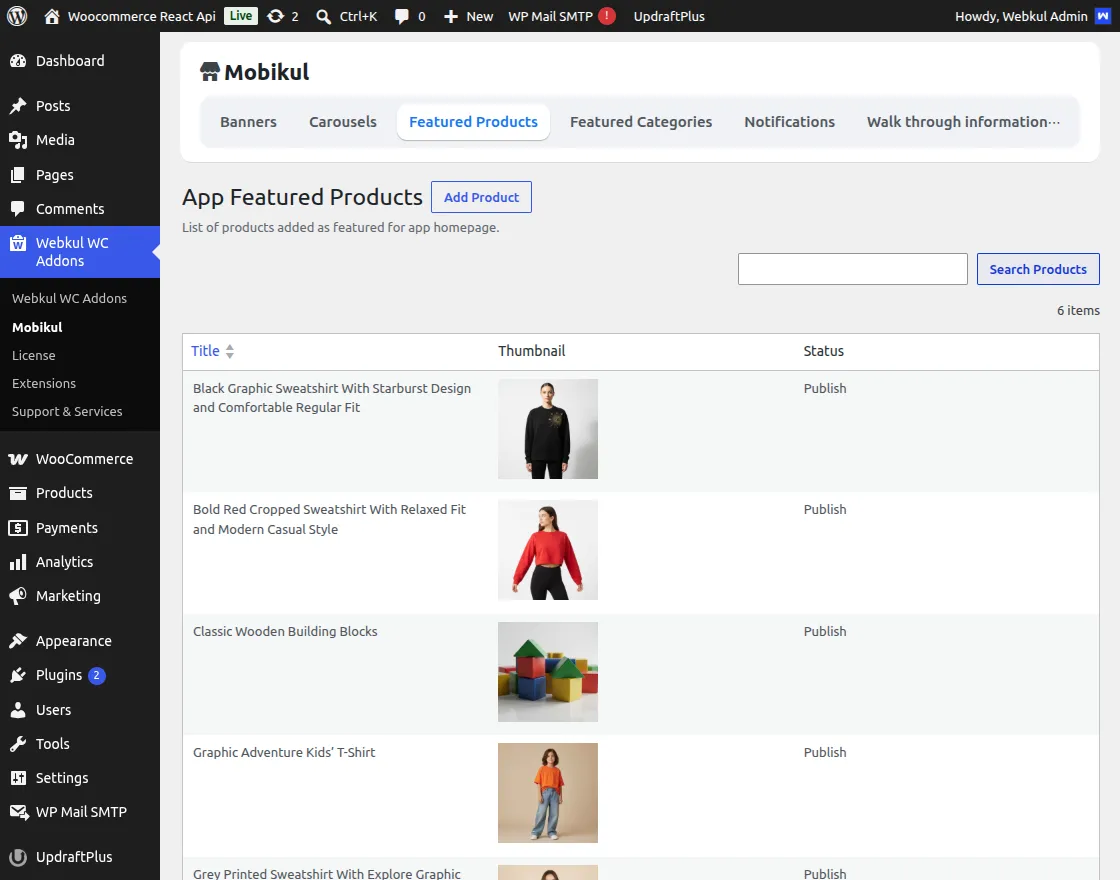
Now after clicking on the Add Featured Product, the admin can add more featured product as shown in the image-
,
Here, the admin can Sort the order of the product, select the product from the Product name, and enable the status of the featured product and click on the save.
Featured Categories
From the admin panel, the admin can manage the Featured Category.
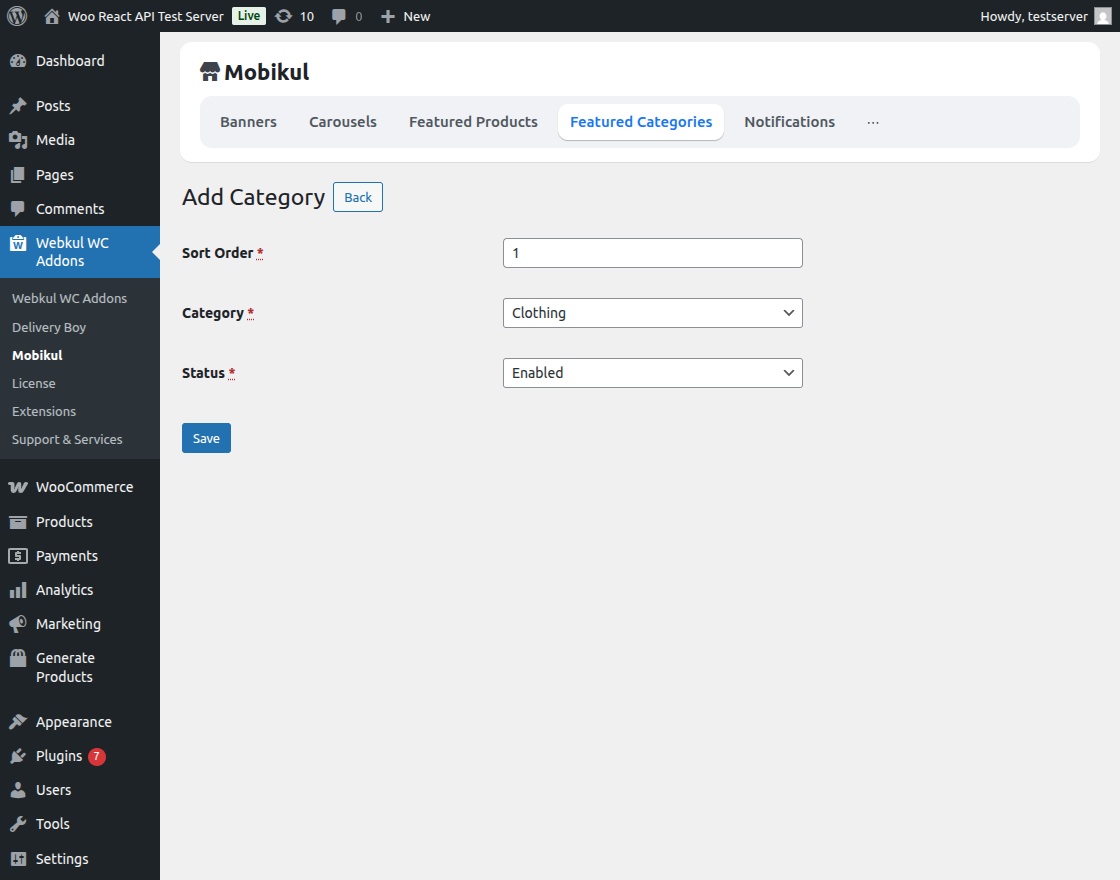
The admin can manage the existing featured category list or add the more featured category from the dashboard as shown in the image –
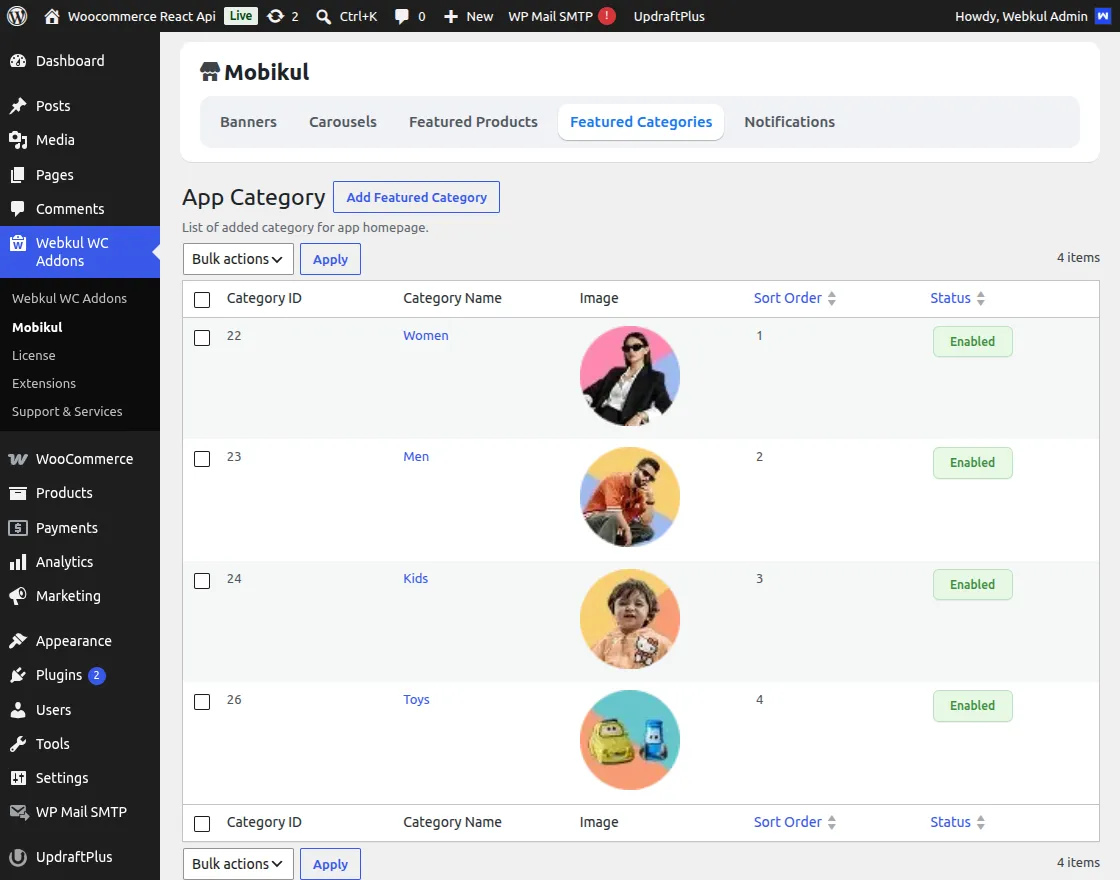
Here, the admin can Sort the order of the selected featured category, select the featured category according to the requirements, and enable or disable the status of the selected featured category.
Click on save to show on the mobile app as shown in the image below-
Notifications
The admin can manage the notification or create more notification to send on the mobile through the app.
Thus, the admin can manage the existing notification or click on Add Notification to add more notification.
Also, for each notification, their buttons will be available to edit, trash, and Send notifications.

The admin will send the notification by clicking on the Send Notification Button for any specific notification.
Hence, this will send notifications to all the customers using the mobile application.
Hence, to make the notification sending process more relevant and seamless, Firebase Cloud Messaging is used here with all the proximity.
These notifications are used to send notifications to the users by the admin to the mobile app.
Now, by clicking on the Add Notification, the admin can add the notification information as shown in the image below-
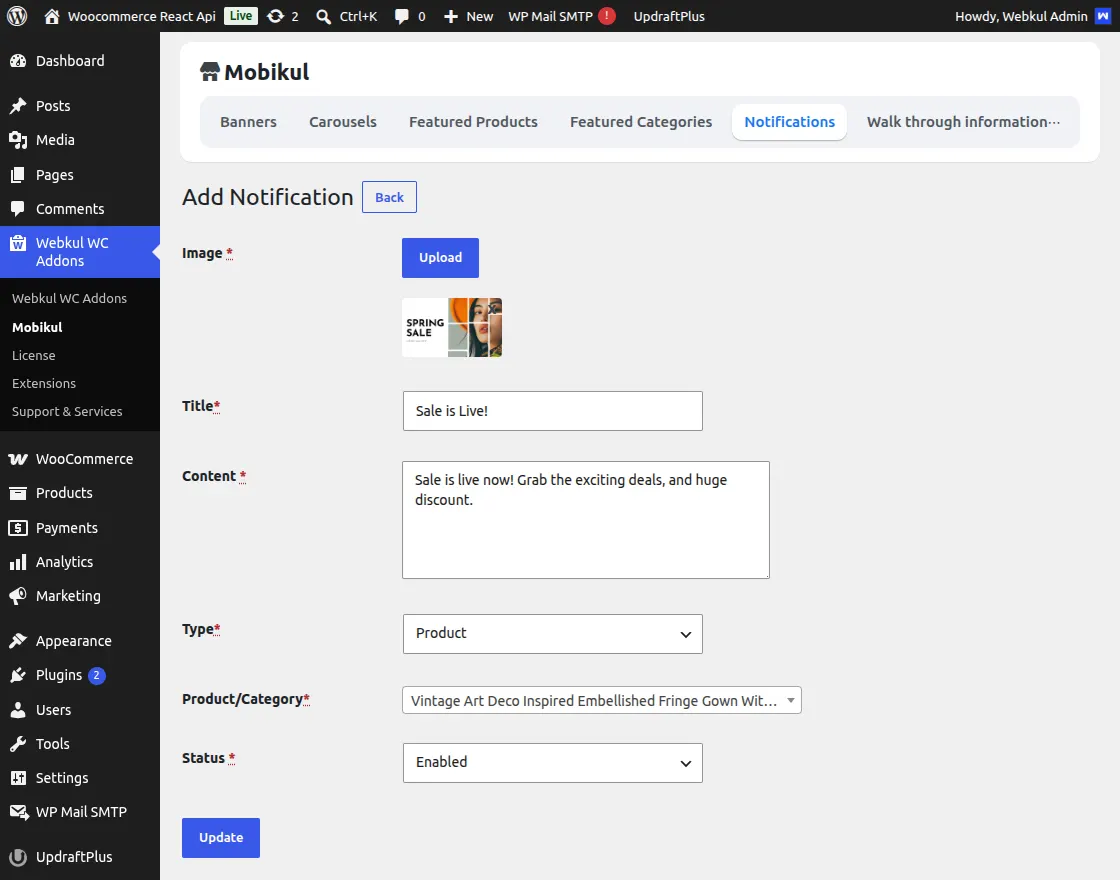
Here, the admin can-
- Upload the image for the notification
- Enter the title of the notification
- Enter the content for the notification
- Select the type of the notification as product or category
- Select the product/category id from the list
- Enable or disable the status of the notification and click on the Save button.
Homepage Configuration
The admin can configure the homepage settings by navigating through Mobikul>Home page configuration.
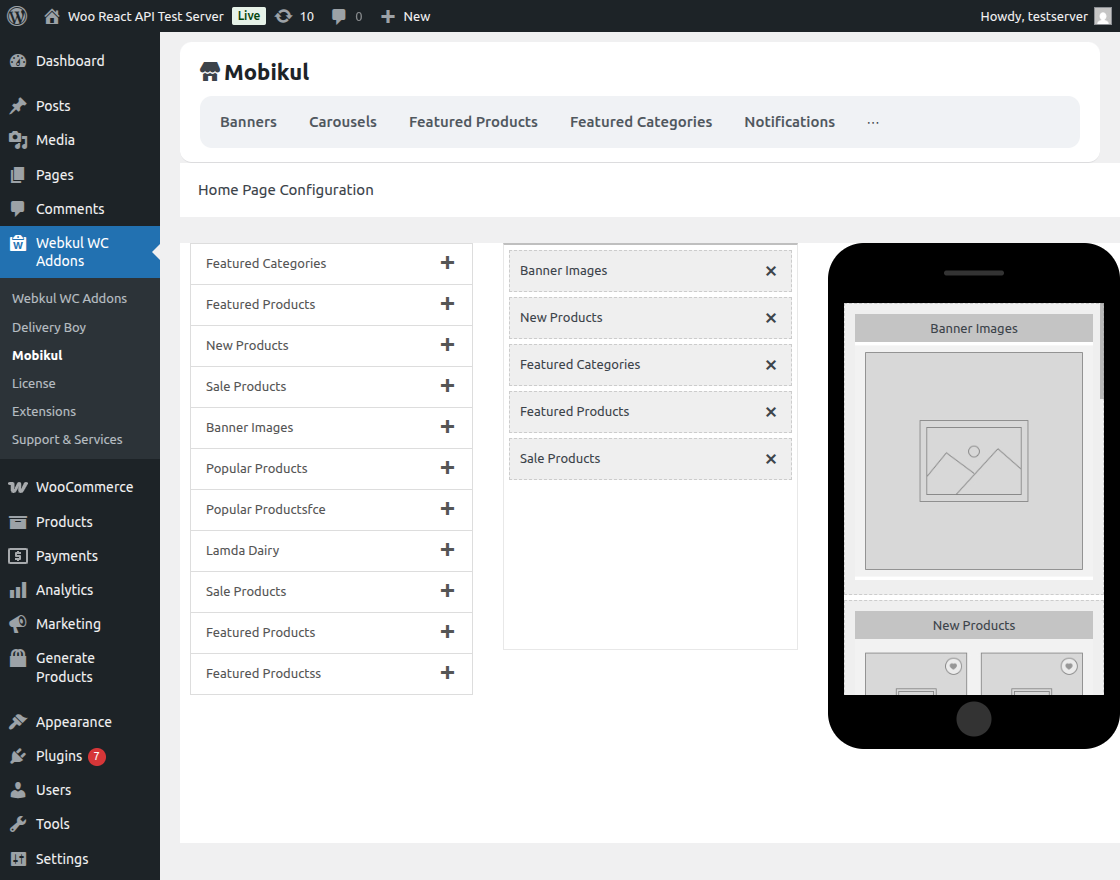
Admin can customize the app homepage as they want it to be displayed to the customer.
They can set the order of different sections to be displayed on the homepage in the way they want.
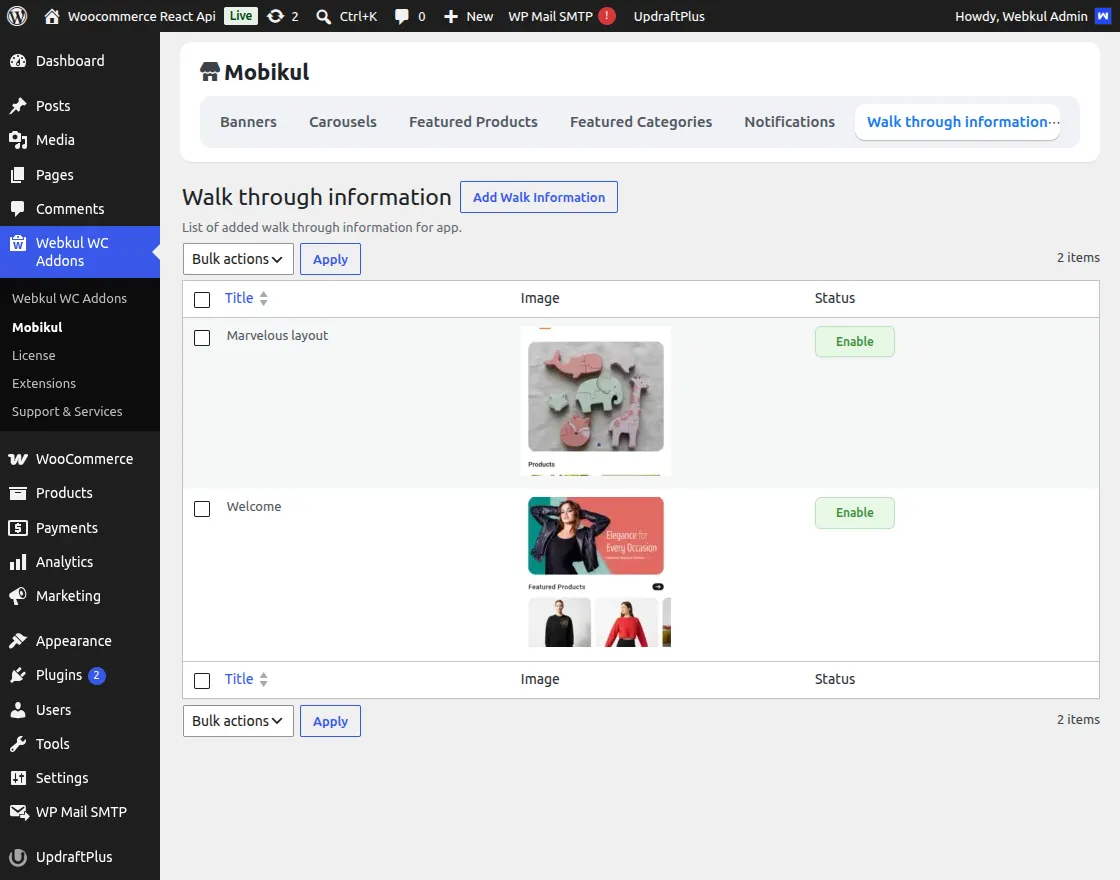
Walk Through Information
The admin can manage the Walk Through Information from the admin backend panel.
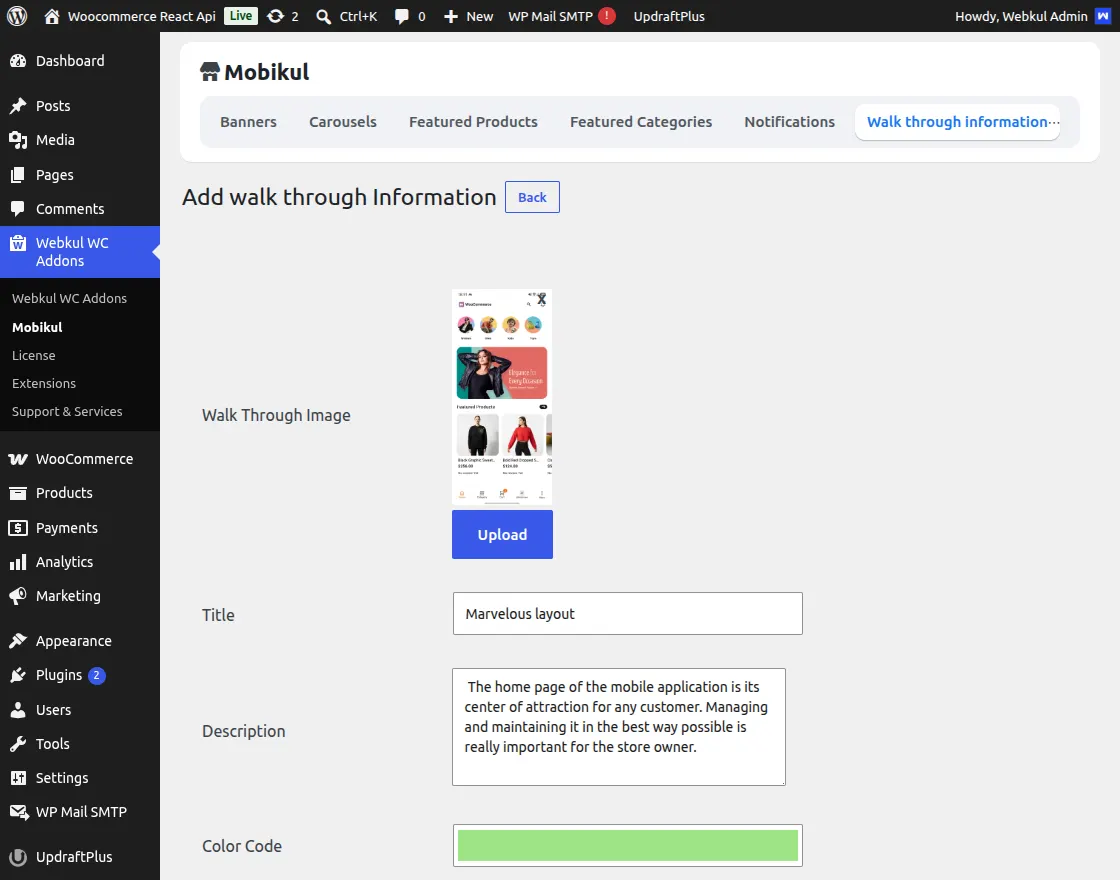
The admin can manage the existing one or add a new one by clicking on add walk information as mentioned below:
Here the admin can upload the Walk Through Image, give a title name, add the description, choose the colour code and set the status to enable or disable as mentioned in the below snapshot:
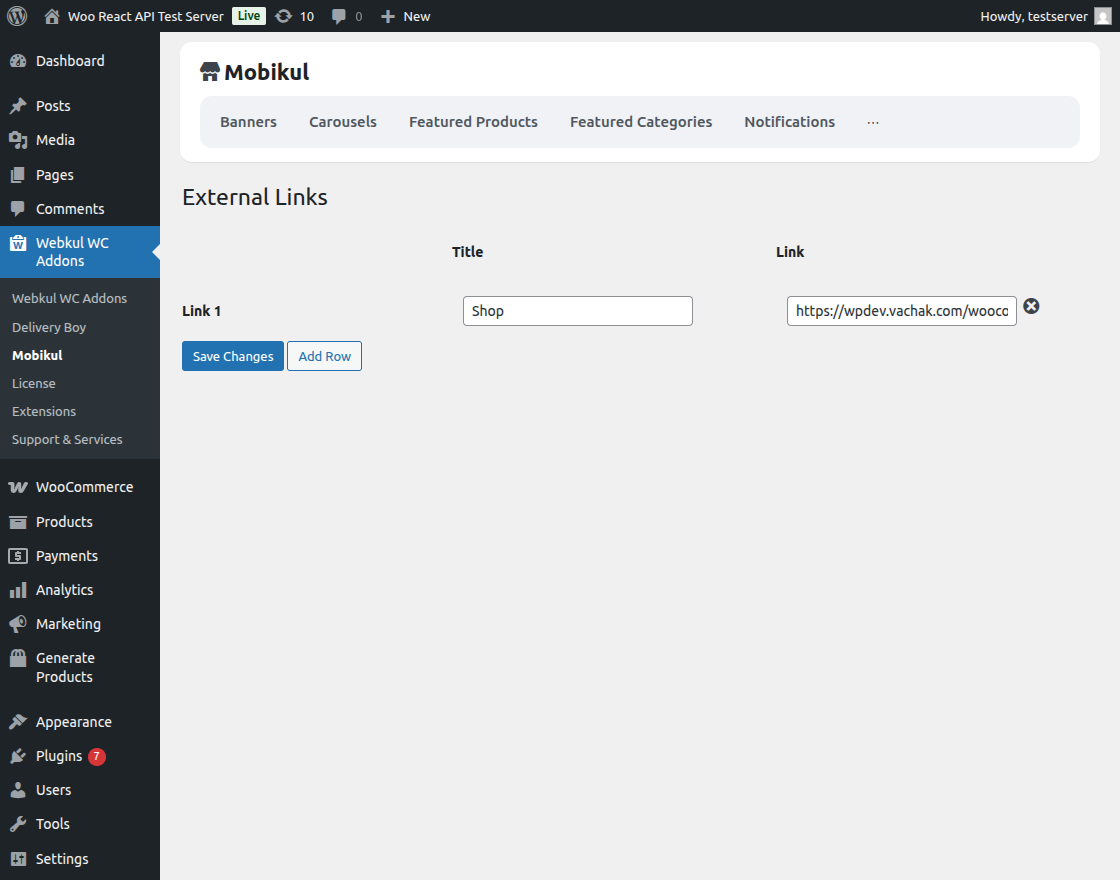
External Links
Thus, under this, the admin can create External Links to manage the CMS pages.
For this, the admin will simply enter the Title of the CMS page and the link on which the button will be redirected on a click.
Settings
The admin can access the settings configuration by navigating through Mobikul>Settings, which provides many options to change the app logo and features.
can,
Launcher Icon Type
Through the launcher icon type option admin can switch between the available app launcher icon types.
App Icon Feature
The admin can change the app icon by uploading the image of the icon as required.
Splash Image
The admin can upload the splash image they want to display when the user opens the app.
Theme Customization
The plugin now supports separate Light and Dark Theme customization, allowing you to create a fully branded mobile app experience.
Light Theme Settings
Customize the appearance of your app when the device is in light mode.
Available Options:
-
App Button Color
Set the primary button color used across the app. -
App Theme Color
Define the main background/theme color of the application. -
App Theme Text Color
Choose the default text color for better readability. -
Button Text Color
Set the text color displayed on buttons. -
App Logo (Light)
Upload a logo specifically optimized for light theme display. -
Splash Image (Light)
Upload a splash screen image for light mode.
Dark Theme Settings
Enable a modern dark mode experience by customizing colors and assets separately.
Available Options:
-
Dark App Button Color
Set button colors optimized for dark backgrounds. -
Dark App Theme Color
Define the primary background color for dark mode. -
Dark App Theme Text Color
Choose text color for visibility in dark mode. -
Dark Button Text Color
Customize button text color for dark theme. -
App Logo (Dark)
Upload a logo variant suitable for dark backgrounds. -
Splash Image (Dark)
Upload a splash screen image for dark mode.
Create Barcode Functionality
The admin can easily create a barcode for a product by following these steps:
- Go to Product > All Products.
- Select the product for which the barcode needs to be created.
- Click on Edit to open the product details.
The interface shown below will appear. Here, the admin can enter the barcode number in the barcode details section for the selected product.
Finally, click the Update button to save the changes.

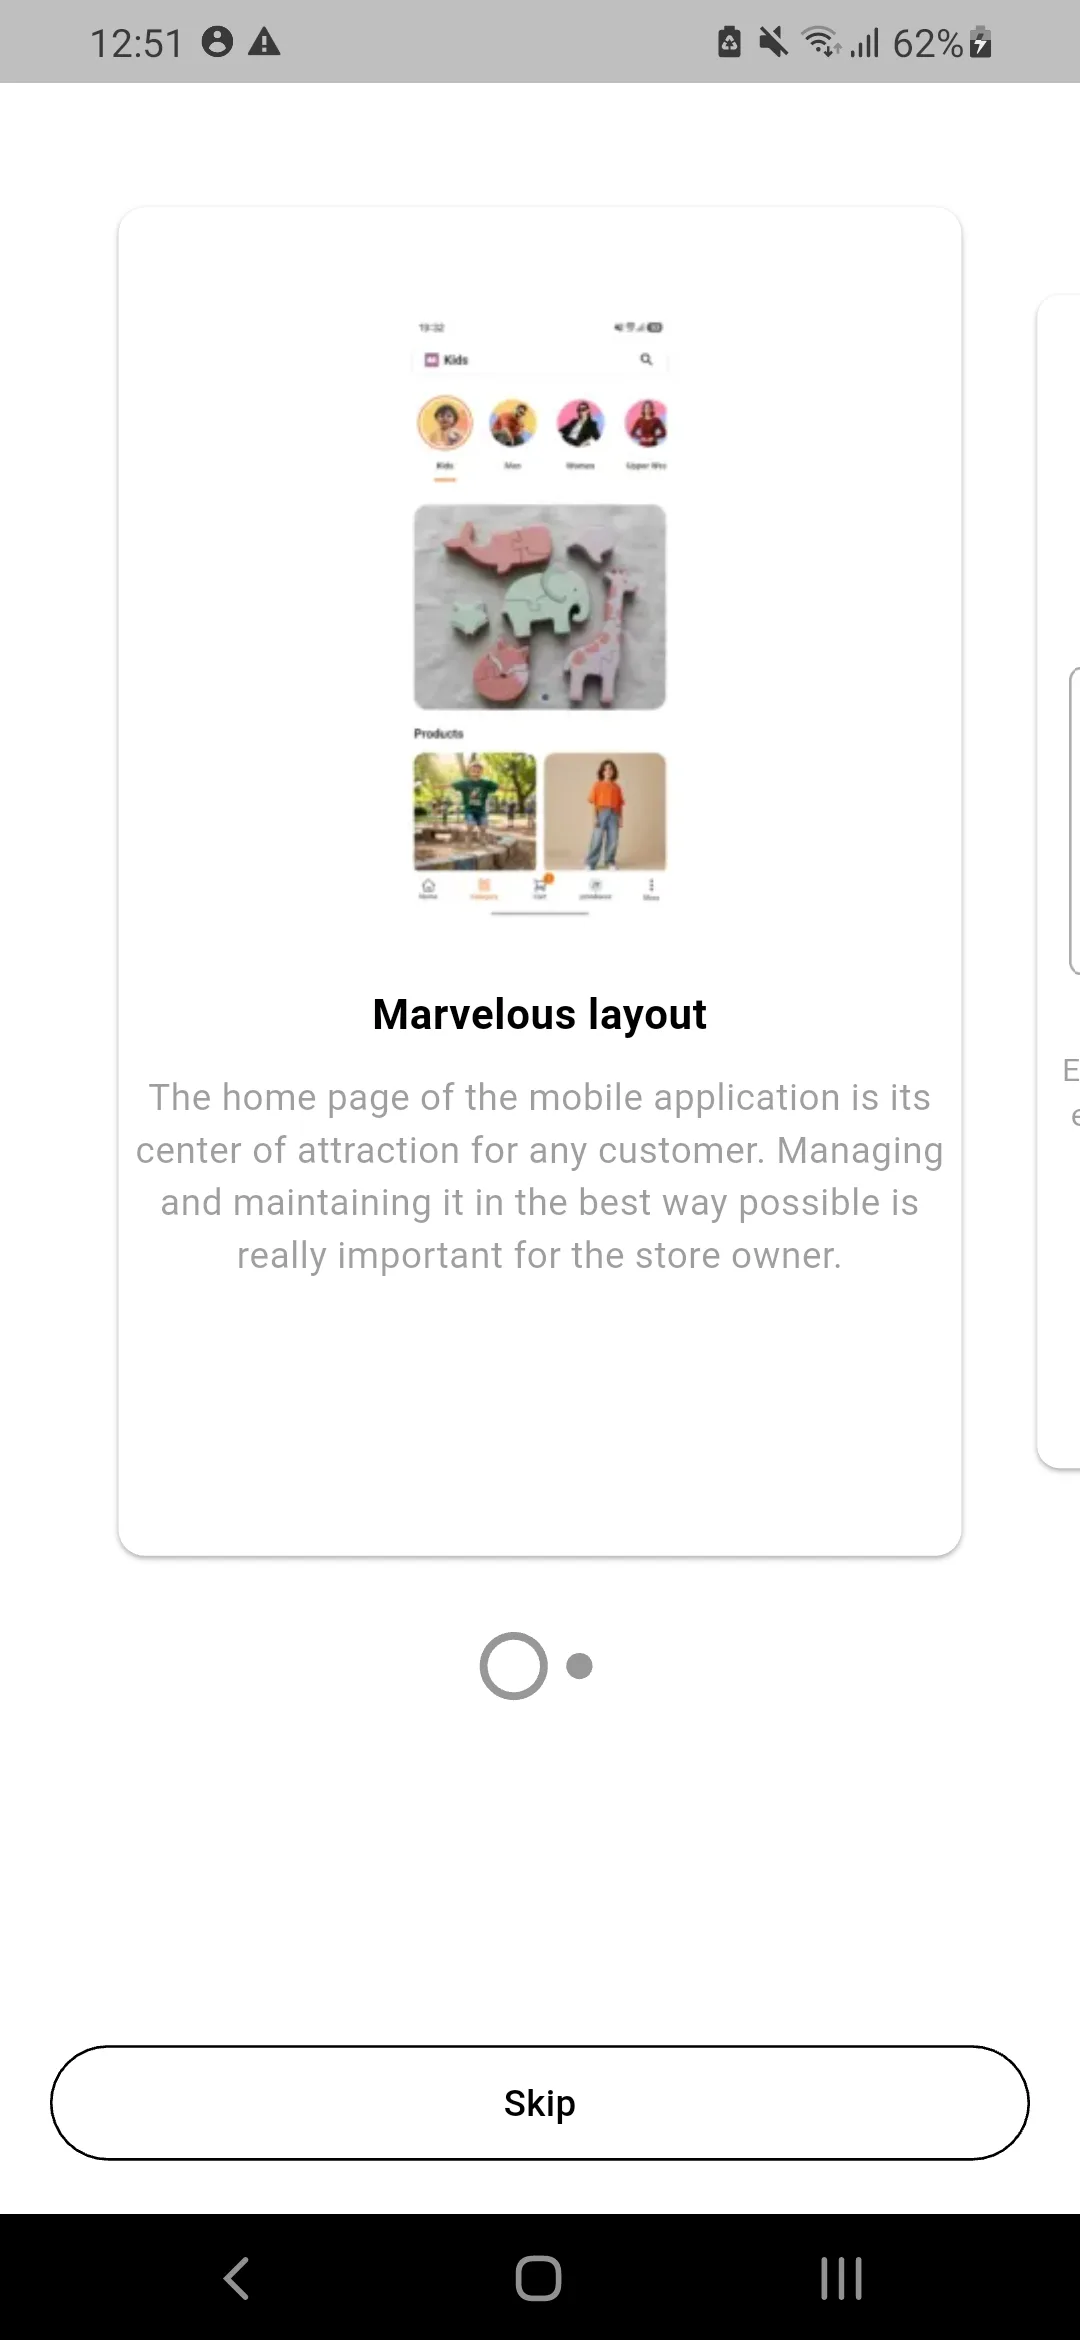
Walkthrough
After downloading the app, once the customer opens up the app they can see a walkthrough of the app.
It guides users a step-by-step process through a set of actions to achieve a specific outcome.
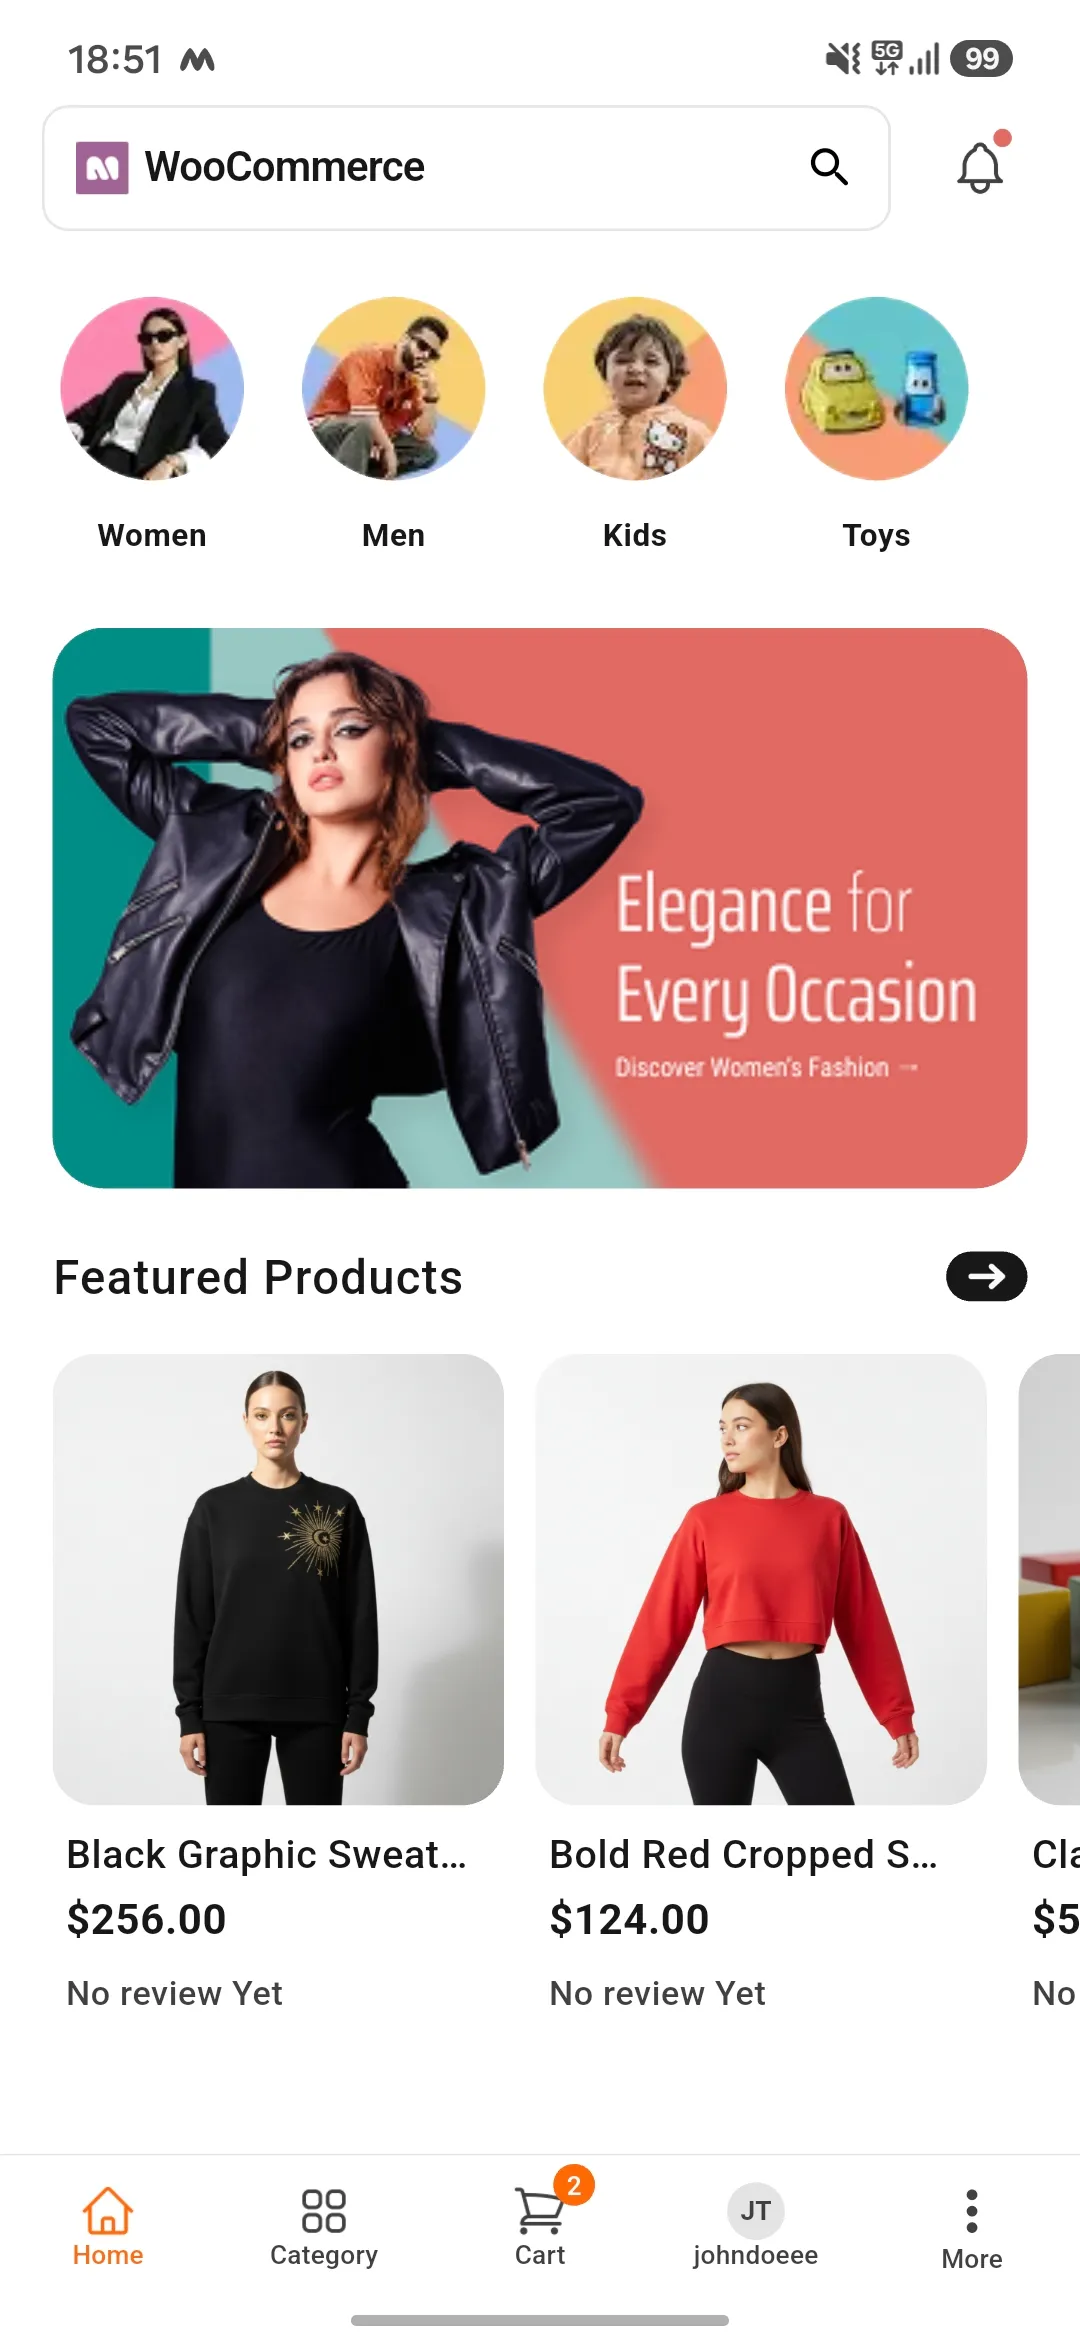
Home page view
Mobikul WooCommerce Mobile App has a fully interactive and user-friendly homepage.The homepage includes Home, list, search, and account in the bottom navigation bar.
So, the Admin can add more slider on the front page.The customer can see the featured products, new products from the home page of the app.
The homepage can be customized by the admin as per their requirement.
Launcher Icon Type:
The WooCommerce mobile App icon is shown on the device, once the customer installs the app the particular app icon is visible.
In the below reference images, you can check that the app icon has been changed through the settings configuration by the admin.


Dynamic App Logo:
Customers can view the WooCommerce mobile App logo on the homepage on the top left corner which could be replaced from the admin end.

Splash Image:
When the customer taps on the app icon on their device a splash screen appears with the logo before navigating them to the homepage.

Product Search using Text or Image:
From the search icon, the customer can search the product with the keywords. Search suggestions would appear after typing the keyword in the search bar.
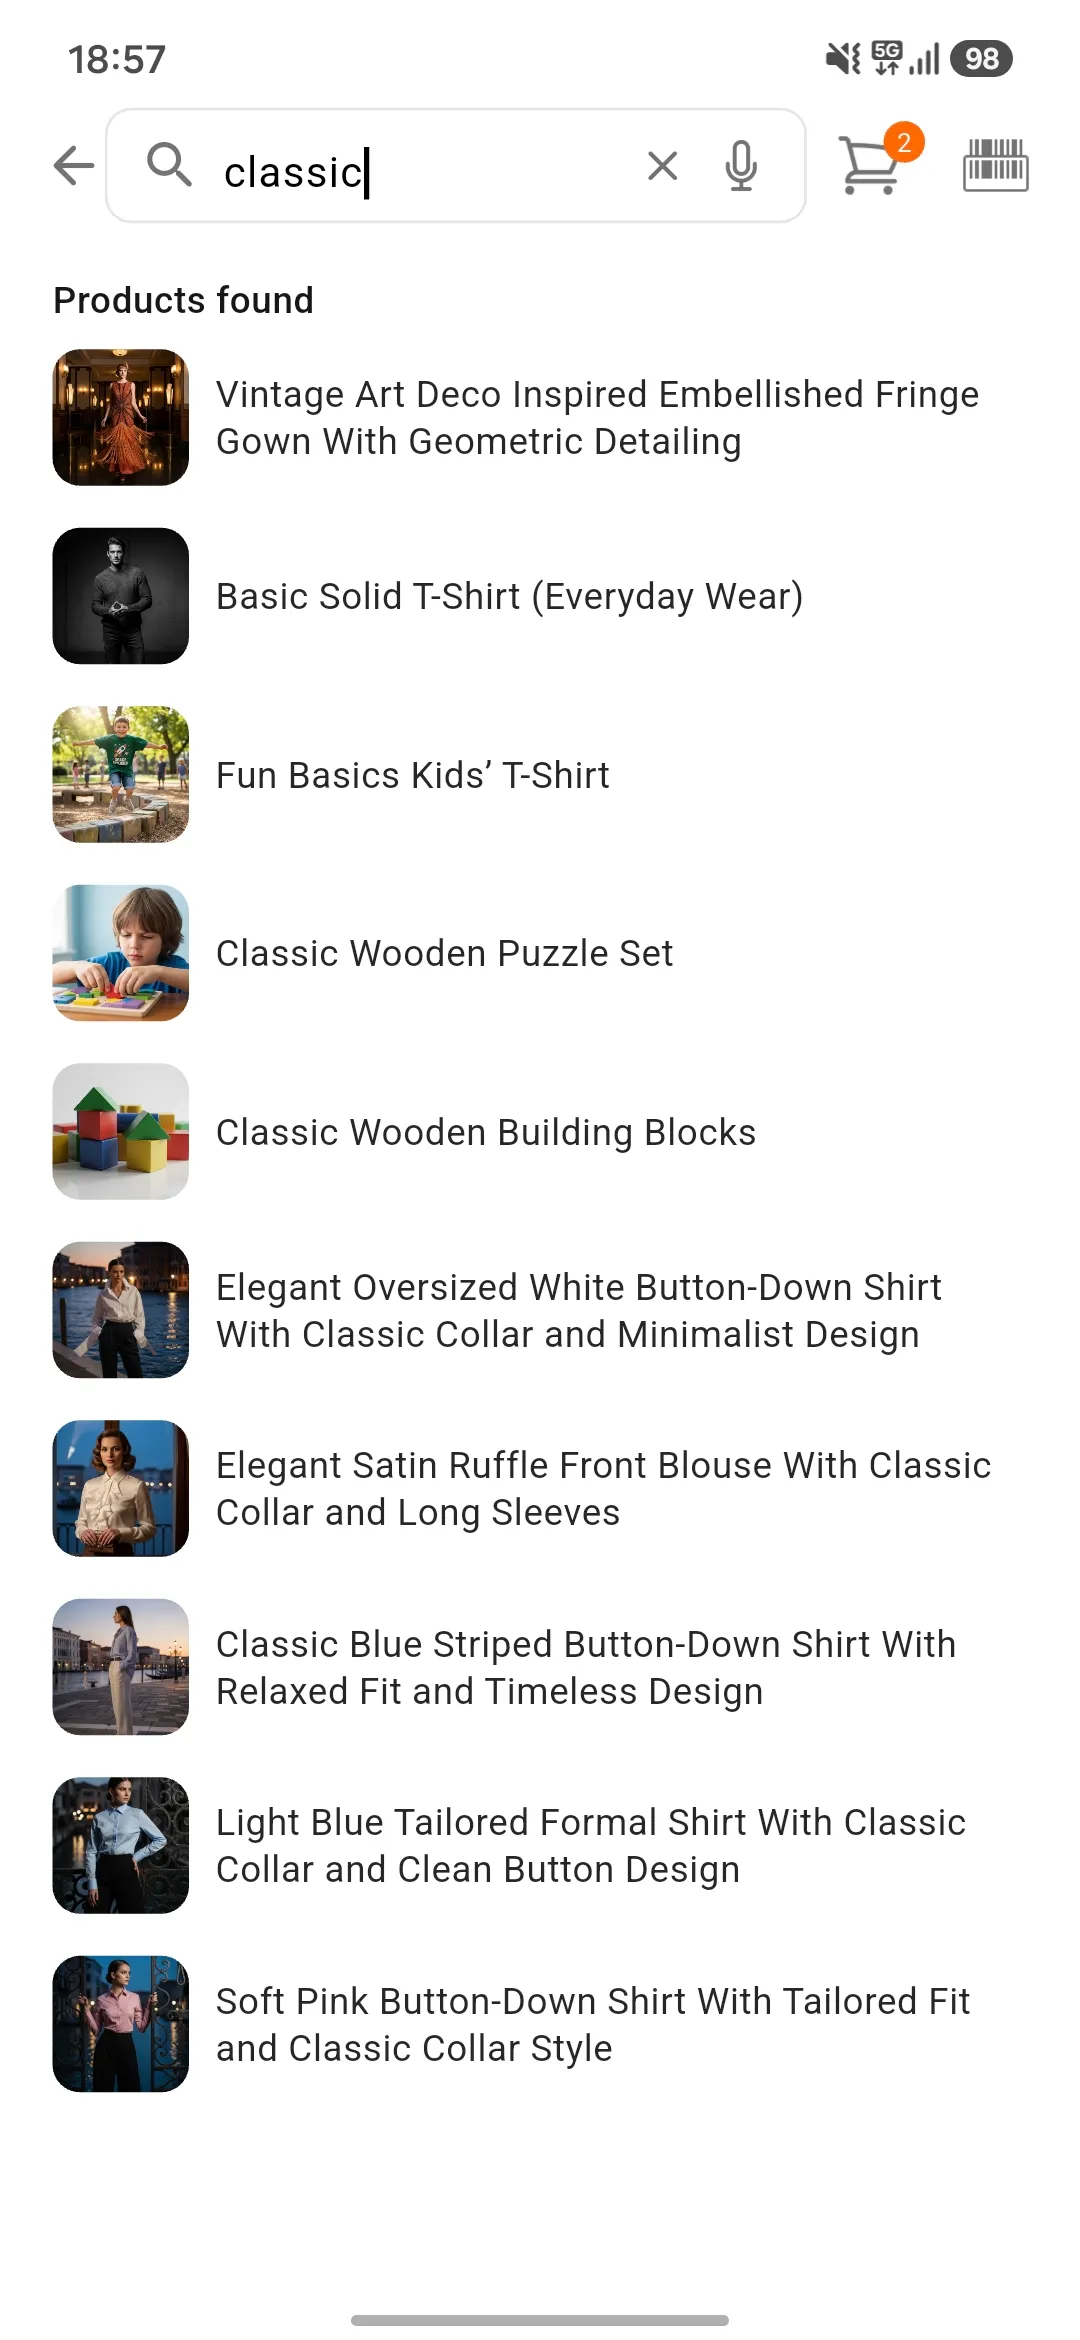
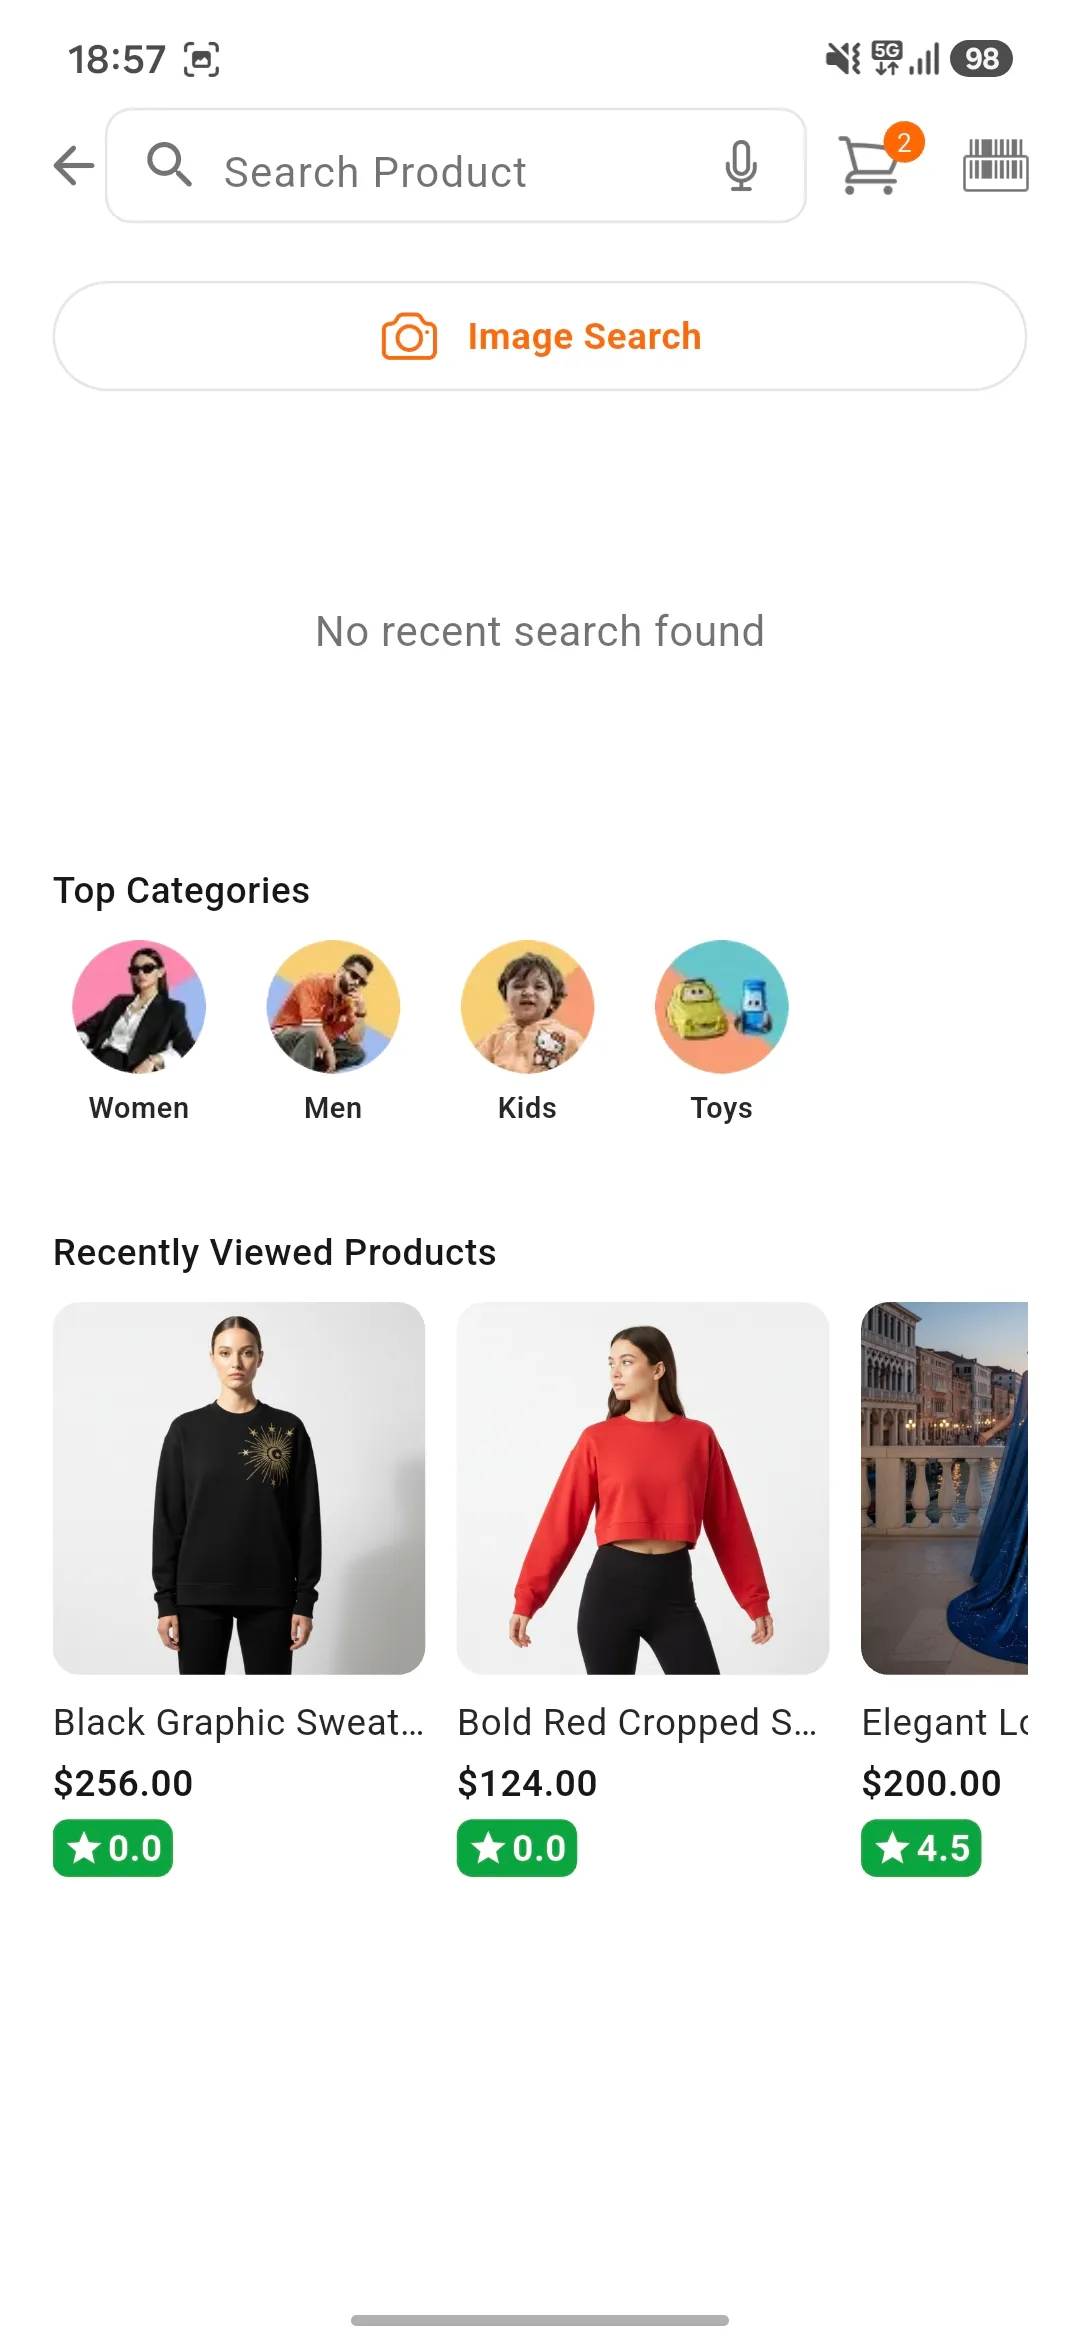
Customers can search by Scanning through Text and Image.
Scan the text you want to search and you will get a list of products there you can choose one and add to cart the product as mentioned in the snapshot below:

In the case of images, customers can scan the product they want and there will be a list of products appear from which the customer can choose.
Add to cart the product as mentioned in the snapshot below:

Barcode-Based Product Search
Customers can scan the barcode to be redirected to the product details.


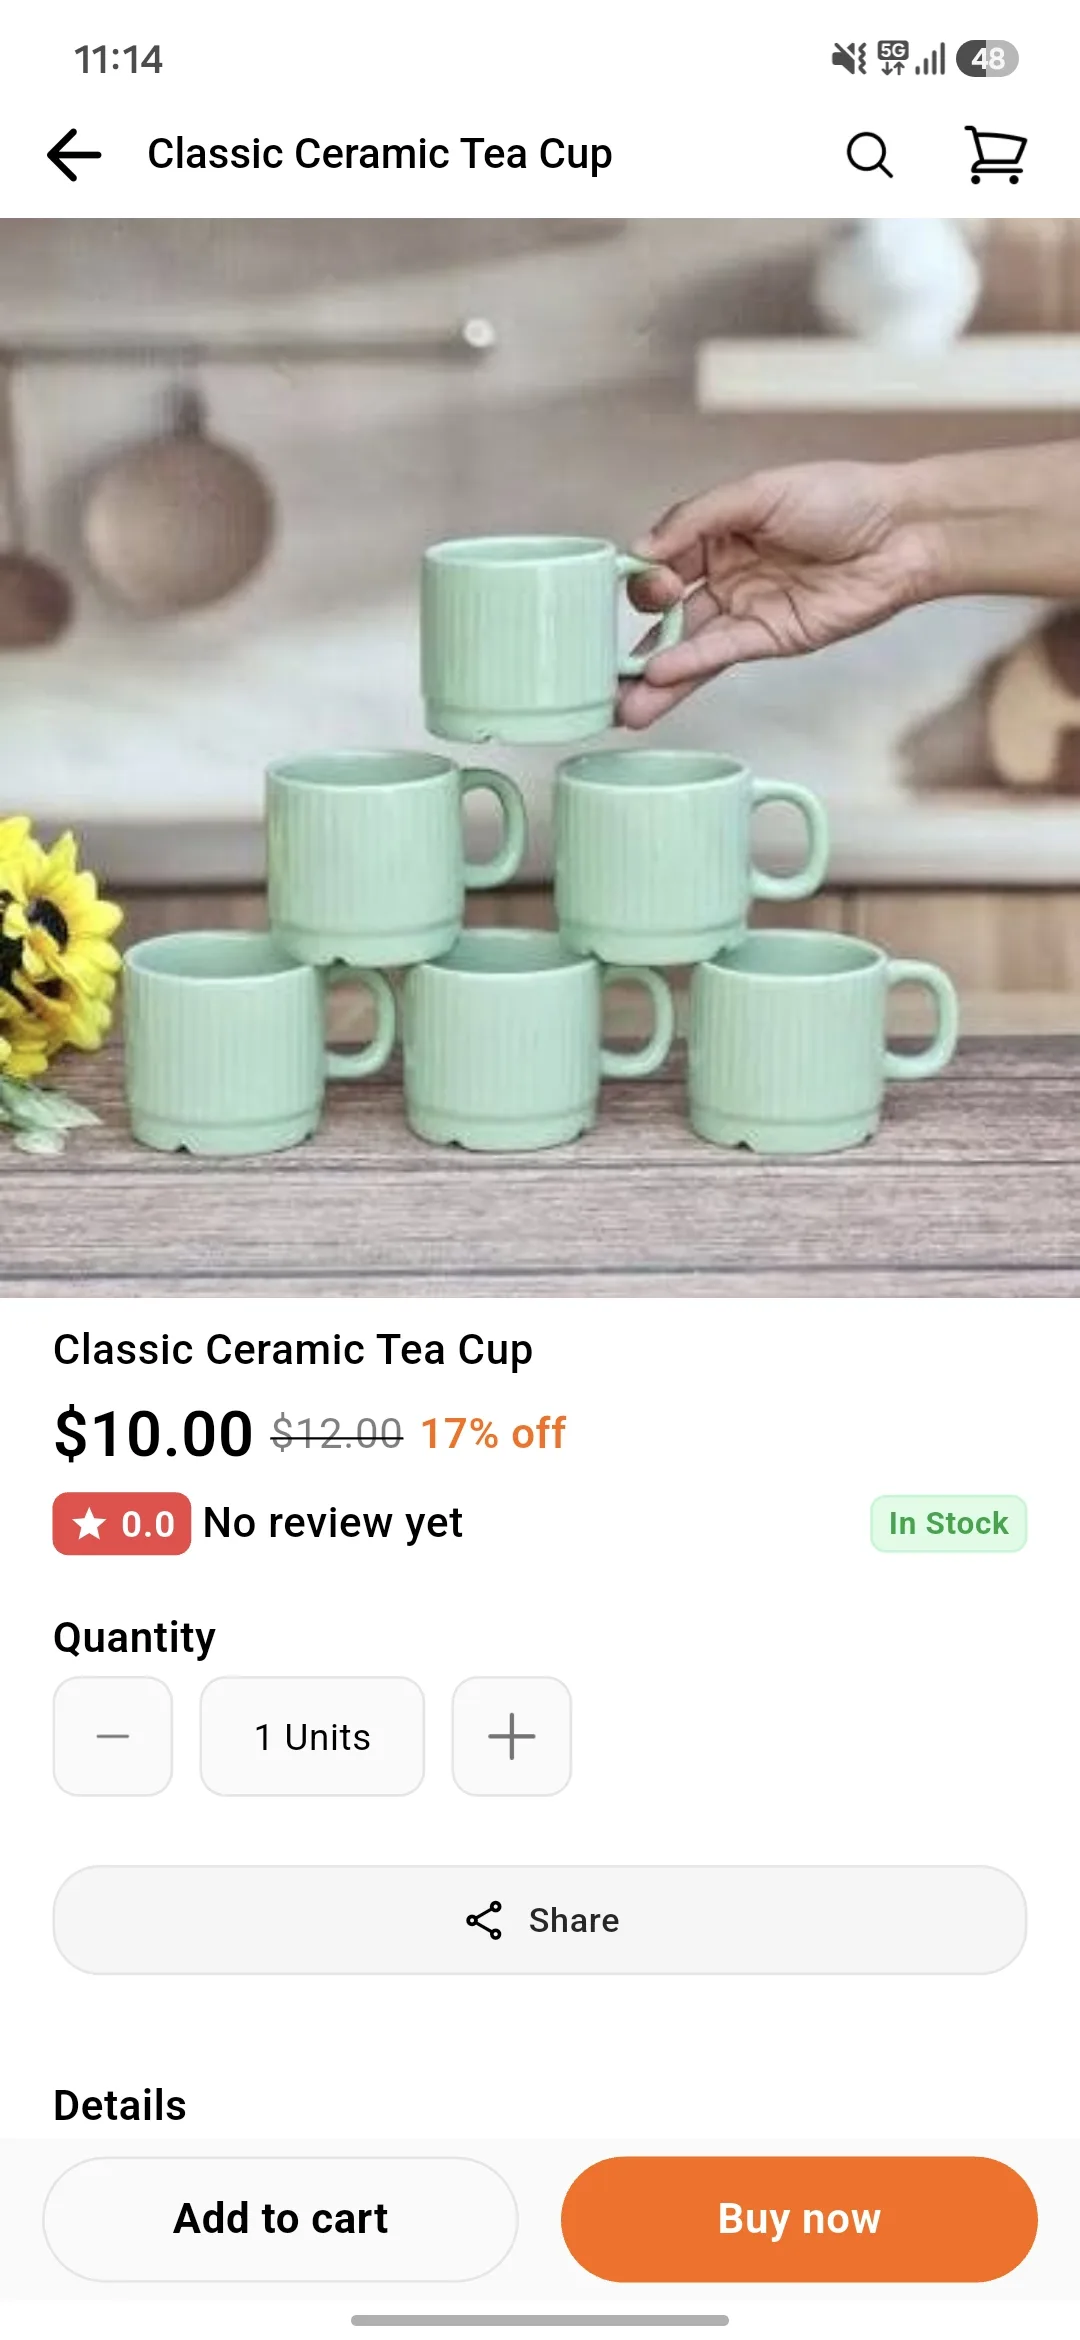
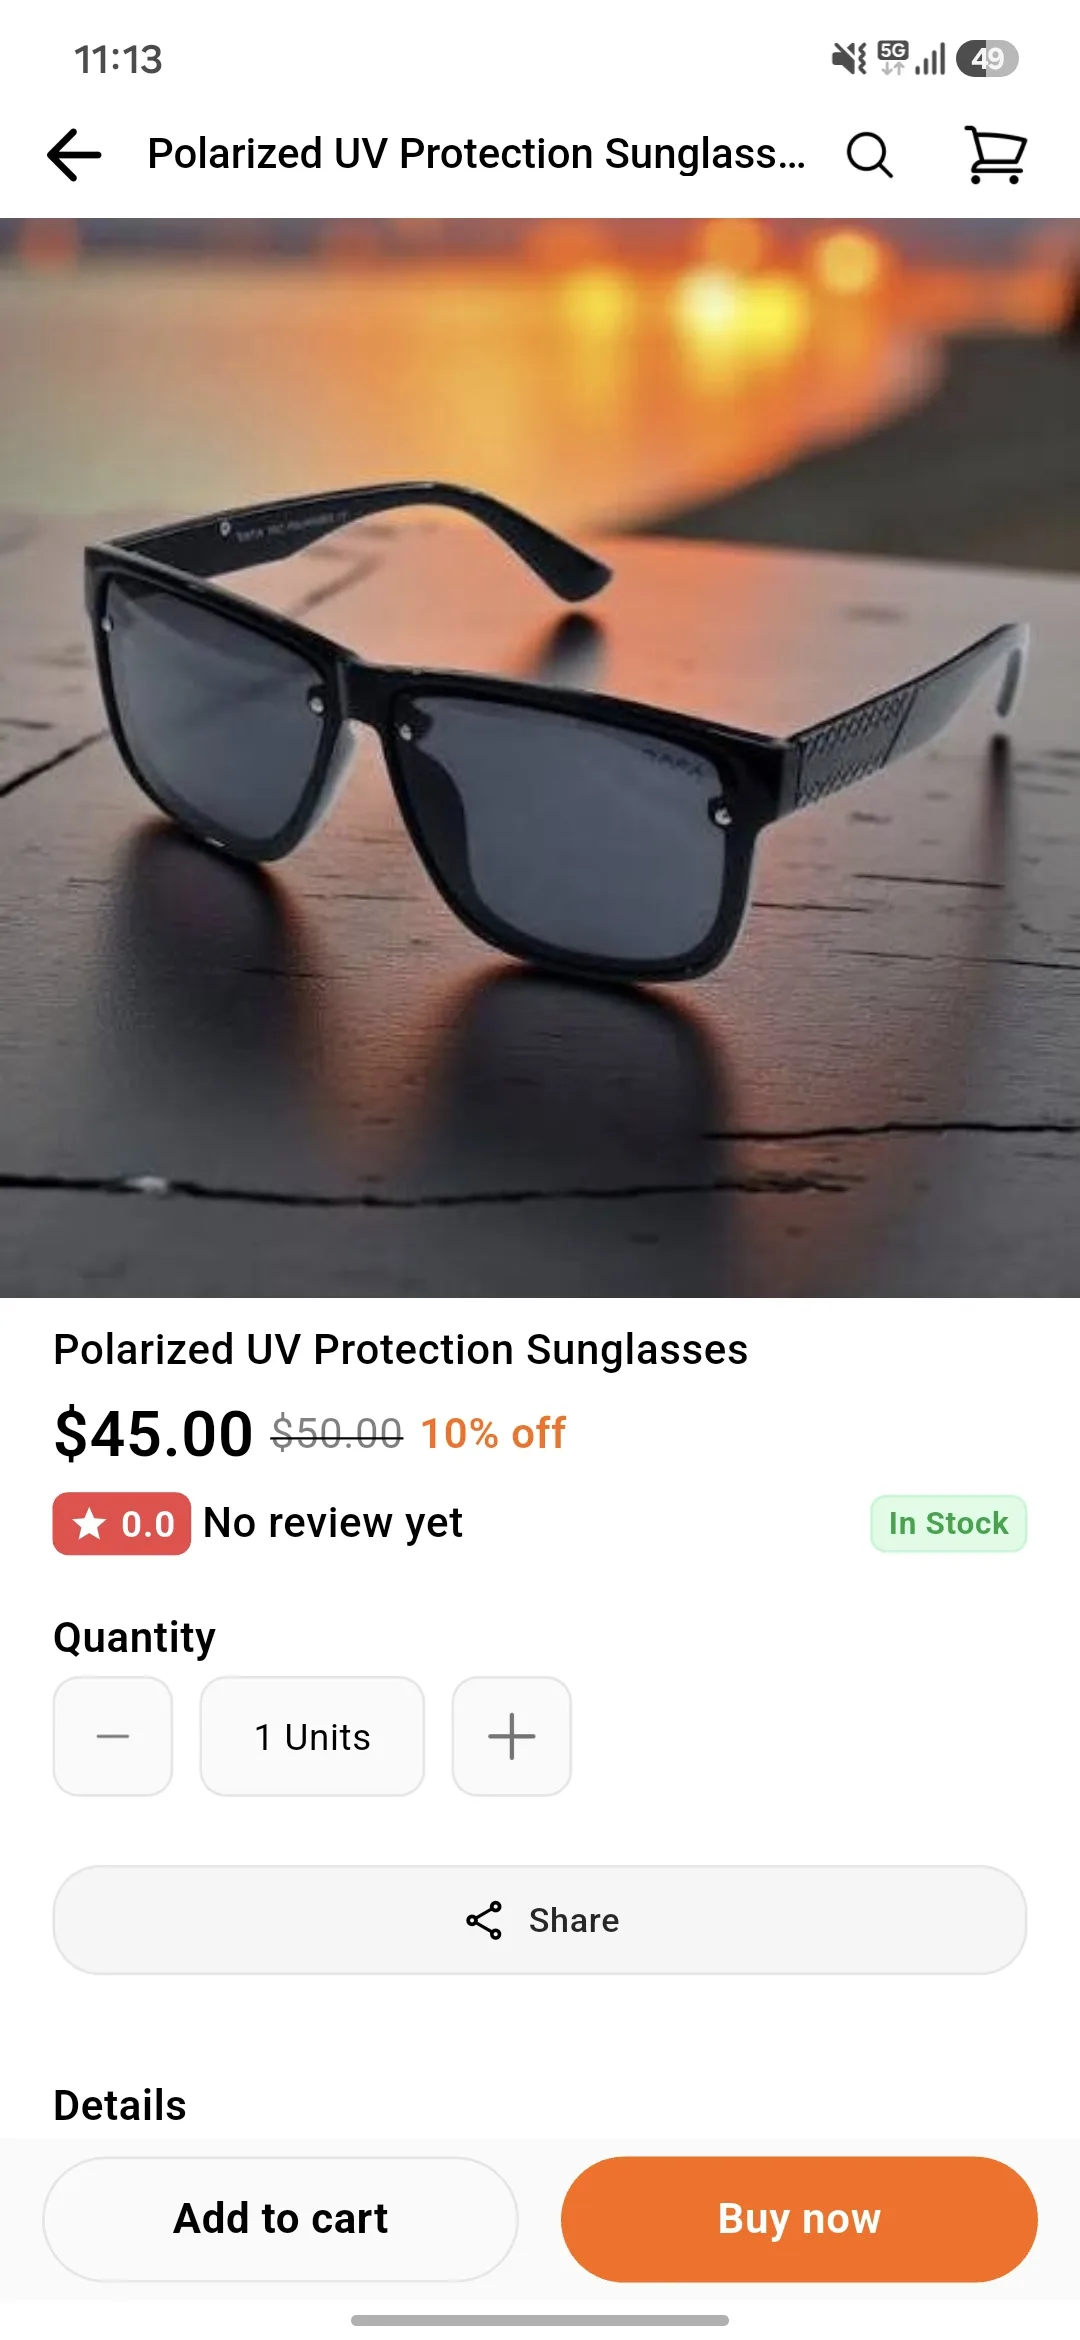
Product View And Order Product
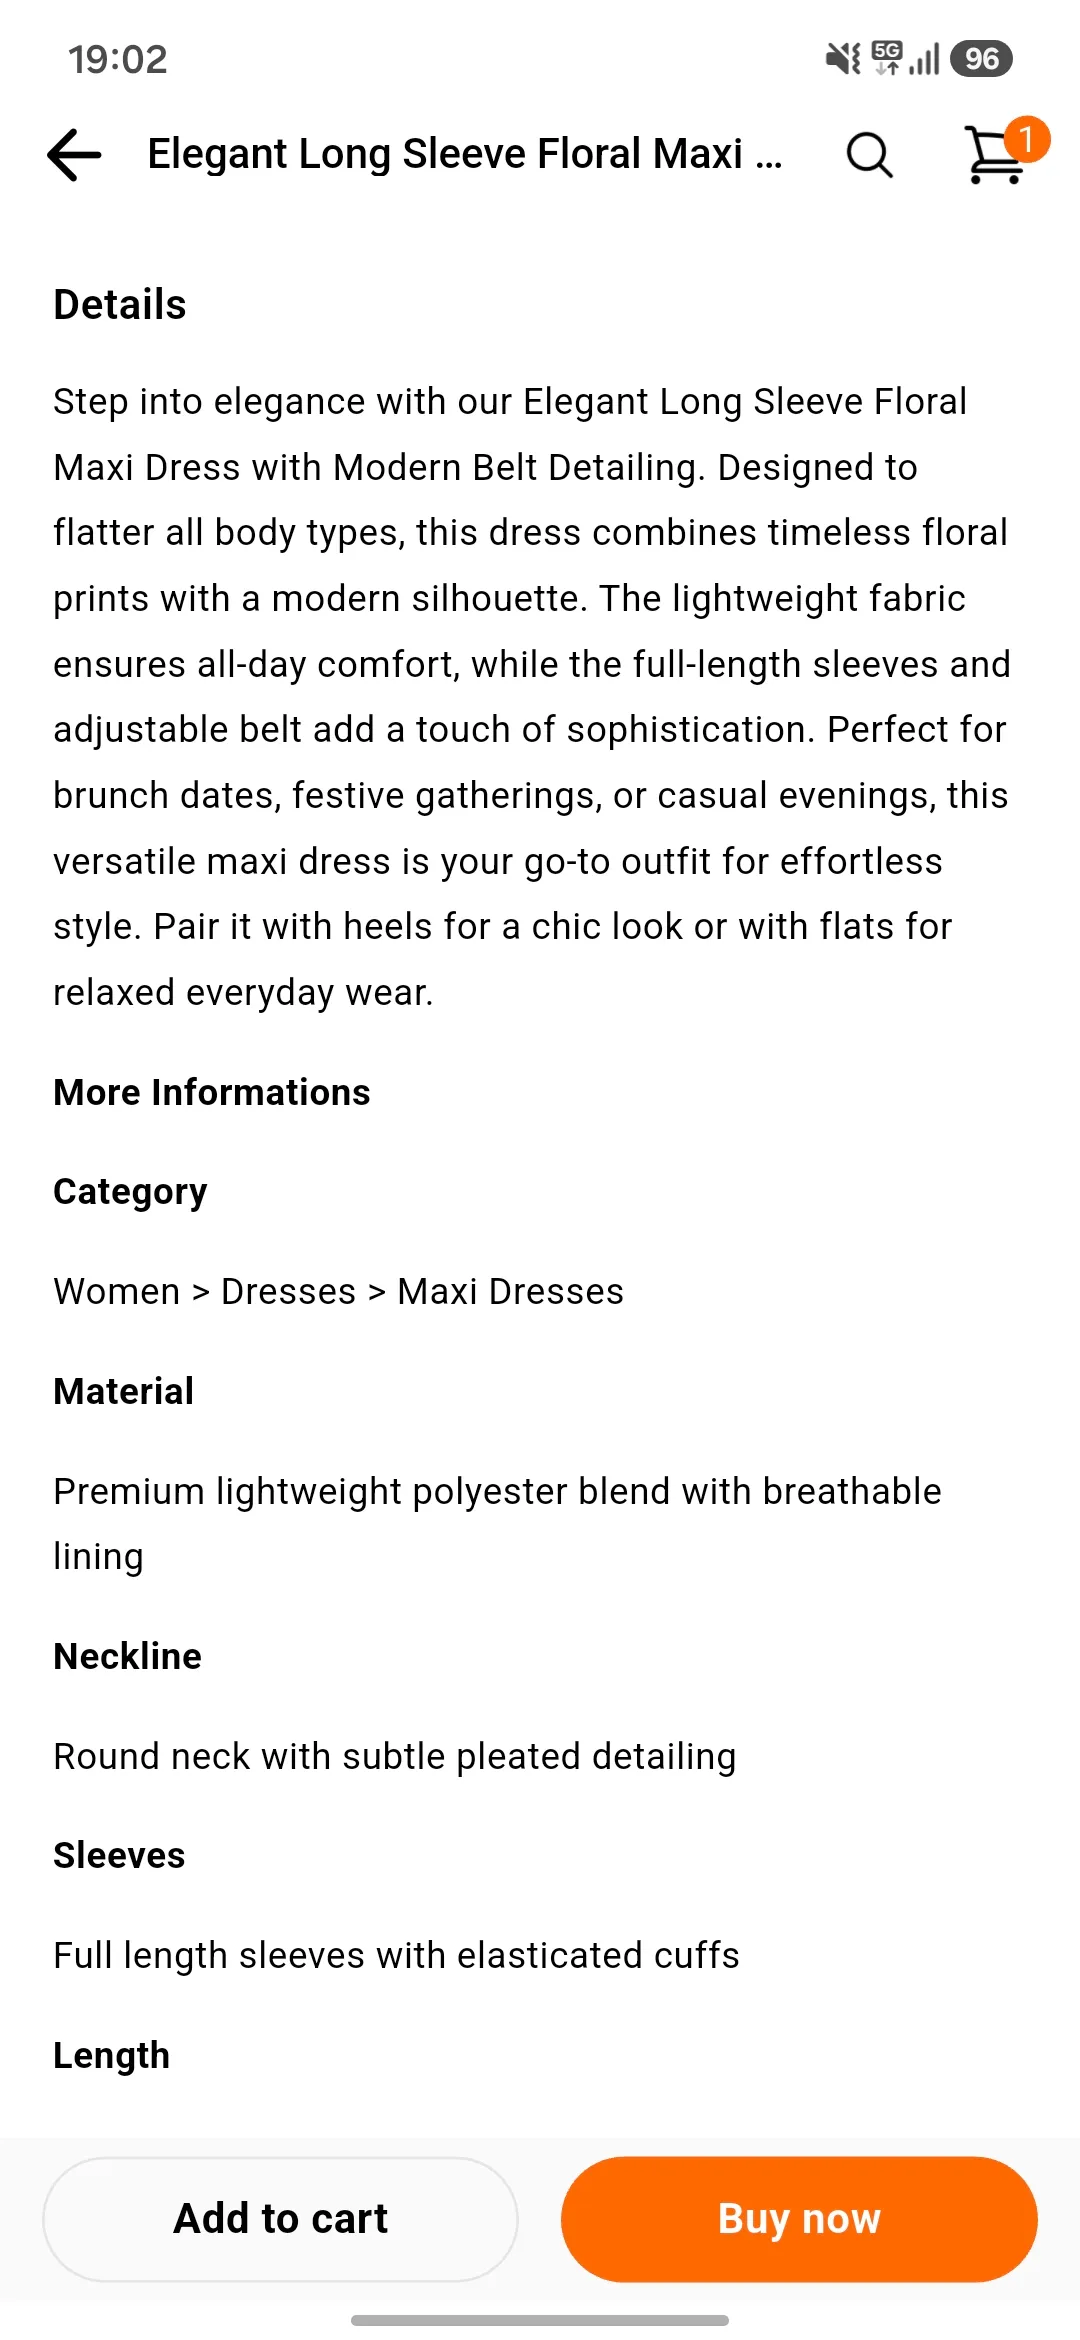
Product View – After clicking on a product, the customer can see the product page.
So, a customer can buy the product, and can see the description, specification, and reviews of the product here.
Add a product to the Cart
After click on “Add to Cart” button, the product will be added to the cart of the customer. Now the customer can check out for their purchase or continue their shopping.
Description and Specification:
The customer can see the description and the specification of the product under the product page.
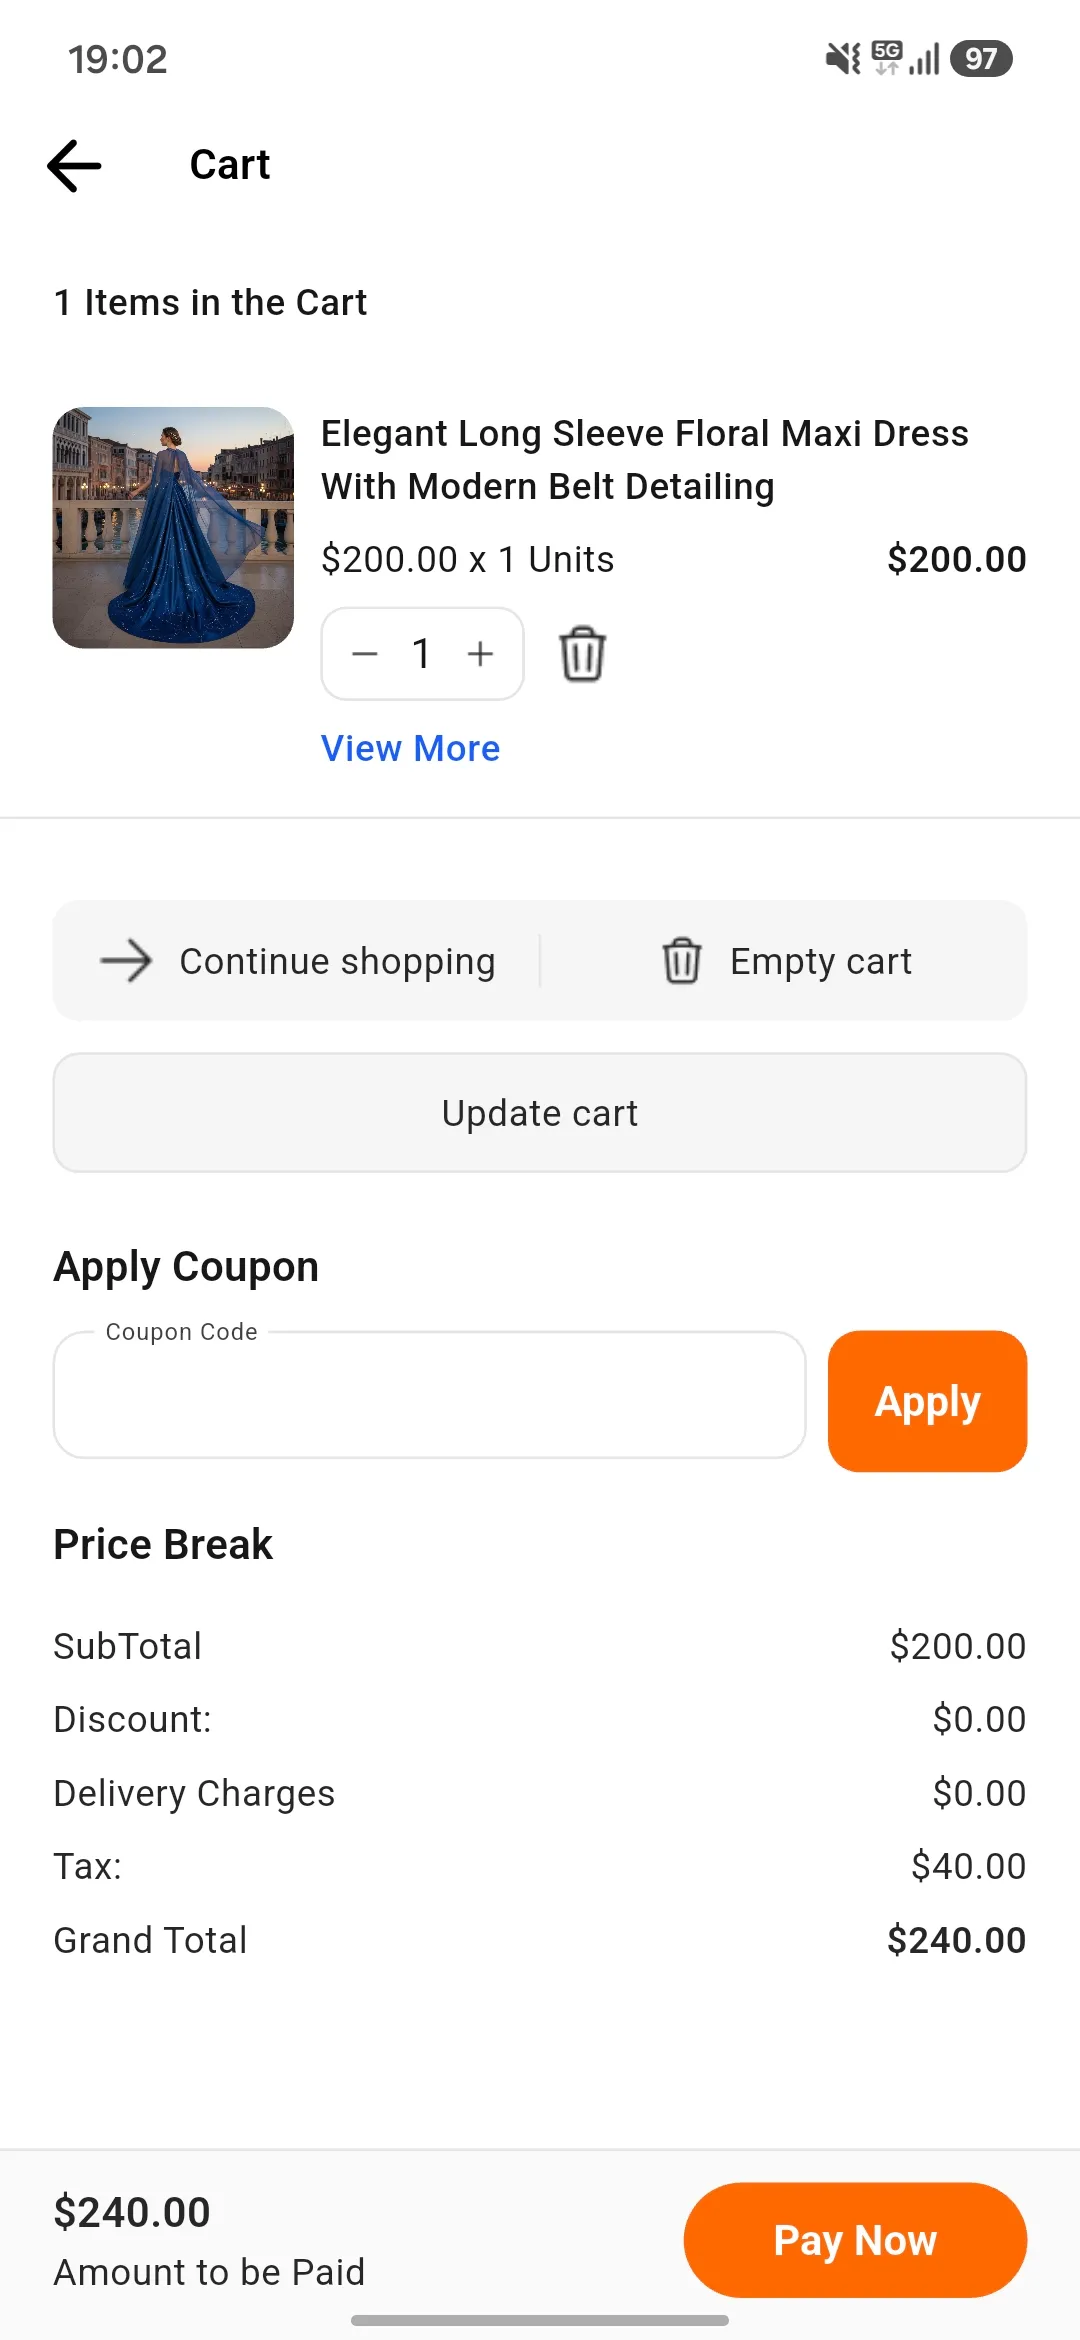
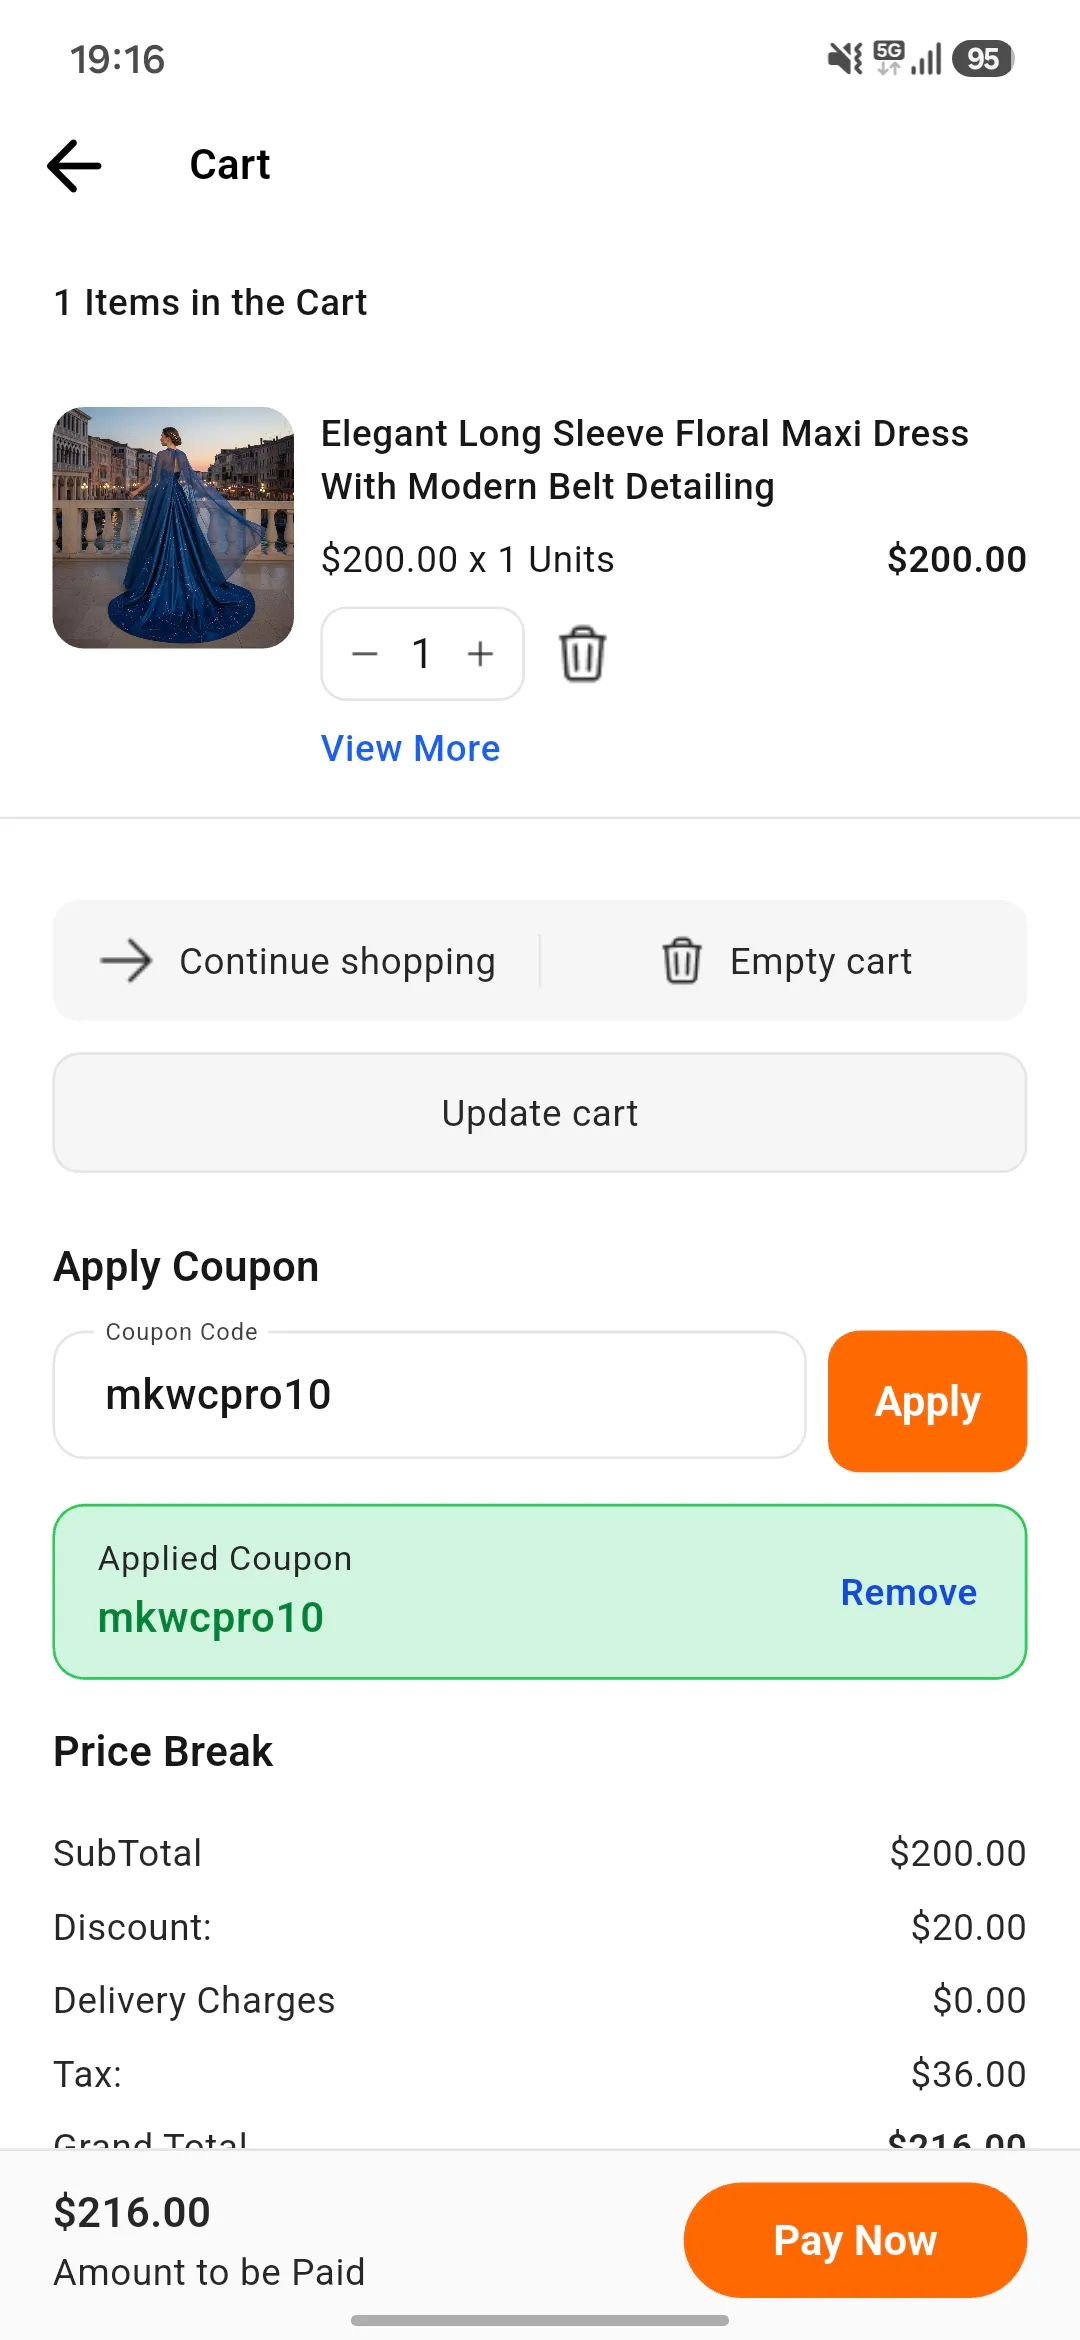
Buy Now:
In buy now section the customer can update their cart and can apply the discount coupons.
Thus, after clicking on the continue shopping button, the customer can go directly to the homepage for continuing their shopping.
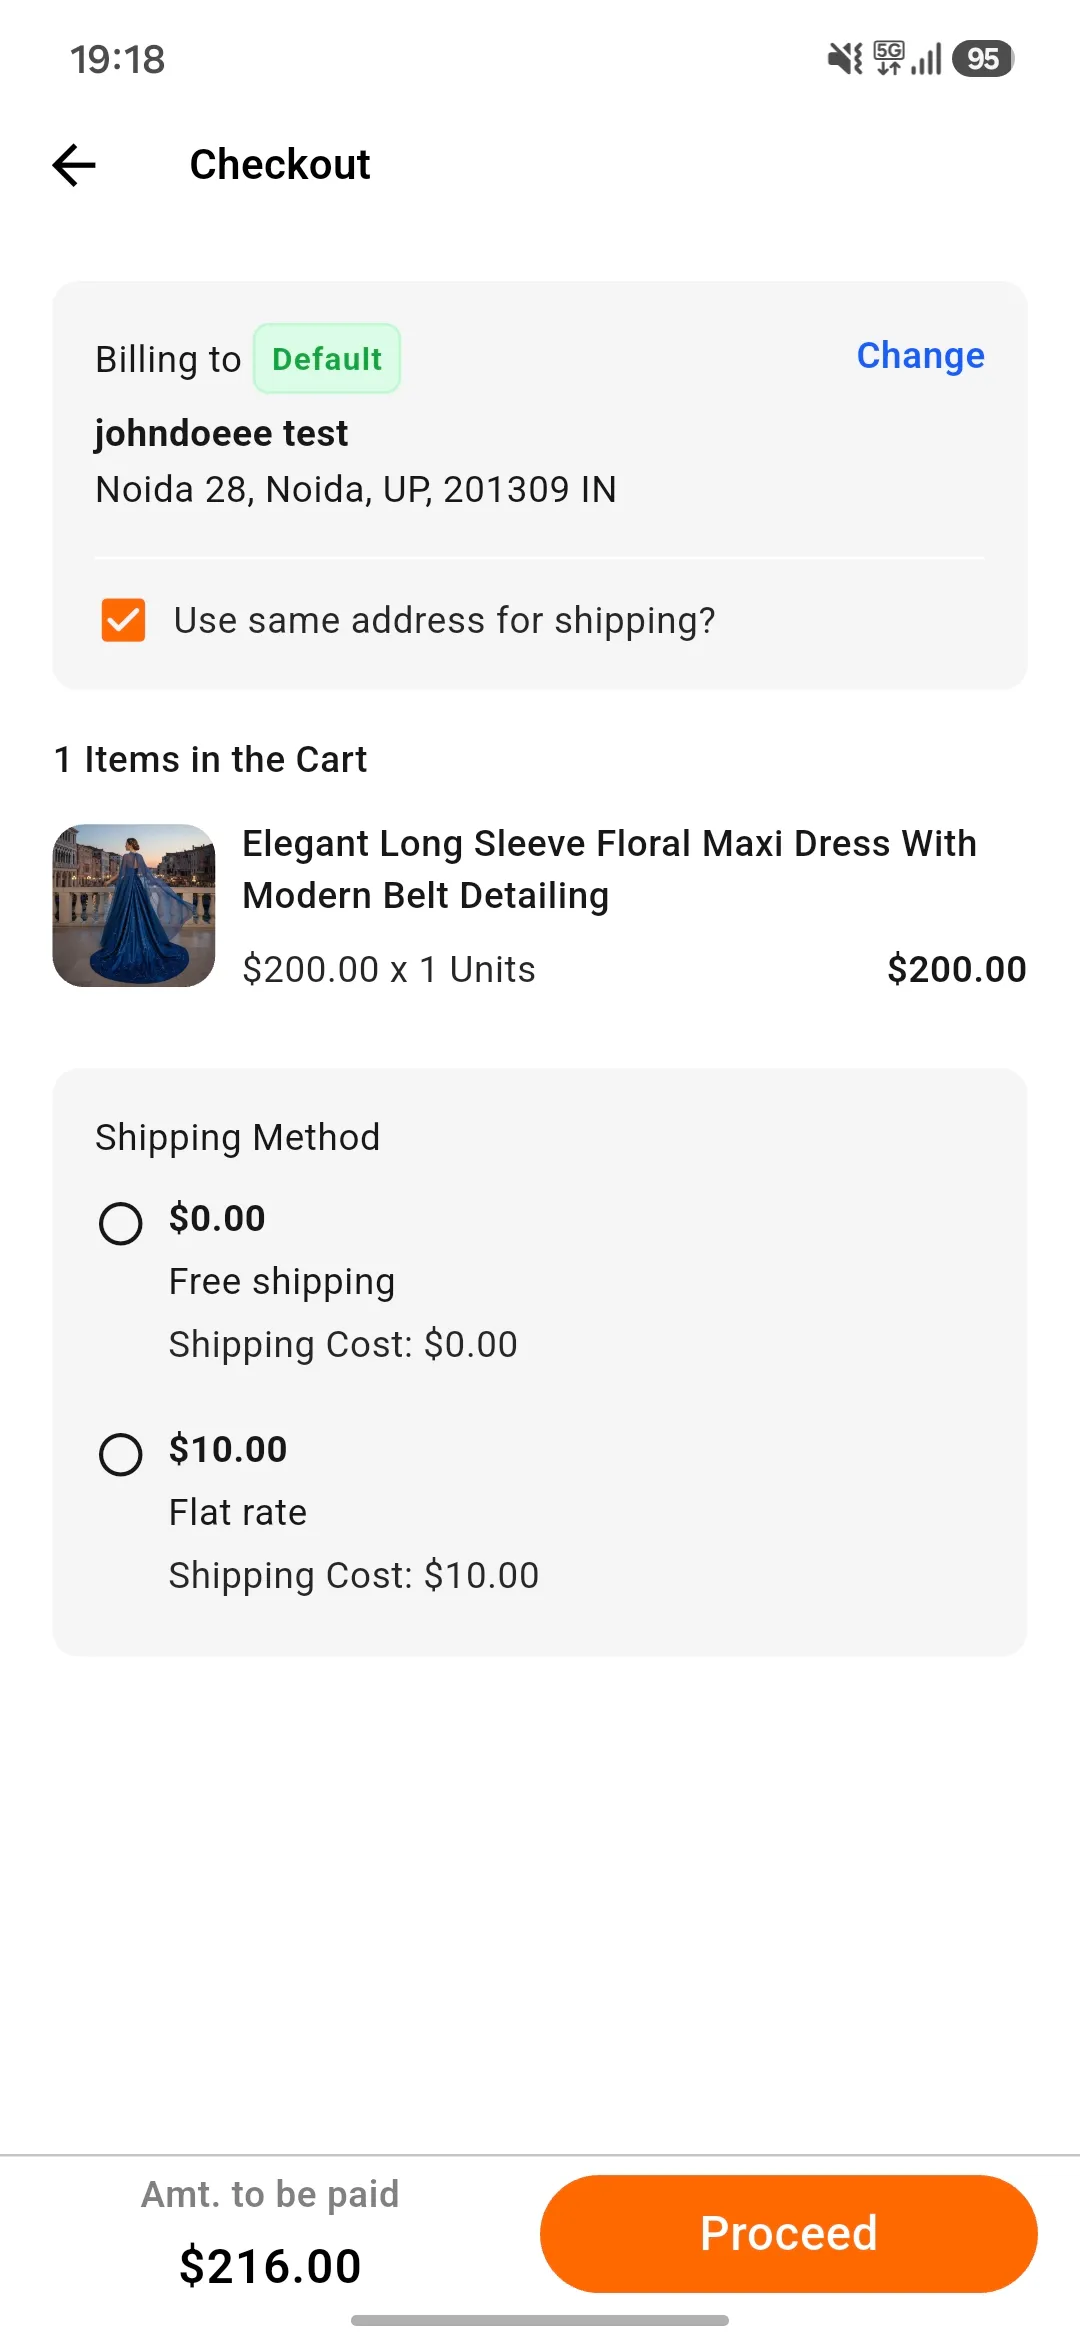
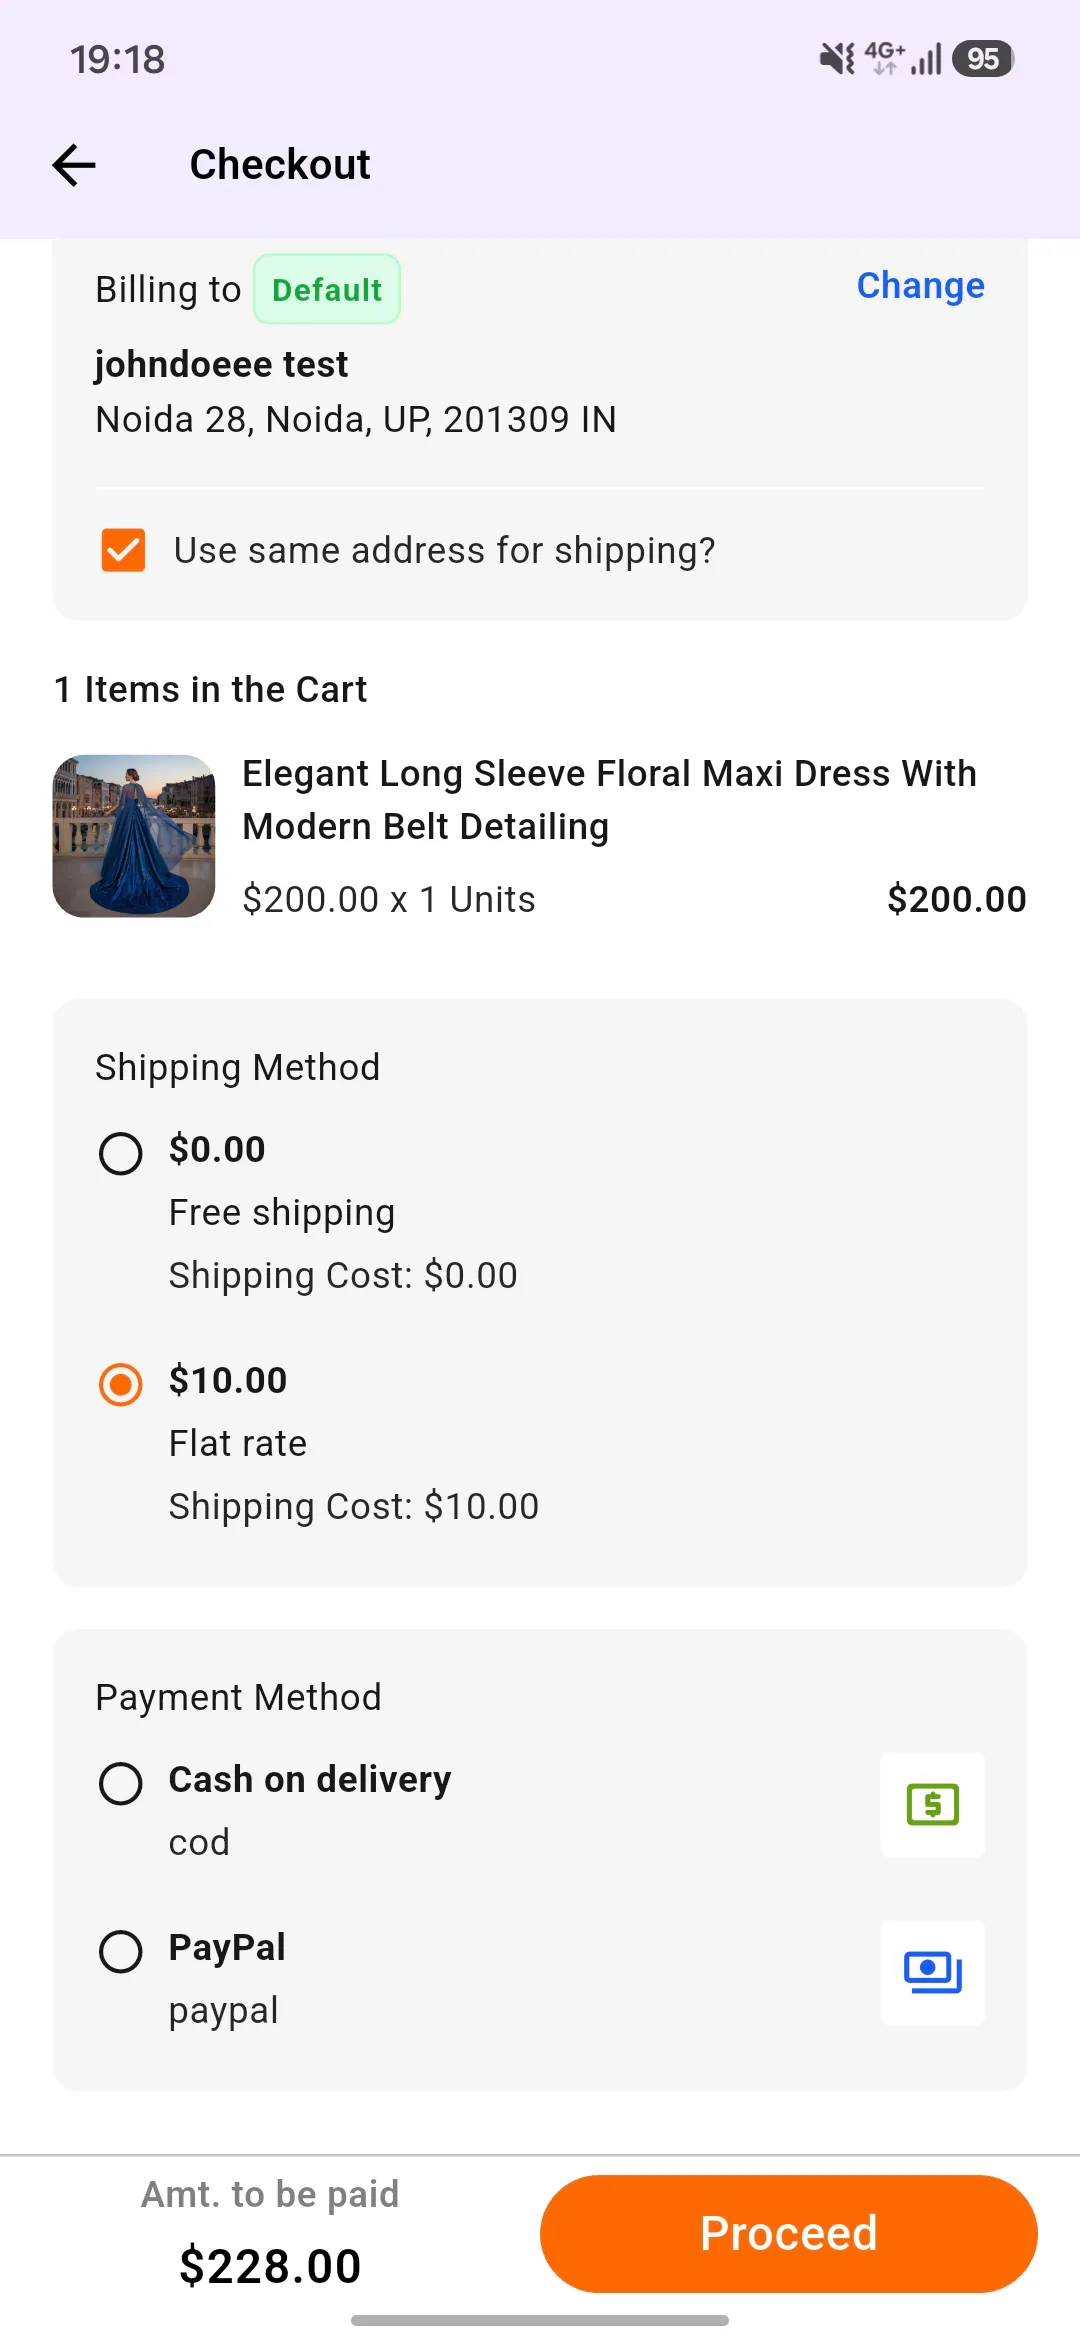
Shipping and Payment Method:
After click on the proceed button, the customer will be redirected to the shipping page. So, the customer can select the shipping method and process for the payment method to complete the order.
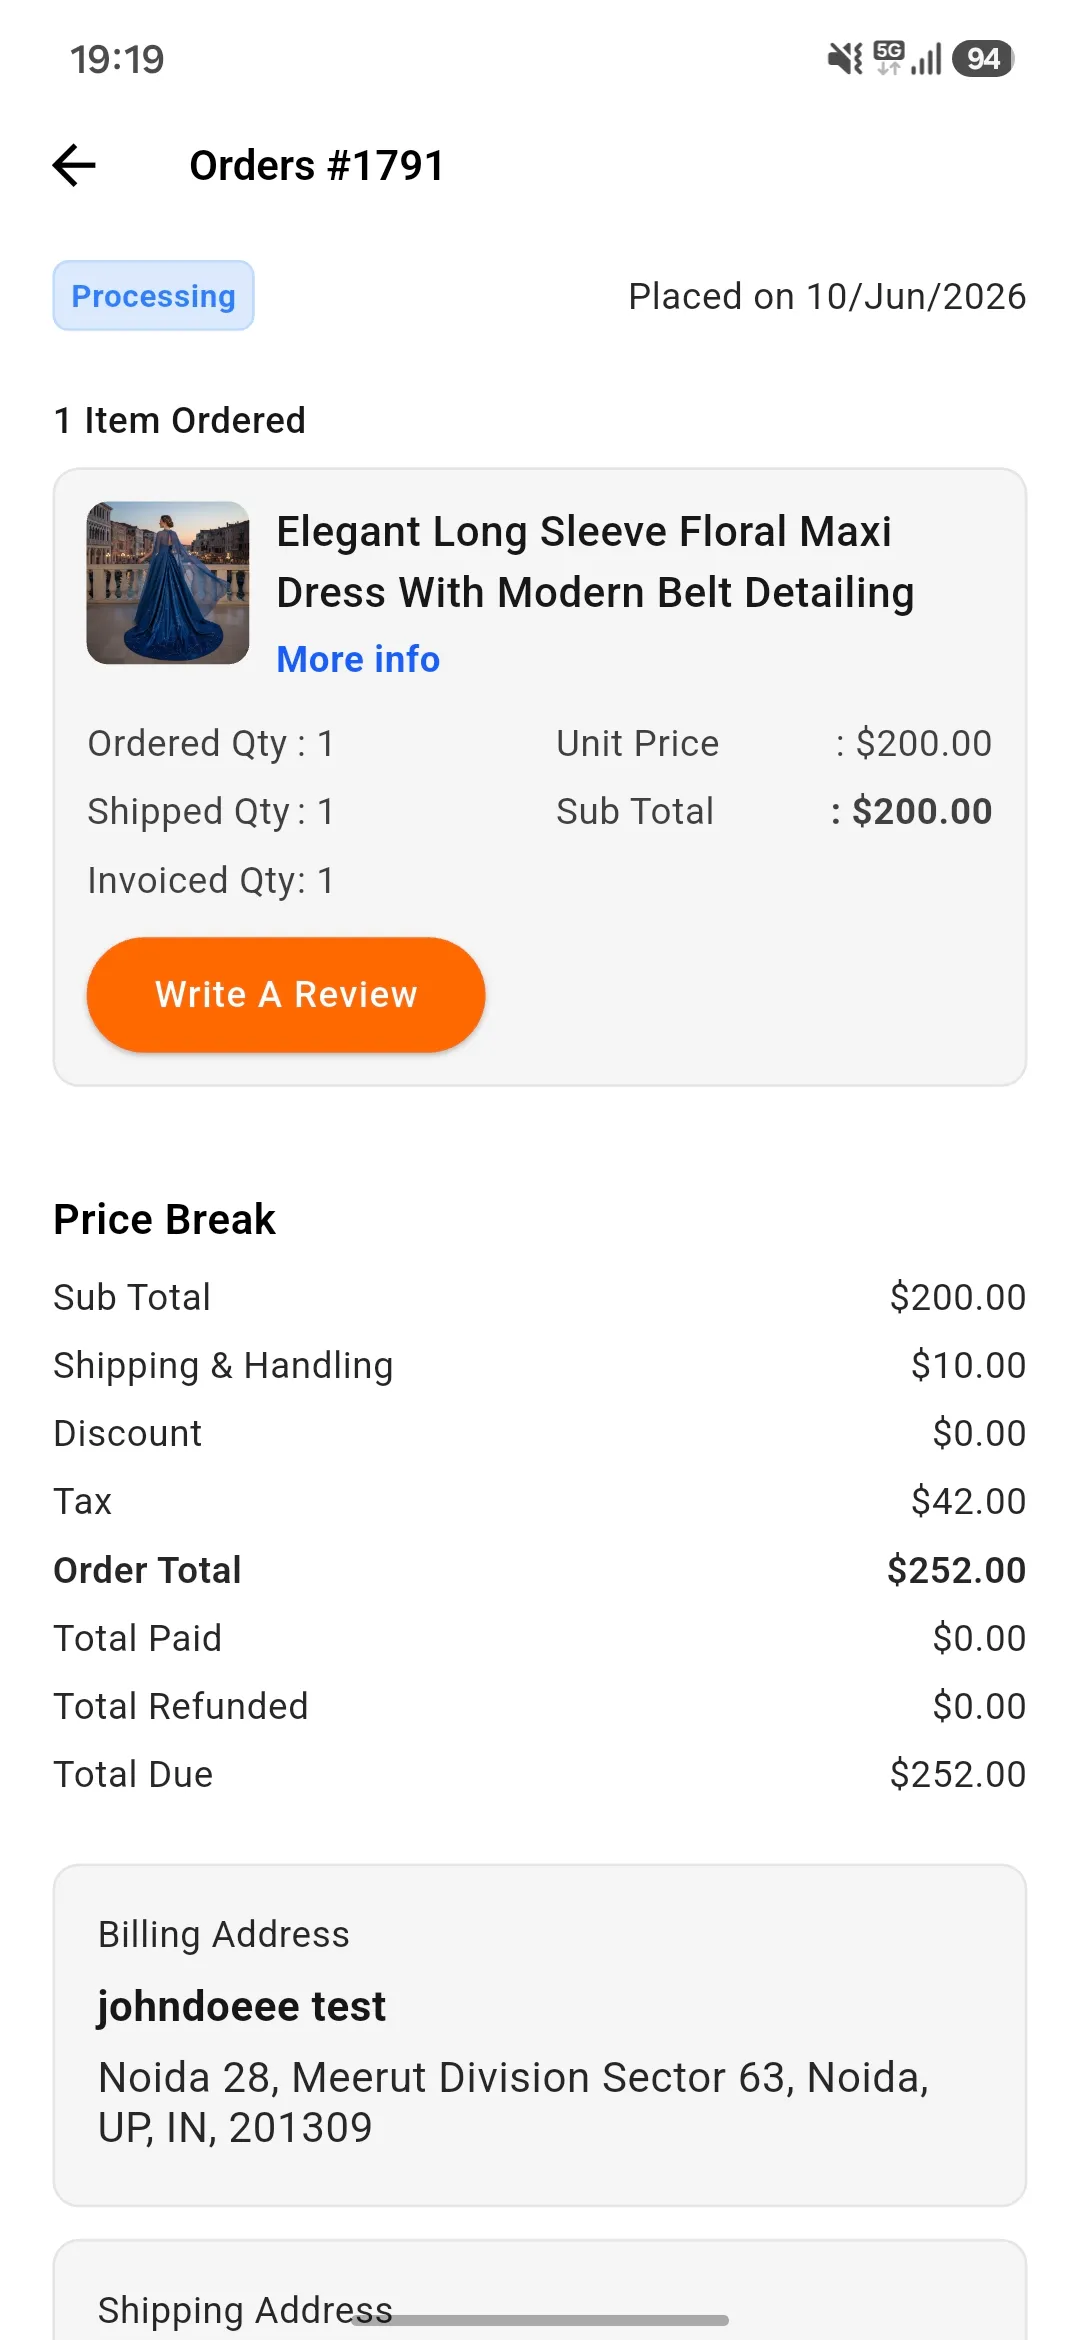
Order Summary:
Hereafter place the order successfully, the customer will get their order details as follows.
In this page, the customer will see the complete order details like their billing time, date, payment method, shipping price, product price, and product information.
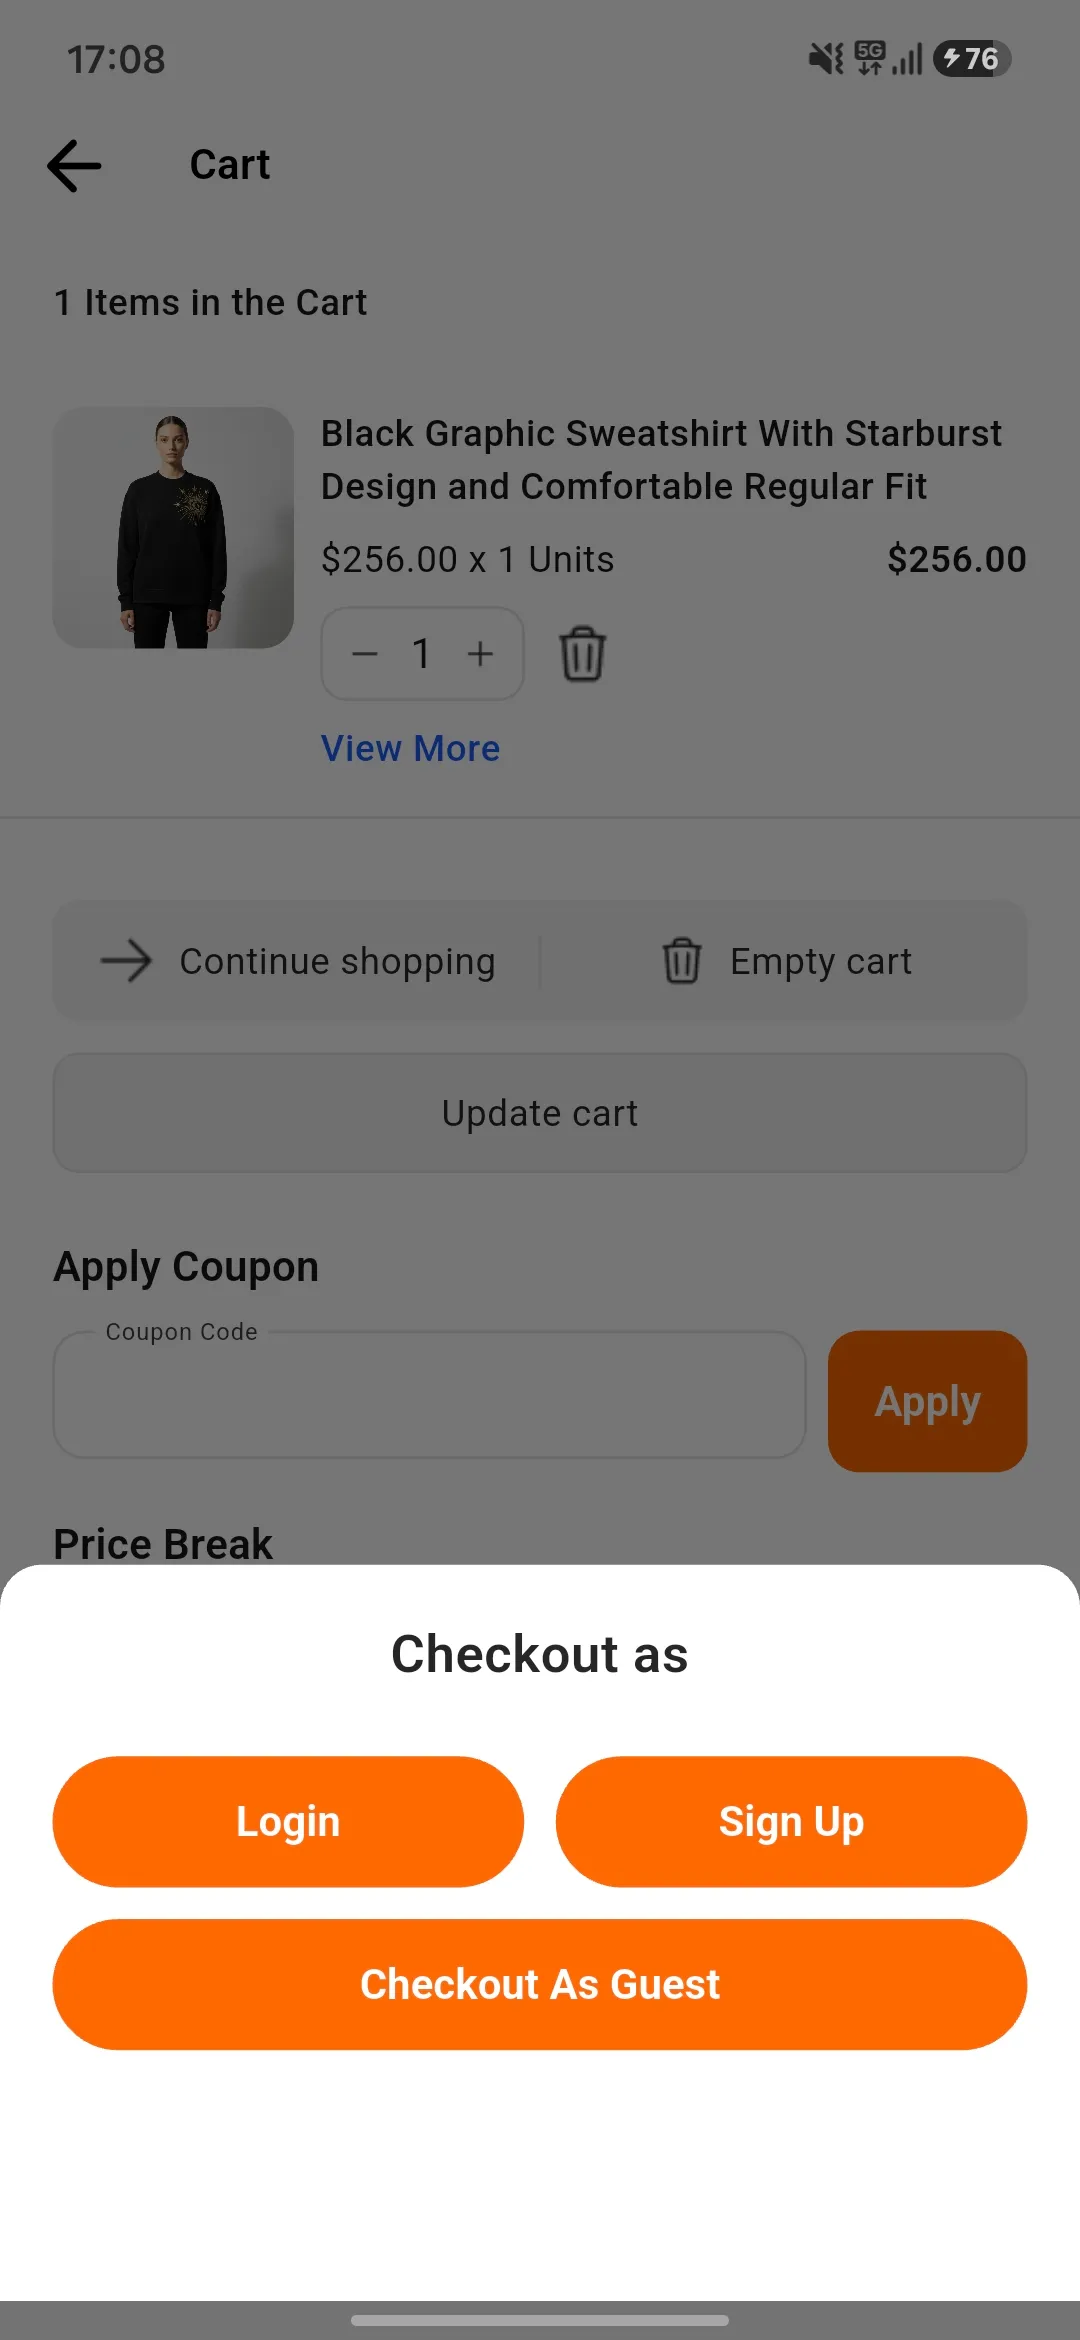
Customer Authentication:
If the customer does not log in to their account(when creating an order), then ask for Sign-up, Sign-in, or Continue as a guest.
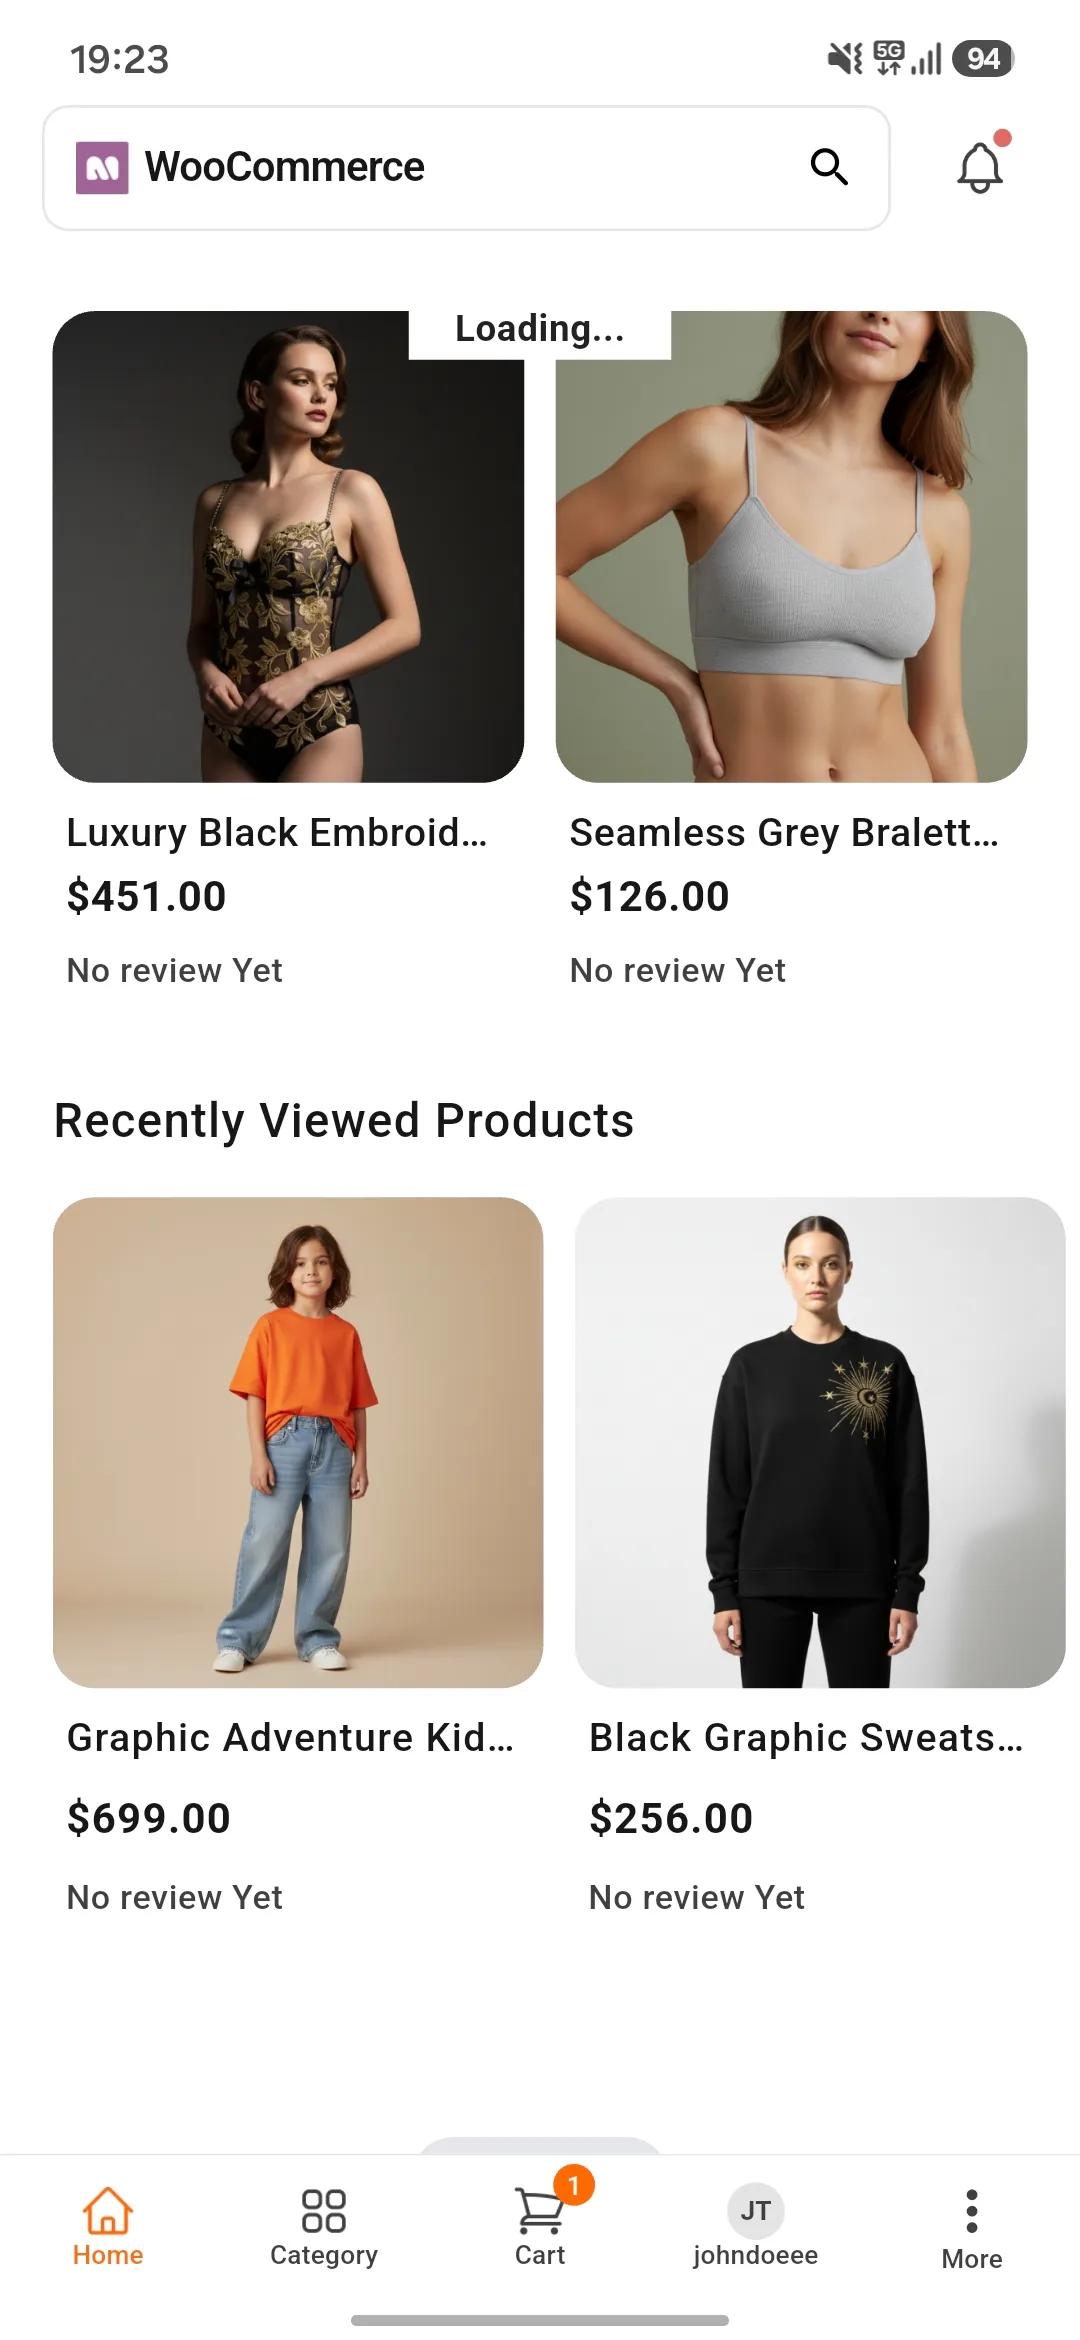
Recently Viewed Products:
The customer can view the product that they have recently viewed. From there, they can open the product and add it to the cart.
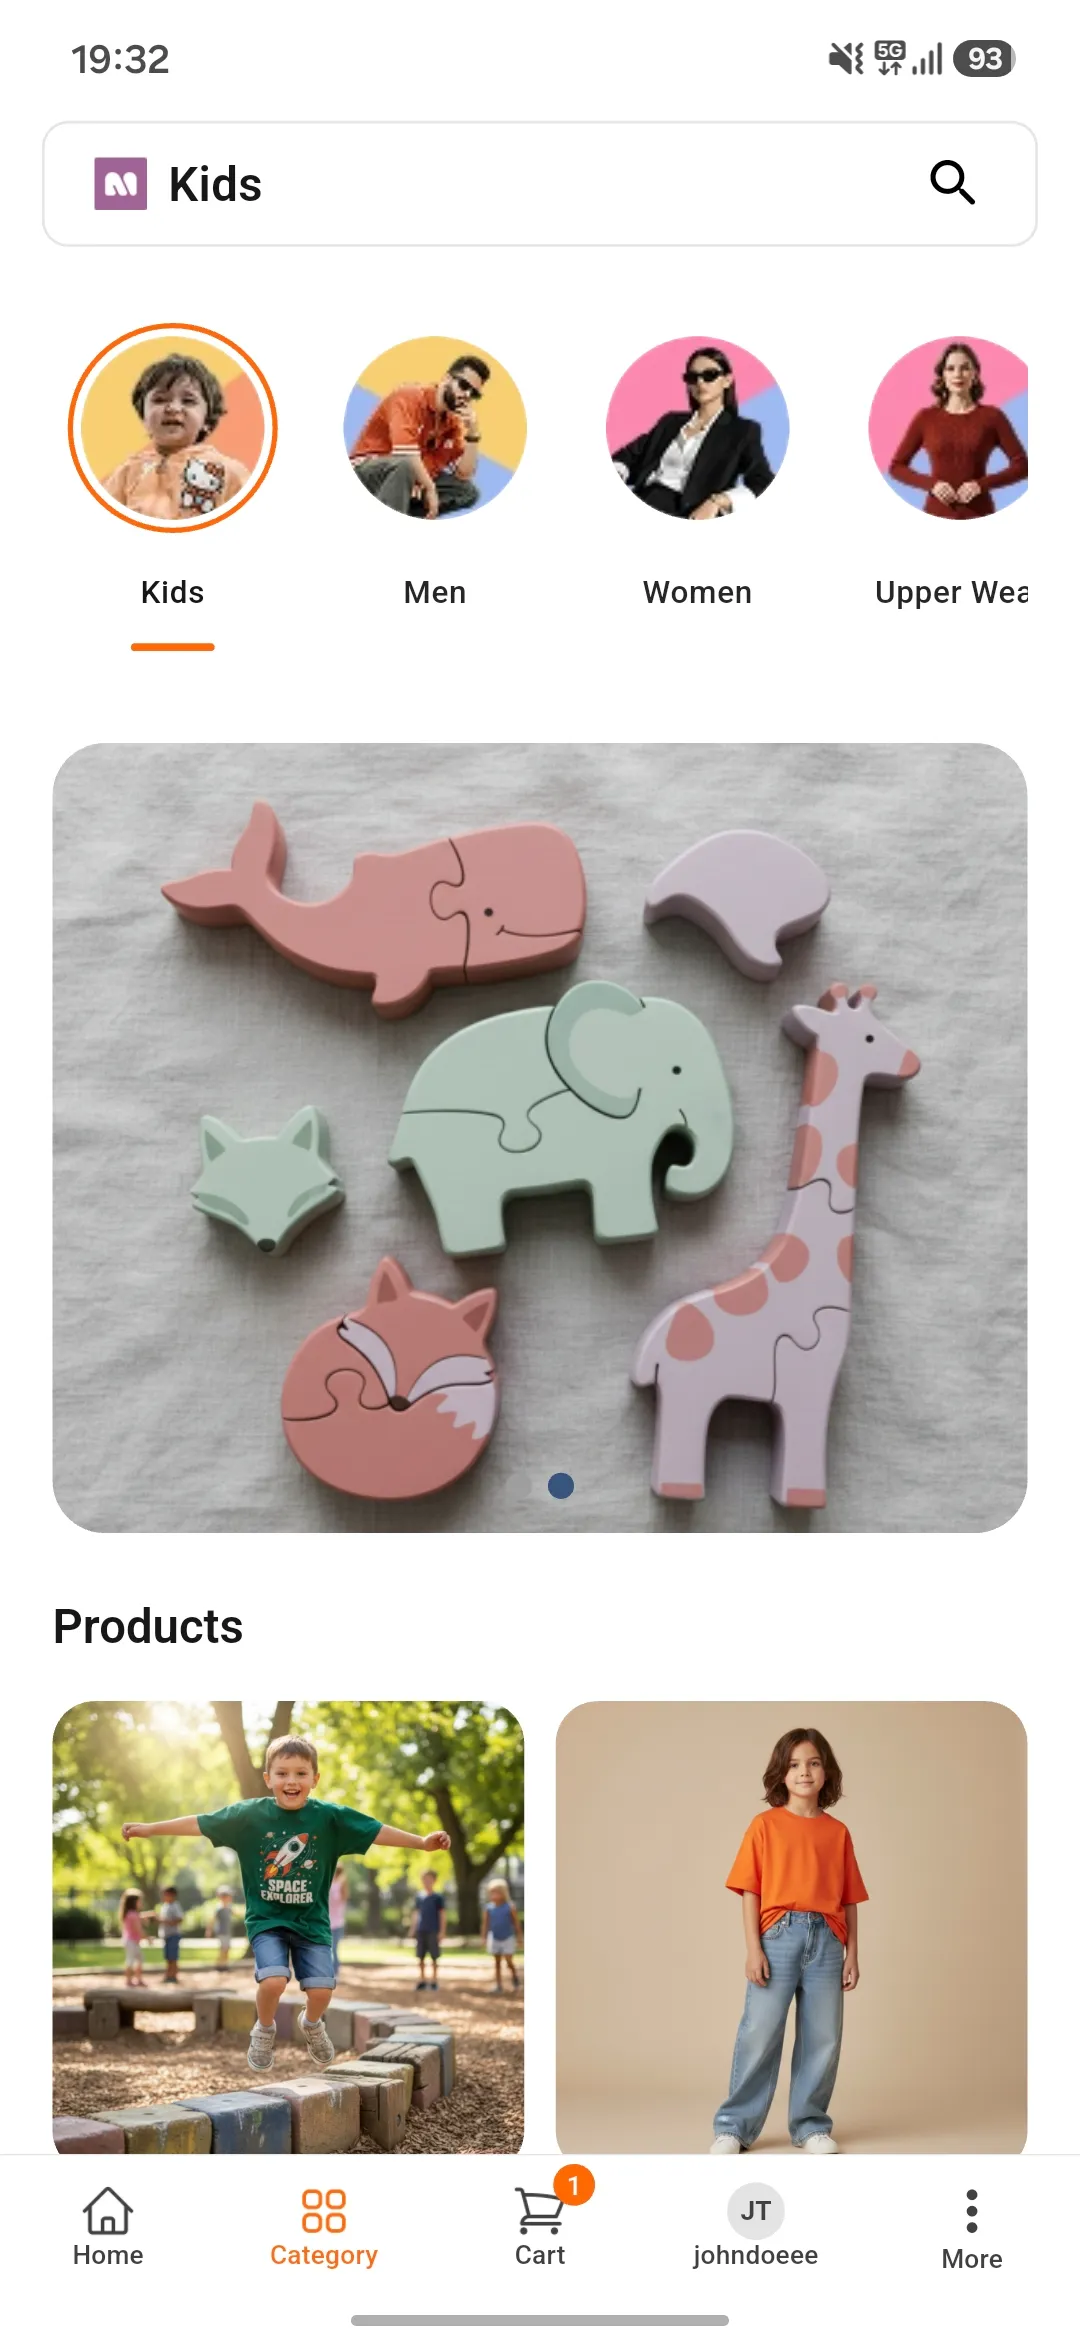
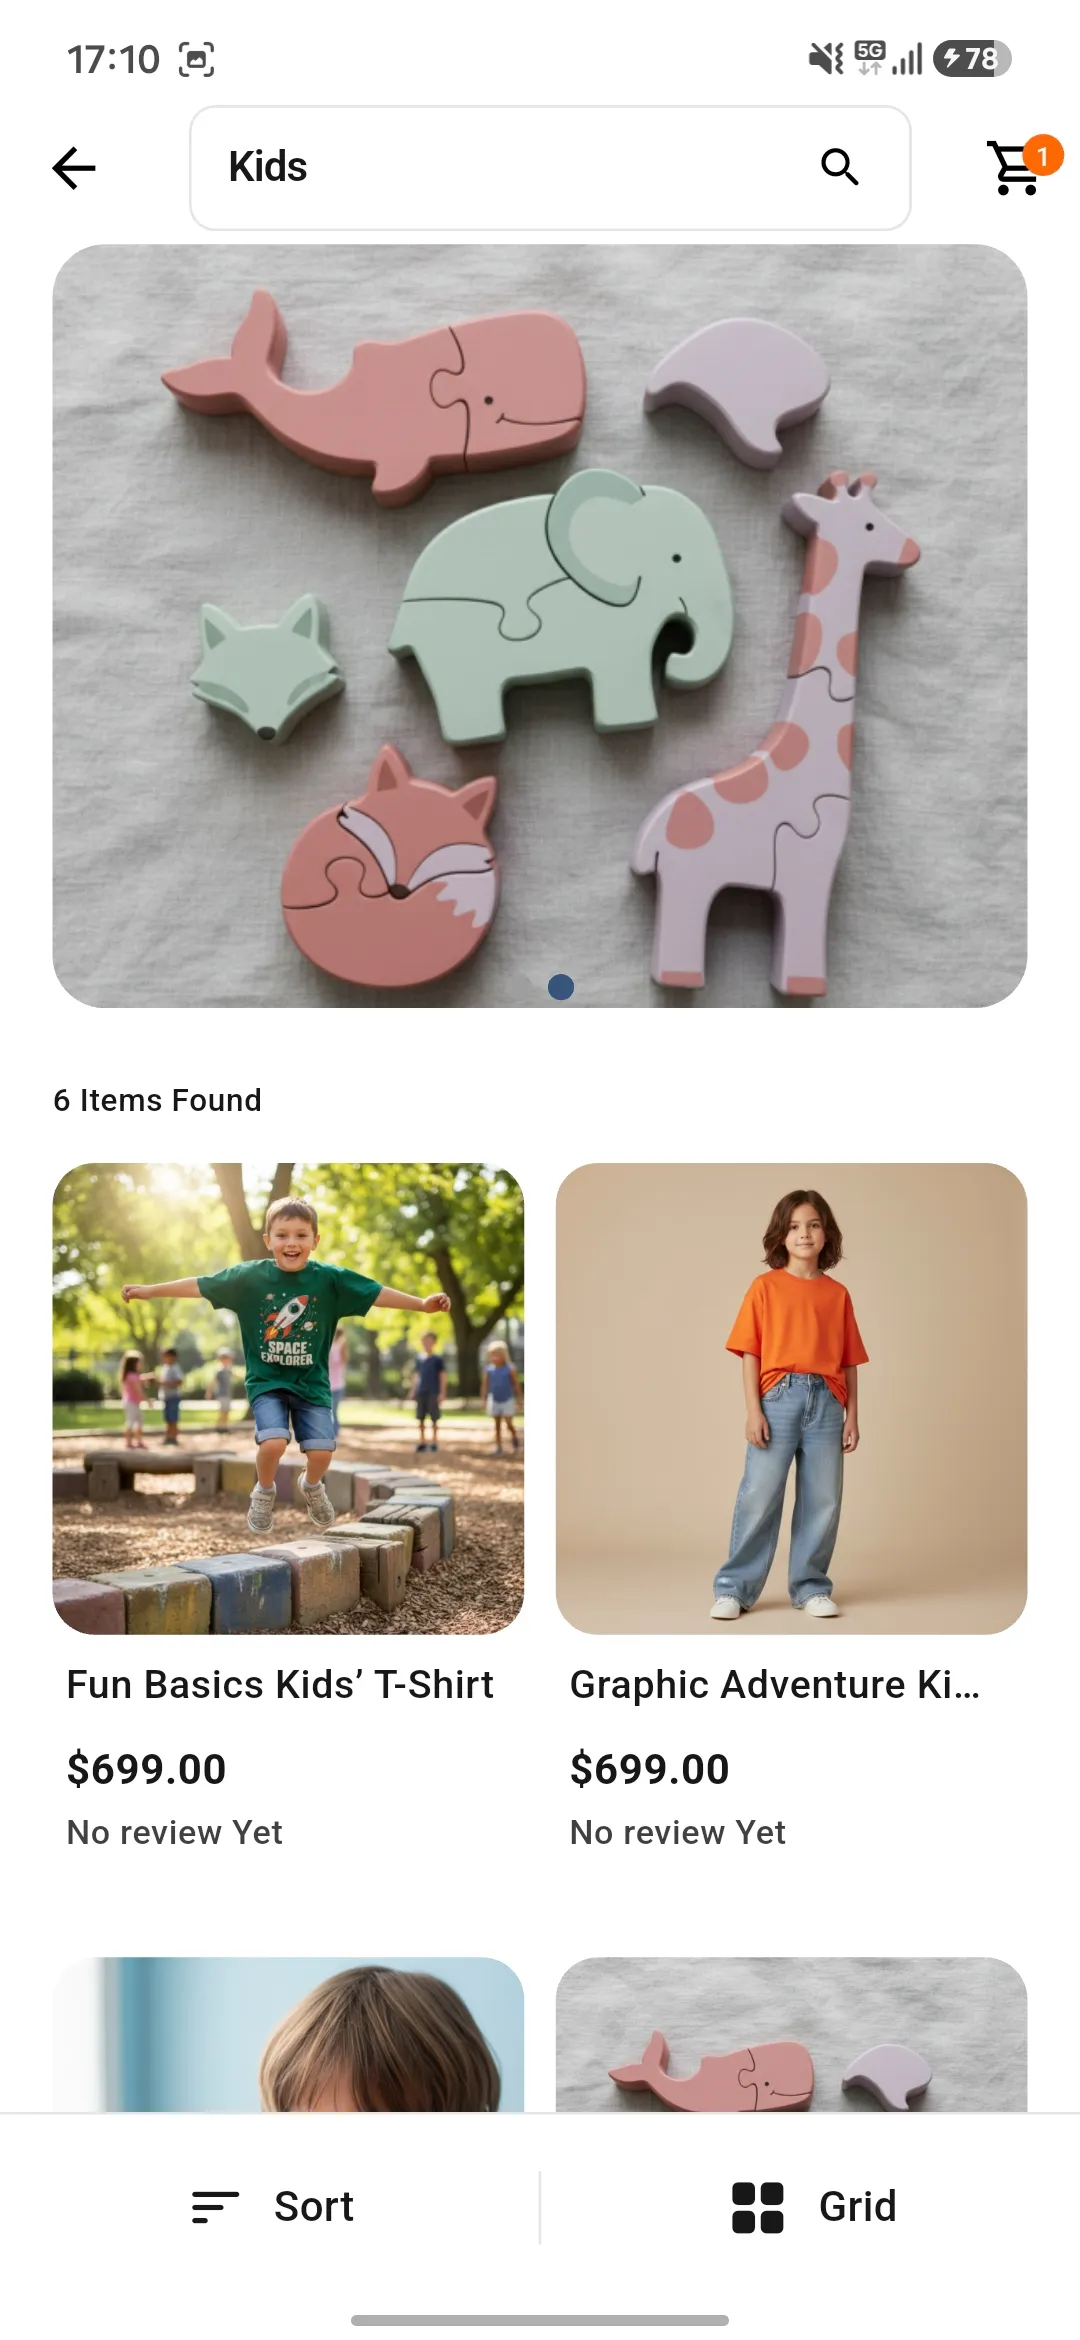
Category View
List Item:
From the bottom navigation, the customer will see the categories of the store. Where they can see the product by category wise. Also, the customer can sort the product according to their needs.
Grid View and List View:
After click on the category customer can see the product of that category. Also, the customer can see the product in Grid view and List view both.
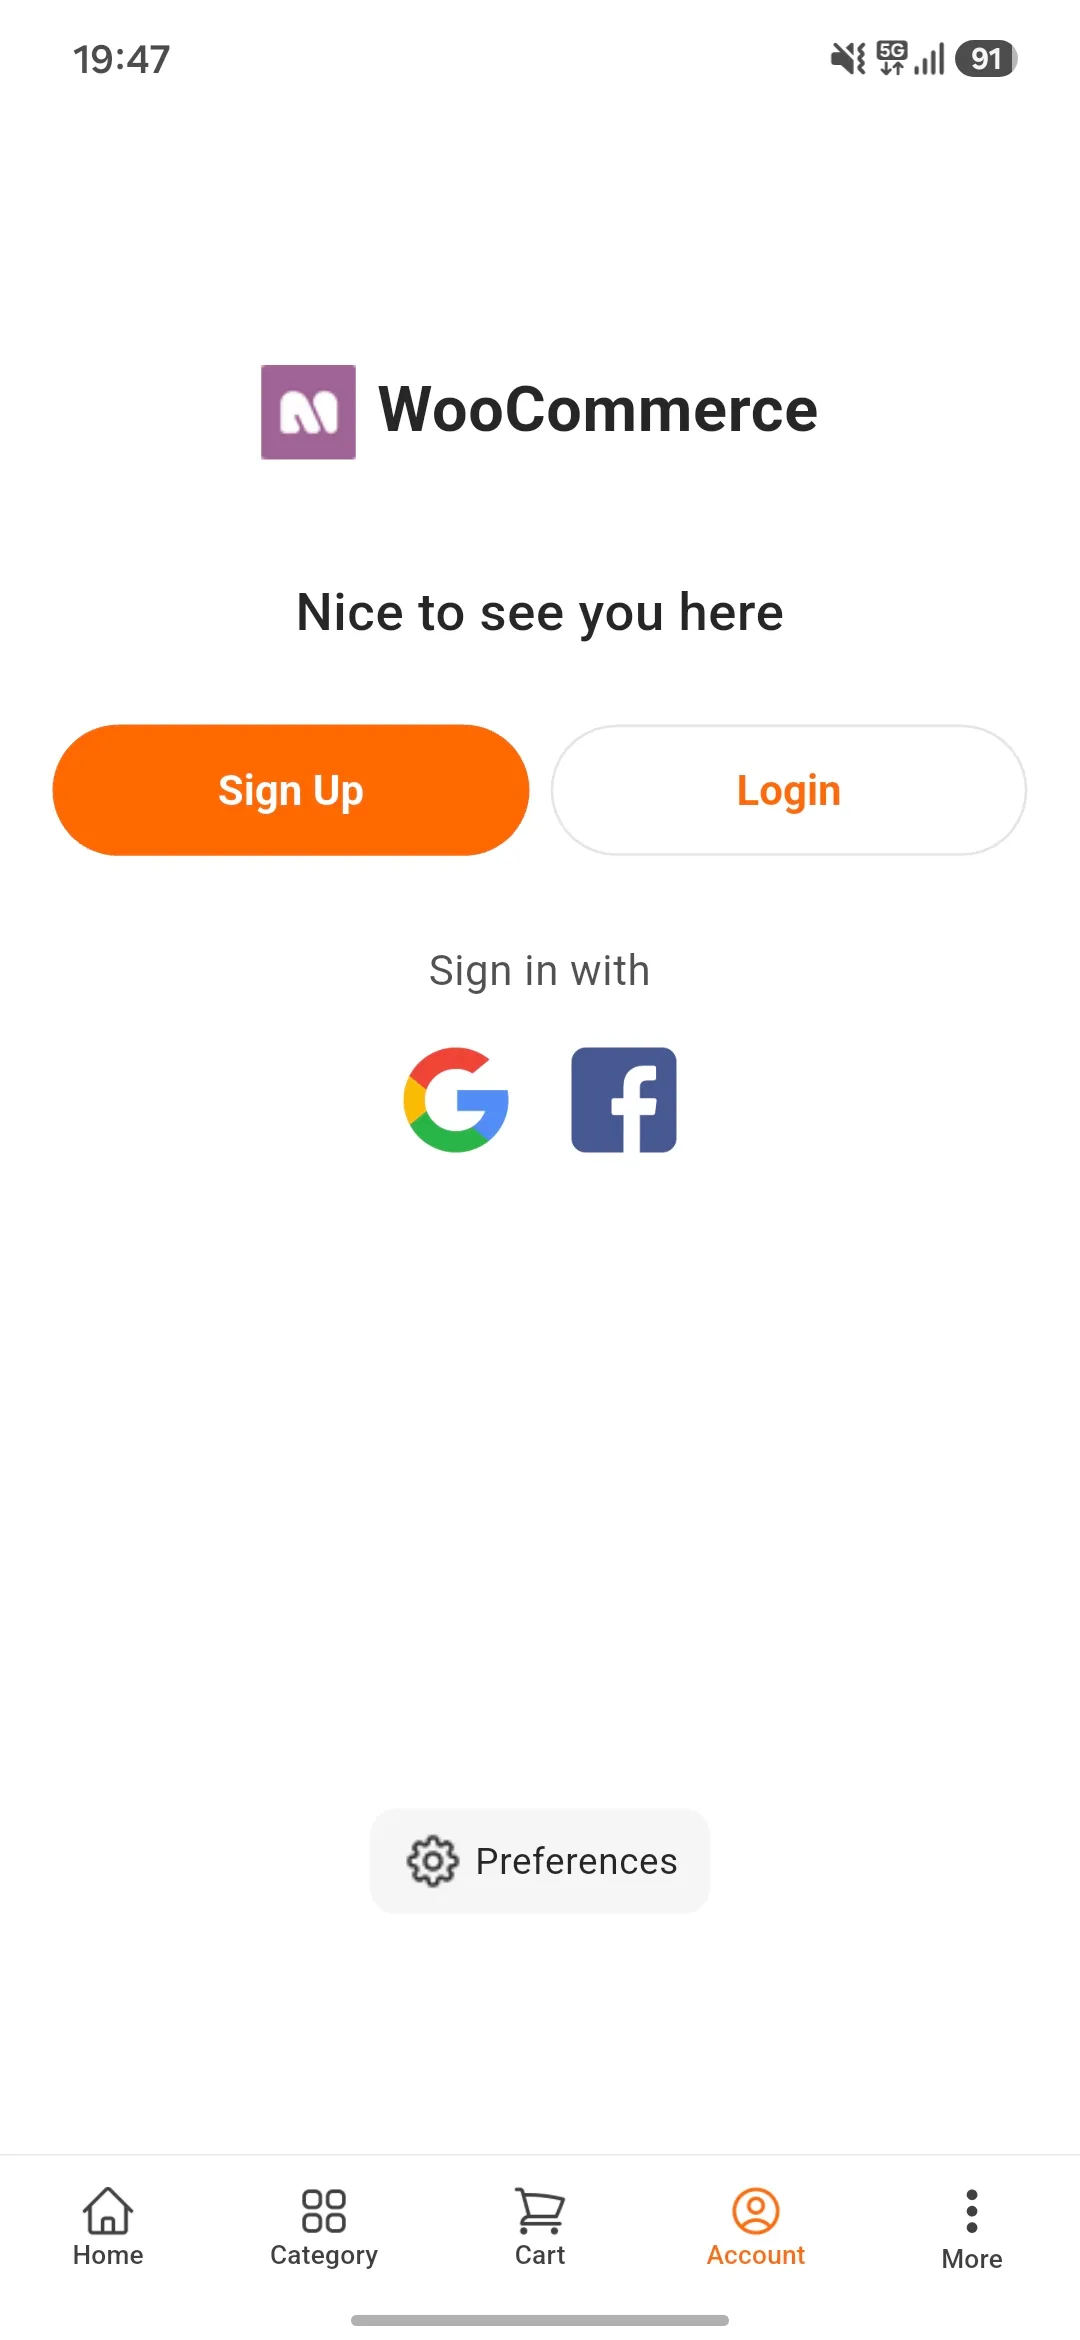
Sign-in and Sign-up
After clicking on the account in the bottom navigation bar, an account dashboard will open. Where the customer can see the sign-in and register button.
After clicking on them they can access their accounts.
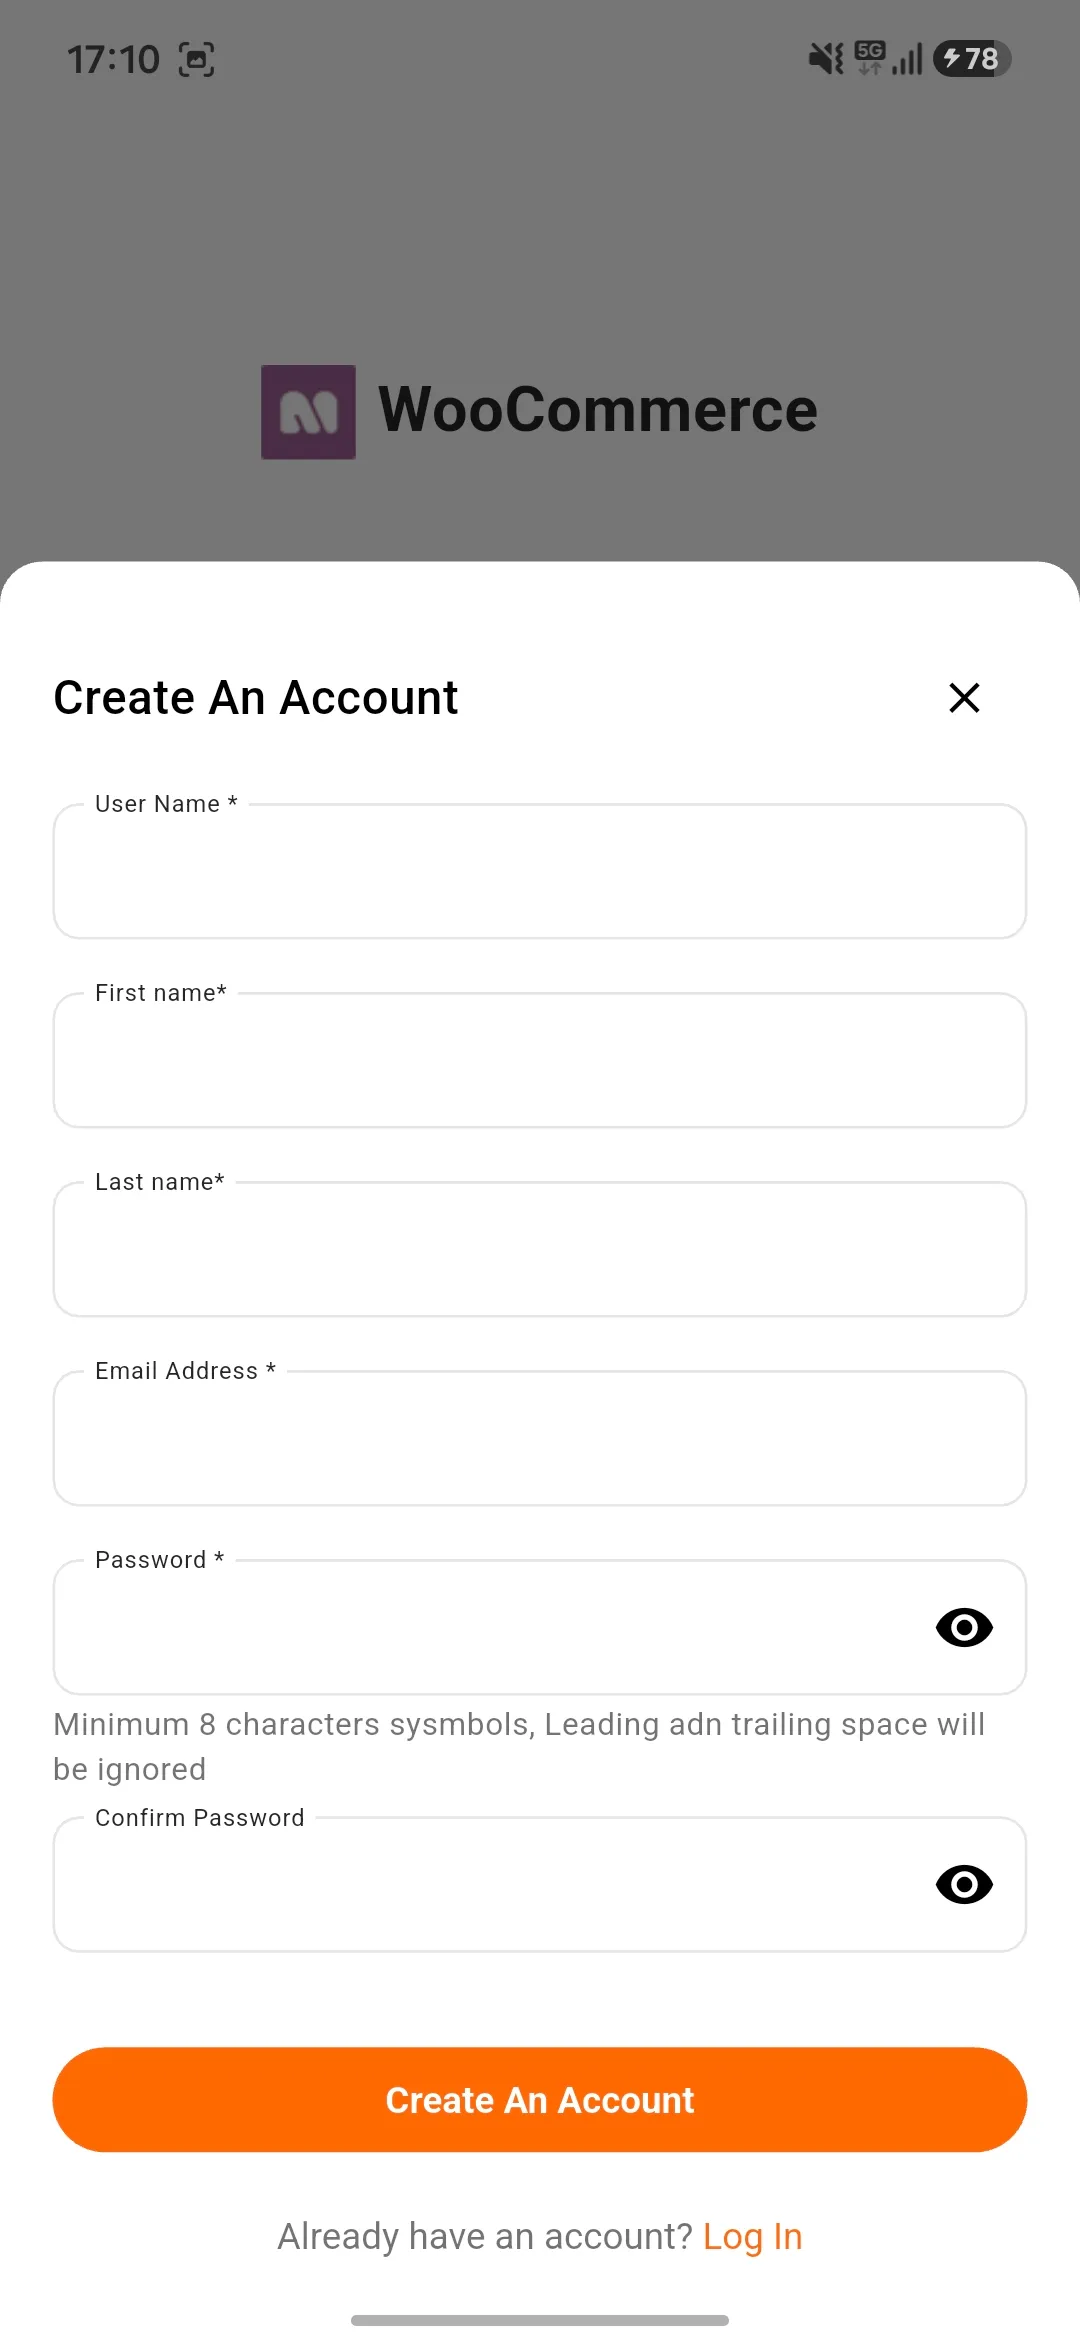
Easy Sign Up and Sign In:
Customer needs to enter the email address and password for the sign up to their account. So, a customer can log in with the email address and password to their account.
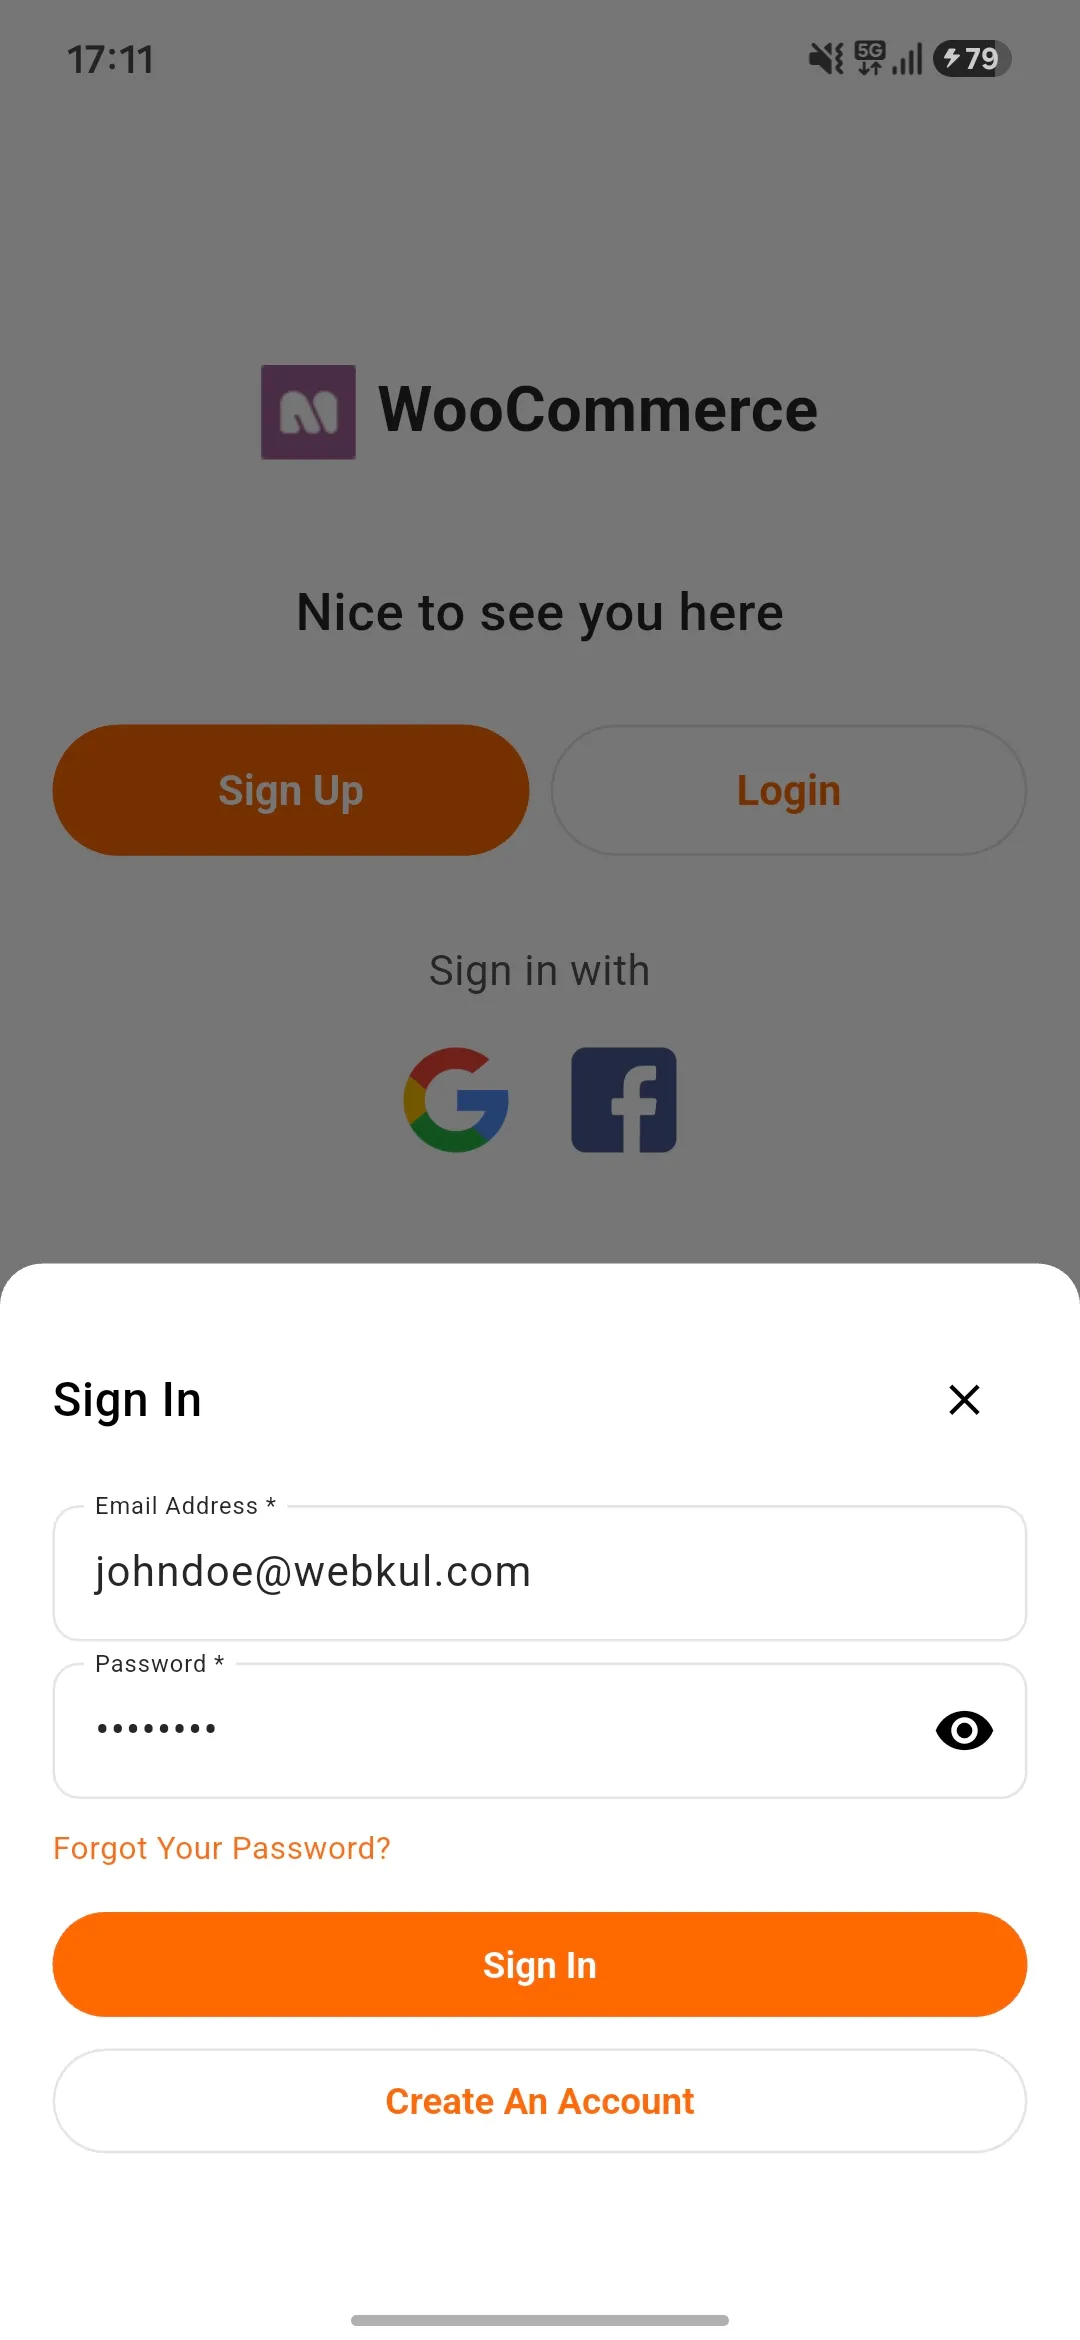
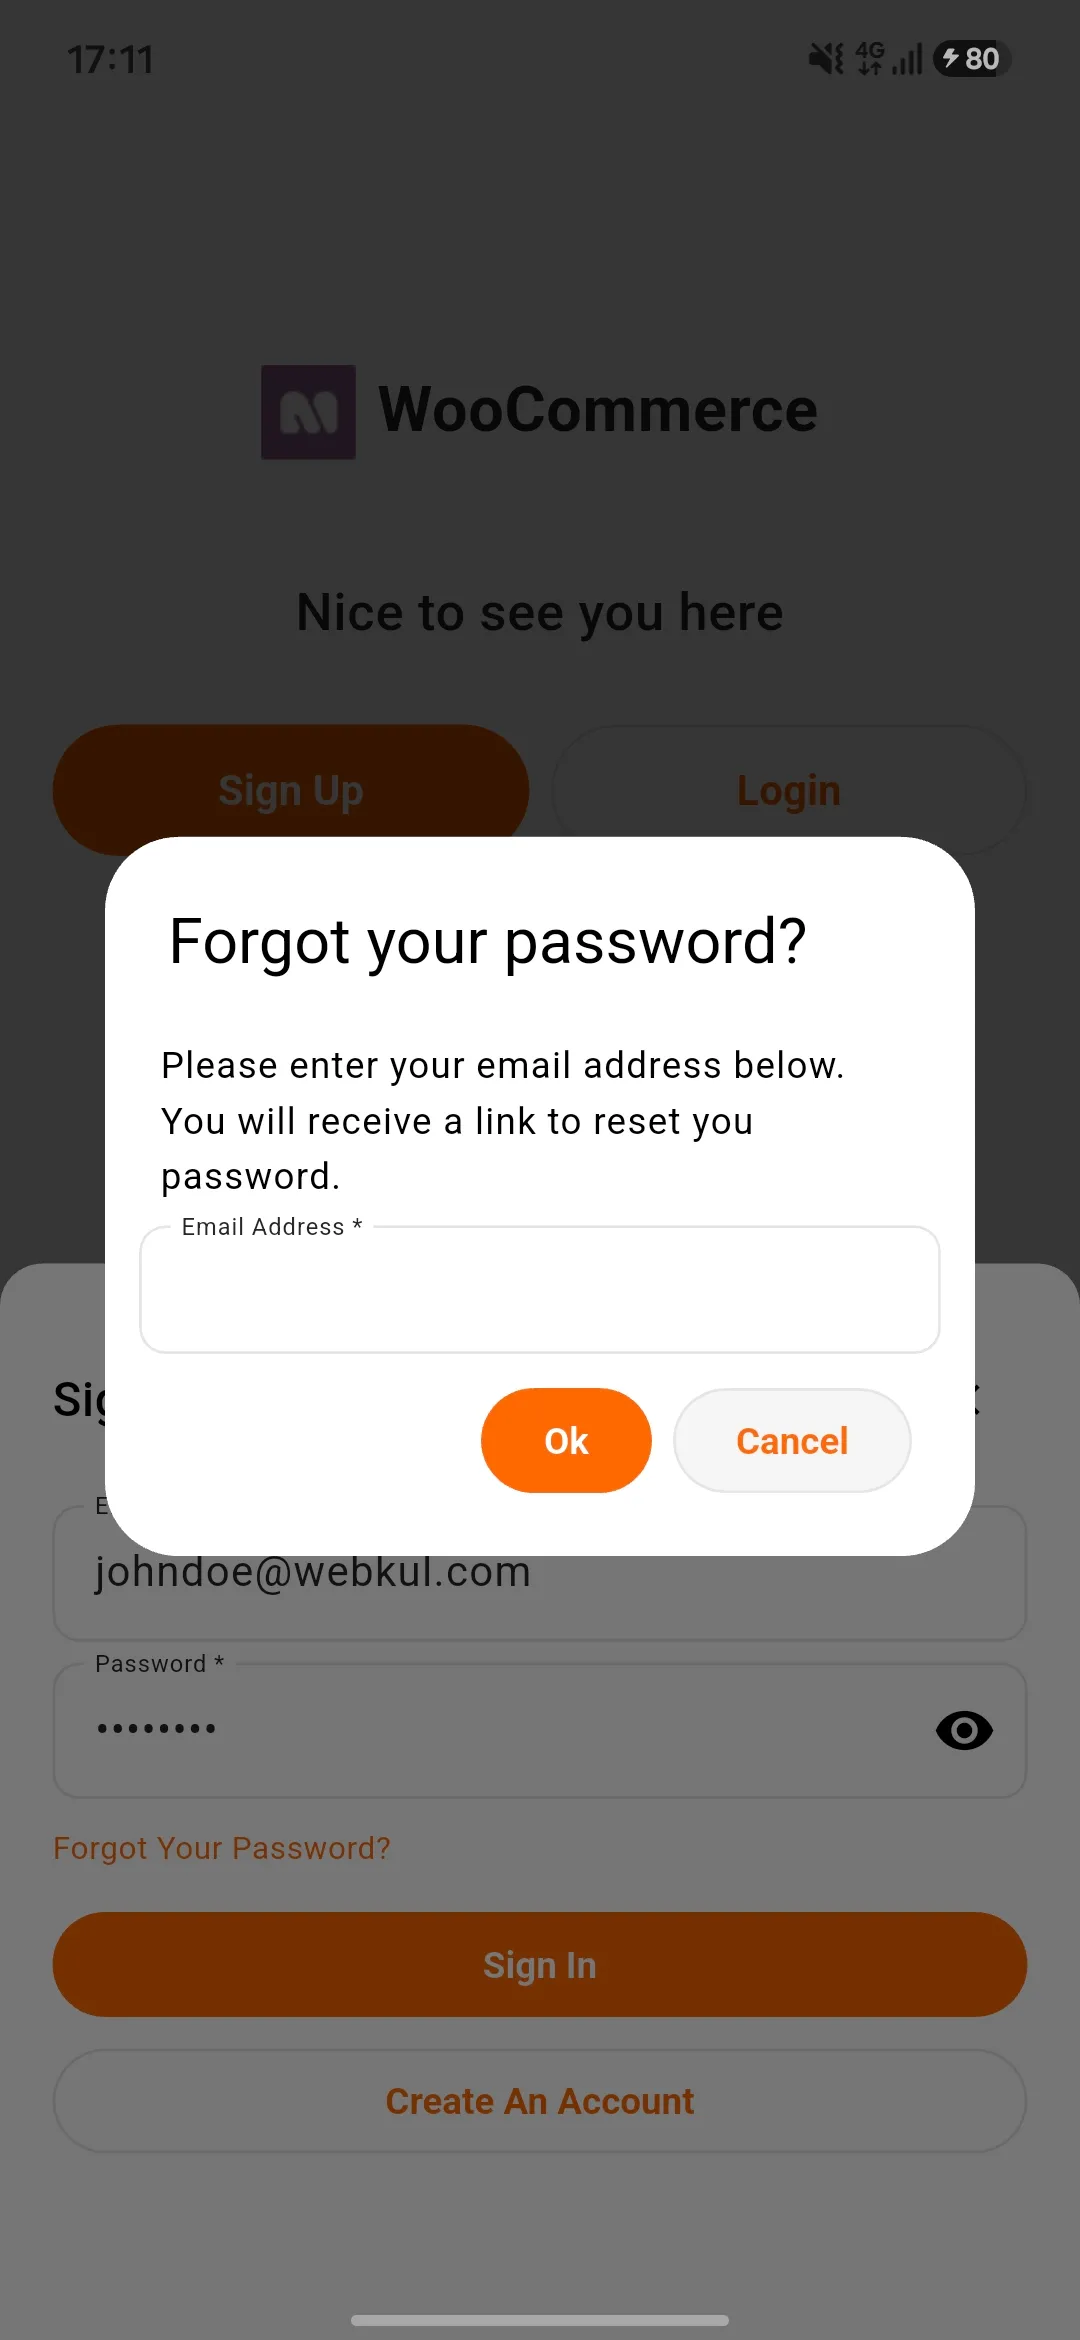
Password Reset:
A customer can reset the password through the app. The customer needs to click on the “Lost your Password” link on the sign-in page.
So, the customer can enter the registered email address and follow the instructions to reset the password.
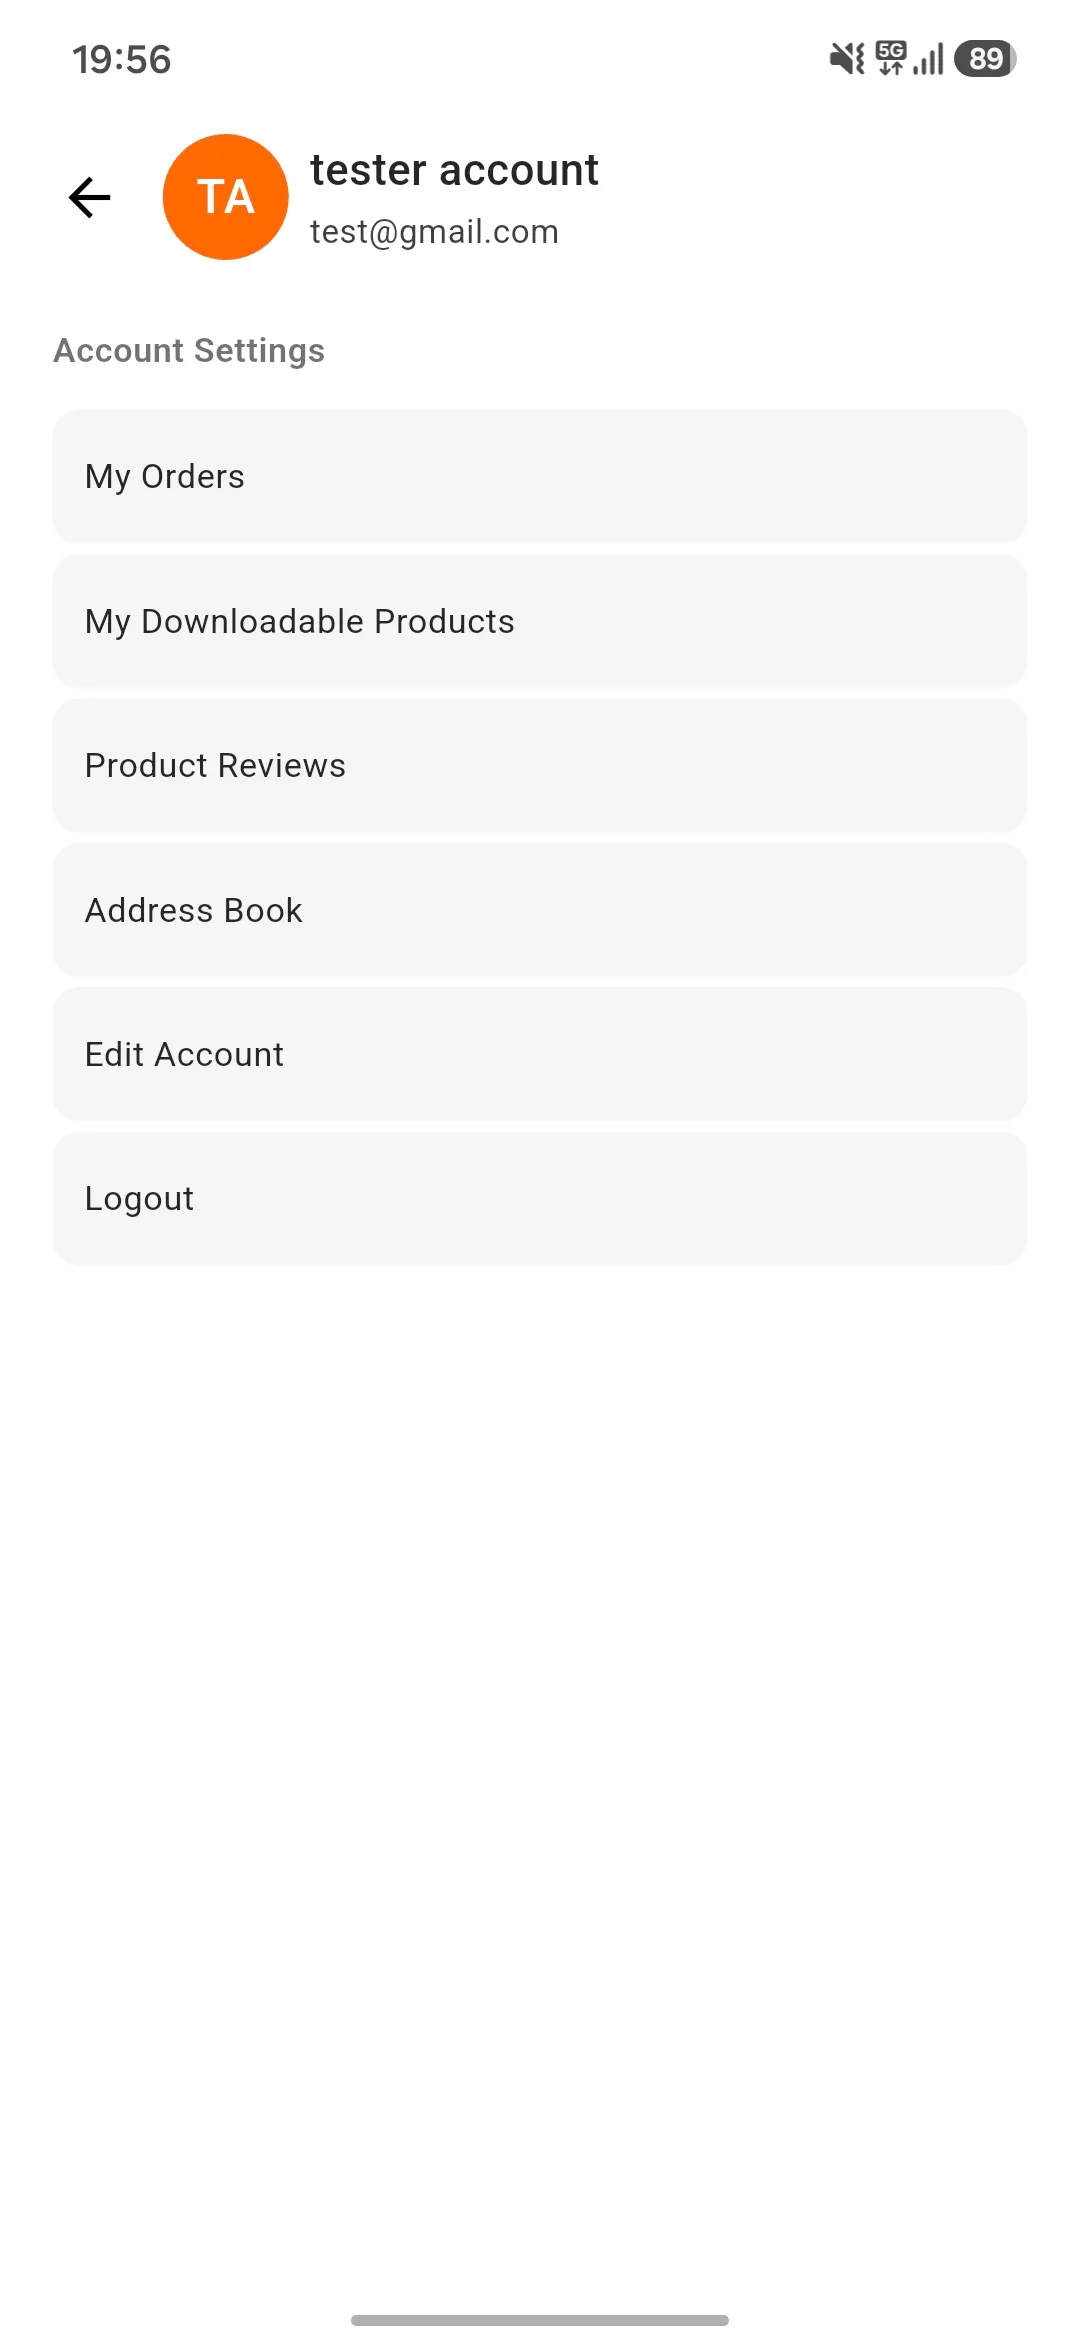
Profile View
My Account:
From the bottom navigation bar, a signed-in customer can see the information. So, the customer can see orders, addresses, account details, even the customer can log-out from here.
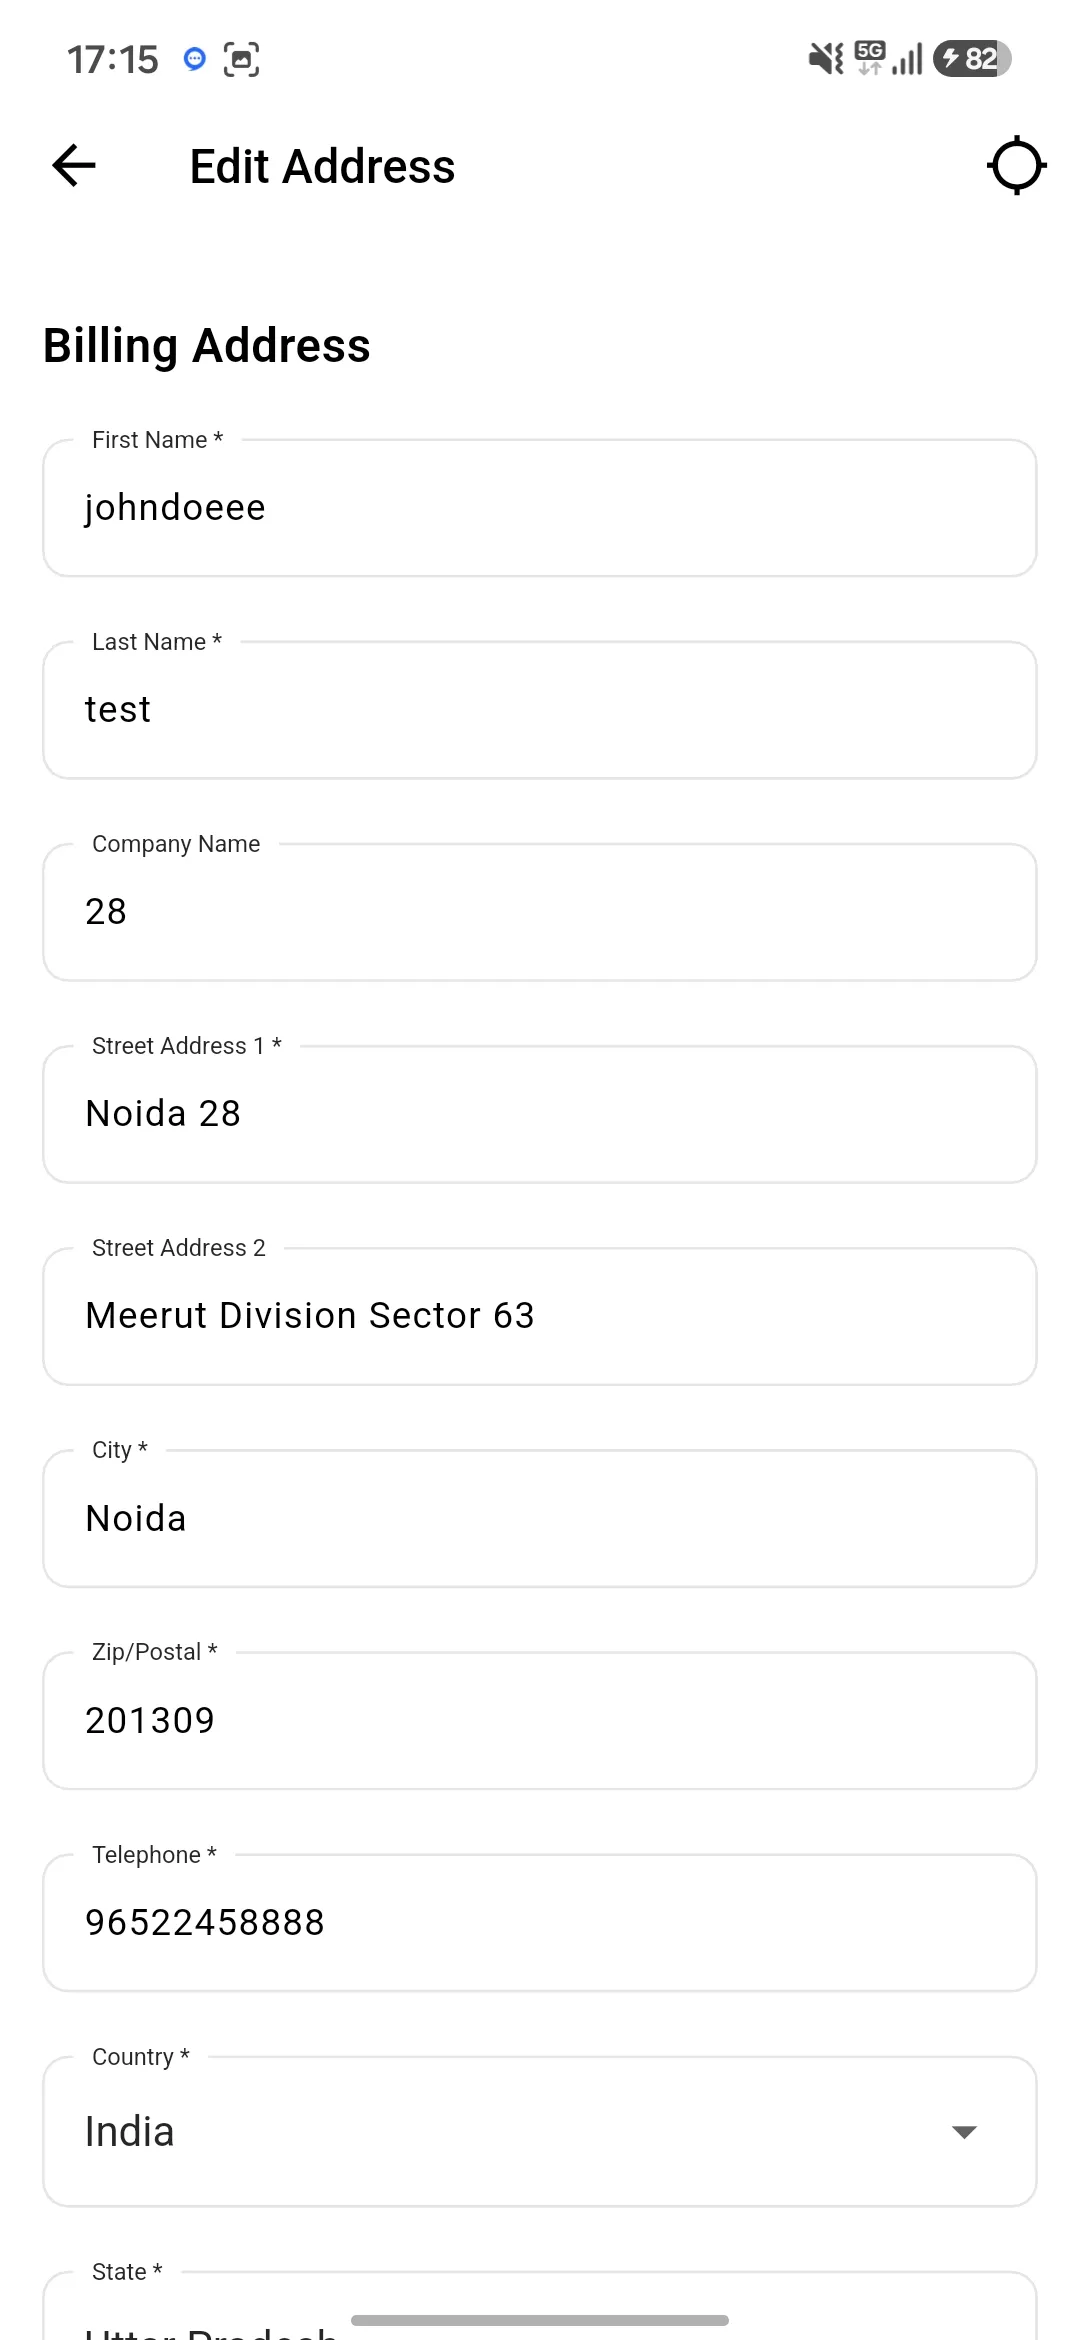
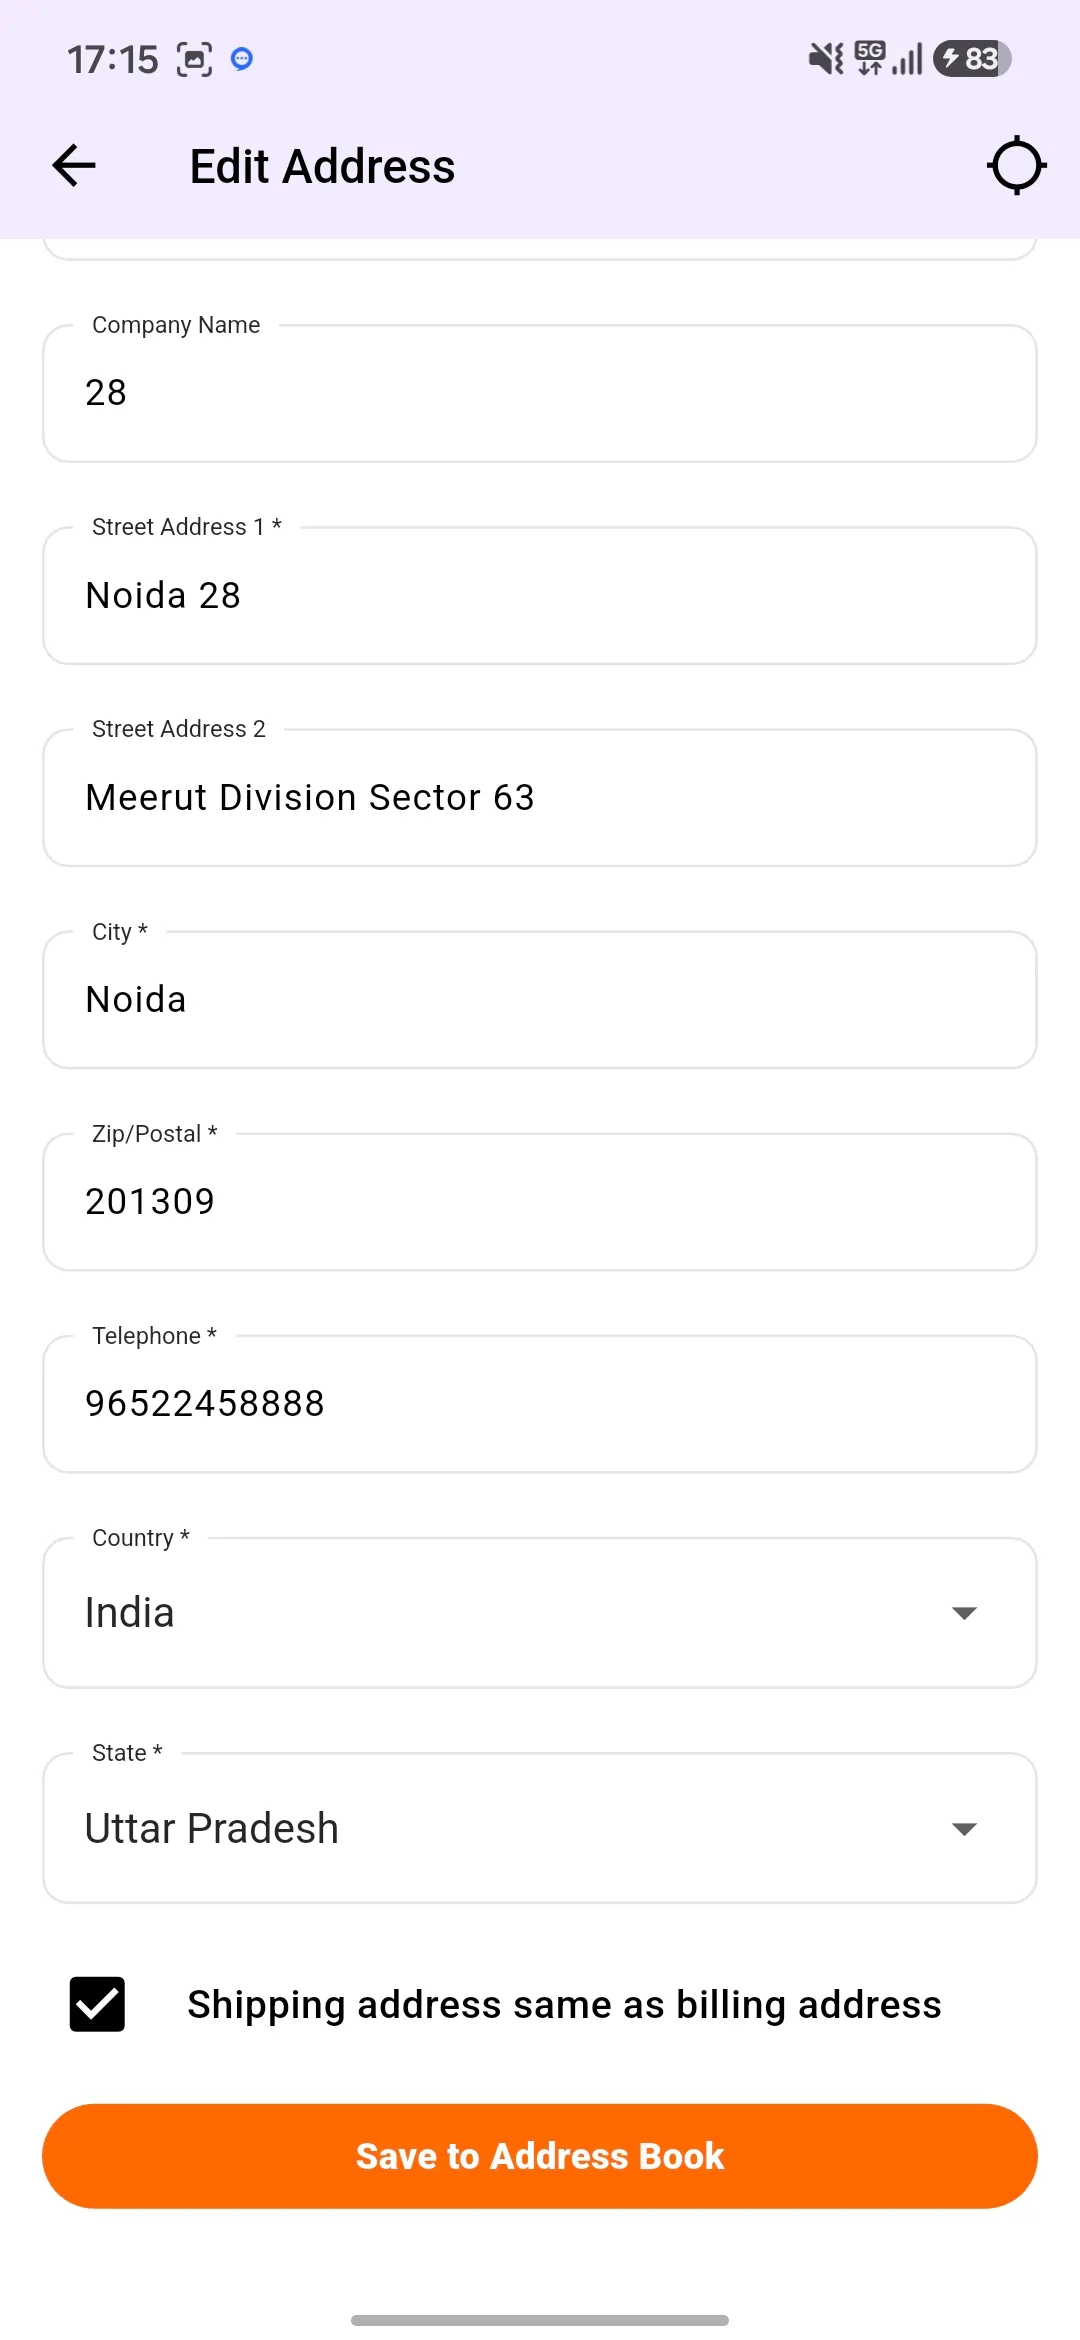
Change in Address:
The customer can change their shipping address and billing address through the app.
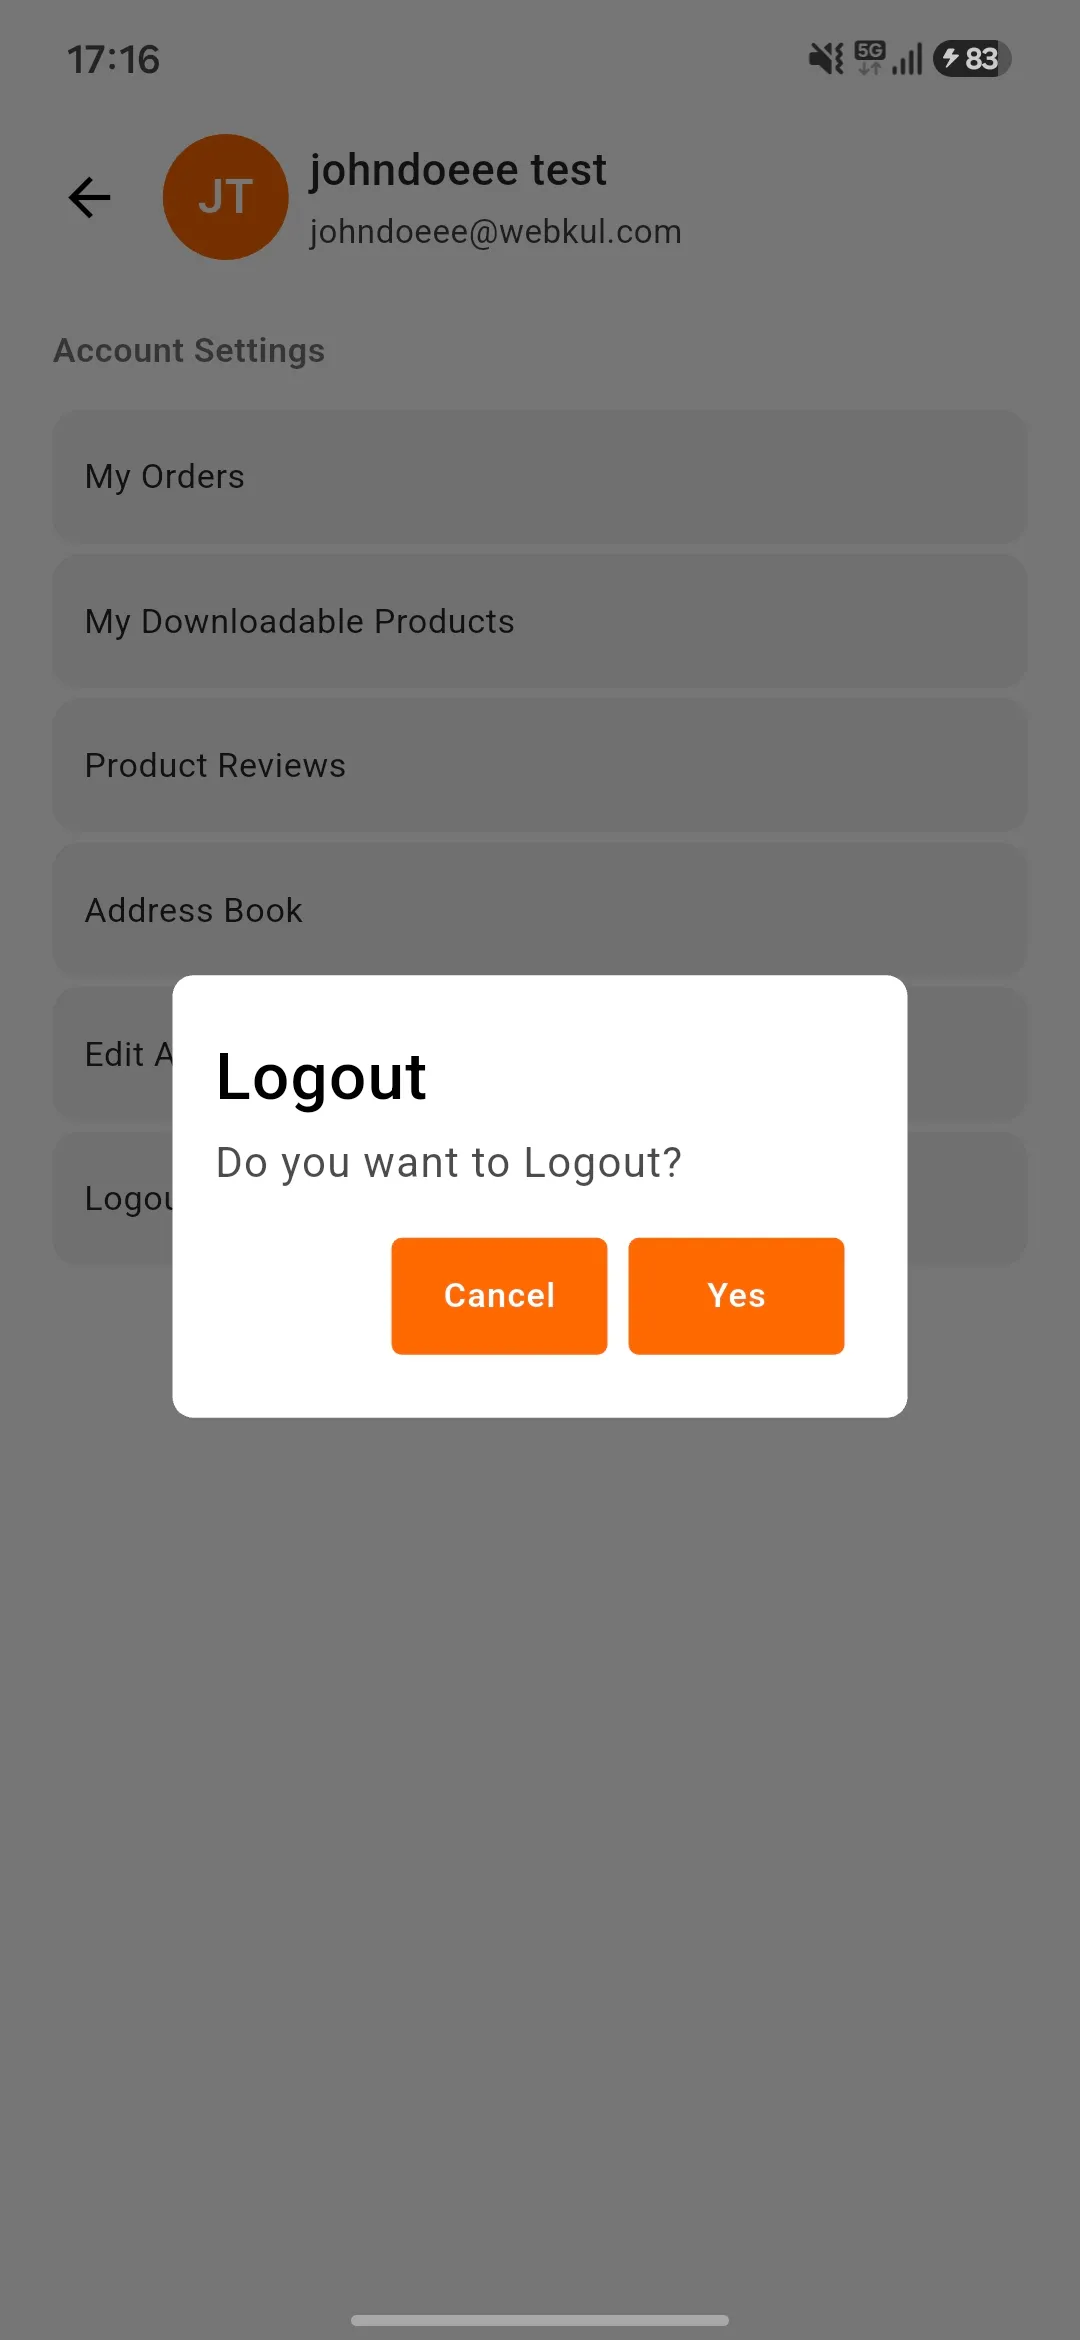
Log-out:
After click on the sign out button, a popup will show there for confirmation of sign out.
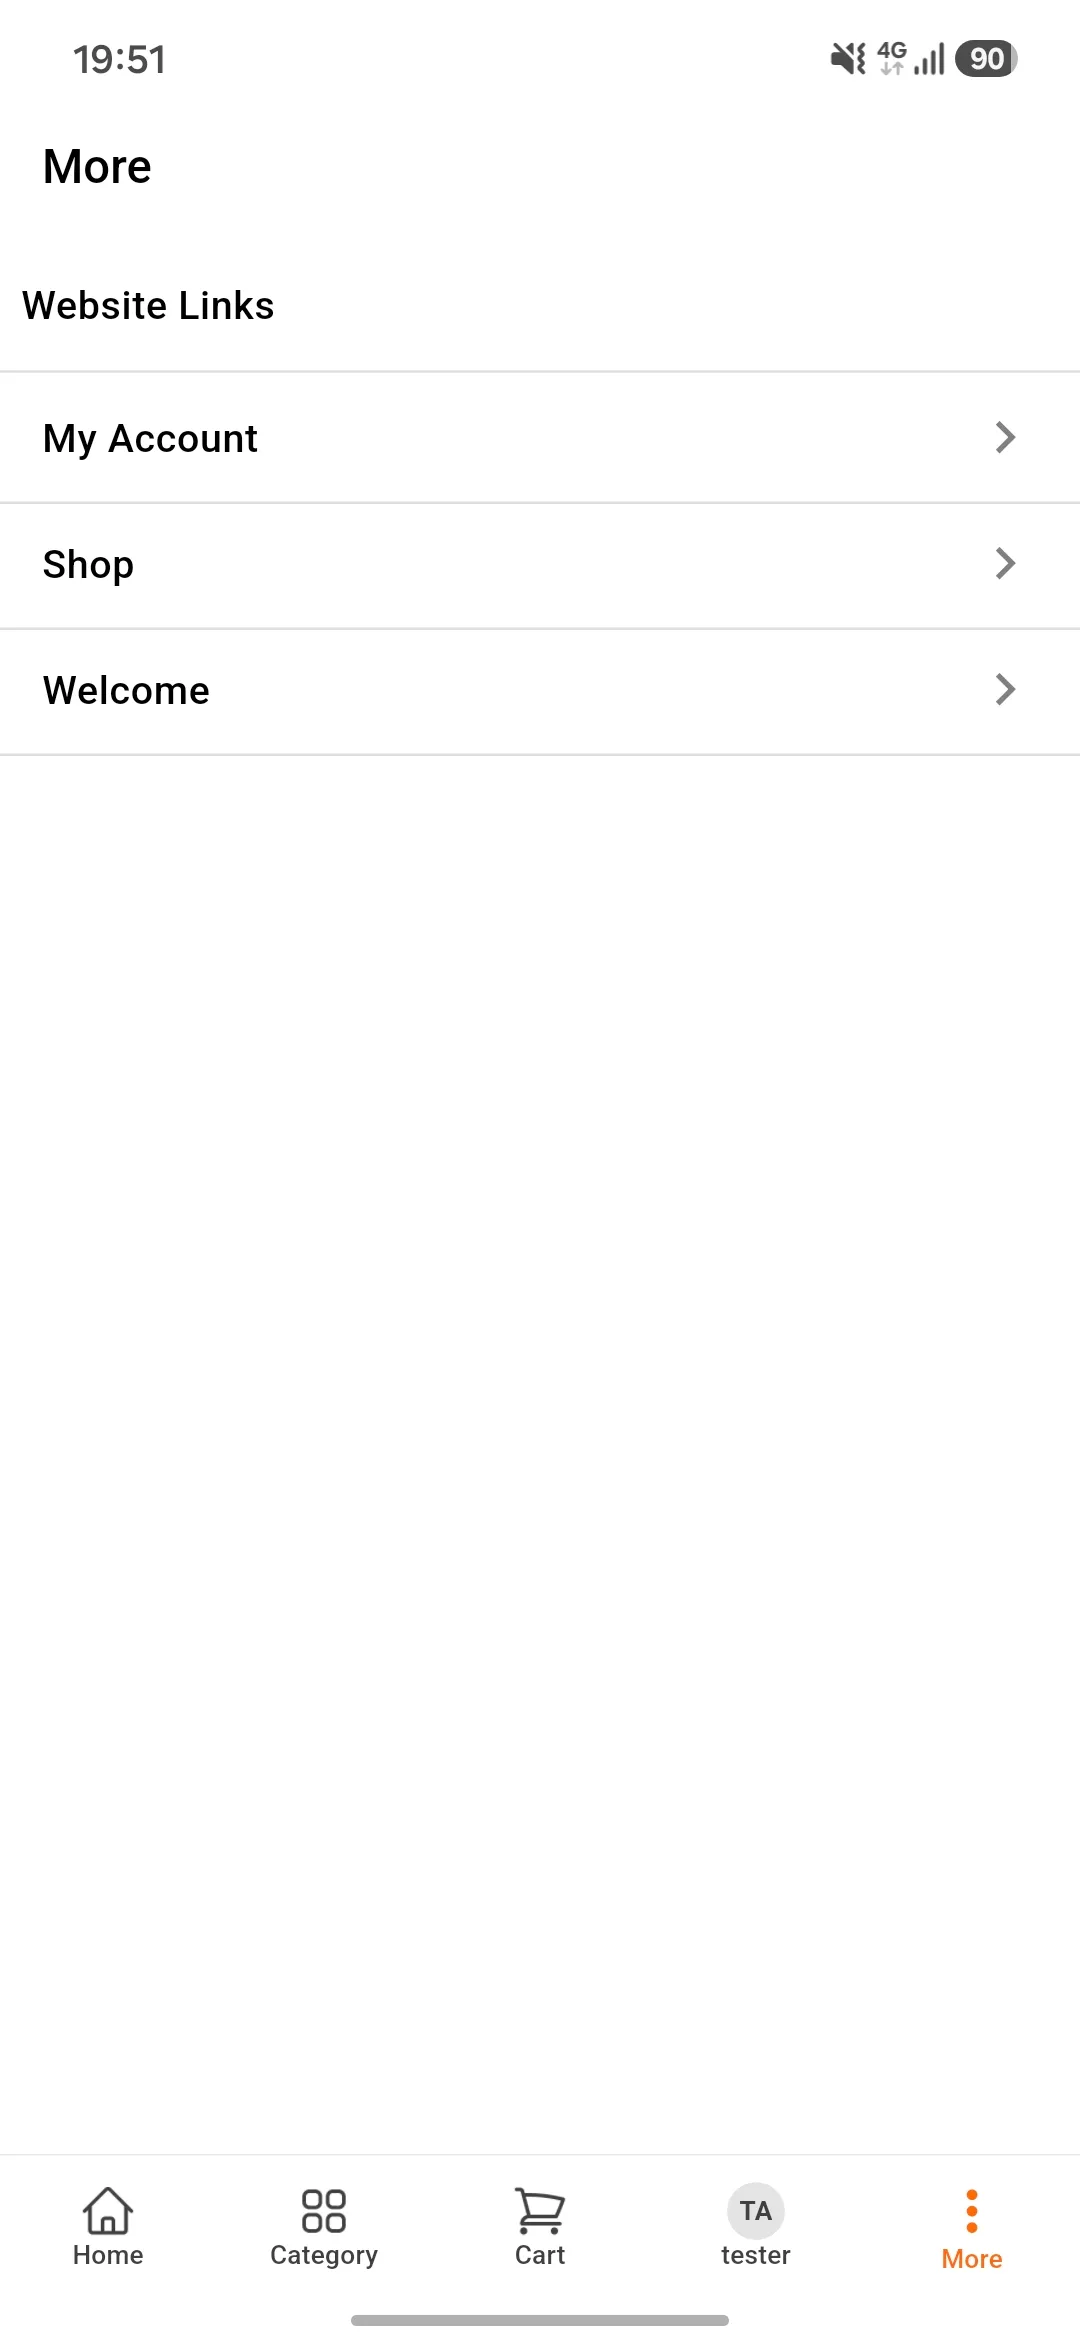
CMS Page View
These pages are meant to inform the app user about the store like the description of the store, policies, customer service details, about the store, and other information.
Hence, following mentioned fields will get redirected to the links added by the admin in the backend.
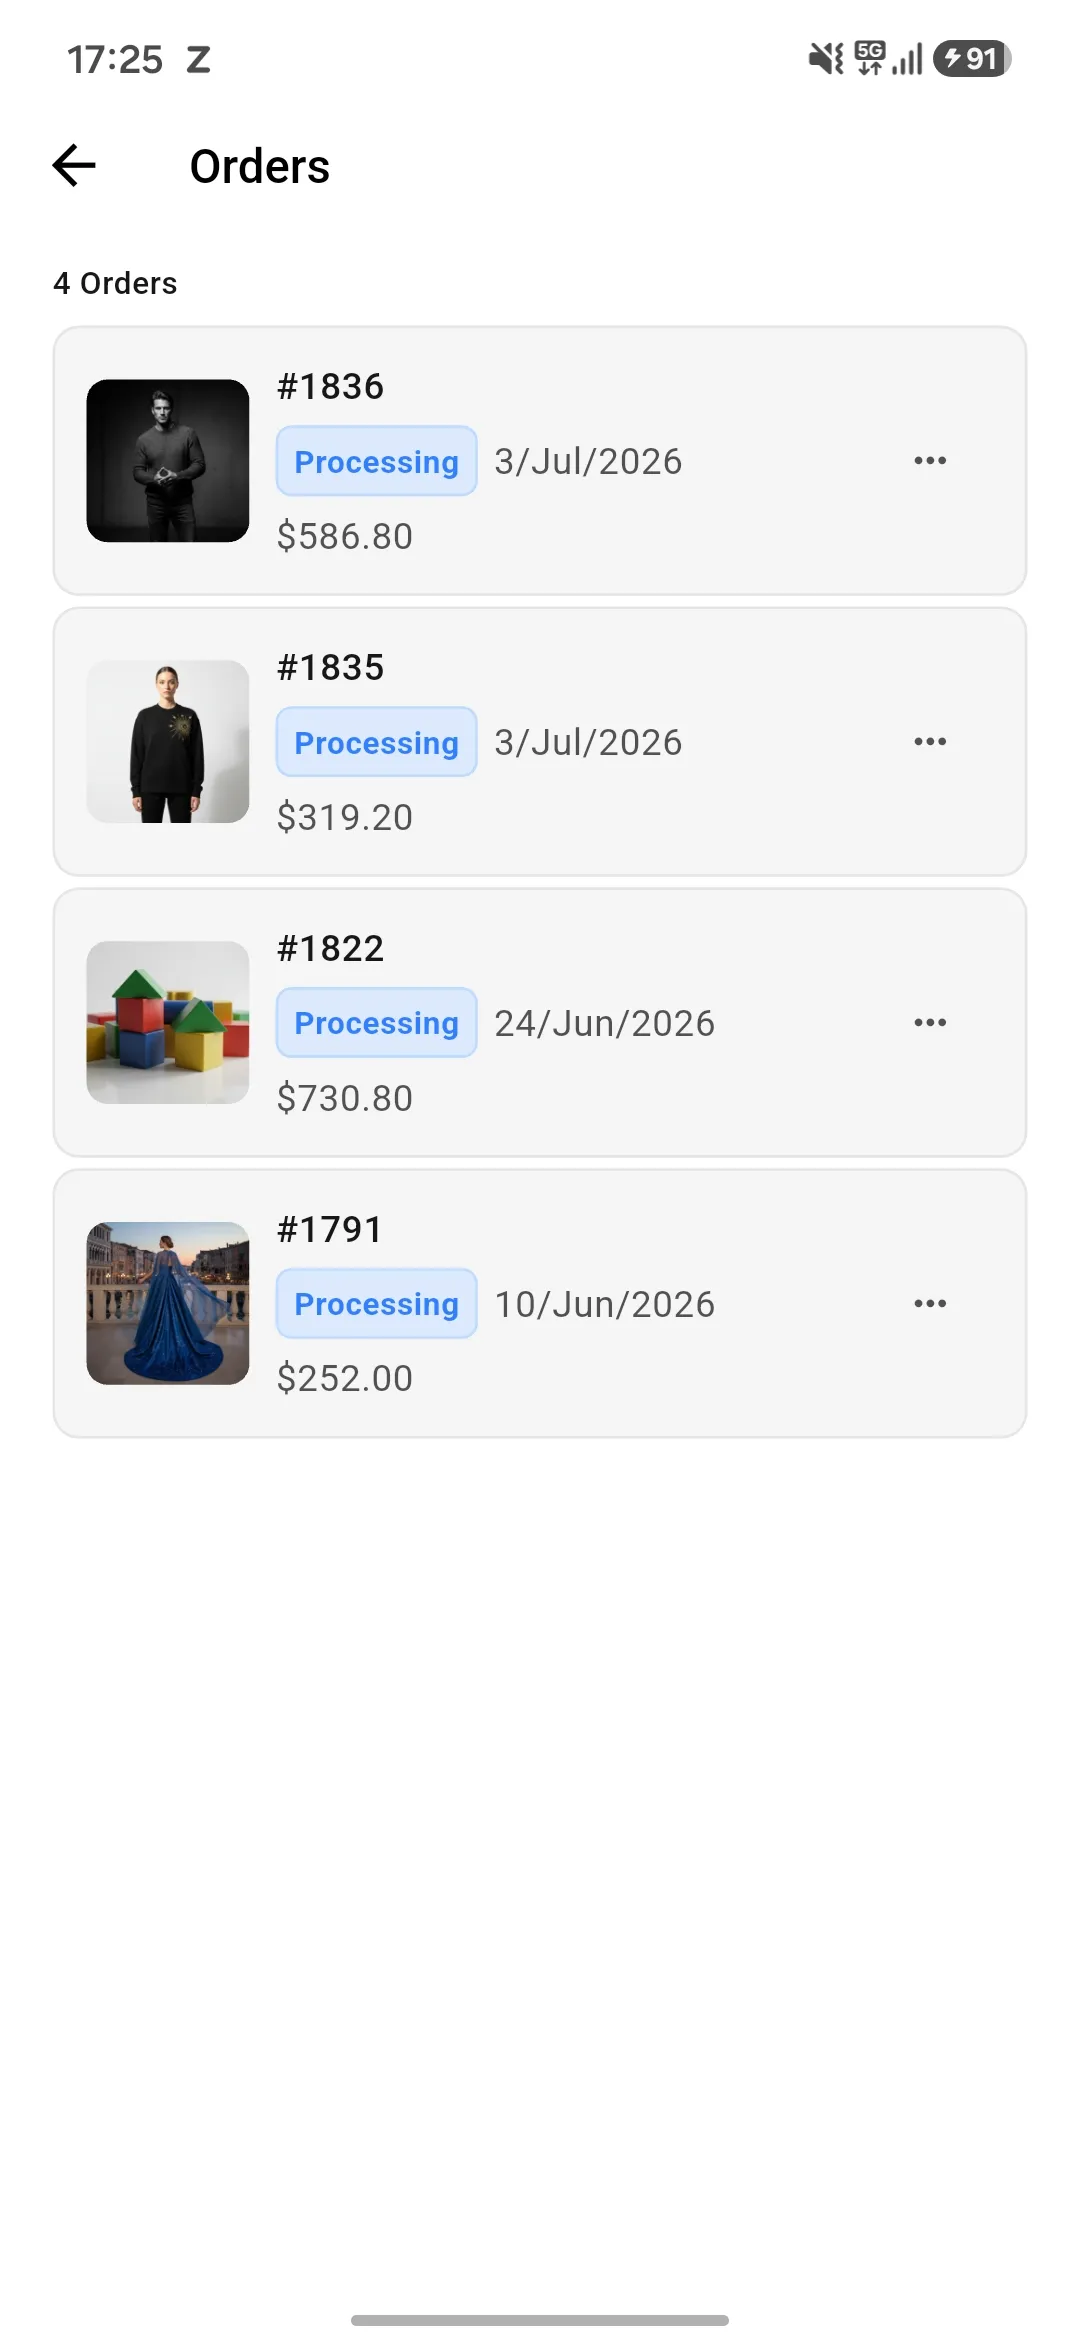
My Orders
Order Page:
So, the customer can see their orders in my order tab. A customer can also pay for their failed order transaction.
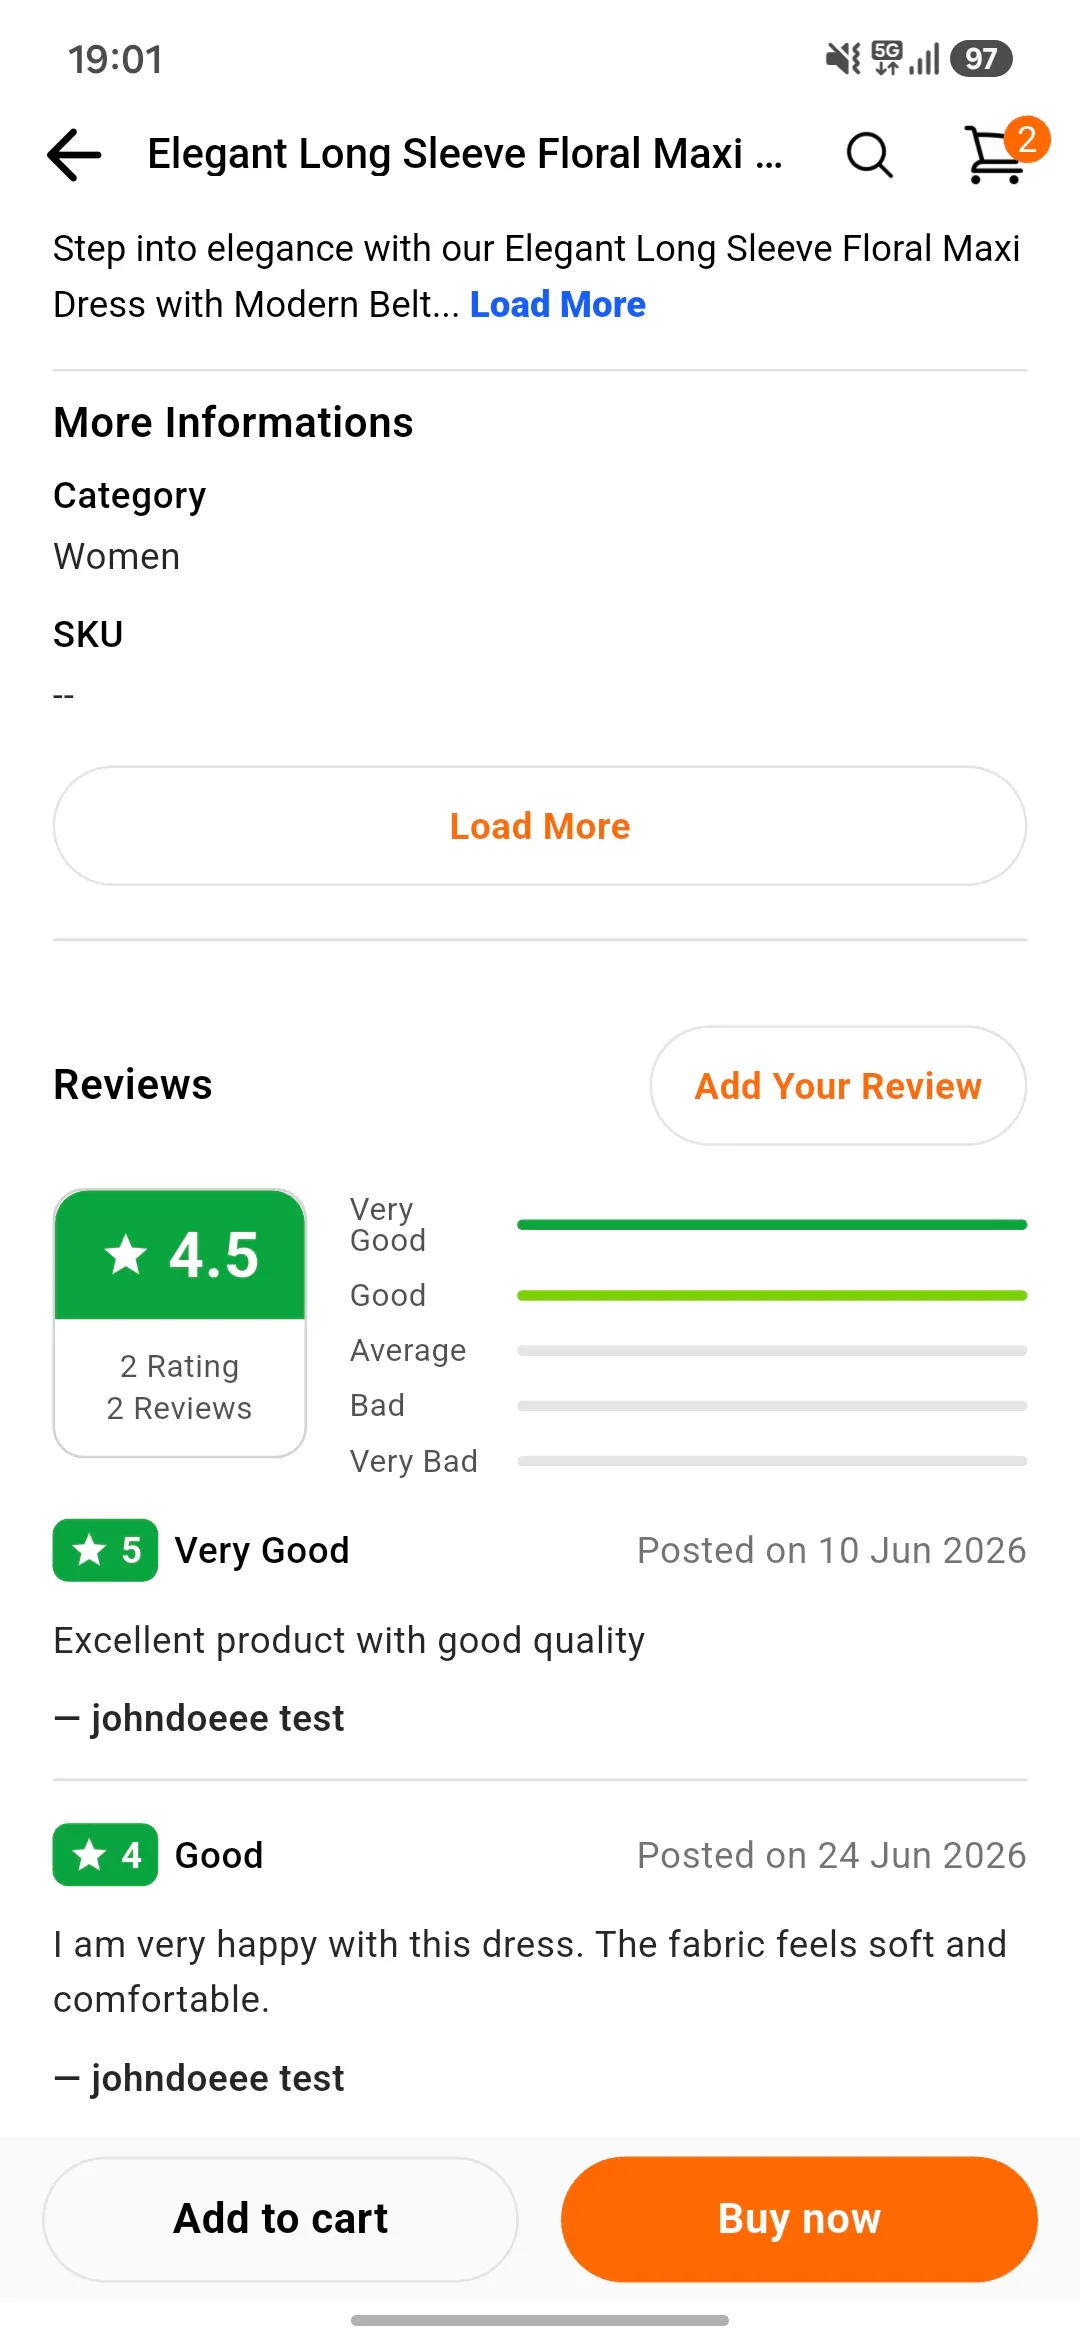
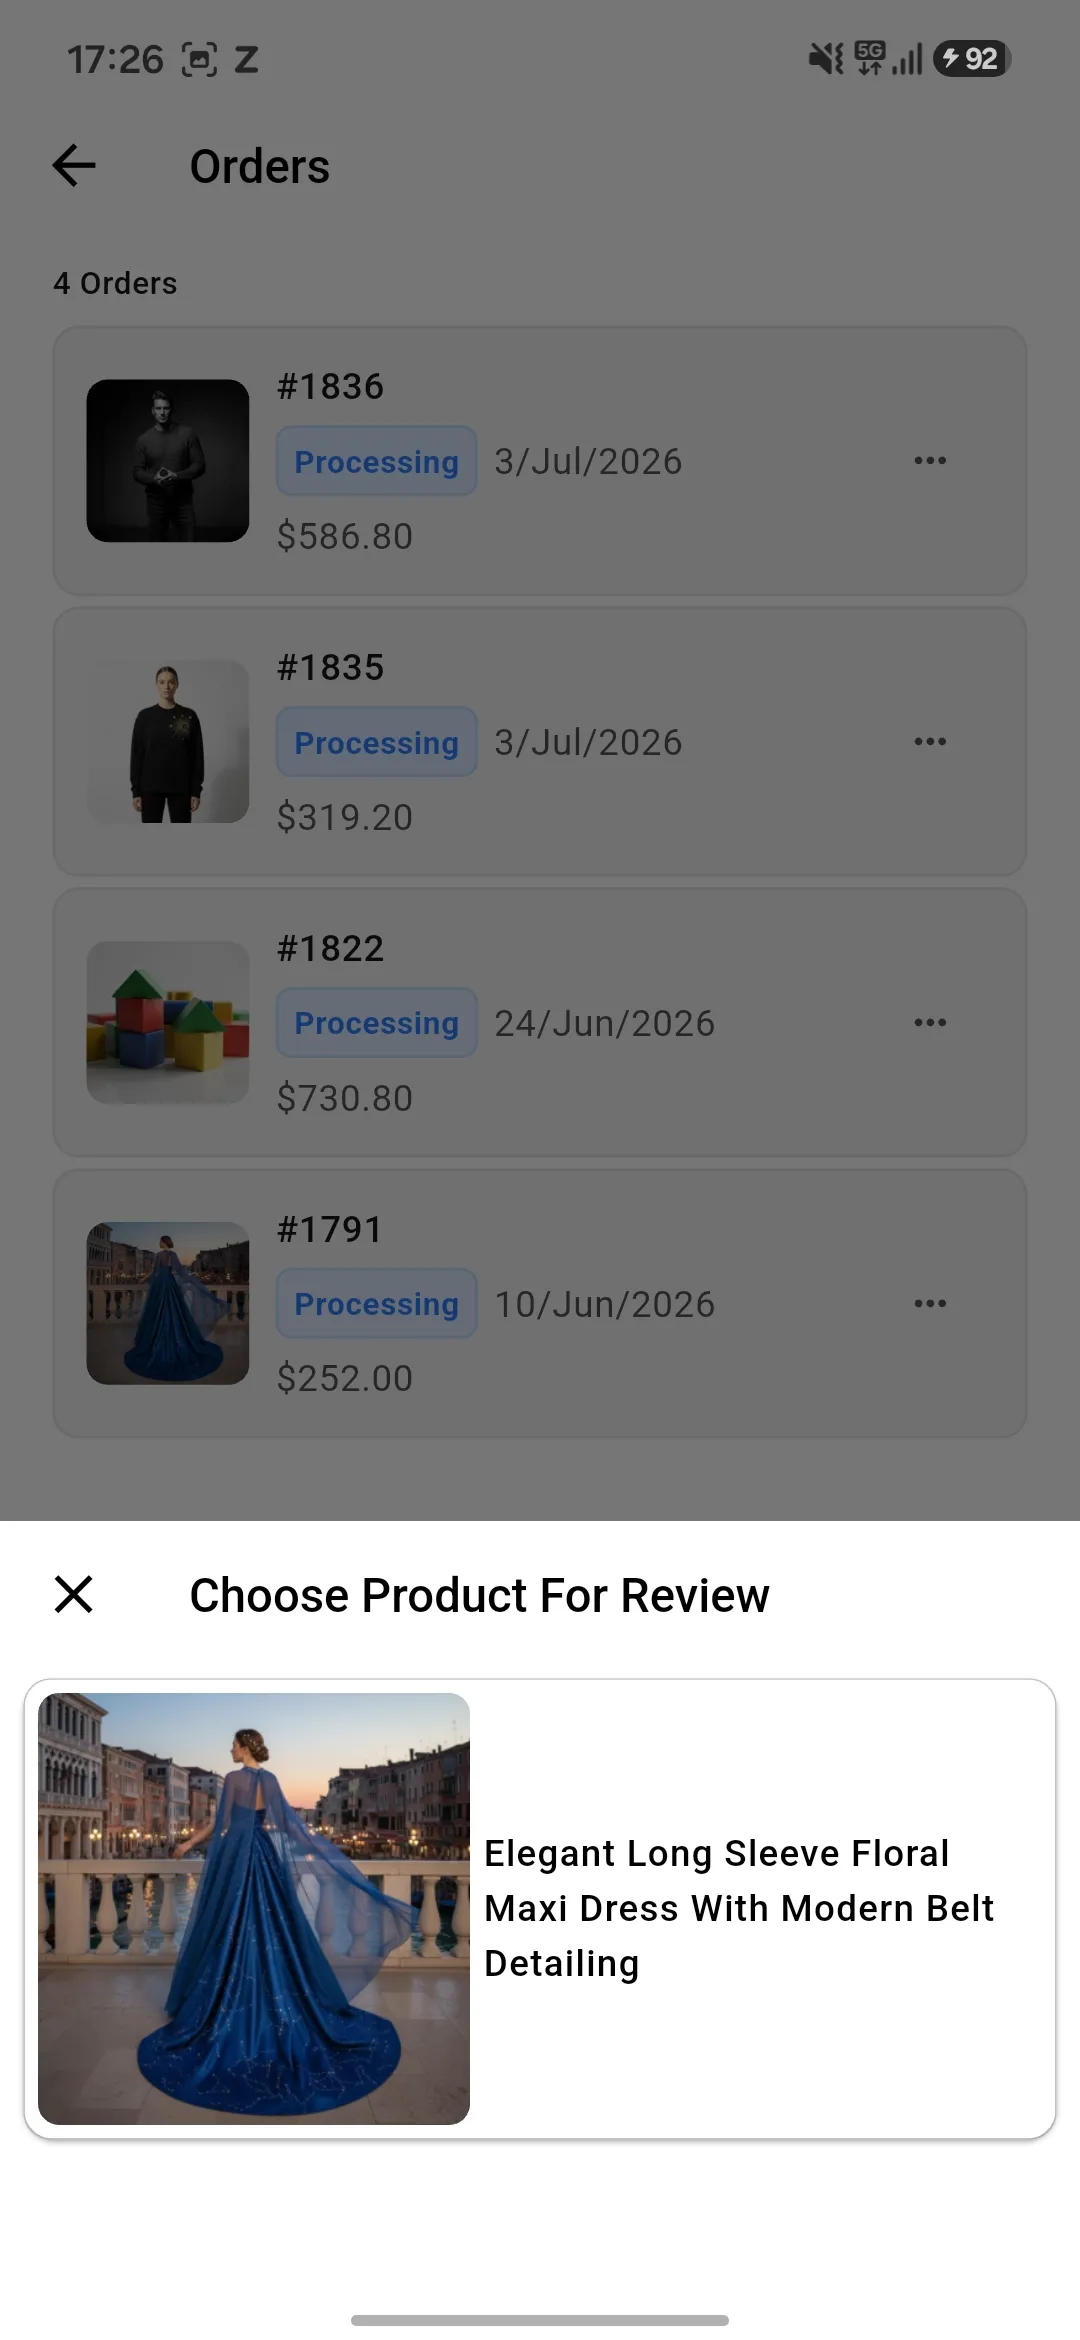
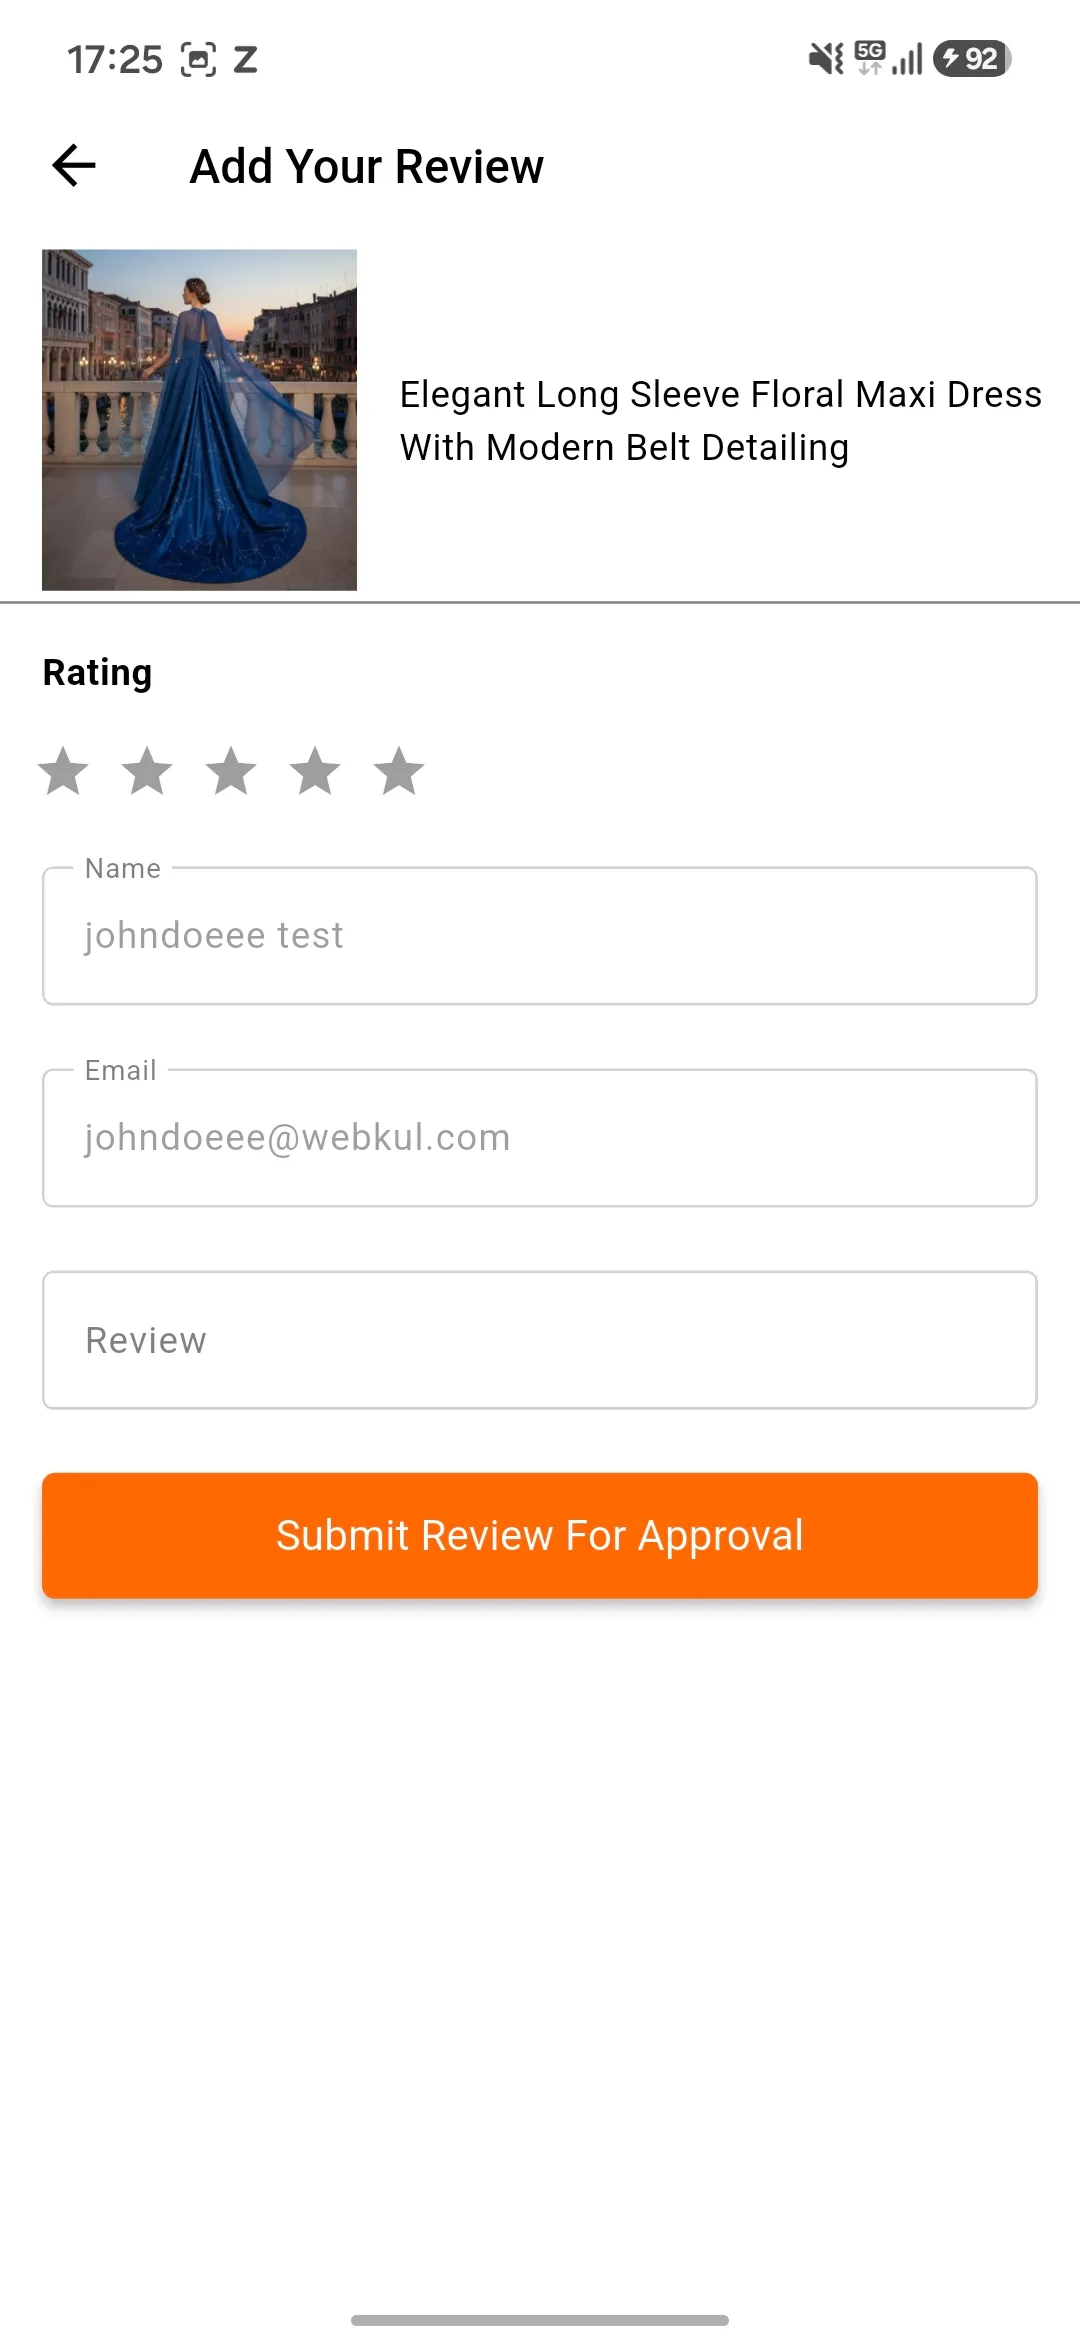
Product Review
Under this section, the customer can write a review of the product from here. Thus, the customer can rate the product in terms of the star.
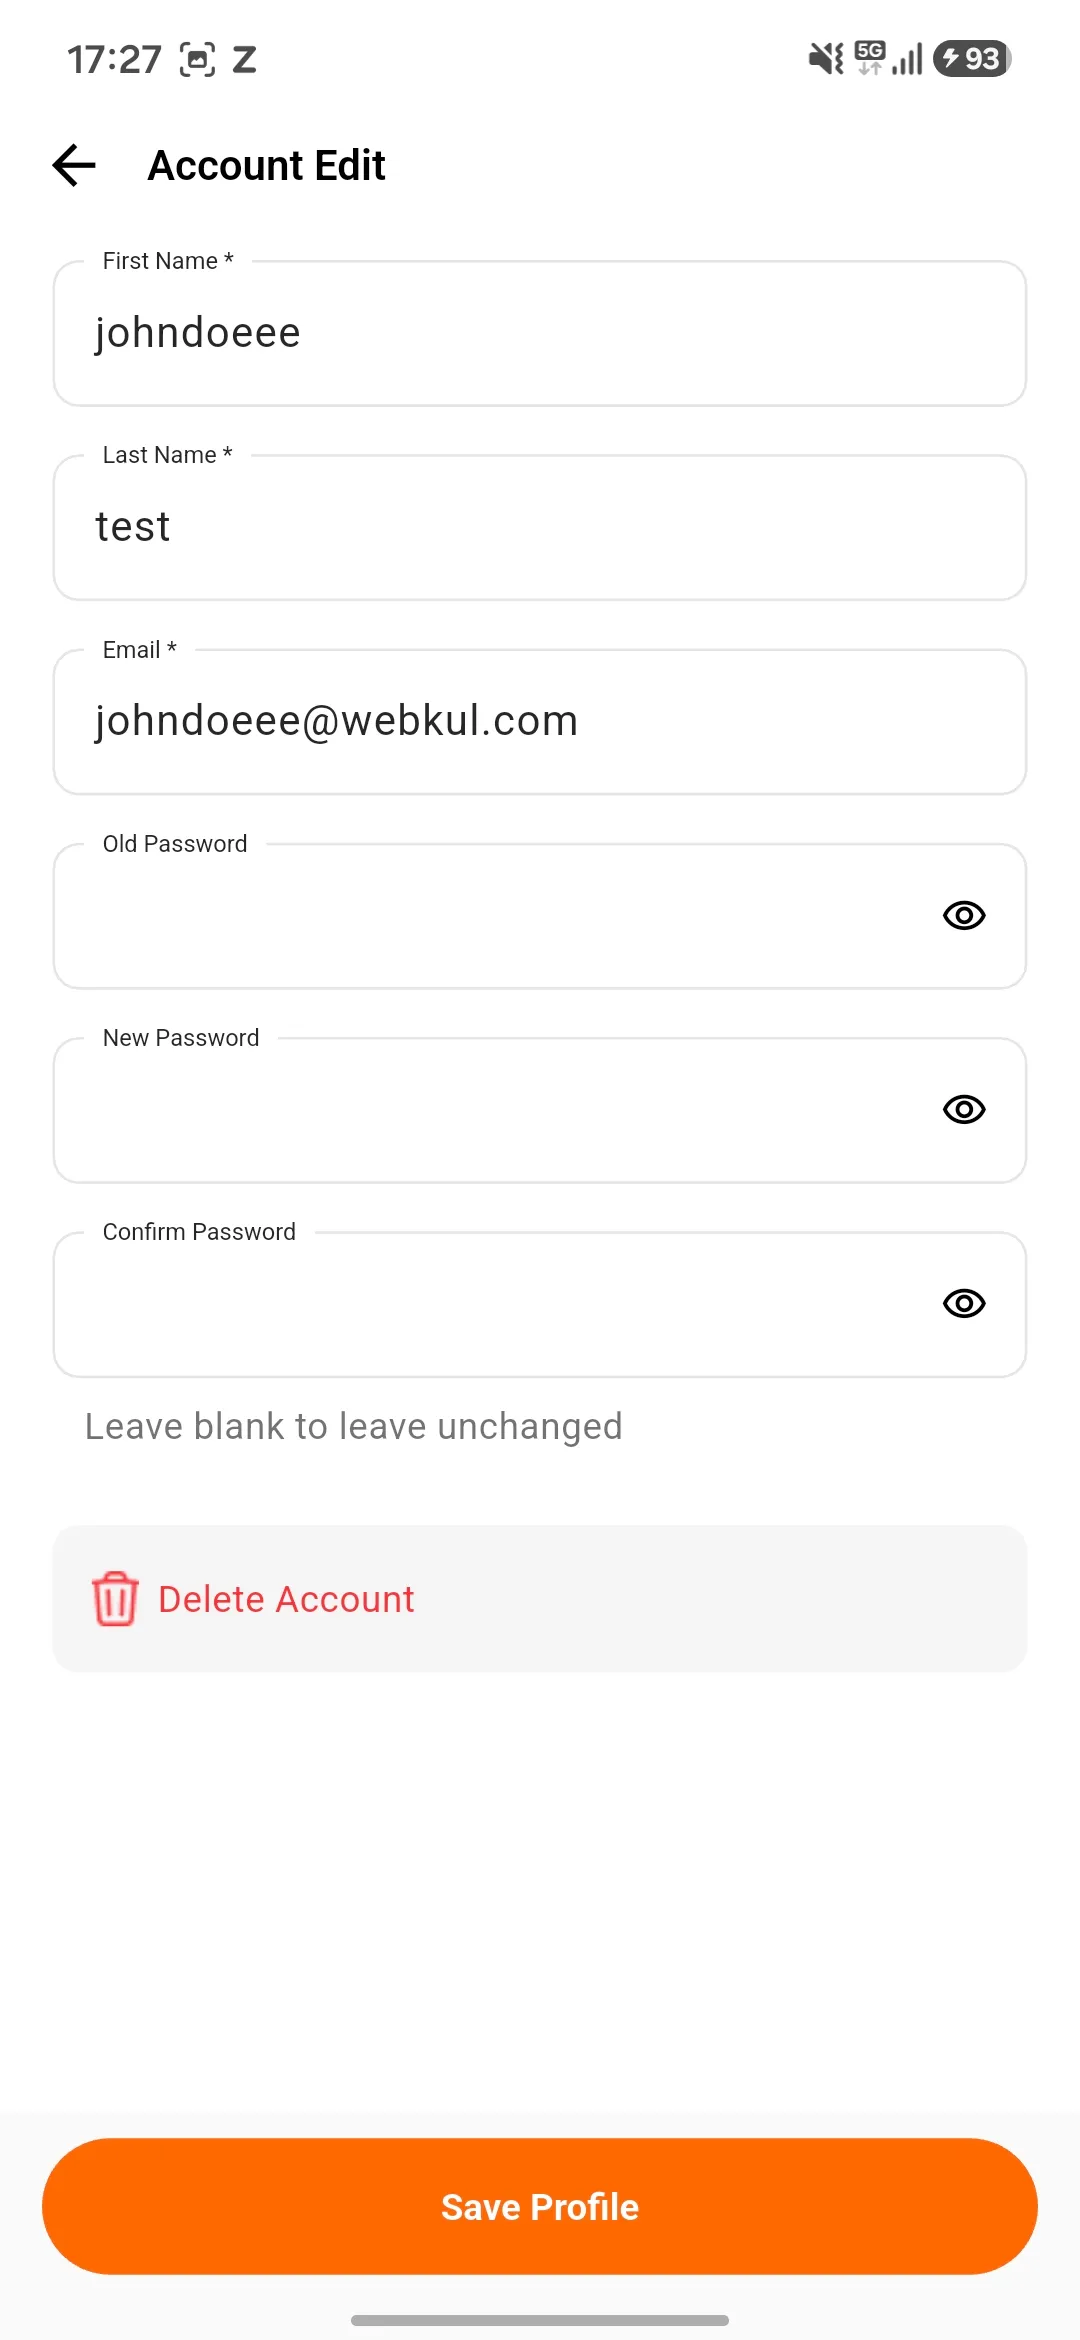
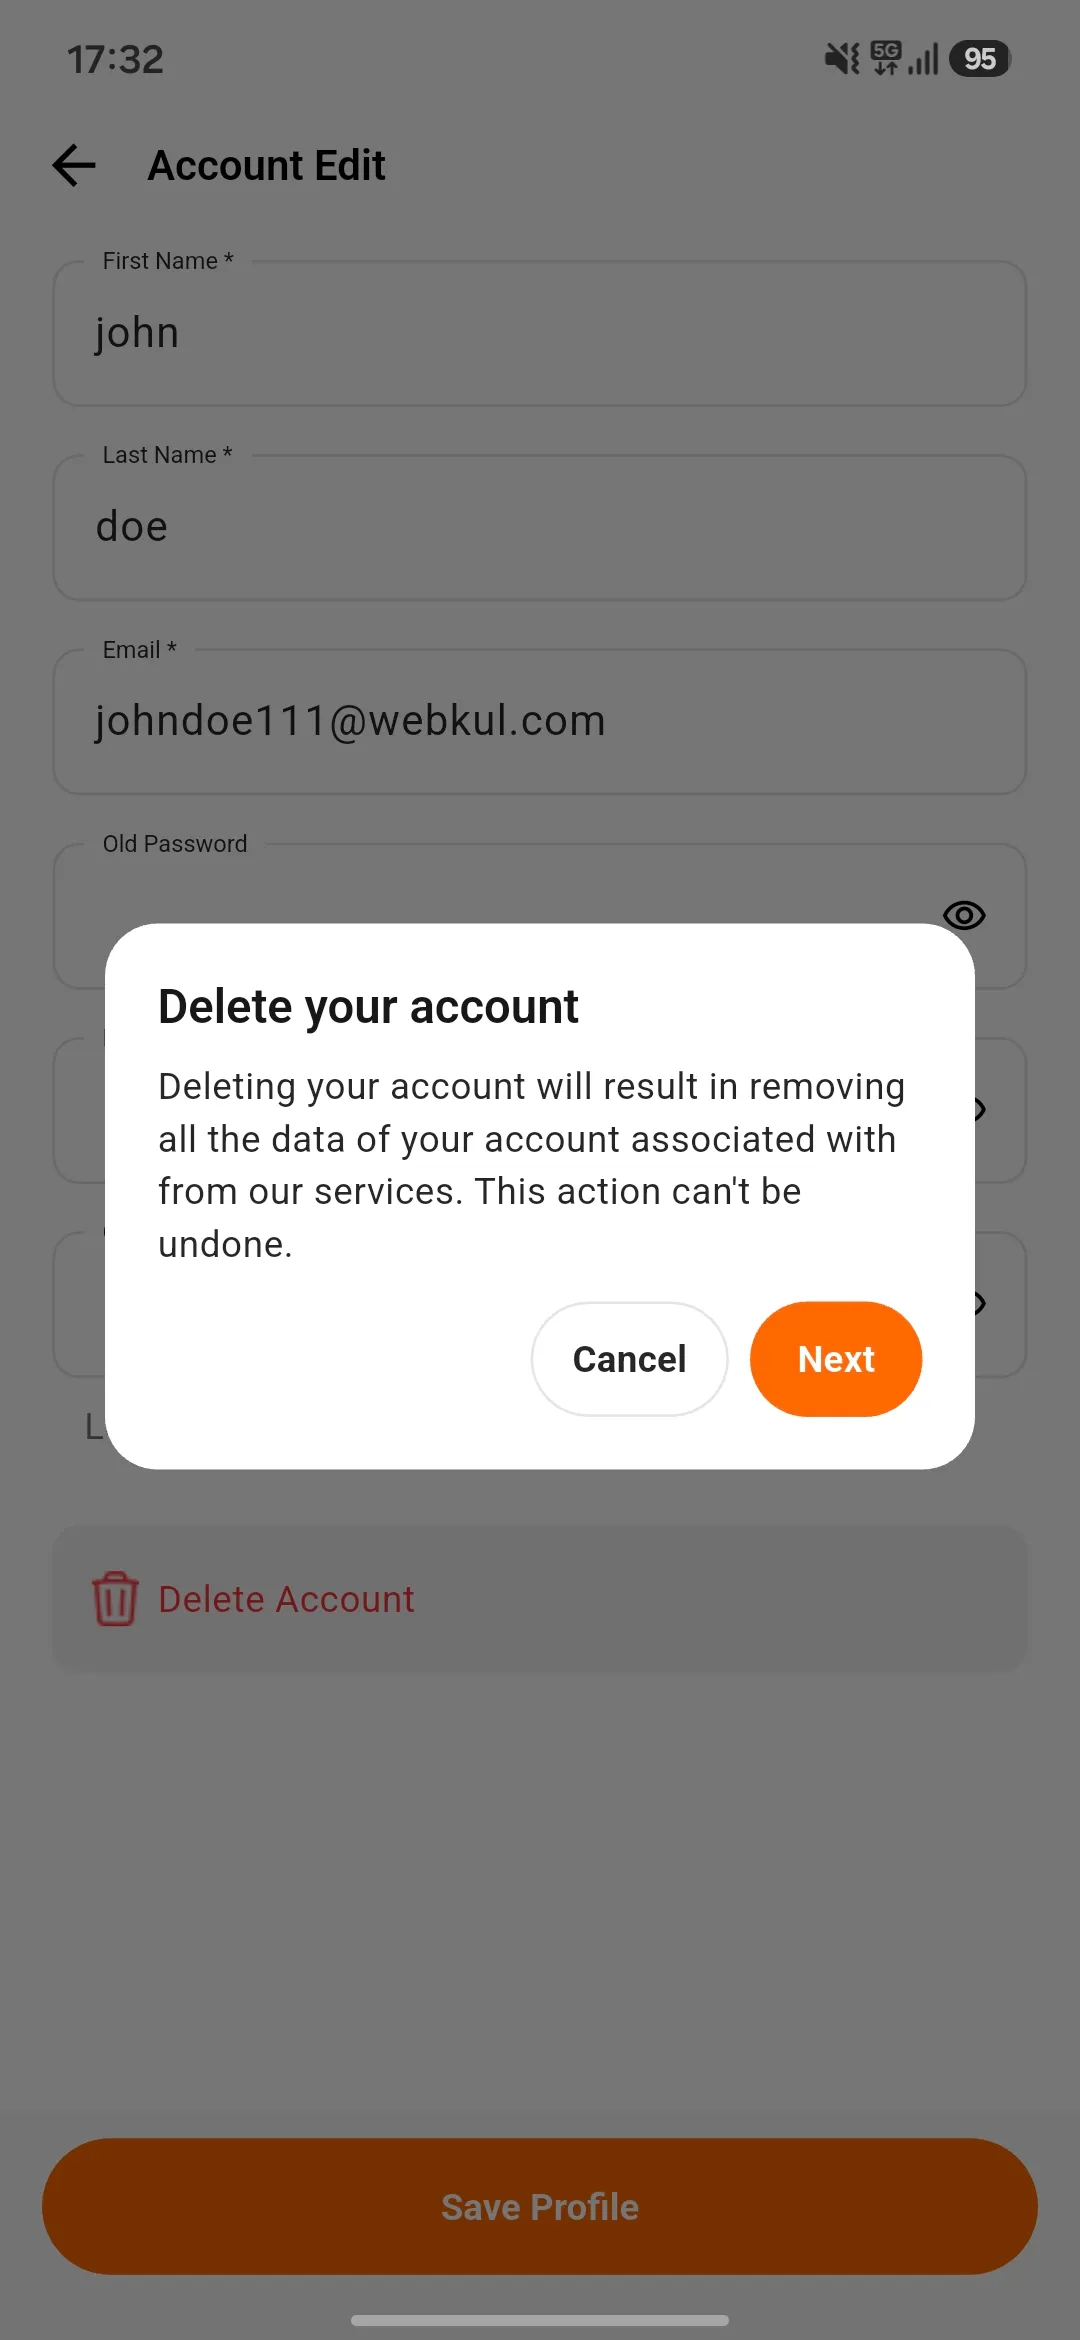
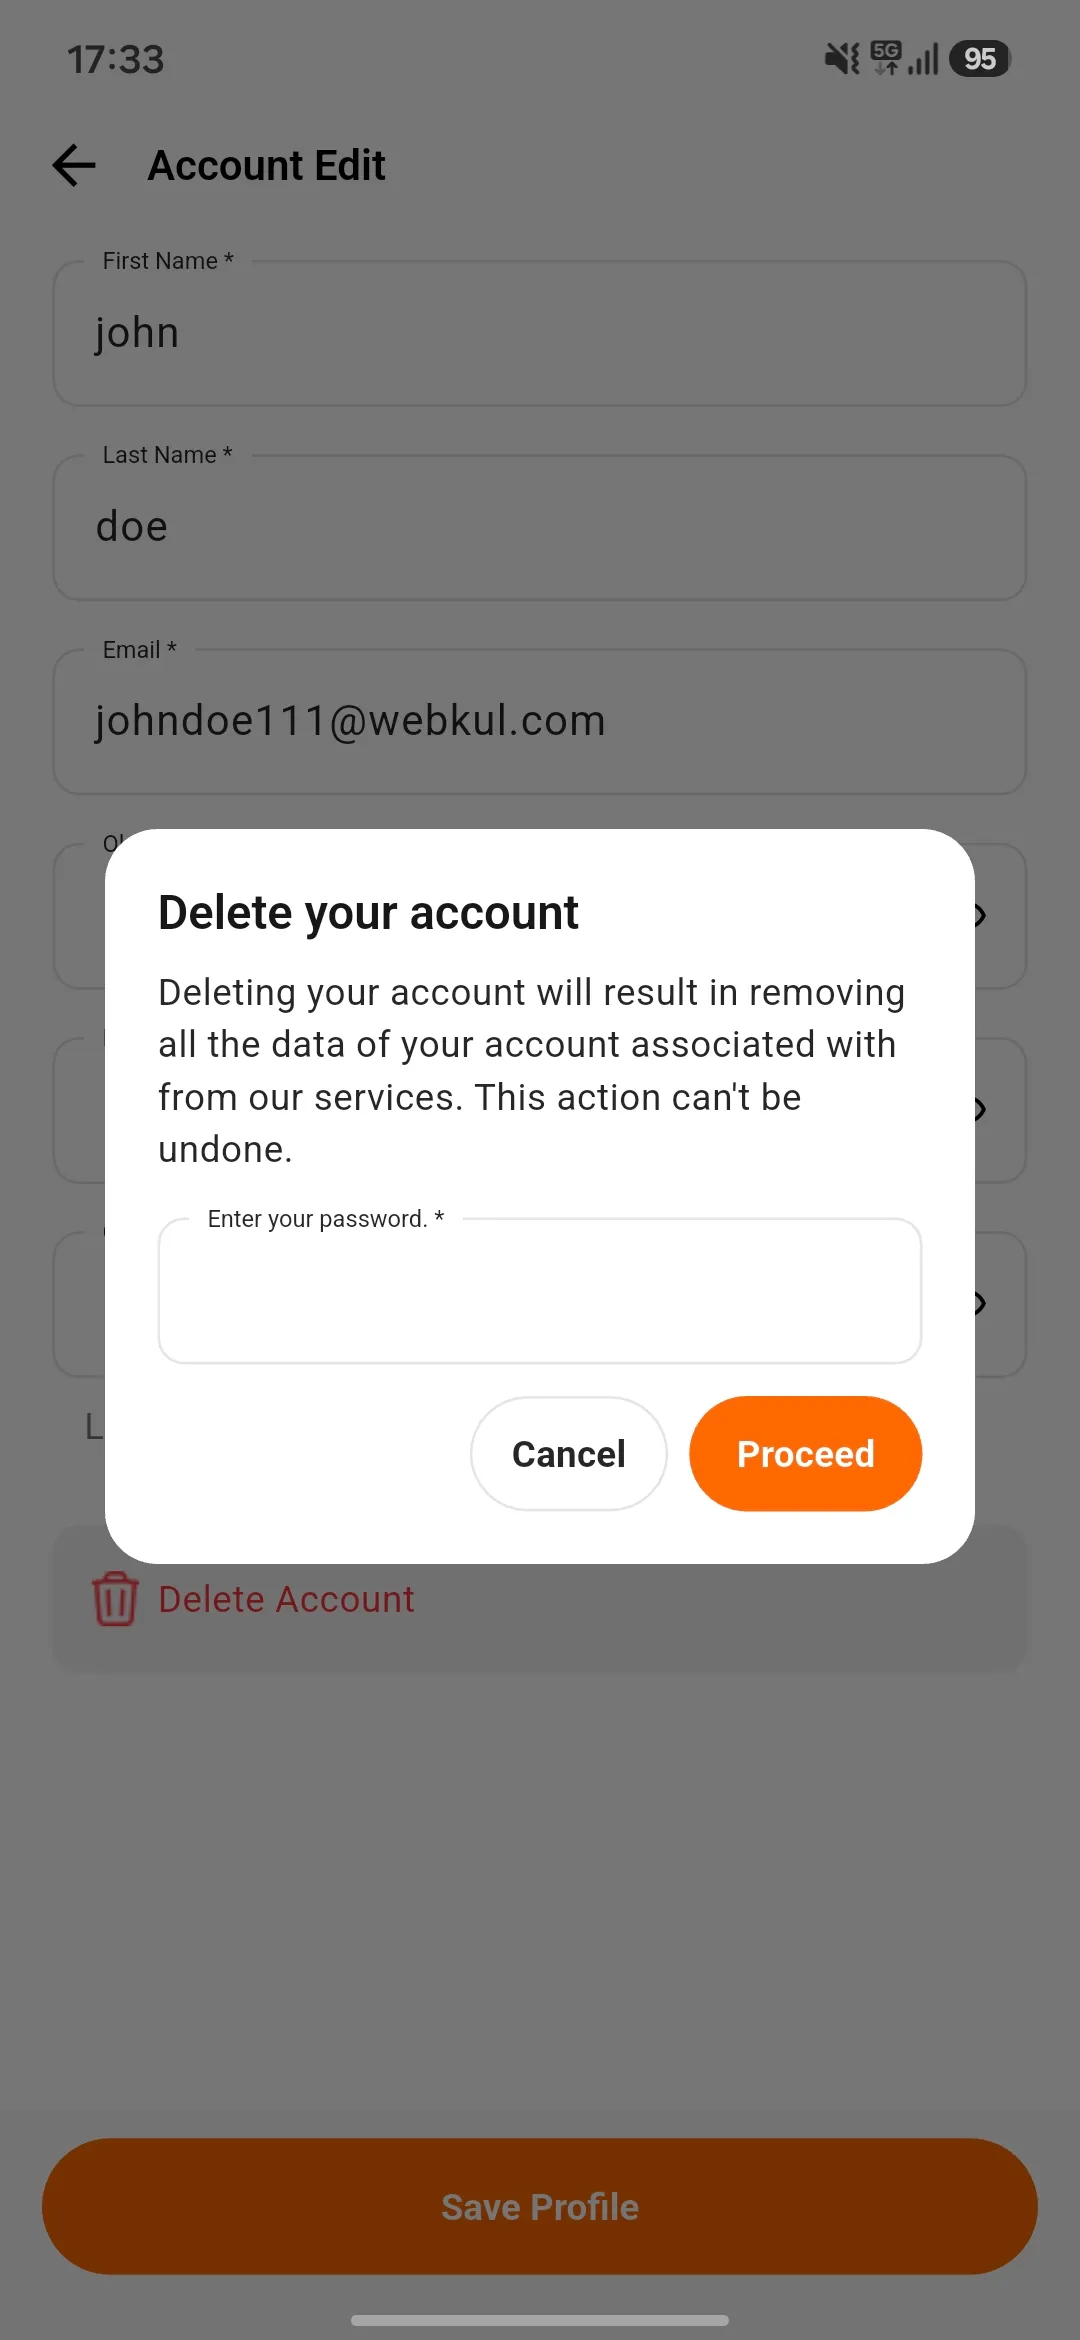
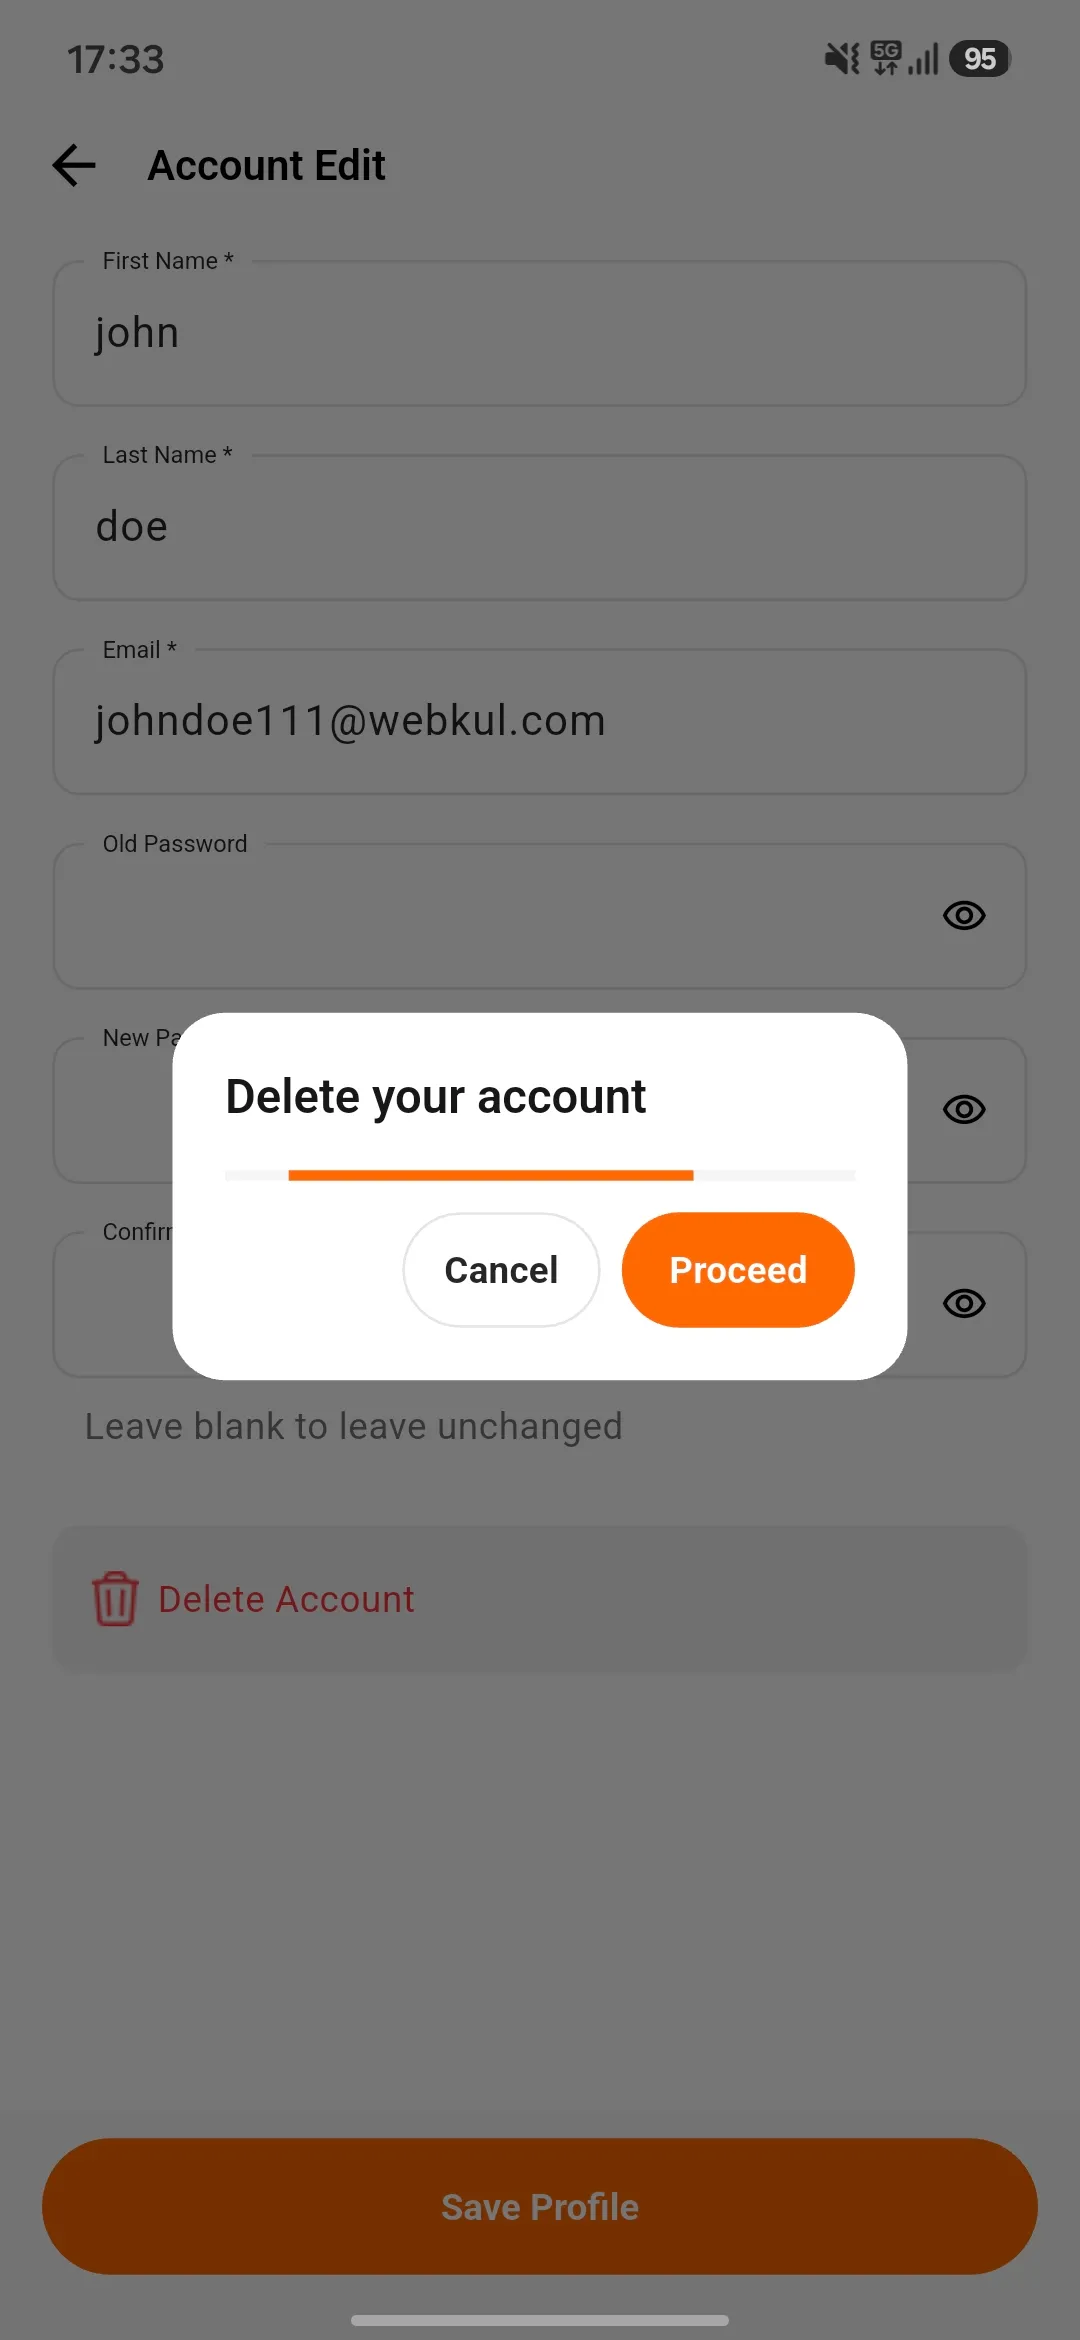
Delete Accounts
For deleting the existing account navigate to the path MyAccount>Delete Account and click on delete account.
Real Time Tracking
The feature enables customers to track the real-time location of the delivery boy within the application.
Additionally, customers can view the pickup location from where the delivery boy collects their order.
Live Tracking Feature only works in conjunction with WooCommerce Delivery Boy App.

Support
Current Product Version - 5.5.0
Supported Framework Version - WordPress- 6.9.4, WooCommerce-10.6

18 comments
We provide one free payment integration (that payment gateway should be working on your live website) in the mobile app as if you’re having the Midtrans payment gateway live on your website we will definitely going to integrate it. For any further query please contact us at [email protected] with your complete requirement so that we can assist you accordingly.
In order to know regarding the mentioned integration features with this application, Kindly revert us at [email protected].
Thanks
We provide one free payment integration (that payment gateway should be working on your live website) in the mobile app. For any further query please contact us at [email protected] with your complete requirement so that we can assist you accordingly.
Thanks!
You can buy the source code for the mobile application later as well for further information you can revert us at [email protected].
Thanks
Can I confirm do I need to setup an Android / iTunes developer account and then use your SDK code on import to then edit the source code to my requirements.
If you want to do modifications in the Source code at your end then you need to have firstly Android Studio (IDE) and Xcode (IDE) respectively for Android and iOS.
To deploy the codes or Apps(to live), you need to have Google Store and Apple Store Accounts.
For iOS, it’s recommended to have a developer account as well. For more queries, please write to us at [email protected]
https://mobikul.com/marketplace/
they seems to be mixing into 1 product suite but yet have 2 different prices?
Thanks For The Query!
Mobikul Mobile App Builder is meant for using the default functionality of the platform. Here the store owner will be dealing with their product and service which the customer can purchase from the app.
However, the Mobikul Multi-vendor mobile app will be dealing with multiple sellers and the customer can purchase the product in the app of various sellers.
For more details on the query refer here.
Regards.
Mobikul Support.
Yes, the source code supports the Android Studio IDE. However, to edit the code you need to have Node.js installed in your system.
For further more details on Mobikul Mobile App Builder for WooCommerce you can share it on [email protected].
Yes, it supports all the Woocommerce extension via API integration, which will be customized in the app. For color selection, we will allow you to share the required color theme at the time of the Pre-Requisite collection.
Also, what about Custom Tabs? Are they displayed on the Products page?
Last, is it possible to change the icons inside the apps?
Thanks For showing interest!
1- Can we add more Categories to Home page?
Yes, more categories can be added to the homepage of the app from the Mobikul tab.
2-Also, what about Custom Tabs? Are they displayed on the Products page?
The Custom Tabs in product page can be customized for you. For that, kindly update us the complete requirement on http://webkul.uvdesk.com
3-Last, is it possible to change the icons inside the apps?
Category icon can be added easily by you from the Mobikul tab in the admin panel. However, if you are referring to the app icon or launcher icon then it can be done from code end which you will provide in the Pre-Requisite.