These days E-commerce merchants are driving towards the fact that personalization is a perfect way to boom the business. Hence, for creating personalized products like handbags, shoes, T-shirts etc just integrate Webkul’s web to print module into your Marketplace and sellers are all set to start their online product personalization business.
Webkul’s Magento 2 Marketplace Web to Print module is suitable for all industries and can help your customers to design and personalize products on your store as they buy them. This includes mugs, t-shirts, cards, stationery and much more. The sellers simply add the products they sell and showcase them to their customers. Thereafter, the customers will select the product they want and start designing it as per their preferences.
Note: To use Magento 2 Marketplace Web to Print module, you need to purchase and install Magento 2 Multi Vendor Module and Magento 2 Web To Print extension first.
To get more clear idea on the module, kindly review the video below-
Features
- Sellers can add new product type ie; Web To Print products and the customer can customize the same.
- Advanced canvas tool for product customization and personalization.
- The seller can upload fonts for the text editor.
- The seller can add images for adding images to the product template.
- Customers can design the products and preview the same before they order.
- The seller can add colors for the text, and shape editor on canvas.
- The seller can edit or define some default design for each product template.
- Reposition the objects with simple mouse drag or arrow buttons.
- The seller can create multiple templates for a single product like for front design, back design etc.
- The customer can use the default design of the product template or edit the template as per the choice.
- The customer can use different editors for customizing the design like an image editor, text editor, and shape editor.
- Let customers upload their own images or choose an image from a prebuilt library.
- The customer can design and view multiple dimensions of one product as set by the seller. For example: can design both the front and back of a t-shirt.
- After a successful purchase, customers can download the images from the order.
- The seller can see and download the customized image template for the order in the order information.
Installation
Customers will get a zip folder and they have to extract the contents of this zip folder on their system. The extracted folder has an src folder, inside the src folder you have the app folder. You need to transfer this app folder into the Magento 2 (Adobe Commerce) root directory on the server as shown below.
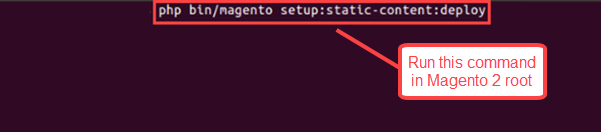
After the successful installation, you have to run these commands in the Magento 2 root directory:
First command – php bin/magento setup:upgrade

Second Command – php bin/magento setup:di:compile

Third Command – php bin/magento setup:static-content:deploy
After running the commands, you have to flush the cache from Magento admin panel by navigating through->System->Cache management as shown below.

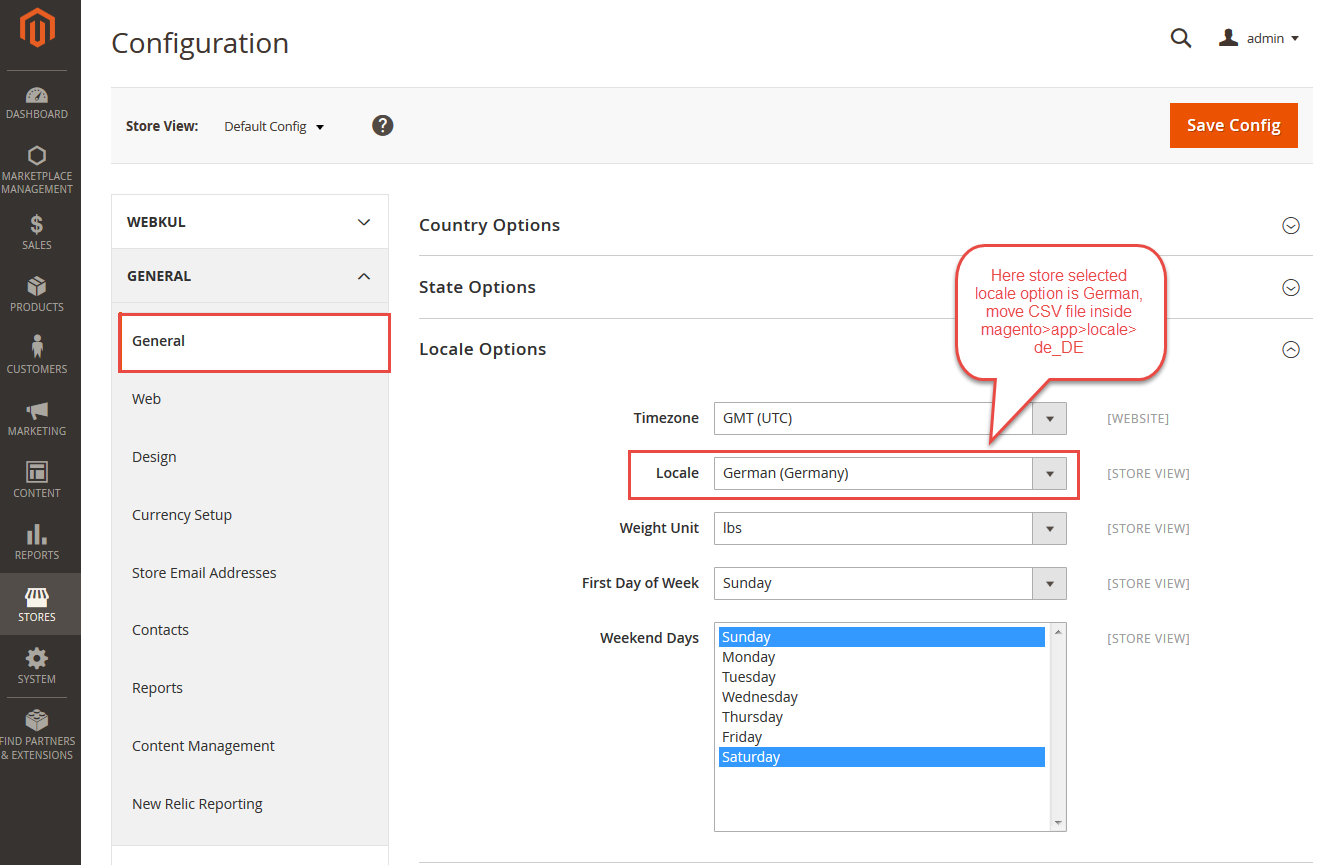
Multi-lingual Configuration
For the multilingual support, the admin will navigate through Store->Configuration->General ->Locale Options and select the locale as German (the language into which admin want to translate his store content).
Language Translation
If you need to do the module translation, please navigate the following path in your system app/code/Webkul/MarketplaceWebToPrint/i18n. Now, open the file named en_US.CSV for editing.

Once you have opened the file for editing. Replace the words after the comma(,) on the right with your translated words.

After editing the CSV file, save it and then upload it to the same folder. Now your module translation is complete.

Admin End
The admin needs to navigate to Stores -> Configuration -> Webkul -> Marketplace -> Seller Product’s Settings.

Under Seller Product’s Settings section, enable the Web to Print product type for the sellers. Otherwise, sellers will not be able to create the customizable products for the customers.
Seller End
The seller will have a Web To Print menu option in their accounts as per the below image.
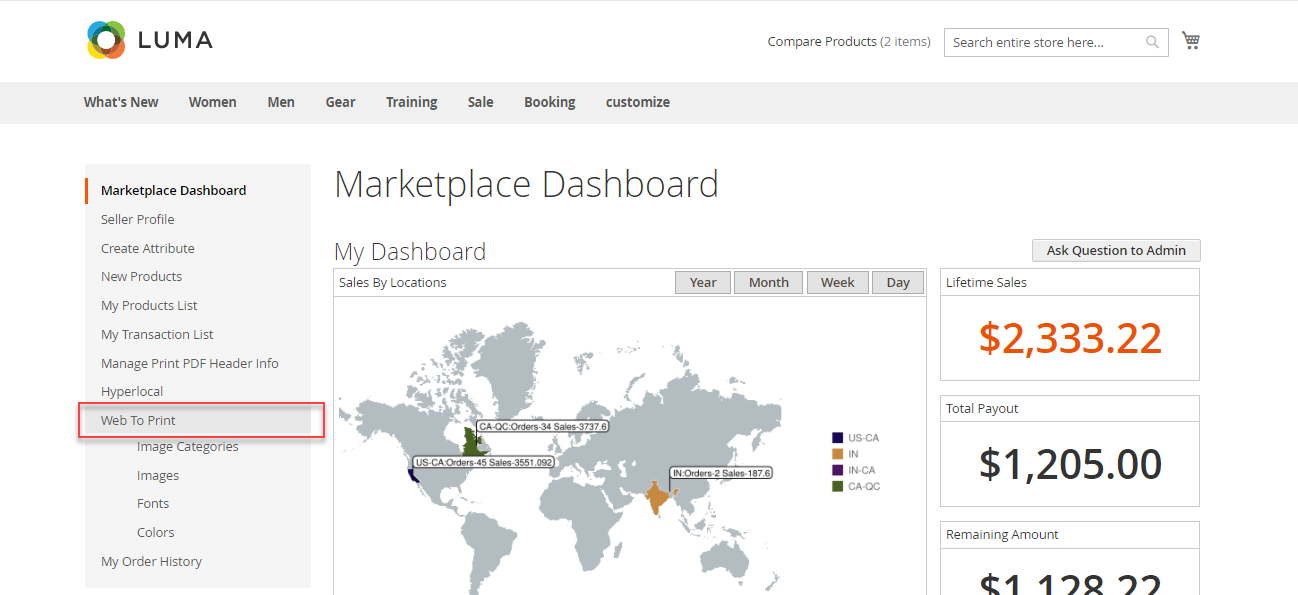
Using the sub-menu options, the seller will configure the settings for Web To Print product.
Image Categories:
For uploading the images for the templates, the seller first needs to create image categories. For this, the seller will click on the Image Categories option and navigate to the image category page as per the below image.

Here, the seller can –
- View the complete list of the categories.
- Edit or delete the category.
- Add new image category.
For adding the new category, click on the Add New Image Category and navigate to the New Image Category Page as per the below image.
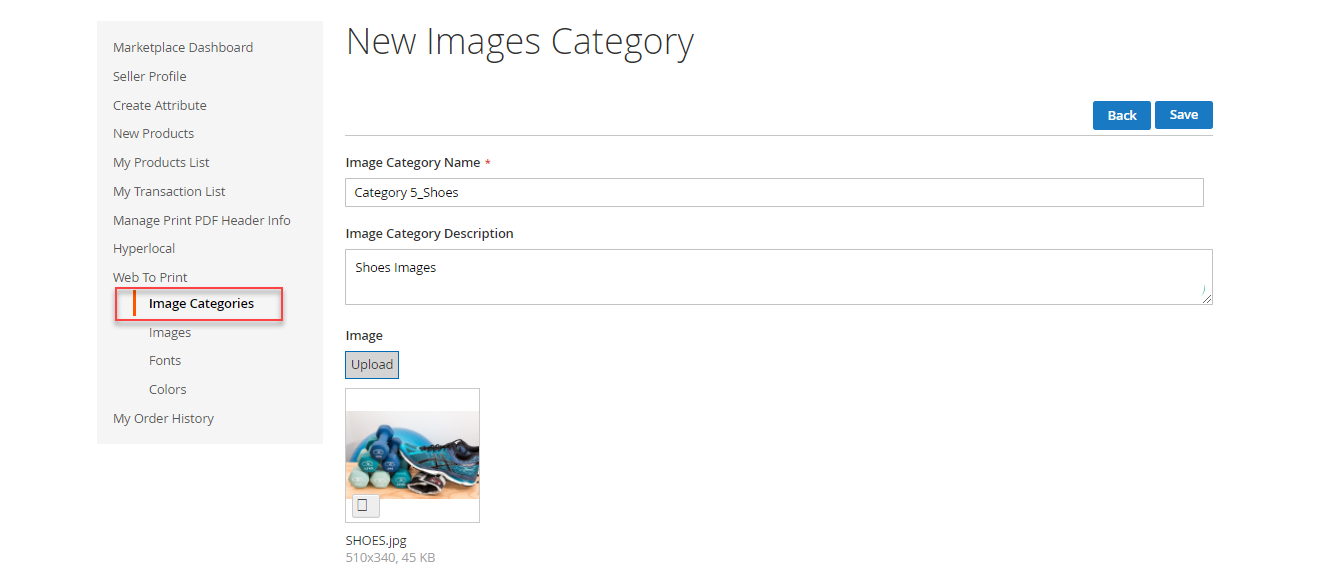
Here, enter the category name and category description. Also, upload the image which will represent the category.
Images:
After creating the categories for the images, the seller can now upload images to the templates. For this, the seller will click on the Images option and navigate to the image page as per the below image.

Here, the seller can –
- View the complete list of the images.
- Edit or delete the images.
- Add new images to the categories.
For adding the new image, click on the Add New Image and navigate to the New Image Page as per the below image.
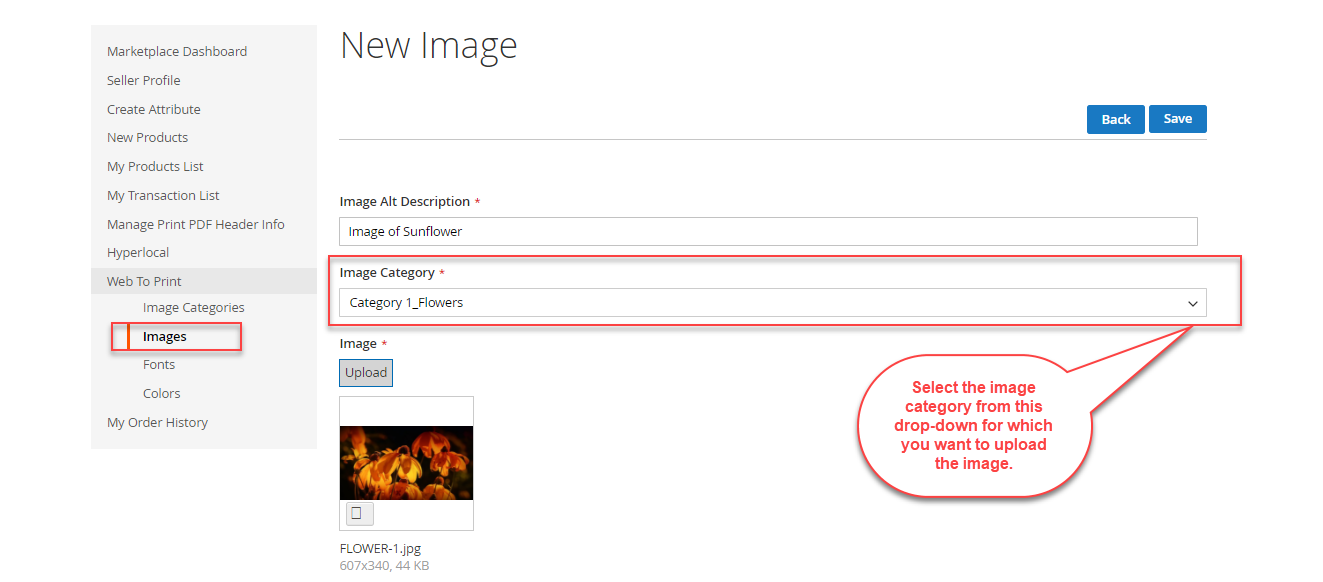
Here, enter the image description and select the image category from the drop-down. And then upload the image which will be added to that selected category.
Fonts:
The seller can even upload custom font files for the text editor. For this, the seller will click on the Font option and navigate to the Font page as per the below image.
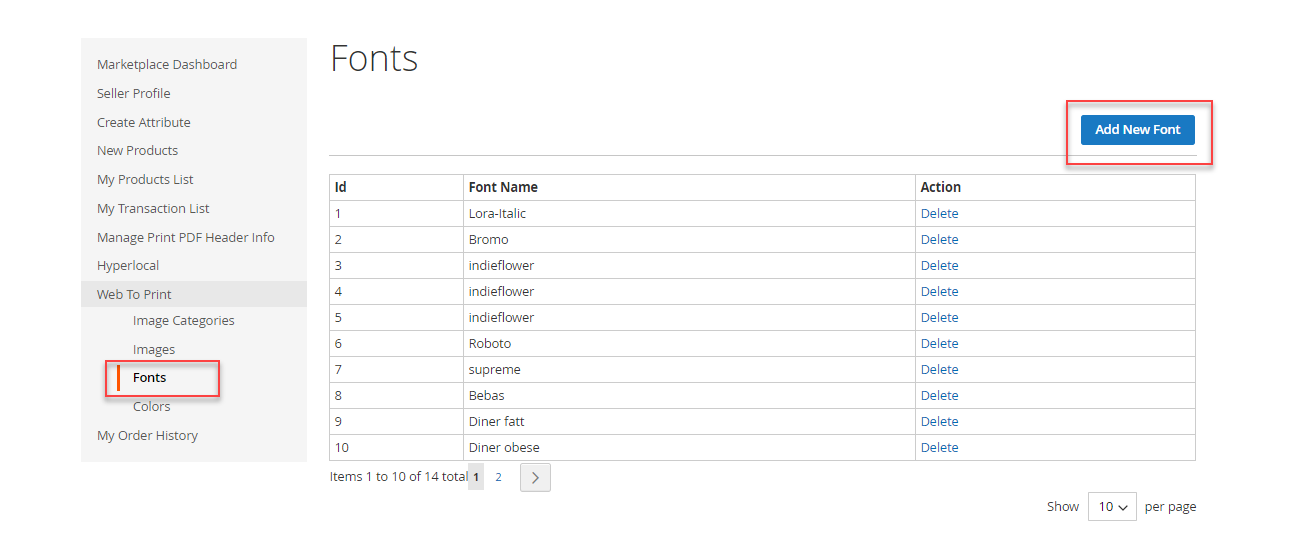
Here, the seller can –
- View the complete list of the font files.
- Edit or delete the fonts.
- Add new fonts for the text editor.
For adding the new fonts, click on the Add New Font and navigate to the New Fonts Page as per the below image.
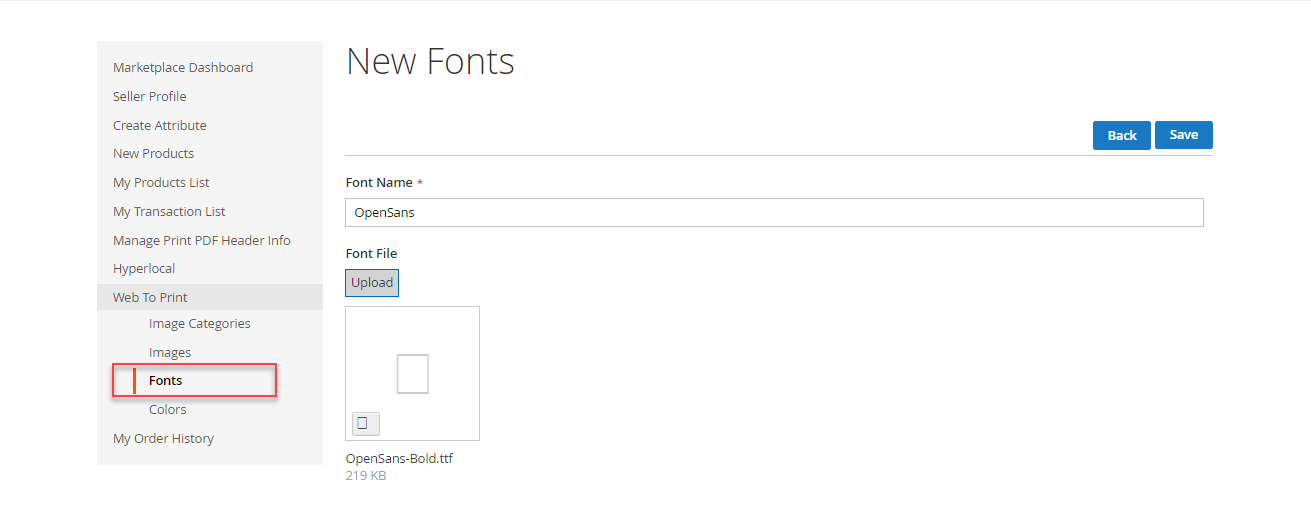
Here, enter the font name and then upload the font file.
Colors:
The seller can add the predefined colors for the template using the color codes. For this, the seller will click on the Colors option and navigate to the Colors page as per the below image.

Here, the seller can –
- View the complete list of the colors.
- Edit or delete the colors.
- Add new colors.
For adding the new colors, click on the Add New Color and navigate to the New Color Page as per the below image.

Here, enter the color name and color code.
Create Personalized Products
For creating a new personalized product for your online store click on New Product menu option.

After this, select the product type Web To Print Product and navigate to the Add New Product page.

Here, the seller first saves the product with the product basic details. Then, only the seller can view the Create Web To Print Template button as per the below image.
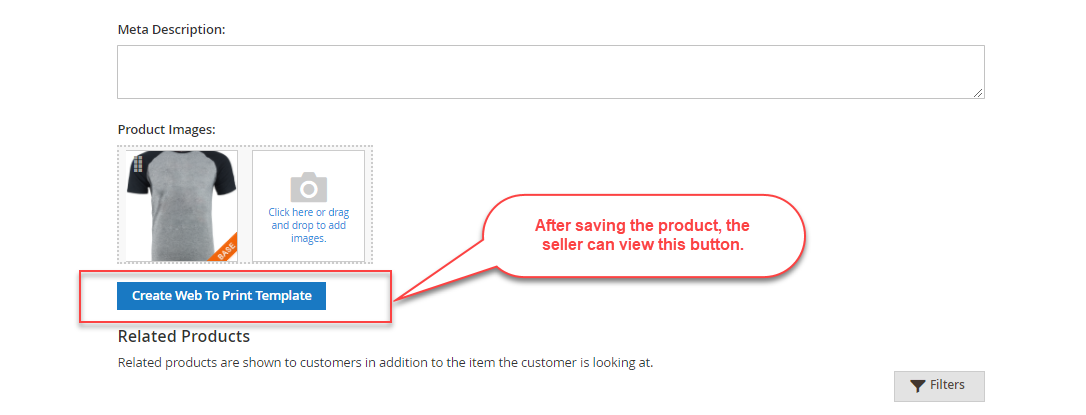
Now, click on Create Web To Print Template button and the editor will be displayed as per the below image.

Adding Template:
To insert a new template, click Add More and the following form will appear.
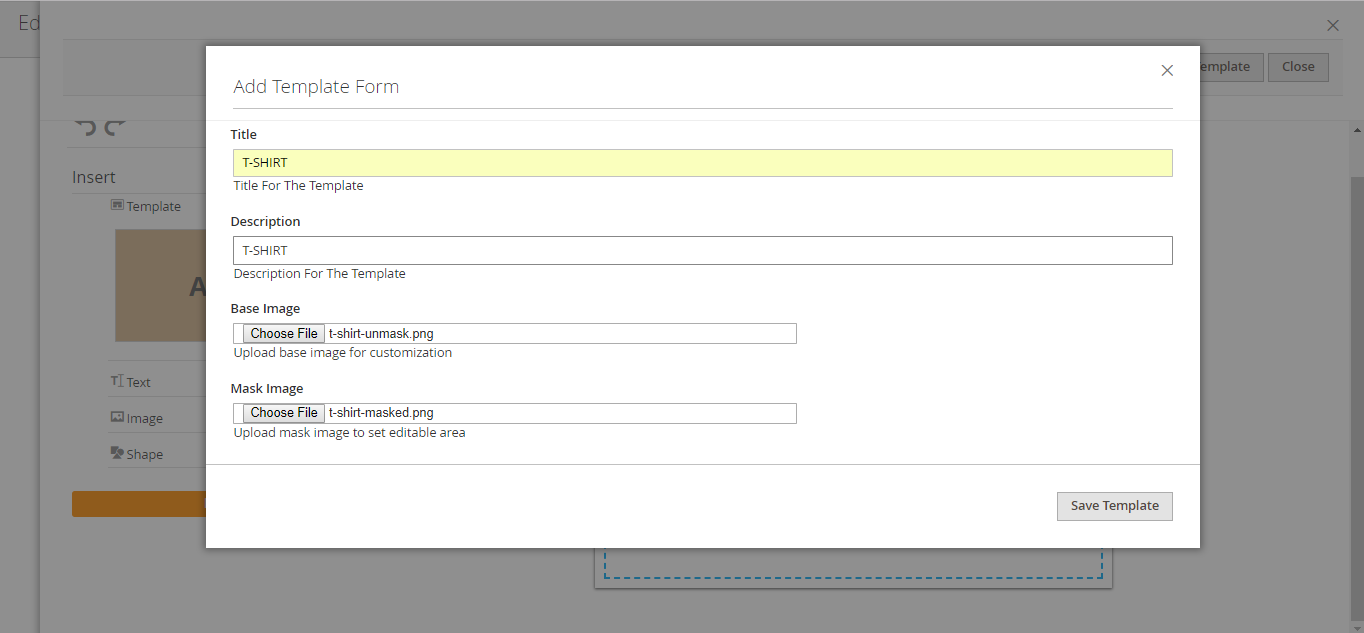
Here, the seller needs to provide the template information:
Title – Set the title for the frontend.
Description – Enter any description of the template.
Base Image – Upload the base image of the product.
Mask Image – Upload the mask image of the product where customization can be done.
Adding Text:
To add a text in the template, click Text icon and edit the text as per the choice.

The text editor has various options to customize the text – font face, bold, italic, size, color etc.
Adding Images:
The seller can add the images to the template. The height and width of the image can be adjusted accordingly.

Adding Shapes:
For adding shapes, click Shape. You can also customize the shape using fill color, border color, width, etc.
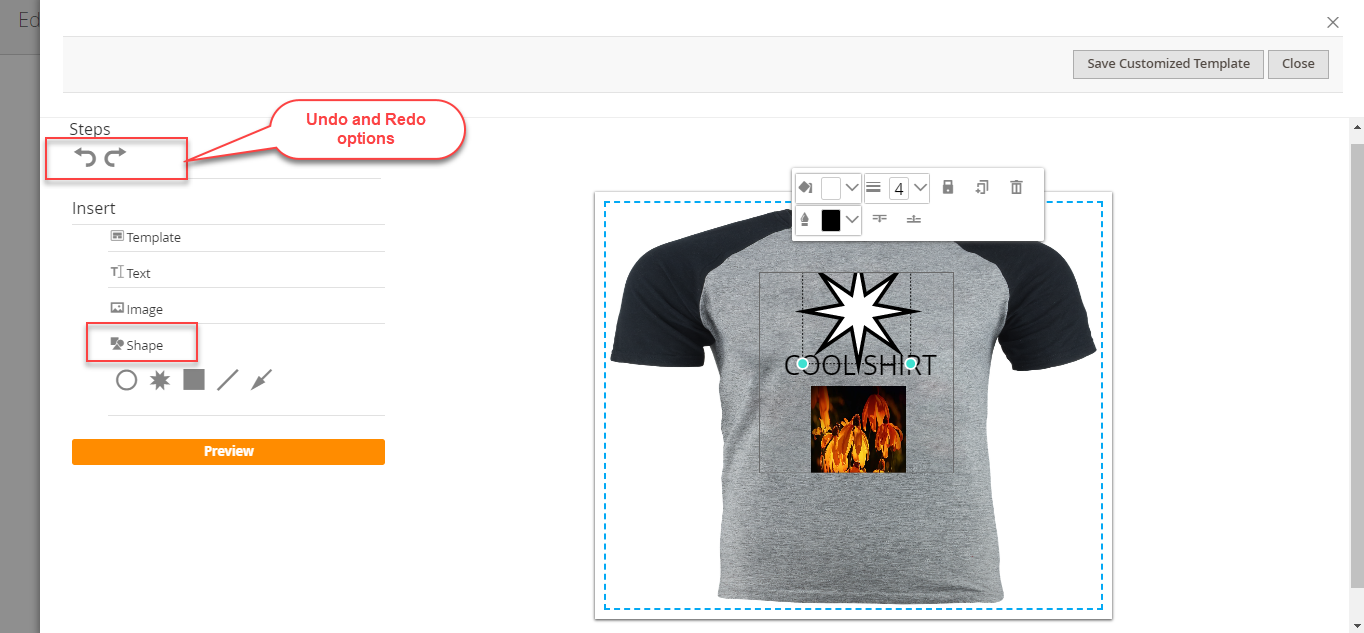
Click on Preview button to preview the template.

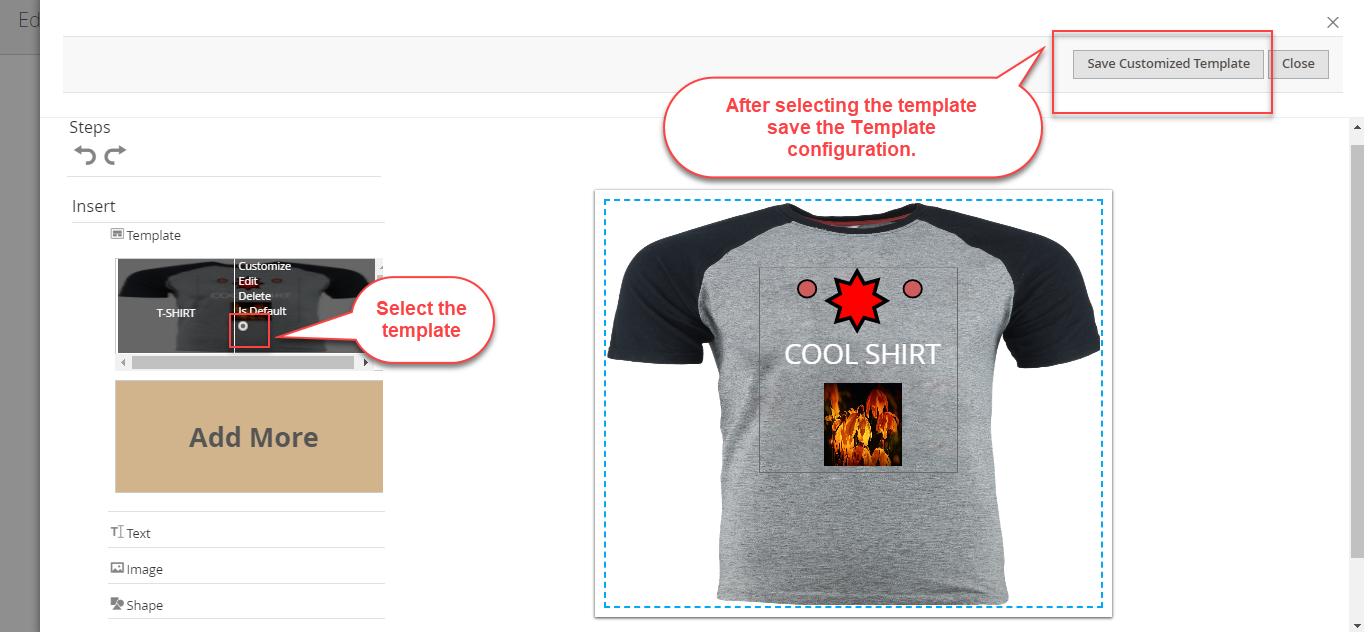
And finally, select the template which you want to display on the frontend and save the configuration.
Frontend
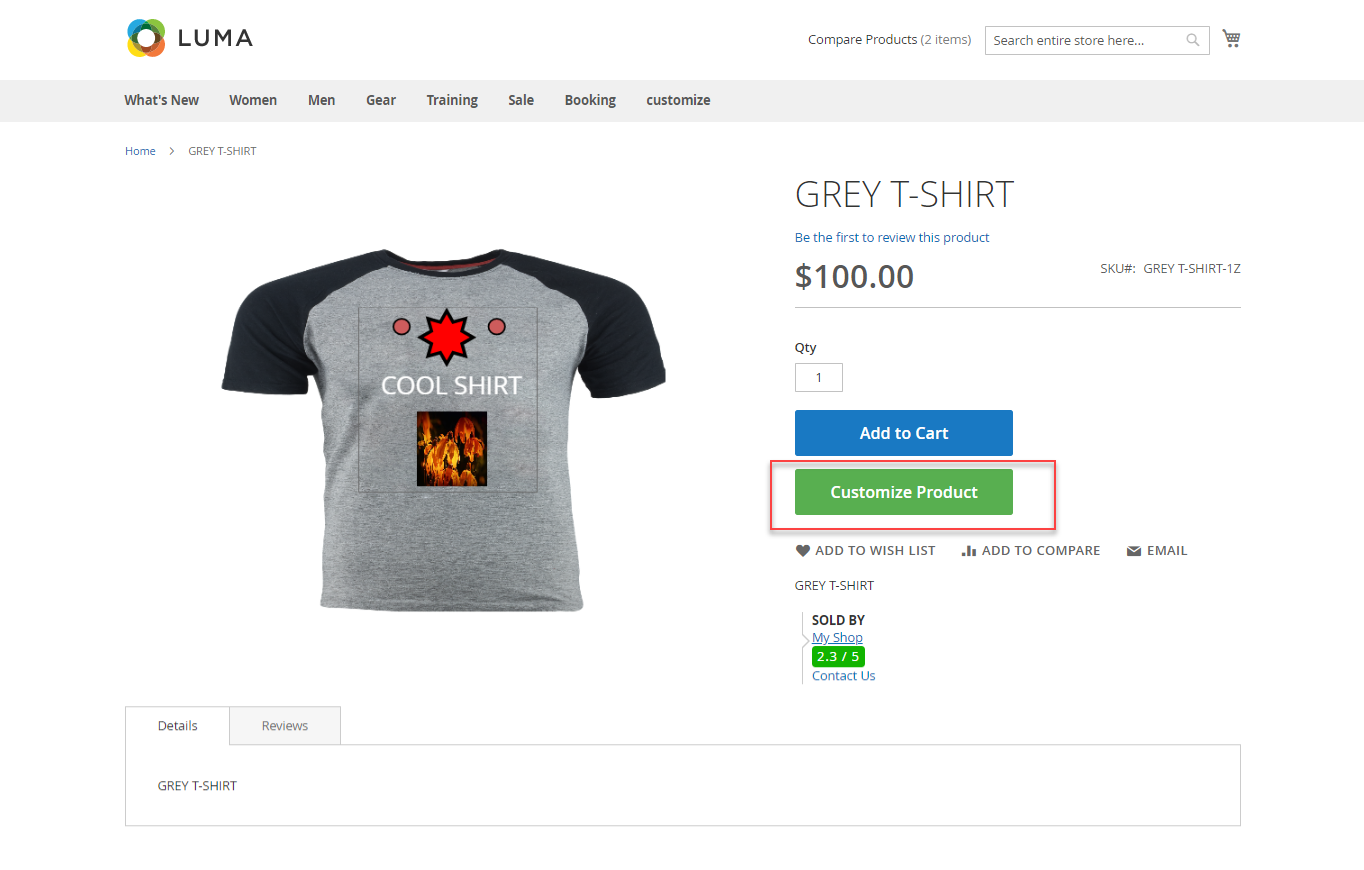
On the product page, the customers will see the Customize Product button.
Canvas
After clicking the Customize Product button, the Canvas editor will open. Here, the customer can customize the product images using the text editor, upload image, or add shapes to the image. The customer can choose any of the templates and customize it accordingly.

Preview – Marketplace Web to Print
Once, the customer is done with the customization, the customer will save the template. And can even preview it by clicking on the Preview button.

A pop-up window will display where the customer needs to check the declaration, enter quantity, and then click Add to Cart button.
Shopping Cart
After adding the product to the cart, the customer can proceed further to place the order.

That’s all for the Marketplace Web To Print for Magento 2 (Adobe Commerce) extension. If still have any issue, feel free to contact us at our HelpDesk System.
Explore the Adobe Commerce Cloud development service by Webkul. You may also browse other Magento 2 marketplace addons. Also our quality Magento 2 extensions.
Current Product Version - 2.0.0
Supported Framework Version - Magento 2.0.x, 2.1.x, 2.2.x,2.3.x, 2.4.x

4 comments
Yes, the module supports the Arabic language.
Thanks
Magento 2 by default comes with the Luma theme. Also, there are many themes available online for Magento 2 and we can develop custom themes as well. For more details and further queries, please email us at [email protected].
Thanks.