Magento 2 Video Player Extension(Adobe Commerce) module allows the admin to upload product video directly, which is further displayed on the product page.
The admin can add multiple videos and can also customize the video player’s appearance.
Adding video to the product page enhances the better outreach of your product to the customer.
Furthermore, there is no barrier with this module as it works for all types of products
(ie. Simple Product, Configurable Product, Virtual Product, Grouped Product, Bundle Product, Downloadable products).
Note- The video upload size depends on upload_max_filesize in phpconfig.
If you want to add audio content to the product page, you can check Magento 2 Audio Player.
Additionally, you can use our Magento 2 TV app for various video streaming directly on TV.
Check the working of the plugin in the video mentioned below –
Features
- The admin can enable/disable the module.
- The Admin can upload mp4 and WebM videos on the product page.
- Mass video upload feature with feature image upload as well.
- The admin can set a preview image for the video.
- The Admin can set video player appearance (ie. Primary color & Player options).
- The Customer can see the product with better visibility.
- The admin can configure settings for the video player.
- The admin can upload the product video.
- YouTube/Vimeo/Google Drive/CDN video URLs are also supported.
- The admin can set a custom text and icon color for the video player.
- The admin can enable a download button for individual product videos.
- The admin can add chapter markers to a video’s progress bar for quick navigation.
- The customer gets an info overlay inside the player showing the video title and description.
- The customer can skip forward or backward by 10 seconds directly from the player.
- Hyva Storefront Compatible.
Installation
#1 Download Module
Firstly, you need to log in to the Webkul Store, go to My Account>My Purchased Products section, verify, and then download and extract the contents of this zip folder on the system.
#2 Upload Folder
Once the module zip is extracted, follow path src>app and then copy the app folder into the Adobe Commerce Cloud root directory on the server as shown below:

#3 Run Commands
After uploading the module folder, you need to run the following commands in the Magento 2 root directory:
php bin/magento setup:upgrade
php bin/magento setup:di:compile
php bin/magento setup:static-content:deploy
php bin/magento indexer:reindex
php bin/magento cache:flush
Language Translation
If you need to do the module translation, please navigate to the following path in your system app/code/Webkul/VideoPlayer/i18n.
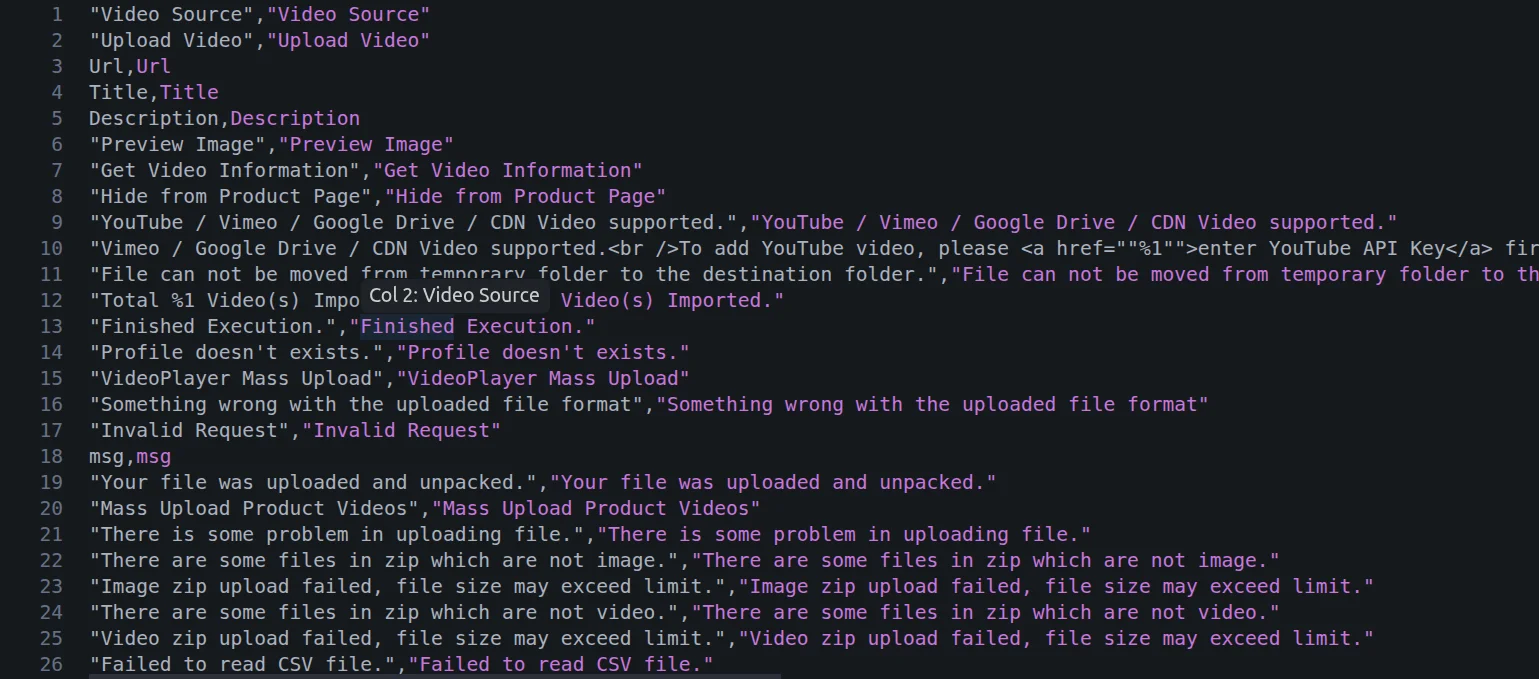
Open the file named en_US.csv for editing as shown in the below screenshot.

Once you have opened the file for editing. Replace the words after the comma(,)†on the right with your translated words.
After editing and translating the CSV file, you need to save the translated file name according to your region language and country code such as – de_DE.csv.
Then upload the translated file to the same folder from where you obtained it. Now your module translation is complete.

Admin Configuration
After the successful installation of the Product Video for the Magento 2 module, the admin will be able to see the configuration panel under Stores>Configuration>Webkul>Video Player.
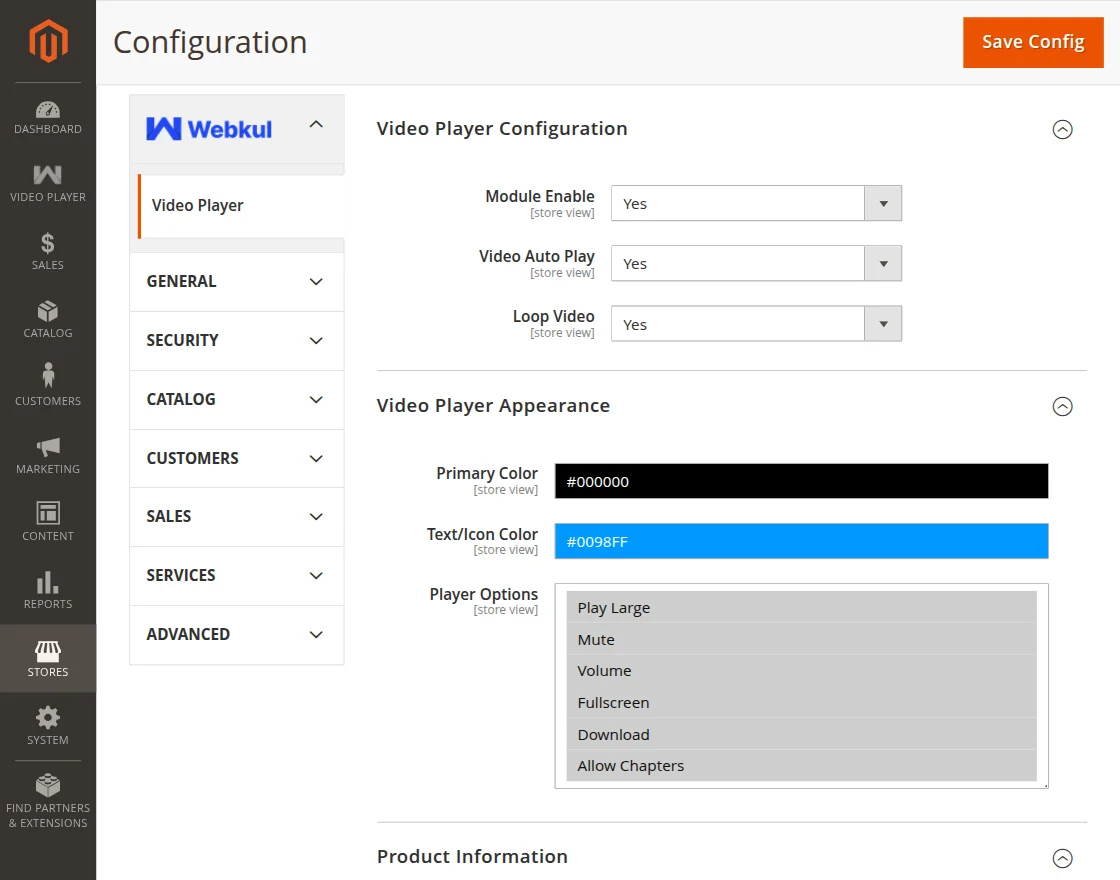
Under Video Player Configuration, the admin can modify settings as per the choice.
- Module Enable- The admin can enable/ disable the module.
- Video Auto Play- Here, the admin can set the video to be played by the customer with a single click.
- Loop Video- The video can be looped by selecting Yes in the loop video.
Video Player Appearance
- Primary Color- The admin can select the color which they want to use for their video player.
- Text/Icon Color-The admin can set a separate color for player text and icons
- Player Options- The admin can choose the options which they want to enable in their video player. That includes:-
- Play Large- Displays a large play button at the center of the video.
- Mute- Lets the customer mute or unmute the video’s audio.
- Volume- Adds a volume slider so customers can adjust the playback volume.
- Fullscreen- Allows the customer to view the video in fullscreen mode.
- Download- Adds a button so customers can download the video file directly.
- Allow Chapters- Enables chapter markers on the video’s progress bar, letting customers click to jump to a specific timestamp.
Note- The Download and Allow Chapters options are supported only for uploaded and CDN videos. They do not apply to YouTube, Vimeo, or Google Drive video sources.
After modifying all the changes as per the choice, the admin will click on Save Config to apply changes.
Admin End Product Video
To add a video to the product, the admin will navigate to Catalog>Products.
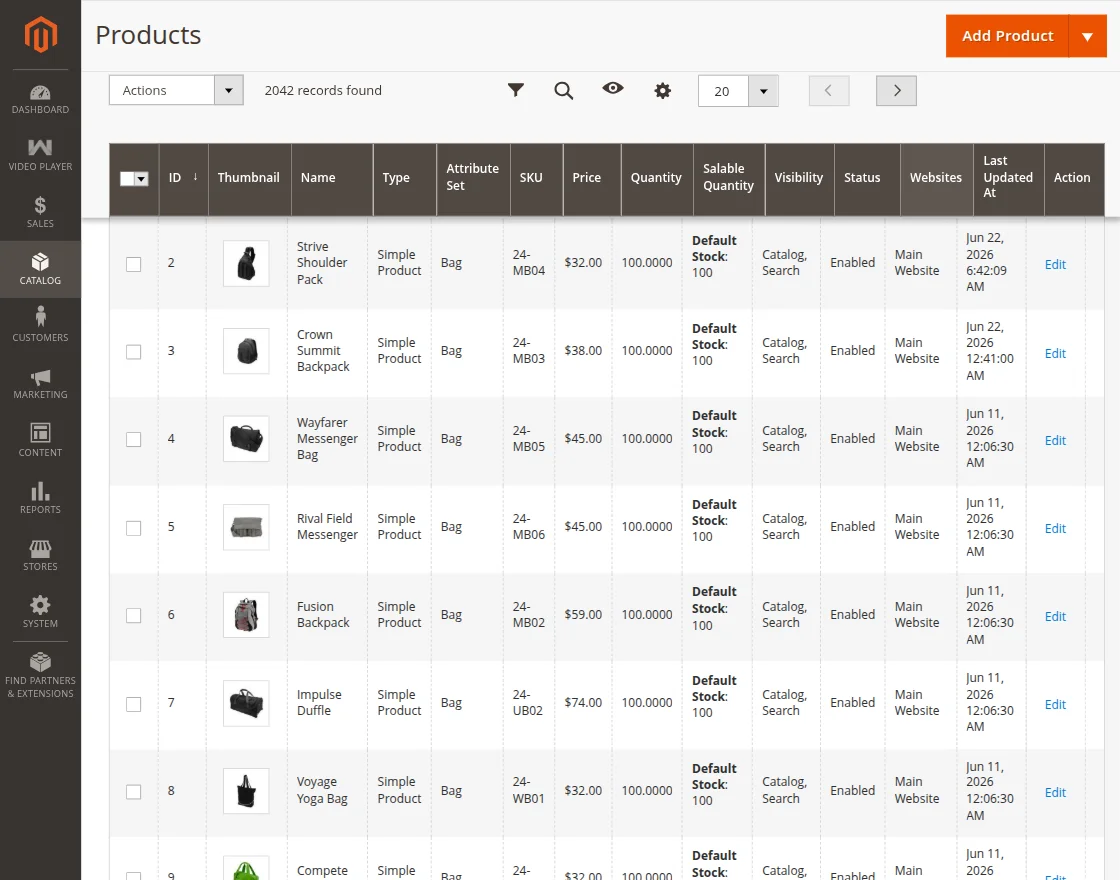
Here, the admin will have to select the product to which they want to add the video. and click on Edit.
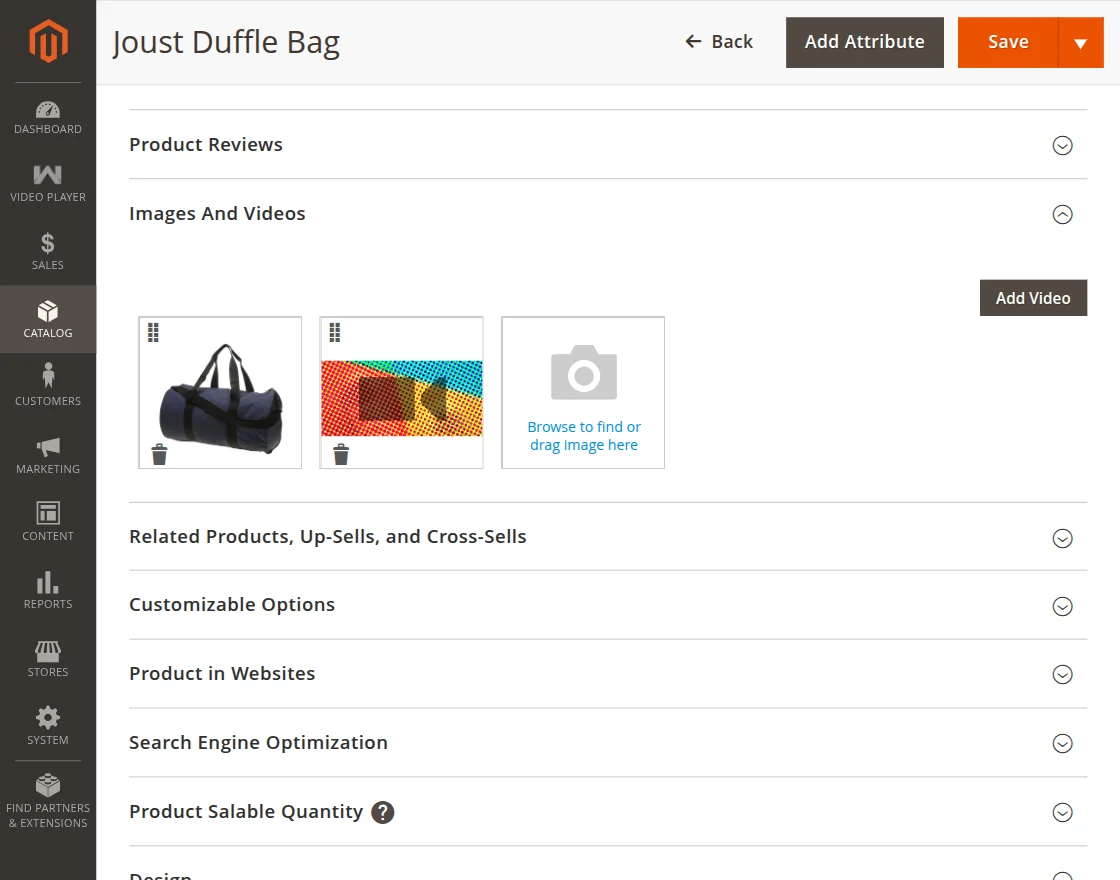
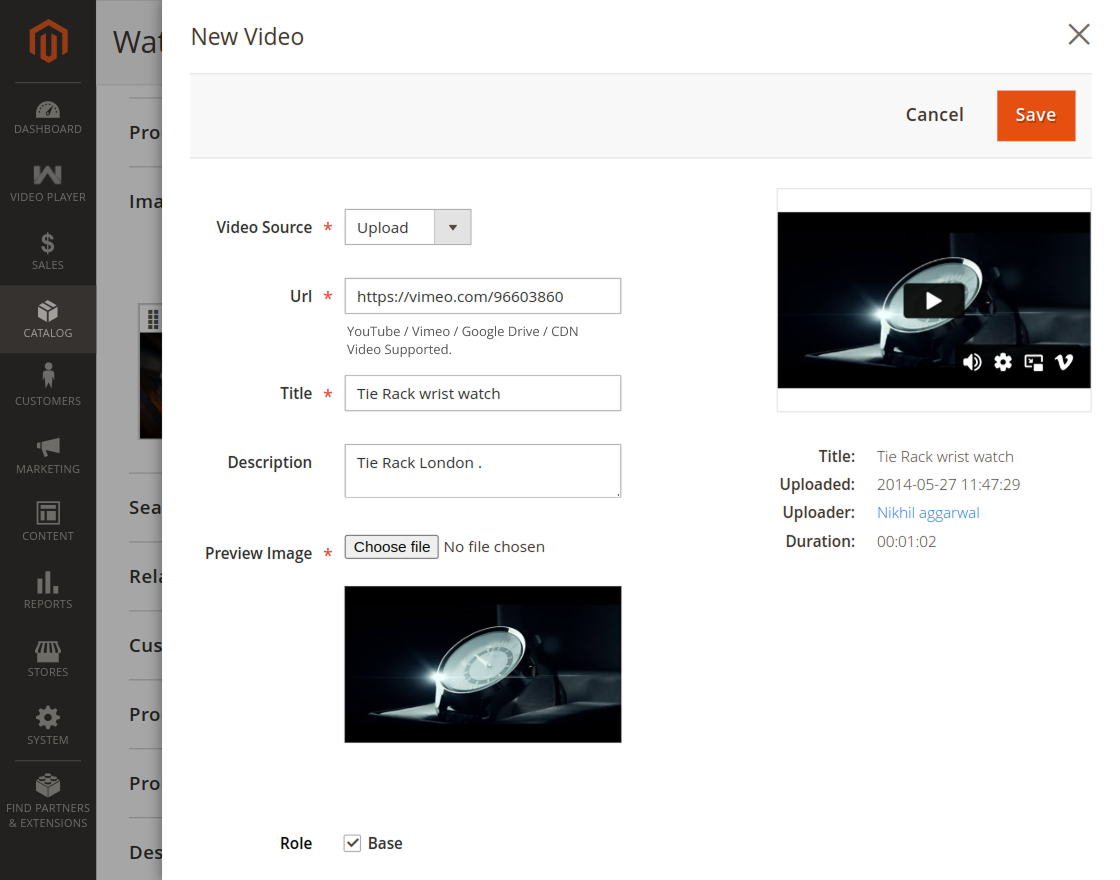
Under Images And Videos, the admin will click on Add Video, a slider will appear to add the video for the product.
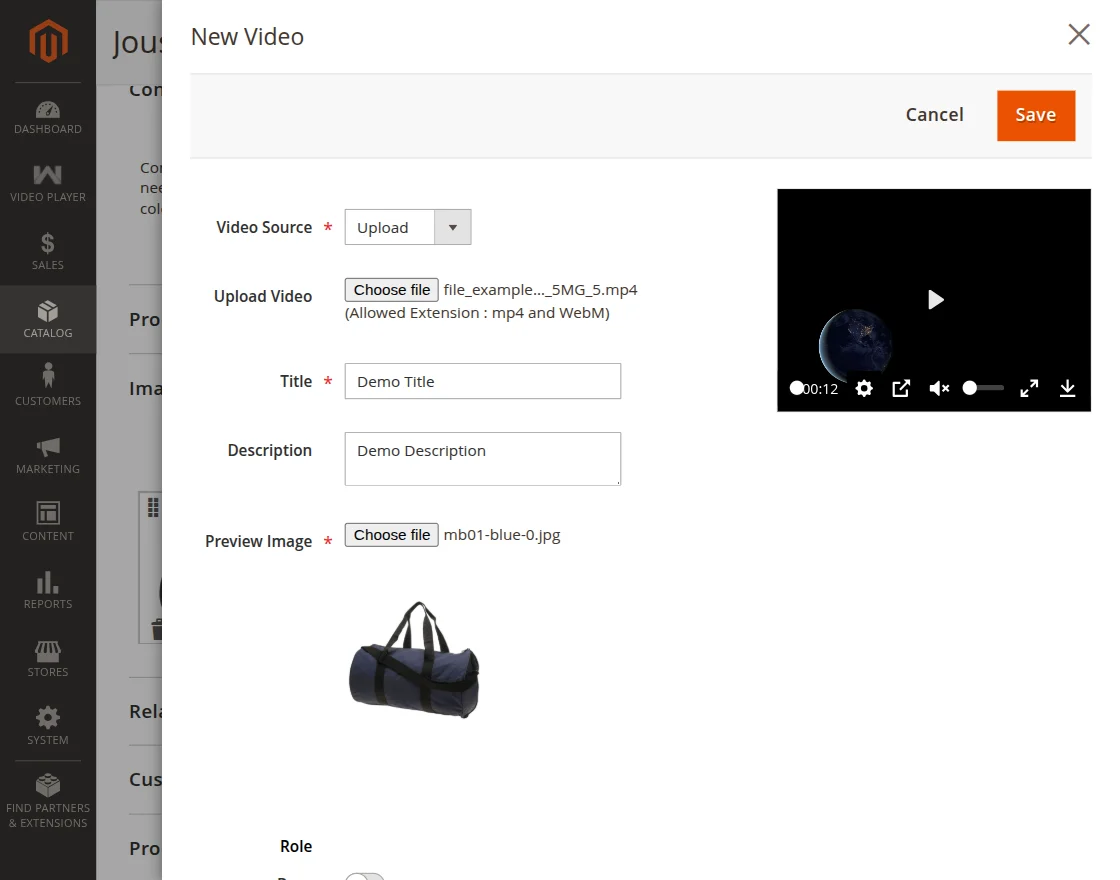
- Video Source– The admin will choose the video source by which they want to add the video ie. Upload.
- Upload Video- The admin will choose the video that they want to upload.
- Title- Here, the admin can select the title which they want to display for the video.
- Description– The admin can add a description for the video.
- Preview Image- The admin needs to upload a preview image which will be displayed on the video.
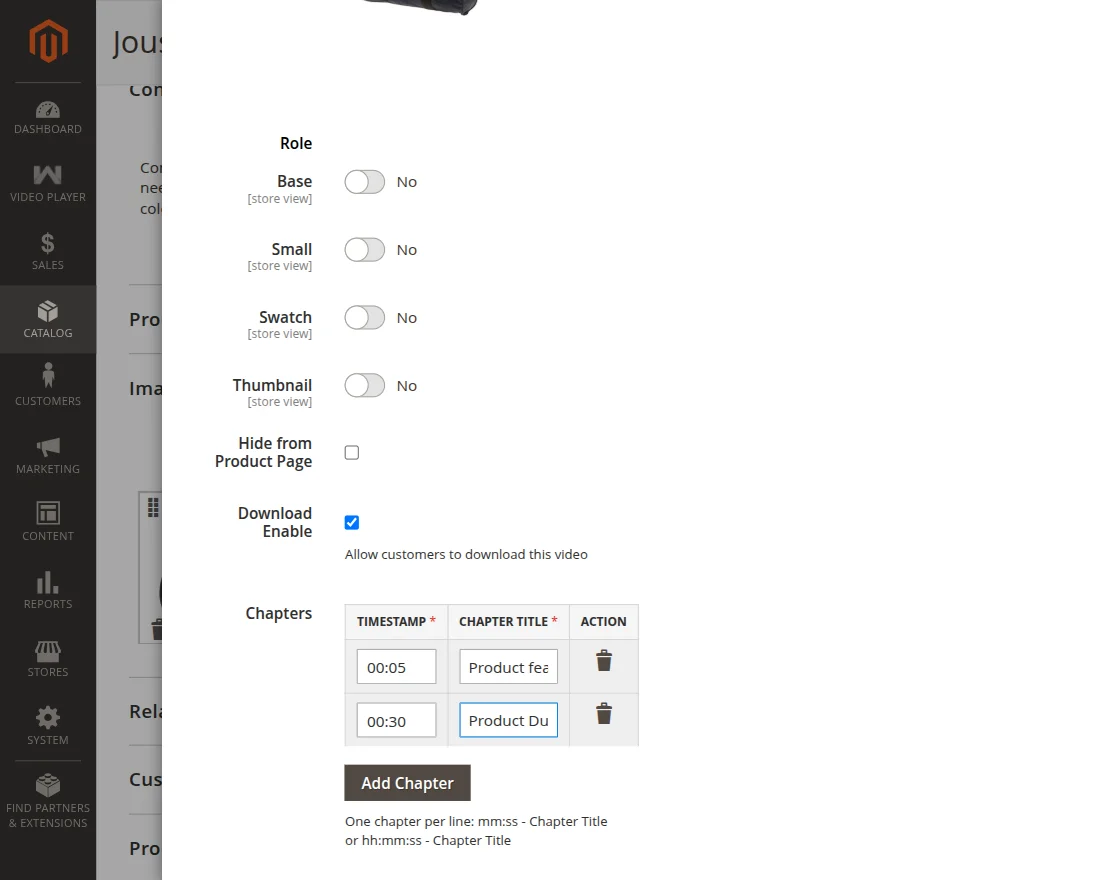
- Role- Here, the admin can select the role as per the choice.
- Download Enable- A checkbox to allow customers to download this specific video.
- Chapters- The admin can add multiple chapters for the video. Each chapter needs a Timestamp (in mm:ss or hh:mm:ss format) and a Chapter Title.
After this, the admin will click on Save to apply changes.
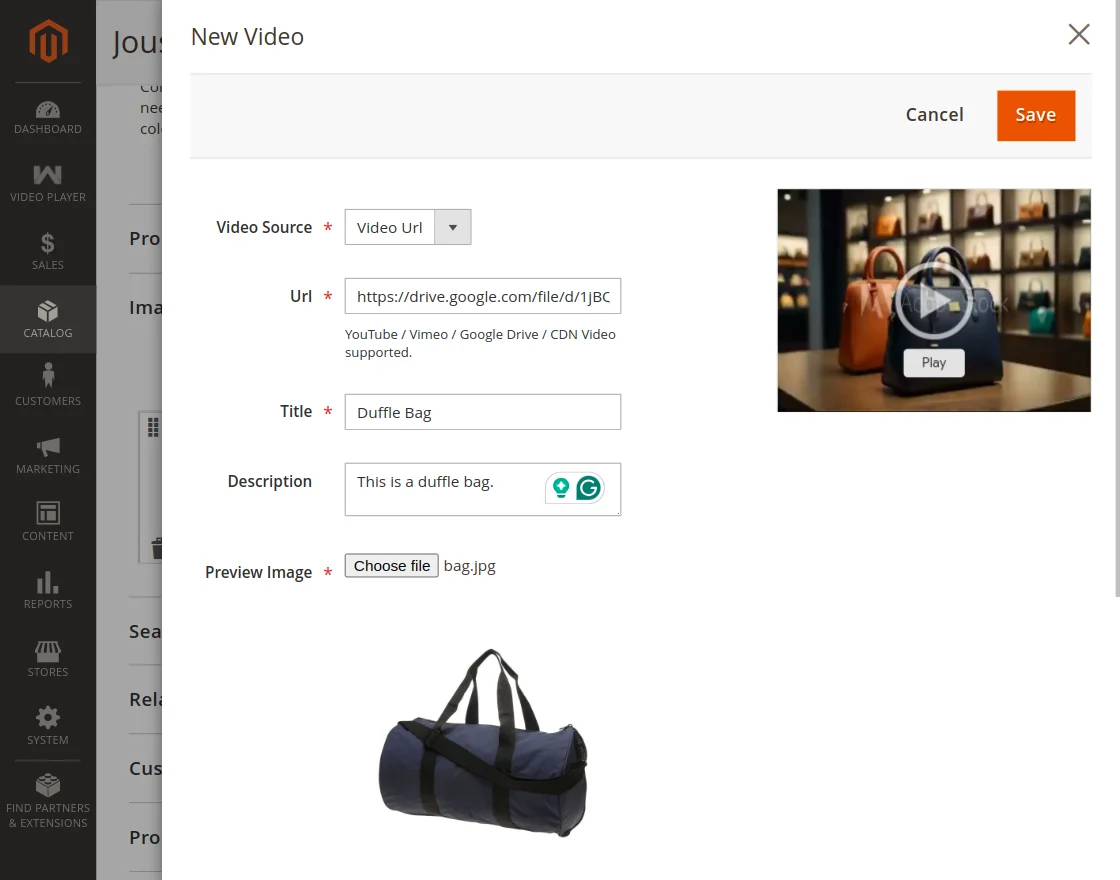
Note- The admin can also select video source as Video URL from the dropdown.

Here, in the below snapshot, you can see the admin has selected the video source as the video URL. The video extension supports video URLs of YouTube, Vimeo, Google Drive, and CDN videos as well.
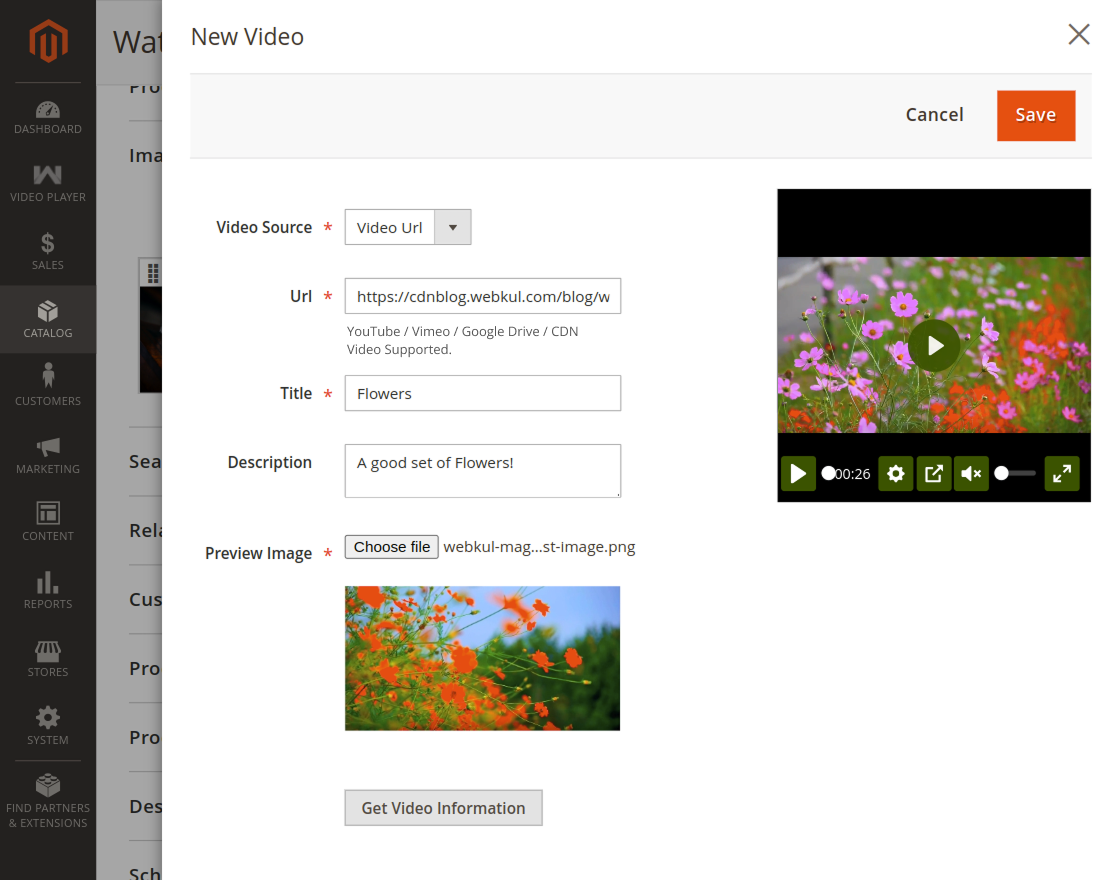
In the above example, we can see that we have used the CDN video URL and after saving the product the video is visible on the product page as well.

Similarly, below we have added the YouTube video URL for the same product.
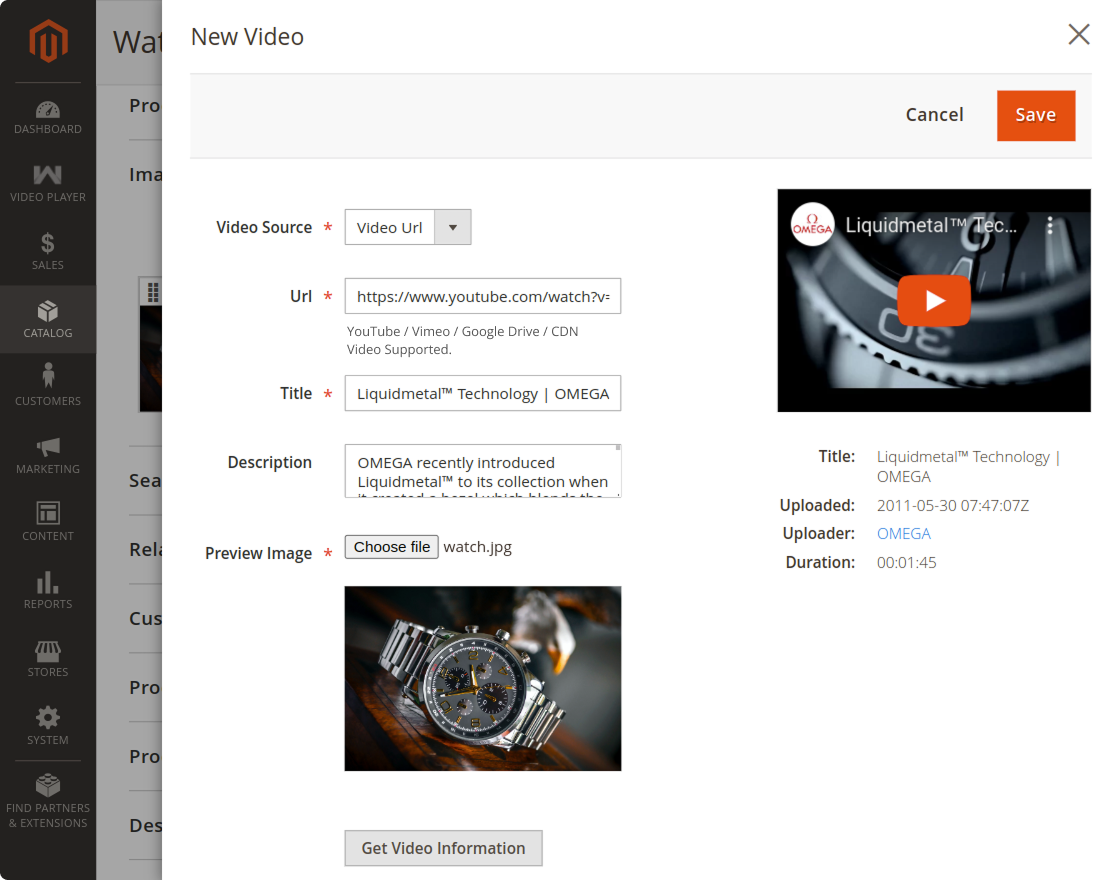
Now, the YouTube video plays on the product page as shown below in the snapshot.

Also, if we add the Vimeo video URL to the product as per the snapshot below.
The Vimeo video can be played on the product page by the users of your website.

Add Google Drive Video URL
Moreover, we also get the option of adding the Google Drive video link, as shown below.
Further, this is how the product video will reflect on the storefront product page.
Note – When adding a Google Drive URL, you can change the word ‘view’ at the end of the link to ‘preview’ to enable direct preview mode.
How to Add a Youtube API key
If you want to use video URL functionality or want to upload videos to YouTube, the admin must add a YouTube API Key. To do so
Navigate to Store > Configuration > Catalog> Product Video > YouTube API Key.

User Front-End View
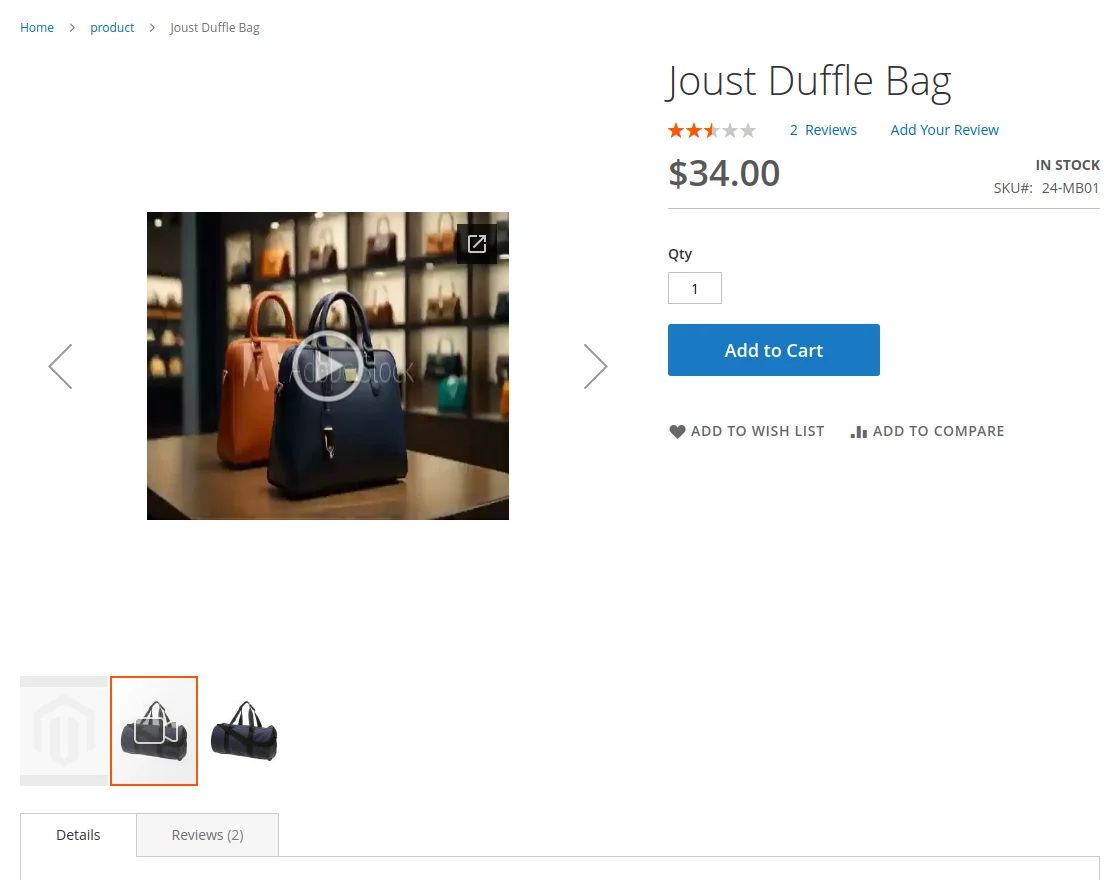
On the front end, the video will be displayed on the product along with the added images. The customer can play the video accordingly without redirecting to a third-party link.
The video appears alongside the product images. Customers can use the left and right arrows to move between the video and other product images.
Here, the customer can see the product video which is uploaded by the admin and helps them to understand the product well.
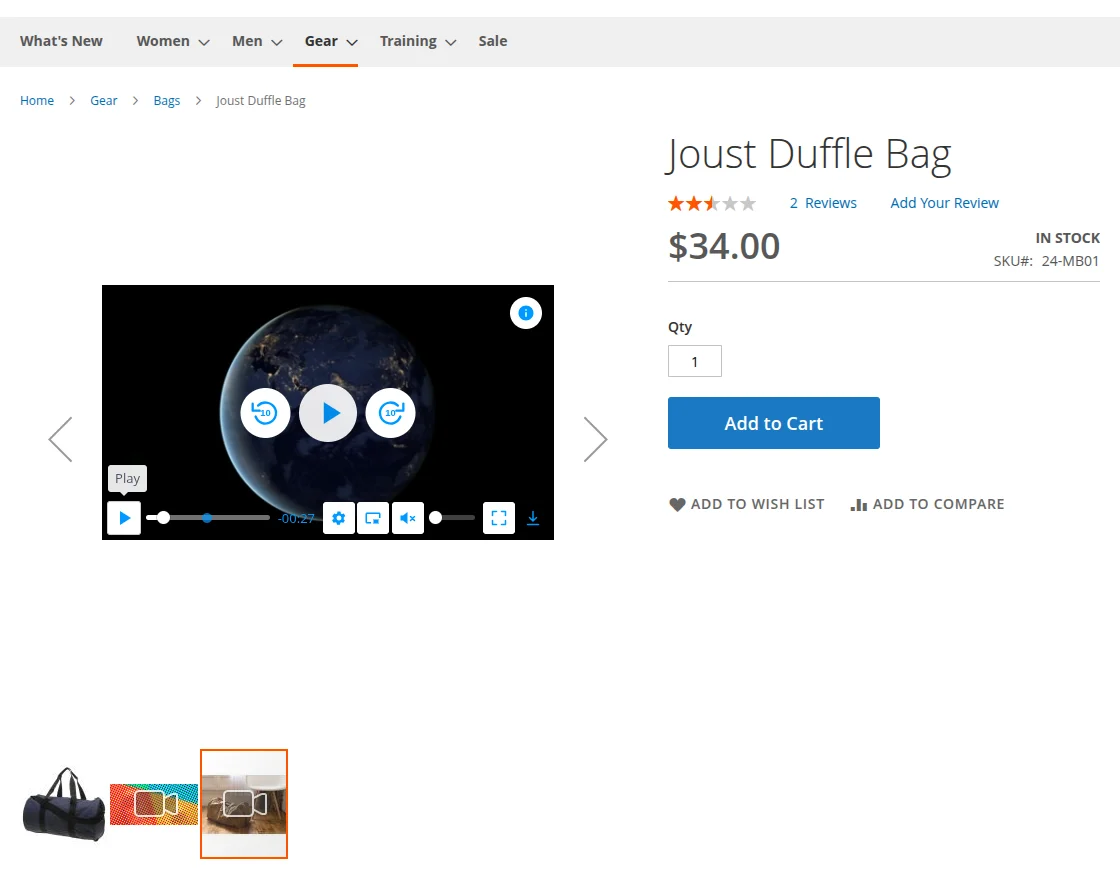
When the video is paused, three controls appear at the center of the player:
- Skip Backward- Lets the customer go back 10 seconds in the video.
- Play- Resumes playback from the current position.
- Skip Forward- Lets the customer jump ahead 10 seconds in the video.
The player’s control bar, at the bottom, includes:
- Play/Pause- Toggles playback.
- Progress Bar- Shows playback progress and lets the customer scrub through the video.
- Settings- Lets the customer adjust video play speed.
- Picture-in-Picture- Lets the customer keep watching the video in a small floating window.
- Mute and Volume- Lets the customer control the audio.
- Fullscreen- Expands the video to fill the screen.
- Download- Lets the customer save the video, when enabled by the admin.
- Info button- Customer can click the info icon to view the video’s title and description.
Mass Upload Product Videos
The admin also has the option to mass upload product videos along with the corresponding product images.
To do so, the admin will navigate through the Video Player side menu option->Mass Upload Product Videos section.
They can upload the product data with the help of a CSV containing the video and image information that is linked to the SKU of the product(s).
Next, they’ll upload the product video and image zip files to upload as well. The below image showcases the configuration available,

That’s all for the Product Video for Magento 2 (Adobe Commerce) module. You may also check our quality Magento 2 Youtube Extension.
If you still face any issues, feel free to raise a ticket and share your feedback to help us improve the module: http://webkul.uvdesk.com/
Current Product Version - 5.0.8
Supported Framework Version - Magento, 2.0.x , 2.1.x, 2.2.x, 2.3.x, 2.4.x

2 comments
We have created a ticket on your behalf and our team will soon revert to your queries over it.
Thanks.