Magento 2 NFT Marketplace module converts your Magento 2 store into a Non-fungible Marketplace. This NFT Marketplace encourages merchants from diverse categories to sell digital collectibles from a single storefront.
If you want a Payment extension for crypto payments then use our Magento 2 Bitcoin and Crypto Currency extension for the same.
Check the overview of the extension –
Features
- Admin can configure wallet address.
- Admin can configure IPFS service.
- The customer (creator) can connect the wallet via Metamask.
- Creators can create collections.
- Creators can buy and sell NFT.
- Customers can see the activity of an NFT
Installation
The installation is quite simple just like the standard Magento 2 extensions.
#1 Download Module
Firstly, you need to log in to the Webkul Store, go to My Account>My Purchased Products section, verify, and then download and extract the contents of this zip folder on the system.
#2 Upload Folder
Once the module zip is extracted, follow path src>app and then copy the app folder into the Adobe Commerce Cloud root directory on the server as shown below:

Unzip the respective extension zip and create Webkul(vendor) and NFT Marketplace(module) name folder inside your magento/app/code/ directory and then move all module files into the Magento root directory Magento2/app/code/Webkul/NFTMarketplace/ folder.
Run the Following Commands via the terminal
php bin/magento setup:upgrade

php bin/magento setup:di:compile

php bin/magento setup:static-content:deploy

composer require kornrunner/keccak

composer require simplito/elliptic-php
Note –
- Make sure Node is installed on your server.
- Make sure PHP’s gmp extension is installed and enabled on your server.
- This module restricts the admin from creating simple, configurable, virtual, downloadable, grouped, and bundle products.

- Only the users registering from the storefront can create the NFTs, the admin will not be able to create the same.
Multilingual Support
Therefore, for Multilingual support, please navigate to Store>Configuration>General >Locale Options. Also, select your desired language from the Locale option.

Thus, in this way, a multi-lingual configuration can be done.
Language Translation
For module translation, navigate to the following path in your system src/app/code/Webkul/NFTMarketplace/i18n/en_US.csv Open the file named en_US.CSV for editing as shown in the below screenshot.

Then replace the words after the comma(,) on the right in the file with your translated words.

After editing and translating the CSV file, you need to save the translated file name according to your region language and country code such as – de_DE.CSV.
Followed by uploading the translated file to the same folder from where you have obtained it. Now your module translation is complete.

Thus, in this way, language translation can be done.
Run the following command to install npm dependencies
npm install

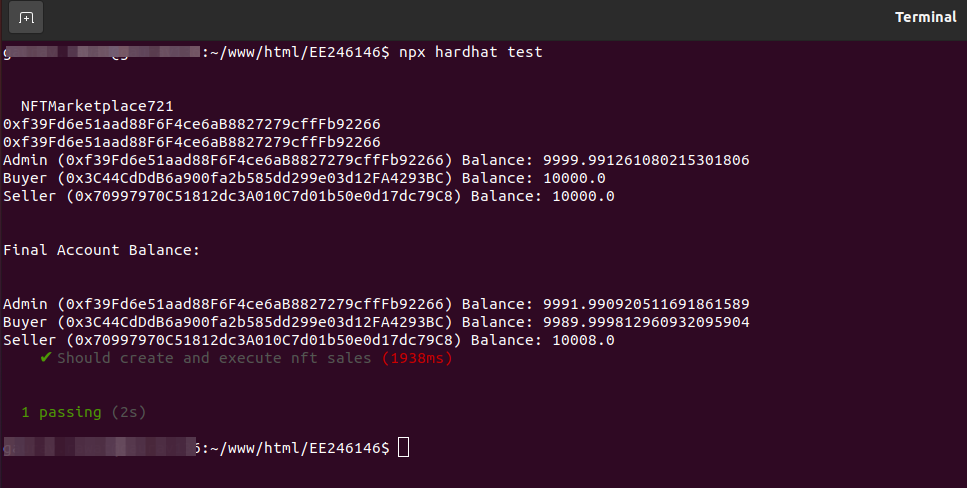
Run the following command to test the smart contract
npx hardhat test
IPFS Storage
Pinata is one of the most popular storage platforms. To use Pinata you need to sign up for an account.
- Head over to Pinata.cloud
- Click Sign up and use your email address to create an account.
Get an API key
You need to generate an API key from Pinata. Your API key allows NFTs to interact with your Pinata account automatically.
- Log into Pinata and select API keys from the sidebar menu.

- Click New Key.

- Expand the Pinning Services API drop-down and select all the options under Pins

- Pinata will give you an API key, API secret, and JWT token.

Enter the Sepolia endpoint to the eth value in the .env file. Goto .env file and add the following credentials.
- WALLET_PUBLIC_ADDRESS
- WALLET_PRIVATE_KEY – The private key will be received from Metamask account details > Show private key.

- ETH_NODE_HTTP_ENDPOINT
- NFT_CONTRACT_ADDRESS

Deploying the Smart Contract
Goto hardhat.config.js file set the configuration, and run the following command to deploy the smart contract on the specified network
Deploying contract to a Local Network
For local contract deployment run the following commands
npx hardhat node
npx hardhat run scripts/deploy.ts --network localhost
Deploying contract to a Live Network
For live network contract deployment run the following command
npx hardhat run scripts/deploy.ts --network sepolia

Goto .env file and add the following line
NFT_CONTRACT_ADDRESS=
Flush the cache and reindex all. now the module is properly installed.
Create an Ethereum Account to Setup the MetaMask Wallet
We need an Ethereum account to send and receive transactions. First, you need to install and set up Metamask Wallet for the browser. Then add the extension in your browser first.
How to get IPFS API Keys?
Generate the IPFS API keys on the Infura website. Click on the Create New API key option.

It will show you a popup to enter the name of your account.

Once you click on create the account will be created and it will show you the API key.

Click on settings it will display the node point or Ethereum URL.

Once the account is configured with Magento 2 you can also check the active endpoints.

Module Configuration
Once the Magento 2 NFT Marketplace module gets installed, the admin needs to configure the module.

General Settings
Enable – Enable the module from here.
Commission – The admin can set the commission rate from here it will apply globally.
Wallet Public Address – Need to enter the Metamask wallet public address key.
Contract Address – Add contract address which we get after running the command (npx hardhat run scripts/deploy.ts –network sepolia).
Sign Message – Enter the sign message which will be displayed on the front end.
IPFS Settings
API Key – Enter the Ethereum API key from Pinata.
Secret Key – Enter the secret key.
JWT Token – Enter the JWT token of the Ethereum account.
NFT Management – Admin End
The admin can manage the NFTs from their end for that navigate to NFT management > Manage Collections.
Manage Collection
Here, the admin can check the created collection list.

Manage NFTs
The admin can check the created NFTs from here.

Manage Creators
The admin can also check registered creators here in the creators section.

Set NFT Marketplace – Front End
Once all the settings are done the user can use the NFT marketplace and set their wallet to the metamask.

Manage Profile
After setting up the wallet, the User can create and edit the profile by clicking on the Profile section. The admin will add the following details.

Wallet Address – Add an Ethereum address here which you get while creating the ID on Metamask. It is a unique identifier that serves as a virtual location for your ether and Ethereum-based tokens. It’s like a bank account number.

User Name: Enter the User name for your NFT wallet.
Bio: Add the description of the profile.
Banner – Add a banner image for the NFT marketplace profile.
Logo – Add logo for the same.
My Collections
In my collections, the creator can check their collections and create a new one.

Create Collection
Click on the Create Collection tab and it will navigate you to another page to enter the collection details.

Enter the collection name, description, and URL, select a category, and set images for logo, featured, and banner. Now save the collection and it will display in the collection list.
My NFTs
In the Magento 2 NFT Marketplace extension, the creator can check their NFTs from here.

Create NFT
The creator can create NFT from here by entering details.

The creator can create their NFT for sale by entering the name, external link, description, price, and collection. Once the NFT is listed it will display in the MetaMask extension.

Now the buyer can buy it.
Buy & Sell NFTs
The buyer can check the added NFT products on the product page.

Check the trending and top NFTs with hourly and day filters.

Top listings

View the product and its details

Here the user can choose products to buy. When the user hovers the mouse on the product it will display the buy now option.

Now the customer can buy the NFT from here.

When click on the buy now button, the NFT will list for purchase. After buying the NFT, the buyer can check the transaction ID on the activity of NFTs.

Transaction Details of NFTs

Once the transaction is completed the user can check the details on Etherscan by entering their transaction ID.
So, that is all about the Magento 2 NFT Marketplace extension. If you have any queries regarding the plugin, please get in touch with us at Webkul Support System.
Current Product Version - 5.0.1
Supported Framework Version - 2.1.x, 2.2.x, 2.3.x 2.4.x

Be the first to comment.