Magento 2 Marketplace Vendor Category Management: In the Magento 2 Marketplace Multi-vendor Marketplace, the admin can set an option that allows a category tree view structure similar to the admin’s at the vendor’s add/edit product page. The admin can assign various categories globally(for all the vendors) and per vendor(for each of the Vendors). The selected categories for global or per vendor category assignment will be shown at the category tree view as per selection made by the admin for each type.
Magento 2 Marketplace – Vendor Category Management
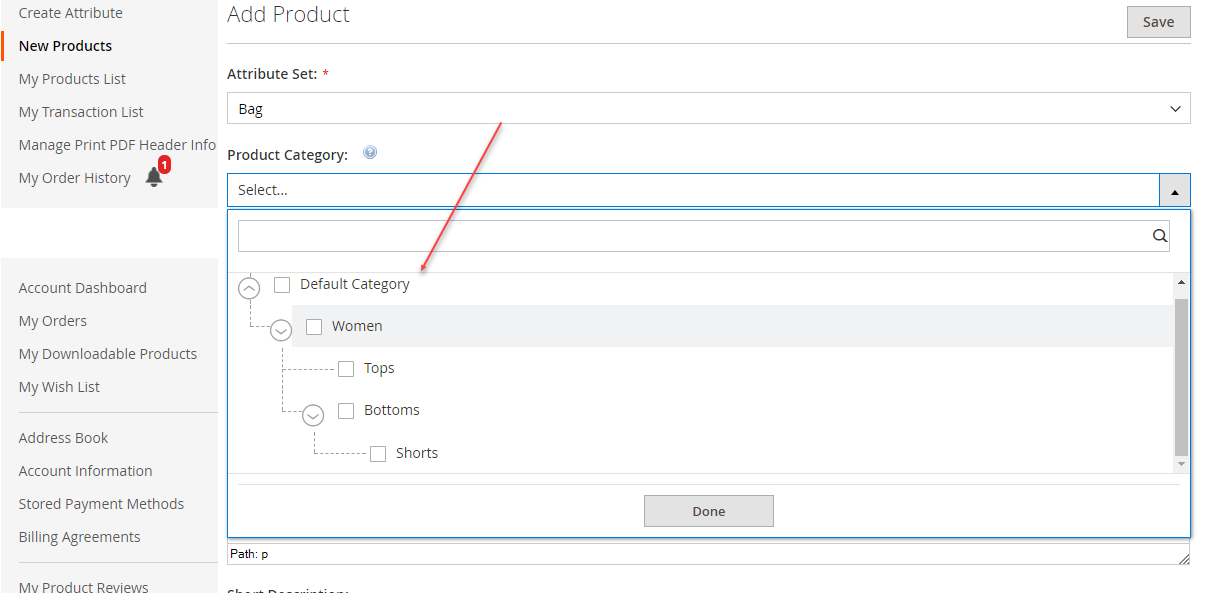
The admin can navigate to Stores>Configuration>Webkul>Marketplace>Seller Product’s Settings>Allow Category tree view like admin product category tree. Here, the admin will set the option “Allow Category tree view like admin product category tree” as “Yes” to allow the vendors to have the same category tree view as of the admin’s category tree view.

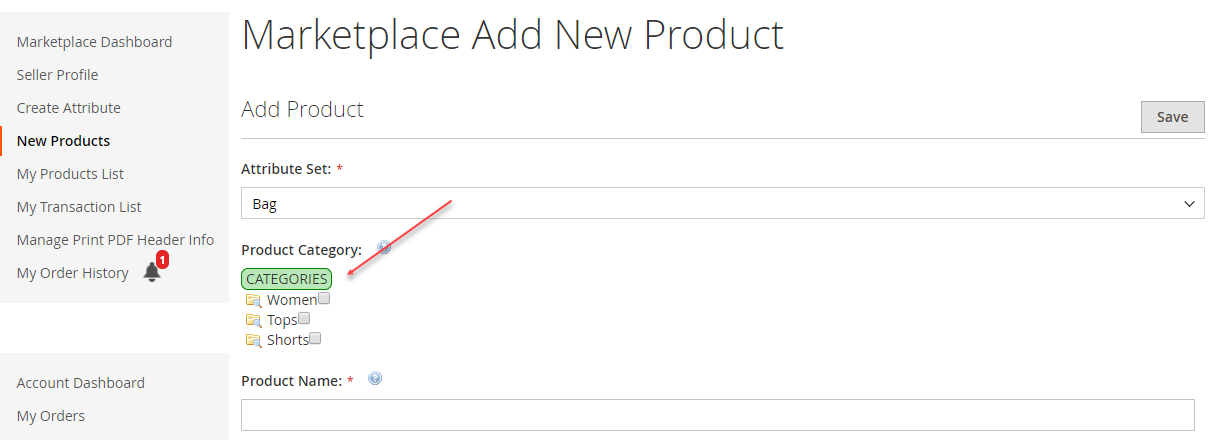
The admin’s category tree view – This is the category tree view at the admin’s add/edit product page.

If this option “Allow Category tree view like admin product category tree” is set as “No“, then the vendors will have the default category view at their add/edit product page.
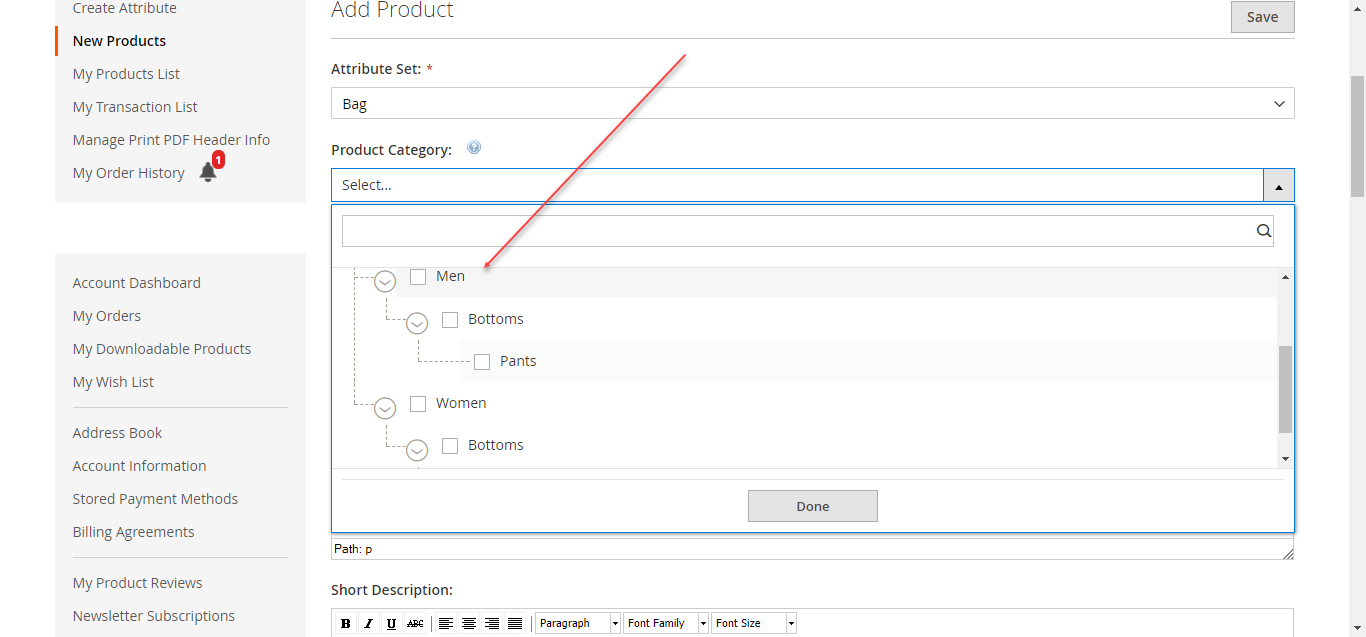
Now, after the setting has been enabled the vendors will have the same category tree view at their add/edit product page as shown below in the snapshot.

Global Category Assignment –
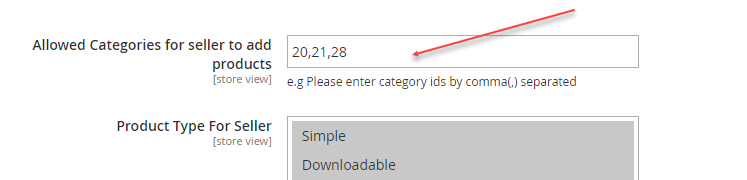
To set the category Id’s the admin will navigate to Stores>Configuration>Webkul>Marketplace>Seller Product’s Settings>Allowed Categories for seller to add products. After the admin has entered the category Id’s separated by a comma, now these referenced categories(whose Id has been entered by the admin) will be available to all the vendors of the marketplace.
After assigning the global categories the vendors can find the categories with the tree view at their add/edit product page and can add the products into these allowed categories only.
Per Vendor Category Assignment –
To assign the per vendor category the admin will navigate to Customers>All Customers. Here, select the vendor for whom you want to assign the categories and then tap the edit link as shown below in the snapshot.

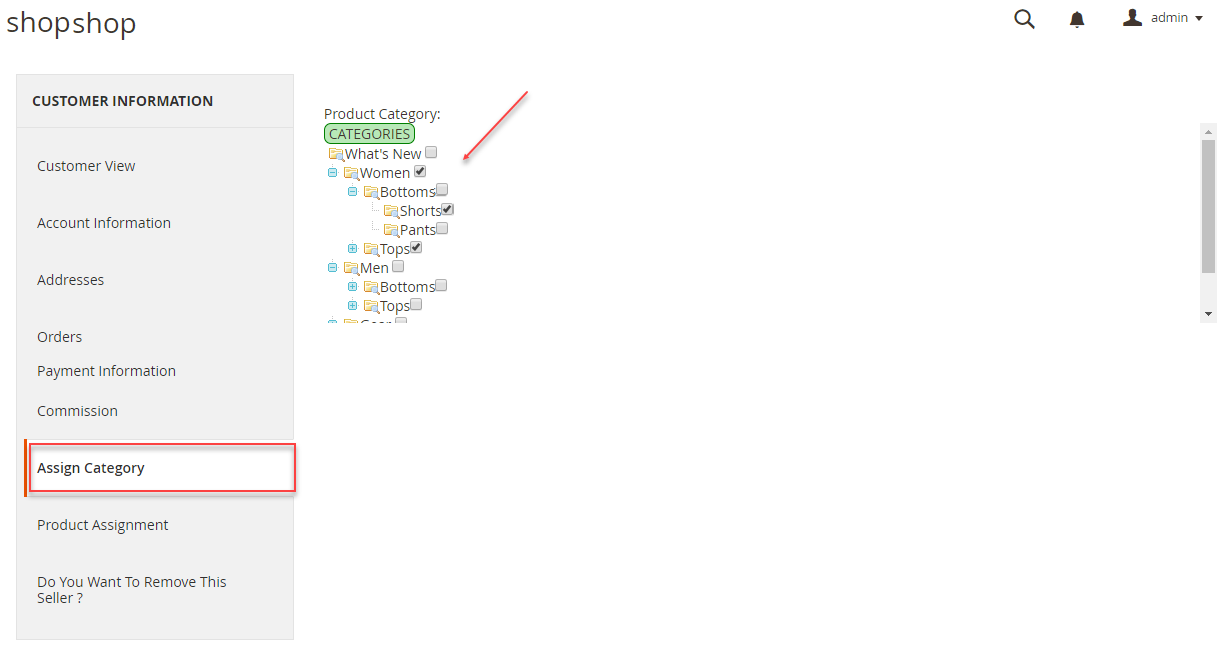
Now, under the customer information section go to the Assign Category menu option. Select the categories or sub-categories that you want to allow for this Vendor 1. Similarly, select the categories or sub-categories that you want to allow for the Vendor 2 and so on. Like this, you can assign one particular category to a vendor and another particular category to another vendor.
Vendor 1 Assigned Categories:
Vendor 2 Assigned Categories:

Now, on the add/edit page the each of the vendors will have their respective assigned categories displayed in a tree view.
Vendor 1 Add/Edit Product Page:

Vendor 2 Add/Edit Product Page:
That’s all for the Magento 2 Marketplace Vendor Category Management. If you have a query or suggestions you can always get back to us at webkul.uvdesk.com

Be the first to comment.