The Magento Social Connect extension allows the users login to the store using their existing login details from Facebook, Twitter, Google, or LinkedIn. The store owner can upload custom icons for social login buttons.
Features of Magento Social Connect
- Customer select one any of the preferred social network to log in.
- The admin can enable or disable social login status.
- Customers can do social login through mobile devices.
- Choose a custom icon for social login button.
- The social login users are added to the customer list.
- Supports Multi Vendor Marketplace.
- Works with multi-store and store views.
- The source code is open for customization.
Installation
Magento Social Connect module installation is super easy you need to move app, skin folder in Magento root directory.

After moving both the folder flush the cache from magento admin panel. Under System > Cache Management.

Facebook API Credentials
To create a google application you need to follow the given steps :
STEP 1 :
- Create a Facebook application using this link :https://developers.facebook.com/
- Login to your Facebook account and click Create App.

STEP 2 :
- Enter desired name for the app under the field Display Name.
- Enter your email address, Click on Create App ID.

STEP 3
- Your App’s Dashboard will be visible to you as shown in the image below.
- You have to go to Settings > Basic, the App ID and App Secret is generated.

STEP 4 :
- At last, you can use your unique App ID and App Secret under My Apps > Dashboard > Settings > Basic and use it to create new Facebook API Application.
**Note – The Facebook Team reviews the application before it gets Live to ensure that you are using their product in an approved manner. You can find more information here – https://developers.facebook.com/docs/facebook-login/review
Twitter API Credentials
To create a twitter application you need to follow the given steps :
STEP 1 :
- First you need to login or register to your twitter account.
- Go to this link to start creating application https://apps.twitter.com/.
- Once you are done, click on Create an App.
**Note :
- The Create an App button will be accessible to you only when you have an approved twitter developer account.
- Twitter takes time to approve the developer account so make sure that you create it before 1 to 2 days you need your twitter application.
- You will be notified for approval via the email address you verified before submitting your application.

STEP 2 :
- Now fill out the form to Create a New Twitter Application.
- Once you are done with filling up the App details you will be able to click on Create Button.

STEP 3 :
- Before moving forward you need to agree Twitter’s Developer Agreement and Policy
- Once you are done with reading all the policies and use cases, click on Create button.

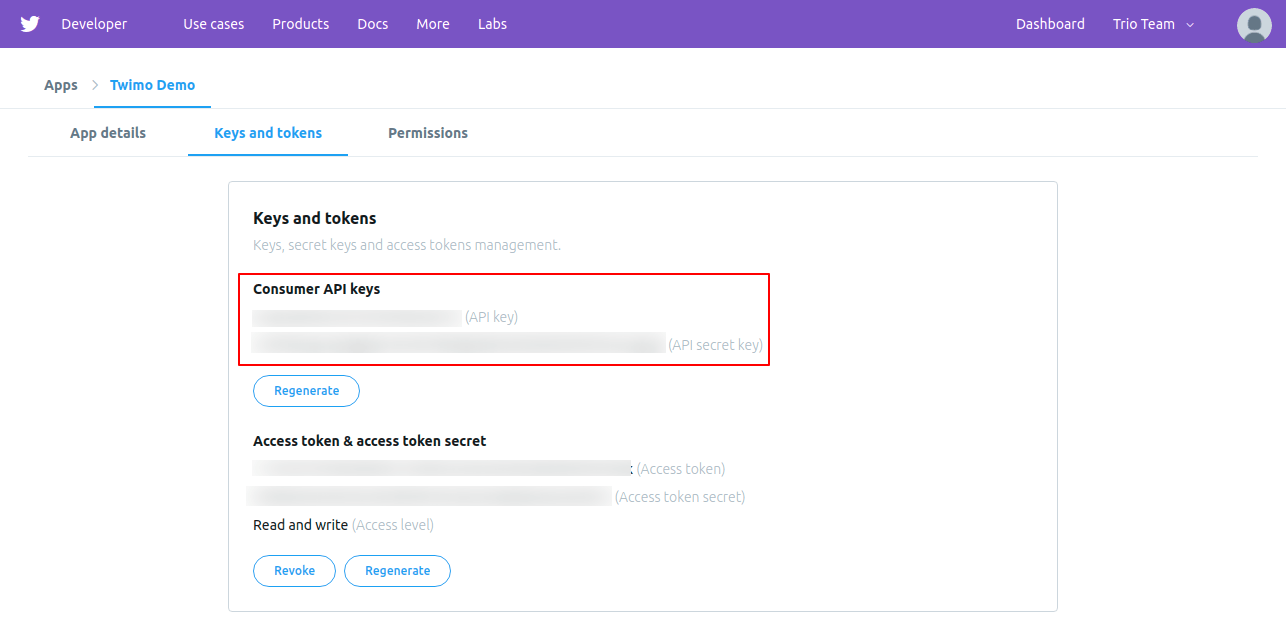
STEP 4 :
- Receive your Consumer API Key and API Secret Key under the section Keys And tokens.
- You have successfully created your Twitter application.
Note:
Twitter doesn’t send Email Id of the customer at the time of Login. It sends only Screen Name. So kindly update your Email Id and Password after sign up with Twitter.
Google API Credentials
To create a google application you need to follow given steps :
STEP 1 :
- First you have to log in to your Google account.
- Click on the link https://console.developers.google.com/project to create the Google application.
- Go to your API & Services > Library.

STEP 2 :
- Under the Library page multiple APIs and Services are listed under different sections.
- You have to click Google+API under the Social section.

STEP 3 :
- Click the Enable button to enable the Google+ API.
- Once you are done, you can create new projects.

STEP 4 :
- Click on My First Project to create a new project.

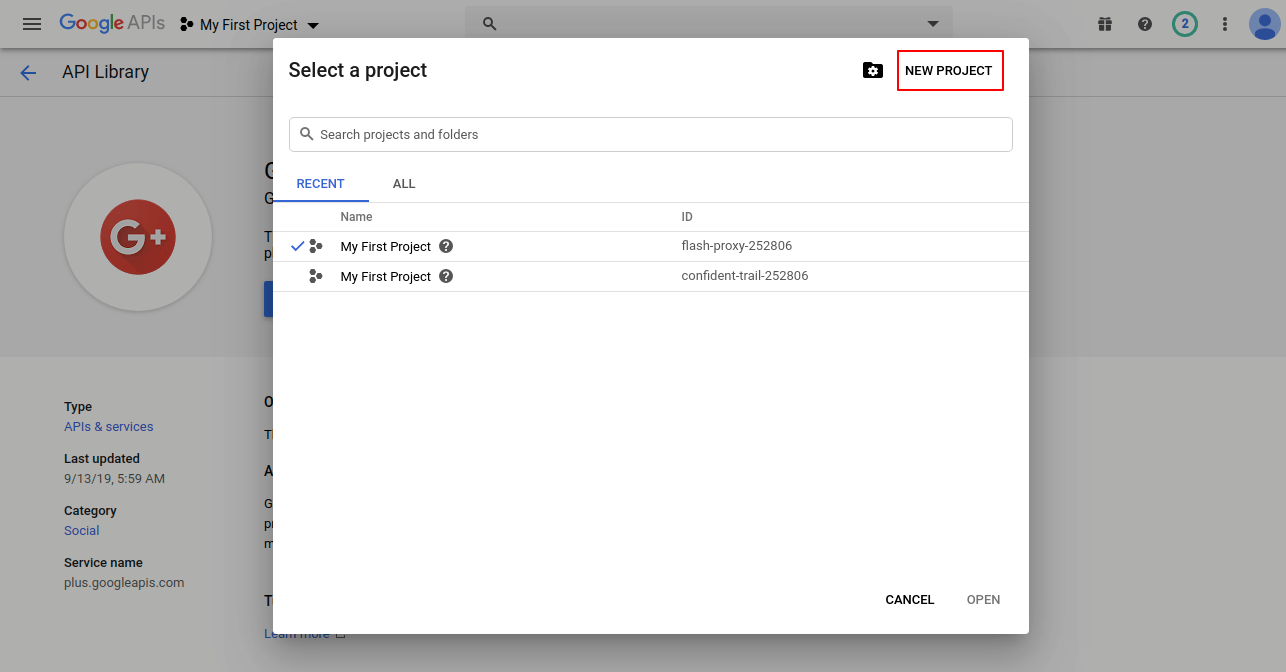
STEP 5 :
- A popup will be visible to you which includes RECENT and ALL projects created before with their IDs.
- You have to click on New Project link.
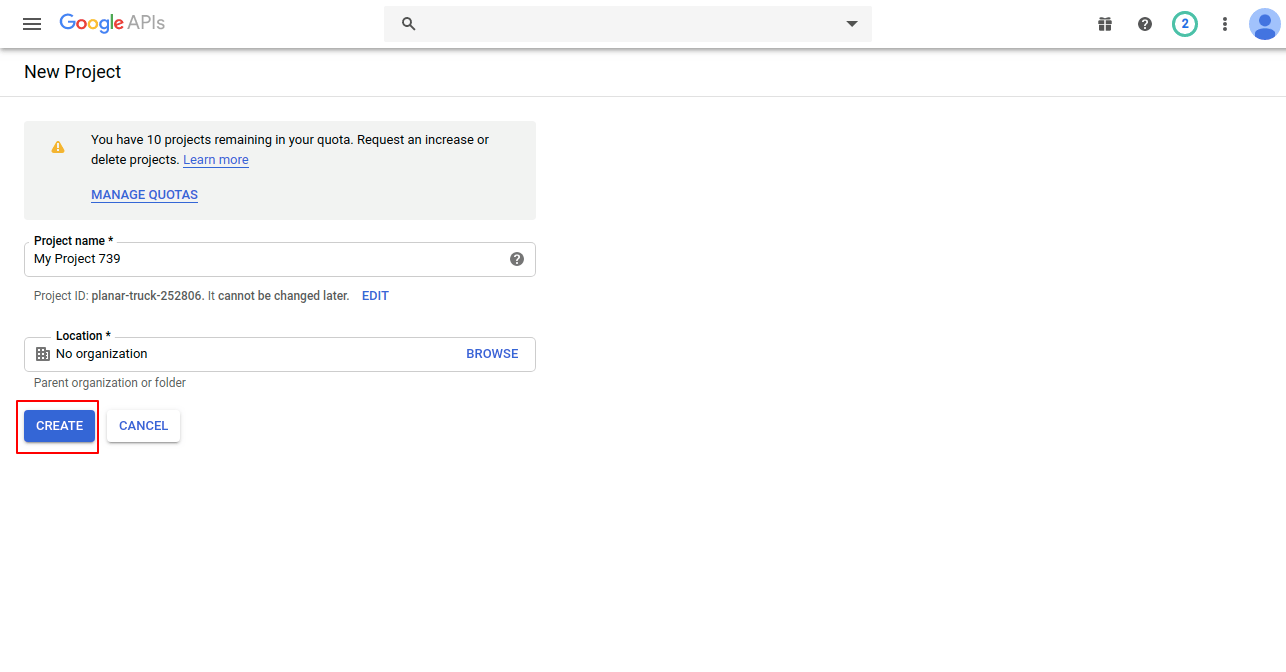
STEP 6 :
- Enter the desired Project Name. Please make sure that you don’t include Google or any other company name as your project name.
- You can create projects with exactly same name if needed, their IDs will be different.
- Browse your location. If it’s not able to find location then select No Organization, click on CREATE Button.
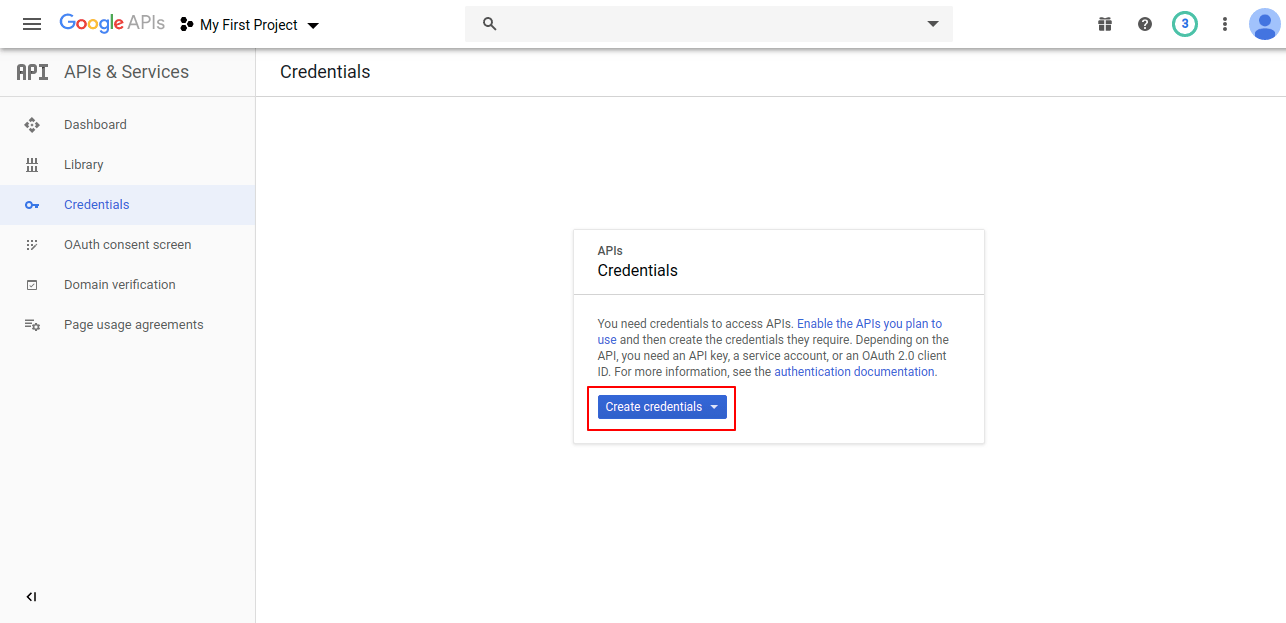
STEP 7 :
- Now go to API & Services > Credentials.

- You have to click on Create Credentials .
STEP 8 :
- Then select the OAuth client ID option.

STEP 9 :
- To create your OAuth Client ID you have to set the application name on the consent screen.
- Click on Configure Consent Screen.

STEP 10 :
- Enter the Application Name, that will be visible to the users.
- Click on Save Button.

STEP 11 :
- Select the Application type and enter the Authorized JavaScript origins and the Authorized redirect URLs.
- Click on Create button.
**Note:
Set the OAuth Redirect URL like this – www.example.com/socialsignup/google/connect/

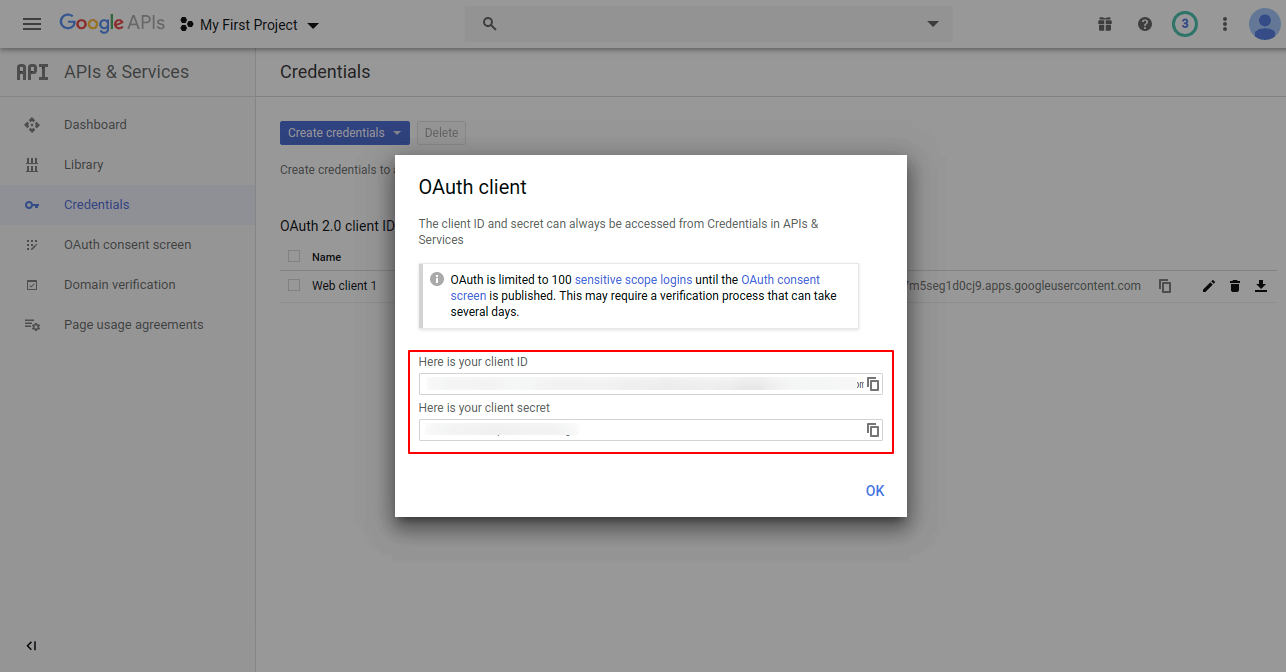
STEP 12 :
- Once you are done with all the process, your Client ID and Client Secret are generated successfully.
- Click on OK Button.
LinkedIn API Credentials
To create a LinkedIn application please follow these steps:
STEP 1 :
- First, go to the link https://www.linkedin.com/developers/
- Click on Create app, and then sign in to your LinkedIn account.

STEP 2 :
- Once you are done, you need to add App information which includes App name, Company, Business email and App logo.
- Select the products you want to add in your app under Products section.
- Click the checkbox under Legal Terms to agree all the API Terms of use.
- Click on Create app.

STEP 3 :
- Once previous steps are completed successfully, you can see your Application credentials under Auth category.
- Finally, your app’s Client ID and Client Secret is generated.

Module Configuration of Magento Social Connect
After the successful installation of the Magento Social Connect module admin will be able to view the Magento Social Connect configuration setting under System > Configuration > Social Signup.

Front-End
After configuration setting, the customers can find various social networks buttons at the login page and also sign up into their site using social networks like Facebook, Twitter, Google, LinkedIn. There is no need to fill various fields for sign up.

LinkedIn Login
After click on the LinkedIn login button below page will be open.

Google Login
After click on Google login button below page will appear.

Twitter Login
After clicking on the Twitter login button below page will appear..

Facebook Login
After clicking on the Facebook login button below page will appear.

That’s all for the Magento Social Connect module if you still have any issue feel free to add a ticket and let us know your views to make the module better https://webkul.uvdesk.com
Current Product Version - 1.0.1
Supported Framework Version - 1.6.x.x , 1.7.x.x , 1.8.x.x , 1.9.x.x

Be the first to comment.