Nowadays, Online Marketplace is the new trend and Magento Marketplace Multi Vendor Module is a perfect module which converts your Online Store into a complete online marketplace shop. Any buyer can become a seller and can sell their products on Marketplace. Now we are adding more and more functionality to make it better to provide great user experience. Now admin can create a Magento Marketplace Seller Central where users can separately register themselves as sellers. The user who wants to become a seller can register here. With the help of this feature every user now has a separate signup page to become a seller. Not only this, admin can change the layout of the seller signup page as per the requirement.
Note : This is a feature of default Magento Marketplace Multi Vendor Module.
Workflow – Admin Panel
Magento Marketplace Seller Central helps admin to separate seller registration page from buyer regstration page. Firstly admin has to disable the Seller registration block from the customer registration page.
Disabling Seller Registration Block from Customer Registration Page
Admin can perform this action through System > Configuration > Marketplace > Landing Page Settings Here admin modify Display Seller registration block on customer registration page setting as “No”.
When Display Seller Registration Block on Customer Registration Page is set as ‘No’, the customer will only be able to register them self as a buyer.

Layout settings
For enabling separate Seller Registration Page, admin has to choose “Layout 2” or “Layout 3” by System > Configuration > Marketplace > Landing Page Settings Here admin modify Marketplace Landing Page Layout as “Layout 2” or “Layout 3”.
Case 1 : When “Layout 2” is selected –

Marketplace Landing Page Head Title :
Here admin will enter the Head title of the Marketplace landing page and that name will appear on the front-end.
Display Seller registration block on customer registration page :
Here admin chooses whether a user can register themselves as a seller on customer registration page or not.
Marketplace Landing Page Layout :
Here admin can choose from various layouts that will be shown on the front-end.
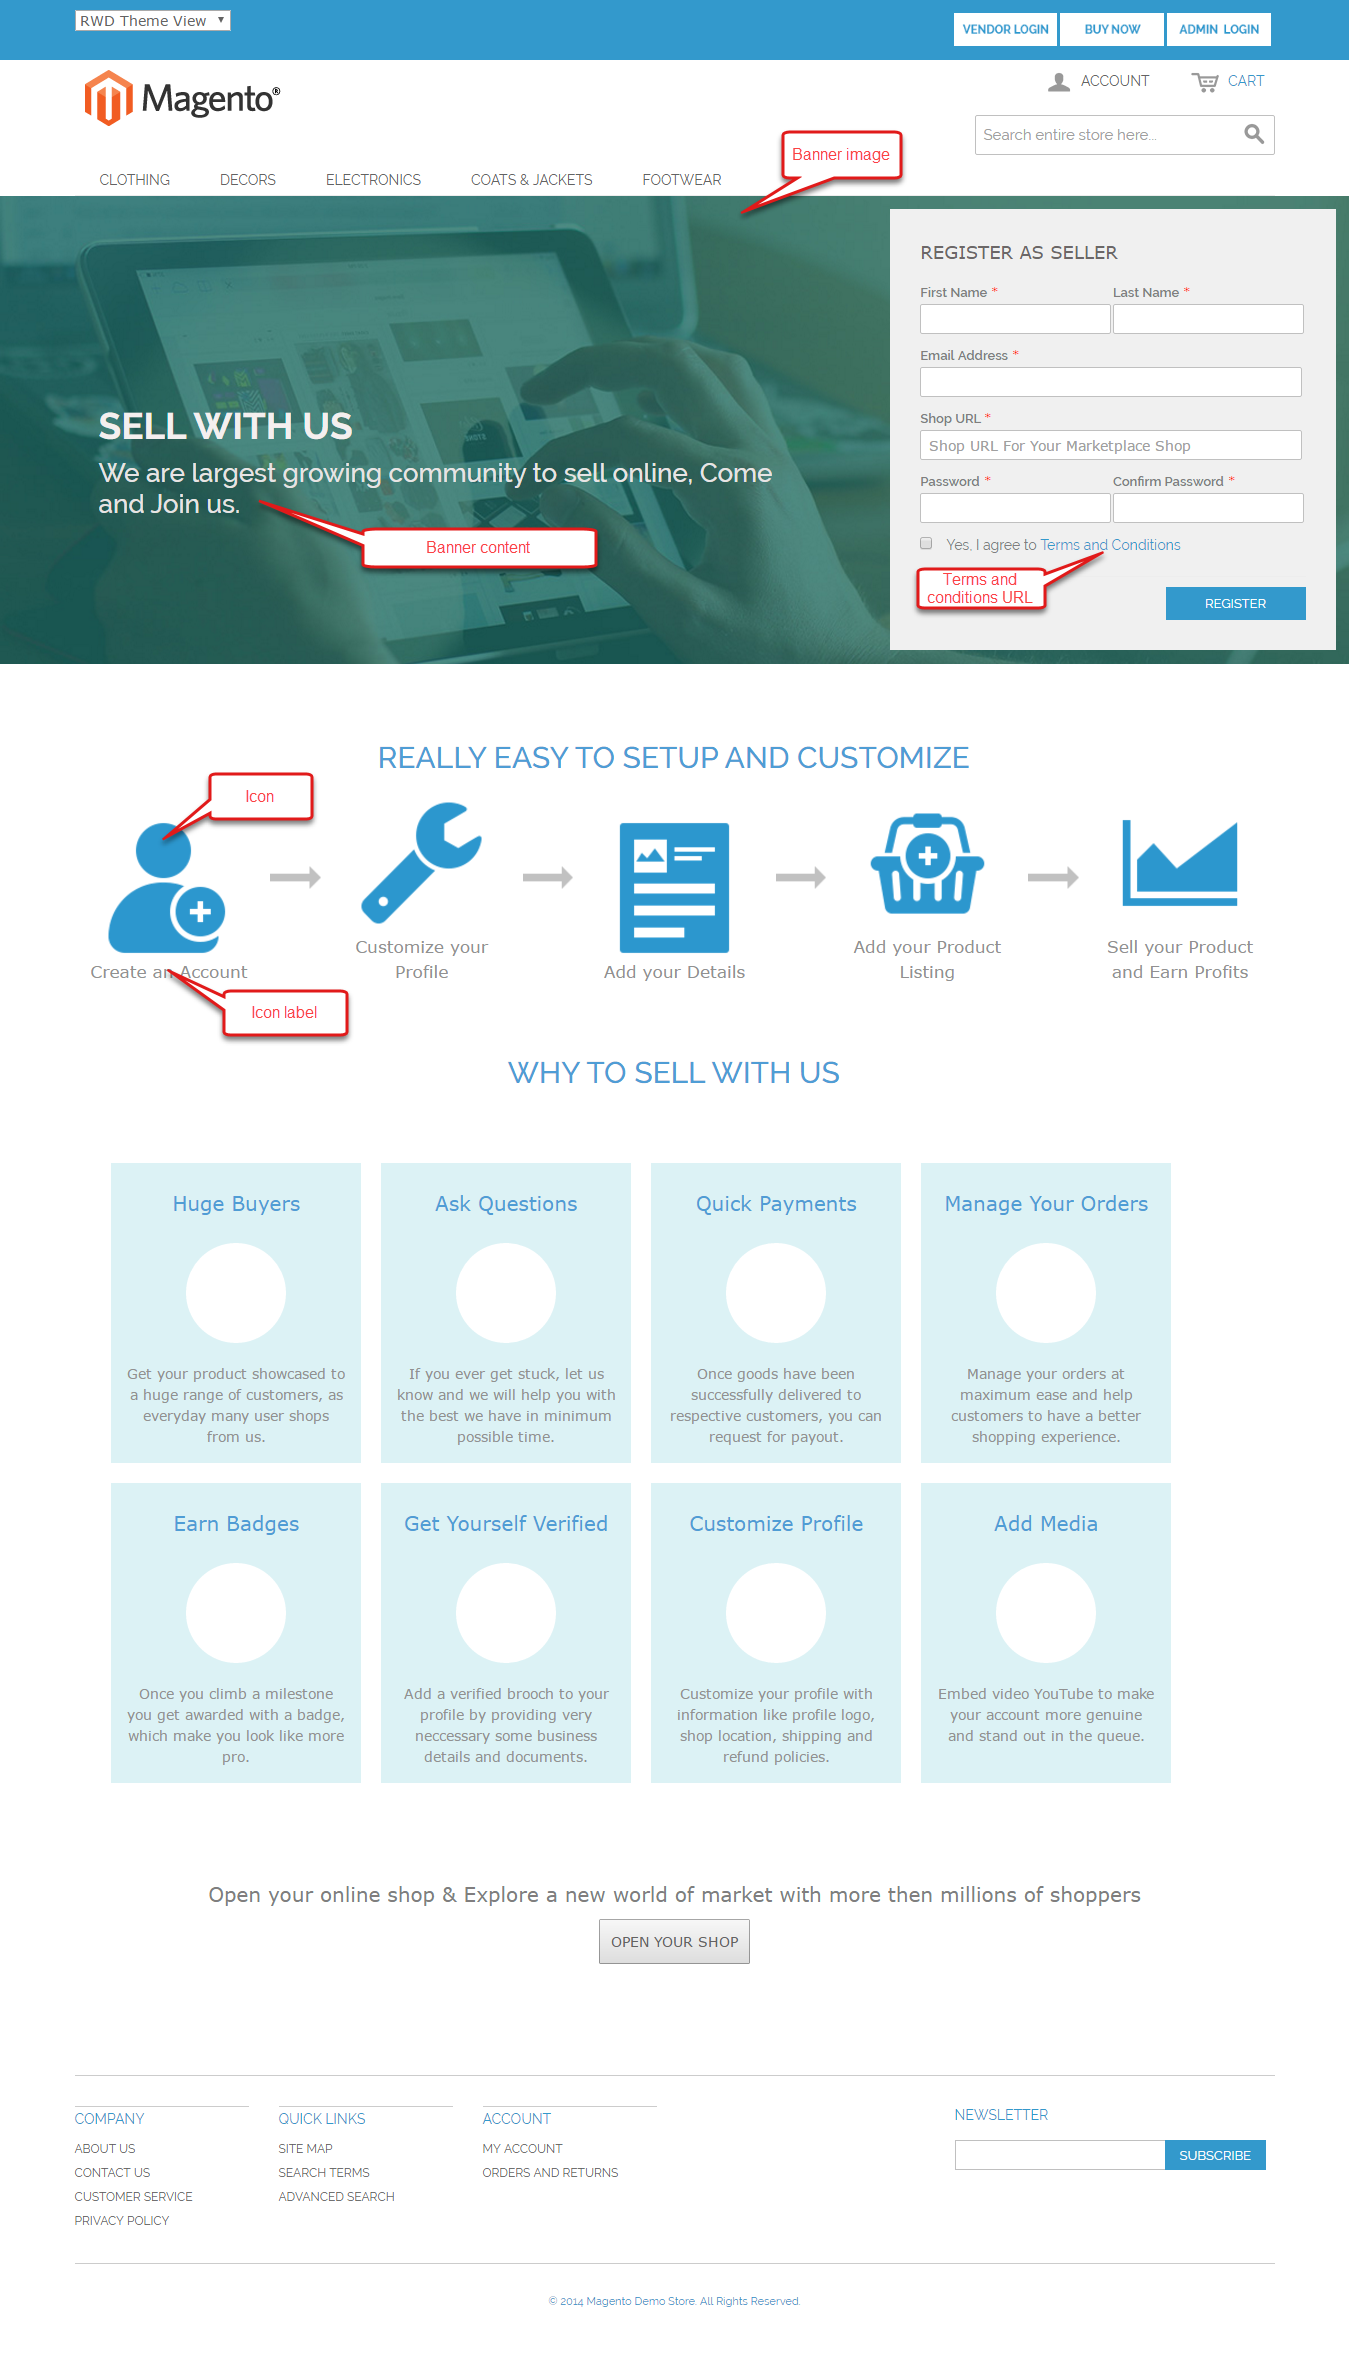
Display Banner :
Here admin chooses whether he wants to show an image as a banner or not.
Banner Image :
Here admin chooses an image to display as a banner on front-end. Admin can delete earlier uploaded images also.
Banner Content :
For the “Banner Content”, the admin will write the content which will be displayed over the banner image in the Marketplace.
Marketplace Landing Page Layout2 Button Label :
Here admin will enter the label for the landing page button label and it will get displayed on banners.
Terms and Conditions URL :
Here admin has to enter the Terms & Conditions Page link address.
Case 2 : When “Layout 3” is selected –

Marketplace Landing Page Head Title :
Here admin will enter the Head title of the Marketplace landing page and that name will appear on the front-end.
Display Seller registration block on customer registration page :
Here admin chooses whether a user can register themselves as a seller on customer registration page or not.
Marketplace Landing Page Layout :
Here admin can choose from various layouts that will be shown on the front-end.
Display Banner :
Here admin chooses whether he wants to show an image as a banner or not.
Banner Image :
Here admin chooses an image to display as a banner on front-end. Admin can delete earlier uploaded images also.
Banner Content :
For the “Banner Content”, the admin will write the content which will be displayed over the banner image in the Marketplace.
Marketplace Landing Page Layout3 Button Label :
Here admin will enter the label for the landing page button label and it will get displayed on banners.
Display Icons :
Here admin chooses whether he wants to display icons or not.
Feature:1 Icon :
Here admin upload icon to be displayed on landing page.
Feature:1 Icon Label :
Here admin will enter the label for the feature icon and it will get displayed on landing page.
Feature:2 Icon :
Here admin upload icon to be displayed on landing page.
Feature:2 Icon Label :
Here admin will enter the label for the feature icon and it will get displayed on landing page.
Feature:3 Icon :
Here admin upload icon to be displayed on landing page.
Feature:3 Icon Label :
Here admin will enter the label for the feature icon and it will get displayed on landing page.
Feature:4 Icon :
Here admin upload icon to be displayed on landing page.
Feature:4 Icon Label :
Here admin will enter the label for the feature icon and it will get displayed on landing page.
Feature:5 Icon :
Here admin upload icon to be displayed on landing page.
Feature:5 Icon Label :
Here admin will enter the label for the feature icon and it will get displayed on landing page.
Terms and Conditions URL :
Here admin has to enter the Terms & Conditions Page link address.
Front-End
Customer registration page
When Display Seller Registration Block on Customer Registration Page is set as ‘No‘, the user will only be able to register them-self as a buyer.

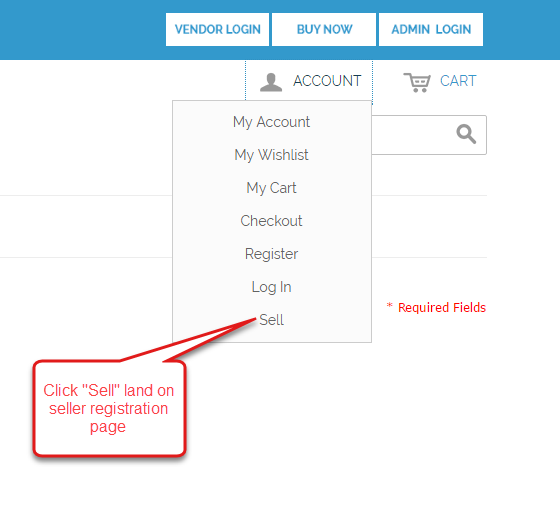
Seller registration page
The customer can go to the Seller Registration page (Seller Central) by clicking the ‘Sell‘ option.
Case 1 : When “Layout 2” is selected –

Case 2 : When “Layout 3” is selected –
That’s all for Magento Marketplace Seller Central if you still have any issue feel free to add a ticket and let us know your views to make the module better http://webkul.uvdesk.com/.

Be the first to comment.