By using this module, Admin can provide Canada Post shipping method for shipping products by which you get shipping rates from Canada Post’s API and but now it is integrated with the Marketplace.
Magento Marketplace Canada Post Shipping module is an add-on of MarketPlace Module. To use this module you must have installed marketplace module first Marketplace Module
**Notes:
- The estimated delivery time shows for Canada, US, and some other International addresses.
- The shipping rates are based according to the delivery details and product weight.
- If the weight of the product is zero, this shipping method will not work.
- An active Business Purpose Canada Post account is required for getting the API credentials.
- Rates are calculated using 3 decimals. Examples: for 450 g, enter .45; for 175 g, enter .175; for 10.5 kg, enter 10.5
- Maximum weight for a parcel is 30 kg (66 lb.)
Features Of Magento Marketplace Canada Post Shipping
- Ability to enable/disable Canada Post Shipping method.
- The seller can print Canada Post Shipping label.
- Allowed multiple selections of Canada Post shipping method that will be shown on the checkout page.
- Set Rate Type Canada Post Shipping.
- Allowed multiple selections of Canada Post shipping method from admin.
- Set Shippers Details like name, phone number etc.
- Set Ship to applicable countries.
- Create a tracking Id for each order by the seller when an order is in processing state.
- The seller can add Invoice & Packing slip address, VAT, TAX information.
- Provide print for invoice of an order at seller”s account.
- Ability to download Invoice and Shipping Slip easily.
- Provide accurate Canada Post shipping rates to customers for shipping.
MARKETPLACE MOBILE APP
Mobikul Marketplace: Mobikul Marketplace converts your Magento marketplace store into a mobile app. Your customers can easily purchase products on the go. They don’t need to have a laptop or desktop, they can easily explore your store through their smartphones. It will not only benefit the store owner and customer it will benefit the sellers too. Sellers can see their dashboard, order history and can contact the admin through the mobile app. So what are you waiting for, you must now have a mobikul marketplace to be a step ahead.
Highlighted Features:
- Seller Profile.
- Seller Dashboard.
- Seller Order History.
- Market Place Landing Page Where Popular sellers and Description about the marketplace is mentioned.
Note: The MOBIKUL Marketplace Mobile app is a different module. You have to install it separately.
Installation Of Magento Marketplace Canada Post Shipping
Magento Marketplace Canada Post Shipping module installation is super easy you need to move app folder into Magento root directory that’s it as per the screenshot.

After moving the folder flush the cache from Magento admin panel. Under System > Cache Management.

Configuration Of Magento Marketplace Canada Post Shipping
After the successful installation of the Magento Marketplace Canada Post Shipping module, you will be able to see the configuration panel under System > configuration as per the below screen.
For proper working of Magento Marketplace Canada Post Shipping, you just need to set Canada shipping origin address from the path System > Configuration > Sales > Shipping Settings > Origin. Here admin can enter origin address for Canada shipping.

Now set the Magento Marketplace Canada Post Shipping settings under System > Configuration > Shipping Methods > Webkul shipping – Canada Post


The admin can select shipping services from Magento Marketplace Canada Post Shipping module for creating Shopping cart Rules from the Admin back-end.

How To Get Canada Post Credentials
Before doing the module configuration, the admin needs to have the Canada Post credentials. The admin needs API Key, API Password, Customer Number, and Contract/Agreement Number (if any).
Please Note: – You need Business Purpose Canada Post account to get these credentials.
Create Account:
First, click here to visit the Canada Post homepage. The following page will appear, click Sign In. 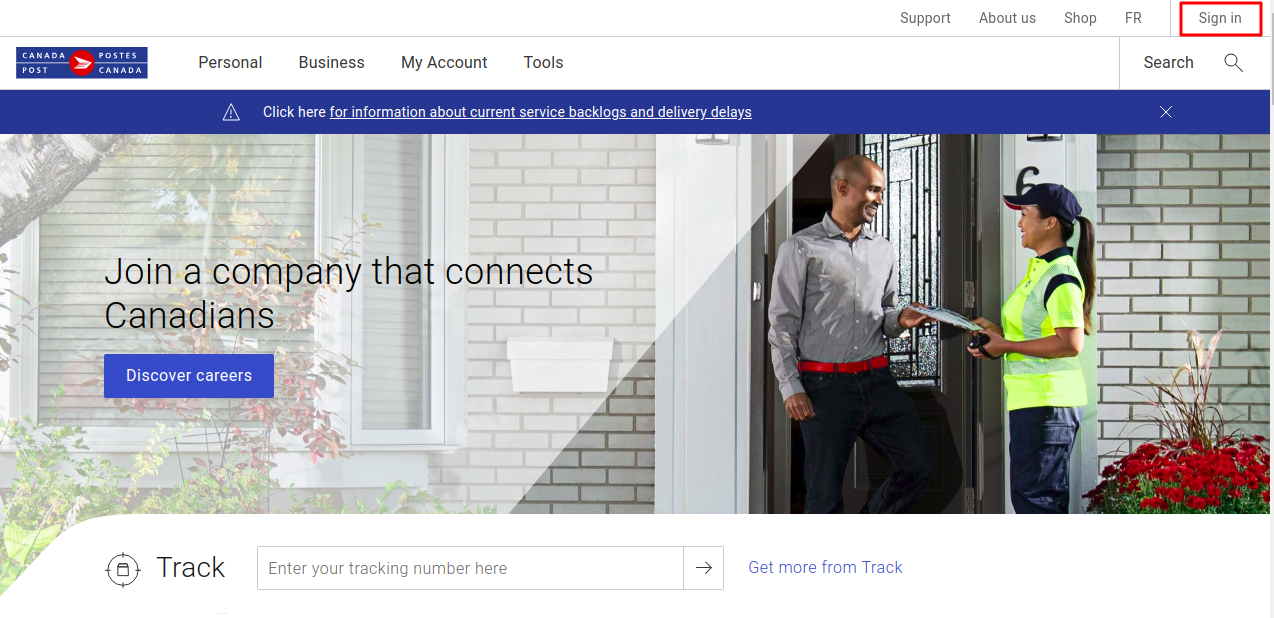
then click Register now to create a new account in the Pop-Up as per below image – 
After clicking the Register now, the following page will appear. Fill in the information as required. Please make sure to select Yes for Is this account for business purposes?

Now, Choose Profile Type as Small Business, and click Select and continue button.

In this step, enter your contact information- business address, phone, first & last name, job title etc. After filling in all the necessary information click Continue.

After this information, you will get ” tell us about your business ” page. You can fill it immediately or later.
After providing the contact information, now you will get your Canada Post Customer Number. Please save this as it will be required for this module configuration.

Now, you will arrive at the dashboard page after clicking continue in the previous step. Navigate to Business >E-commerce >Integrate with our APIs.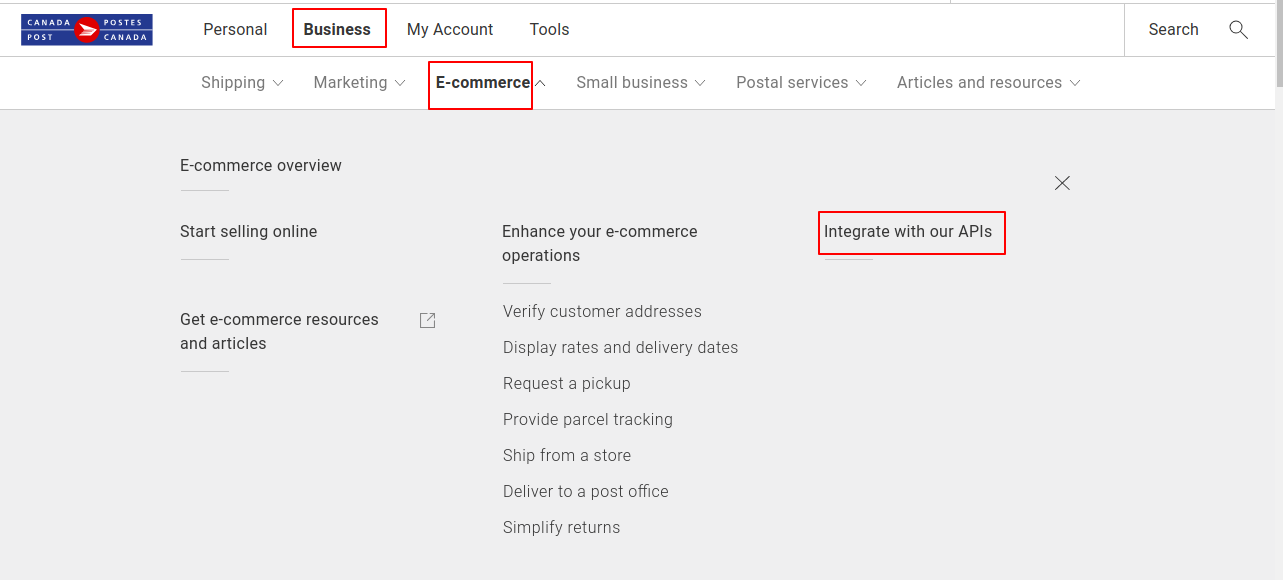
Clicking on Integrate with our APIs, then below page will appear – 
The following page will appear after clicking the Go to Developer Program. Click Join Now for creating API Key and Password.
Here, again click on Join Now –
 A pop-up window will appear about the Canada Post Developer Program Agreement. After reading the document, please click Agree and Continue.
Finally, you can now have your API Key and API Password. There will be two types of credentials, one for the Development (Test/ Sandbox Mode) and other for Production (Live).
How to get the Agreement/ Contract Number –
If customers wishing to apply for a Commercial Agreement with Canada Post.
For this customer need to meet certain conditions (ship at least 1,250 domestic parcels a year or 100 international parcels )must complete the appropriate Agreement Activation Form.
To apply, Please call at 1-866-757-5480 or contact their Sales Representative.
Once all completed documentation is approved, Canada Post will provide the customer with a copy of all the required documentation, along with a Customer Number, an Agreement Number and any other identification number required. More details please visit here
How To Use Magento Marketplace Canada Post Shipping
If Magento Marketplace Canada Post Shipping module is enabled then the seller can set the Invoice & Shipping address, VAT, TAX information under Marketplace > Manage Shipping.

When Buyer will place an order of seller’s product, the buyer can see Magento Marketplace Canada Post Shipping under shipping methods like this screenshot.
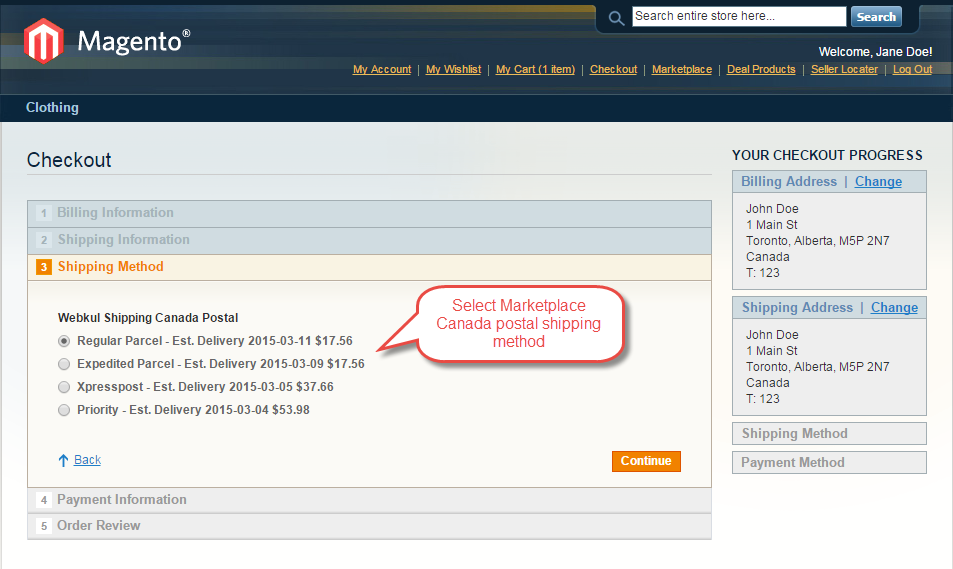
Buyer can see selected shipping method under Order Review.

Note:
In Magento Marketplace Canada Post Shipping module, the shipping rate will be calculated according to seller’s product weight and seller origin address.
Marketplace Canada Post Shipping Management
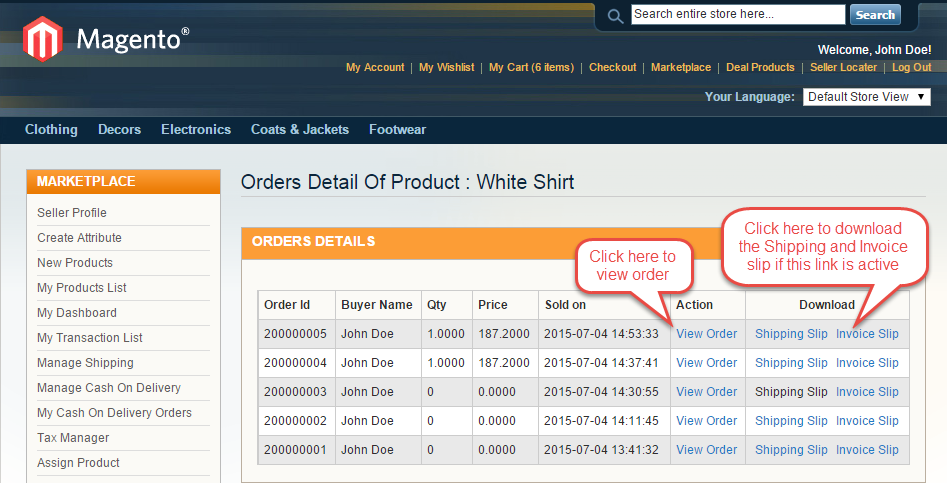
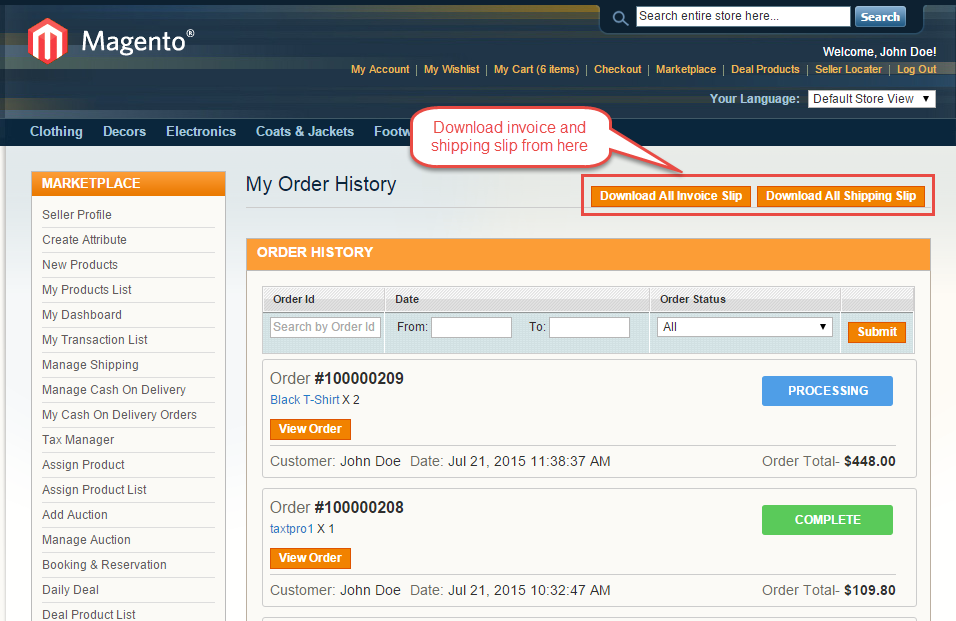
When the order is placed, the seller can see the order under “My Order History” as per the image below.

The Seller can see the quantity sold of the product under “My Product List”. The seller can see the column of “Quantity Sold” and after clicking on the numbers, it will display the order of sold products as per the screenshot.

If admin sets the “Allow Seller to Manage Order” option “yes” then the seller can manage the orders from front-end. Now the seller can generate invoices for their ordered products, generate the tracking number and shipment for the orders of their products. Even the seller can notify the customers by sending them emails, cancel/refund the order and even print the order.

Once the seller generates the shipment and invoice, the seller will able to see complete order details.

Shipping Information

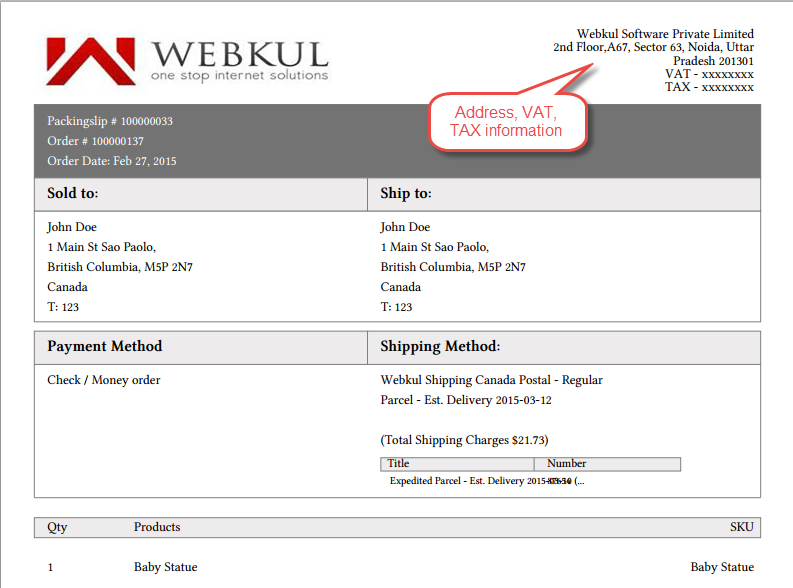
Canada Post label

The seller can download the Shipping and Invoice slip very easily. In the shipping and invoice slips, you can also see the company logo and address, vat, tax information which is entered by the seller under Manage Shipping tab.
Invoice slip
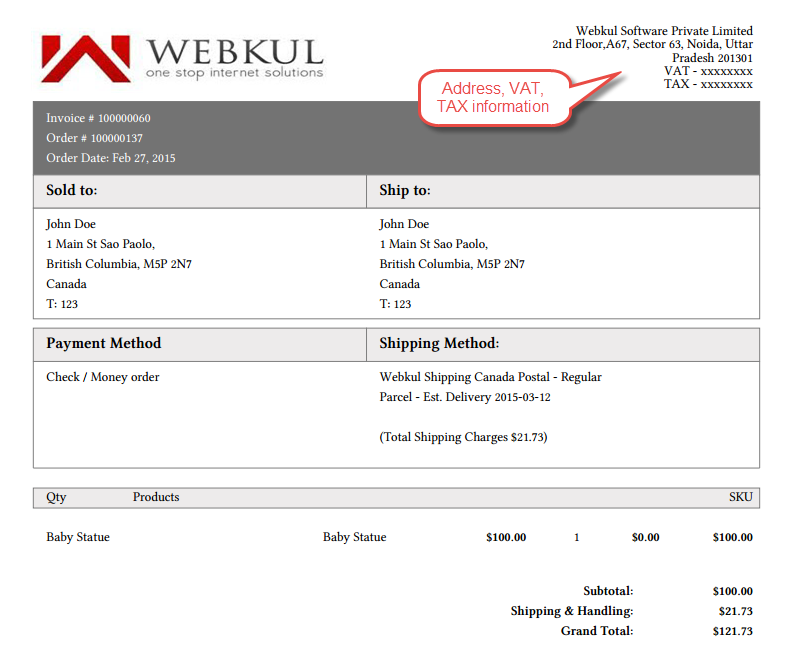
Print PDF for invoice

Seller can also download the PDF of shipping and invoice slip under Marketplace > My Order History.
After clicking on Download option a pop-up window will be open up. Here you will enter the date up to which you want to download shipping slip.

That’s all for the base Magento Marketplace Canada Post Shipping still have any issue feel free to add a ticket and let us know your views to make the module better webkul.uvdesk.com
Current Product Version - 0.1.3
Supported Framework Version - 1.6.x.x, 1.7.x.x, 1.8.x.x, 1.9.x.x

2. If the marketplace owner assumes the cost, does he charge it back in the sales transaction plus the marketplace commission?
3. What kind of account does a owner require with Canada post for this to work?
4. Has this been tested and does anyone have this module working?