Marketplace Affiliate System For Magento is a performance driven marketing module where the affiliate user will be benefited by getting rewards for each unique click and also if the visitor makes a purchase too. Using this module you can send the request to become an Affiliate Partner of any seller. The seller can manage their affiliate users from their end.
Since it’s an add-on for the Magento Marketplace Module, so marketplace module must be installed before installing the Marketplace Affiliate System For Magento.
Features
- Enable/disable affiliate registration by admin.
- Manage general Registration settings like Enable/disable affiliate registration, Automatically approve affiliates by admin.
- Allow seller to approve/unapprove/delete Affiliates.
- Choose the commission rate type to be Fixed Or Percentage.
- Affiliates/admin can choose various payment methods.
- Allow seller to set Per unique click rate, Commission rate in Fixed or Percentage and Payout Settings.
- Allow seller to send mail to the affiliates.
- Allow seller to create text banners.
- Allow seller to Unapprove/Delete/Edit their banners.
- Allow seller to see affiliate summary with payment method.
- Allow seller to see payment history.
- Allow admin to approve/delete/edit affiliate users.
- Allow admin to send mail to the affiliate users.
- Allow admin to see Traffic, All Clicks, Unique Click.
- Allow admin to see monthly or yearly sales/traffic.
- Allow admin to see affiliate payments.
Installation
Installation of Marketplace Affiliate System For Magento module is very simple. You just need to move app, js, skin folder into Magento root. Please follow the screenshots for the same.

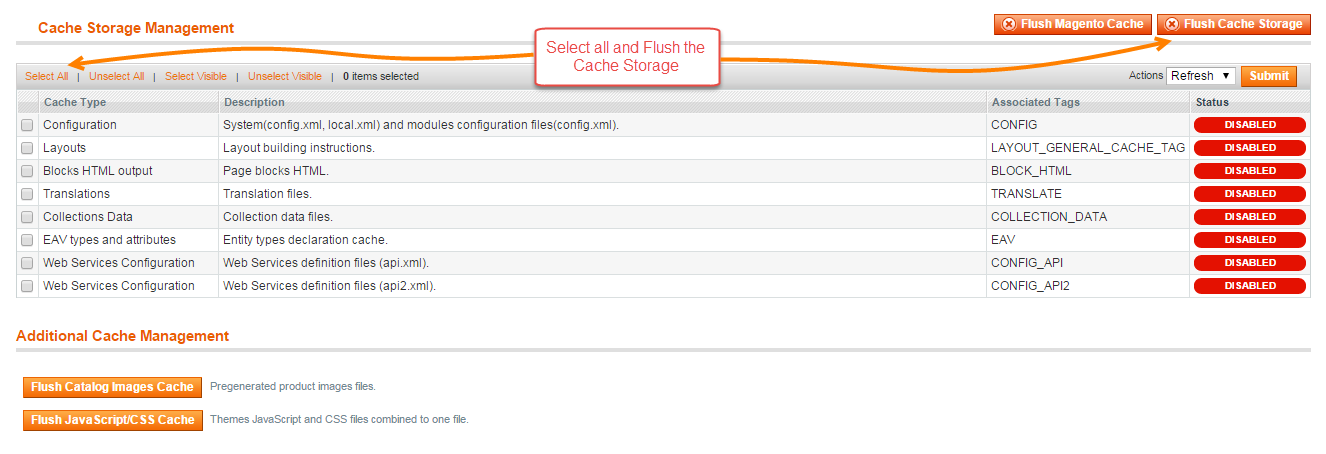
After moving the folder flush the cache from Magento admin panel. Under System > Cache Management.
Language Translation
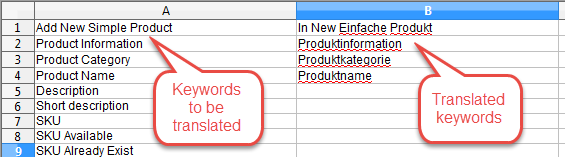
After the module installation, the user will unzip the folder and click on src folder. Inside that folder, you will find app folder. Click on the app folder and you will get locale and inside that you will find the language folder in English language as en_US. Now follow the same path and open the locale folder where you have installed the Magento Marketplace and go inside the locale folder and create a new folder and name with the language for which you want to convert your module content. Now edit the Webkul_Affiliate.csv and then upload to your server inside the locale folder.

Before uploading the CSV file, open and edit it with the translated keywords. Please check the below image for the better understanding.
Configuration
After the successful installation of the Marketplace Affiliate System For Magento module you will be able to see the configuration panel under System > Configuration > Webkul > Manage Affiliate.
Manage Payment Methods & To Set general commission rate for affiliate user.

To enable Marketplace Affliate Registration status and Affiliate Program Terms

Front End
At the Frontend there is an affiliate registration link in footer block like this screenshot.

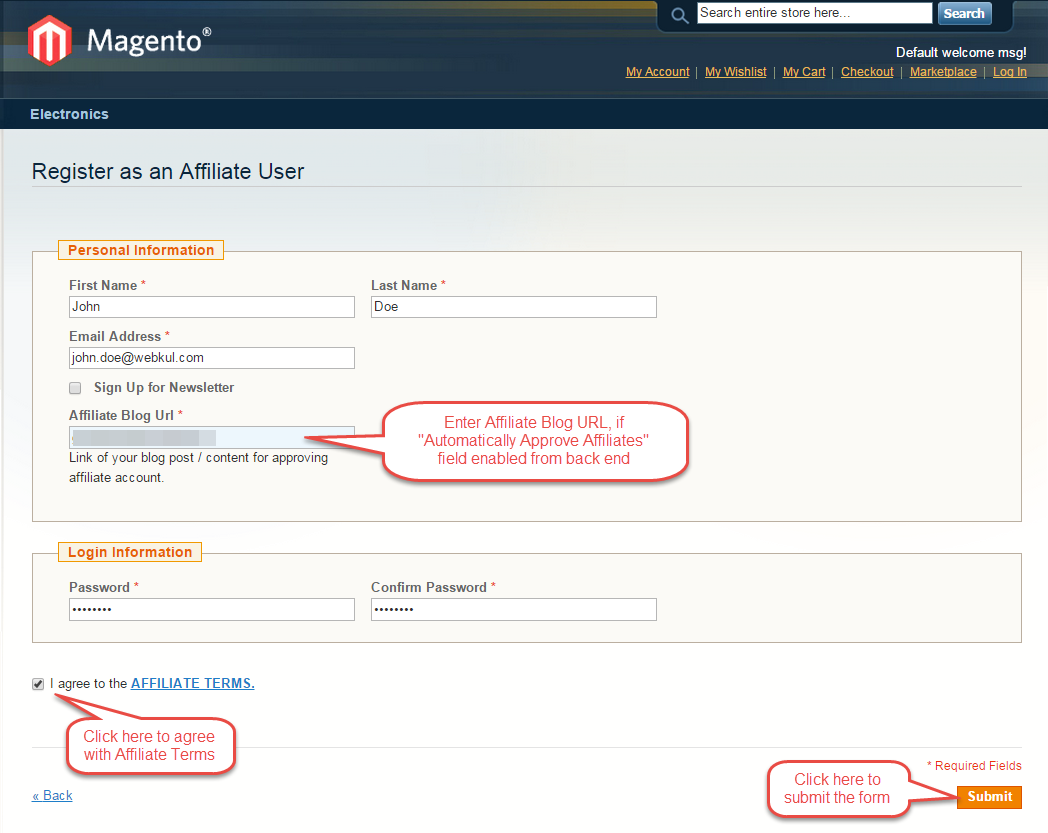
Once you click on this registration link, below form will open with Affiliate user detail.
If the user has been approved as an Affiliate User then Affiliate Panel block will display in an account section of a user as per the images. Let’s discuss each field of this panel.

All details of any affiliate user will display on Summary. Like Seller name, Click, unique click, sale, commission etc.

Using commission rate field, affiliate can see commission rate of each seller.

Under Banners & Ads, affiliate user can see the seller’s Banner and ads. An affiliate user can apply this banner by copying the HTML code and paste it on the website where he/she wants to display. When any user clicks on this banner or purchase these products then it’s affiliate user will be rewarded for its unique click. When any user buys this affiliate product then affiliate user will get the commission only when the order is completed.

Text Ads
After clicking on Text Ads link, affiliate user can see the Text ads.

Affilaite Users can send emails to the users, under Affiliate Panel > E-mail Campaign. They can send email to the multiple email ids.

Affilaite Partners or users can see the traffic list under Affiliate Panel > Traffic.

Using Sales field, affiliate user can check all sales details.

An affiliate user can check their transaction details under this field.
![]()
An affiliate user can see statistics for traffic on his account like this screenshot.

Affiliate user can send their request to the seller under Affiliate Panel > Request To Seller.

Under Payment Methods Affiliate user can set their payment methods using Check Money/Order, Bank Transfer, Paypal Standard Payment.

After creating an affiliate account, affiliate user needs to add blog link (where wanna post ads and banners) for admin to enable affiliate account so that affiliate user can post ads/banners to his website as shown in given screenshot.

Seller Management
The seller can see a new field “Manage Affiliate” under Marketplace panel. From here seller can manage affiliates users.

The seller can approve/unapprove/delete the Affiliate user under this field.

The seller can configure the Affiliate System under Marketplace > Manage Affiliate > Affiliate Configuration. Using this field seller can set Per click, Per sale, Payout Settings. The seller can set the Commission rate as Fixed or Percentage both.

The seller can send the email to the affiliate user using this field.

The seller can create text banners under Marketplace > Manage Affiliates > Create Text Banners. Here seller can create new text banner and also edit/delete/unapprove the text banners.

The seller can see the affiliate details under this field. Here seller can see the Unique click, Sale, Commission, Paid, Balance, Payment method.

After clicking on payment method below pop up will open.

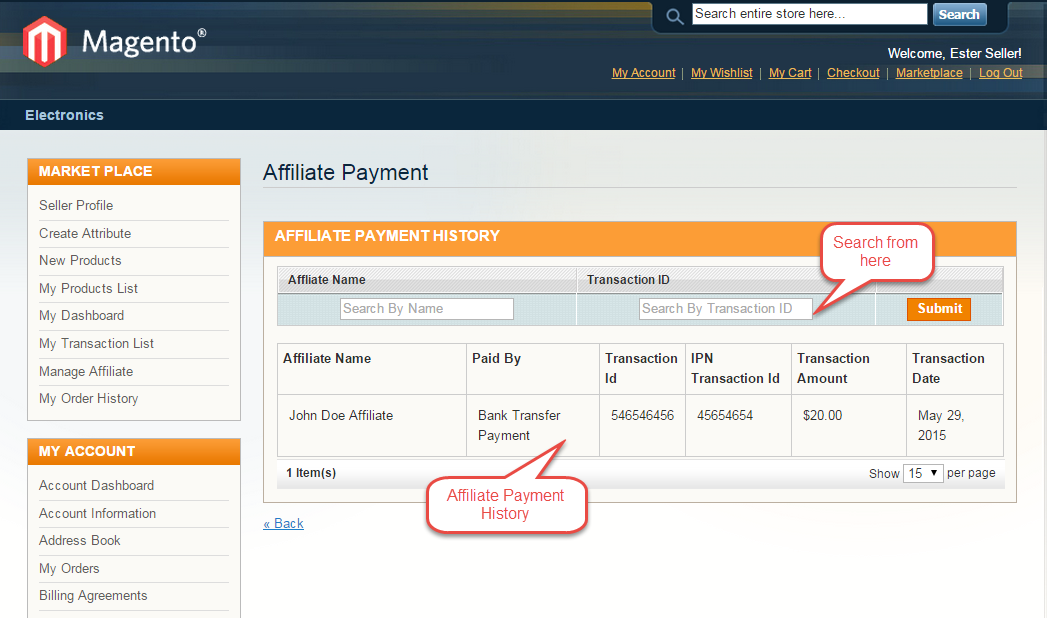
The seller can find Affiliate Payment History under Marketplace > Manage Affiliate > Affiliate Payment.
Admin Management
After the successful installation of this module, a new menu “Affiliate” added in the Marketplace Management under the admin panel. Refer to the screenshot for the same.

Admin can manage the affiliate users under Marketplace Management > Affiliate > Manage Affiliate > Manage Affiliate Users. Here Admin can edit/delete/remove the affiliate users.

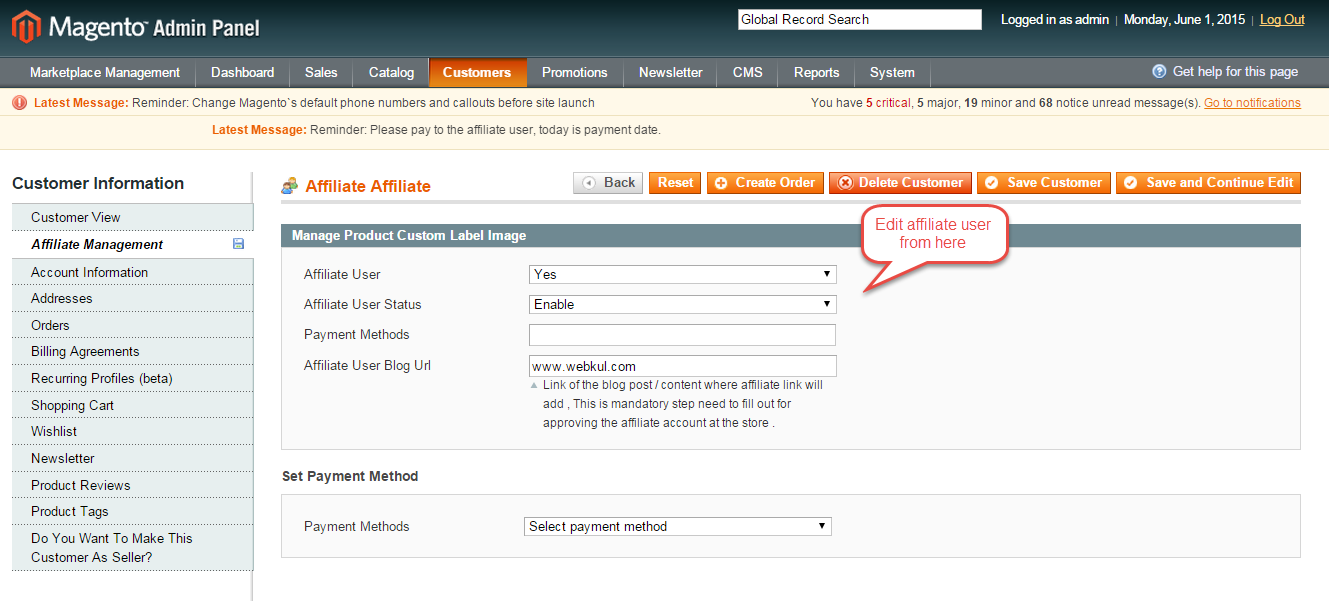
Once admin clicks on Edit option below page will open. From here admin can edit the Affiliate user.
Admin can send mail to the affiliate users, Under Marketplace Management > Affiliate > Manage Affiliate > E-mail Affiliates.

The admin can see the traffic grid from admin panel under Marketplace Management > Affiliate > Statistics > Traffic.

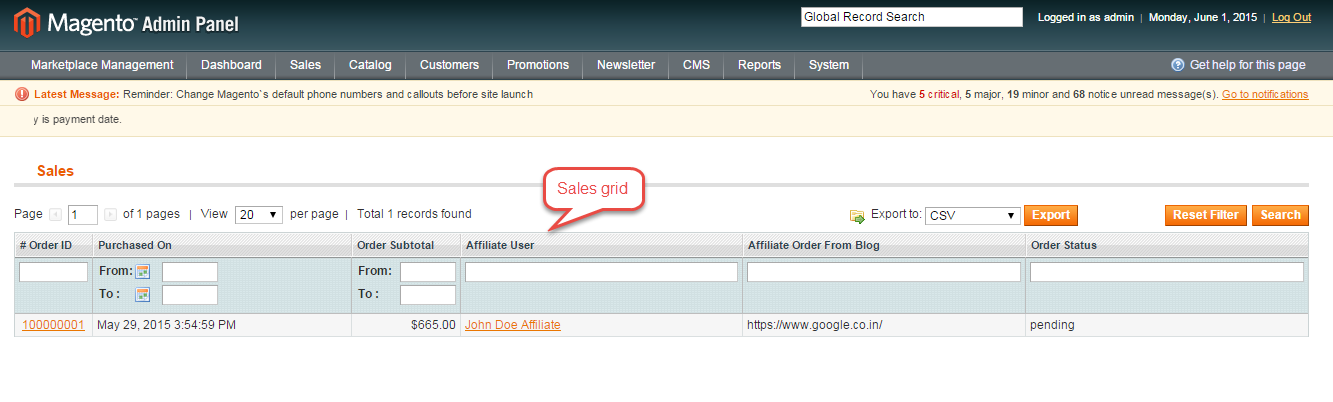
The admin can see the sales grid from admin panel under Marketplace Management > Affiliate > Statistics > Sales.
Admin can find the Affiliate payment under Marketplace Management > Affiliate > Statistics > Payments.

Admin can see statistics for sales/traffic monthly/yearly under Marketplace Management > Affiliate > Statistics > Statistic Graph.

That’s all for the Marketplace Affiliate System For Magento module still have any issue feel free to raise a ticket and let us know your views to make the module better atwebkul.uvdesk.com
Current Product Version - 0.2.0
Supported Framework Version - 1.6.x.x, 1.7.x.x, 1.8.x.x, 1.9.x.x

2 comments
Thanks for showing interest!
Will this work with Magento 2.3.3
This, extension is for Magento version 1, however, you can check our – Magento 2 Marketplace Affiliate System.
For further details, you can write to us on [email protected].
Thanks and Regards