Aramex is an international mail delivery and logistics services company from Middle-East region. It offers cross-border shipping services to its customers. This module allows the admin to set up Aramex Shipping for its customers. It enables a customer to select Aramex as the shipping method for the product delivery. The customers can also use Aramex COD (Cash on Delivery) as the payment method for their orders.
Features
- The admin can set the Aramex Shipping status as enabled or disabled
- Set a title for Aramex Shipping Method for the customers
- Testing mode is available for checking and diagnosing any errors
- Select allowed domestic & international Aramex shipping methods
- Aramex COD (Cash on Delivery) payment method available
- The admin can add cash on delivery service cost for the customers
- The module calculates shipping rates using Aramex API
- The admin and the customer can use tracking number to trace the shipment
- Generate and print shipping labels for the package
- Set custom dimensions for the shipment package – height, length, width
- Display custom error message, if Aramex shipping method not available
- The source code is open for customization
- Supports many language translations
Installation
Extract the downloaded zip file and copy app and js folders to the root directory of the magento.

After copying the folders, you need to flush the cache storage from magento back-end. Navigate through System -> Cache management and click Select All. Then click Flush Cache Storage button as shown below:

Language Translation
After the module installation, you need to unzip the folder and click on src folder. Inside that folder, you will find app folder. Click on the app folder. And you will get locale and inside that, you will find the language folder in the English language as en_US.
Now follow the same path and open the locale folder where you have installed the Magento. And go inside the locale folder and create a new folder. Set folder name with the language for which you want to translate your module content.
Now edit the language CSV file and then upload it to your server inside the locale folder.

Before uploading the CSV file, open and edit it with the translated keywords.
Module Configuration
Once you have installed the Aramex Shipping module. The admin needs to go to the backend. Navigate through System->Sales->Shipping Methods->Webkul Aramex Shipping. From here you will find the following options:
Enabled – Select Yes to use this module, else select No to disable.
Testing Mode – Select Yes to use testing mode for checking any errors.
Title – Set the shipping method tooltip title.
Method Name – Set the shipping method name for the customers
Aramex Credentials – Enter your Aramex shipping account details as follows:
- Password
- Pin Number
- Account Number
- Account Entity
- Country Code
Weight Unit – Select the weight unit as – kilograms or pounds.
Allowed Domestic Methods – Select the Aramex shipping services for domestic regions.
Allowed International Methods – Select the Aramex shipping services for internal regions.
Enabled COD – Select Yes to use Cash on Delivery service for customers, else select No.
COD Value – Set the cost of using the Cash on Delivery service.
Display Error – Select Yes, to show an error message if Aramex shipping method is not available. Else select No.
Custom Error – Enter the content for the error message to display.

Customer Front-End View
So after adding the product, the customer will do the checkout process. The customer needs to select the shipping method. The customers will see Webkul Aramex Shipping as one of the shipping methods. All the available Aramex shipping services with the estimated prices are visible. The customer needs to select any one of the shipping services.
Webkul Aramex Shipping

Aramex COD
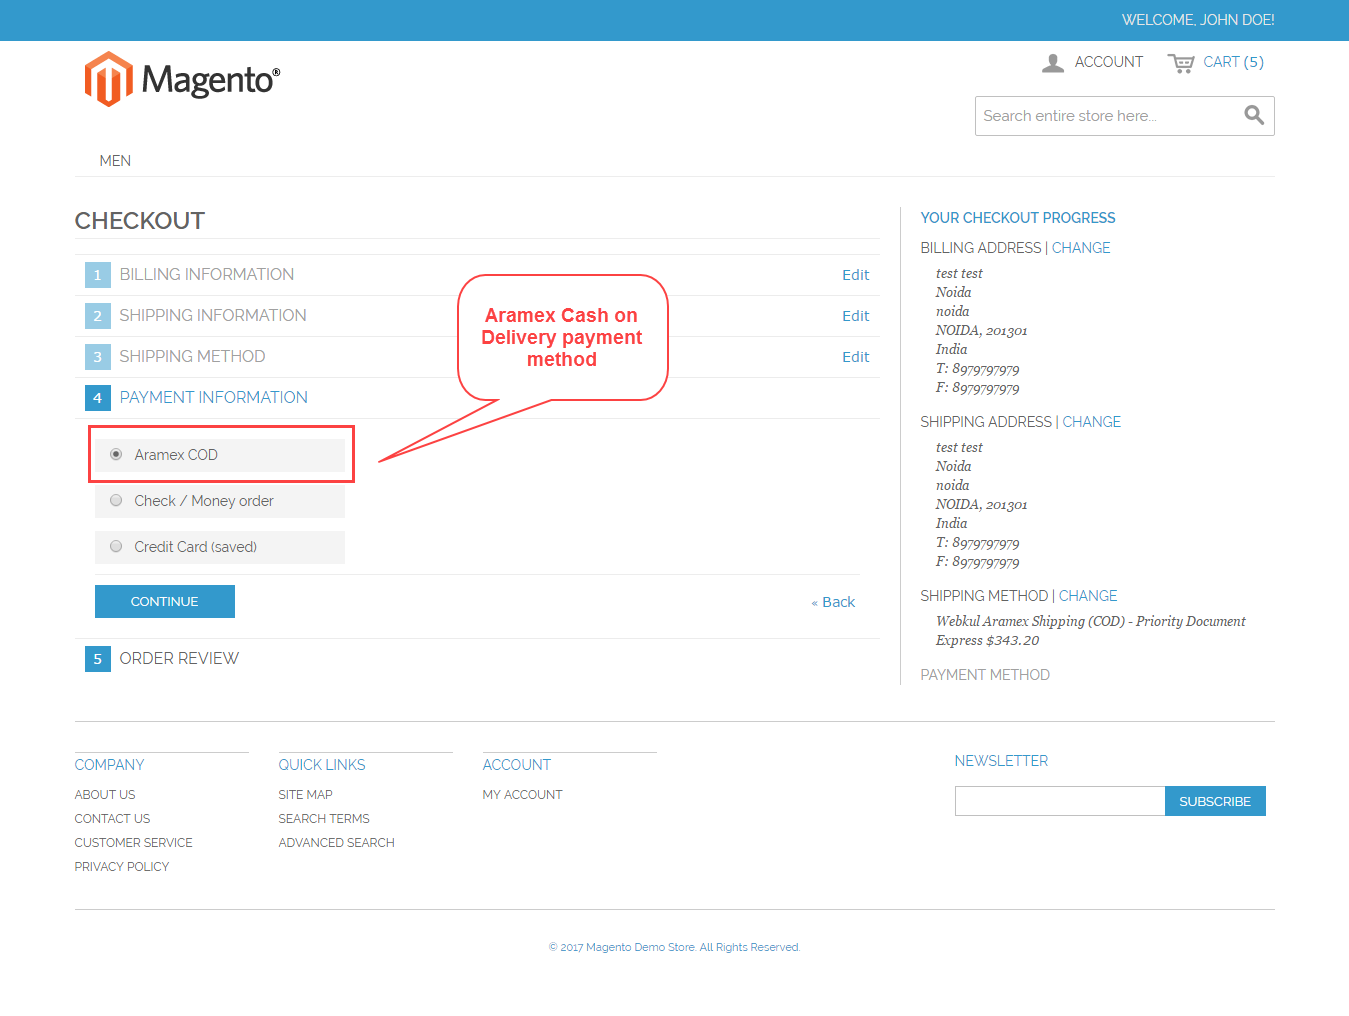
Then, the customer needs to select the payment information. For availing the Cash on Delivery service. The customer should select Aramex COD option at the time of selecting the payment method. Please view the screenshot:
After selecting the preferred Aramex shipping service and payment method. The customer can finally place the order. Aramex calculates shipping rates basis on the product weight and origin address.
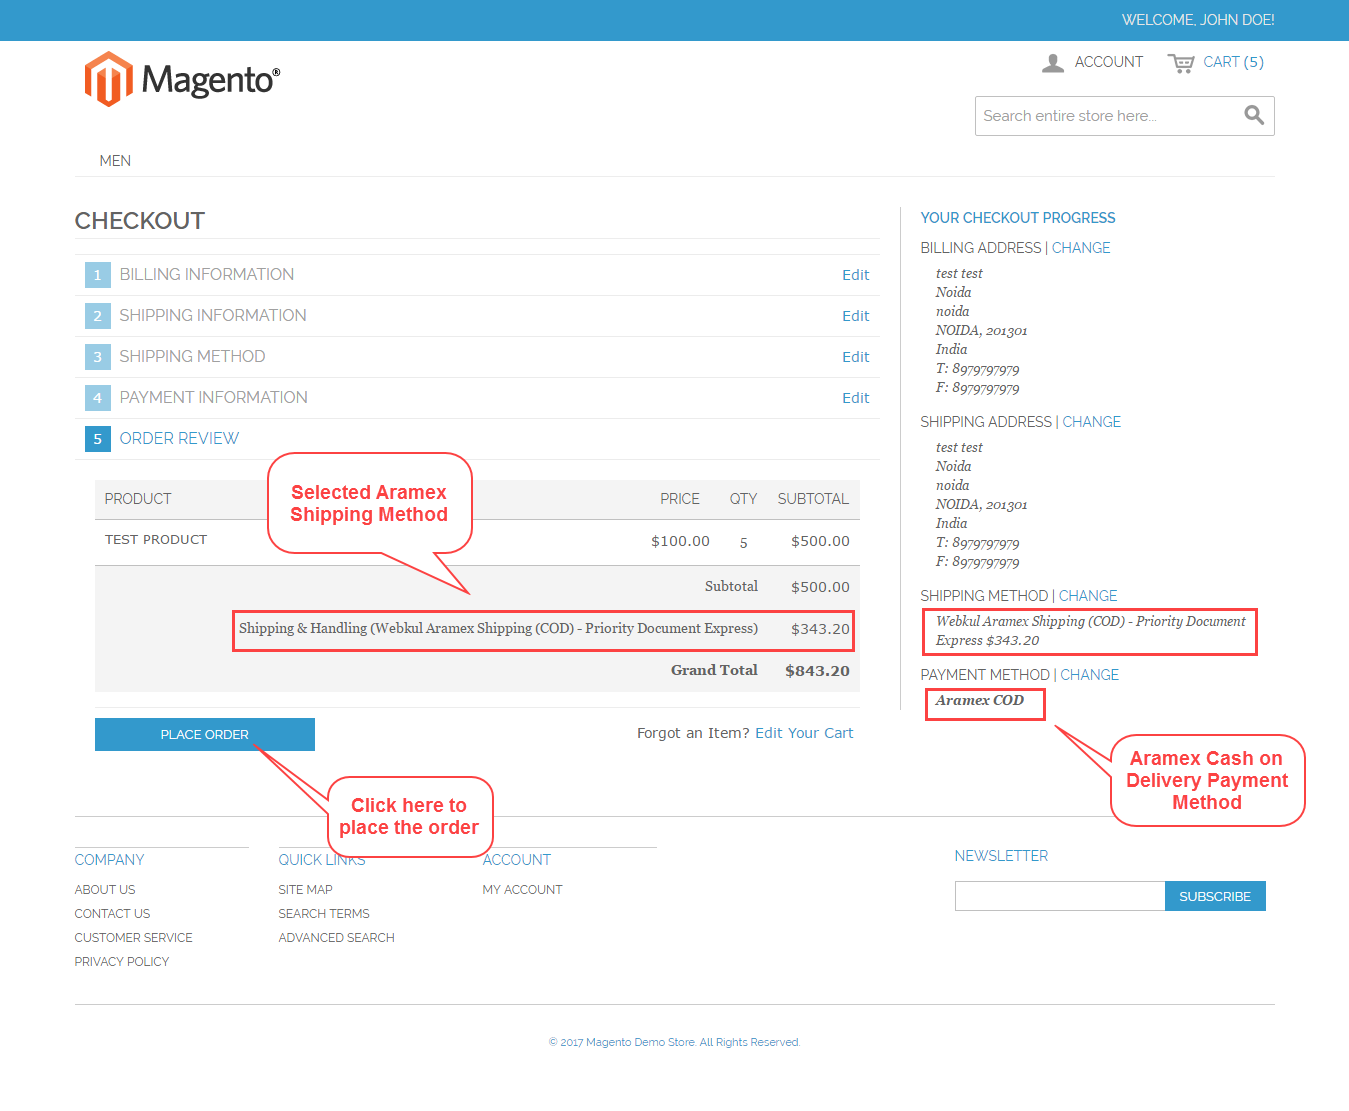
Order Information
Here’s the sample order showing the Aramex shipping details. The customers can take the print out to view detailed information about the order placed. It also shows the Aramex COD as the payment method.

Shipment Created
When the admin creates shipment for the order. The customer can check the shipment information from My Orders section. After selecting the order, click Shipments option. The customer can track its shipment. It can also print out the shipment information.

Tracking Shipment
The customer can track its shipment by clicking the Track this Shipment link. The following window will appear mentioning the location, date & time, description.

Admin Back-End View
View Order Information
The admin needs go to the backend panel to view the orders. Navigate through Sales->Orders. Select the order and click View. The following page will appear. From here the admin can view the detailed information about the order.
To generate an invoice, click the Invoice button.
To create a shipment for this order, click Ship button.

Create Shipment
After the clicking, the Ship button, following page will open. First, select the checkbox option to Create Shipping Label. You can also send a copy of this shipment to the customer.
Click Submit Shipment button to move on to the next step.

Create Package
After clicking the Submit Shipment button, you need to create a package. The following window will appear. First, you need to add products to the package.

So after adding the products and the required information about the package. Click the OK button.

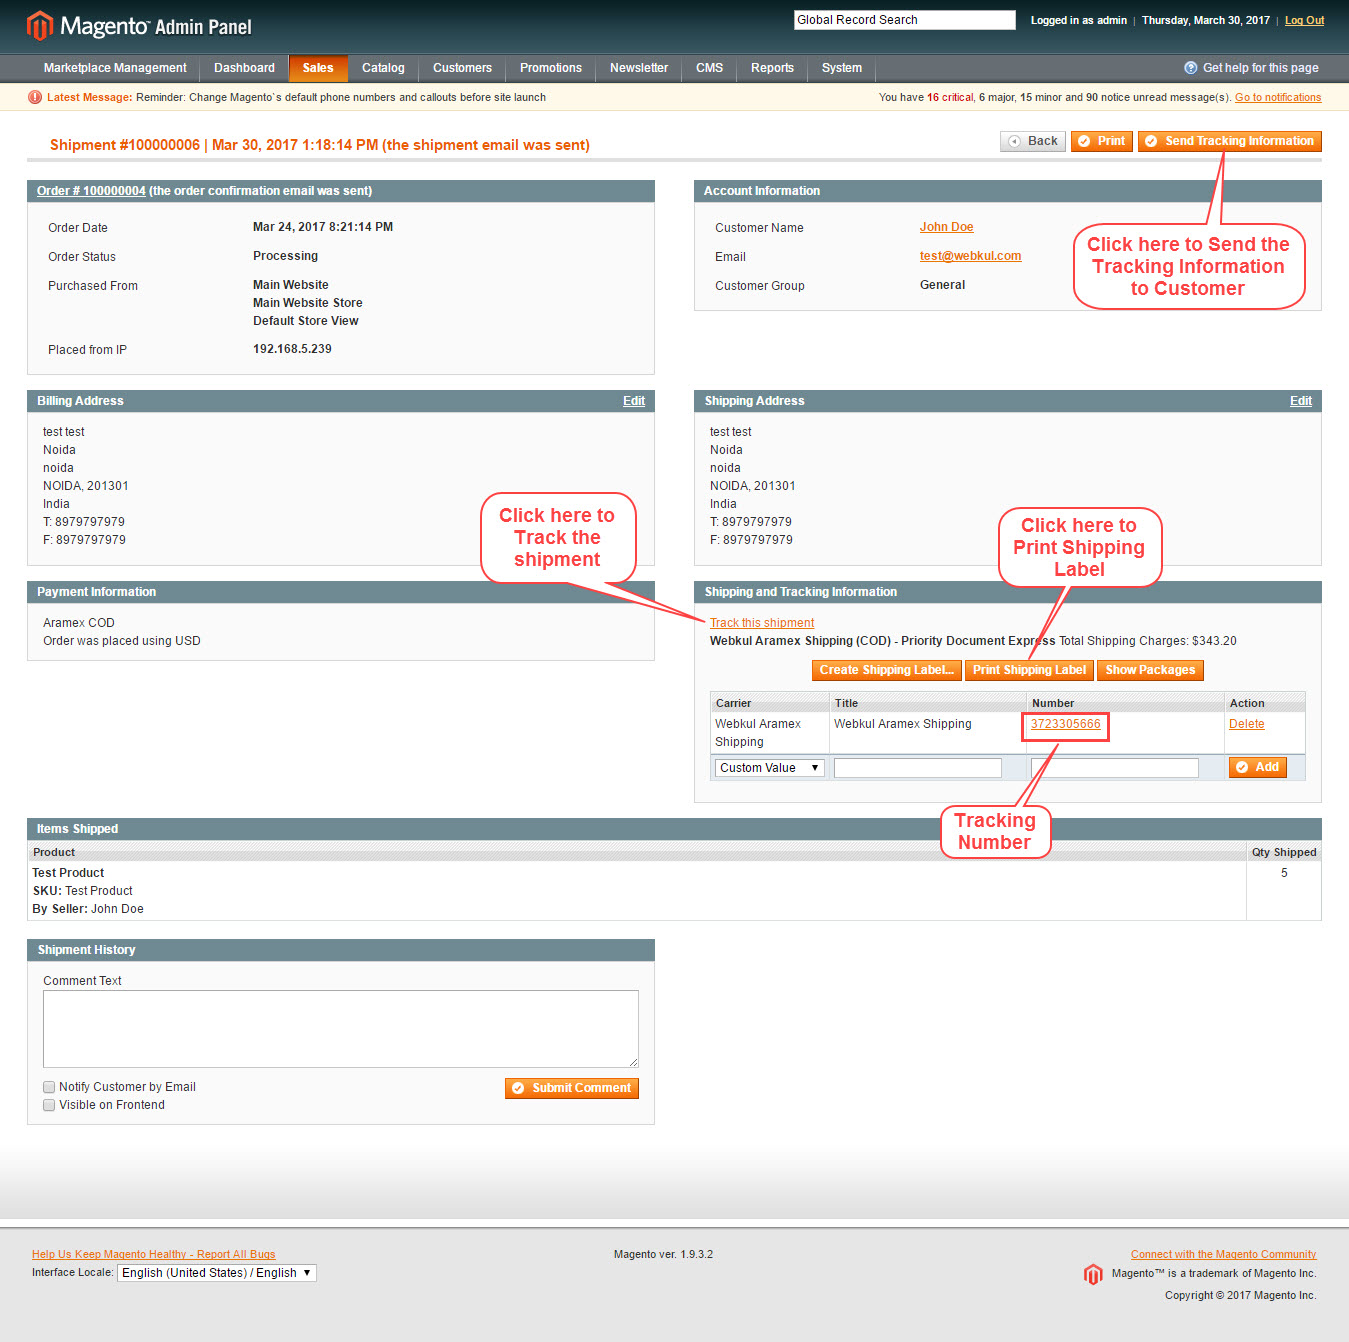
Shipment Created
After creating the shipment. You can send the tracking information to the customer. It will generate a tracking number for this shipment. You can also print the shipping label of this shipment.
Shipping Label
Here is the sample Aramex Shipping Label mentioning tracking number and shipment details.

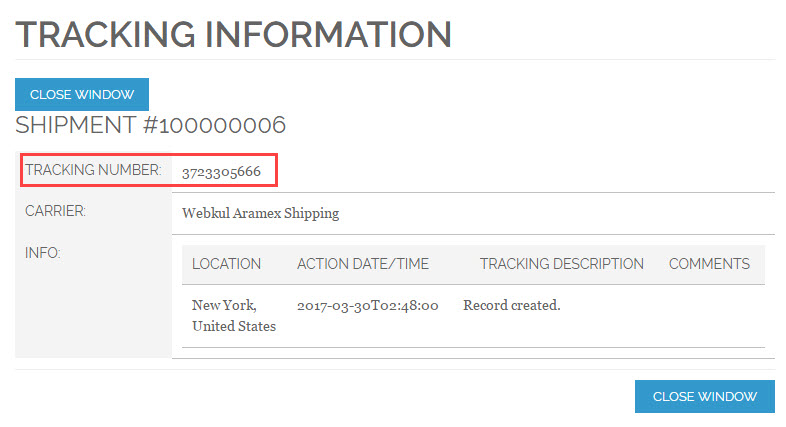
Track Shipment
To track a shipment, click the Track this Shipment link. The following window will appear mentioning the location, date & time, description.
Thank you for viewing this blog. If you have any issues, please visit webkul.uvdesk.com
Current Product Version - 1.0.0
Supported Framework Version - 1.6.x.x, 1.7.x.x, 1.8.x.x, 1.9.x.x

7 comments
Currently, in this module, there is a tracking shipment number to track the shipment. You can check the given screenshot link for the same: https://bit.ly/3d9jQlX
For further queries, you can drop us a mail on [email protected] and we will assist you accordingly.
Thanks
It was installed inside my store
But after adding Aramex account data and I did the purchase experience did not appear to me
It was installed inside my store
But after adding Aramex account data and I did the purchase experience did not appear to me
The shipping cost shows me wrong
I want you to help me solve this problem because work is on hold