The Magento 2 Business Directory module adds a business directory feature to your Magento 2 store.
The users can add business indexes. Additionally, they can search and filter the directories using the standard searches like alphabetical search, extended search, and keyword search.
Also, the user can add directories with various attributes like categories, maps, and locations with search engine-friendly URLs.
Thus this module will enhance your eCommerce store with a business directory.
Using Enhanced Magento 2 customer profile module, users can have an interactive profile with more attributes.
Watch the below video tutorial to understand the extension workflow :
Features Of Adobe Commerce Business Directory
- Very Suitable for your vertical industry.
- Admin can create subcategories for the business directory’s root category.
- Merchant can enable or disable auto-approval of directories.
- The owner can see reports and claims of directories.
- The store owner can enable/disable/delete directories created by users.
- Merchant can add the reasons for reporting a directory.
- The owner can also delete the reason which is already used in the reports.
- The owner can enable/disable/edit/delete reasons.
- The registered user can create directories with multiple attributes like categories, location, website title, etc.
- Enables multiple image upload for each business directory.
- The user can easily reach to any directory by multiple search options like alphabetical search, advanced search, extended search, and a general search.
- Users can make claim and reports on the directories.
- The user can contact the directory owner.
- Admin can also add the business directory.
Installation
The installation is quite simple just like the standard Magento 2 extensions.
#Download Module
Firstly, you need to log in to the Webkul Store, go to My Account>My Purchased Products section, verify, and then download and extract the contents of this zip folder on the system.
#Upload Folder
Once the module zip extracts, follow path src>app and then copy the app folder into the Magento 2 root directory on the server as shown below:
The extracted folder has an src folder, inside the src folder you have the app folder.
Also, you need to transfer this app folder into the Magento2 root directory on the server as shown below.

# Run Commands
php bin/magento setup:upgrade
php bin/magento setup:di:compile
php bin/magento setup:static-content:deploy
php bin/magento indexer:reindex
php bin/magento cache:flush
Note:-
After installing the Adobe Commerce Business directory module, also need to install the Business directory theme.
After this installation, there is a need to install the Business directory theme
Installation of Business Directory Theme
Customers will get a zip folder and they need to extract the zip folder contents on their system.
The extracted folder has an src folder, inside the src folder you have the app folder.
Also, you need to transfer this app folder into the Magento2 root directory on the server as shown below.
You need to run the following commands:
php bin/magento setup:upgrade
php bin/magento setup:di:compile
php bin/magento setup:static-content:deploy
php bin/magento indexer:reindex
php bin/magento cache:flush
Adobe Commerce Business Directory Configuration
After the complete installation of the Magento 2 Business Directory module, the admin navigates to Store -> Settings -> Configuration -> Webkul -> Business Directory for configuration.
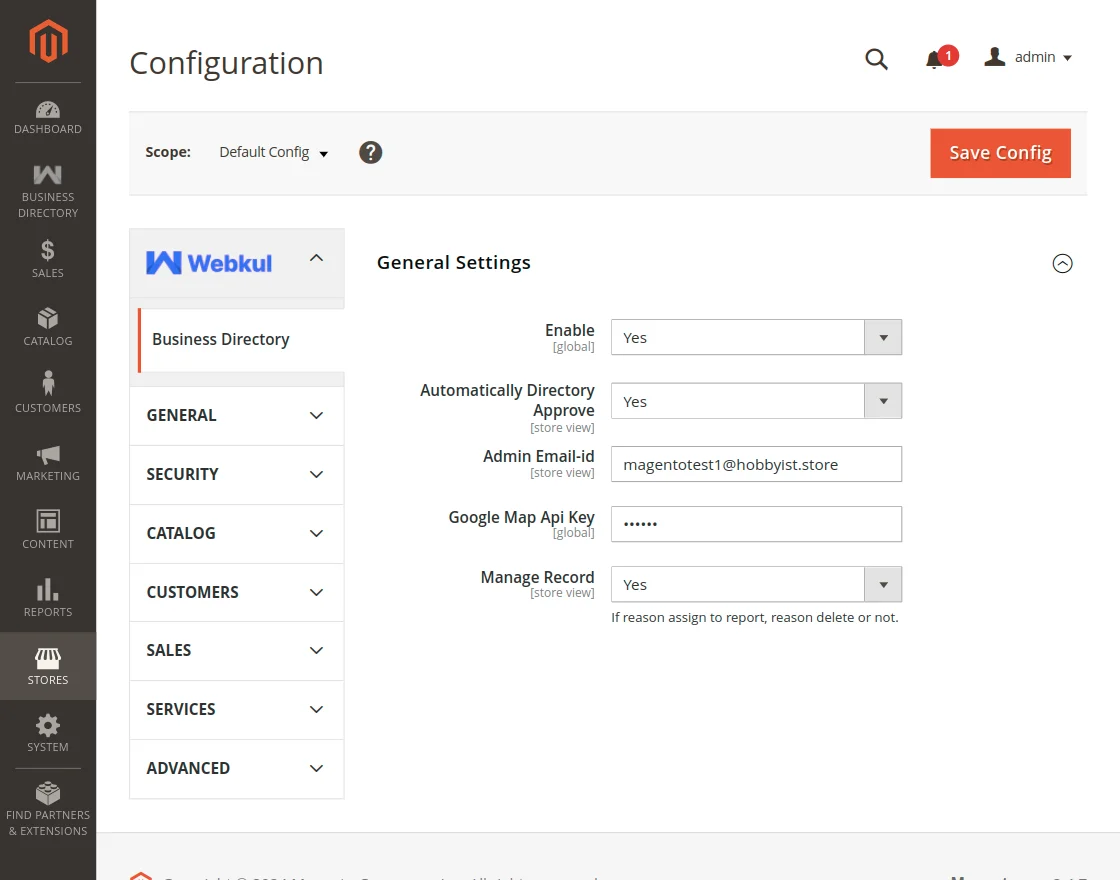
General Setting
- Enable: The owner can choose ” Yes” to enable the module else ” No“.
- Automatically directory approve: Merchant can enable or disable auto-approval of user-created directories from the admin side. “Yes” for enabling and “No” for disabling the auto-approval.
- Admin Email-id: Forthwith store owner will enter the email id used for this module’s email transaction including the admin.
- Google Map API Key: Next the merchant will provide the API key of the google map. It will allow users to use google maps while creating their directories for the location purpose.
- Manage Records: If the admin select ” Yes” then the admin can delete the reasons even they are assigned to a report and select “No” then the merchant cannot delete the assigned reasons.
Please Note:
The admin email id is used to send email to the admin when a user creates/claim/report a directory. The vice versa process is done for the approval of the directory from the admin.
Customers have to wait for the admin’s approval to get the created business directory if auto-approval of the business directory is not enabled.
Adding Sub-Categories
The owner can create subcategories under the root category of the Business Directory.
Moreover, to add subcategories of the root categories navigate through Products -> Categories -> Business Directory -> Add Subcategory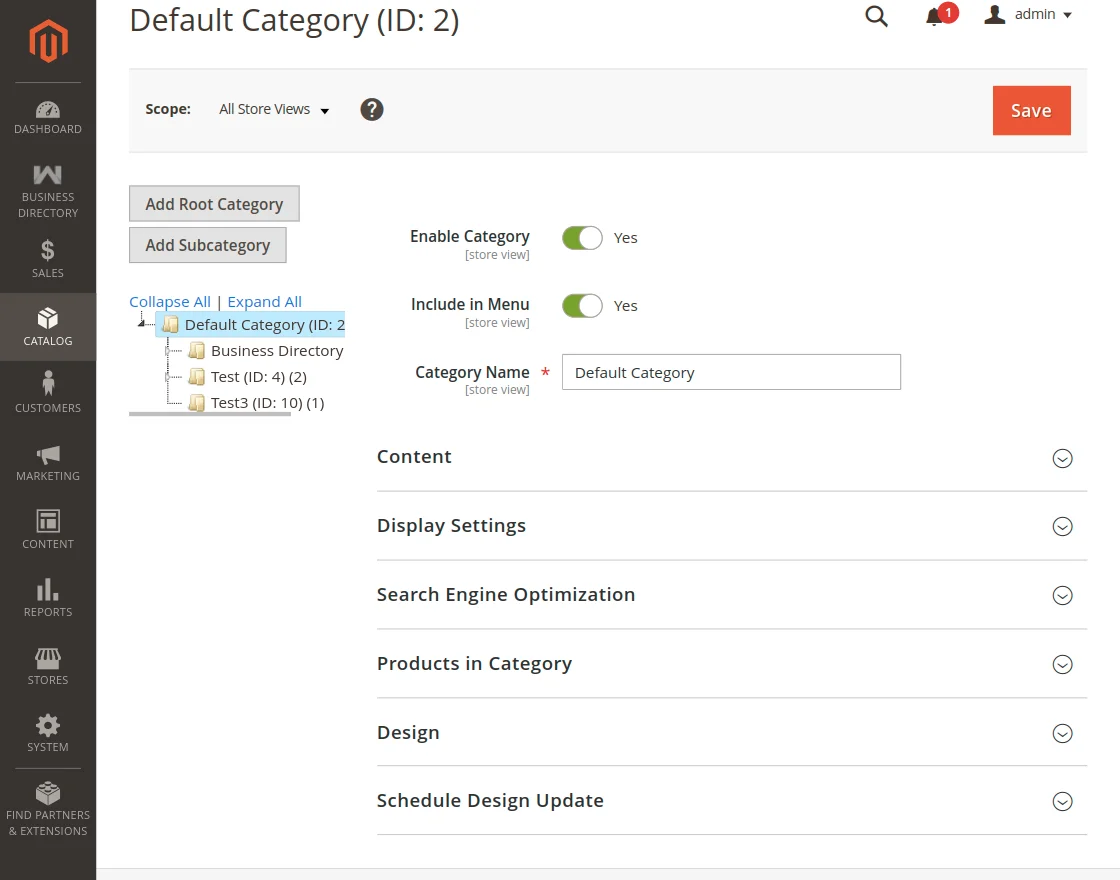
Add Subcategory
After clicking “Add Subcategory“, the admin will be redirected to the subcategory setting page. The owner can add new subcategory by doing the following essential settings :
- Enable Category: The first admin will enable or disable the subcategory.
- Include in Menu: Then enable or disable to include the menu in a subcategory
- Category Name: After that, the merchant can set the name for the subcategory.
Content
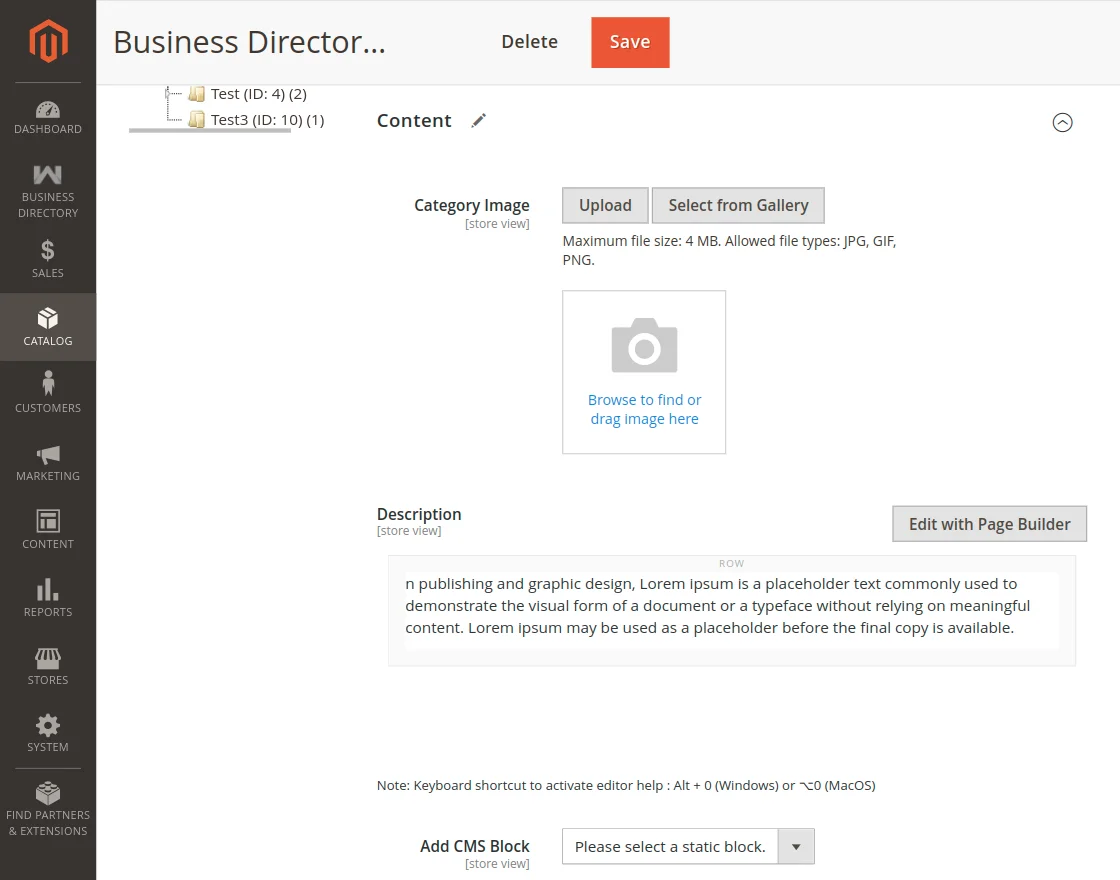
- Category Image: Now the store owner can set an image for the category.
- Description: Then add a subcategory description from this field.
- Add CMS Block: Now select the static block.
Display Settings
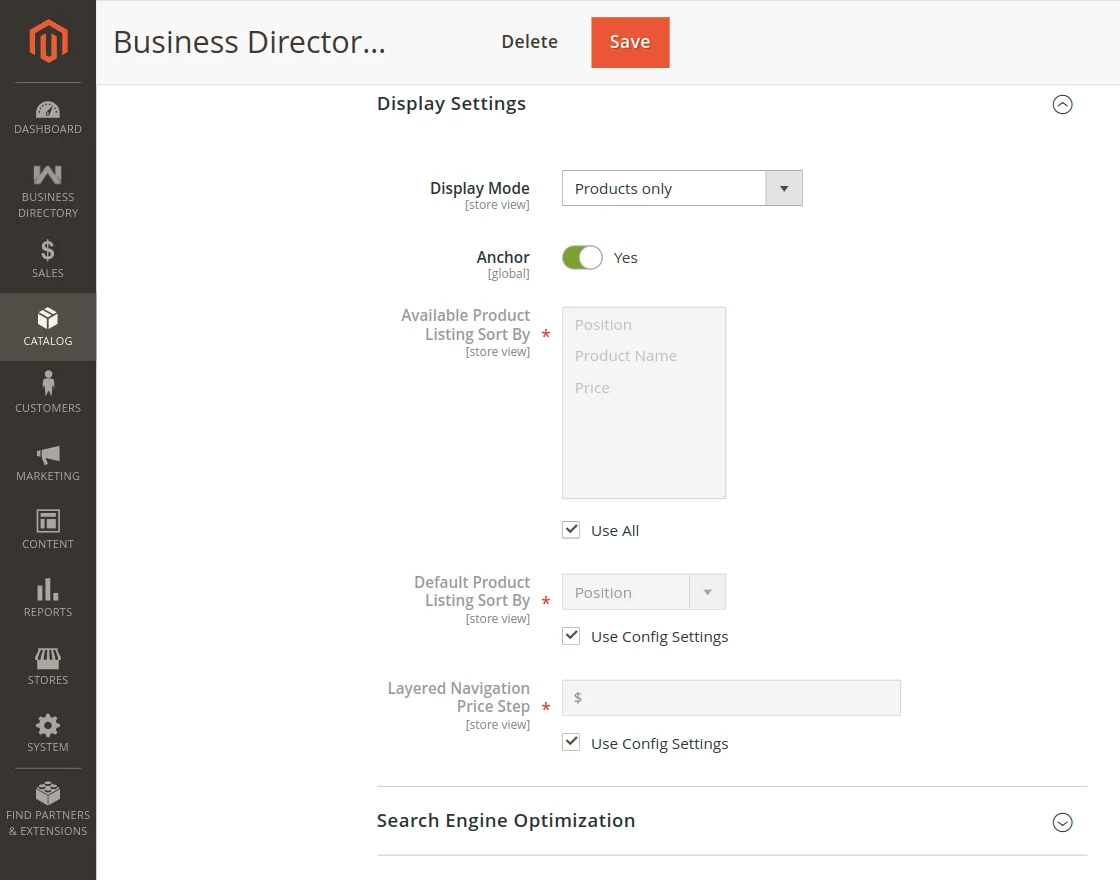
- Display Mode: Next the admin can set the display mode for the subcategory.
- Anchor: Furthermore store owners can make the subcategory eligible for the anchor.
- Then Use Available product listing sort by.
- After that Apply Default product listing sort by.
- In the end, Implement Layered Navigation Price Step.
Search Engine Optimization
- Meta Title – Now, enter the Meta Title
- Mera Keyword – Then, enter the Meta Title
- Meta Description – Finally, write Down the Meta Description.
Products in Category
Now add a directory from this section to the subcategory via a directory checkbox or mass selection checkbox for selecting all products at once.

Design
- Use Parent Category Settings: Further merchant has to enable it for inheriting the root category display setting or the “Business Directory” theme in the Theme field.
- Theme: If the “Use Parent Category Setting” is not enabled then the theme has to set to “Business Directory”.
- Layout: Then, select the layout.
- Layout Update XML.
- In the end, apply Design to Products.
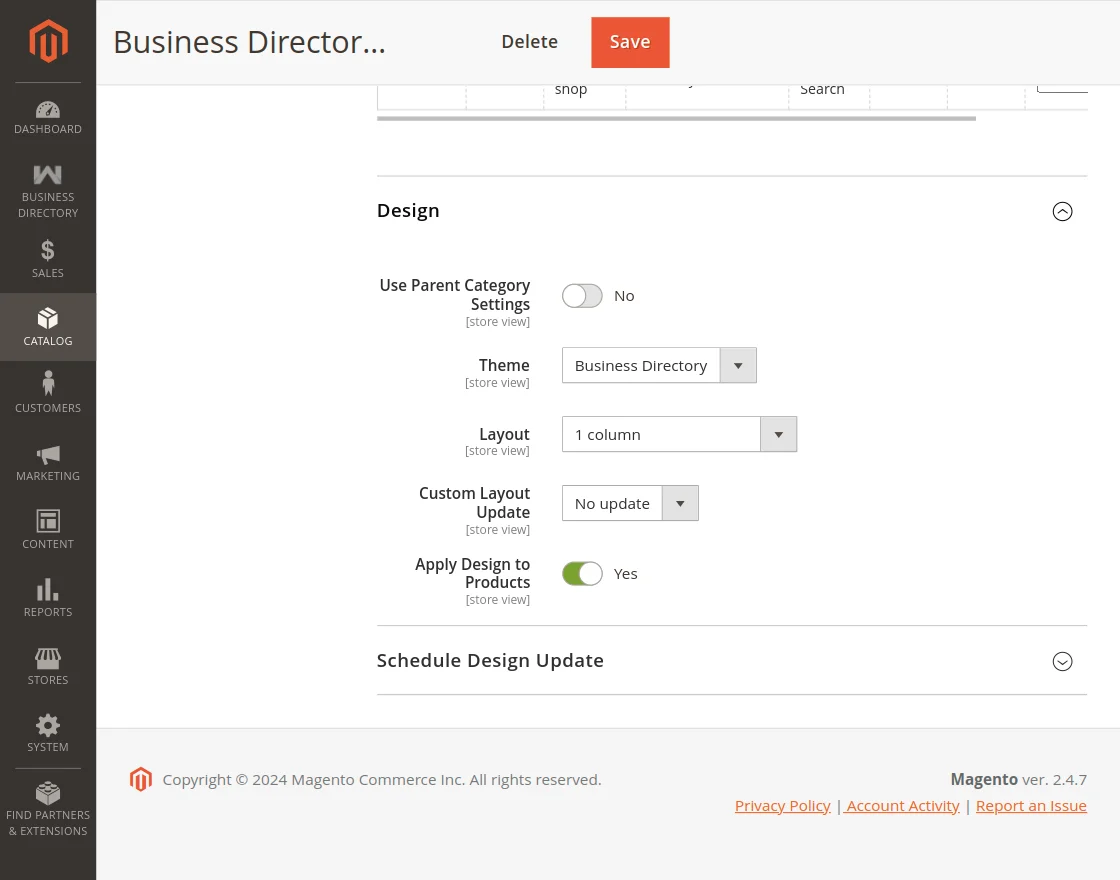
Please Note:
Selecting the “Use Parent Category Setting” or the Theme as “Business Directory” is necessary to view the directory in the proper manner.
If these settings are not made then the directories will appear as normal products on the front view for the users.
Schedule Design Update
Now select the beginning and end date for the schedule design update.
User Directory Management
After all the above Magento 2 Business Directory module configuration and settings, the registered user can add a directory.
Now to add the directory the user will navigate through Login(The user will first login) -> Add Directory.

Add Directory
- Directory Category: First the admin can choose the categories for the product.
- Company Name: Second the merchant will provide company name.
- Contact Person: Third name of the contact person of the company.
- Email: Then email id of the contact person.
- Street: After that Street name where the company is located.
- Postcode: Further postal code of the company.
- City: Then the city name where the company is located.

- Country: Now the country name of the company.
- Location: Then latitude and longitude for setting the location on the map view.
- Phone: Then phone the number of the contact person.
- Fax: Also Fax number of the company.
- Website Title: Furthermore the user will give the website URL in this field.
- Business Days: After that Here the user will set the working days of the company by selecting the weekday names.

- Description: Then set Description of the company.
- Short Description: After that Set Short description of the company.
- Company Logo: In the end, The user can provide the company’s logo.
Lastly, the user will save the directory via the Save Directory button.
Manage Directory – User
The registered user can see their created directories by navigating through Login(The user will first login) -> My Directory List.

- The user can edit/ delete any directory.
- Also, the user can select directories and delete the directories via the “Delete Directory‘ button.
- Filtered search for better reachability to any directory.
- Also, view the status of approval of directories from the status column.
- View the reports, claims, and contact owner count in Total Report, Total Claim, and Total Contact columns respectively. Thus the user can see the details of each by clicking on the counts.
-
Total Report Detail Page

2. Total Claim Detail Page

3. Total Contact Owner Request Detail Page

Admin Management for Business Directory
The admin can manage the user-created business directories by approving, disapproving, deleting, and viewing directory information or by creating/managing reasons.
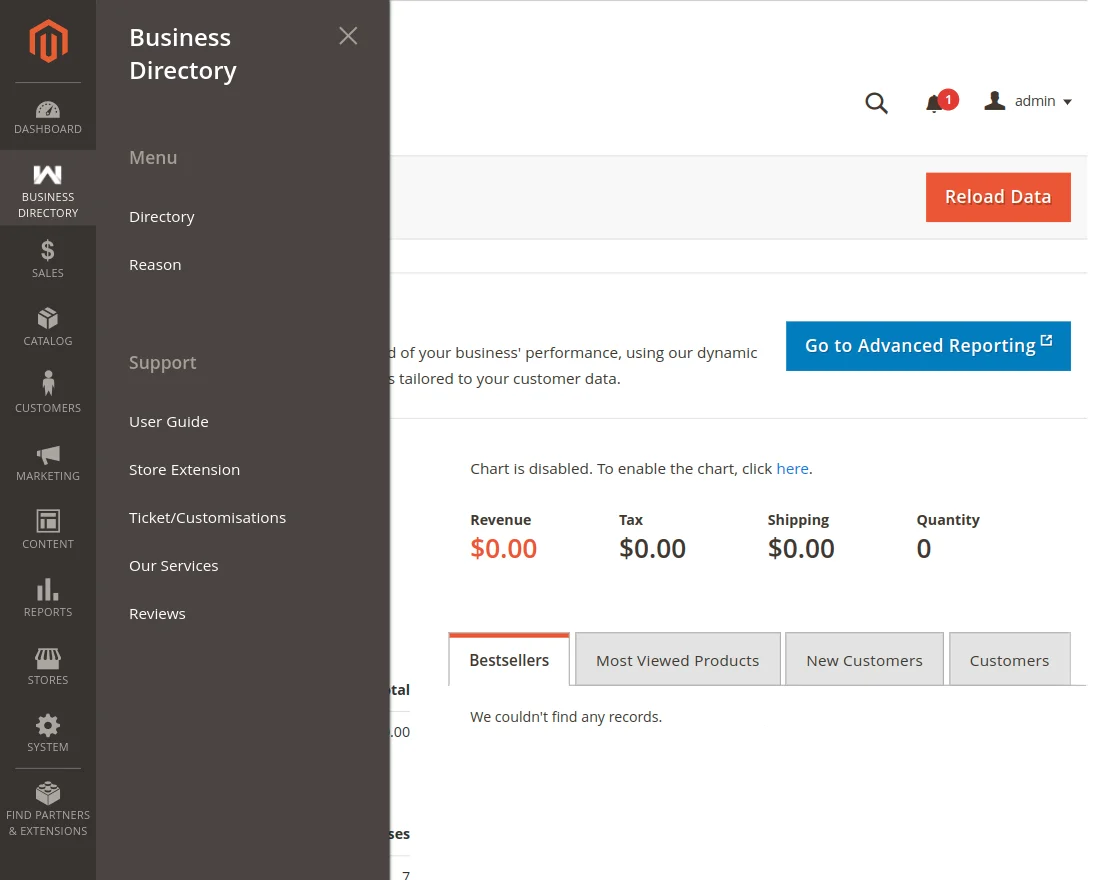
Directory Management
Navigating through Business Directories -> Directory for the directory management:
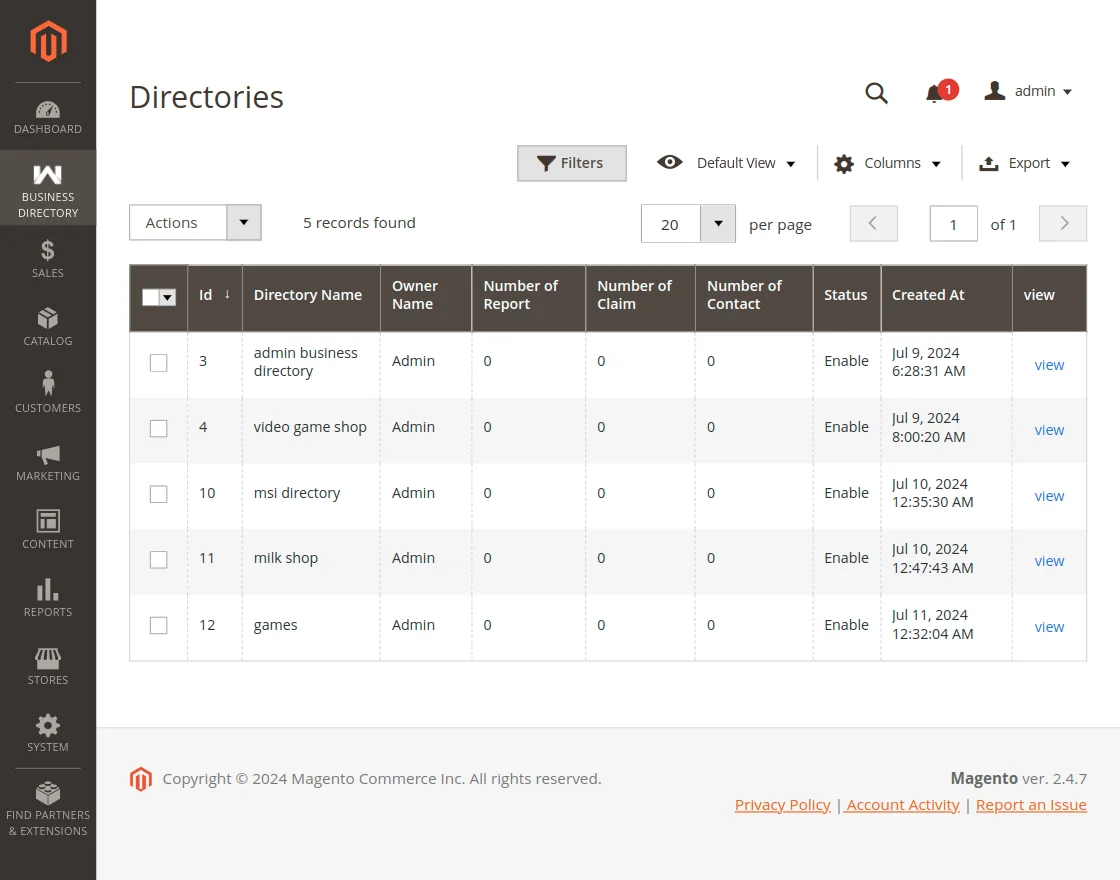
- It has informative columns of user-created directories drafted below:
- Id: It shows the system Id for any directory.
- Directory Name: It shows the name of the directory.
- Owner Name: It shows the name of the owner who has created the directory.
- Number of Report: It gives the count of the reports done on the directory.
- Number of Claim: It gives the count of the claims of the directory.
- Status: It shows the approval status of the directory.
- Created At: Date and time of the creation of directory are shown in this column.
- The users can delete or update the status of the selected directories to “Enable” or “Disable” via the “Actions” drop-down.
- Use Directory selection checkboxes to select specific directories on which the admin has to take the action.
- Admin has to take the actions to select specific directories
- Use the Mass Selection checkbox to select all directories at once.
- The user can click on “View” to see directory information:
Claim
This can be navigated by Business Directory -> Directory -> View -> Directory Information – > Claim.

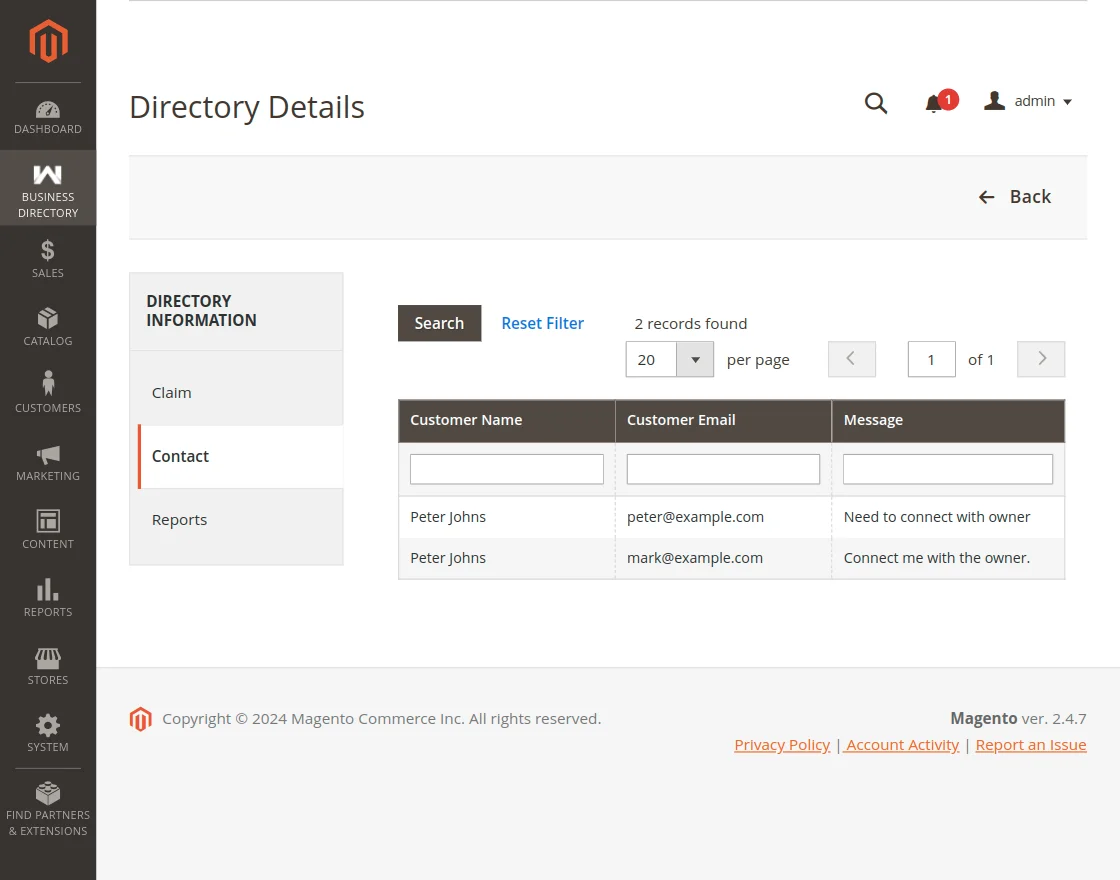
Contact
Navigated it through Busienss Directory -> Directory -> View -> Directory Information -> Contact.
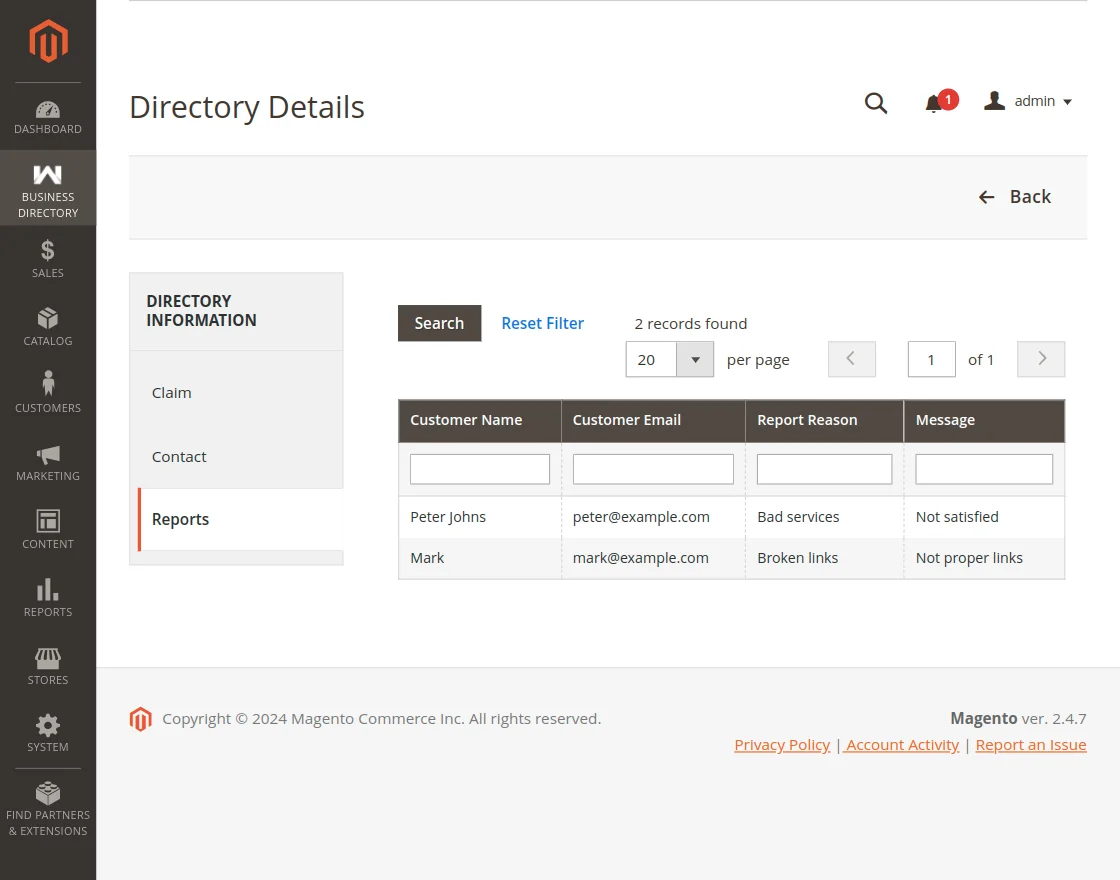
Report
Navigated it through Busienss Directory -> Directory -> View -> Directory Information -> Report.
Reason Management
The admin can manage the reason by navigating through Business Directory> Reason.
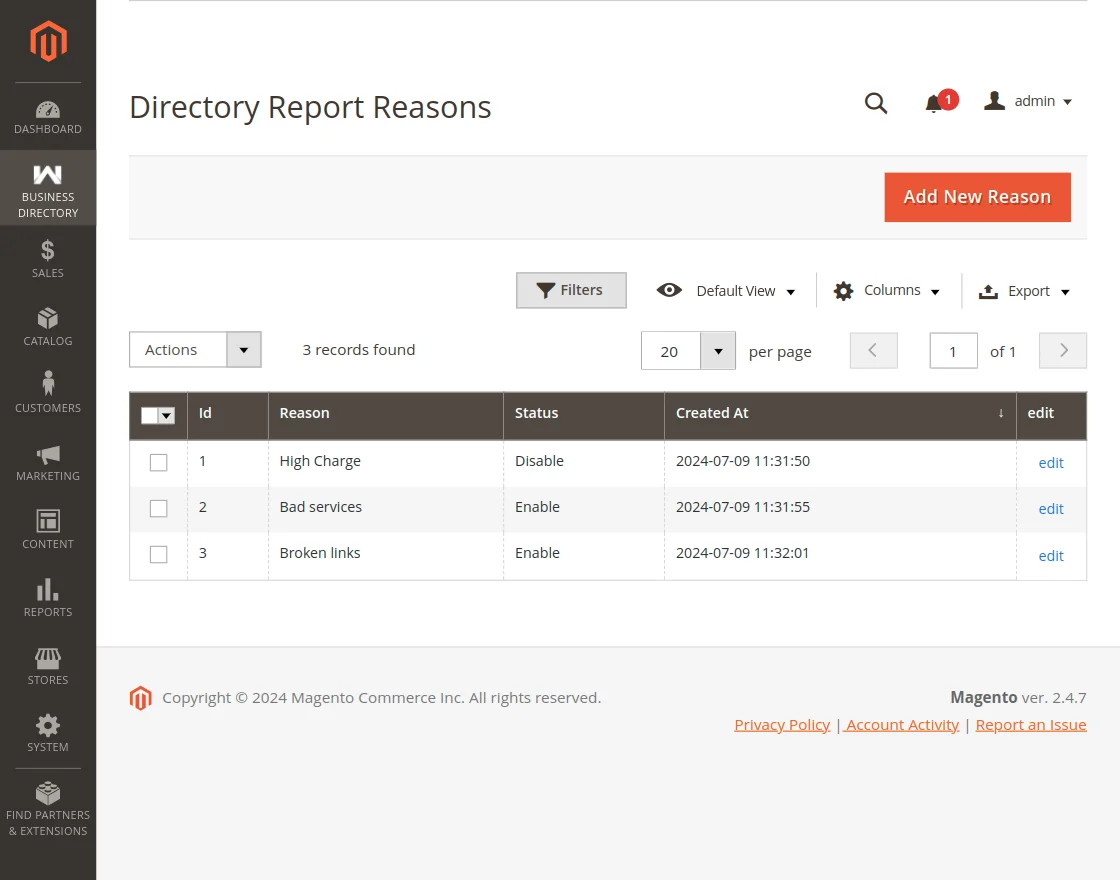
- It has various informative columns of user-created directories like :
- Id: It displays the system Id for reasons.
- Reason: also It shows the name of the Reason.
- Status: moreover It presents the approval status of the reason.
- Created At: Date and time of the creation of reason are shown in this column.
- The users can delete or update the status of the selected reason to “Enable” or “Disable” via “Actions” drop-down.
- Use Directory selection checkboxes to select specific Reasons on which the admin has to take the action.
- Use Mass Selection checkbox to select all Reasons at once.
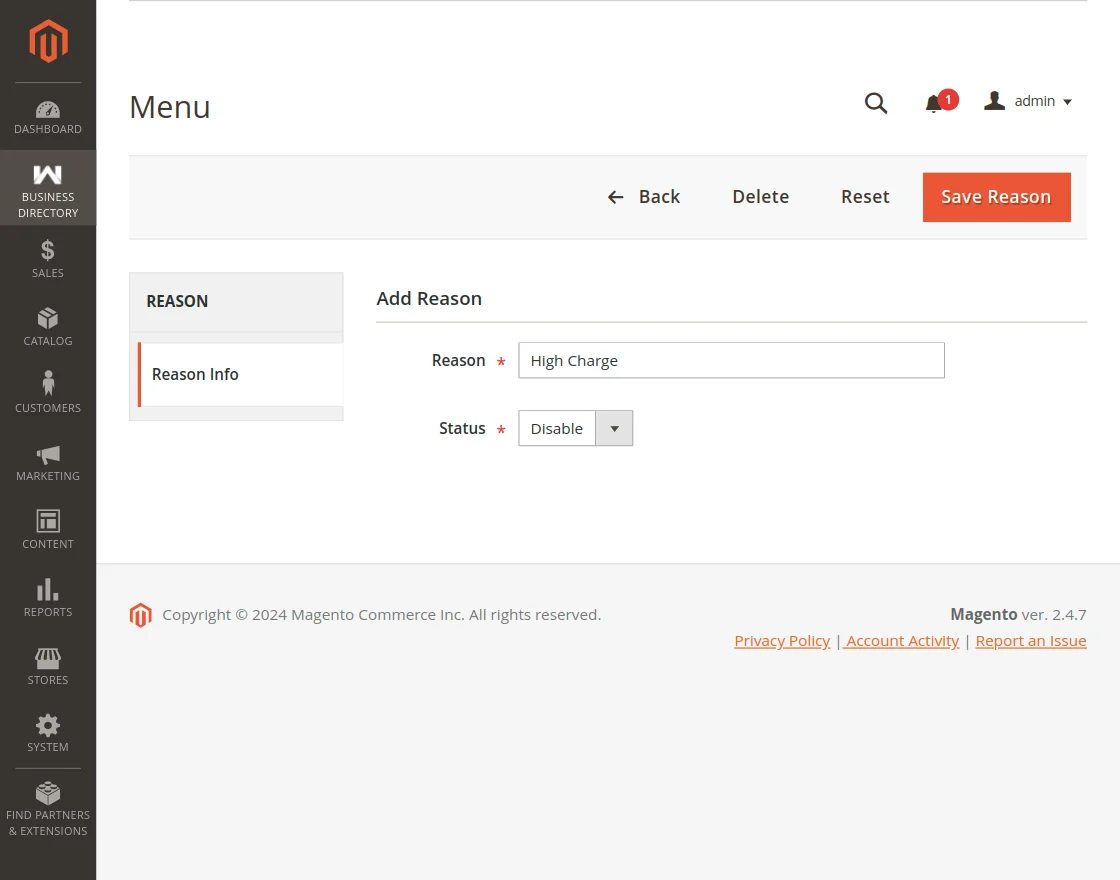
Reason Editing
The user can click on “edit” to edit a reason.

- The admin can edit the reason text content via “Reason“.
- Further, edit the status of the reason from the “Status” dropdown.
- Also, the user can delete the reason from the “Delete” button.
- And use the “Reset” option to reset the settings of a reason.
- Then the user can save the edited reason via the “Save Reason” button.
- “Add New Reason” button is used for adding new reasons for reporting any directory. When any user reports a directory then a reason for reporting is required, this reason is created by the admin via “Add New Reason”.
- Reasons: Now the admin will set the reason content.
- Status: Further The admin can enable or disable the created reason.
- Save Reason: After setting the two fields the admin can save the Reason.
Admin can add Business Directory
Admin needs to navigate to Dashboard>Catalog and add the products. There the admin will be able to see the option for the Business Directory in the catalog.
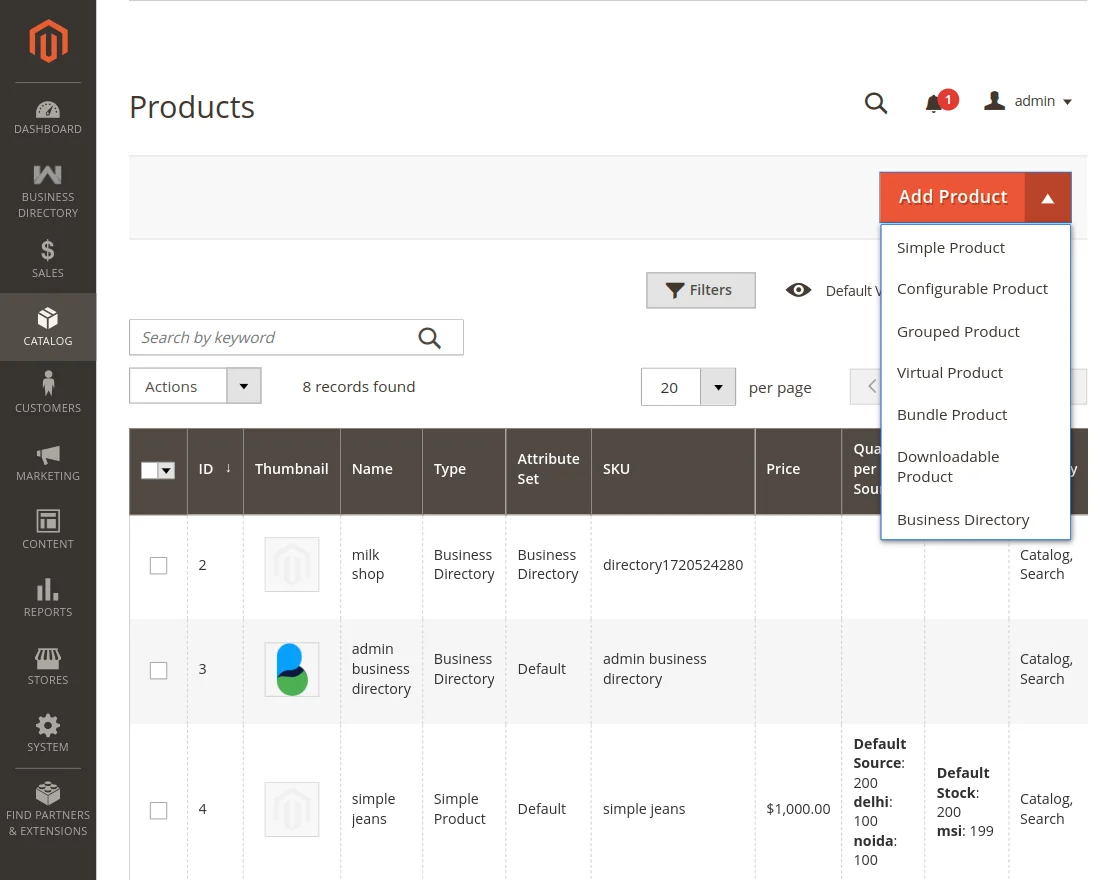
Once the Business DIrectory is selected it will open a new page where it will ask for certain details for creating a products as shown below.

Furthermore admin needs to scroll down and there will be another section named business directory on the same page.

Admin needs to provide all the details as shown in the above attached screenshot for the business directory comprises of address, phone number, business days, website, fax details, geolocation (latitude and longitude), and person name.
Business Directory User End
After all the above configuration settings and directory addition, any user can view the directory under Directory Category.
Any logged in or a guest user can navigate to the directories by clicking on the “Business Directory“.

- Create New Entry: First of all The user can create a new directory by clicking this button. It will redirect to the user to the Add Directory page. If the user is not logged in or registered then, it will redirect the user to sign up/login page.
- Keyword Search by category filter: Then Directory can be searched via the category search filter. The user can choose a category and search the directory by entering a keyword.
- Alphabetical and Numeric Search: Also The user can search a directory by selecting its first starting alphabet or a numeric digit.
- Advanced Search: Then the user can search by keywords of directories with much-advanced options like:

All Words
First, Searching keywords by entries that have “All Words“: Use all the words of the given keyword together to search the directory by name.
For example – If the keyword is “Human rights” then take the whole keyword “Human rights” together for searching a directory by name.
Any Words
Second, Searching keywords by entries that have “Any Words“: Take all the words of the given keyword independently to search the directory by name.
For example – If the keyword is “Human rights” then “Human” and “rights” both will get independently used for searching a directory by name.
Exact Words
Third, Searching keywords by entries that have “Exact Words“: Use all the words of the given keyword and that will exactly get used word by word to search the directory by name.
For example – If the keyword is “Human rights” then the exact word by word keyword will get used for searching.
Extended Search
Use advanced search for better and extended search options including searching by location, category, and country.

Additional Information
- Just below the business directory description, all the subcategories of the root category is displayed with their subcategories.
- Posts count shows the count of the directories enabled by the admin under a subcategory of the root category.
- Short Description View of the directories is provided with a Category filter drop-down.
- Furthermore, On clicking the title of the directory, the detail view of the directory opens with all the details of the directory including Street name, Postcode of the location, City name, Country name, Phone number of the contact person, Website URL, Business days detail, About company along with the map view of the company.
- Additionally, The user can also report/claim a directory to the admin. Any user can contact the owner of the directory.

Claim Listing / Report Listing / Contact Owner

Claim Directory: Even the user can claim on a directory to the admin. 
Report Directory: Further the user can report a directory by selecting it for a particular reason.
Note: Also the reason selected is created by the admin.

Contact Owner: Also, the user can contact the author of the directory.
That’s all for the Adobe Commerce Business Directory module.
If you still have any issue feel free to raise a support ticket immediately also let us know your views to make the module better at HelpDesk System.
Current Product Version - 4.0.3
Supported Framework Version - Magento 2.0.x, 2.1.x, 2.2.x,2.3.x, 2.4.x

Be the first to comment.