Image Before After for Magento 2 extension shows before and after image comparison in your store. Insert the widget in any part of the page where you want to show the comparison.
Add multiple widgets on the same page. Set widget suffix, width, and height values. The users can drag the mouse cursor and view the before and after images.
Features
- Show image comparison using two images.
- Easy to set up and configure the widget.
- Users can use the slider for viewing the images.
- Users can download both the images.
- Set widget width & height values.
- Enter suffix when using multiple widgets.
- Animation works without using the flash or java plugin.
- Works on all devices – mobile, desktop, laptop, tablet.
- Supported image file extensions – jpg, jpeg, png.
- Module source code is open for customization.
Module Installation
To install this extension, please follow each and every step carefully as follows:
Step 1:
After extracting the downloaded zip file and you will get the src folder. Inside src folder, you will find the app folder, copy the app folder to the Magento2 root directory. Please view the below screenshot.

Step 2:
After copying the app folder, you need to run the commands in the Magento2 root directory. Please view the below screenshots:
php bin/magento setup:upgrade

php bin/magento setup:di:compile

Navigate the path – <magento_root>/lib/web/mage/adminhtml. Then, open browser.js file and replace this.modal.modal(‘option’, ‘closed’, options.closed);

with this.modal.modal(‘option’, ‘closed’, true);

php bin/magento setup:static-content:deploy

Step 3:
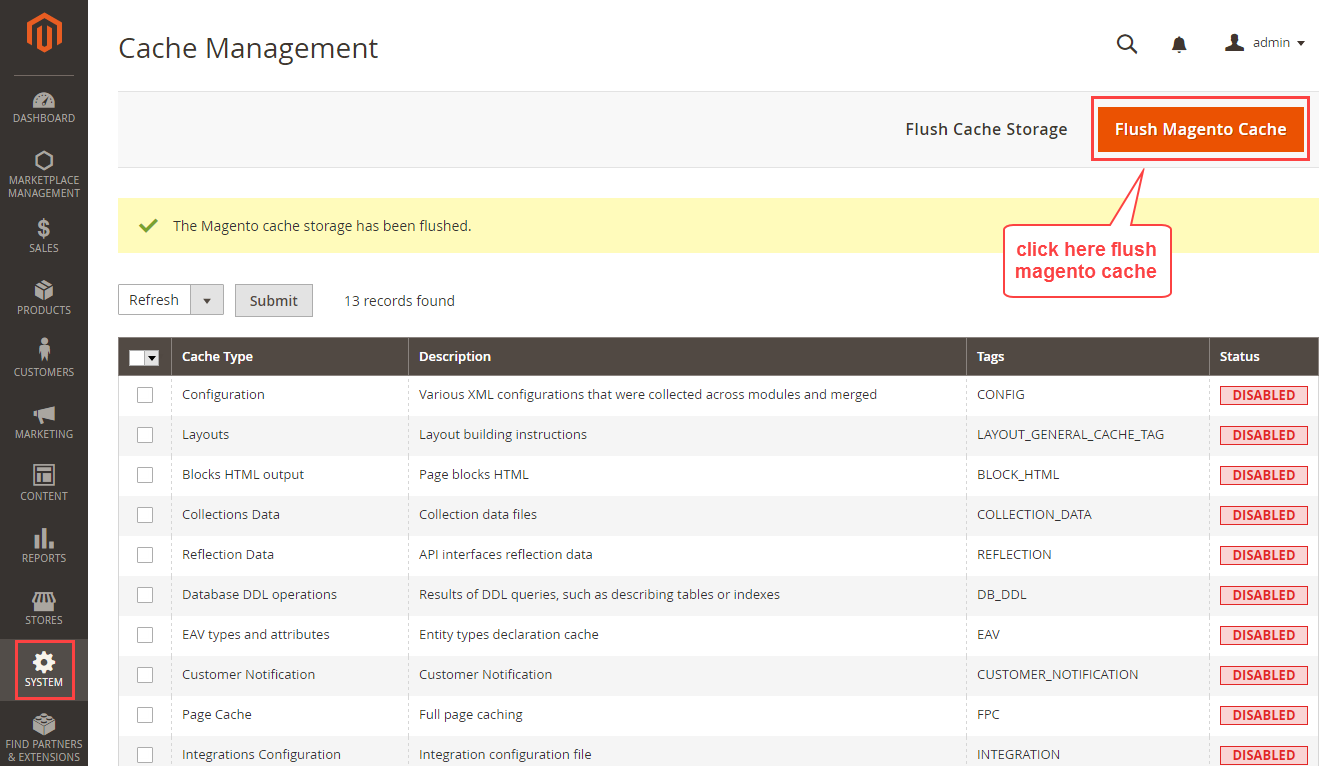
After running the commands, you need to flush the cache and reindex all from the Magento2 admin panel. Navigate through System>Cache Management. Click Flush Magento Cache button as shown below:
Widget Configuration
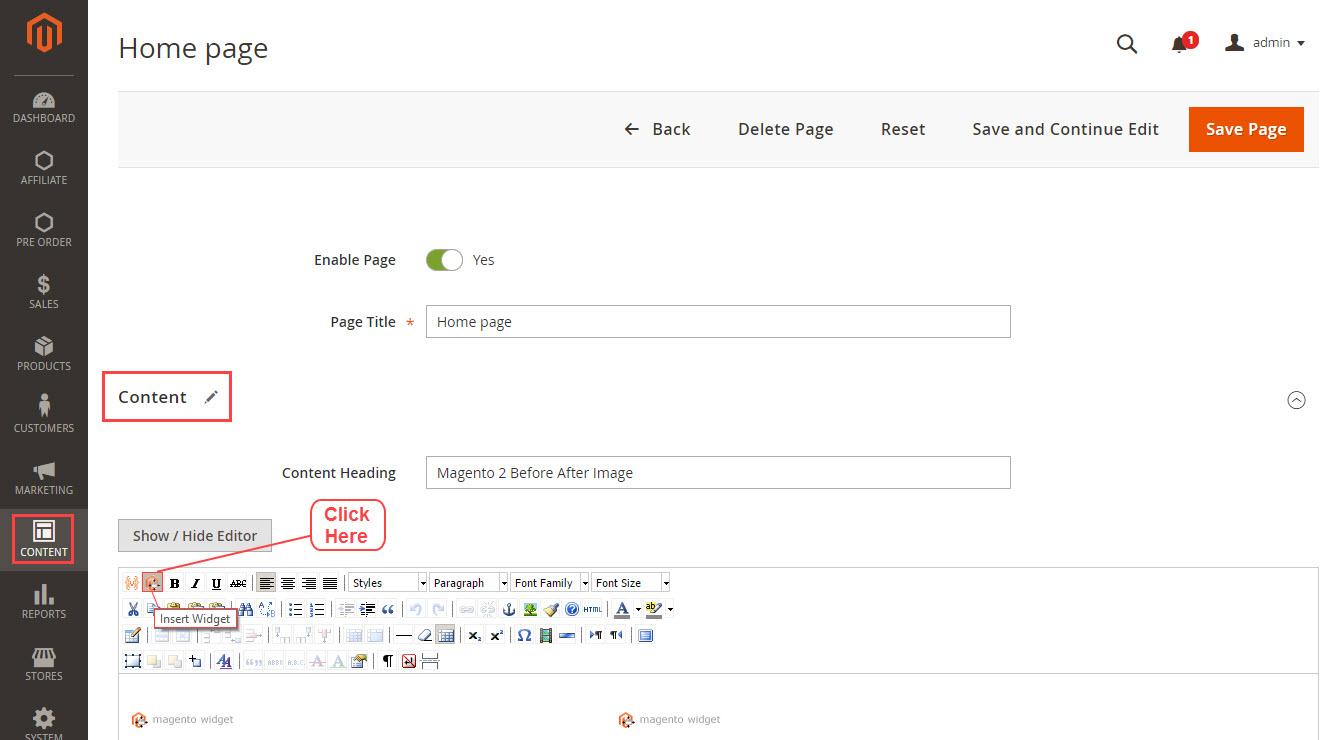
After the module installation, navigate to Content>Pages. Now select the page where you want to show the image. Click Edit to show the before after image on an existing page.

After opening the page, go to Editor panel, click Insert Widget icon as visible in the screenshot below:
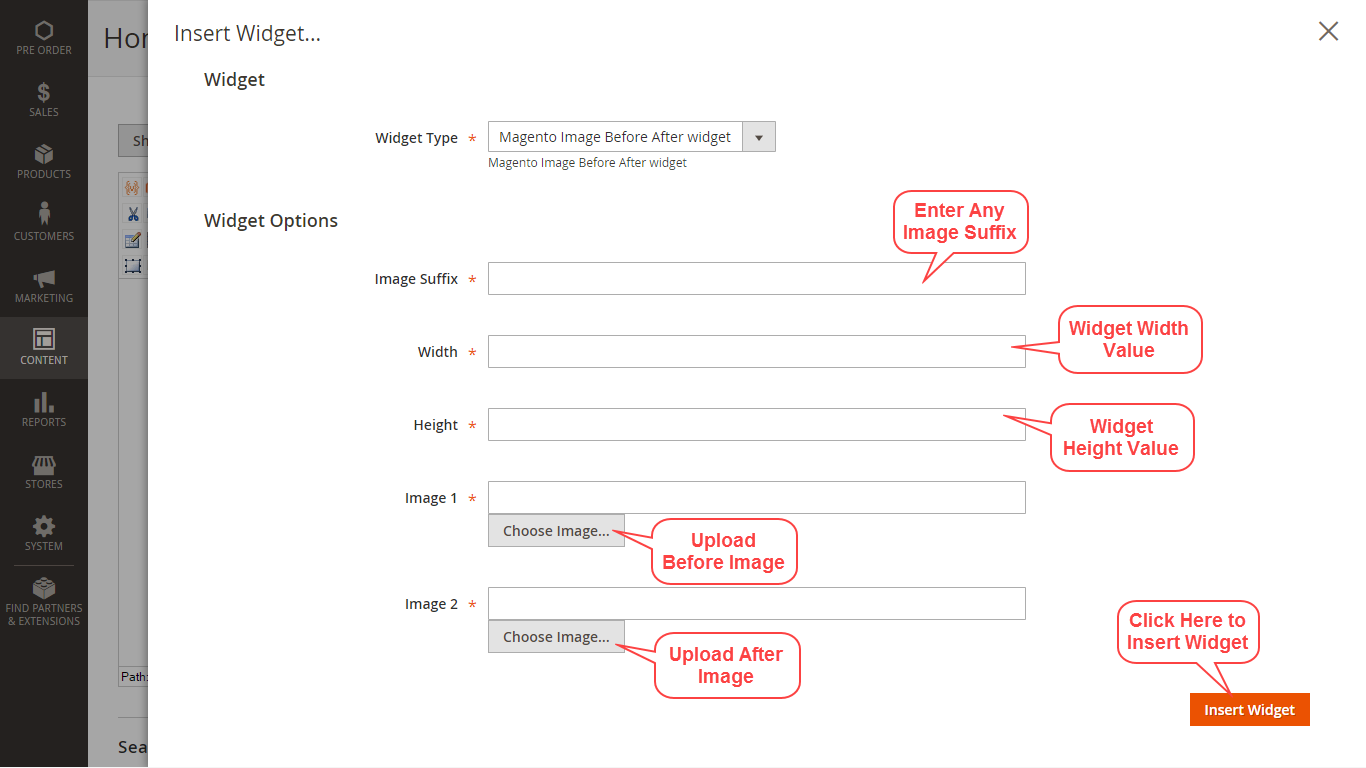
A pop-up window will appear, select Widget Type as Magento Image Before After Widget. Click Insert Widget button after that.

Now you need to provide the following information about the widget:
Image Suffix – Enter any text here to differentiate multiple widgets.
Width – Enter the width value of the widget for the front-end.
Height – Enter the height value of the widget for the front-end.
Image 1 – Upload the before image.
Image 2 – Upload the after image.
Click Insert Widget button add this widget to the page. Follow the same process again for adding multiple widgets.
Now widget will appear in the content area, click Save Page button to apply your changes. On the front-end, the before after image widget will appear.

User Front-End View
Here is how the Before After Image will appear on the front-end. The users can view both the images on the page. They can use the mouse cursor to slide the images.
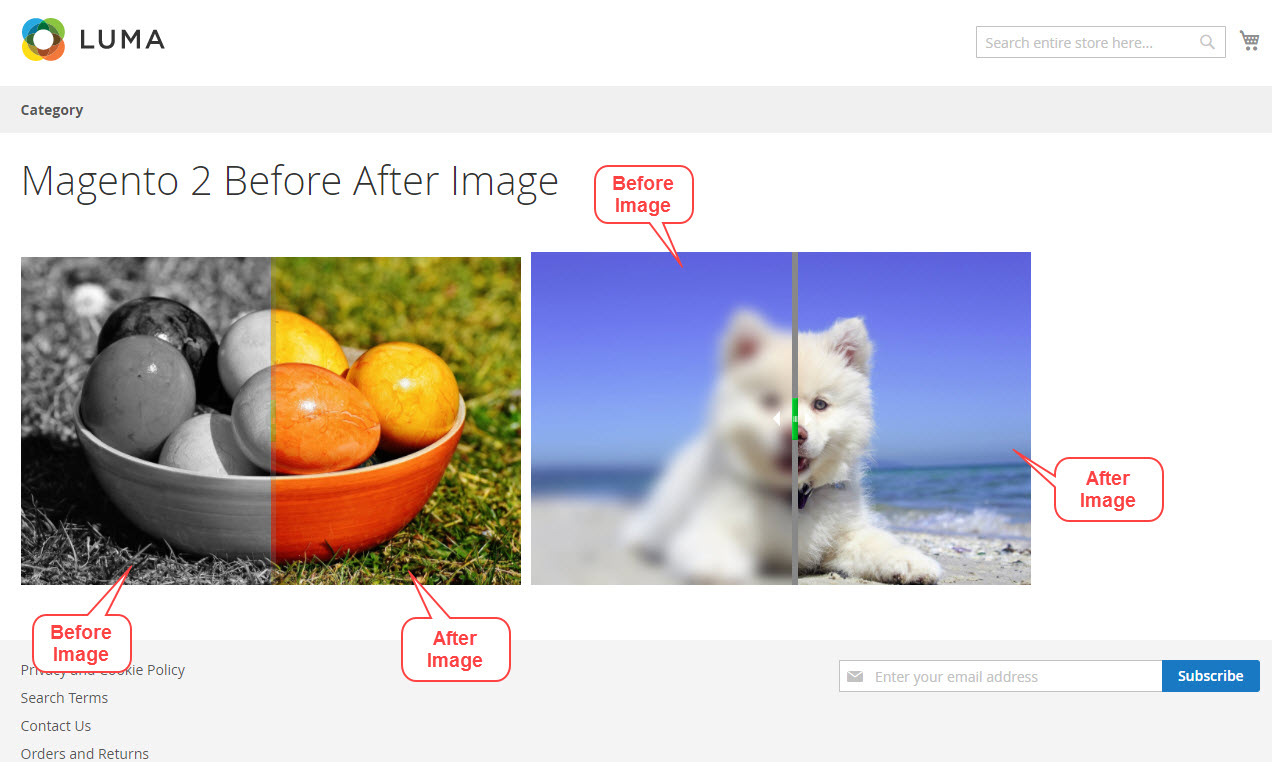 A small message appears when the users point the cursor near the slider.
Thank you for viewing the blog for the extension, if you have any further queries please visit uvdesk.com
Current Product Version - 2.0.0
Supported Framework Version - Magento 2.0.x, 2.1.x, 2.2.x,2.3.x, 2.4.x

Be the first to comment.