Magento 2 GDPR Extension provides the latest EU (European Union) guidelines or regulations that provide control to customers over their personal information or data.
Moreover, Magento 2 GDPR Module allows customers to send requests to update/delete their personal data.
Admin can update the status of the customer’s request as pending/processing/ complete/declined.
Further, Magento 2 EU Cookie Law consists of various tools and features that enable you to secure and protect your customers’ private data.
Features
- Customers can request for the data update or delete using Magento 2 GDPR Cookie Consent.
- On customer data request admin will receive mail too.
- Customers can access his data immediately in pdf or HTML.
- Customers can view all his data related to the account, order, address, and cart.
- The admin can enable or disable GDPR module on the frontend.
- Admin can enable customer data consent on customer registration and account edit page.
- The admin enables cookie notice on all the pages on the website.
- The admin can change the design of the cookie notice by simply creating a new static block and setting the identifier in the module config.
- Admin can see all the customer data update and delete requests in the grid.
- Admin can easily update the status of each request to pending, processing, complete or decline.
- On each status update customer will receive email.
- Admin can change the email templates too from the configuration.
- Option for deleting the personal data of customers who are not accessing their accounts.
- Set the customer data PDF file content footer text.
- Anonymization of customers’ personal data is available for the customers if enabled by the admin.
- The customers can opt out of the given consent if enabled by the admin.
- Choose the agreement to display at – registration, payment, login, contact, and feedback forms or below the shipping methods.
- The admin can customize the cookie popup as required by editing the layout theme.
- Customize the cookie popup by editing the layout theme.
- Create and customize cookies from the Cookie List that are displayed to customers.
- Add cookies as per requirement and assign them to cookie categories as required.
- Admin can check the cookie logs in a graphical dashboard.
- Magento 2 GDPR Module is also compatible with the Hyva theme.
Installation
The installation is quite simple just like the standard Magento 2 extensions.
Firstly, the customers will get a zip folder and they have to extract the contents of this zip folder on their system.
The extracted folder has an src folder, inside the src folder you have the app folder.
You need to transfer this app folder into the Magento2 root directory on the server as shown below.

After the successful installation, you have to run these commands in the Magento2 root directory.
First command-php bin/magento setup:upgrade
Second Command –php bin/magento setup:di:compile
Third Command –php bin/magento setup:static-content:deploy
Fourth Command –composer require mpdf/mpdf:8.0
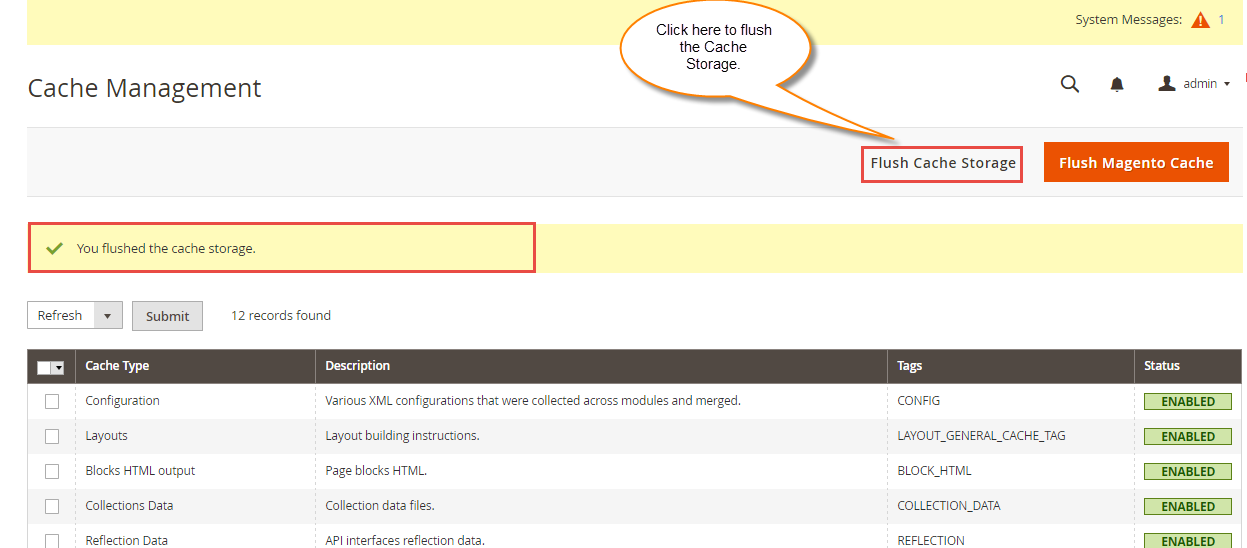
After running the commands, you have to flush the cache from the Magento admin panel by navigating through->System->Cache management as shown below.
Language Translation
For translating the module language, navigate through src/app/code/Webkul/GDPR/i18n and edit the en_US.csv file.
Thereafter, rename the CSV as “en_SA.csv” and translate all right side content after the comma in the Arabic language. After editing the CSV, save it.

Now, upload it to the path src/app/code/Webkul/GDPR/i18n where the installation of Magento 2 is on the server.
The module translates into the Arabic Language. It supports both RTL and LTR languages.
The user can edit the CSV like the image below.

Initial Configuration Settings
After the installation of GDPR for Magento 2, you will find the configuration settings panel by navigating through Stores->Configuration->Webkul>GDPR Settings per the snapshot below.

General Settings
Here, the admin will be able to –
- Enable the GDPR functionality for the store and display the GDPR side menu option on the admin side panel.
- Set up the PDF footer content that is visible to the customers after they download their data in PDF file format.

Personal Data Deletion
- Enable the option for deleting the personal data of customers who are not accessing their accounts.
- Set up the abandoned customer’s account automatic deletion period(in Days).

Customer’s Account Privacy Settings
- Set the privacy setting tab name which is visible under the customer account panel.

- Enable the Policy Doc section for the customers.
- Enable customers to download their personal data.
- Allow anonymization of personal data.
- Allow customers to delete their data.
- Allow customers to opt out of the given consent.

Cookie Message Settings
Here the admin for the cookie notice will be able to –
- Enable the cookie notice for the store.
- Choose the Cookie block display position as bottom left or right as required.
- Enter the Cookie block static identifier.

The admin will also be able to make the settings for the email templates.

Here, the admin will be able to –
- Select the email template for the data update request.
- Choose the data delete request template.
- Select the request status update template.
- Choose the request status delete template as required.
Lastly, save the configuration settings by tapping the Save Config button at the top right-hand corner.
You can also check the GDPR extension for the Magento 2 Multi Vendor Marketplace. This extension allows data updates and deletion requests to be made by marketplace vendors.
Further you can check how the GDPR plays a very crucial role in the e-commerce industry.
GDPR Options – Admin Side Panel
After the successful installation and configuration, the admin will find the GDPR side panel option with various menu options to make the settings and check the requests.

Let’s go through each of the options one by one:
Cookie Categories
Here, the admin will find the cookie categories that are visible to customers for selection at the storefront.

This is how these cookie categories are visible to customers for selection at the store front end after they tap on the Select Preferred Cookies button.

Here, the essential cookie category is mandatory and hence is always active by default. So, a total of three cookie categories have been created by default.
The admin can not further add any but can add the cookies to the respective cookie categories as required. The admin can delete or edit the cookie categories as required.
After tapping the edit button below page appears.

Here, for the respective cookie category, the admin can –
- Change the Cookie Category name.
- Enable or disable the cookie category as required.
- Make the cookie category as Mandatory or not(this one is mandatory by default).
- Set the sort order at the storefront.
- Choose the store view for which the cookie category will be applicable.

- Enter the description for the cookie category visible at the storefront.

Cookie List
Under this section, the admin can create the cookies and assign them to the cookie category as required. The admin can also add or delete the cookies as required.

To add a new cookie to the cookie category, the admin will tap the Add Cookie button.

Here, for the new cookie, the admin will –
- Enter the cookie name.
- Enable the cookie.
- Set the lifetime from and to values for the cookie as required.
- Enter the cookie owner’s name.
- Choose the cookie group/category to which you want to add the cookie.
- Enter the description of the cookie as required.
Lastly, save the cookie.
Now, the cookie will be visible at the store front end under the respective cookie category.

Agreements
Here, the admin will be able to create the agreement and display it on the registration, payment, login, contact, and feedback forms. It can also be enabled under the below shipping methods.

To add an agreement tap the add agreement button. For now, I’ll be editing and showing you the already-created agreement with various sections that need to be configured.
General Configuration:

Under this section, the admin will –
- Enter the agreement name.
- Enable the status of the agreement.
- Make the field mandatory.
- Choose to enable the privacy policy on the first visit or not.
- Choose the agreement to display at – registration, payment, login, contact, and feedback forms or below the shipping methods.
- Enter the agreement message that is visible to the customers.
- Set the position of the agreement.
- Choose the email template.
Version:
Under this section of the agreement, you have to mandatorily add the version.

To add a version tap the Add New Policy Button. After editing the version we have other sections to configure.

Here, for the version the admin will –
- Enter the block title.
- Enable the status of the policy.
- Set the version number.
- Choose the store view for the policy version.
- Add a description that is visible to the customers.
Save the version.
Note: The content of the latest version will appear on frontend (in case of multiple versions).
Customer Log: After a customer logs in after checking the agreement, a log gets generated for the same as shown below in the snapshot.

After setting up the agreement, it is visible on the selected pages, as shown below.

Tapping the same displays the agreement content.

Cookie Pop-up Theme
Under this section, the admin can configure the cookie pop-up theme settings as per requirement.

Here, the admin will edit the already available light theme by tapping the edit link under the actions column.

General Settings
- Set the cookie popup theme label as per requirement.
- Enable the cookie theme by enabling the same.
Primary Popup
- Set the Cookie popup title.
- Choose cookie Popup type as fixed size or full width.
- Set the cookie popup width if the cookie popup is set as a fixed size.
- Choose the cookie popup location as a center, left, or right.

- Choose the cookie popup background color as required.
- Enter the content for the cookie popup as required.
- Upload the logo image that is displayed on the cookie popup.

- Set the logo image alt text.
- Set the logo image width, height, and logo image location on the popup.
- Set the Accept button label.
- Enable the decline button and set the decline button label.
- Choose to enable the select preferred cookie button and set the label for the same.
- Choose the primary button color.
- Choose the primary button border
- Select the secondary button color.

- Set the secondary button border.
- Choose the secondary button border color.
- Set the border width and radius.
Category Popup
Here, the admin will –
- Set the category popup title.
- Choose the cookie popup location.
- Set the cookie popup background color.
- Cookie Popup content.
Lastly, save the settings by tapping the Save button.
A view of the cookie popup at the storefront.

Selecting preferred cookies displays another popup to select the respective cookies.

Customer Requests
Here, the admin can see all of the requests sent by the customers for updating and for account deletion as per the snapshot below.

For a particular customer request the admin can change the status of the request to – Pending, Processing, Complete, or declined as required.
Cookie Log
Here, the admin can view the cookie acceptance and rejection logs as required.

The admin can also view the data store view-wise as required.

Storefront – Workflow
Users accessing the webstore will be able to see the cookie consent popup where they can decline the cookies or select and enable the cookies they want to permit access to.
The users can also accept all the cookies as required.

Tapping on the Select preferred cookies brings up the popup to select and enable the cookies.
Here, the essential cookies are auto-enabled and the users can choose the cookies to enable for the other cookie categories as required.

Also, the customers logging in to their account panel can see the agreement that needs to be checked and read first before logging into their accounts.
This agreement can be enabled for the various pages of the store as required.

After tapping the Read Privacy policy a popup appears with the required information.

The same agreement can also be seen when a new user is registering himself at the store

Customer End – Workflow
After logging in to the account, the customers will find one side panel option – Customer GDPR Data as per the snapshot below.

GDPR Data

View Policy Doc
Under this section, the customers will be able to view and read the privacy policy by tapping the Read Privacy Policy Link.

Anonymize Personal Data
Under this section, the customers will be able to anonymize their personal data, customer information will be removed and replaced with random values.

So, the customer has to check the respective checkbox, enter the current password for the account, and submit the request to the store admin.
Status of Agreement
The customers have an option to opt in or out of the consents by enabling or disabling the respective available checkbox.

Request Data Access

1. Request Data Access
Under this section, the customers can download the data in a PDF or HTML file format as required by tapping the respective button.

HTML

2. Request Data Update
Here, the customer can send a data update request to the admin.
The customer needs to specify what information is to be updated and then tap the submit request button to send the request to the admin for further processing.
3. Request Data Update
Here, the customer can send a data delete request to the admin.
The customer needs to specify the deleted reason and then tap the submit request button to send the request to the admin for further processing.
Request List

Under this section, the customers can see all of their update and delete requests with their creation and update time stamps as well.
After a request status is updated the same is visible to customers in this particular section.

After a request is completed by the admin, the completed status is visible to the customers for that particular request.

Email Notifications
When the status is changed to processing for a particular request by the admin an email is received by the customer.

When the status is changed to complete, an email notification is received by the customer.

If the request is declined by the admin, an email notification for the same is sent to the customer using the Magento 2 GDPR extension.

Support
That’s all for the Magento 2 GDPR Extension, for any further queries kindly drop us an email at [email protected] or you can create a ticket at Webkul Support System.
If you’re looking to create a custom e-commerce website, it’s a great idea to hire Magento developers who can help you build a powerful and scalable online store.
Also, check our complete Magento 2 Modules list.
Current Product Version - 4.0.2
Supported Framework Version - Magento 2.0.x, 2.1.x, 2.2.x,2.3.x, 2.4.x

Be the first to comment.