CS-Cart Amazon Connector Add-on helps merchants expand their eCommerce business on Amazon.
Managing sales on both Amazon and a CS-Cart store separately can be challenging, but this add-on simplifies the process.
With this integration, you can manage Amazon products and orders directly from the CS-Cart backend. It helps centralize operations and reduces switching between multiple panels.
The add-on allows product import and export between Amazon and CS-Cart, keeping your catalog updated across platforms.
You can also update product details on Amazon directly from the CS-Cart admin panel.
In addition, it supports category mapping, allowing you to map Amazon categories with CS-Cart categories for accurate product listing.
It also enables order synchronization by importing Amazon orders into your CS-Cart store, making order management more efficient.
You can manage all your orders from one place.
Overall, the CS-Cart Amazon Connector Add-on simplifies multi-channel selling by managing products, categories, and orders in one system.
Note: Before installing the add-on, extract the downloaded package.
- Install the License Manager add-on first.
- Then install the required add-on.
- Follow the license activation steps to generate your license key.
CS-Cart Amazon Connector Features
- Seamlessly integrated with CS-Cart and CS-Cart Multi-Vendor for smooth performance.
- Provides two App Mode options to connect your Amazon account with CS-Cart: Public App (OAuth) and Private App (Client Credentials).
- Admins and vendors can easily import and export products between CS-Cart and Amazon.
- Provides cron synchronization settings to enable or disable automatic pulling of orders and product synchronization.
- Provides functionality to import Amazon orders directly into the CS-Cart store.
- Allows admin/vendors to fetch and sync orders within a specific date range.
- Enables real-time product updates on Amazon from the CS-Cart admin panel.
- Also, the vendor can add & connect multiple Amazon Channels to Import/Export from each account separately.
- Besides this, it has the option to export products individually or in bulk. So that Admin/Vendor can export CS-Cart products that are not in his/her Amazon account.
- Option to select Amazon order statuses that you want to import.
- Supports fulfillment modes such as FBM (Fulfilled by Merchant), FBA (Fulfilled by Amazon), or both.
- Includes cron-based synchronization for auto-pulling orders and products.
- Feature to map payment methods between CS-Cart and Amazon.
- Allows shipping method mapping with Amazon carriers for accurate order processing.
Flow of Installation And Configuration
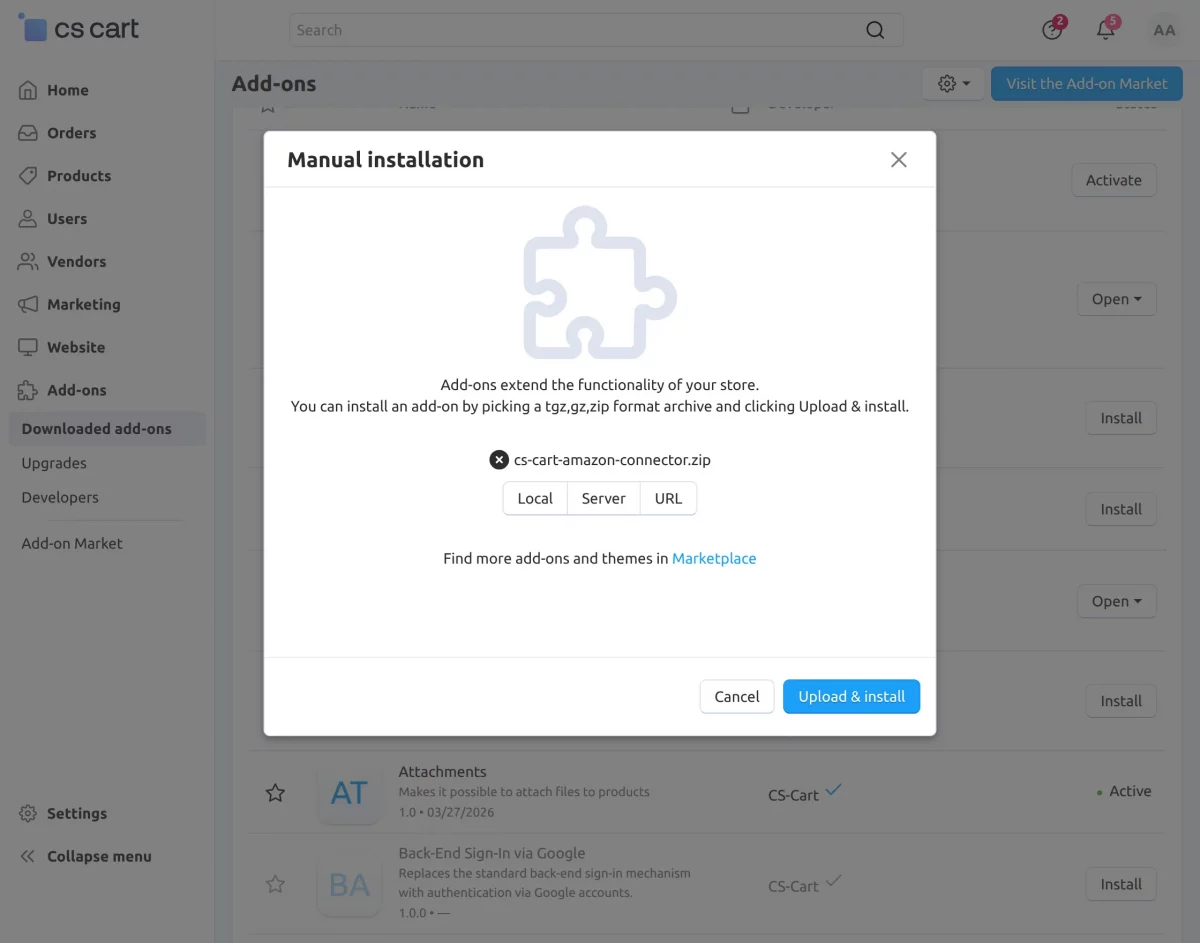
When you download the “CS-Cart Amazon Connector”, you’ll get one zip file and the install.txt file. Read it carefully and follow it. After that, install the zip file.
Navigate to Add-ons > Downloaded add-ons and click on the settings icon. You can manually install the zip file as shown below:
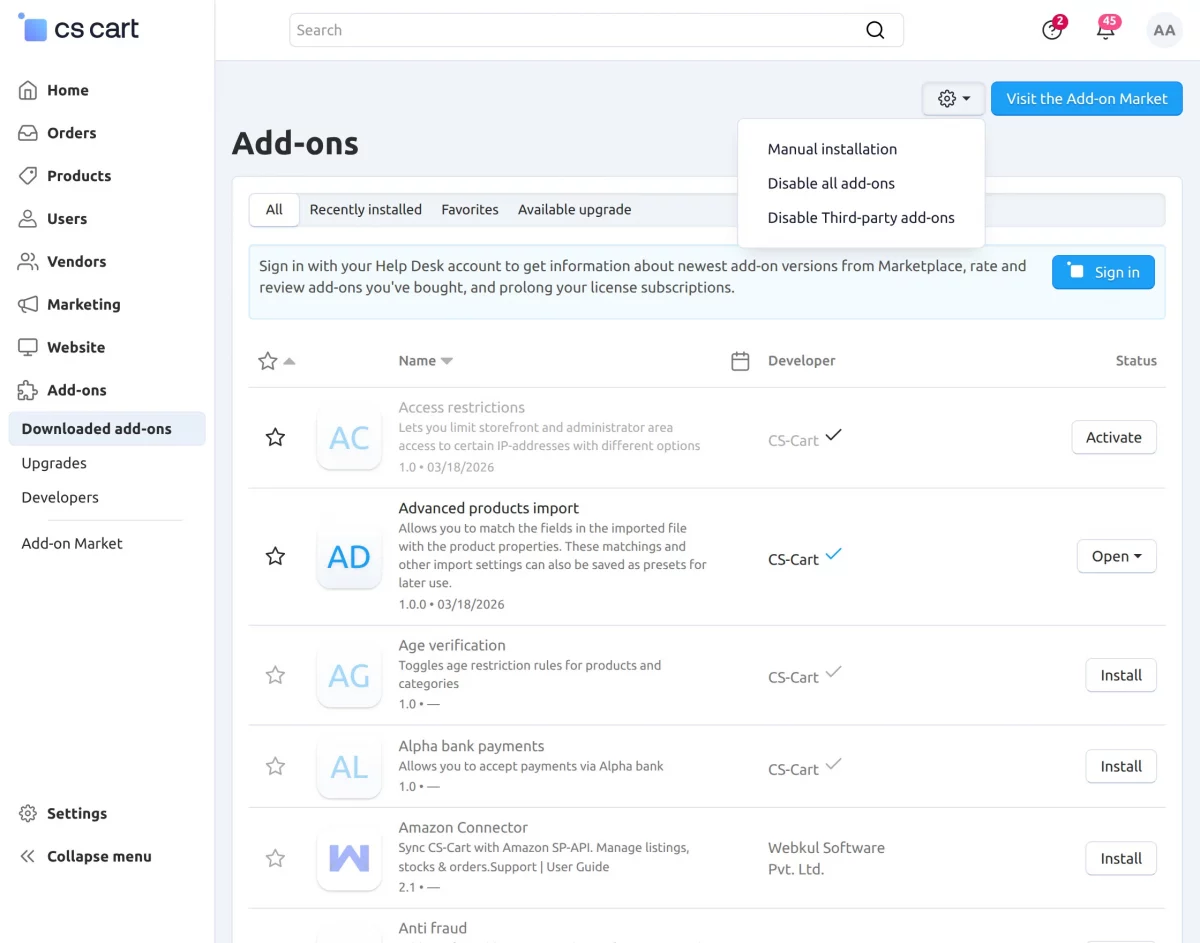
Click on “Local” to browse the zip file and then click on “Upload & Install” as shown below in the snapshot.
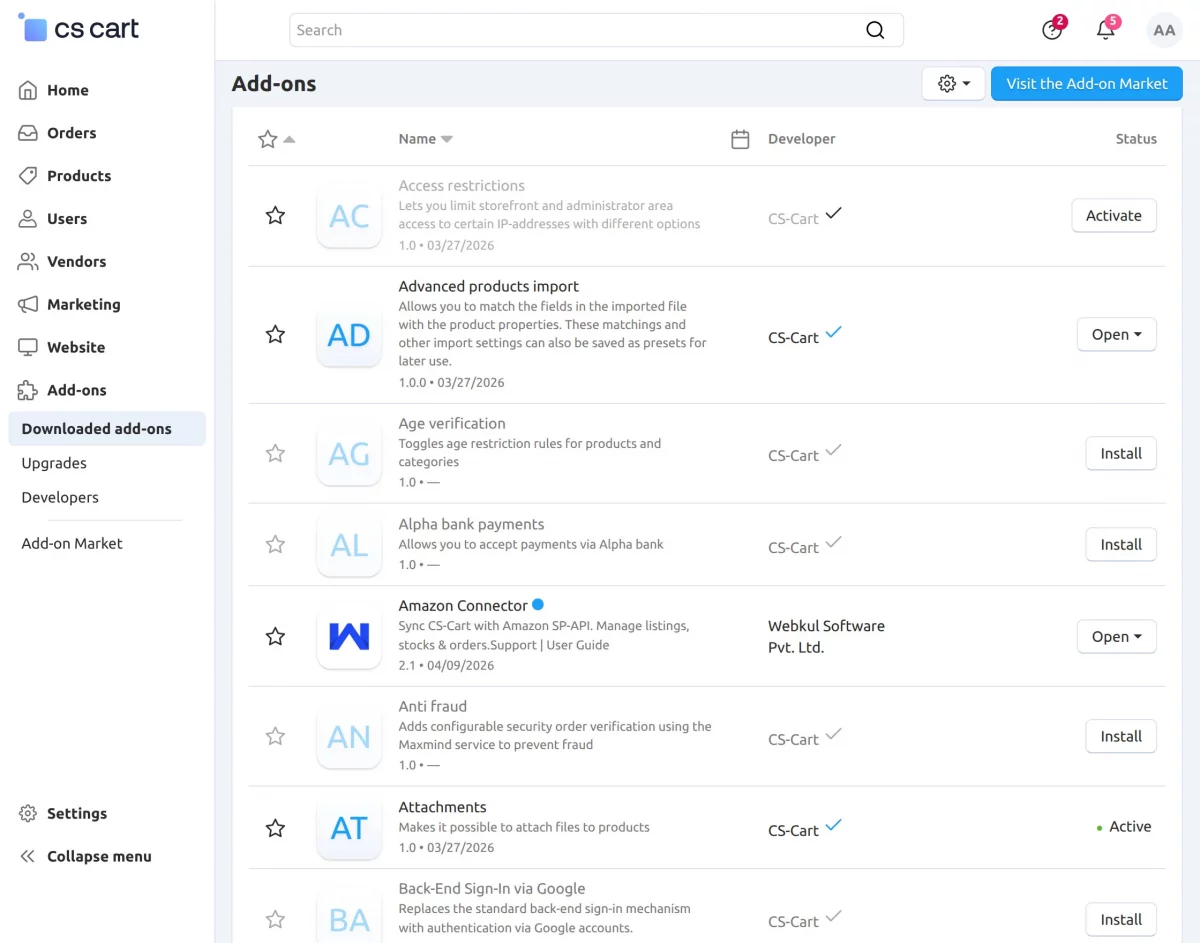
Activate Add-on
Once you install and activate the CS-Cart Amazon add-on, you can begin configuring its settings.
Note – The Amazon Connector add-on depends on the CS-Cart Queue Handler add-on, so make sure to install and enable it first.
It is required for efficient bulk data processing. You can refer to the official documentation for configuration here: CS-Cart Queue Handler
Configure the Add-on Settings
Go to the Add-ons section and click on the CS-Cart Amazon Connector add-on, then navigate to the Settings tab to configure it.
There are three main sections available in the configuration:
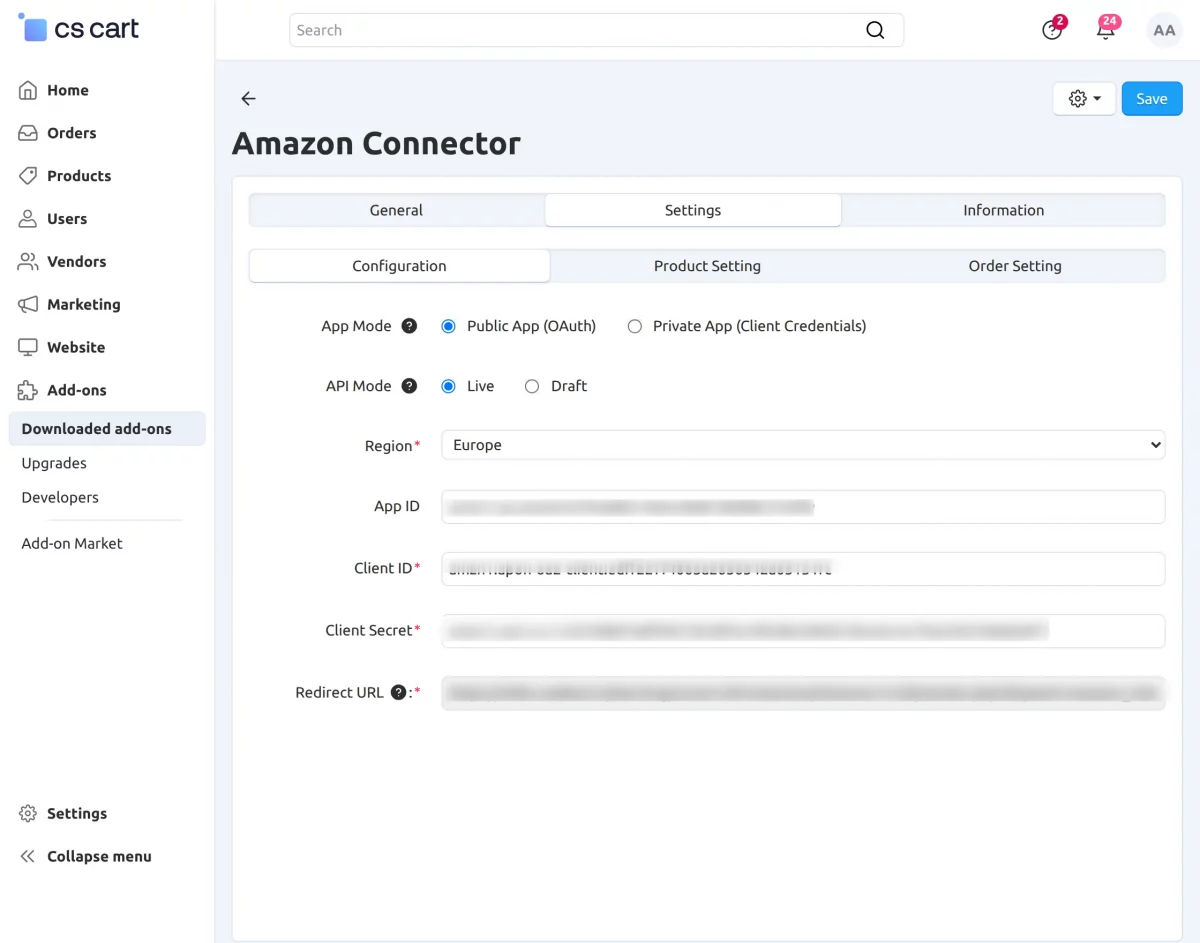
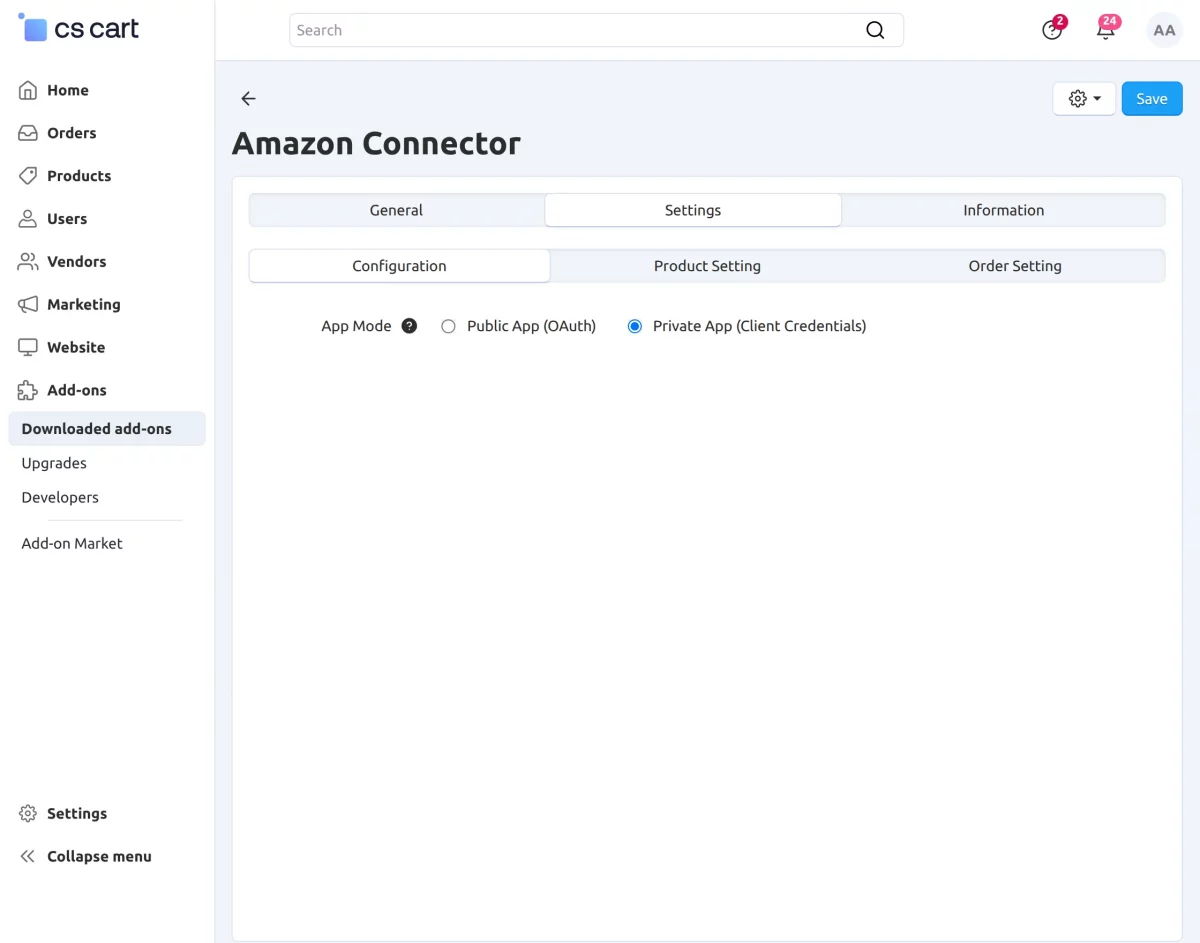
1 – Configuration
In this section, you will find the App Mode setting, which defines how your CS-Cart store connects with Amazon. There are two options available:
Public App (OAuth) – This option uses the Amazon OAuth consent flow, where you need to provide details like App ID and Redirect URL to establish the connection.
Private App (Client Credentials) – This option works using the client credentials method, requiring only the Client ID and Client Secret for authentication.
It is simpler and suitable for direct integrations without a user consent flow.
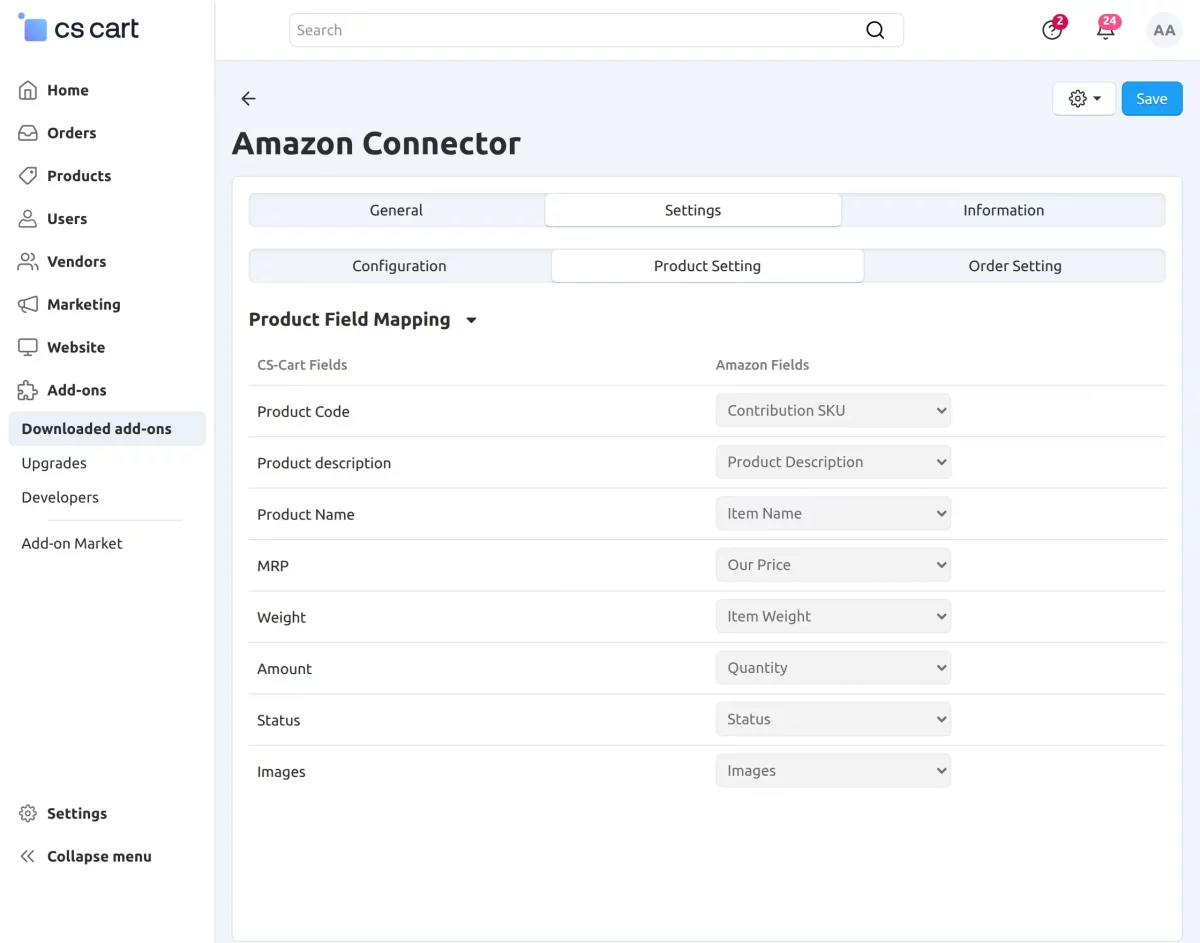
2 – Product Settings
Go to the Product Settings tab to view and manage the product field mapping between CS-Cart and Amazon. This ensures proper synchronization of product data.
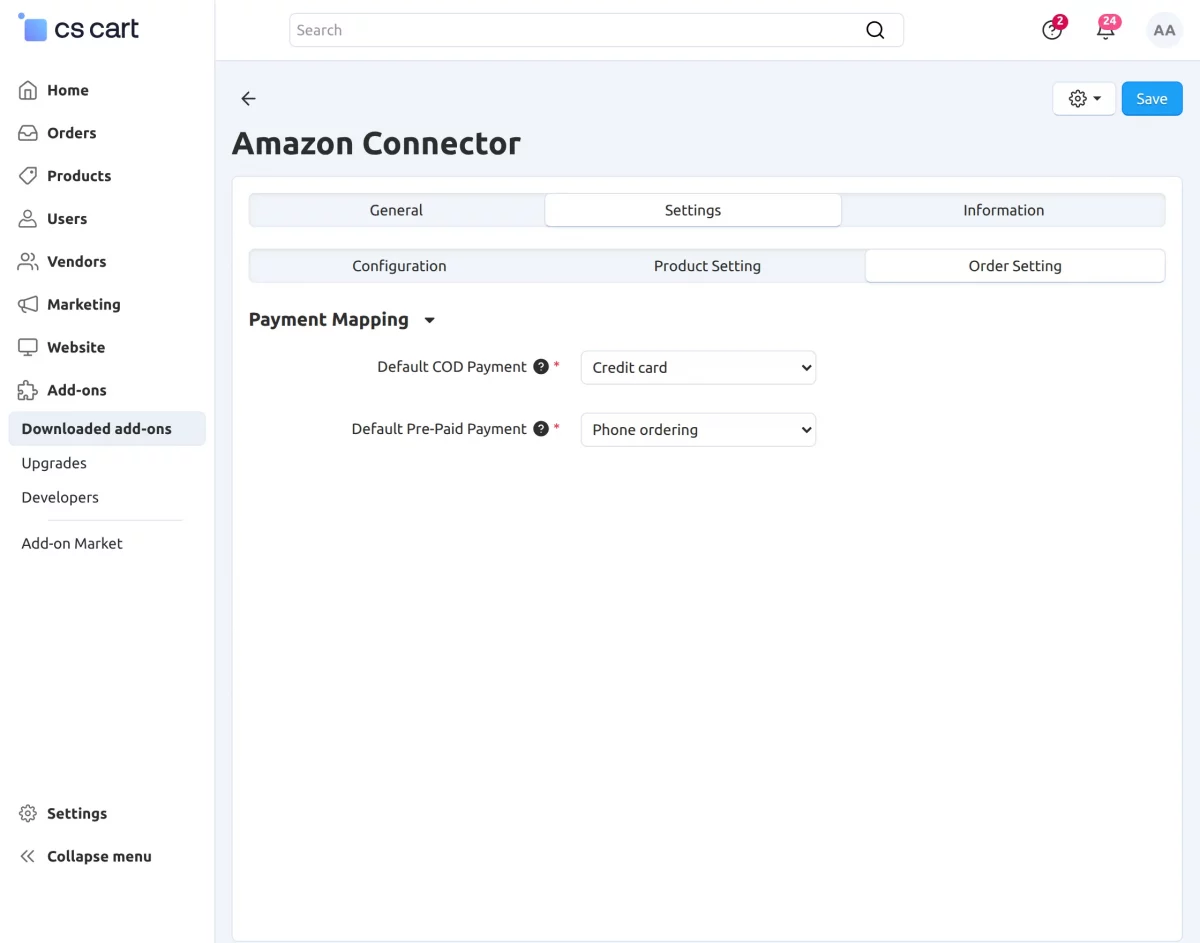
3 – Order Settings
Go to the Order Settings tab and click on payment mapping to configure order-related settings.
Default COD Payment – Select a payment method for COD orders.
Default Pre-Paid Payment – Select a payment method for prepaid orders.
After completing all the configuration, simply click on the Save button to apply and store all the settings.
How to Get Your Amazon Credentials?
Step 1: Create an Amazon Seller Account
To begin, you must first register on Amazon Seller Central. This is the primary account where your products, orders, and store data are managed.
Without a seller account, you won’t be able to connect your CS-Cart store with Amazon.
Steps to follow :
- Visit Amazon Seller Central
- Click on Sign Up
- Enter your business and personal details
- Complete the verification process
Finding your Amazon Seller ID –
- To access your store, you first need to log in and sign in to your Amazon Seller Central account.
- Once signed in, you can search for your store or product listings to locate your Seller ID. To find your Seller ID, you can simply go to your storefront page.
- Find one of your product listings on Amazon.
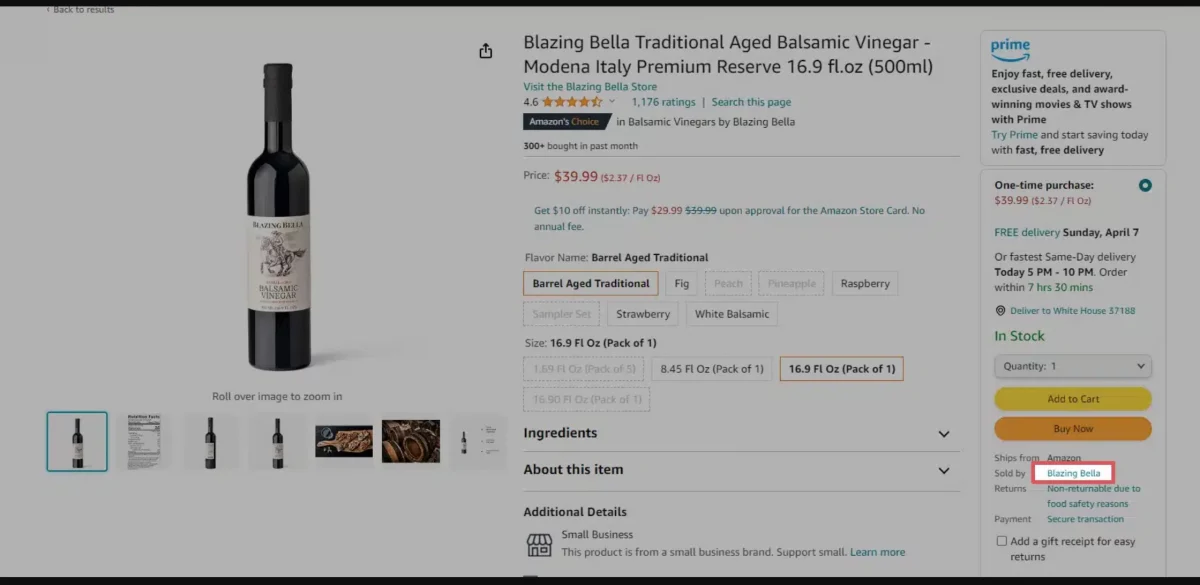
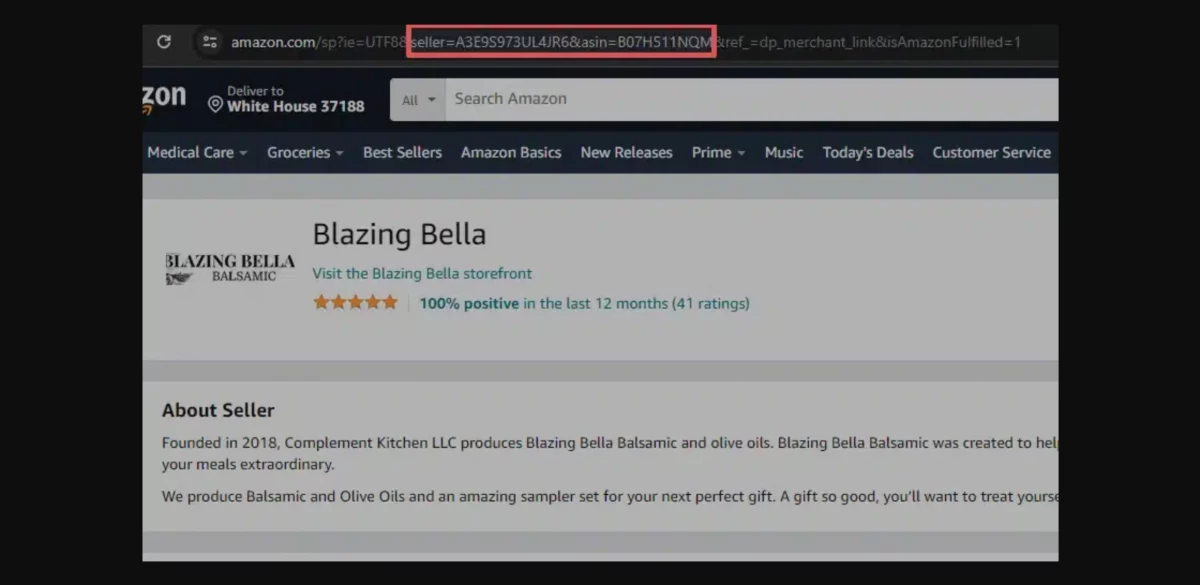
Click Sold By [your company name] to view your About Seller page. This page shows your Seller ID in the URL: seller=XXXXXXXXXXXXX
Step 2: Create an Amazon Developer Profile
After setting up your seller account, the next step is to create a developer profile on Amazon Developer Console.
This account is required to generate API credentials that will be used in CS-Cart.
Steps to create a developer profile:
- Log in to the Amazon Developer Console using the same credentials
- Navigate to Developer Console
- Register as a developer by filling in the required details
Step 3: Generate LWA Credentials
Once your developer profile is ready, the next step is to create Login With Amazon (LWA) credentials, which are required to authenticate your CS-Cart store with Amazon.
Steps:
- Navigate to Apps & Services → Login With Amazon in the Amazon Developer Console
- Click on the “Add New App Client” button
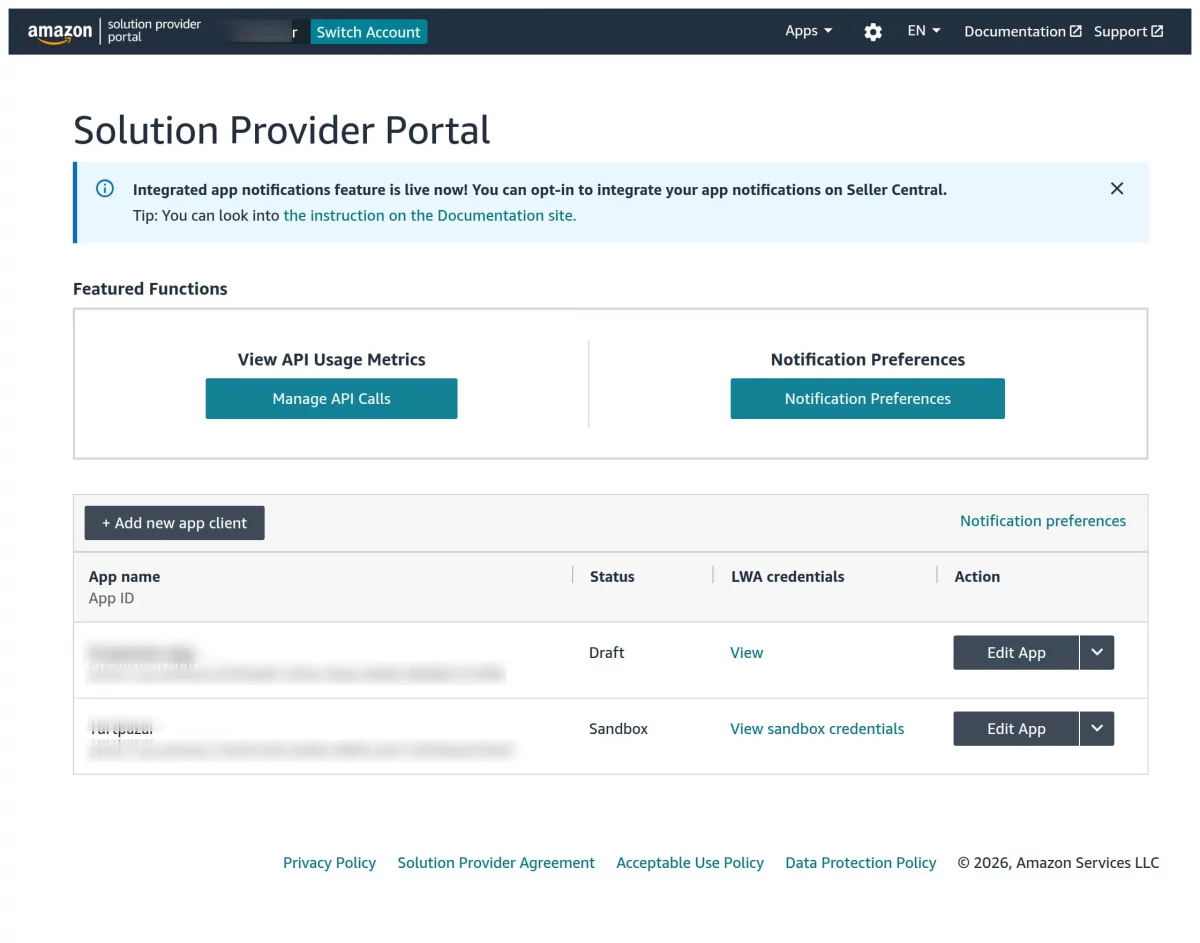
- Enter the required details such as App Name, API Type, App Type, and other necessary information to complete the setup.
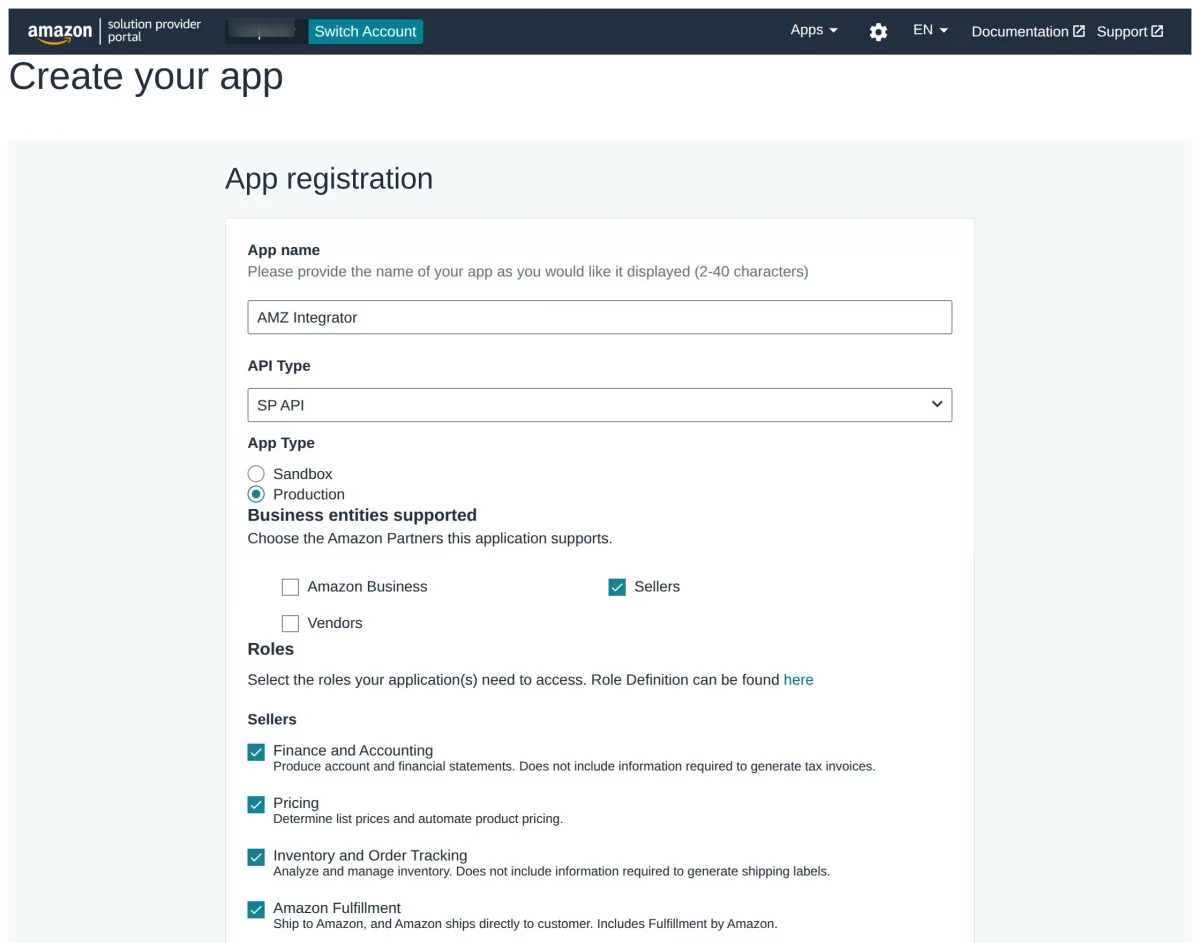
- Click on Save and Exit to apply the settings.
Note – Enable PII access in your Amazon Developer App by selecting “Yes, I will delegate access to PII” and checking all four PII types.
Without this, orders will import successfully in CS-Cart, but customer details such as name, address, and tax information will be missing or incomplete.
Here, you can view the list of apps along with their status and credentials, and also have the option to edit them.
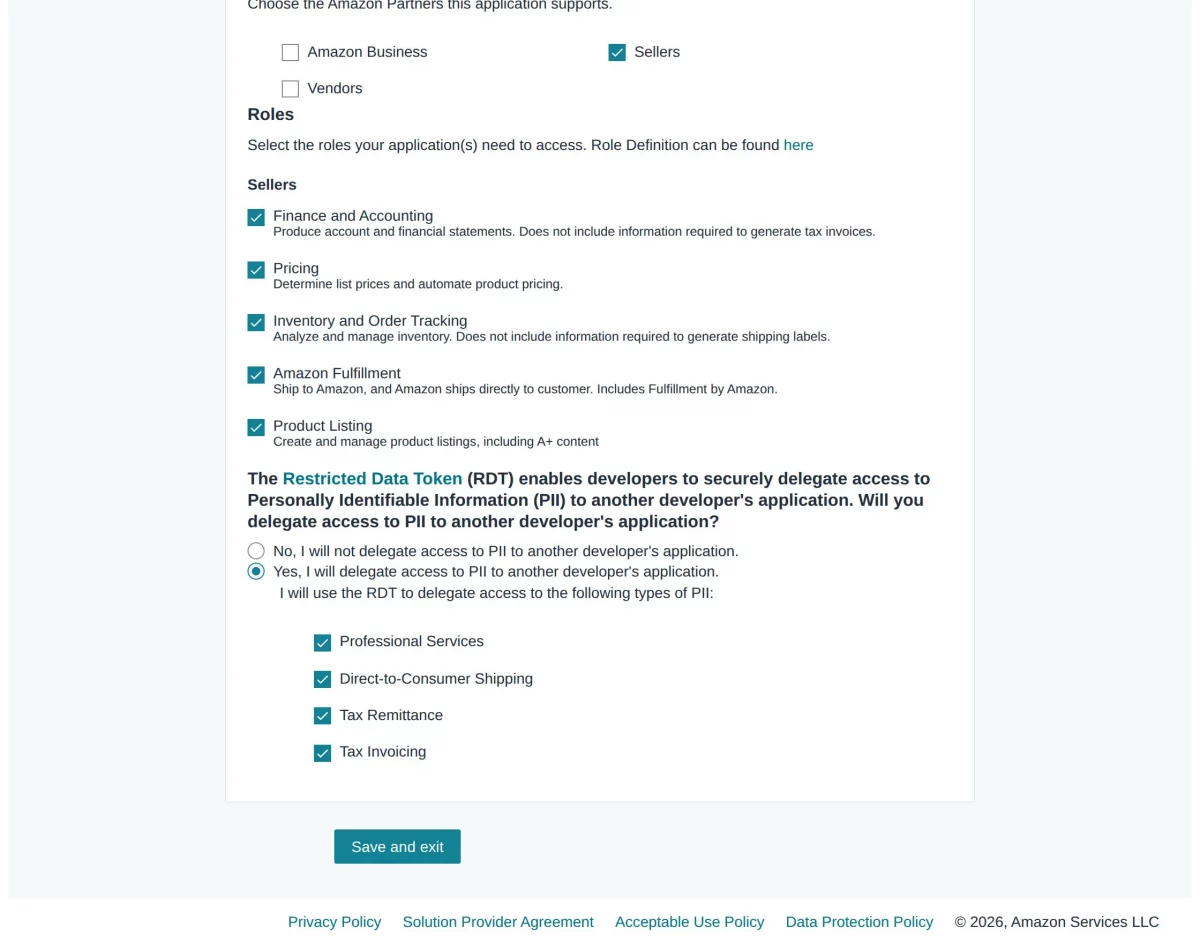
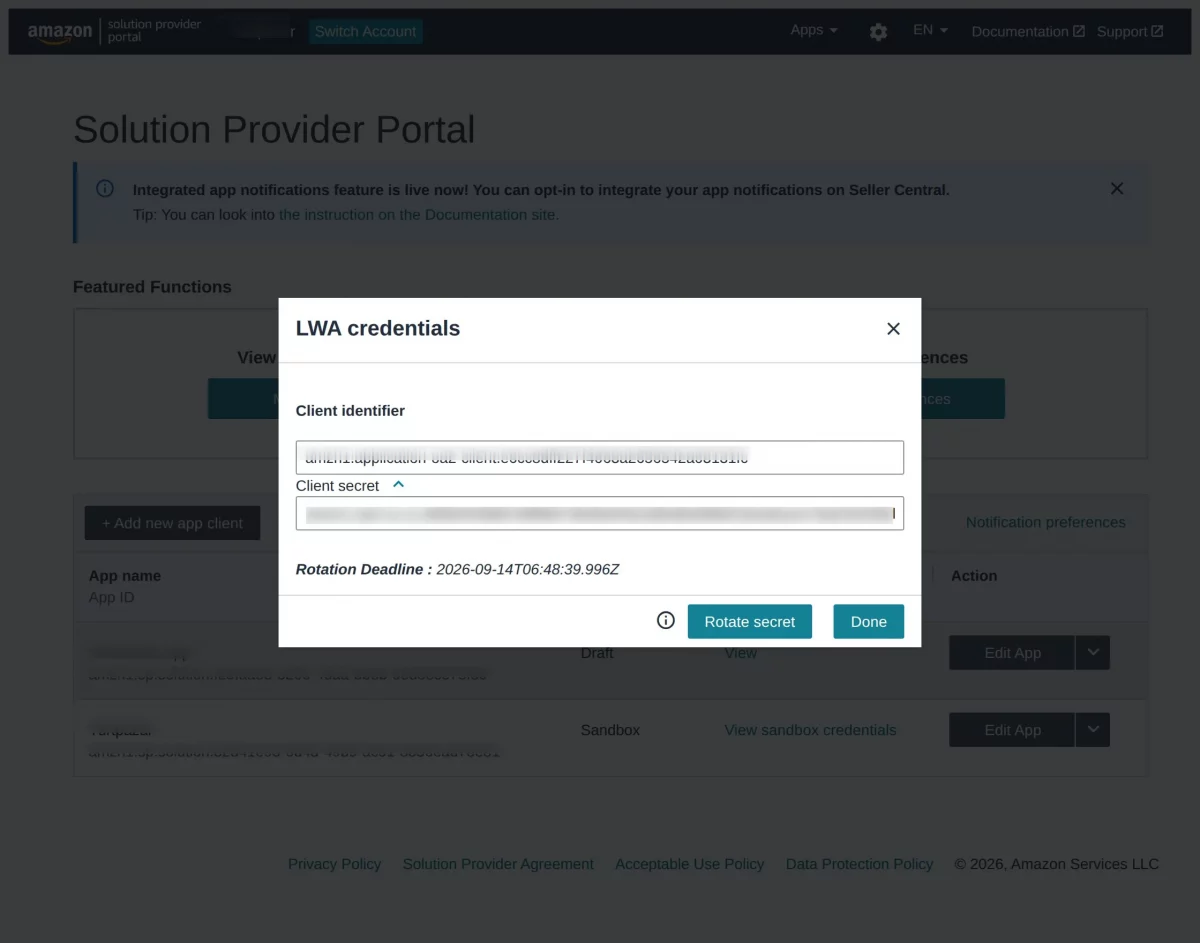
Click on the “View” link to access the LWA credentials, including the Client ID and Client Secret.
Note – Amazon provides a Rotate Secret option in LWA credentials with a mandatory Rotation Deadline.
Once the secret is rotated, a new Client Secret is generated in your Amazon Developer Account, which must be manually updated in your CS-Cart Amazon Connector settings.
Failing to do so will disconnect the connector from Amazon and stop all sync operations.
For details, please check the Amazon SP API docs: https://developer-docs.amazon.com/sp-api/docs/rotating-your-apps-lwa-credentials
Step 4: Steps to Create a Refresh Token
- Select the app from your application list for which you want to generate the token.
- Click on the “Create Token” button available for the selected app.
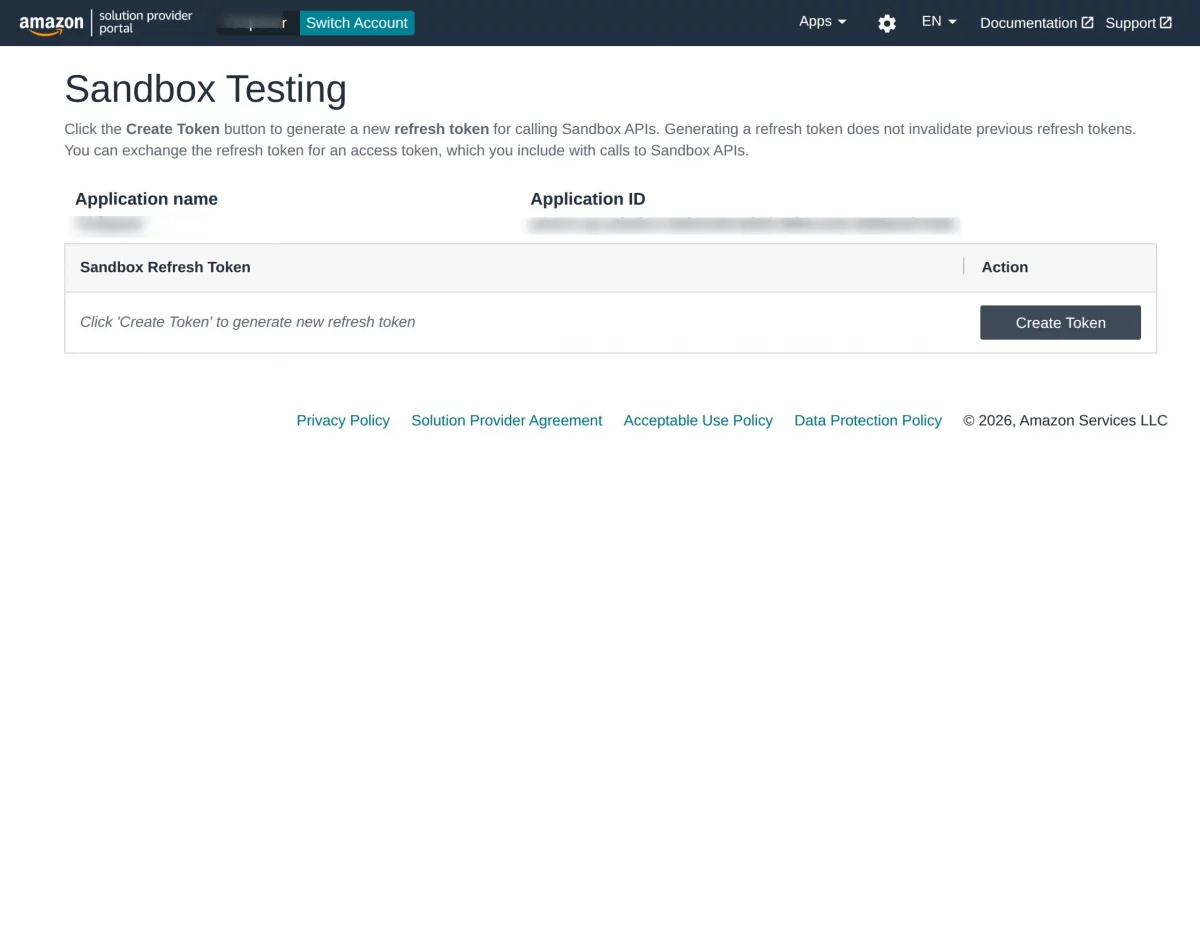
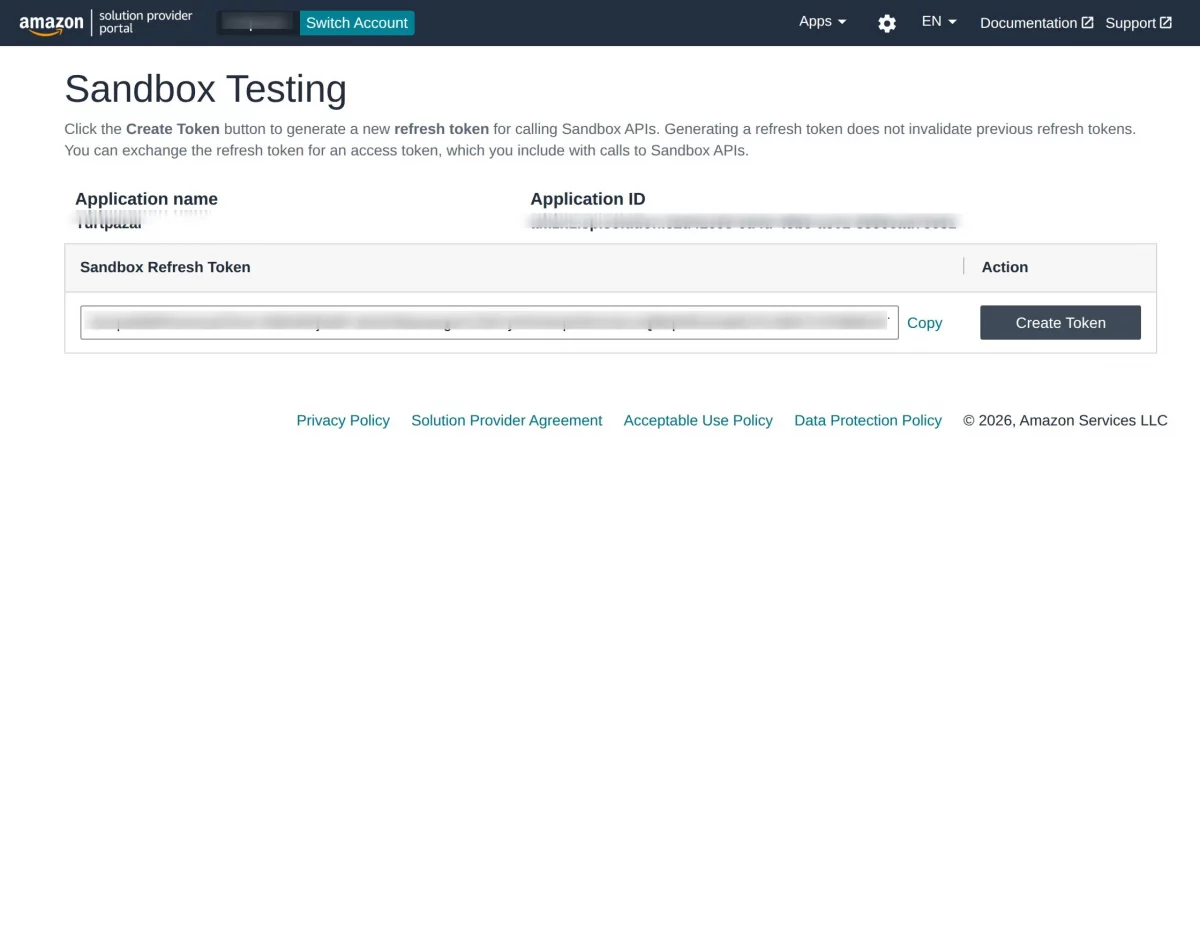
Once generated, the Refresh Token will be displayed, which can be used for authentication.
Using Public App (OAuth)
When the admin selects Public App (OAuth), configure the following details:
- API Mode – Select Live for production SP-API calls or Draft for sandbox/testing environment.
- Region – Select the appropriate region based on your Amazon marketplace.
- App ID – Enter your Amazon application App ID.
- Client ID – Enter the LWA Client ID.
- Client Secret – Enter the LWA Client Secret.
- Redirect URL – Here you will see the Redirect URL. Make sure it matches the same URL configured in your Amazon Developer application.
Create a New Amazon Channel Using Public App
To create a new Amazon channel, first log in to the seller panel. Then navigate to the Settings section and click on Amazon Connector.
Here, you will be able to view the list of existing Amazon channels, along with the option to create a new one.
It allows you to enable or disable a channel by changing its status as needed.
In addition, you can edit the channel details anytime to update credentials or configuration settings.
The add-on also provides a category mapping feature, which helps you link CS-Cart categories with Amazon categories for accurate product listing and better synchronization.
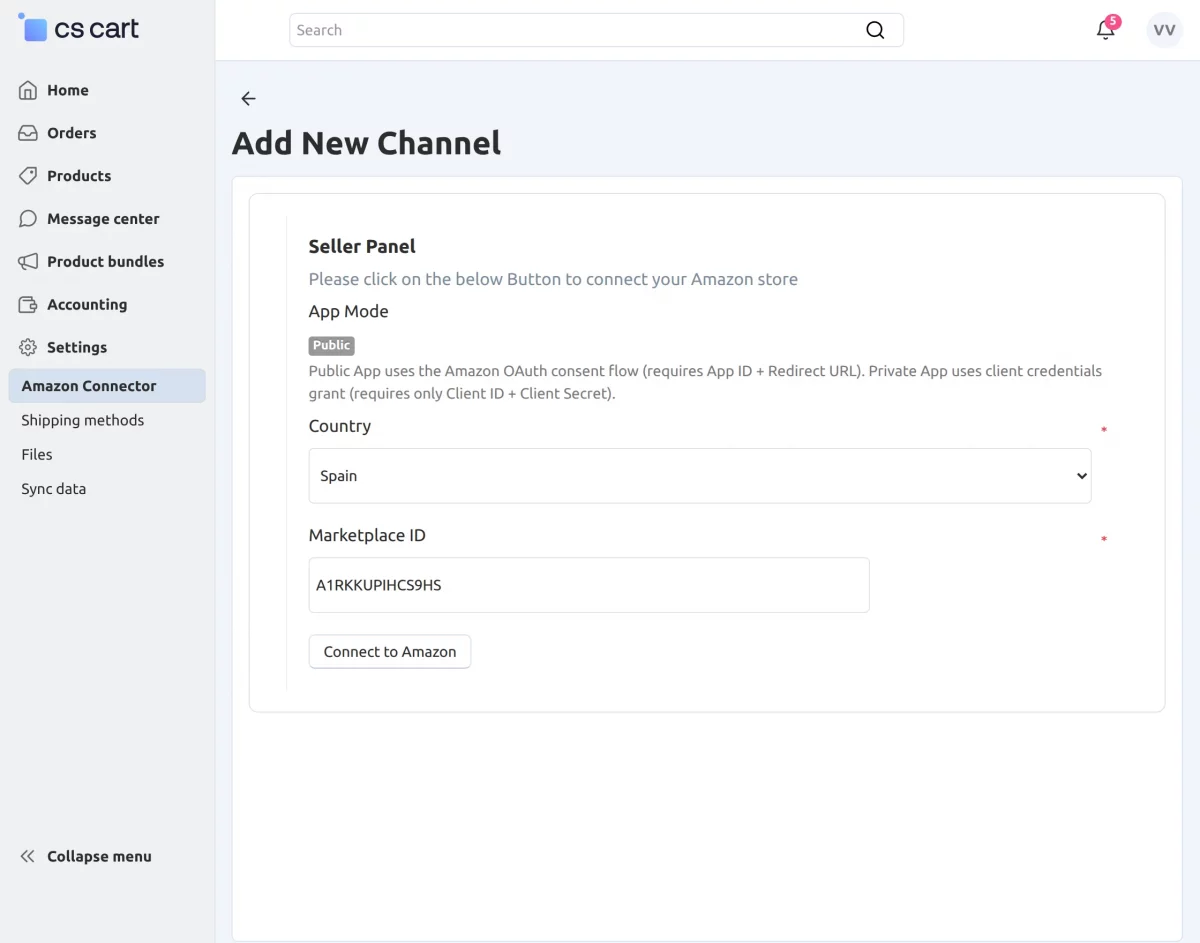
Click on the “+” button to create a new Amazon channel using Public App.

The seller can select the country and click on the Connect to Amazon button to proceed with the channel connection.
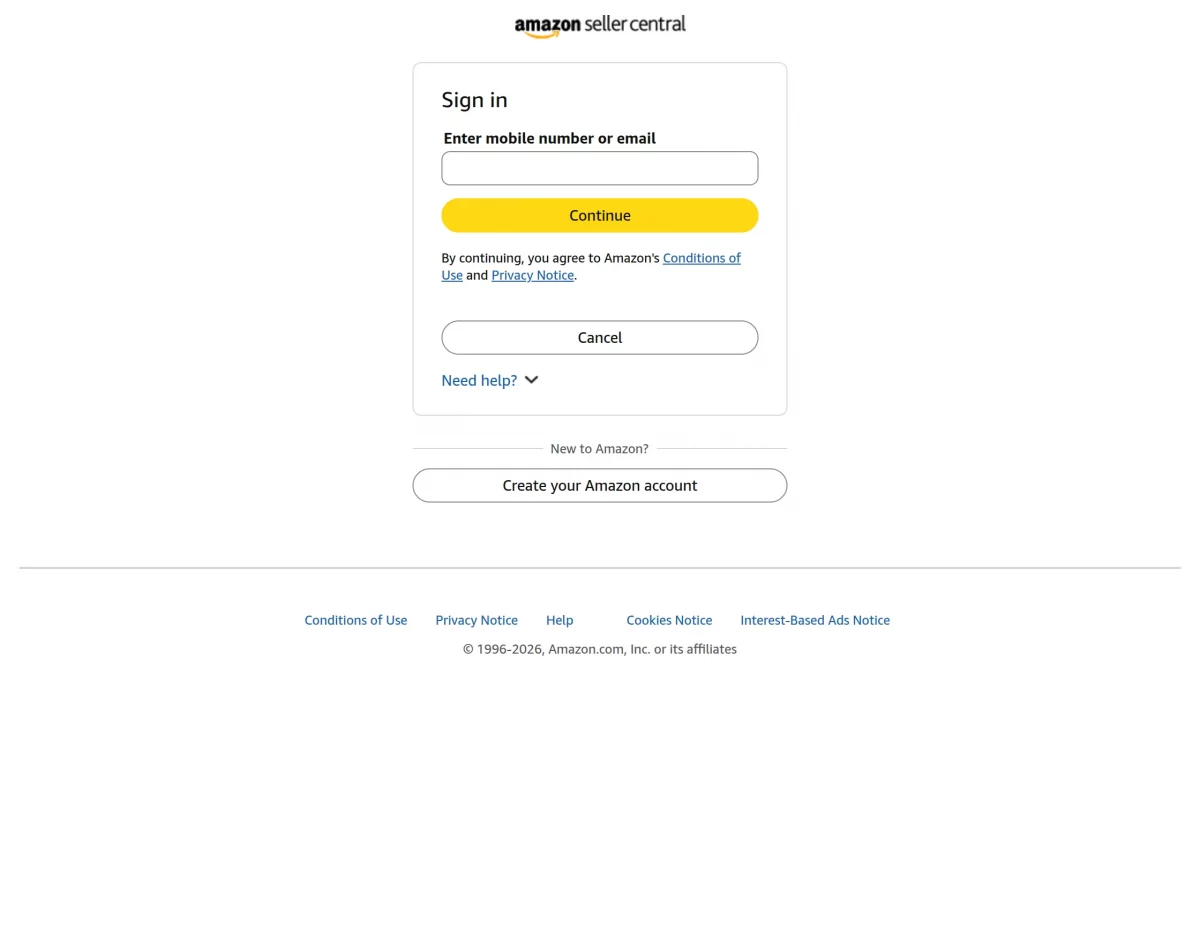
When you click on the Connect to Amazon button, you will be redirected to the Amazon Seller Central sign-in page.
Here, the seller needs to enter their Seller Central account credentials to connect the Amazon account.
Using Private App (Client Credentials)
Select this option to continue with the Private App setup.
Create a New Amazon Channel Using Private App
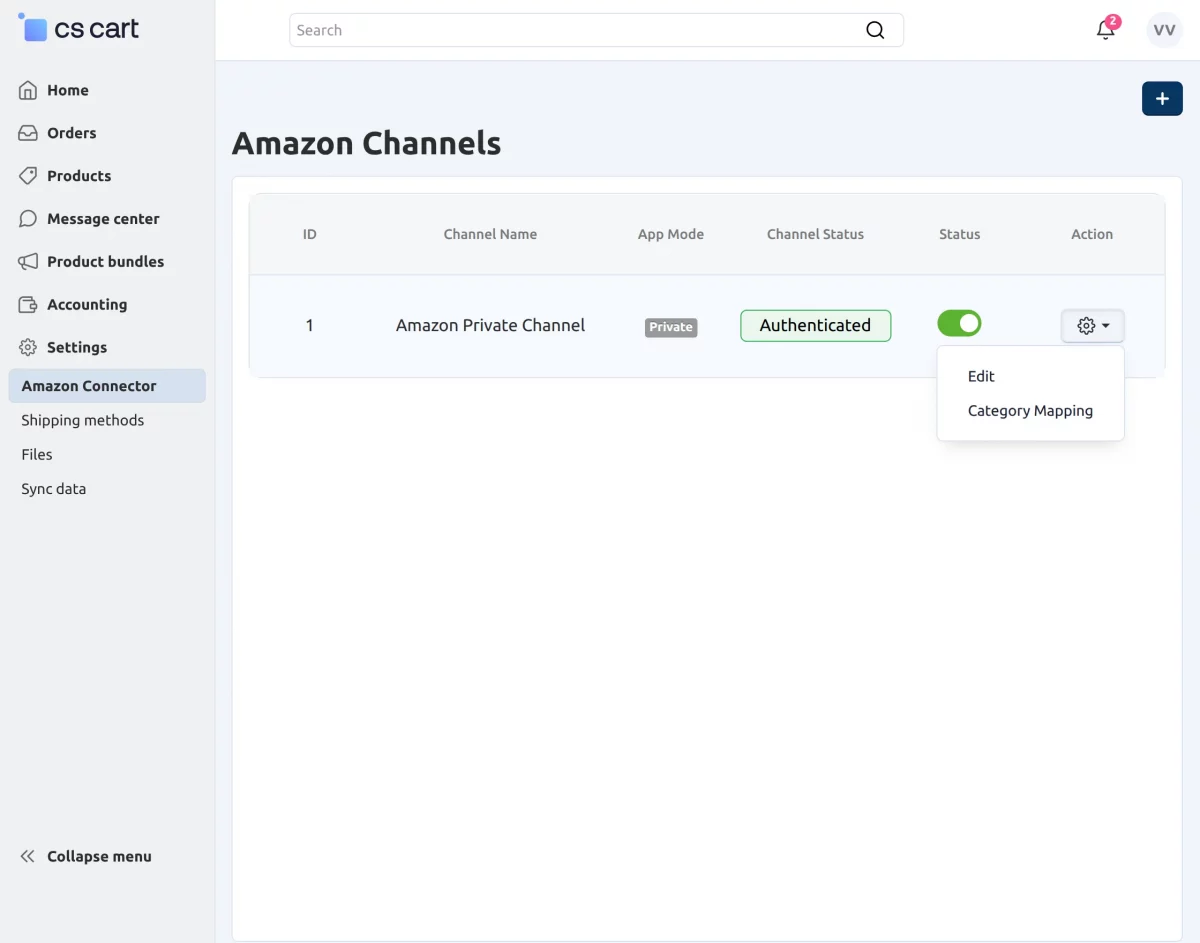
To create a new Amazon channel, first log in to the seller panel. Then navigate to the Settings section and click on Amazon Connector.
Here, you will be able to view the list of existing Amazon channels, along with the option to create a new one. It allows you to enable or disable a channel by changing its status as needed.
In addition, you can edit the channel details anytime to update credentials or configuration settings.
The add-on also provides a category mapping feature, which helps you link CS-Cart categories with Amazon categories for accurate product listing and better synchronization.
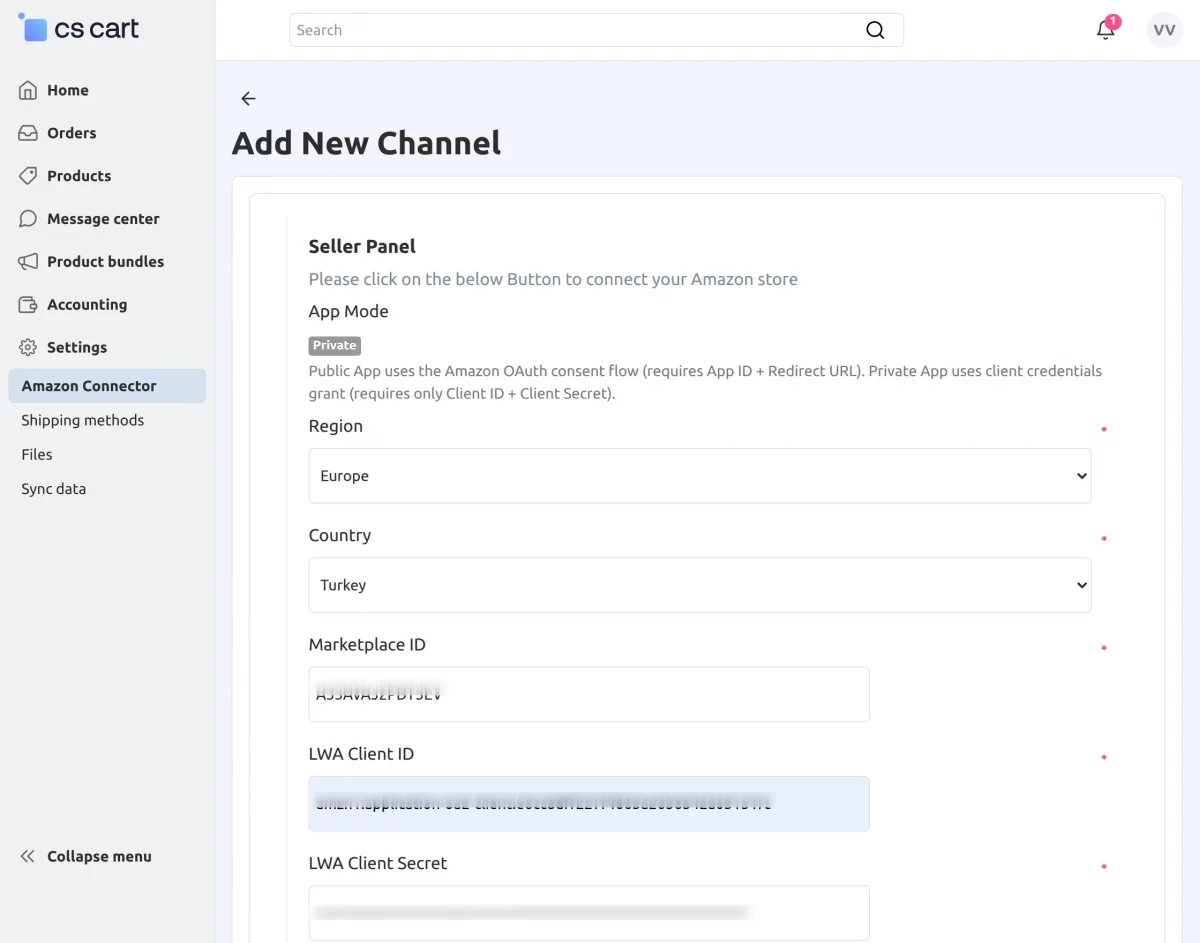
Click on the “+” button to create a new Amazon channel using Private App.
Steps to Create a New Amazon Channel –
- Select the region based on your Amazon marketplace.
- Choose the country matching your Seller Central account.
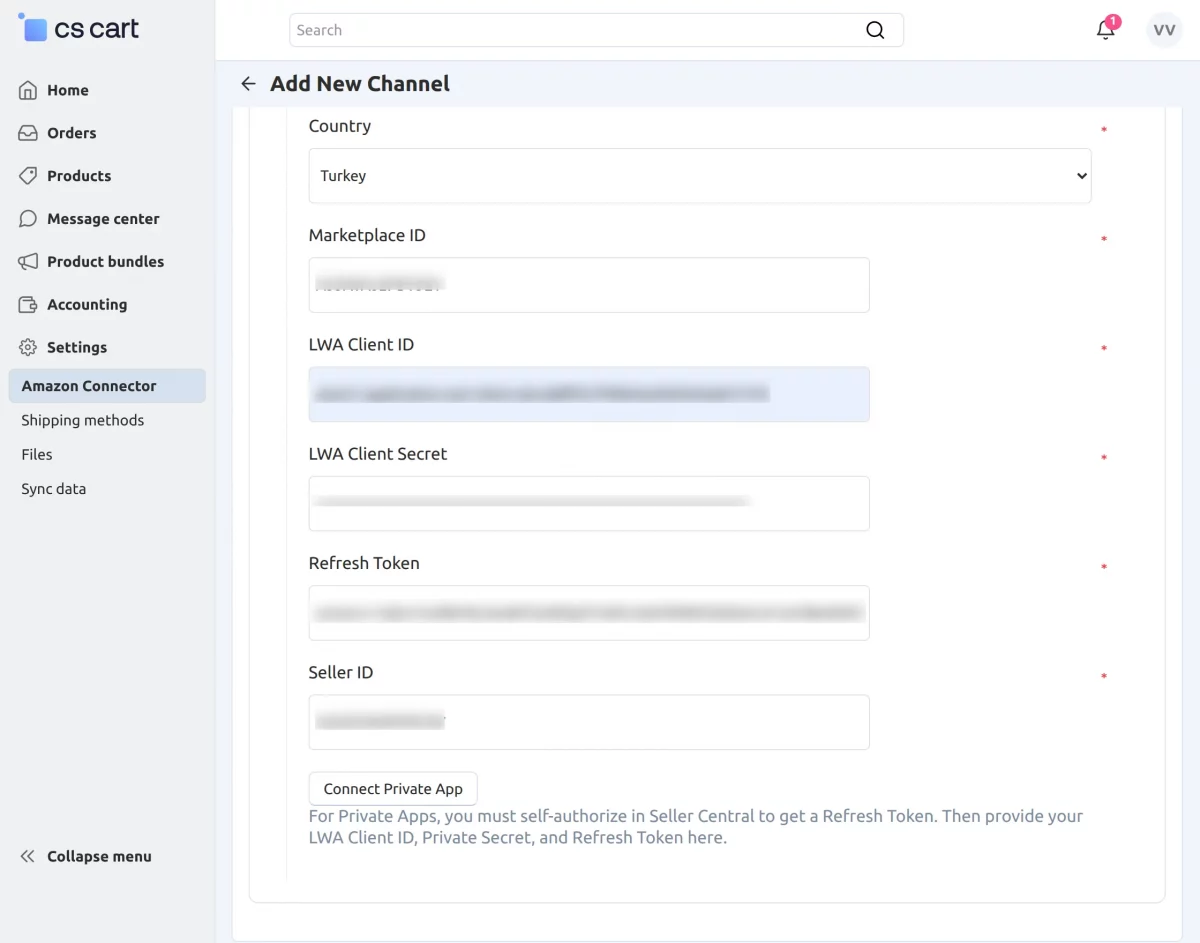
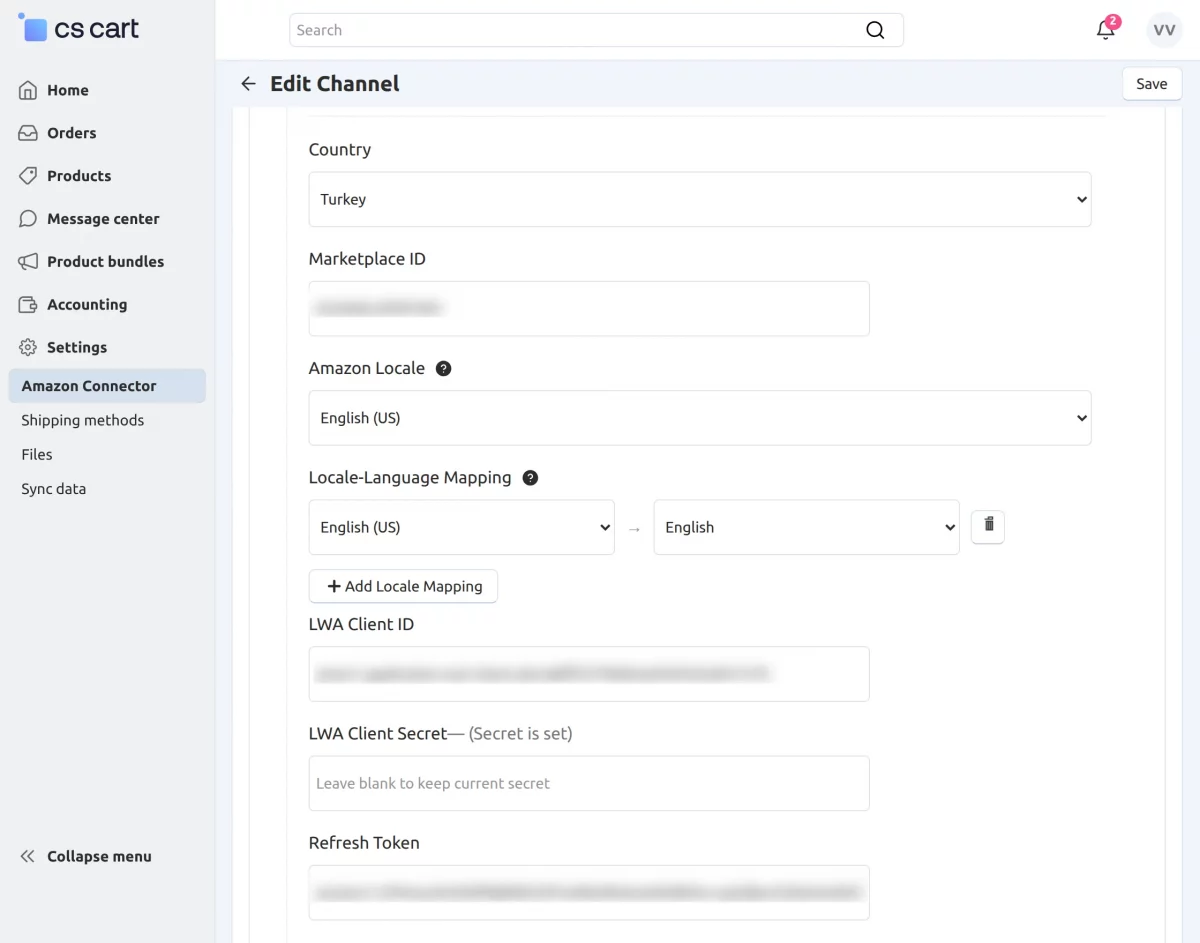
- Enter the LWA Client ID and Client Secret.
- Add the Refresh Token.
- Enter your Seller ID.
After filling in all the details, click on the “Connect Private App” button to create the channel.
Seller Side: Edit Amazon Channel Settings
Sellers can easily edit their Amazon channel settings whenever needed. Go to the Amazon channel listing page, click on the “gear” icon, and select the Edit option.
You will be redirected to the editing page, where you can modify and configure the channel settings as required.
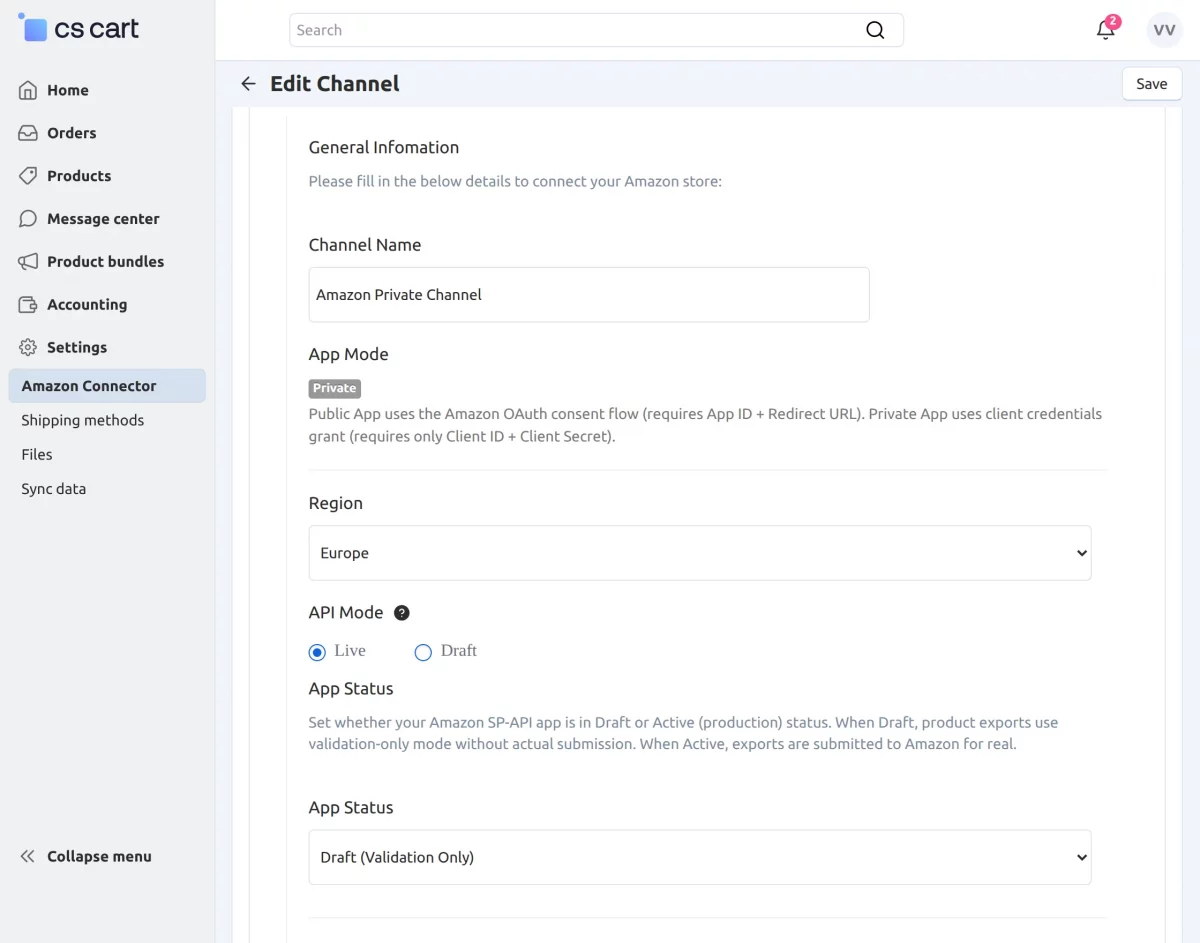
On the editing page, you will see basic details like Channel Name and App Mode.
- Region – Select and update the region based on your Amazon marketplace.
- API Mode – Choose “Live” for production SP-API calls or “Draft” for sandbox/testing purposes.
- App Status – Select Active or Draft:
- Active: Used for live product submissions to Amazon.
- Draft: Used for validation only, without actual submission.
Country – Select and update the country as per your Amazon marketplace.
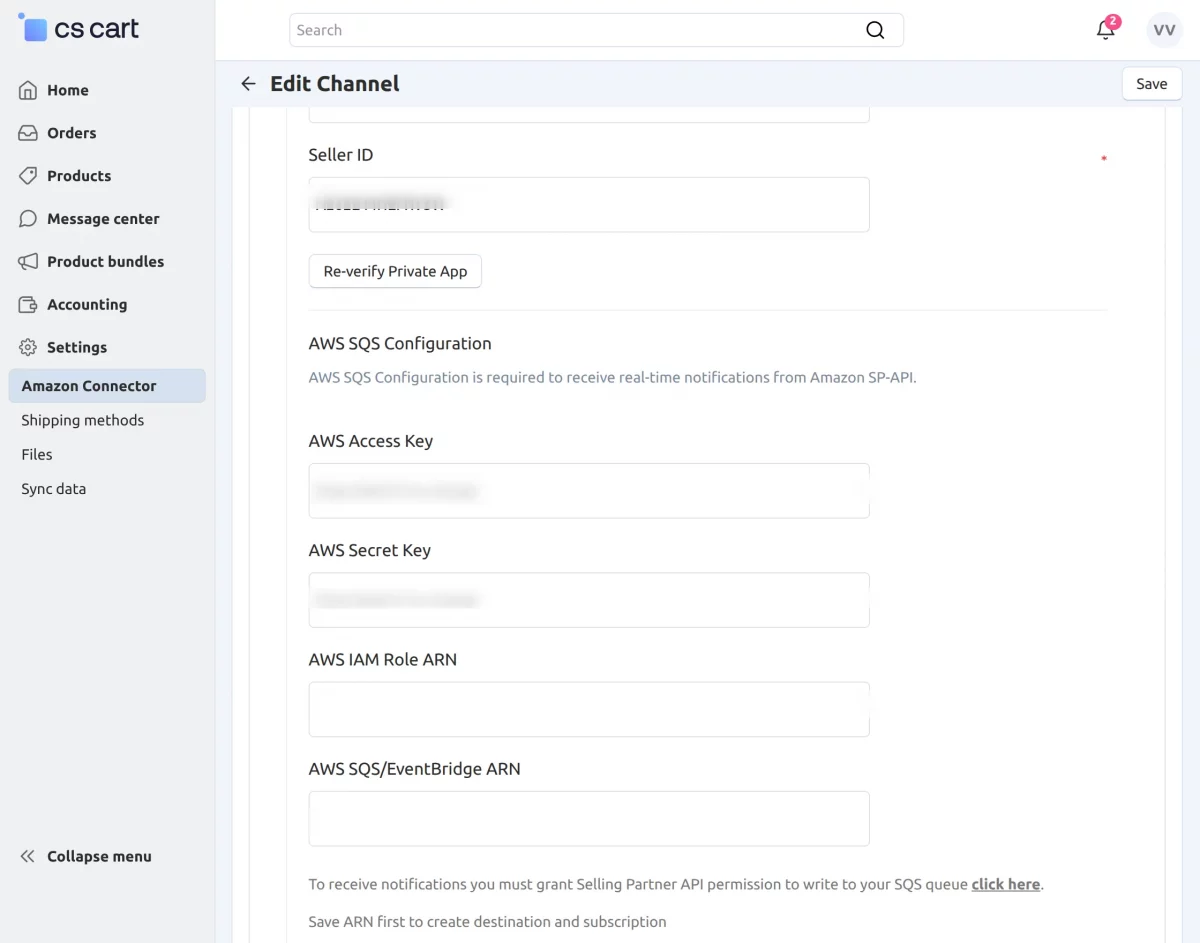
To update credentials such as Client ID, Client Secret, Refresh Token, or Seller ID.
Click on the “Re-Verify Private App” button.
AWS SQS Configuration
AWS SQS Configuration is required to receive real-time notifications from Amazon SP-API, helping you keep your orders and updates in sync automatically.
To set up this section, you need to provide the following details:
- AWS Access Key – Enter your AWS Access Key used to authenticate the connection.
- AWS Secret Key – Enter your AWS Secret Key associated with the access key.
- AWS IAM Role ARN – Provide the IAM Role ARN to allow secure access between Amazon and your system.
- AWS SQS/EventBridge ARN – Enter the SQS queue or EventBridge ARN to receive event notifications.
Make sure all details are correctly configured to ensure smooth and real-time data synchronization.
Please check this document for more information: https://developer-docs.amazon.com/sp-api/docs/notifications-api#step-1-grant-selling-partner-api-permission-to-write-to-your-sqs-queue
Note – All credentials are stored in encrypted form within the database, ensuring they cannot be directly accessed or misused.
Queue Settings
The Queue Settings section allows you to manage synchronization using the queue handler and control how products and orders are synced between Amazon and your CS-Cart store.
- Use Queue Handler – Enable this option if you want to process data using the queue handler for better performance. Disable it if you prefer direct processing.
- Product Sync – This setting helps you sync product data from your Amazon channel to your CS-Cart store.
- Product Pull Sync – Enable or disable this option to control whether products are imported (pulled) from Amazon.
- Product Push Sync (Export Products) – Enable or disable this to export products from CS-Cart to Amazon.
- Pull Orders Sync – This option allows you to import orders with the selected order status from Amazon. You can also select a date range and enable or disable order synchronization as needed.
Order Import by Date Range
The Amazon Connector allows you to pull orders using a selected date. Based on Amazon SP-API limits, order data for up to 120 days can be fetched.
When you select a date in the Amazon channel settings, orders from the previous 120 days (from the selected date range, as supported by Amazon) can be imported into your CS-Cart store.
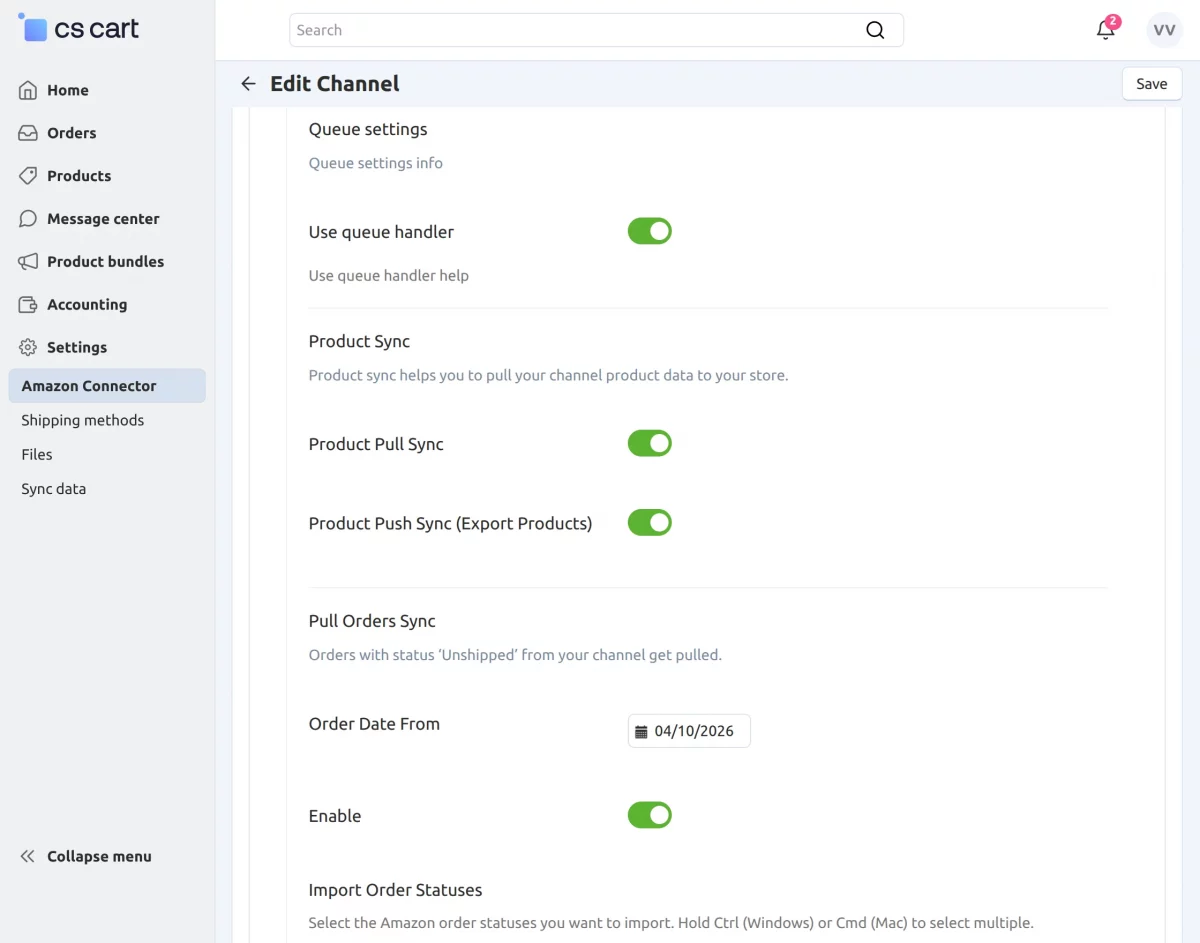
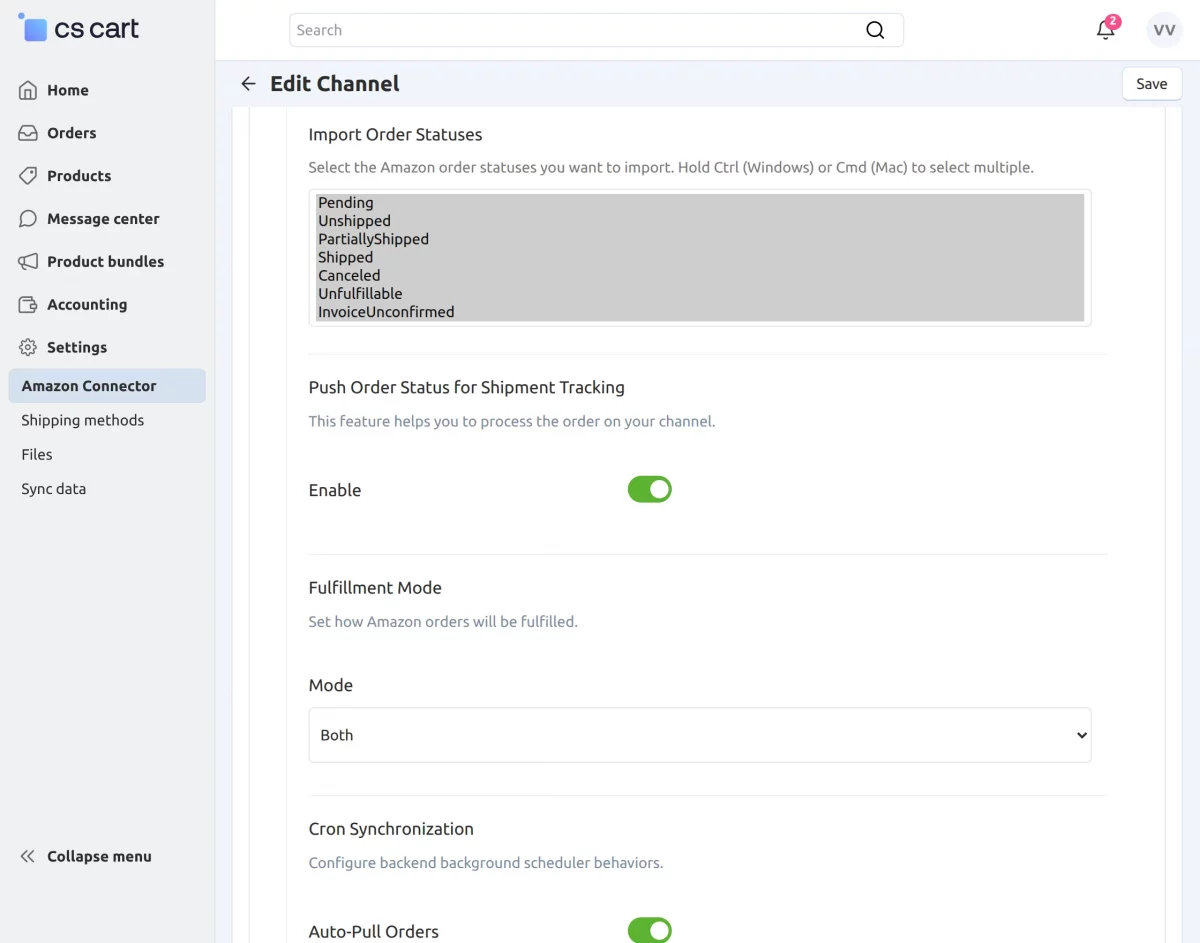
- Import Order Statuses – Select the Amazon order statuses you want to import. You can choose multiple statuses by holding Ctrl (Windows) or Cmd (Mac).
Make sure to configure these settings properly to ensure smooth and efficient data synchronization.
Order Processing & Fulfillment Settings
These settings help you manage how orders are processed and fulfilled between Amazon and your CS-Cart store.
- Push Order Status for Shipment Tracking – This feature allows you to update and push order shipment status from CS-Cart to your Amazon channel. You can enable or disable this option based on your requirement.
- Fulfillment Mode – This setting defines how Amazon orders will be fulfilled. You can choose from the following options:
- FBM (Fulfillment by Merchant) – Orders are fulfilled and shipped by the seller.
- FBA (Fulfillment by Amazon) – Orders are fulfilled by Amazon using their logistics network.
- Both – Supports both FBM and FBA orders, giving you flexibility to manage different fulfillment types.
Cron Synchronization – Set up background scheduler tasks to automate data syncing between Amazon and Cscart
- Auto-Pull Orders – Enable or disable automatic fetching of orders from Amazon.
- Auto-Pull Products – Enable or disable automatic syncing of product data from Amazon.
Map Payment Methods – Map your CS-Cart payment methods with Amazon order types such as COD and Prepaid. Select the appropriate methods for accurate payment handling.
Map Shipping Methods – Map your store’s shipping methods with Amazon carriers to ensure proper order delivery and processing.
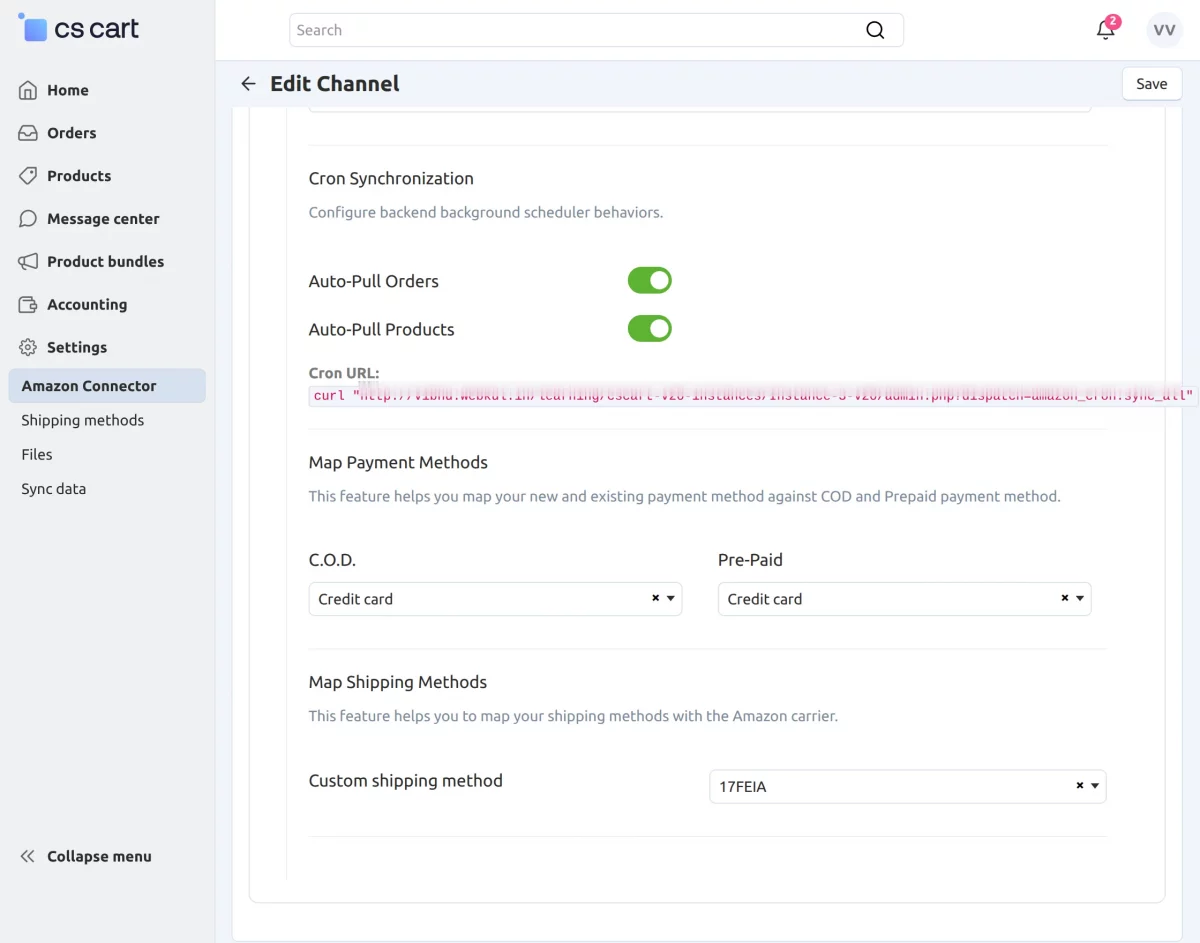
After completing all the configurations, click on the Save button to apply and store the settings.
Manage Category Mapping (Seller Panel)
Sellers can easily manage category mapping for their Amazon channels. Go to the Amazon channel listing page, click on the “gear” icon, and select “Category Mapping” to proceed.
Sellers can click on the refresh icon to fetch the latest Amazon categories.
Note – If the queue handler is enabled and properly configured in the channel settings, all categories will be added to the queue for processing.
You will need to run the cron (or trigger it manually) to process and download the categories. If it is disabled, the categories will be downloaded directly without queue processing.
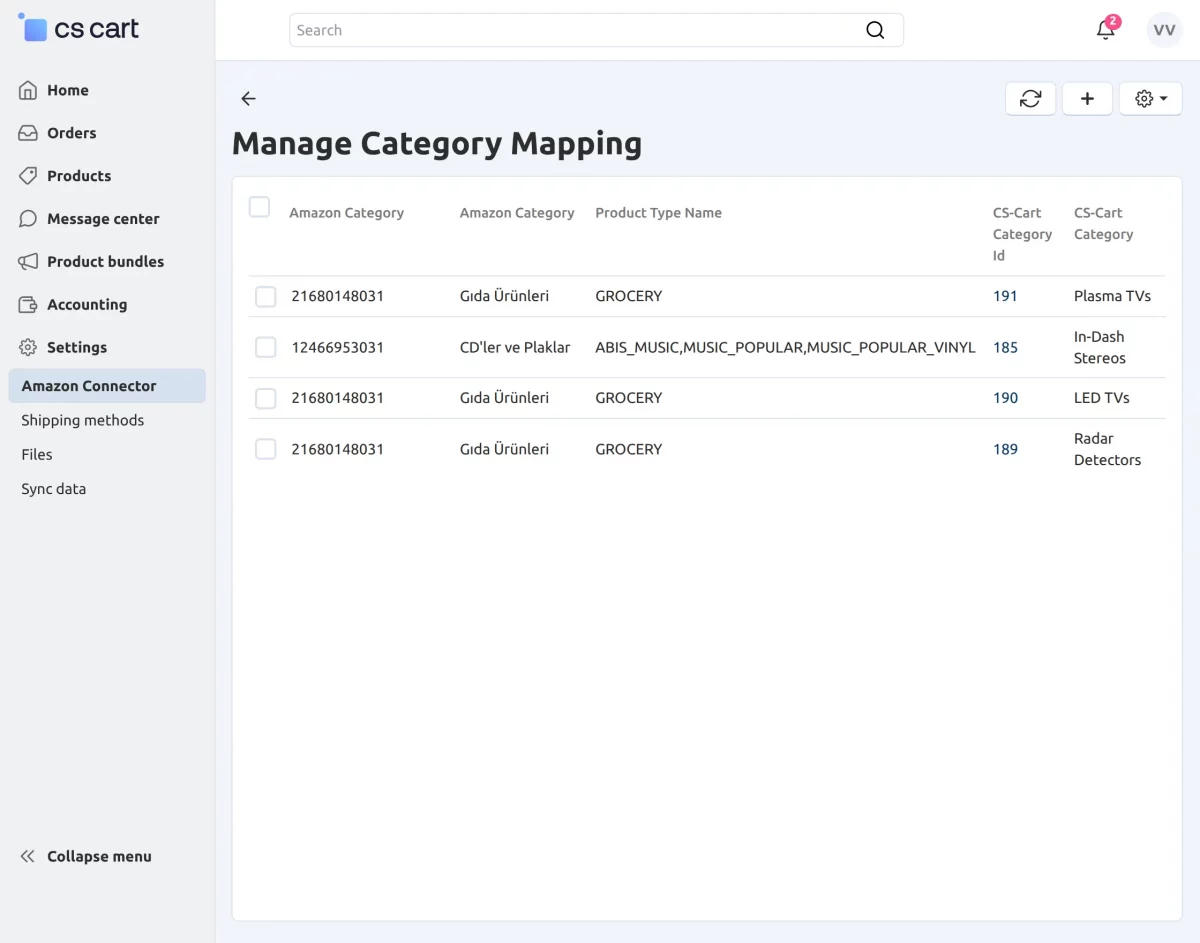
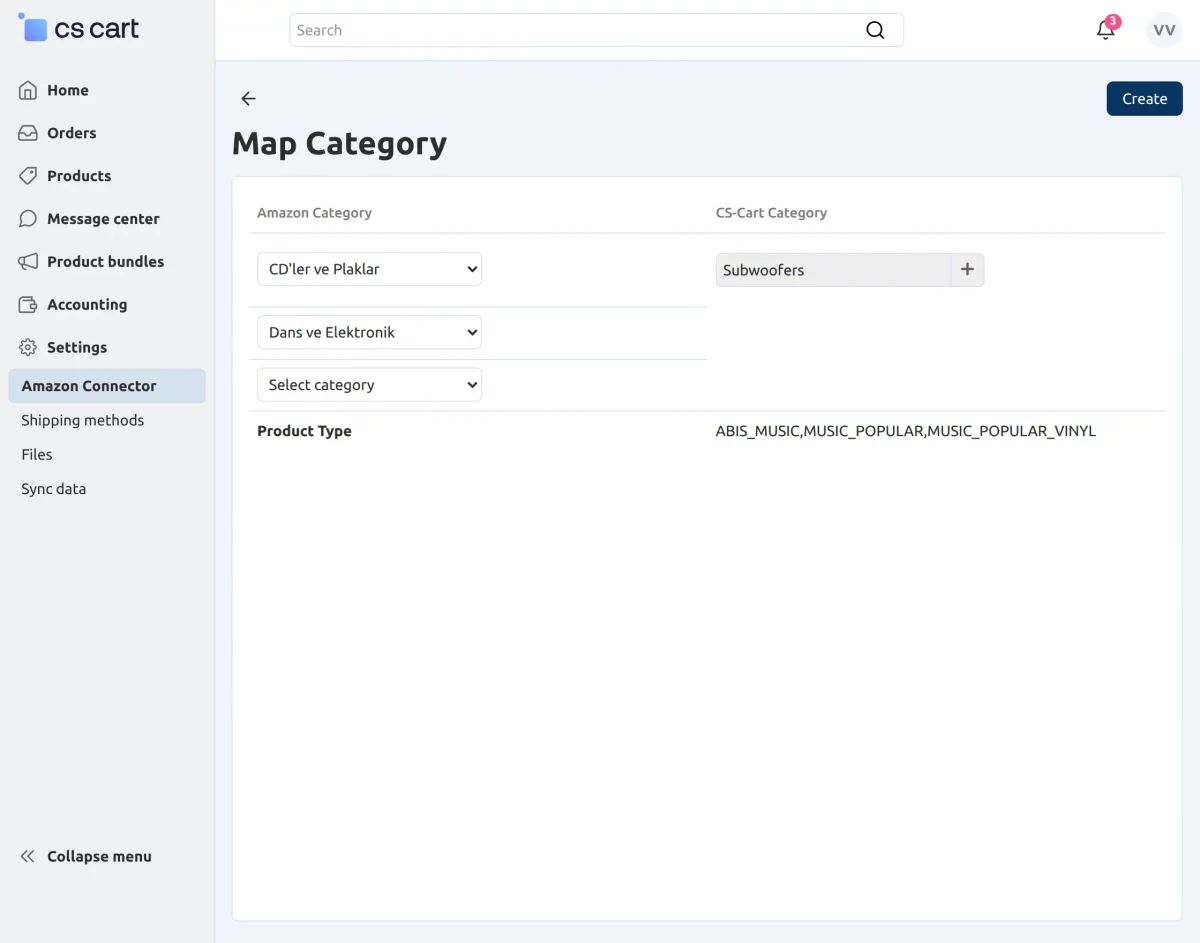
Click on the “+” icon to map a CS-Cart category with an Amazon category. Here, you need to select both the Amazon category and the corresponding CS-Cart category.
You also have the option to map Amazon subcategories with CS-Cart categories for more accurate mapping.
On this page, you will also see the product type associated with the selected categories.
Note: Ensure that the product type of the mapped category matches the product type of the specific product category used during import.
This is required for all product features to be fetched and for the product to be imported successfully; otherwise, the import may fail.
How Sellers Can Import Amazon Products?
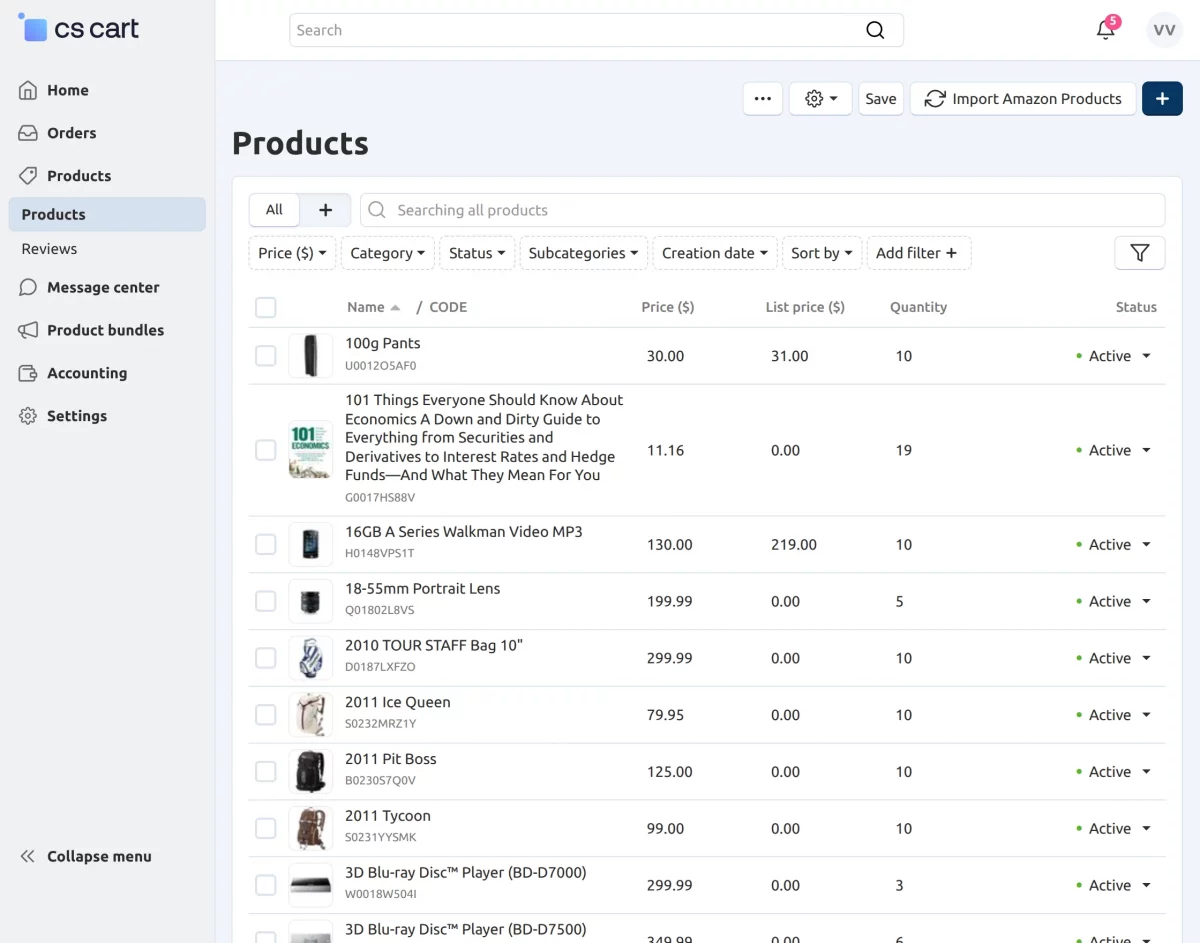
Go to Products > Products, where you will find the “Import Amazon Products” button.
Click on this button to import Amazon products into your CS-Cart store.
How Sellers Can Export CSCart Products?
Sellers have the functionality to export CS-Cart products to Amazon. They can export products individually or perform bulk exports to Amazon with ease.
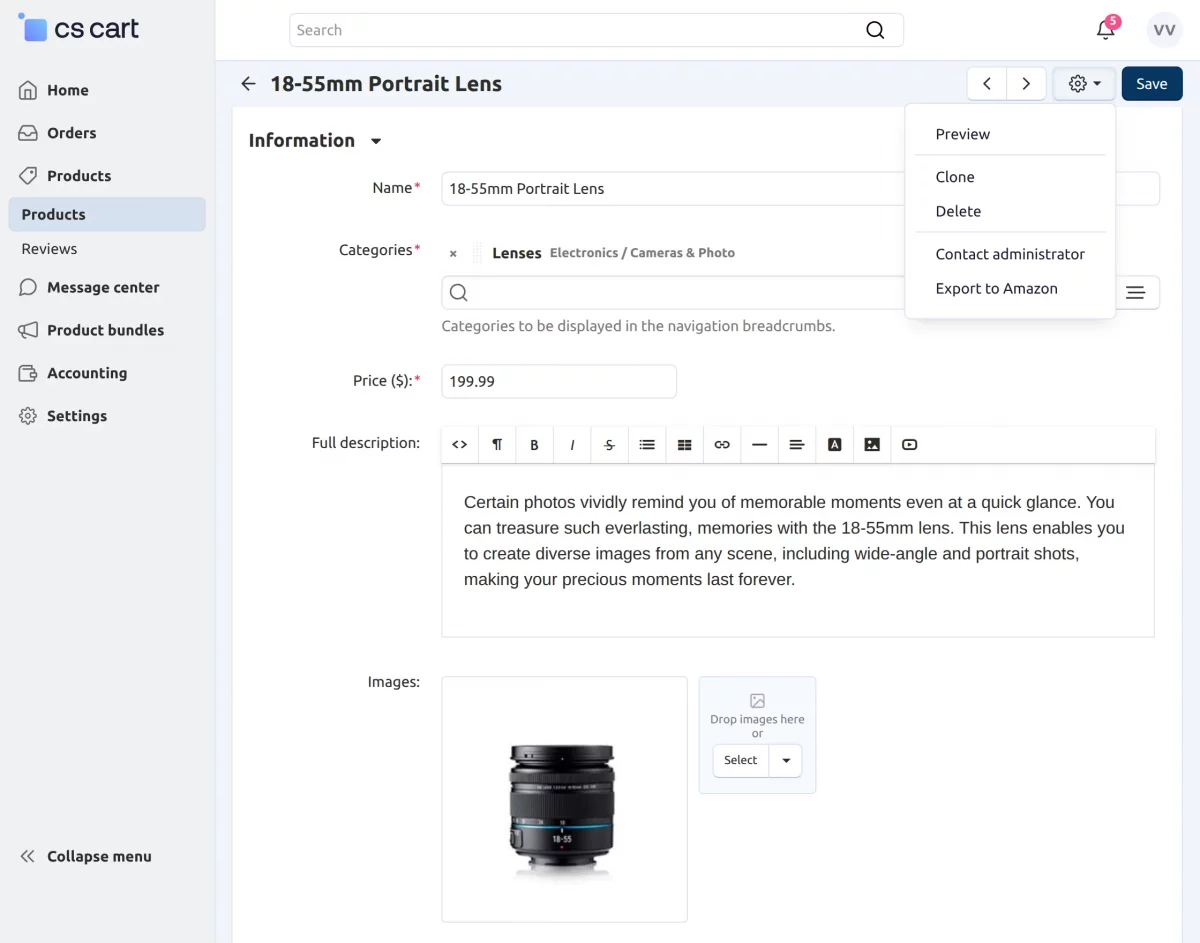
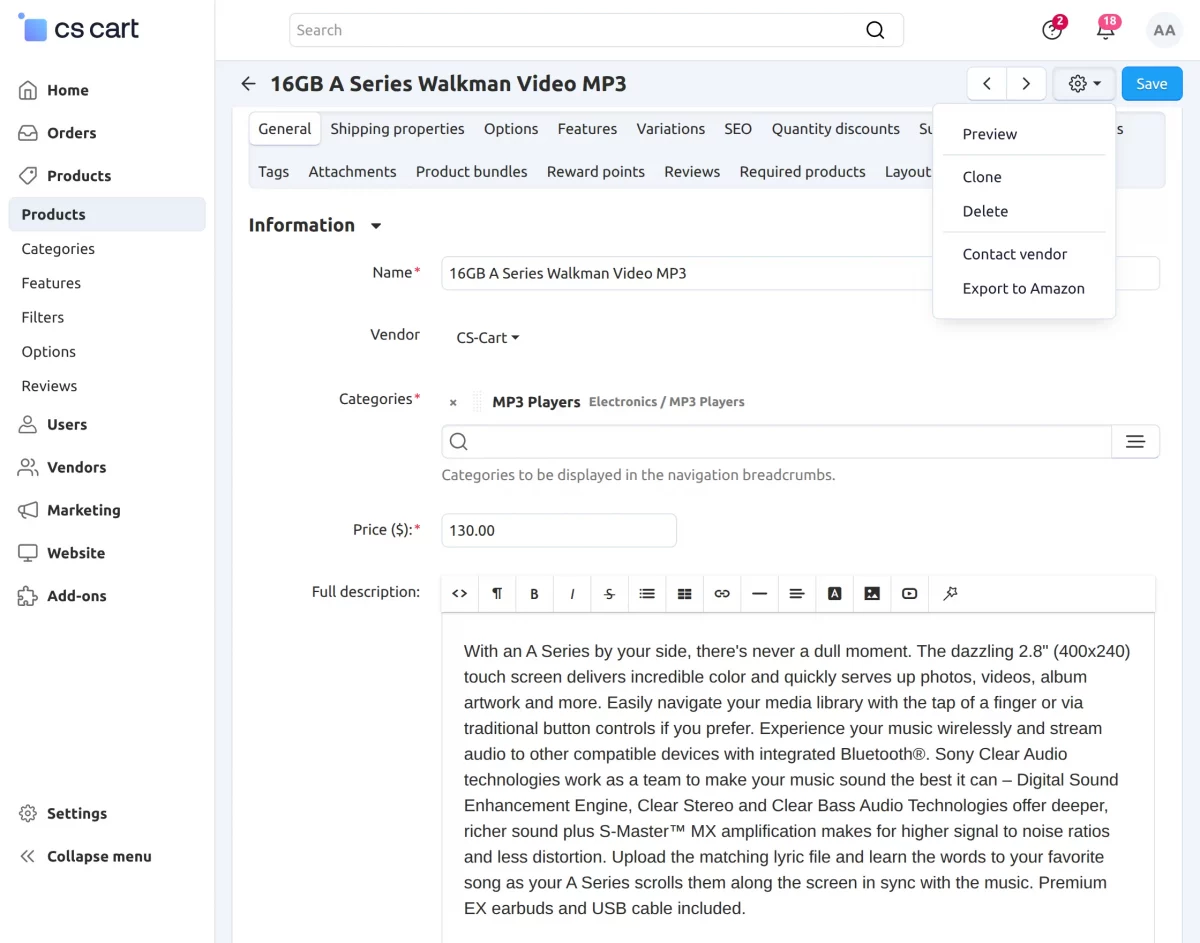
Single Product Export
Go to Products > Products, select a product, and open it to access the product details page. From there, click on the “gear” icon and choose “Export to Amazon.”
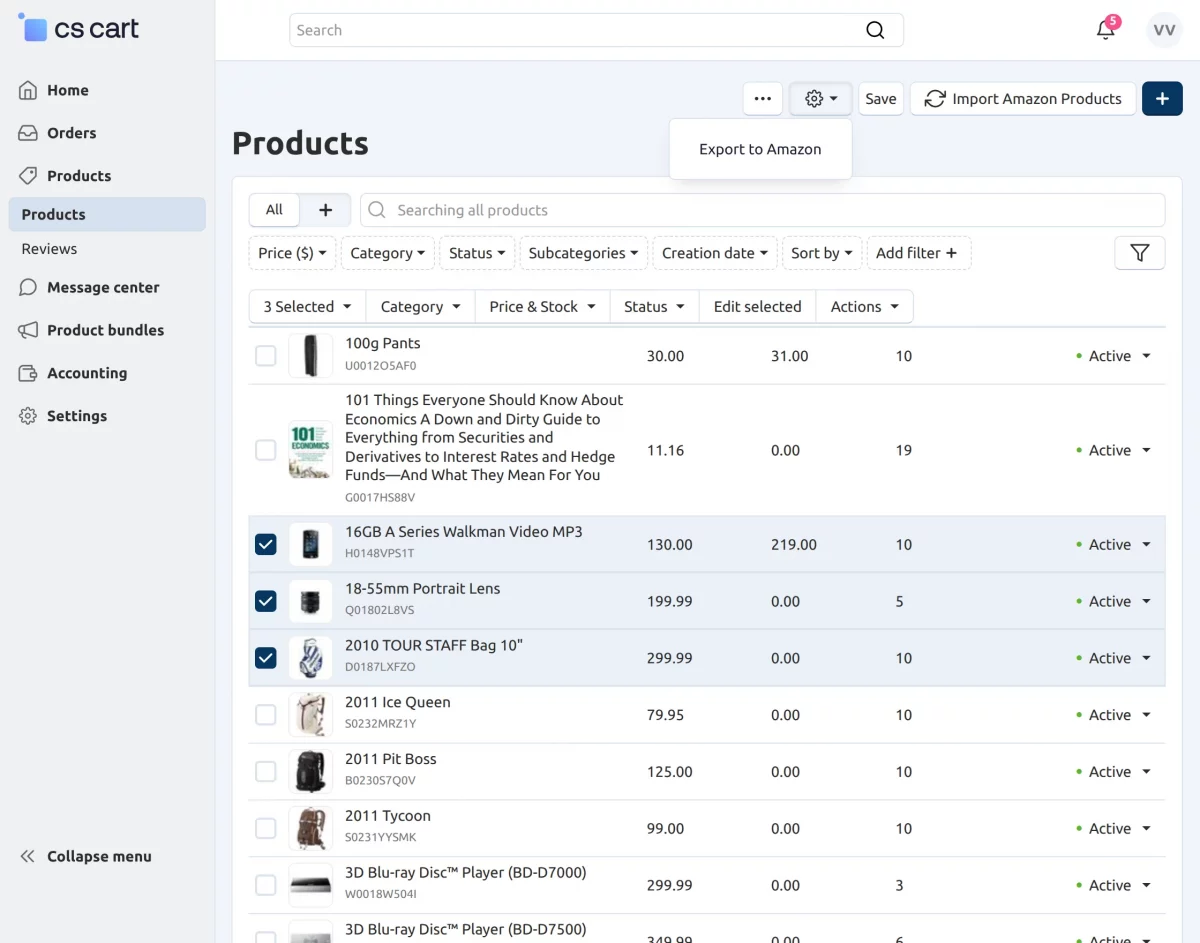
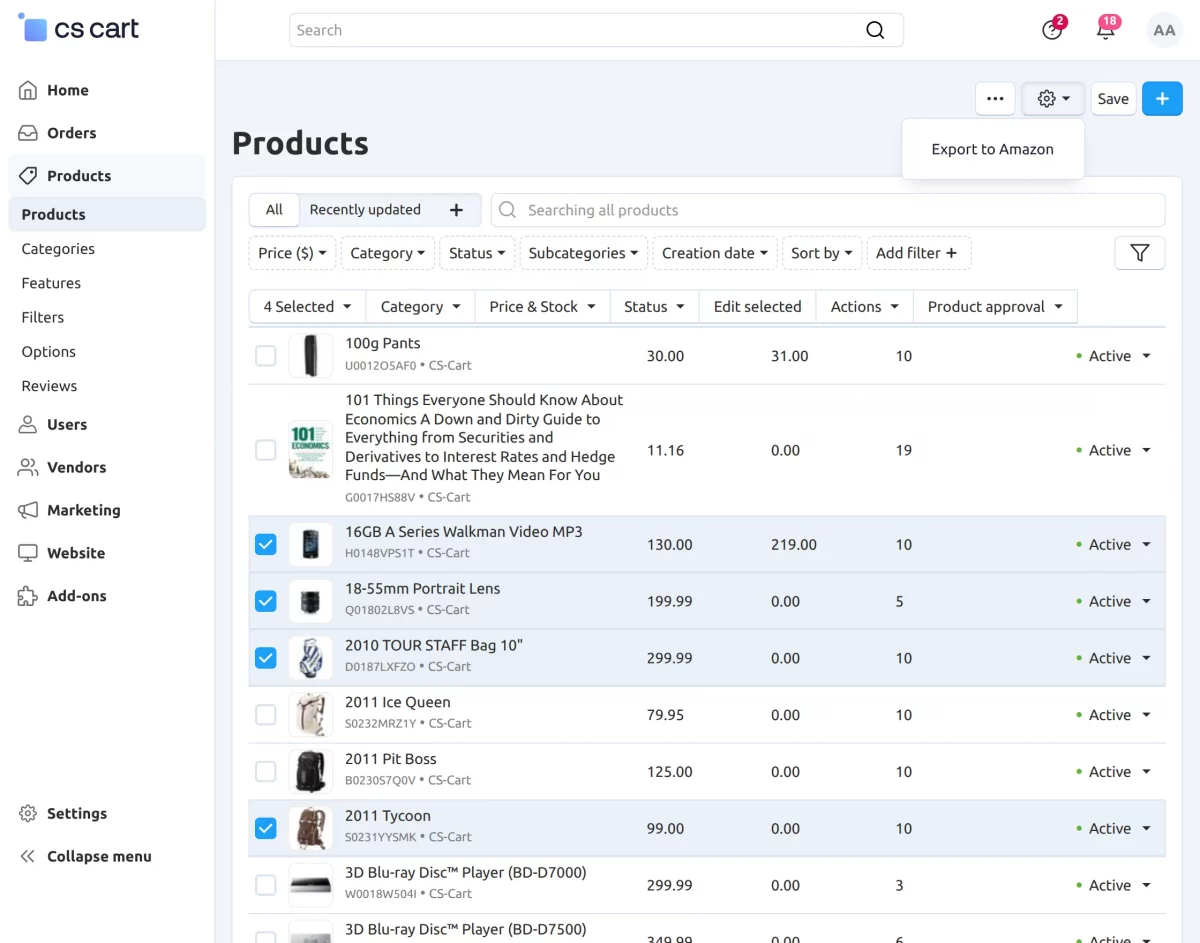
Bulk Product Export
Go to Products > Products, select multiple products, then click on the “gear” icon at the top right and choose “Export to Amazon.”
Note – Before exporting a product from CS-Cart to Amazon, make sure the selected product category is properly mapped with an Amazon category. Otherwise, the product export will not be successful.
How Sellers Can Import Amazon Orders?
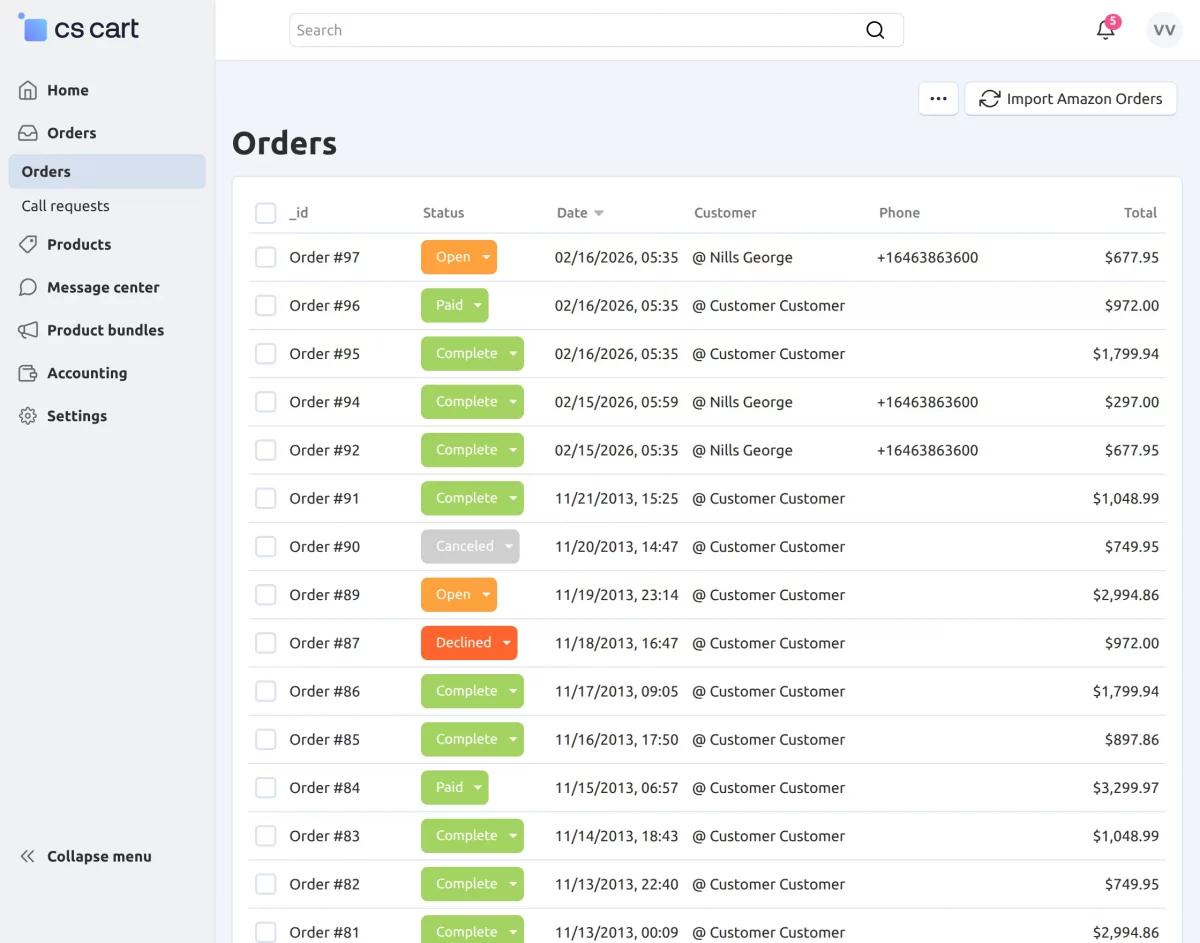
There is also a functionality to import Amazon orders into the CS-Cart store. Simply go to Orders > Orders, where you will see the order listing page.
At the top right, you will find the “Import Amazon Orders” button. Click on it to import Amazon orders into CS-Cart.
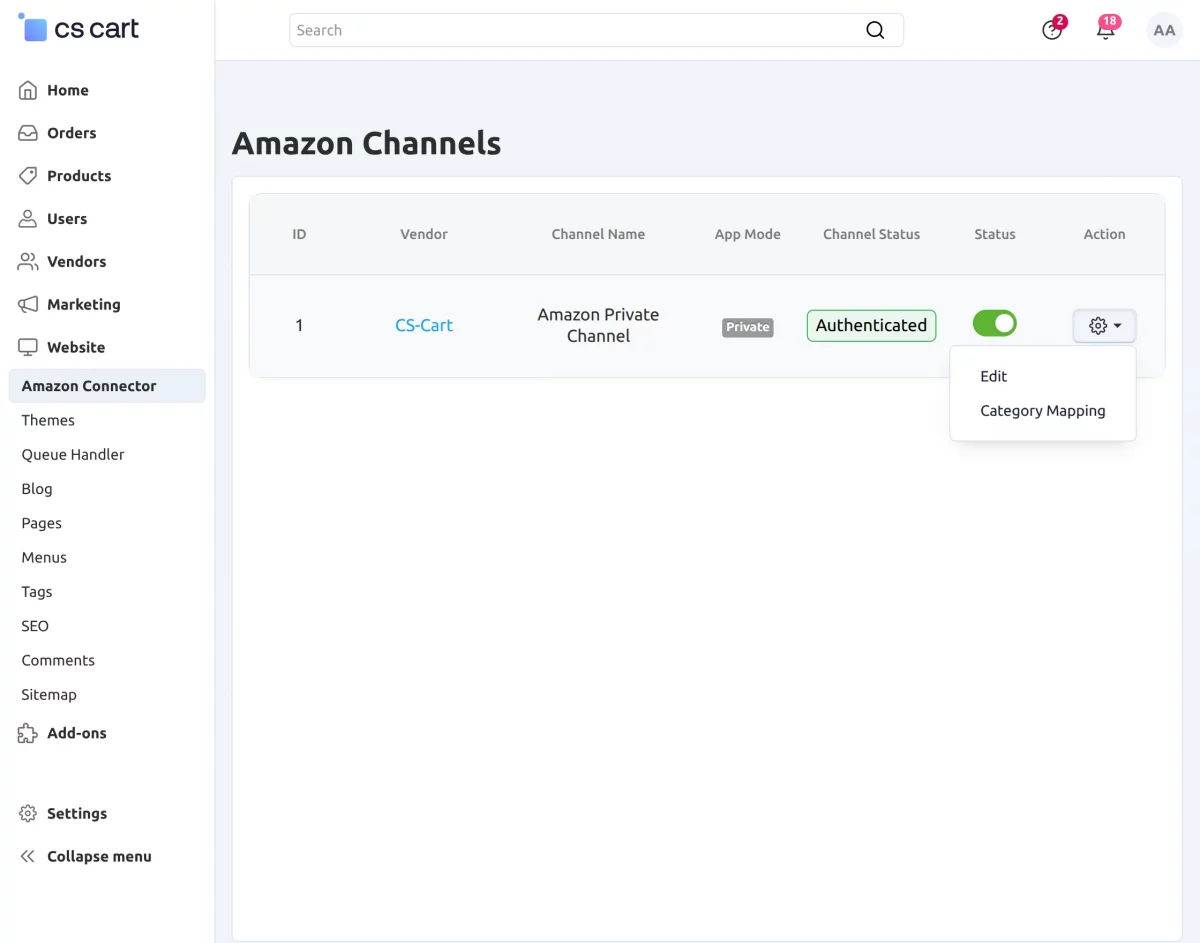
View and Manage Amazon Channels (Admin Side)
The admin can view and manage all Amazon channels created by sellers from the admin panel. This allows full control over channel configurations and activities.
Admins have the option to edit any Amazon channel settings and can also enable or disable a channel as required. This helps in controlling which channels are active.
There is also a category mapping feature available. On the category mapping page, the admin can view the categories mapped by sellers and can also create or update mappings between CS-Cart and Amazon from the admin side.
Note – All the settings and steps for editing channels and category mapping are the same as in the seller panel.
How Admin Can Export CSCart Products?
The admin can export CS-Cart products to Amazon, either individually or in bulk, making product management quick and efficient.
Single Product Export
Go to Products > Products, select a product, and open it to access the product details page. From there, click on the “gear” icon and choose “Export to Amazon.”
Bulk Product Export
Go to Products > Products, select multiple products, then click on the “gear” icon at the top right and choose “Export to Amazon.”
Support
That’s all for the add-on “CS-Cart Amazon Connector“. If you still have any issues, feel free to write here http://webkul.uvdesk.com and let us know your views to make the module better.
Please explore our CS-Cart Development Services and Quality CS-Cart add-ons.
Current Product Version - 2.1
Supported Framework Version - 4.16.x to 4.20.x

Be the first to comment.