The EGSMA Marketplace Integration connects your Adobe Commerce store with the EGSMA platform. It helps you extend your store into a scalable marketplace setup.
Adobe Commerce Cloud Service is built for single-store selling. It does not support multi-vendor marketplaces by default.
With this integration, multiple vendors can register and manage their products. Each vendor gets a separate panel to handle catalog and orders.
When a vendor adds products in EGSMA, they sync to your Adobe Commerce store. Customers can view and purchase them directly from your storefront.
After an order is placed, the data syncs back to EGSMA in real time. Vendors can manage orders, shipping, and fulfillment from one place.
This setup reduces manual work and keeps data consistent across systems. It gives you a simple way to run a multi-vendor commerce platform.
What is EGSMA Marketplace Integration
The EGSMA Marketplace Integration connects Adobe Commerce Cloud Service with the EGSMA platform. It acts as a bridge between your storefront and the vendor management system.
Adobe Commerce Cloud Service supports single-store selling by default. It does not include built-in multi-vendor marketplace features.
This integration extends your store without modifying the core system. It enables a marketplace setup using an external vendor panel.
Vendors operate from the EGSMA platform to manage products and orders. Your Adobe Commerce store remains the main customer-facing website.
The system keeps both platforms connected through data synchronization. This helps maintain consistency across products, orders, and inventory.
How the Integration Works
The integration starts by connecting Adobe Commerce with EGSMA. This setup allows both platforms to exchange data.
Vendors register on the EGSMA platform and access their dashboard.
They manage products, inventory, and updates from this panel. Products created in EGSMA are reflected on the Adobe Commerce store.
Customers can browse and purchase them directly from the website. When an order is placed, the details are shared with EGSMA.
Vendors can view and process orders from their panel. Shipping and fulfillment updates are handled from EGSMA. These updates are synced back to the Adobe Commerce store.
Key Features of Adobe Commerce Multi-Vendor Integration
- Enables multiple vendors to register and sell products independently on a single marketplace.
- Syncs products, inventory, and categories between Adobe Commerce and EGSMA in real time.
- Allows vendors to manage products with full control over creation, updates, and deletion.
- Automatically transfers new products between both platforms without manual effort.
- Synchronizes customer orders instantly from Adobe Commerce to the vendor panel.
- Allows vendors to create and manage shipments directly from the EGSMA panel.
- Supports both simple and configurable product types for flexible catalog management.
- Reduces manual work by automating data exchange between Vendor’s both panel (Adobe Commerce and EGSMA).
Set Up Your Adobe Store Connection to EGSMA
- To get started, click Register here and complete the registration.
- After completing the registration, please send an email to [email protected] and include your registered email address along with your domain name.
- Once your request is processed, you will receive the following credentials:
MVM_ACCESS_TOKEN
MVM_MERCHANT_BASE_URL
Setup Adobe App Builder
Pre-requisites
Before you start, confirm the following are in place:
- Your organization’s product admin or system admin must add you as a user of the Adobe Commerce as a Cloud Service product before you can create an instance. Adobe
- You must have an active Adobe Commerce as a Cloud Service license with API access enabled, and access to Adobe Developer Console for creating I/O Management API credentials. Adobe Developer
- The traditional admin and integration token generation methods are not supported in SaaS environments. Instead, you must obtain an IMS admin token through OAuth 2 authentication via Adobe’s Identity Management System (IMS). Adobe Developer
- Node.js version >= 20 installed (use
nvmfor version management), and the Adobe I/O CLI (npm install -g @adobe/aio-cli).
Creating the App Builder Project
Log in to the Adobe Developer Console and select the desired organization from the dropdown menu in the top-right corner.
Click Create new project > Project from template, then select App Builder. Specify a Project Title and App Name, and make sure the Include Runtime with each workspace checkbox is selected.
Adding Required APIs
If you do not see the Adobe Commerce as a Cloud Service service listed.
Make sure you have developer permissions for Adobe Commerce as a Cloud Service – Backend – Commerce Cloud Manager for your organization.
On the Configure API page, select the OAuth Server-to-Server option and click Save configured API.
Then from the workspace front page, click the Add service menu, select API, filter by Experience Cloud, and add Adobe I/O Events for Adobe Commerce. Adobe Developer
Steps to Setup
Install the App from Adobe Exchange
Go to Adobe Exchange, find the app, and click Install. Complete the installation for your organization, entering all prompted configuration keys when asked In App Management Configure Section.
Configuration Keys Prompted During Installation
Since the app is non-downloadable, all required credentials and endpoints are collected at the time of installation
You will see the app at app management after acquiring our app:
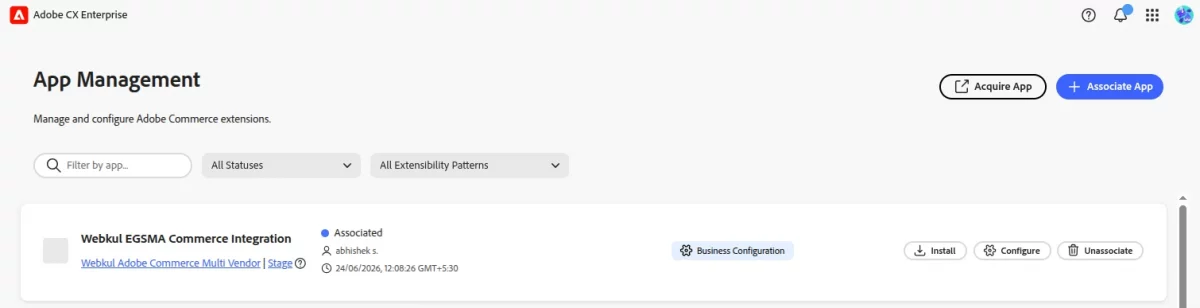
Click on Configure:
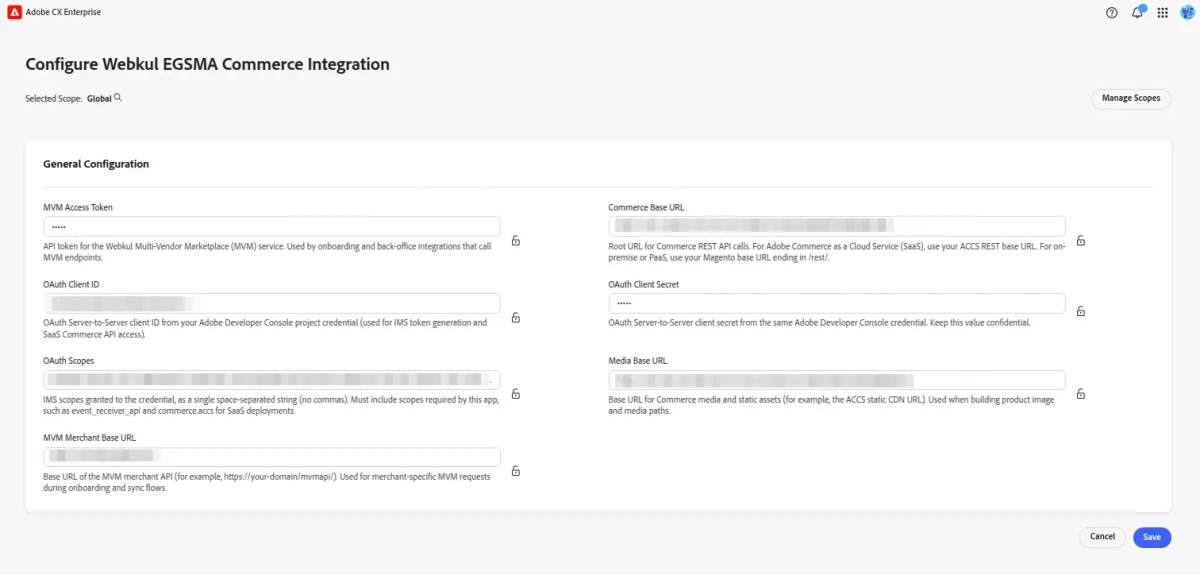
Click on Save Button after filling these configurations
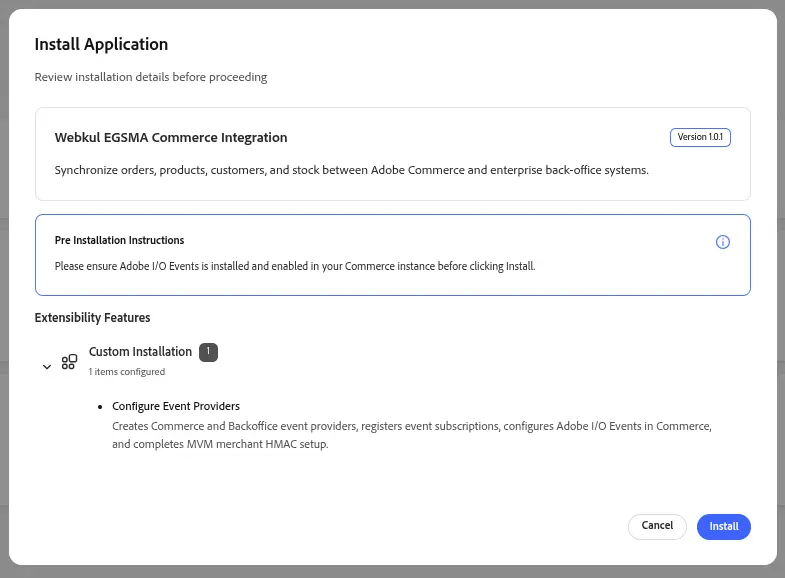
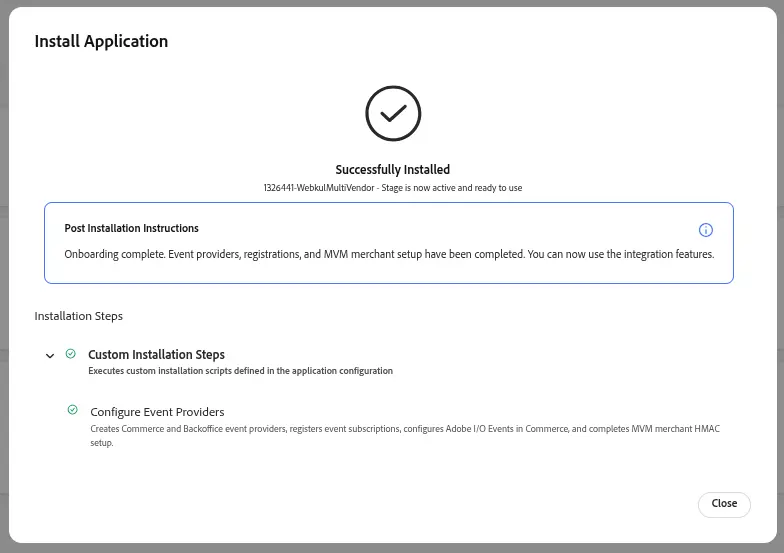
Then, Click on Install
SaaS (ACCS) Configuration
For SaaS environments, you should:
- Configure IMS OAuth (Server-to-Server) credentials
- Set Commerce Base URL and Media Base URL
- Leave OAuth 1.0a Commerce integration fields empty, unless explicitly required
This approach uses Adobe’s Identity Management System (IMS) for authentication.
PaaS / On-Premise Configuration
For PaaS or on-premise Adobe Commerce, you should:
- Configure Commerce Integration (OAuth 1.0a) credentials
- Provide:
- Consumer Key & Secret
- Access Token & Secret
- Set Commerce Base URL (must end with
/rest/) - Optionally configure admin username and password for token-based authentication
Field Reference Guide
Below is a detailed explanation of all configuration fields used in App Builder integrations.
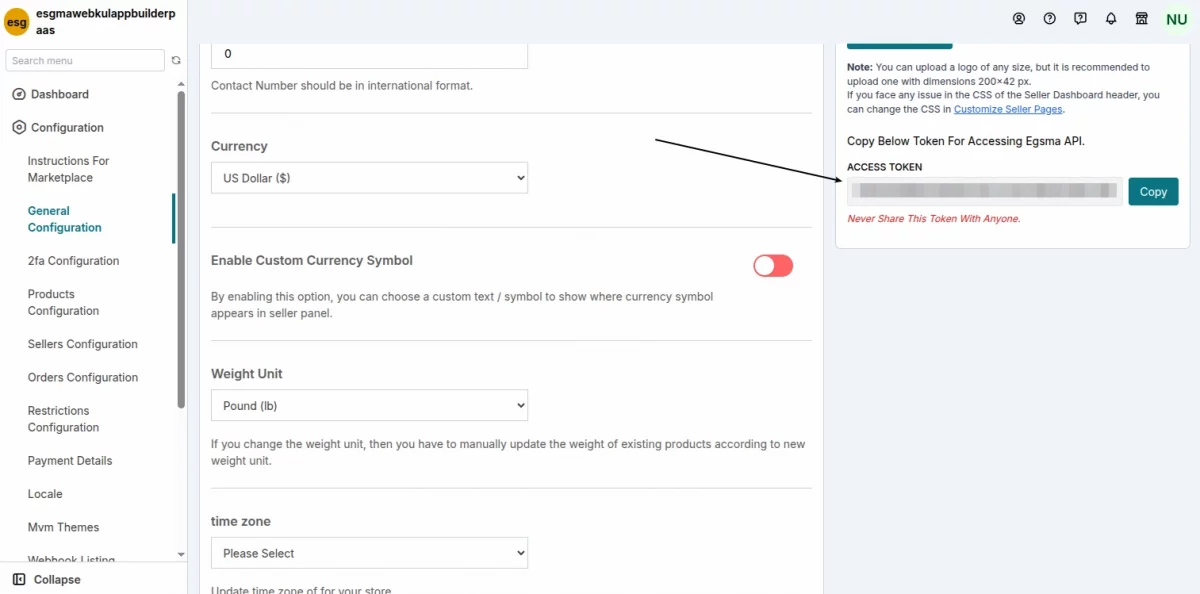
MVM Access Token
Environment Variable: MVM_ACCESS_TOKEN
API token for the Webkul Multi-Vendor Marketplace (MVM) service.
Used in onboarding and backend integrations to authenticate MVM API requests.
Commerce Base URL
Environment Variable: COMMERCE_BASE_URL
Defines the root endpoint for Commerce API calls.
- SaaS (ACCS):
Example:https://na1-sandbox.api.commerce.adobe.com/{tenantId}/ - PaaS / On-Premise:
Must end with:/rest/
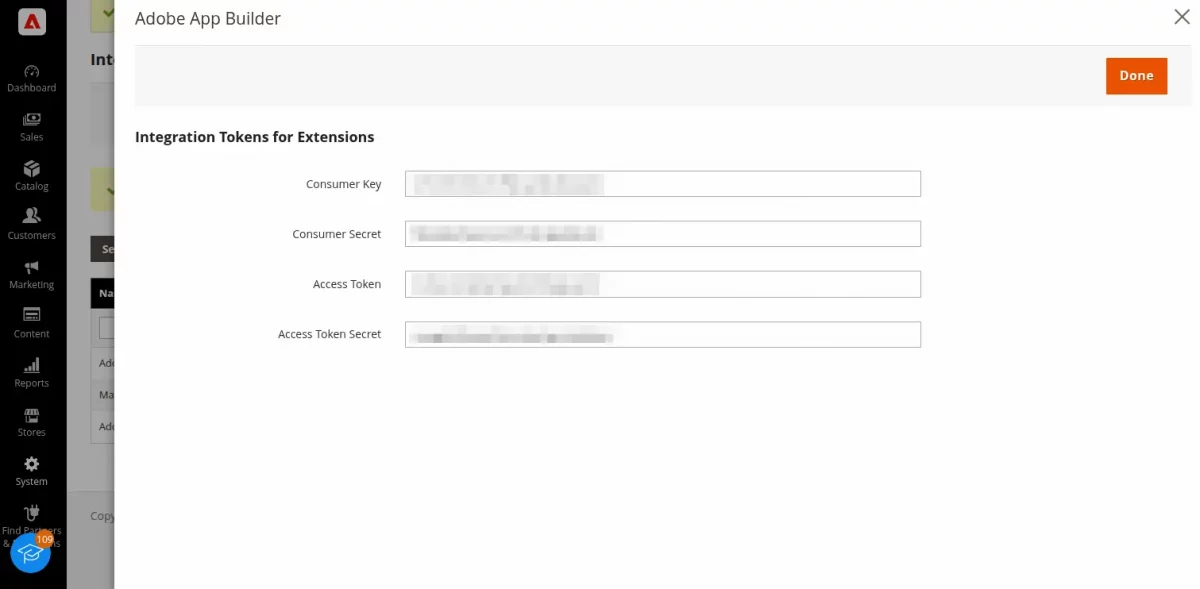
Commerce Consumer Key
Environment Variable: COMMERCE_CONSUMER_KEY
Integration consumer key from Adobe Commerce Admin:System → Integrations
- Required for PaaS / On-Premise (OAuth 1.0a)
- Not required for SaaS (IMS OAuth)
Commerce Consumer Secret
Environment Variable: COMMERCE_CONSUMER_SECRET
Paired with the consumer key.
- Required for PaaS / On-Premise
- Not used for SaaS
Commerce Access Token
Environment Variable: COMMERCE_ACCESS_TOKEN
Used for authenticating API requests in OAuth 1.0a.
- Required for PaaS / On-Premise
- Not used for SaaS
Commerce Access Token Secret
Environment Variable: COMMERCE_ACCESS_TOKEN_SECRET
Secret paired with the access token.
- Required for PaaS / On-Premise
- Not used for SaaS
For Getting the Commerce Credentials We need to create an Integration in our Magento Admin Panel:
System > Extentions > Integration
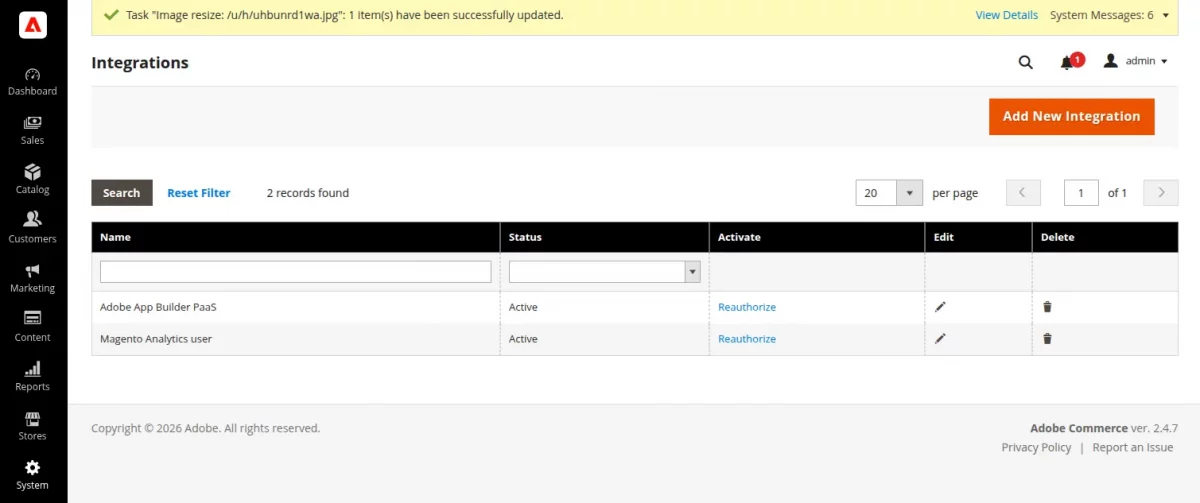
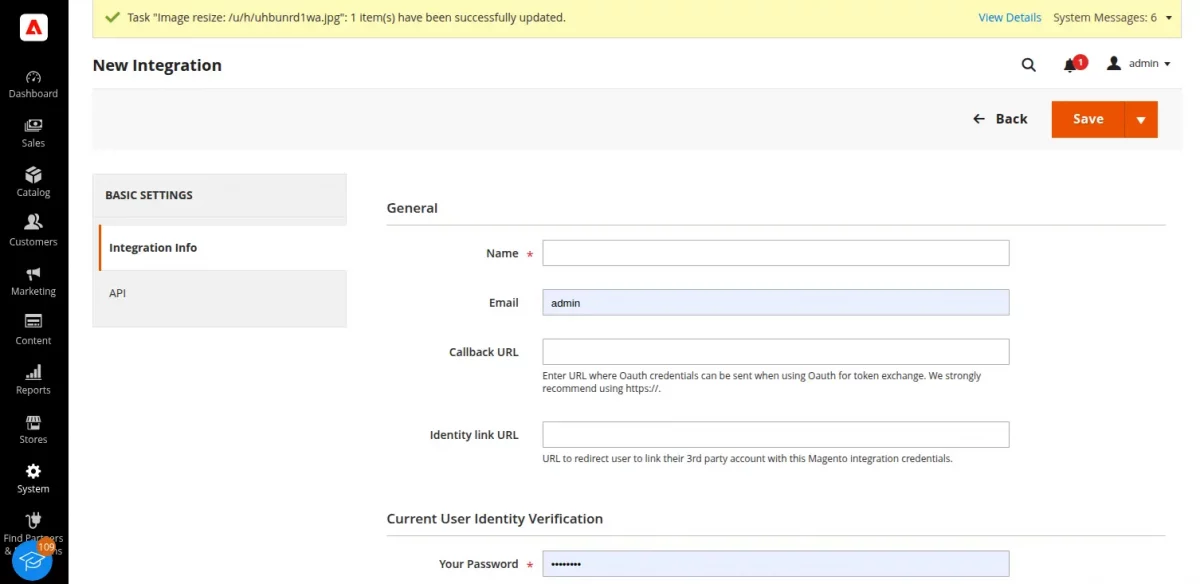
Click On Add New Integration
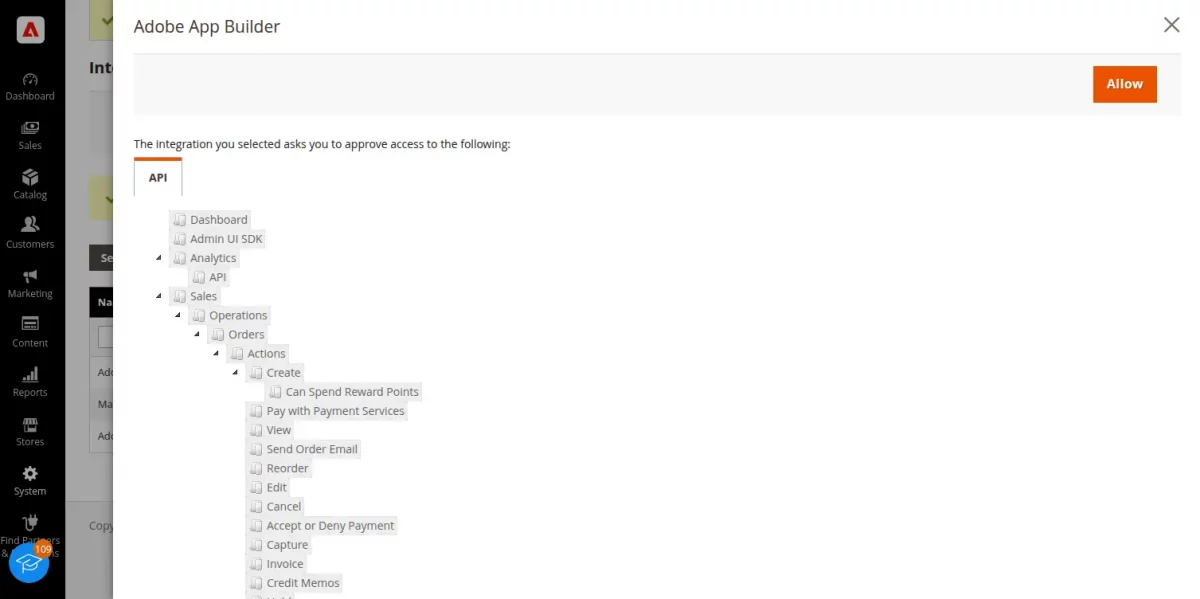
Then Click On API Tab, and select All
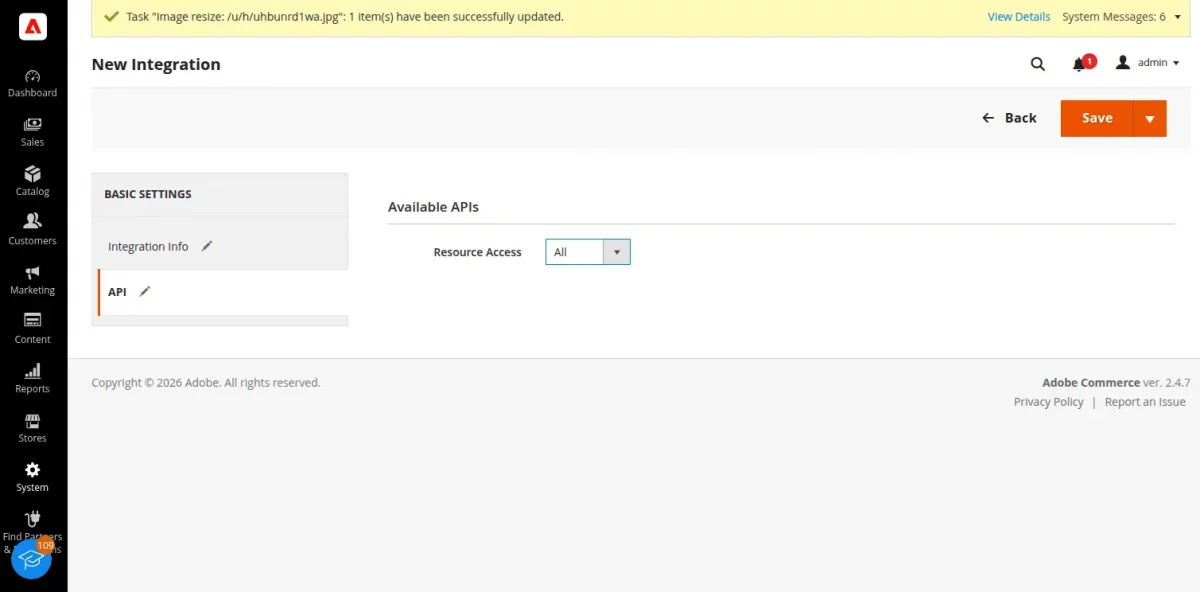
Save Your Integration, We need to activate our integration
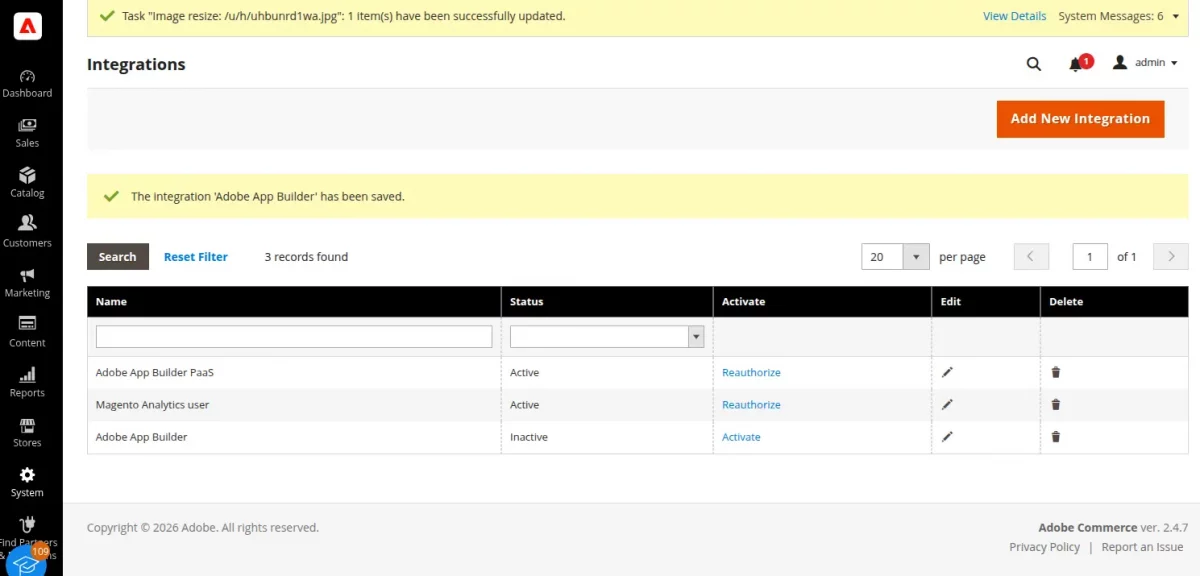
Allow the roles
And Collect the Commerce Credentials
How to get started and how to configure Eventing
Adding Events in Adobe Commerce (formerly Magento 2) using Adobe App Builder involves creating event-driven integrations that trigger actions when specific events occur in the system.
Adobe App Builder enables you to build and deploy custom applications on the Adobe Experience Cloud and integrates with Adobe Commerce through Event.
We have covers all steps to add Events in Adobe Commerce We can visit our BLOG
OAuth Client ID
Environment Variable: OAUTH_CLIENT_ID
Client ID from your Adobe Developer Console project.
Used for generating IMS access tokens.
OAuth Client Secret
Environment Variable: OAUTH_CLIENT_SECRET
Client secret from the same Adobe Console credential.
Important: Keep this value secure and never expose it publicly.
Media Base URL
Environment Variable: MEDIA_BASE_URL
Base URL for product images and static assets.
- Typically a CDN URL in SaaS
- Used to construct media paths in responses
MVM Merchant Base URL
Environment Variable: MVM_MERCHANT_BASE_URL
Base URL for merchant-specific MVM APIs.
https://mvmapi.webkul.com/
Used during:
- Merchant onboarding
- Data synchronization flows
Commerce Username
Environment Variable: COMMERCE_USERNAME
Admin username for Adobe Commerce.
- Required only for PaaS / On-Premise
- Used in admin token authentication
- Not used in SaaS (IMS handles authentication)
Commerce Password
Environment Variable: COMMERCE_PASSWORD
Admin password corresponding to the username.
- Required only for PaaS / On-Premise
- Not used in SaaS
All values entered during installation are securely stored and automatically injected into the app’s runtime actions — no local file editing or CLI access required.
How the Integration Works
Vendor Registration & Dashboard
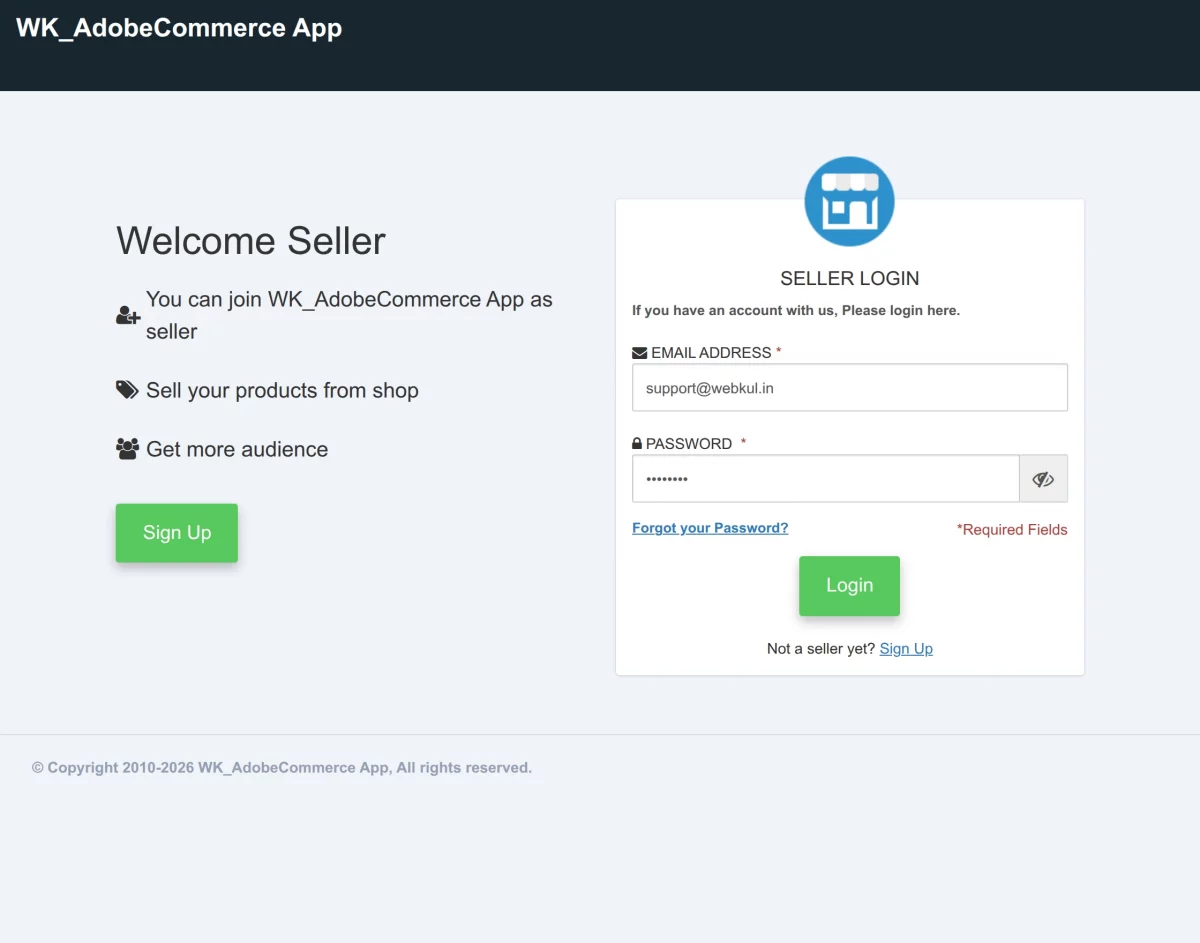
Initially, the vendor will have to sign up or register on the marketplace platform to start selling their products on it.
They will enter the required details and create an account to register on the multi-vendor marketplace
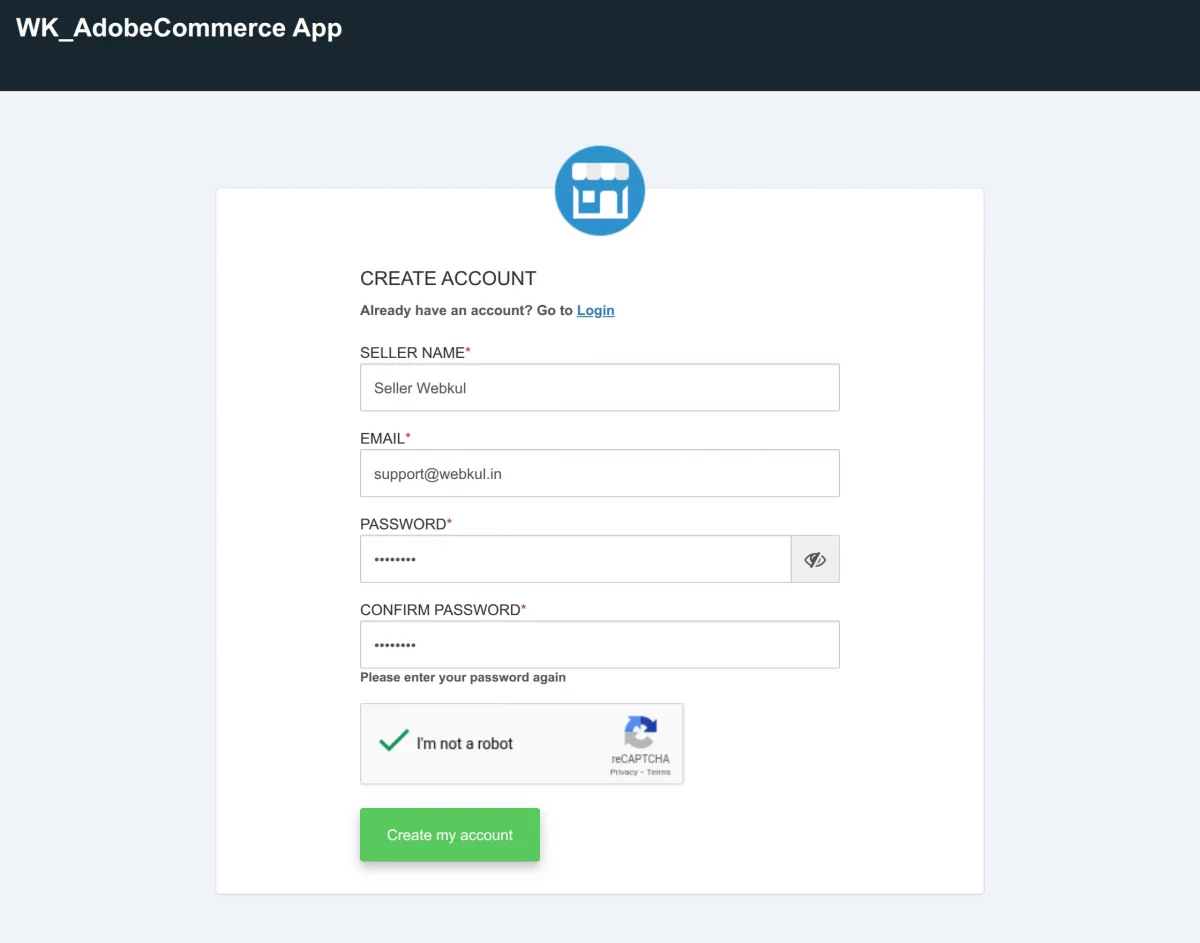
Once the system successfully registers the vendor, they can log in as shown in the image below.
Once successfully logged in, let’s check the options available in the Multi-Vendor Marketplace Panel Dashboard below.
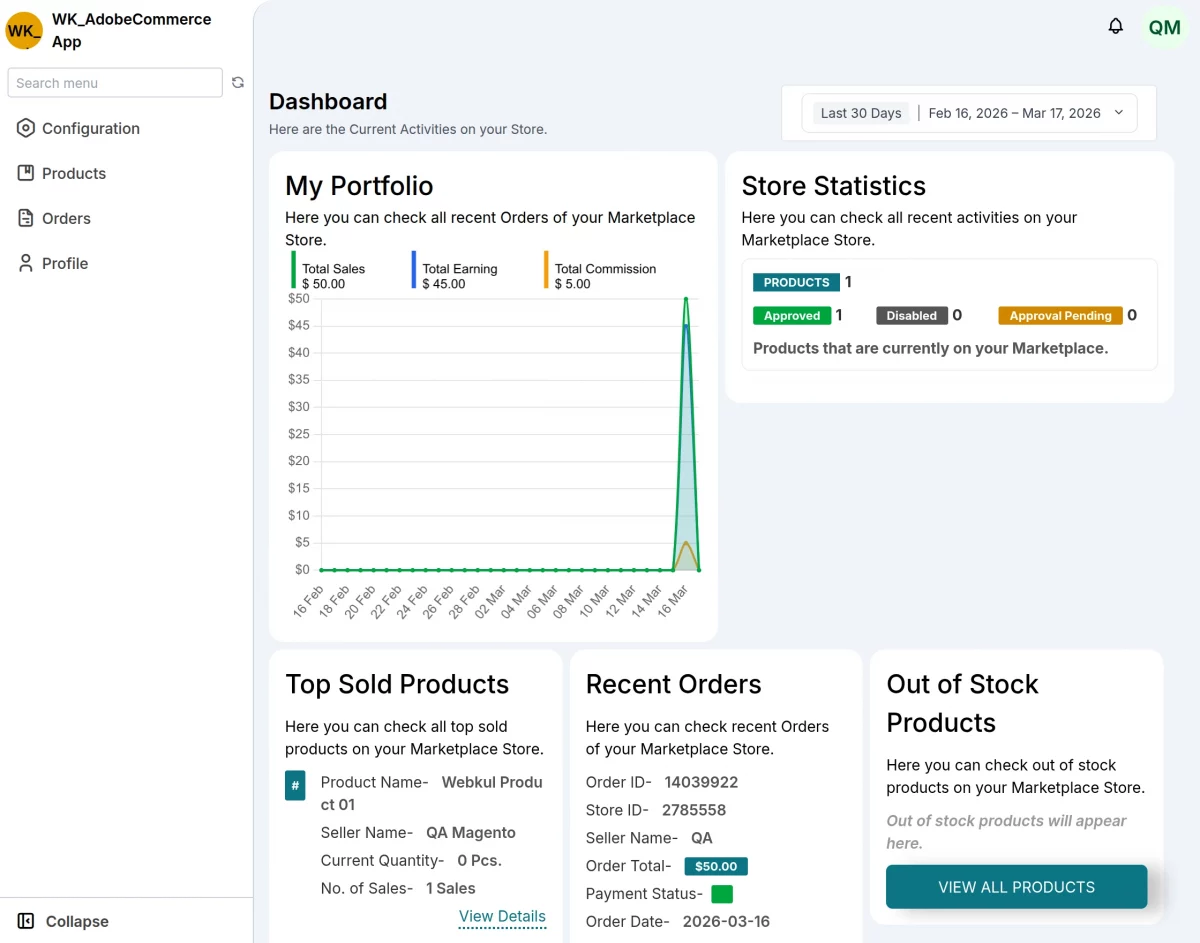
Under this section, the vendor can manage their products and orders.
Product Management
The vendor can keep their products synchronized between Adobe Commerce and EGSMA in both directions.
- Fetch Product by ID: Looking up any product quickly using its ID.
- Create Product: New products added to Adobe Commerce automatically appear in the external platform and vice versa
- Update Product: Changes to product details sync both ways automatically
- Update Product Status: Enable or disable products on both platforms at once
- Delete Product: Removing a product from one platform removes it from the other
- Delete Product Variant: Remove specific sizes, colors, or other options
- Update Product Variant: Change variant details like price or SKU
- Update Product Images: Product photos stay consistent across platforms
- Update Product Categories: Category assignments sync automatically
EGSMA to Adobe Commerce Product Sync
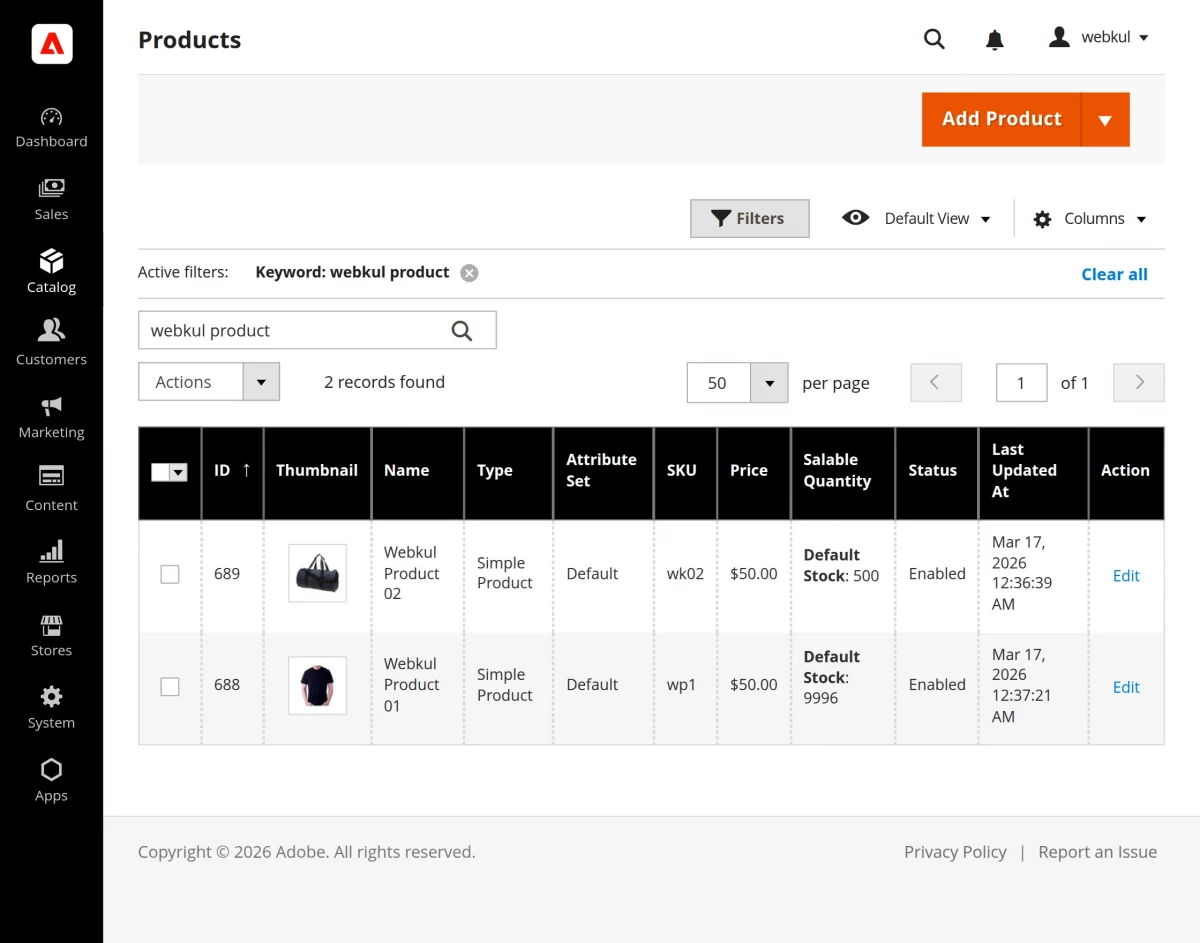
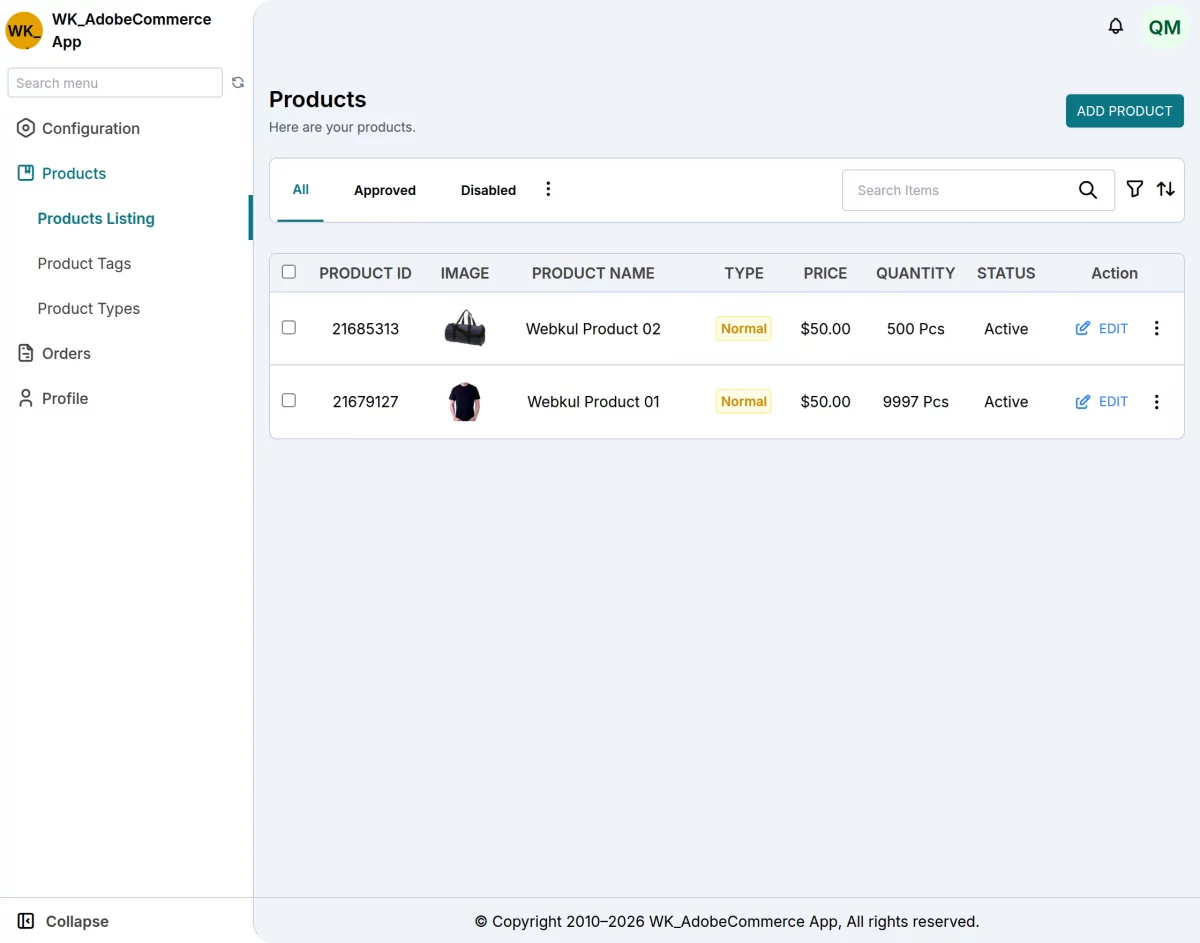
When the vendor creates a product on the EGSMA platform. As soon as they create it, the system marks the product as active and automatically syncs it with the Adobe Commerce store.
Product-related details such as name, quantity, and images stay consistent across platforms.
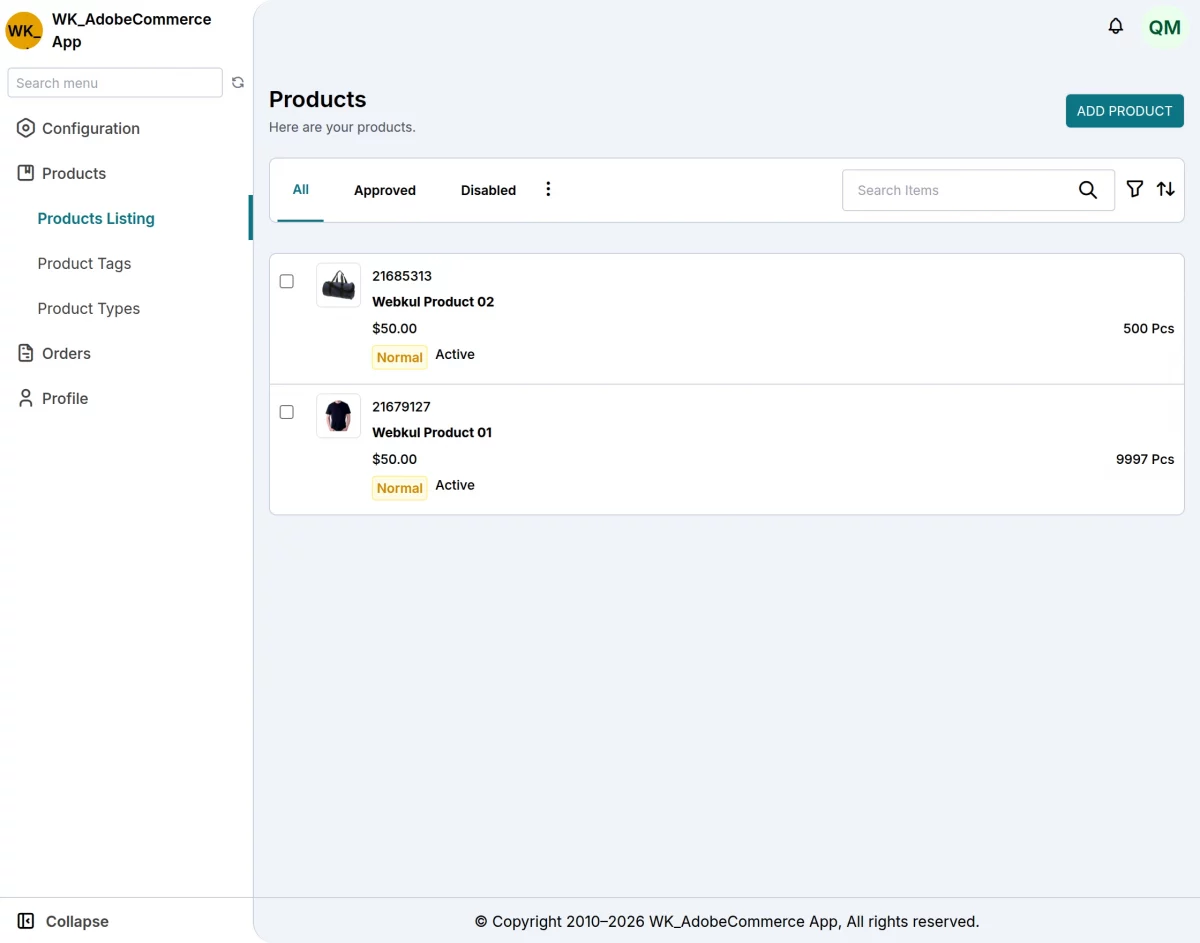
The product has been successfully synced in Adobe Commerce.
Adobe Commerce (Cloud Service) to EGSMA Product Sync
Similarly, when the vendor creates a product in Adobe Commerce, the system automatically syncs it to the EGSMA (Vendor End).
First, the system triggers an event as soon as the vendor creates the product. Then, the connector immediately captures this event in real time.
After that, it sends the product data to the EGSMA (Vendor End) without any manual action.
Finally, the EGSMA platform automatically creates the product. As a result, both the marketplace and the vendor panel remain synchronized and up to date.
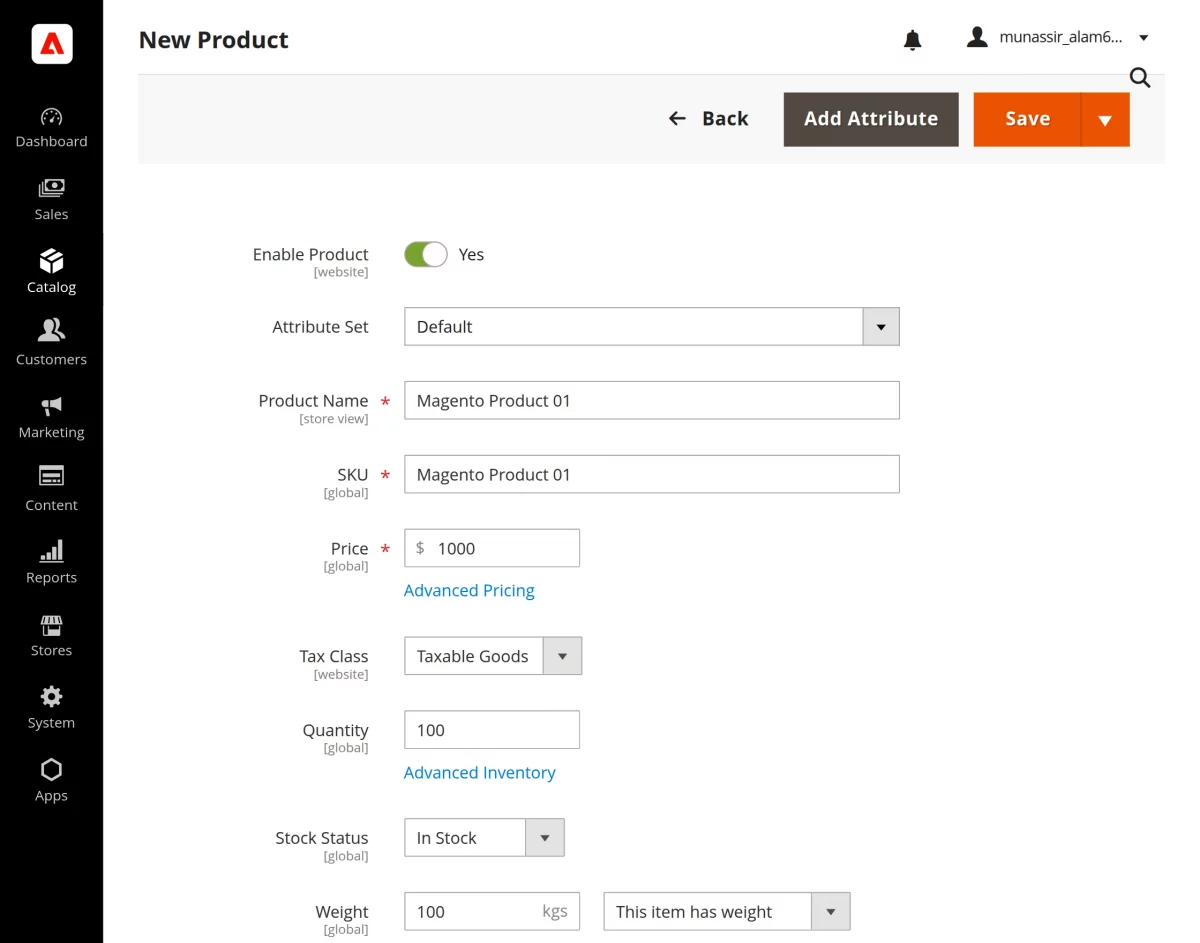
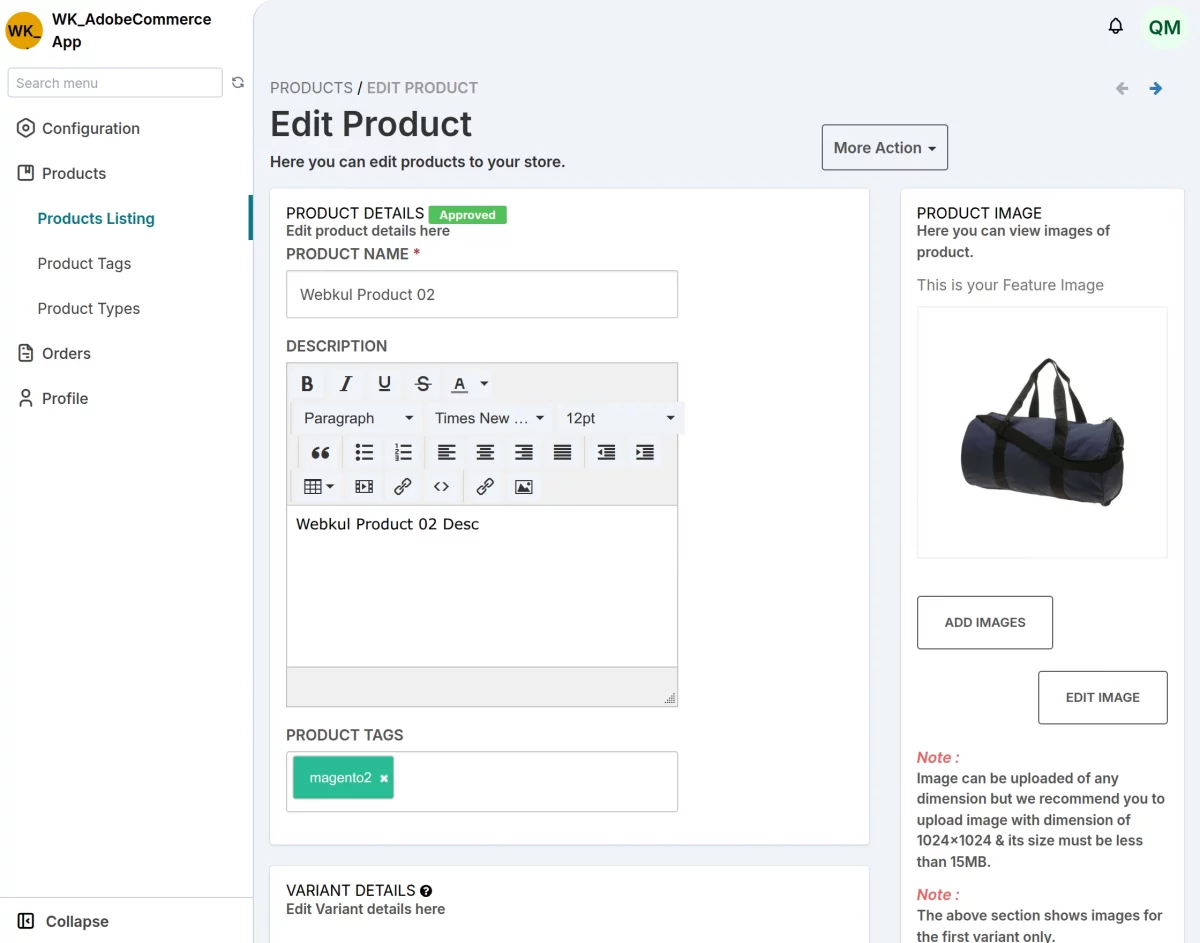
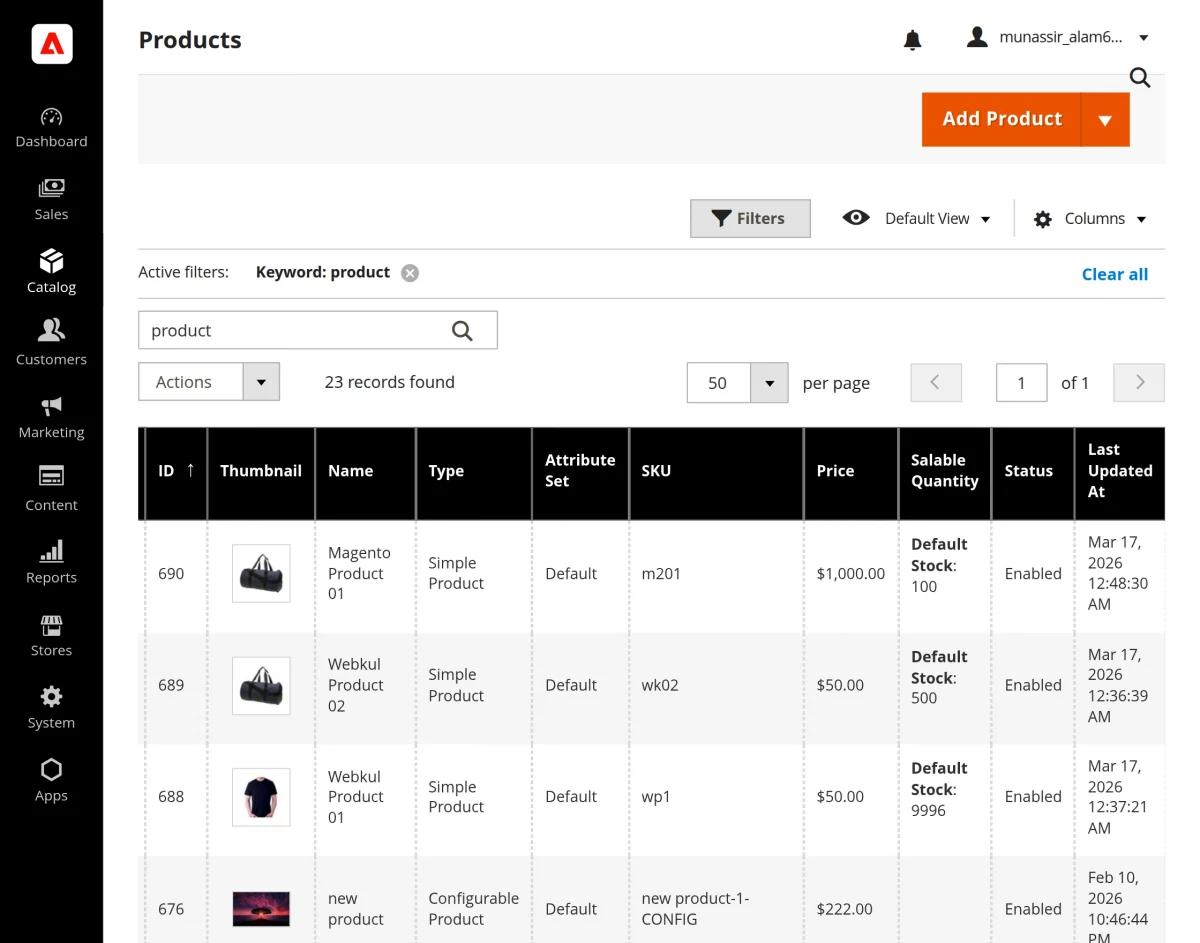
The product is created on Adobe Commerce.
The product is now synced on the EGSMA platform. The admin then assigns the product to the vendor.
Note: Enable the Auto Approve Product setting in the admin panel to automatically approve all new products without requiring manual action.
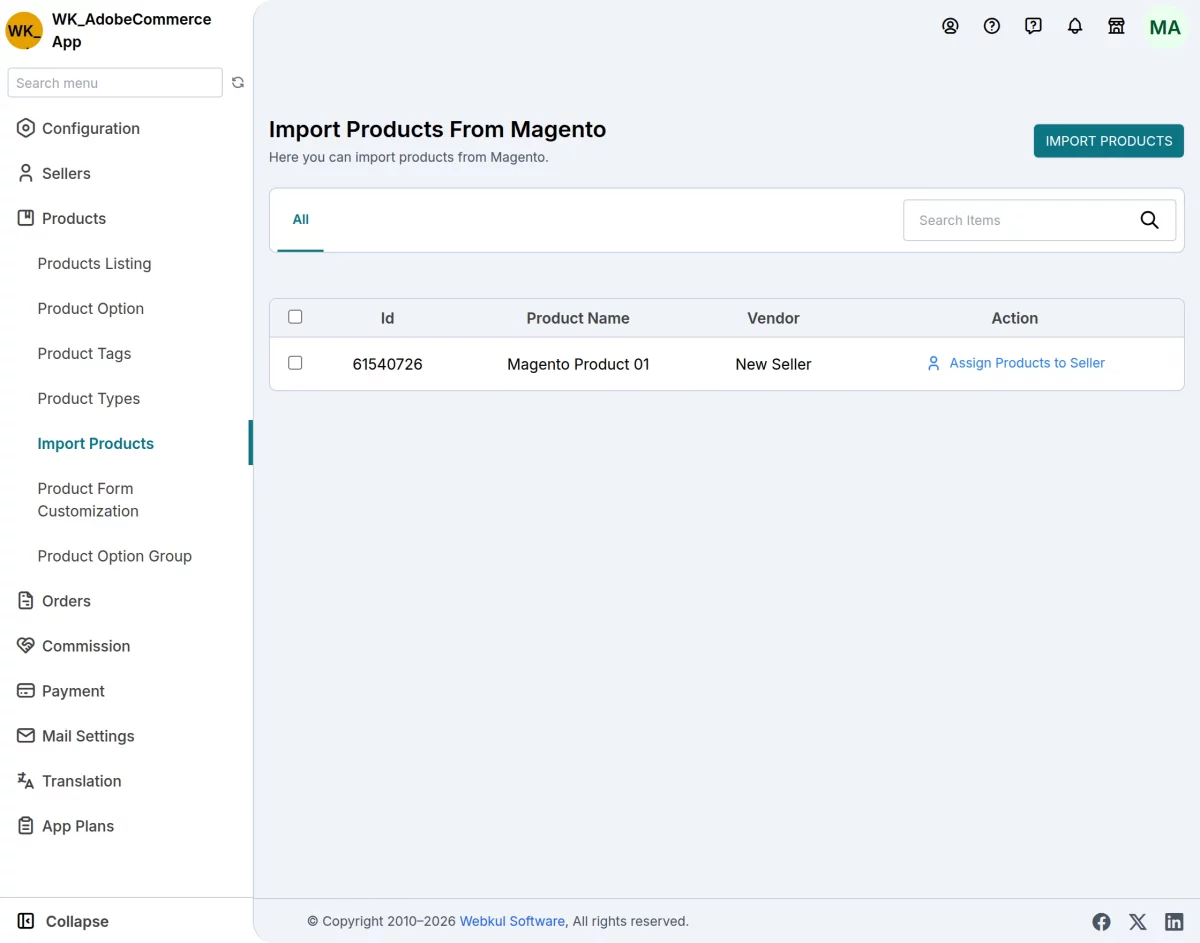
A pop-up will appear, allowing the admin to select “Assign Product As” and enter the seller’s email.
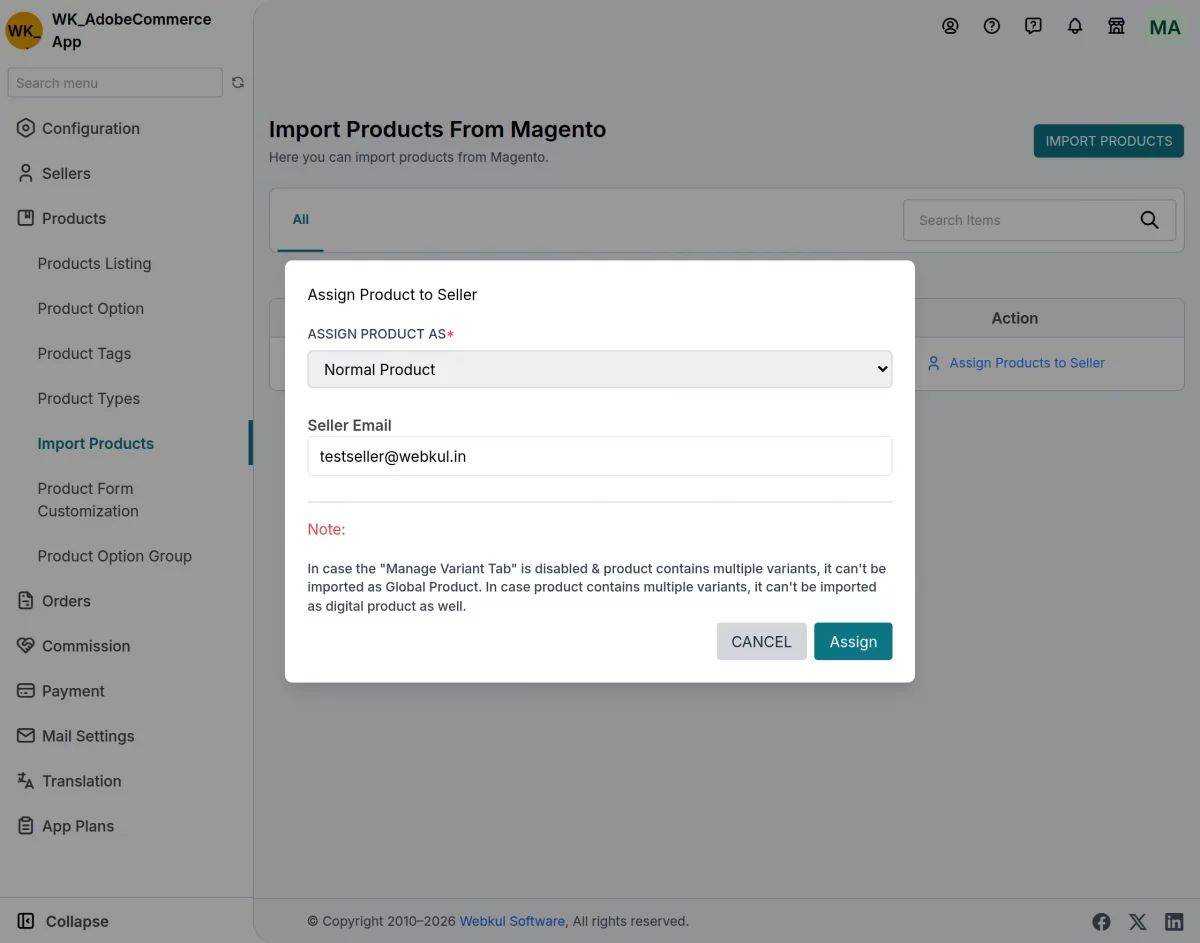
After the admin assigns the product, the system displays it in the vendor panel’s product listing.
Supported Product Types in EGSMA Multi-Vendor Integration
Vendors can manage the following product types on their platform.
Simple Products: Basic products without variants
Configurable Products: Products with multiple variants (size, color, etc.)
Order Management
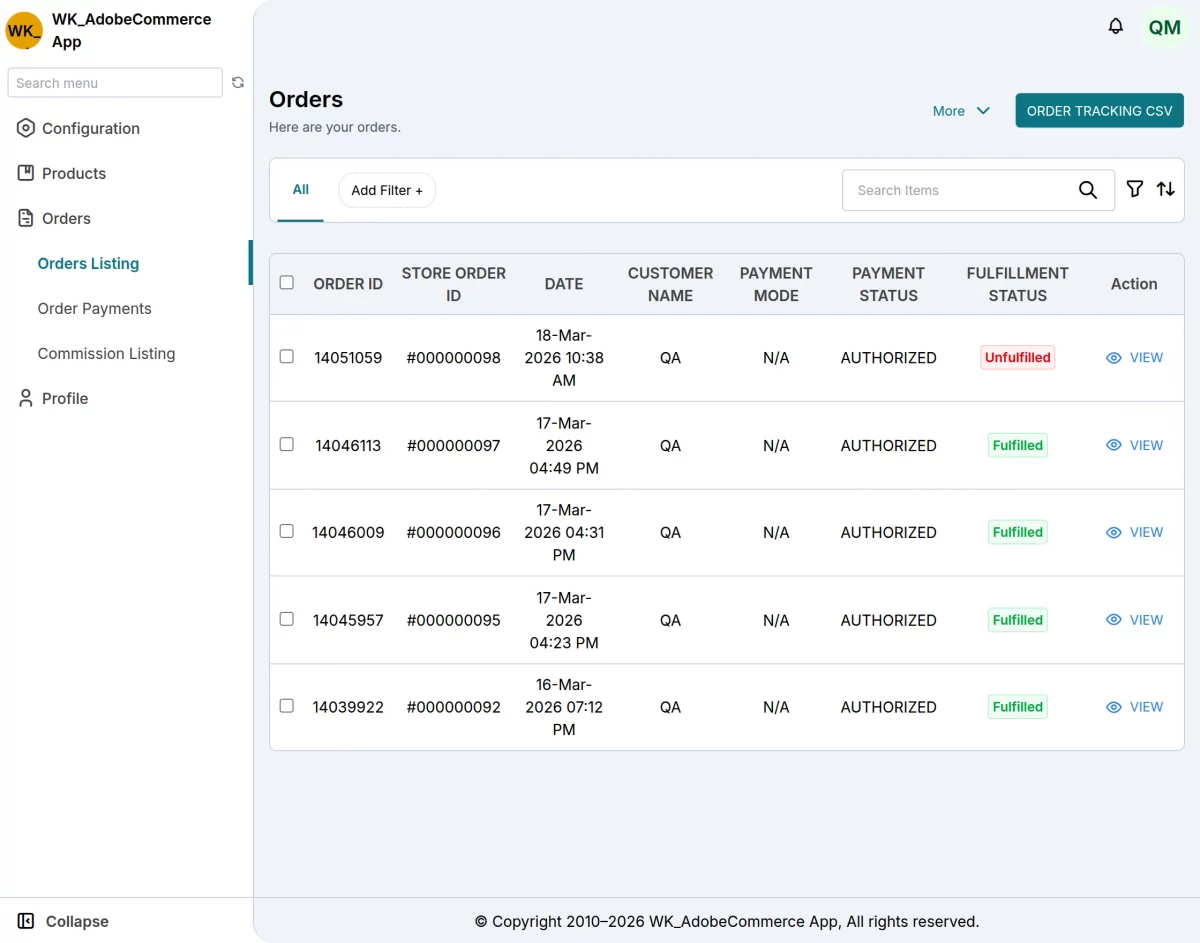
Vendors can manage orders on their platform. The system synchronizes order information from the EGSMA platform to Adobe Commerce automatically.
- Order Created: Automatically syncs new orders from Adobe Commerce Store to appear in your EGSMA store
- Order Updated: Order status changes are synced
- Order Fulfillment: Manage fulfillment status between Adobe Commerce and the EGSMA store.
- Returns & Refunds: Handle returns and refunds in Adobe Commerce
- Shipment Created: Shipping information syncs from Adobe Commerce store to EGSMA store and vice versa
- Shipment Updated: Update shipment information bidirectionally
- Keeps customer accounts synchronized between both stores.
- Customer data is synchronized only during the order synchronization process.
Inventory/Stock Management
The Vendors can manage stock on their platform. The system keeps stock levels synchronized in real time across both platforms.
- Stock Updated: When inventory changes in one system, it is automatically updated in the other; consequently, data consistency is maintained across both systems.
- Stock Sync: Keep stock quantities consistent across platforms.
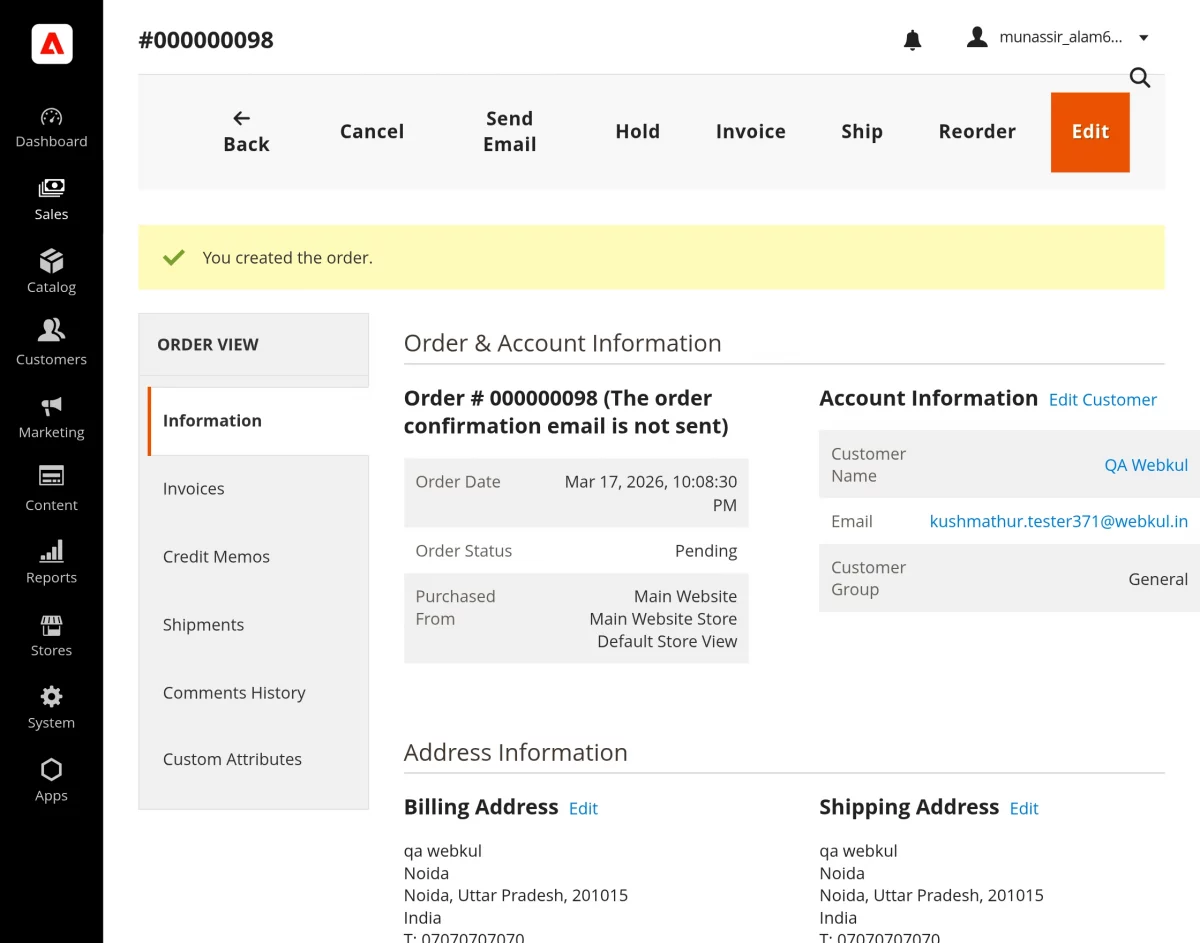
Adobe Commerce (Cloud Service) to EGSMA Order Sync
When a customer places an order in the vendor’s Adobe Commerce store.
Vendors receive order data from Adobe Commerce on the EGSMA platform in real time. The system automatically syncs this data whenever a customer places an order.
This process ensures that both platforms always display consistent order information. It reduces manual work and improves order accuracy.

How Order Synchronization Works
When a customer places an order in Adobe Commerce, the system triggers an order creation event and captures it instantly.
It then sends the order data to the vendor’s EGSMA store, where the platform automatically creates the order.
EGSMA Adobe Commerce integration runs in real time without manual input.
Order Data Sync
The system synchronizes all essential order details clearly and consistently.
These details include customer information, billing and shipping addresses, ordered products with their quantities, pricing, and totals, the selected payment method, and the current order status.
This ensures complete order visibility in the vendor’s EGSMA panel.
Order Status Updates
When the vendor updates an order in Adobe Commerce, the system immediately processes the change. First, it sends the updated order information to the EGSMA (Vendor End) in real time.
As a result, the connector ensures that the status update reflects instantly on the vendor panel. Consequently, both the marketplace and the vendor system remain synchronized.
Moreover, this real-time update helps maintain accurate and consistent order status across the entire marketplace.
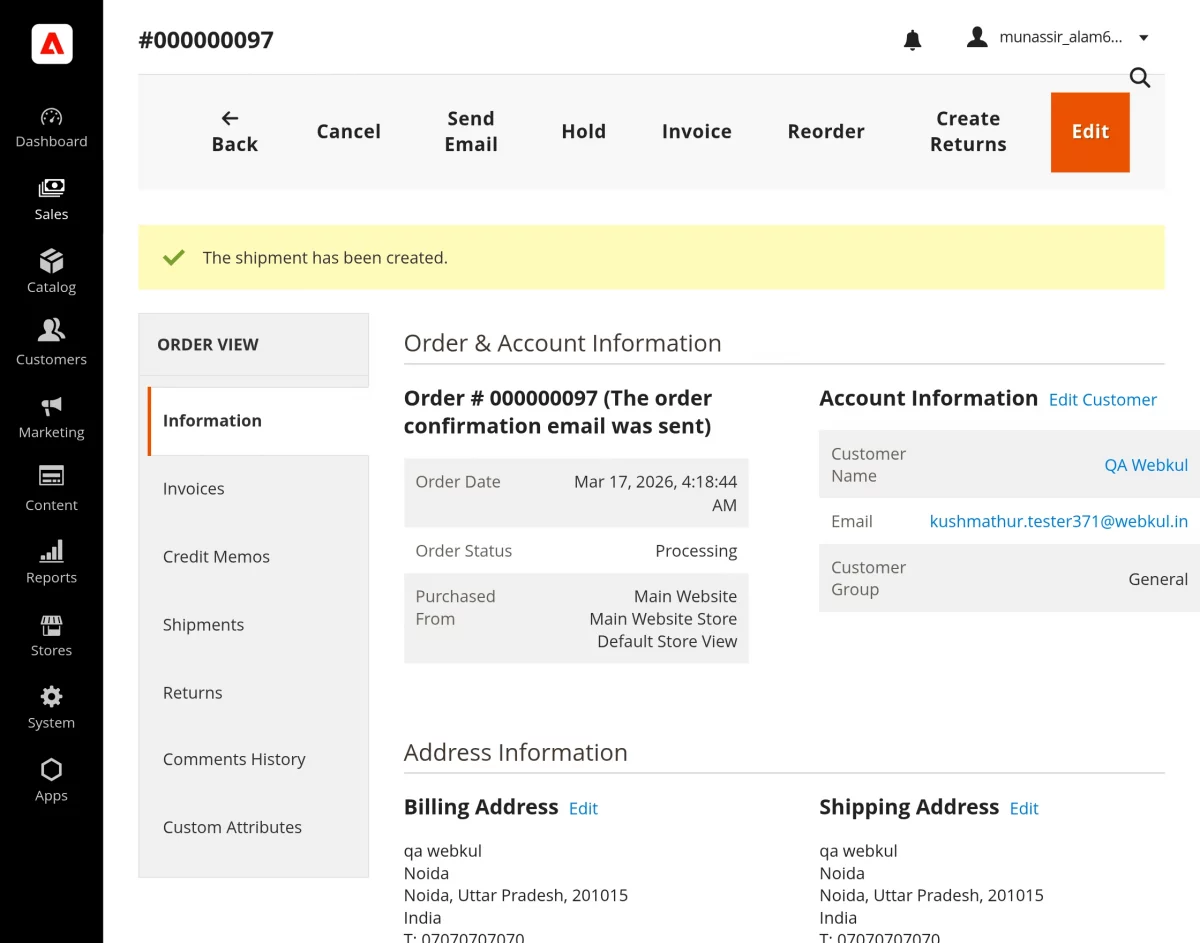
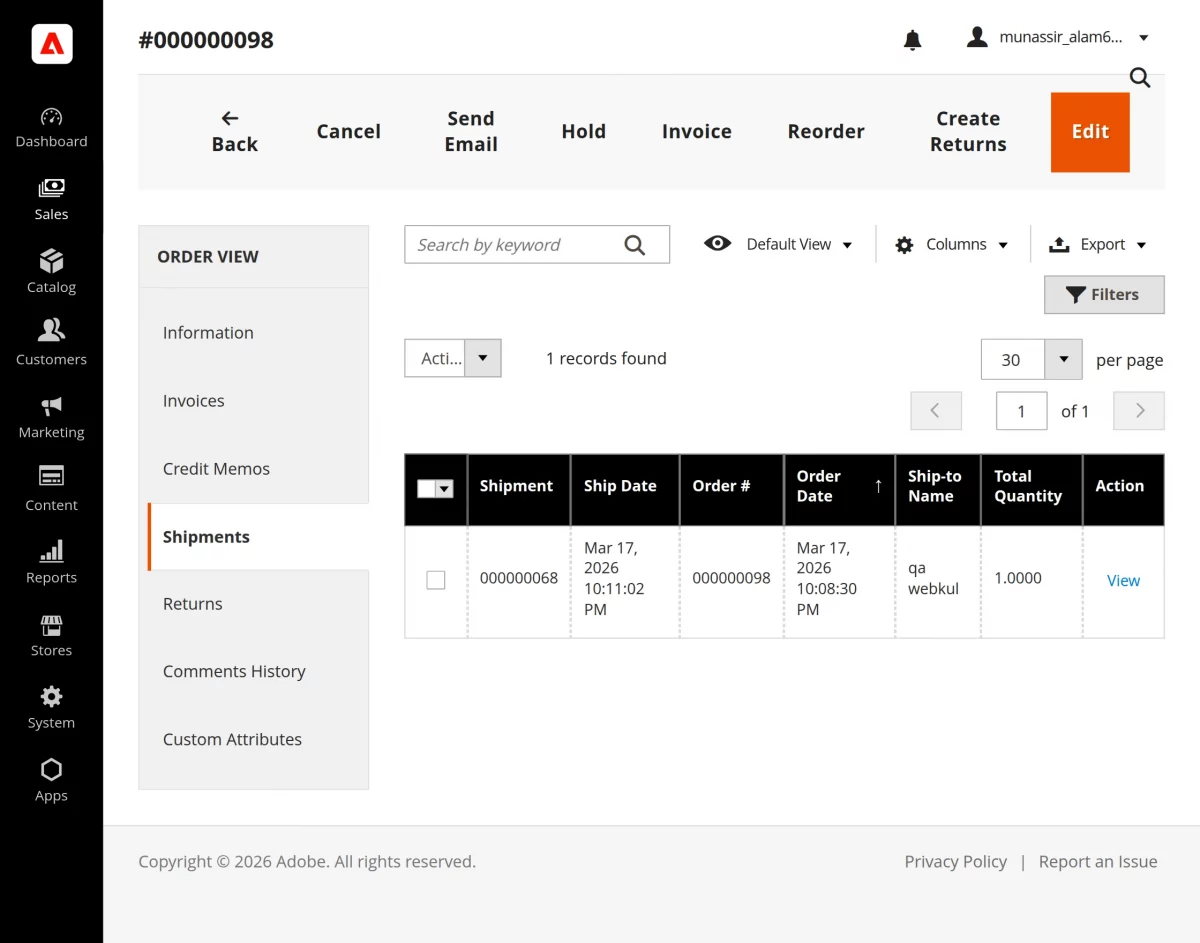
Shipment/Fulfillment Generated on EGSMA & Sync to Adobe Commerce
After receiving the order, the vendor proceeds with fulfillment from the EGSMA (Vendor End). The vendor creates a shipment by entering tracking details, shipping method, and carrier information.
Once completed, the connector syncs this shipment data back to Adobe Commerce.
This ensures both platforms stay aligned during order delivery.
Key Capabilities
The system enables vendors to create shipments in Adobe Commerce directly from the EGSMA (Vendor End). As a result, it streamlines the fulfillment process across the marketplace.
In addition, it automatically updates the shipment status, ensuring that both platforms remain aligned.
Moreover, the connector syncs tracking details in real time, which allows customers to monitor their orders without delay.
Finally, it maintains fulfillment consistency across both systems. Consequently, vendors and the marketplace always display accurate and up-to-date shipment information.
How Shipment Sync Works
Shipment Creation in EGSMA
When the vendor creates a shipment on the EGSMA (Vendor End), the system automatically starts the process. First, it triggers a shipment event as soon as the vendor creates the shipment.
Next, the connector captures this event in real time. After that, it sends the shipment data to Adobe Commerce without requiring any manual action.
Finally, Adobe Commerce receives the data and creates the shipment record on the marketplace. As a result, both the vendor panel and the marketplace remain synchronized.
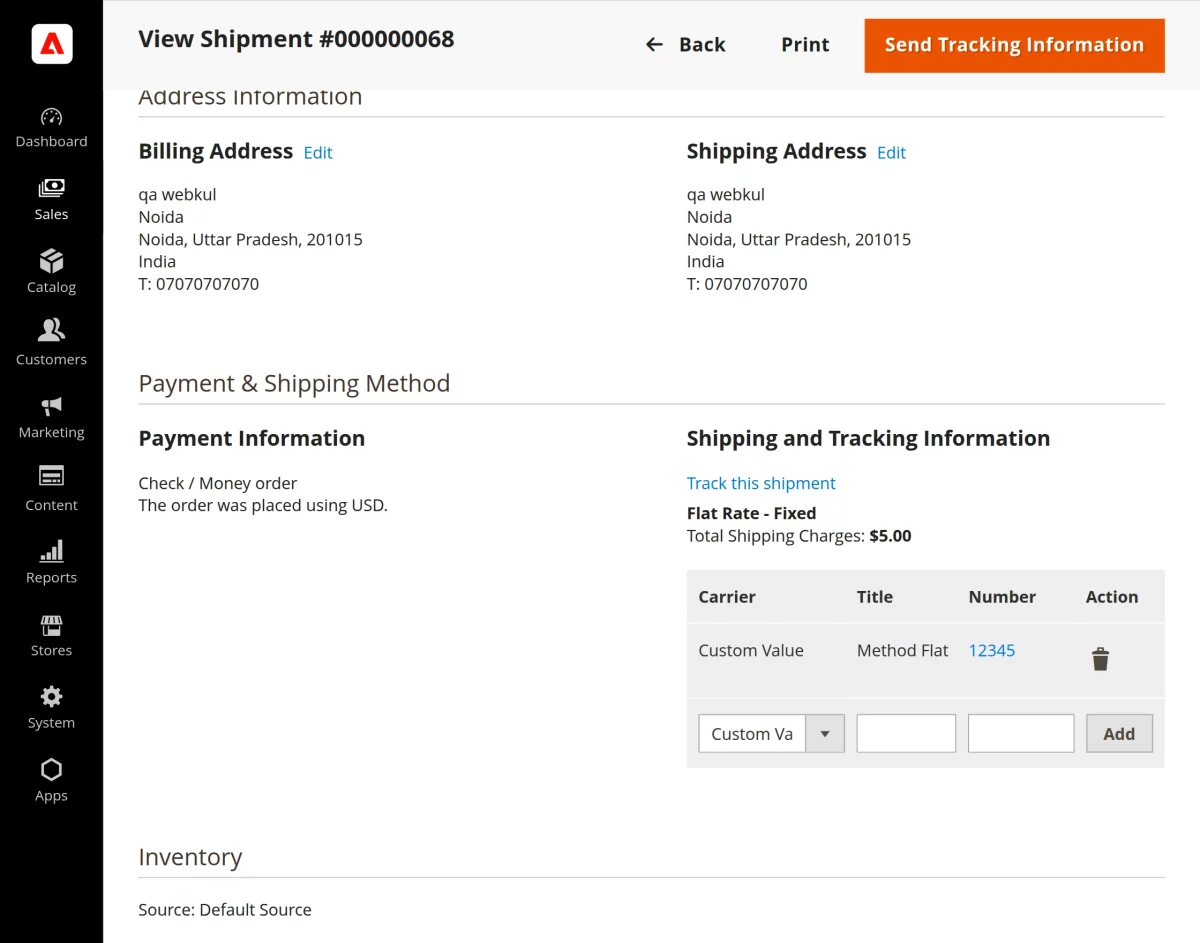
Shipment Data Sync
During shipment synchronization, the system transfers all essential shipment details from the EGSMA (Vendor End) to Adobe Commerce.
This process ensures that both the vendor panel and the marketplace remain aligned.
It includes the order reference ID, which links the shipment to the correct order. In addition, the system syncs the shipped items along with their quantities to maintain accuracy.
Furthermore, the system shares the shipping method to clearly define the delivery type. In addition, it syncs the tracking number, allowing customers to track their orders in real time.
Finally, the system updates the carrier details and ensures complete visibility of the shipment across the marketplace.
Shipment Updates
When the vendor updates shipment details in the EGSMA (Vendor End), the system immediately triggers the synchronization process.
As a result, the connector syncs the updated shipment information to Adobe Commerce in real time.
Consequently, Adobe Commerce reflects the latest shipment status without any delay. This ensures that both the vendor panel and the marketplace remain consistent.
Additionally, it allows customers to view accurate and up-to-date tracking information.
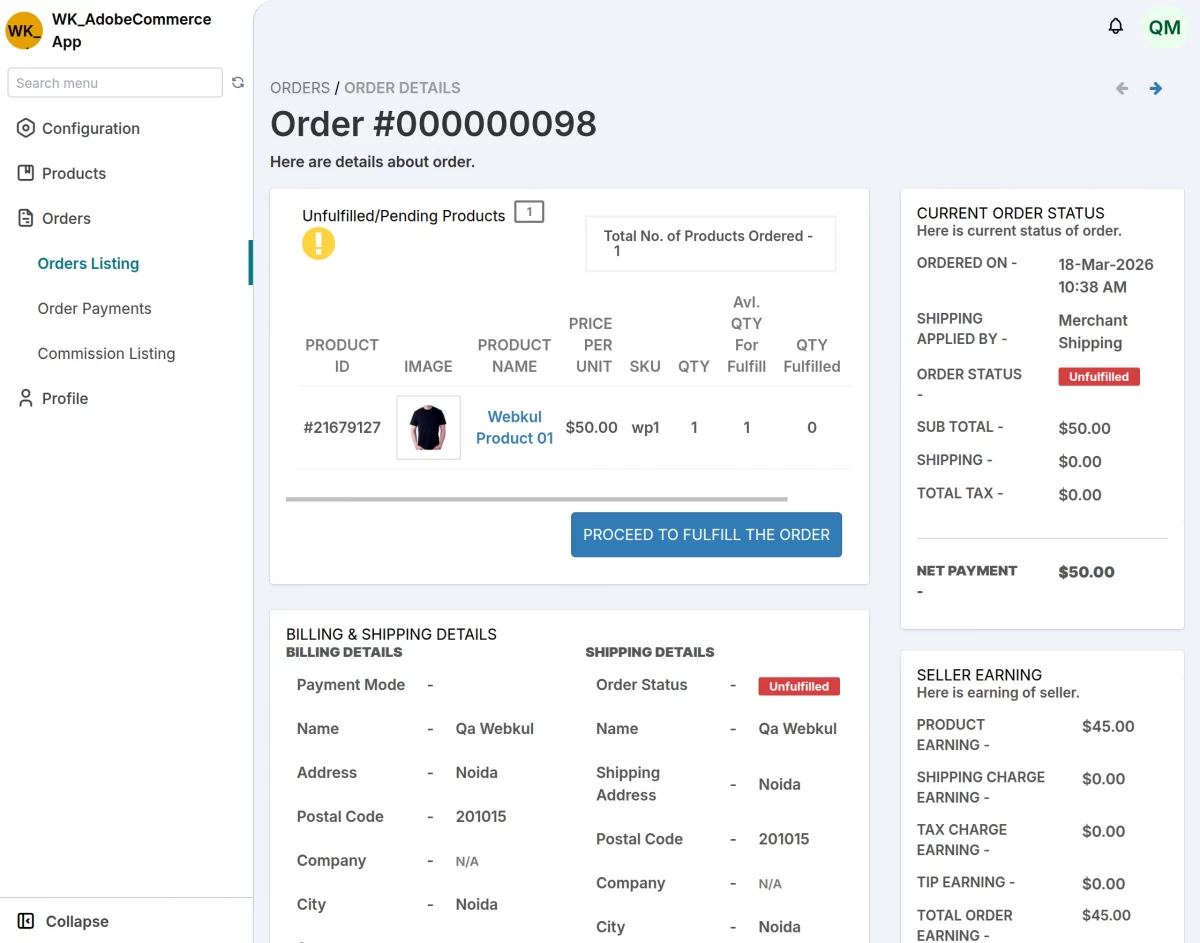
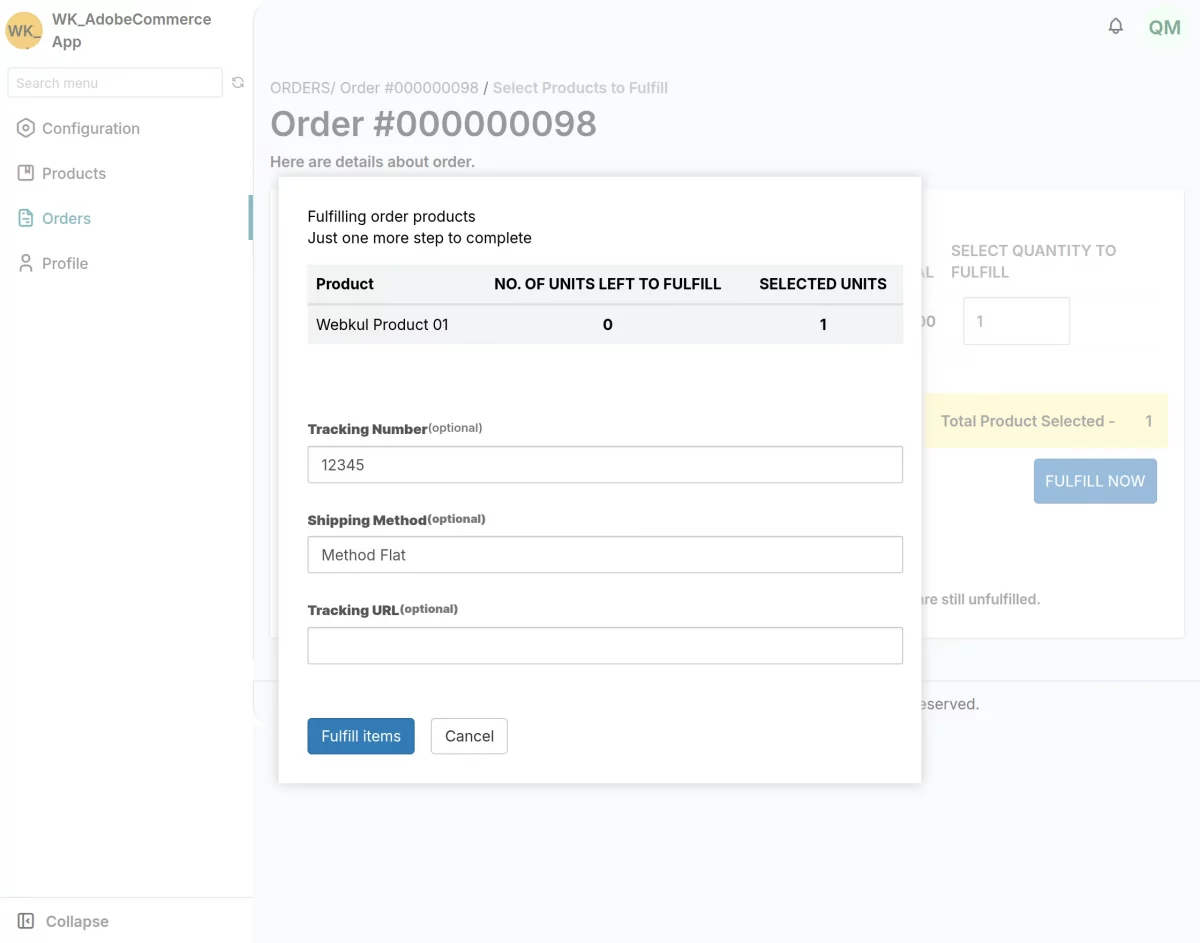
To generate the fulfillment, the vendor first clicks on the Proceed To Fulfill The Order button. As a result, the system initiates the fulfillment process.
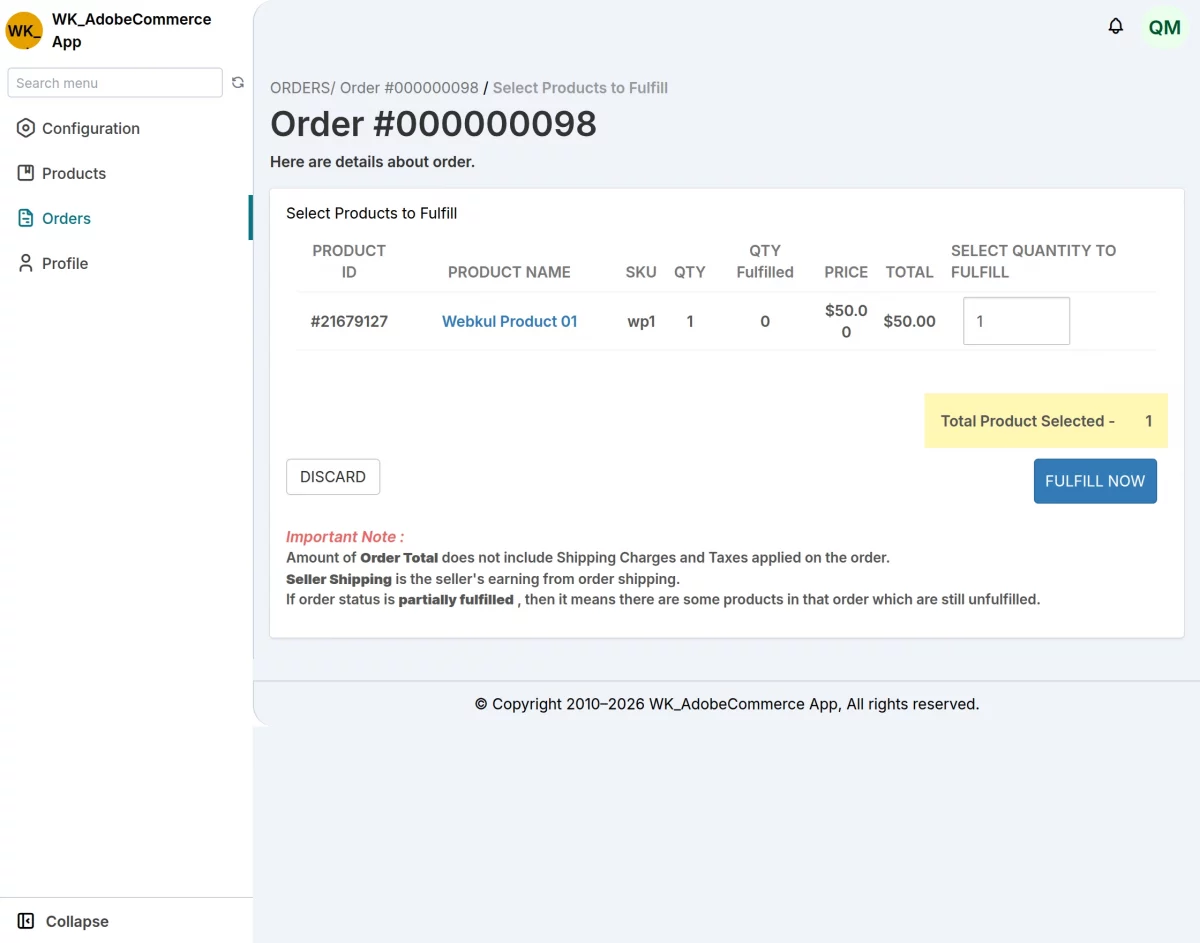
Next, the vendor clicks on the Fulfill Now button to proceed. As a result, the system opens a pop-up window for entering shipment details.
In this step, the vendor provides the tracking number, selects the shipping method, and enters the tracking URL.
Once completed, the system captures these details and prepares the shipment for synchronization.
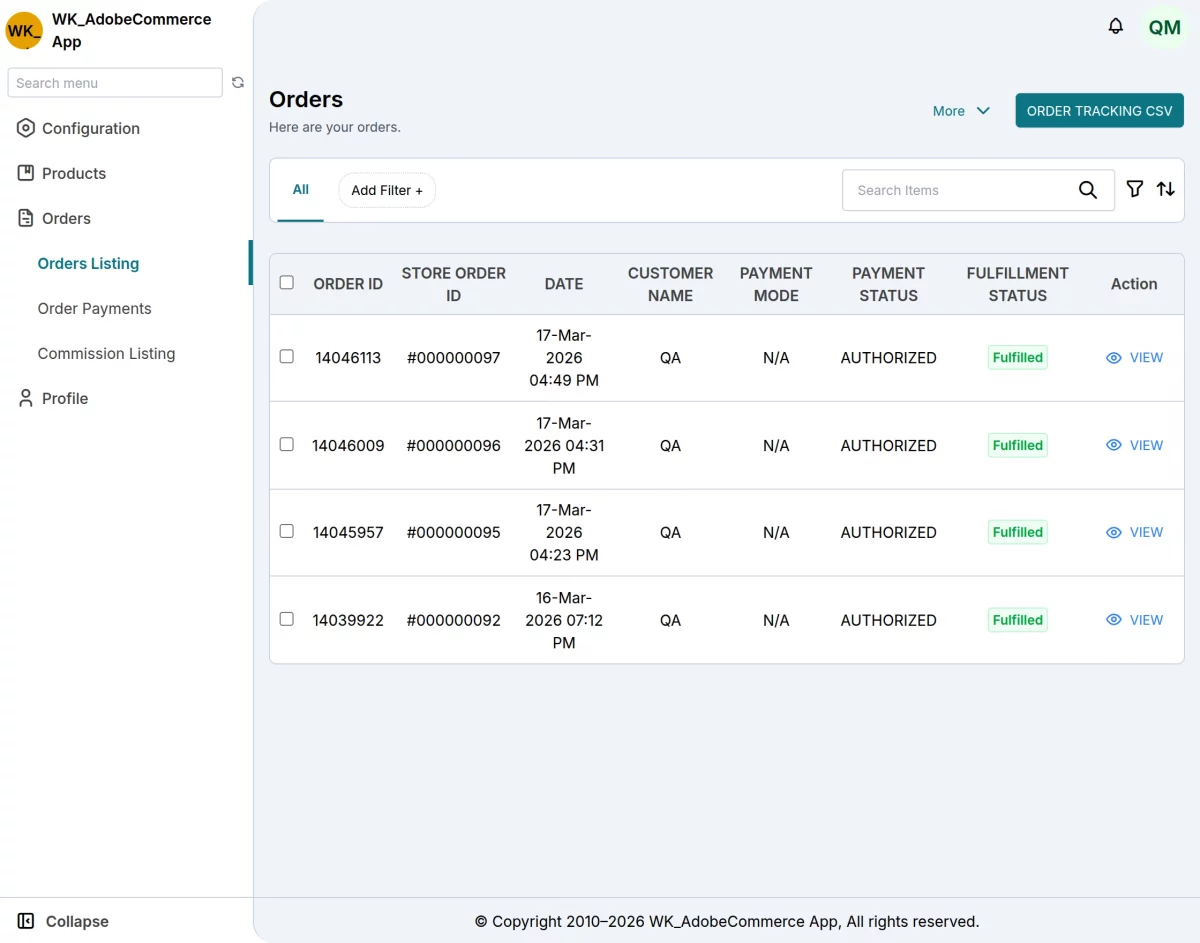
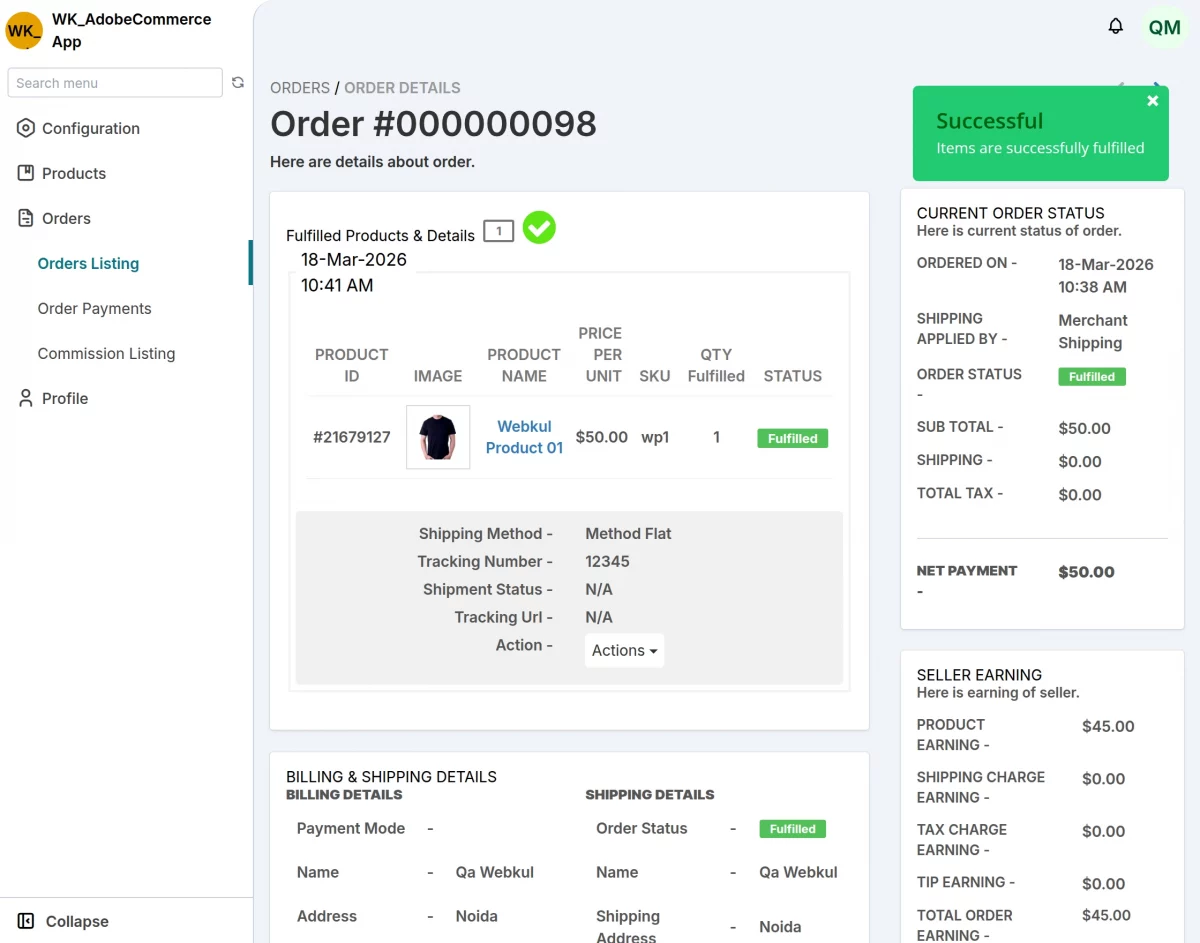
The system successfully completes the order fulfillment and updates the order status accordingly. As a result, both platforms reflect the latest status in real time.
Consequently, both the vendor panel and the marketplace reflect the fulfilled order in real time.
Fulfillment Status Sync
The EGSMA–Adobe Commerce integration system actively keeps the fulfillment status aligned across both platforms. As a result, any updates made on one side reflect instantly on the other.
Moreover, the connector ensures continuous synchronization of fulfillment data. Consequently, both the vendor panel and the marketplace display accurate and up-to-date order status at all times.
EGSMA seamlessly syncs shipment details to Adobe Commerce in real time. As a result, the marketplace instantly receives the latest shipment information.
In conclusion, that’s all for the EGSMA Marketplace Integration for Adobe Commerce Cloud Service. If you face any issues, feel free to raise a support ticket.
Furthermore, there is no need to search elsewhere; seize the chance to initiate your projects with the accredited Adobe Commerce development company.
For a personalized touch, engage and hire Adobe Commerce developers who are focused on delivering exceptional results for your custom e-commerce projects.
Current Product Version - 1.0.0

Be the first to comment.