PrestaShop Advertisement Addon : Advertisement means making a thing known to the people commercially. We live in an age of publicity.
In modern business world, advertising plays an important role to establish contact between the buyer and seller. It is also a medium to monetise your site.
Worldwide Advertising has gained an exceptional significance.
We hereby bring to you our new PrestaShop Advertisement Addon with the help of which your customers can place their advertisements on your PrestaShop site.
This furnishes advantage not only to themselves by making their products/shops known but also by providing a revenue generation medium for your website.
Note: PrestaShop Advertisement Addon module is compatible with Multi-Store Feature.
Features of PrestaShop Advertisement
- Admin can monetize his website by providing advertisement space to the customers.
- Provide a panel to customers where they can place their advertisement request by selecting the required available position.
- Set impact price for every advertisement position.
- Admin can also provide an advertisement position free of cost by setting the impact price as zero.
- Allow/disallow external link for banner images added by the customer for their advertisement.
- Allow/disallow the approval of the banners uploaded by the customers.
- Customers gets options to select the advertisement display positions.
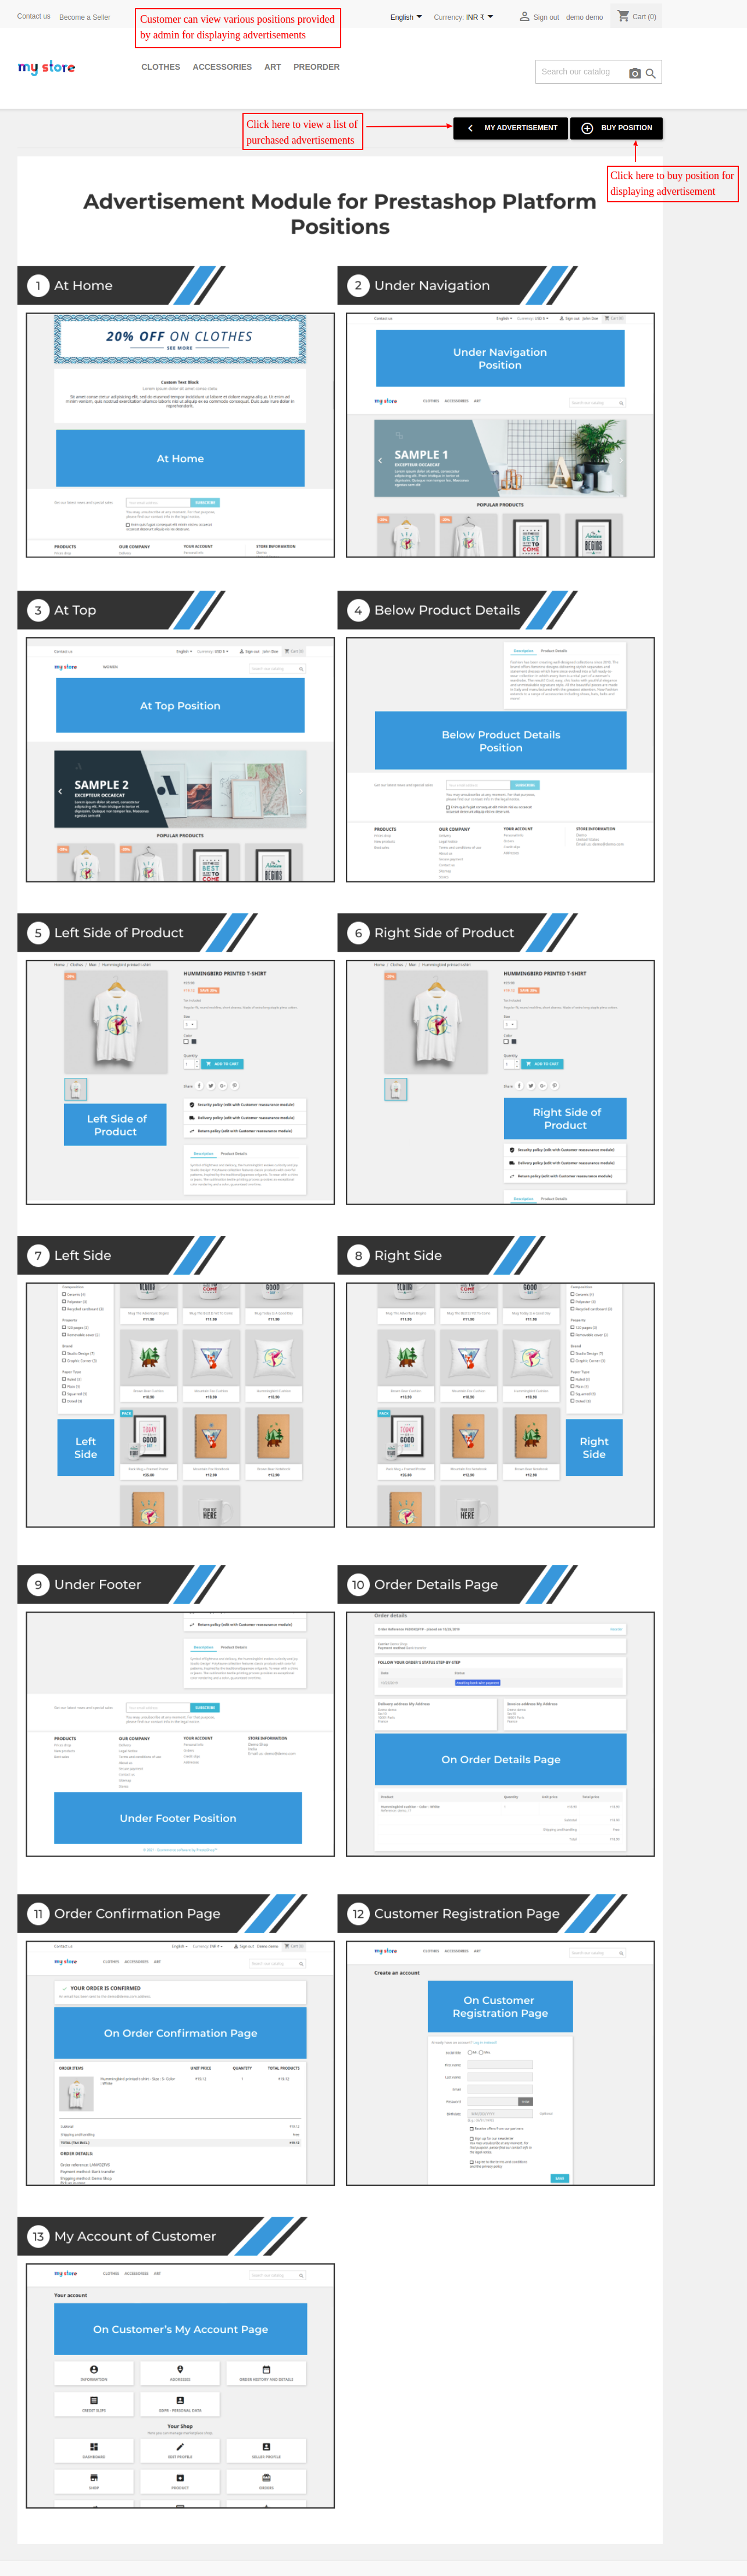
- Customers can have a look at the various advertisement positions provided by the admin of the site.
- The customers can add Banners on the advertisement position purchased.
- Customer can select the date range for which advertisement will be displayed and make payment accordingly.
- Customers are redirected to a secured Payment gateway – Paypal to make the payment for advertisement request.
- Admin will have complete control of advertisements displayed on the website
- View the list of customers who have purchased the advertisement plans.
- Enable/disable or delete the advertisement banners added by the customer.
How to Install PrestaShop Advertisement Module
- Firstly, go to the module manager in the back office and click on ‘upload a module’.
- After that, drag and drop the module file or select the file from the system.
- In this way, the module installation will be successful.


PrestaShop Advertisement Configuration
Admin has to set configuration for PayPal in PayPal Configuration Tab :

Next, Admin has to set the General Configuration of the module where admin can allow/restrict the customers to add links to their banners.

Admin will then go to Set Impact Price for Display section. Here admin can add impact prices according to various advertisement display positions.

How to Get API Keys
To get the API keys, login to your PayPal account and click on Apps & Credentials.

Now, click on ‘Create App’ button.

On clicking the ‘Create App’ button, a popup appears on the page where you need to specify app name, select app type, and click on Create App button.

After clicking on the create app button, you can view client id and secret key.

Front End Workflow
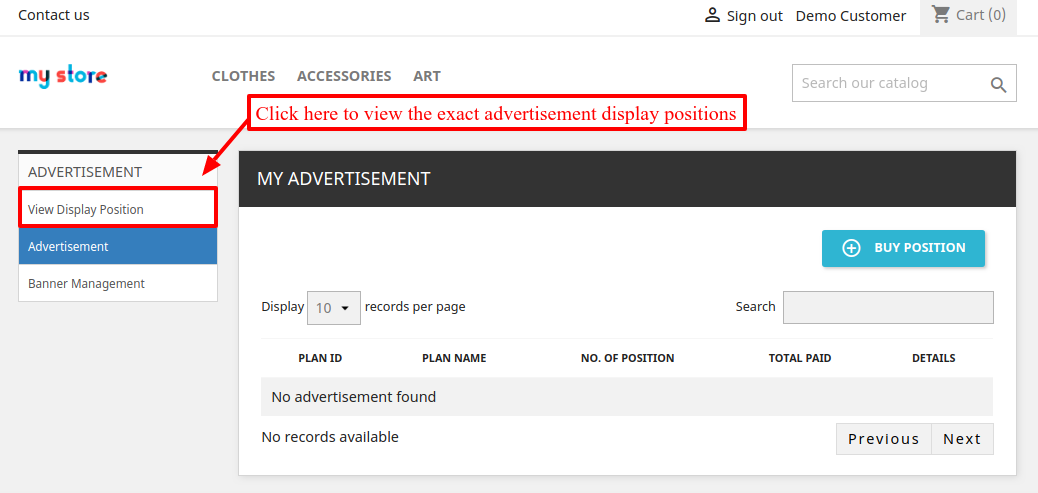
A new tab ‘My Advertisement’ gets available in customers’ account.

Customers can click on the “My Advertisement” tab to purchase the available advertisement positions as per the required date. By clicking on “Buy Position” tab, customer goes to create plan page.

Here customer will create his own advertisement plan by selecting the position and date.

By clicking on “View Display Position” tab, customers can view the various advertisement positions allowed by the admin where the advertisement can be displayed.
Customer selects the display position and adds the date range for which the advertisement will displayed on the selected position.
The total amount will be calculated considering the Impact price set for the selected position and the number of days for which the plan is being purchased.

After clicking on the “Add” button, the advertisement plan is added to the selected plan list.
From there, the customer can either proceed with the payment via PayPal by clicking on the “Pay” button or delete the selected plan from the list.

Let’s add one more position.

The customer will then be redirected to PayPal checkout to complete the payment procedure.

Customer will then login to its PayPal account and make the payment for the advertisement plan selected.


Once the payment is made, customer will receive a confirmation notification and will have an option to “View details” for the purchased advertisement.

The customer when clicks on “View Details” will see a pop-up appear with a list of all the advertisement positions purchased in that particular plan.
Add banner
“Add banner” option will help customer to add banners and hyperlinks on the banner (if allowed by admin in module configuration) to the respective advertisement position.

Once you click on “Add Banner”, add banner page will appear as shown in the following screenshot. The customer will upload the desired banner image and attach the hyperlink.

Once the customer has uploaded the banner, banner preview will be visible for that particular advertisement position. Customer can also edit or delete the banner from here.

When a customer clicks on the “Edit Banner” option, the customer will be redirected to edit Banner page from where he can change the uploaded banner as well as change the attached link on the banner.
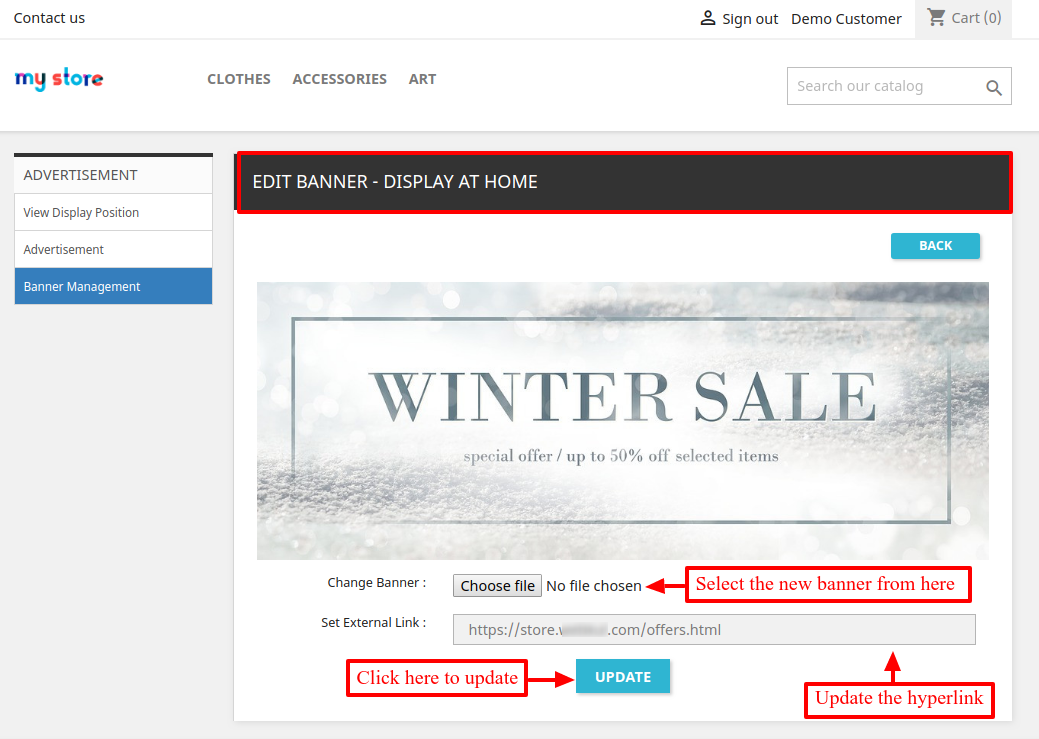
And the Selected Banner is displayed as per the advertisement position as configured.

So as per our example, the banner is displayed on the home page.
Overall Banner Management Tab
We have also given a separate tab to add the banners.
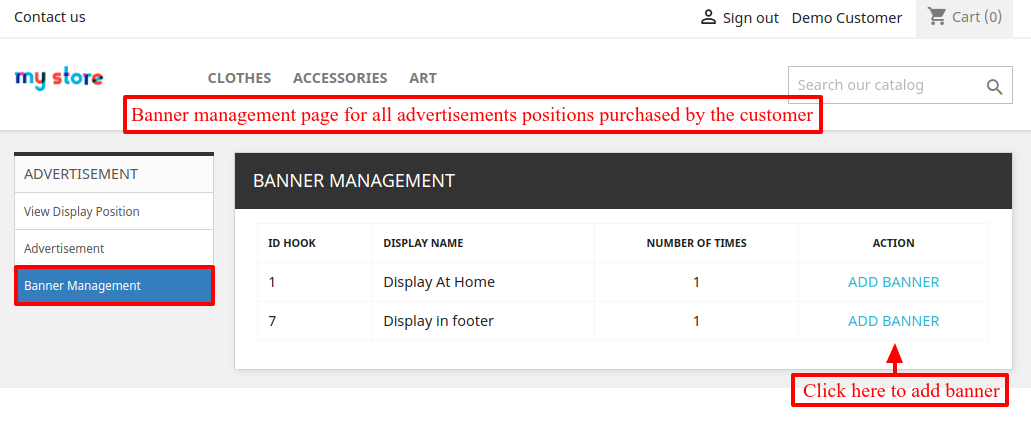
When customer clicks on “Add Banner Option” for any advertisement position listed, Customer will be able to set banner for that position.
If customer wants then the same banner can be set for the same advertisement position purchased for different dates.

Admin End
As we know, admin holds control of his entire website. Admin should aware of the advertisements that is displaying on the admin’s website.
After the Installation of the Module, 3 new tabs are added to admin dashboard.

Customer Advertisement
Here Admin can view the list of customers who have purchased the advertisement plans.

To view the plan details, admin will click on “View” tab. Admin will be able to see the details of the advertisement positions purchased in that particular plan.

Banner
Here admin gets a drop-down menu to select the customer, admin can now see the banners uploaded by that customer for the advertisement positions purchased.

Customer can view the Banners added by the customer by clicking on “View Banner” tab. Admin can enable/disable or delete the banner.

Support
For any kind of technical assistance or query, please raise a ticket at http://webkul.uvdesk.com or send us a mail at [email protected]
Also, please explore our PrestaShop development services & vast range of featureful PrestaShop Addons.
Current Product Version - 5.1.1
Supported Framework Version - 9.x.x, 8.x.x, 1.7.x.x

Be the first to comment.