Introduction
Odoo Website ClickPay Payment Acquirer helps you accept secure online payments using ClickPay from website checkout. It supports multiple payment networks and currencies.
It also gives real-time updates and flexible capture options. The module makes payment flow simple and secure. It helps manage payments easily with better control and tracking.
Features
- Secure ClickPay checkout integration for safe and smooth online payments.
- Supports multiple payment networks like Visa, MasterCard, Mada, and MEEZA.
- Provides both automatic and manual capture options for flexible payment control.
- Tracks payment status in real time across orders and transactions.
- Supports multi-currency payments for different regions and countries.
- Ensures secure server-to-server API communication for safe transactions.
- Redirects customers to a secure hosted ClickPay payment page.
- Allows capture and void actions for better payment management.
- Offers simple and easy configuration for quick setup and use.
Installation
- Once you purchase the App from Webkul store, you will receive a link to download the module’s zip file.
- Extract the file on your system after download finishes. As a result, you will be able to see a folder named- ‘wk_payment_clickpay’.
- Copy and paste this folder inside your Odoo Add-Ons path.
- Now, open Odoo App and click on the Settings menu. Here, click on Activate Developer Mode.
- Then, open Apps menu and click on ‘Update Modules List.’
- In the search bar, remove all the filters and search ‘wk_payment_clickpay’.
- You will be able to see the module in the search results. Click on ‘Activate’ to install it.
Workflow
Configuration of Odoo Website ClickPay Payment Acquirer
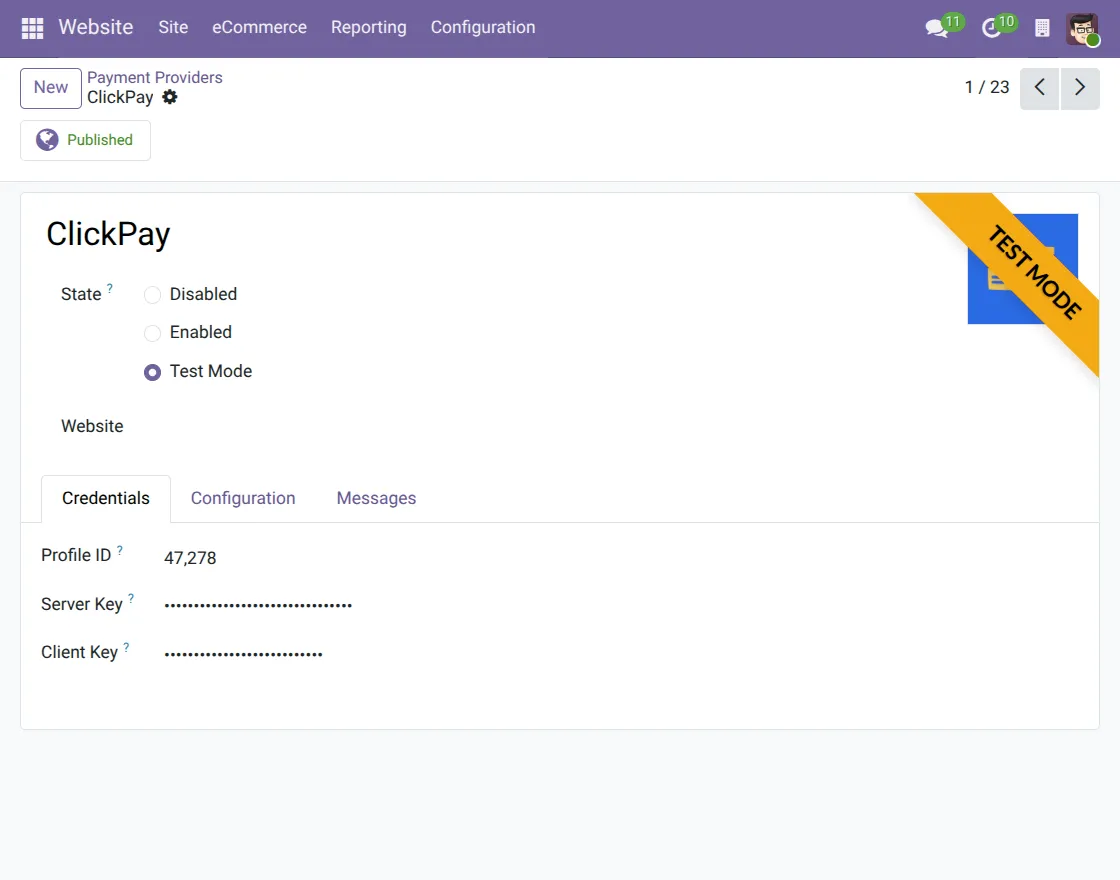
1. Go to Website → Configuration → Payment Providers, open the ClickPay payment provider, set the state to Enabled or Test Mode, and save the settings to activate it.
2. Open the ClickPay payment provider, select Enabled or Test Mode, enter the required credentials like Profile ID and Server Key, and save the configuration.
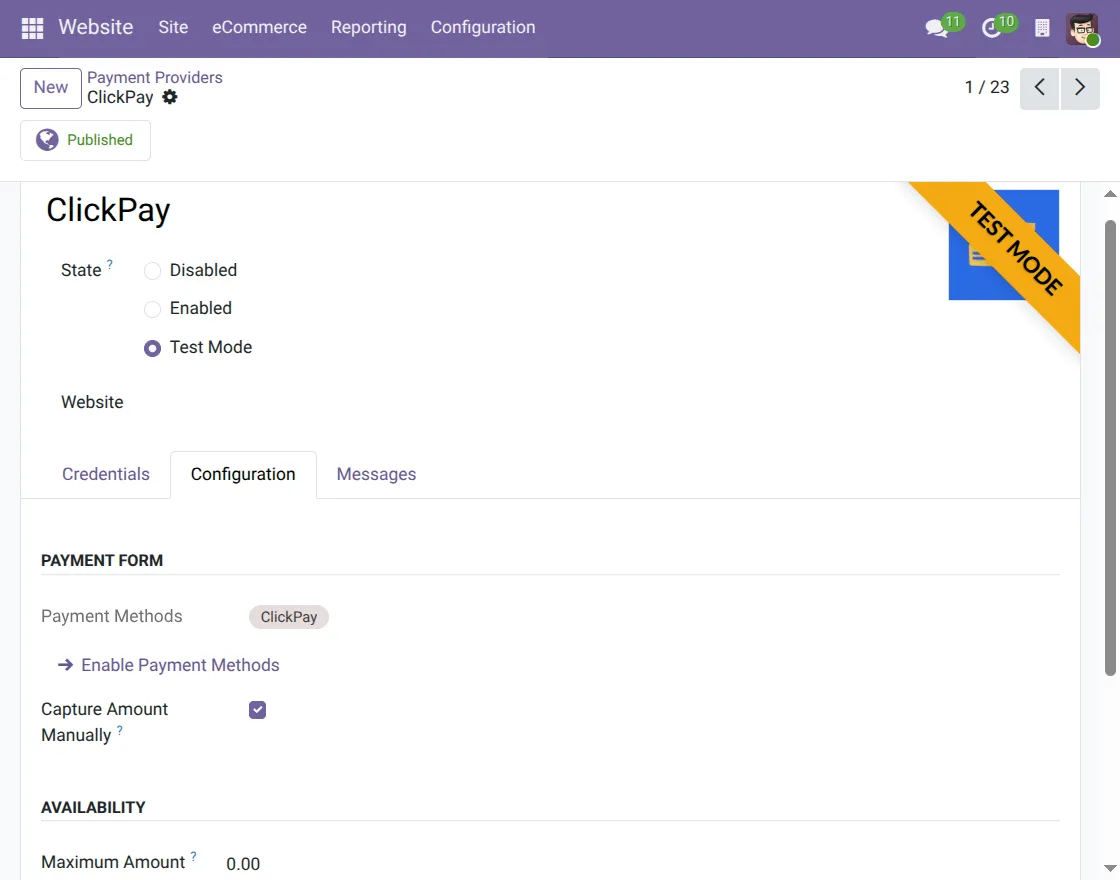
3. Open the Configuration tab, enable ClickPay payment methods, select manual or automatic capture, and save the settings.
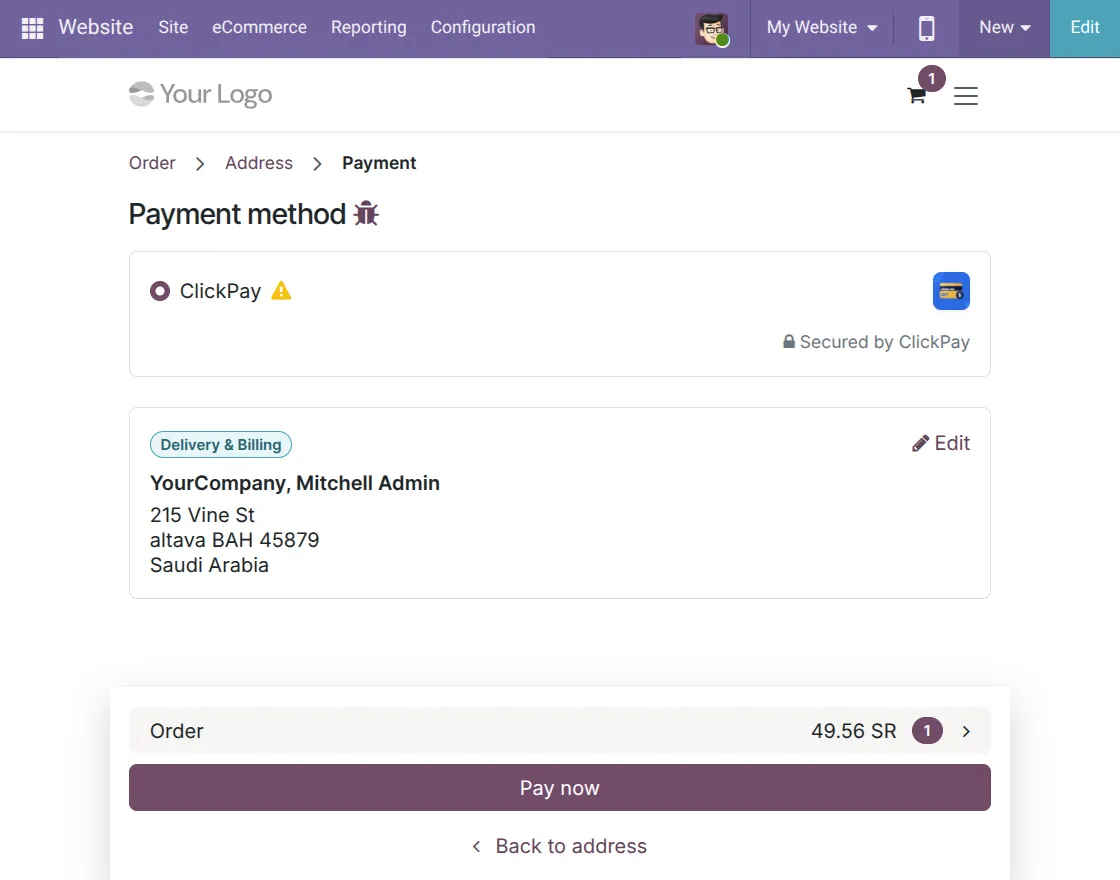
4. Go to the website checkout page, select ClickPay as the payment method, and click on Pay Now to continue.
5. On the ClickPay-hosted payment page, enter your card details and billing information, then click on Pay Now to proceed with the payment.

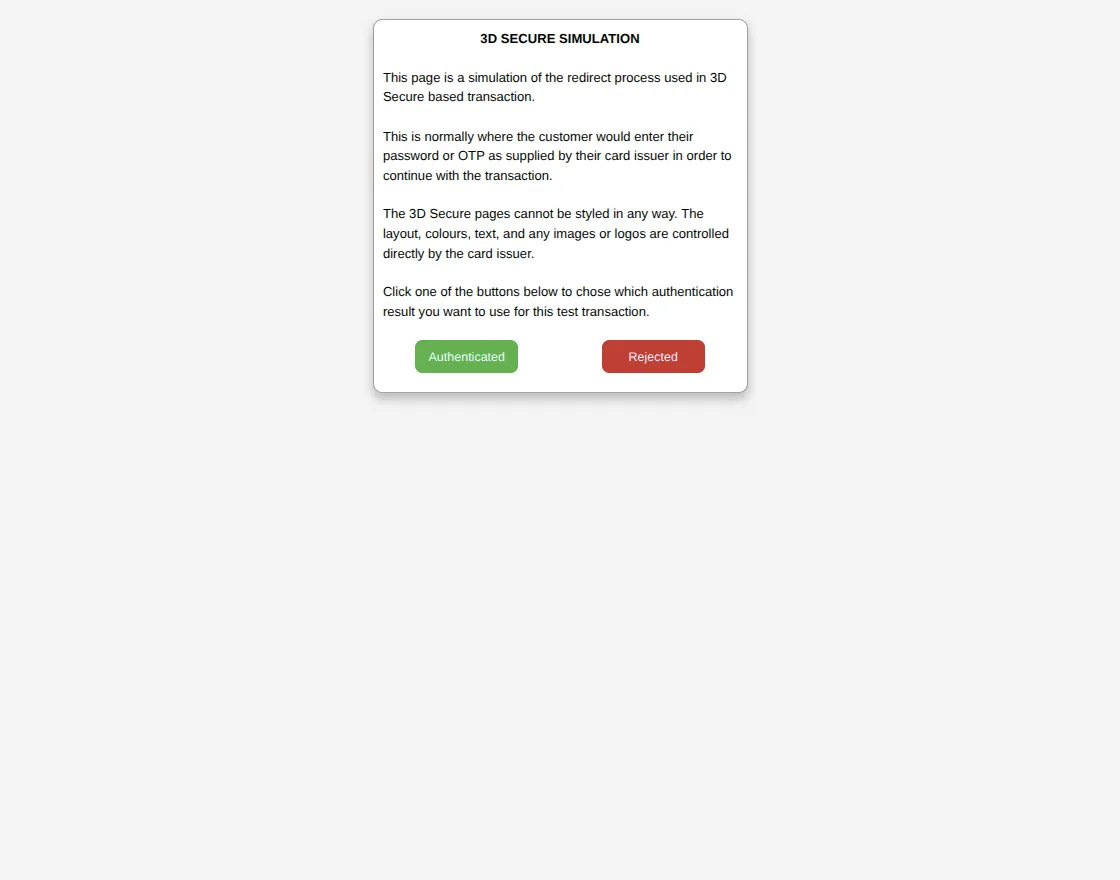
6. After entering payment details, a 3D Secure pop-up will appear where you need to select Authenticated to proceed or Rejected to cancel the payment.
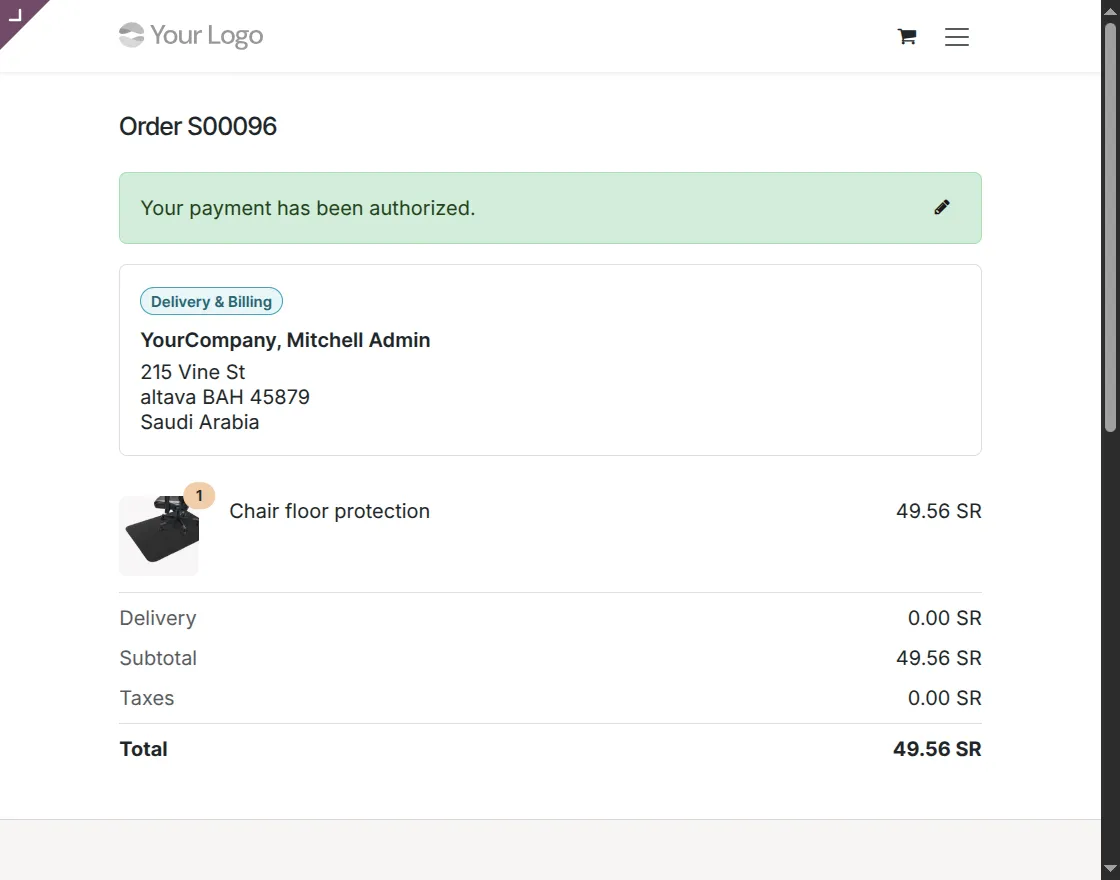
7. After successful authentication, you will be redirected back to the website, where the order confirmation page shows that the payment has been authorized.
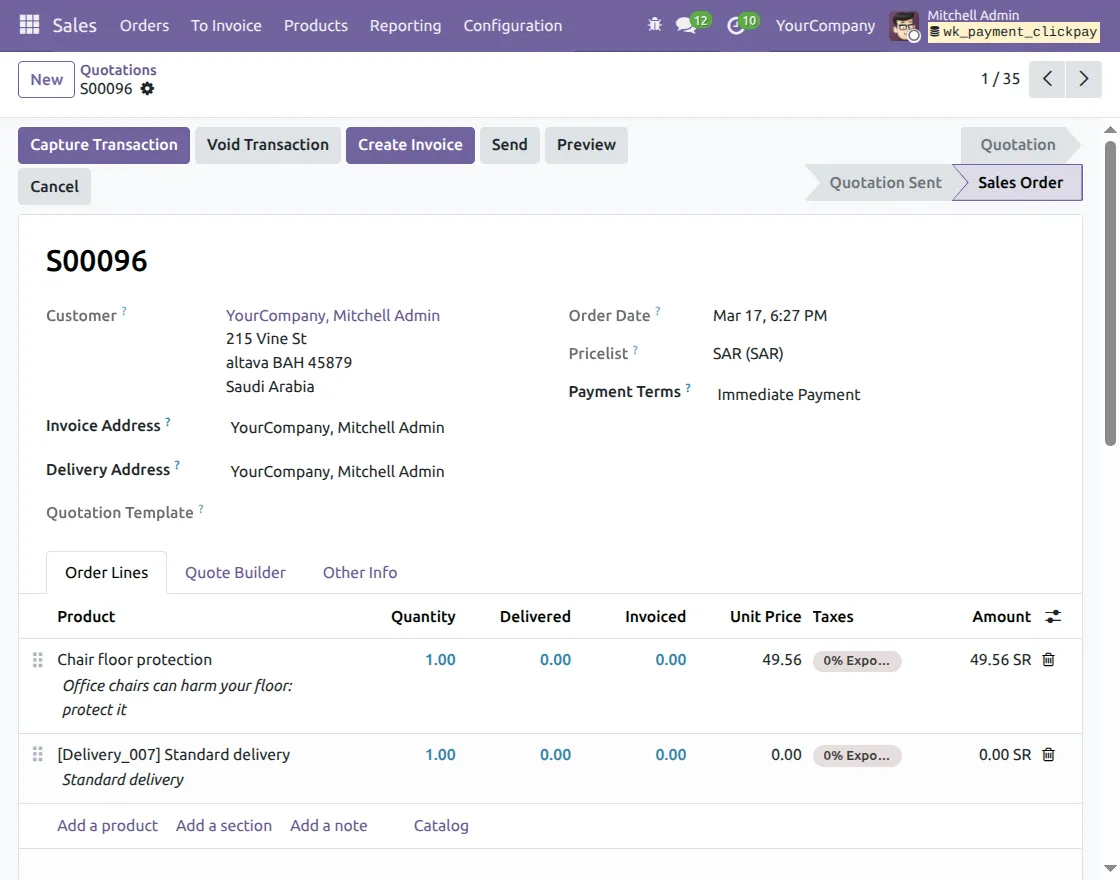
8. Go to the Sales and open the related Sales Order to view order and payment details; you can also capture or void the transaction from here.
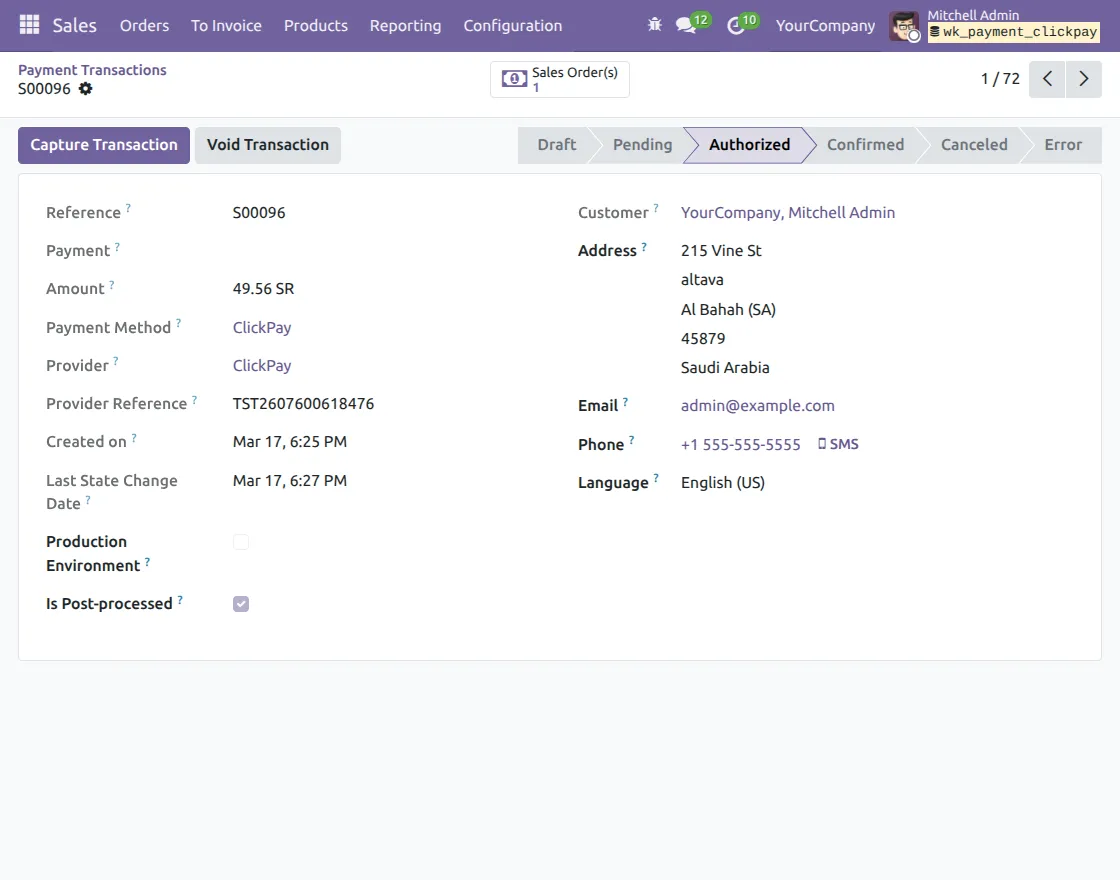
9. Open the Payment Transaction record to check the payment status and manage actions like capture or void directly from the transaction.
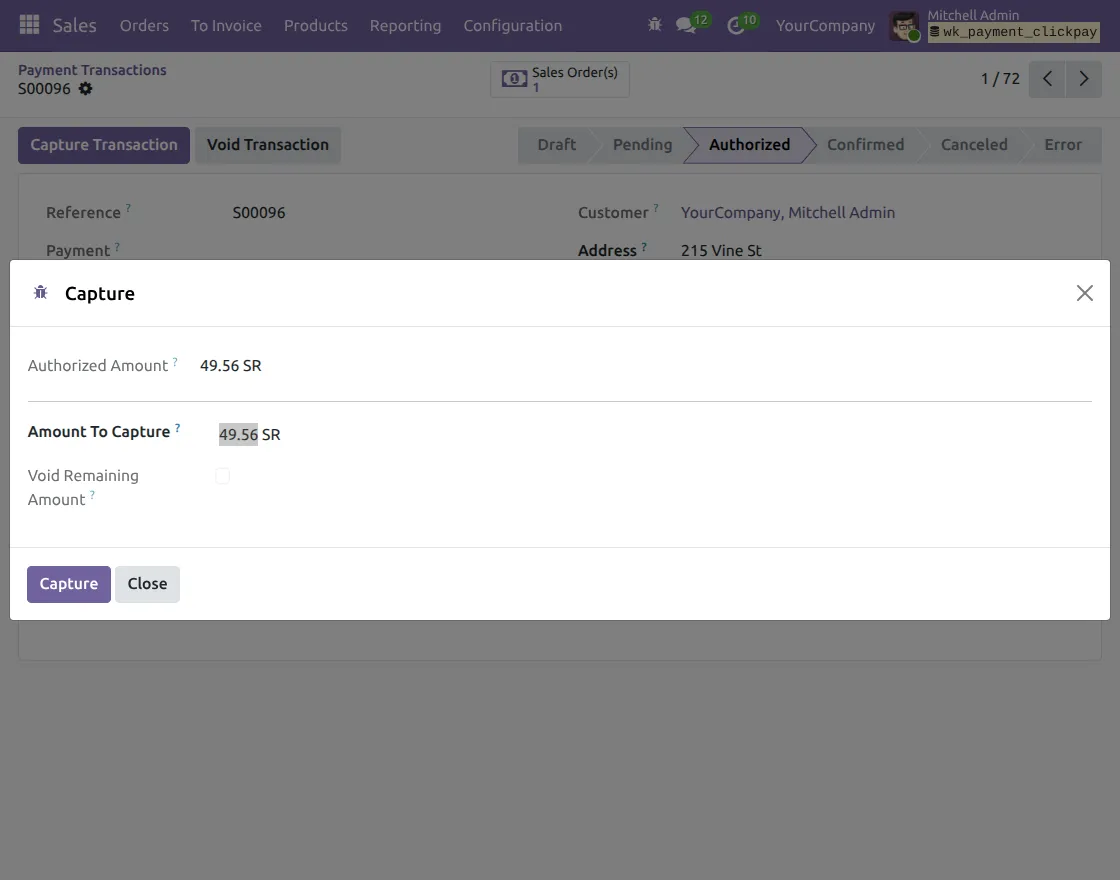
10. Click on the Capture Transaction button, enter the amount to capture (full or partial), and confirm to complete the payment capture process.
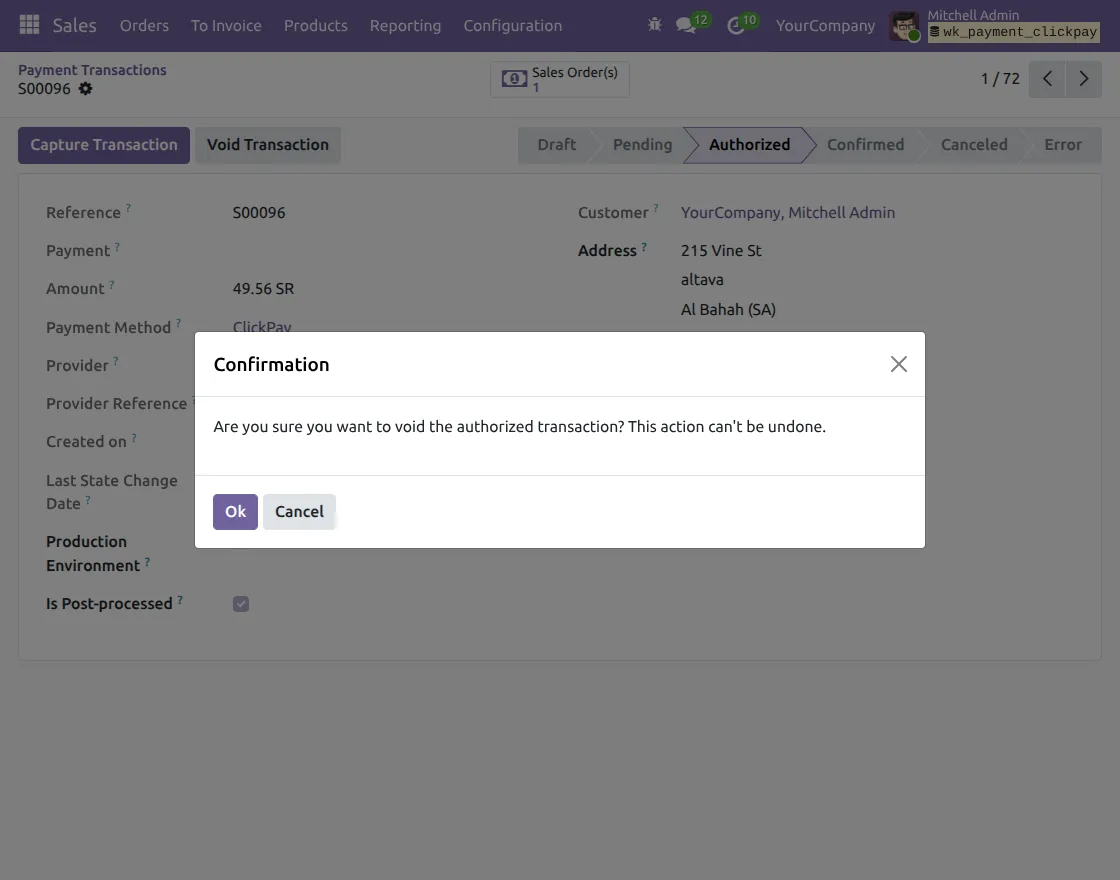
11. Click on the Void Transaction button, then confirm the action in the pop-up to cancel the authorized payment, as this action cannot be undone.
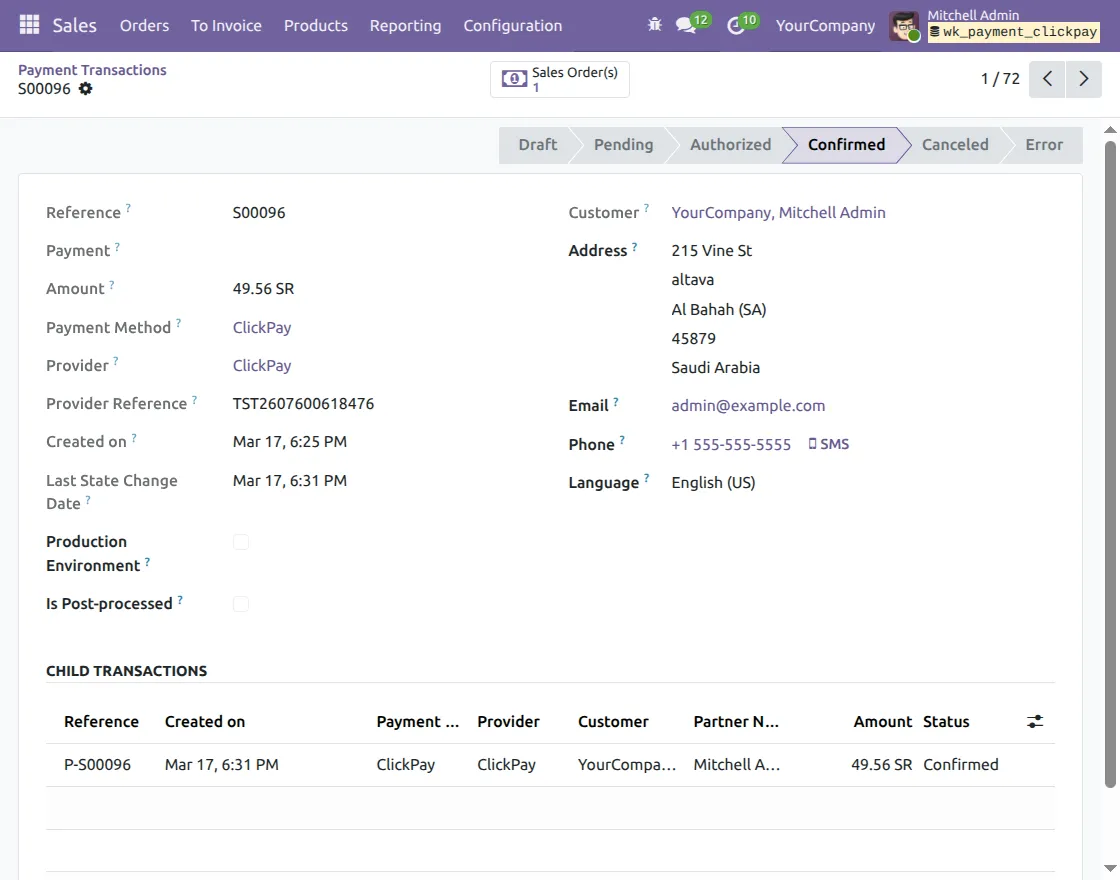
12. Once the payment is captured, the transaction status changes to Confirmed, and you can view the completed payment details along with child transactions in the record.
Need Help?
Hope you find guide helpful! Please feel free to share your feedback in the comments below.
If you still have any issues/queries, please create a ticket at the UV Desk.
I hope this helps. In case of any further queries, contact us at our support mail.
Thanks for paying attention!!
Current Product Version - 1.0.0
Supported Framework Version - ODOO 18, 19

Be the first to comment.