Prestashop UPS Shipping – Provides UPS(United Parcel Service) shipping methods for products to your customers. UPS shipping methods are available for both US-based and international customers.
The module calculates UPS shipping costs based on admin configuration and also allows label generation from the order details page in the PrestaShop back office.
Note: The module will work only with the new keys of UPS that are created after July 2023.
Features of Prestashop UPS Shipping
- Shipping methods are available for domestic as well as international buyers.
- Admin can set shipping preferences settings.
- Also, the admin can configure packaging settings.
- Calculates UPS shipping cost based on the configuration set by admin.
- Admin can generate shipping labels from within the PrestaShop order details page in the Back Office.
- Customers can view the access points (nearby locations) of a specific UPS shipping method in Google Maps on the checkout page.
- View access point selected by a customer on the orders page in the back office.
- Supports freight shipment.
- Supports more UPS shipping methods.
- Remove country restriction (Now admin can ship their products worldwide).
- Improve file structure and database structure.
- Fully compatible with the latest API.
- Country restriction for the stores’ availability has been removed.
- Admin has to specify the origin address and city.
- The admin can also enable or disable the addition of handling fees in the UPS shipping rates.
- Enable or disable testing mode in module configuration.
- Added option for UPS account number shipper name and phone number field.
- Also, an option to add shipping/origin address has been provided.
How to Install Prestashop UPS Shipping
- Firstly, go to the module manager in the back office and click on ‘upload a module’.
- After that, drag and drop the module file or select the file from the system.
- In this way, the module installation will be successful.
Provides UPS(United Parcel Service) shipping methods for products to your customers


How to get the API keys
In order to get the API keys, you must need to login to https://www.ups.com/lasso/login.

After successfully login to the UPS account you need to go to the UPS developer portal.

You must need to create an application for generating the UPS API credentials.


After clicking on Add Apps you need to enter the required details to create the application.

Note:
- You need to add a valid payment method to create the UPS application.
- Also, ensure that the required services are enabled for your UPS API key. You can do this by visiting your UPS API dashboard and selecting the necessary services, as shown in the reference image.

Once your application is created and the required services are enabled, you will receive the following credentials from the same interface.
- Shipper Number
- Client ID
- Client Secret Key
How to get Google API Key
To configure this module, you will need a geolocation API key.
You can get this API using the following steps :
- Go to: https://console.cloud.google.com
- Login in and go to API’s and Services > Credentials.

3. Create a project here


4. Select API key from the option and Click on create credentials.

5. Credentials will be created

Module Configuration
After the installation of the module, the admin needs to configure it. The module configuration is divided into 5 sections:
- Account Info
- Ship from Address
- Shipping Preferences
- Packaging
- UPS Freight
Account Info
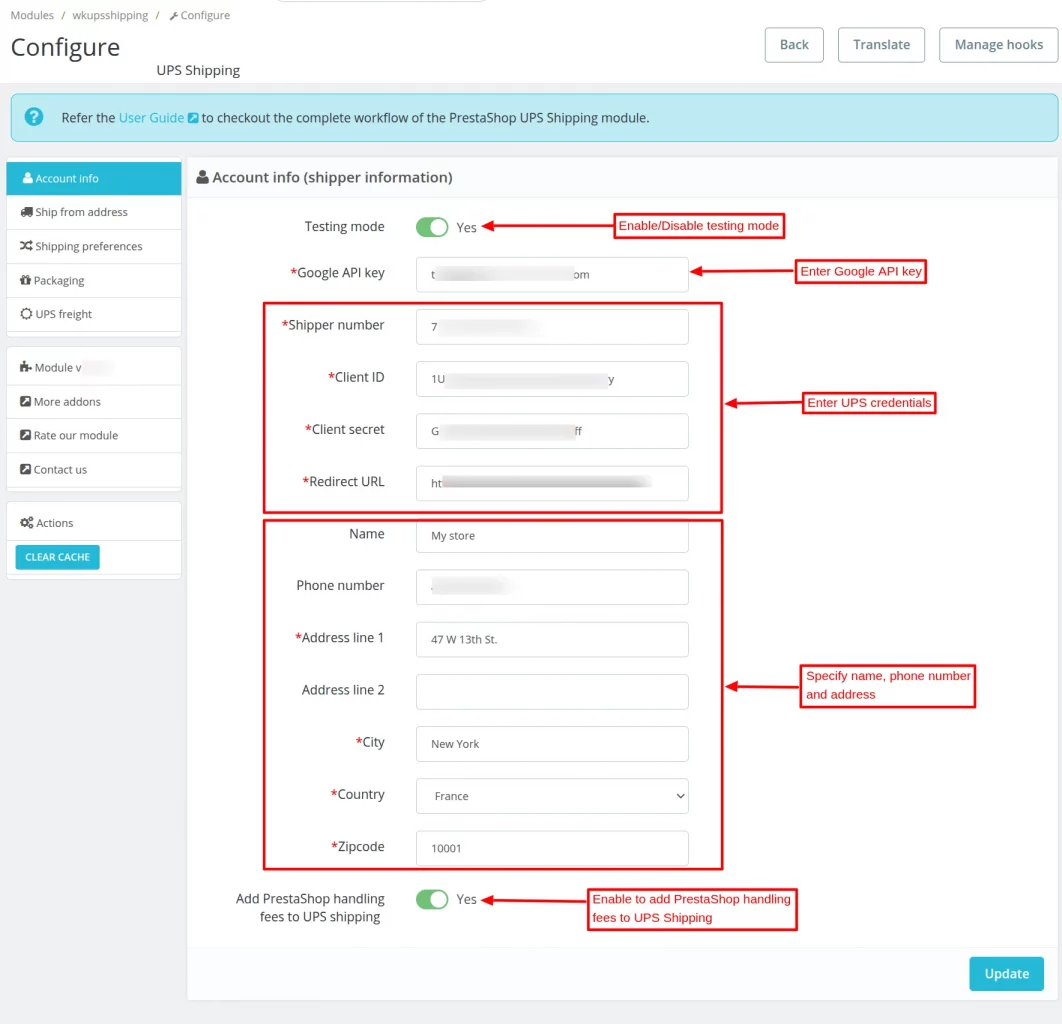
Under Account Info, the admin:
- Can enable or disable the testing mode.
- Needs to specify the access key, account number, shipper number, client ID, and client secret.
- Can enter the PrestaShop front office URL in the redirect URL field.
- Has to enter the name, phone number, and address details.
- Can choose to add the PrestaShop handling fees to UPS shipping.
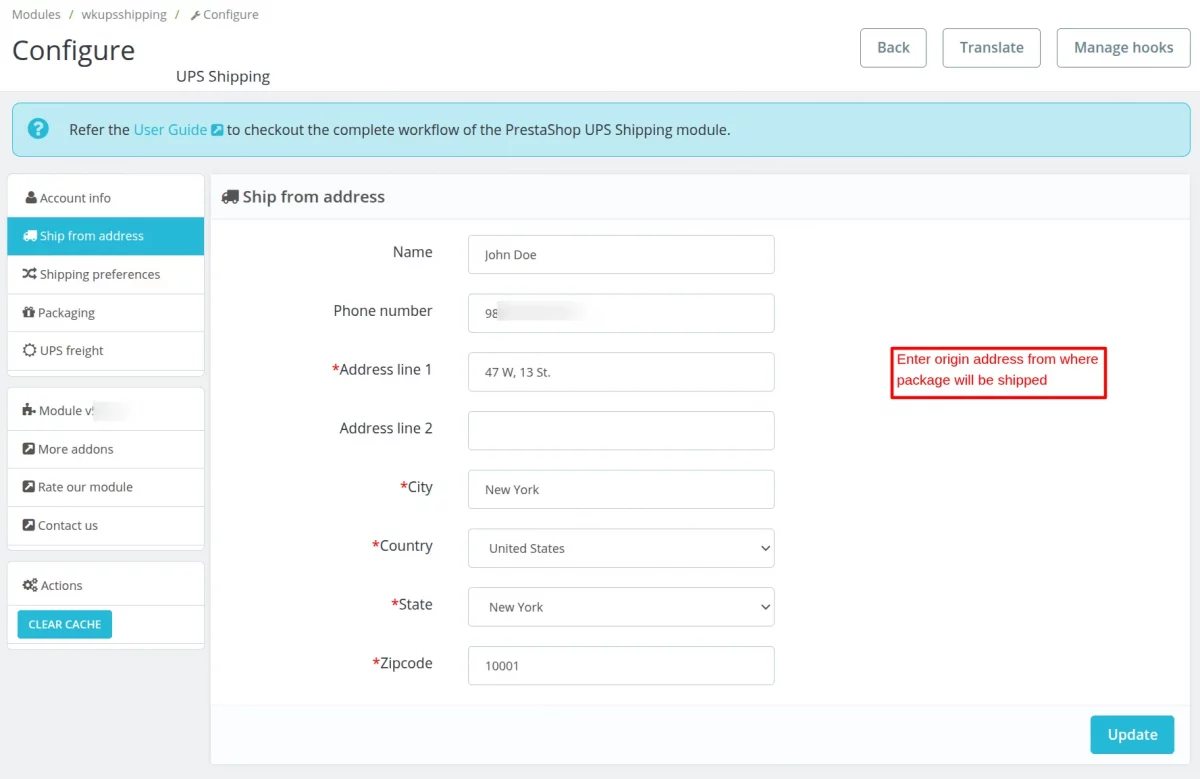
Ship From Address
Under this tab, the admin needs to enter the originating address for the shipment of parcels.
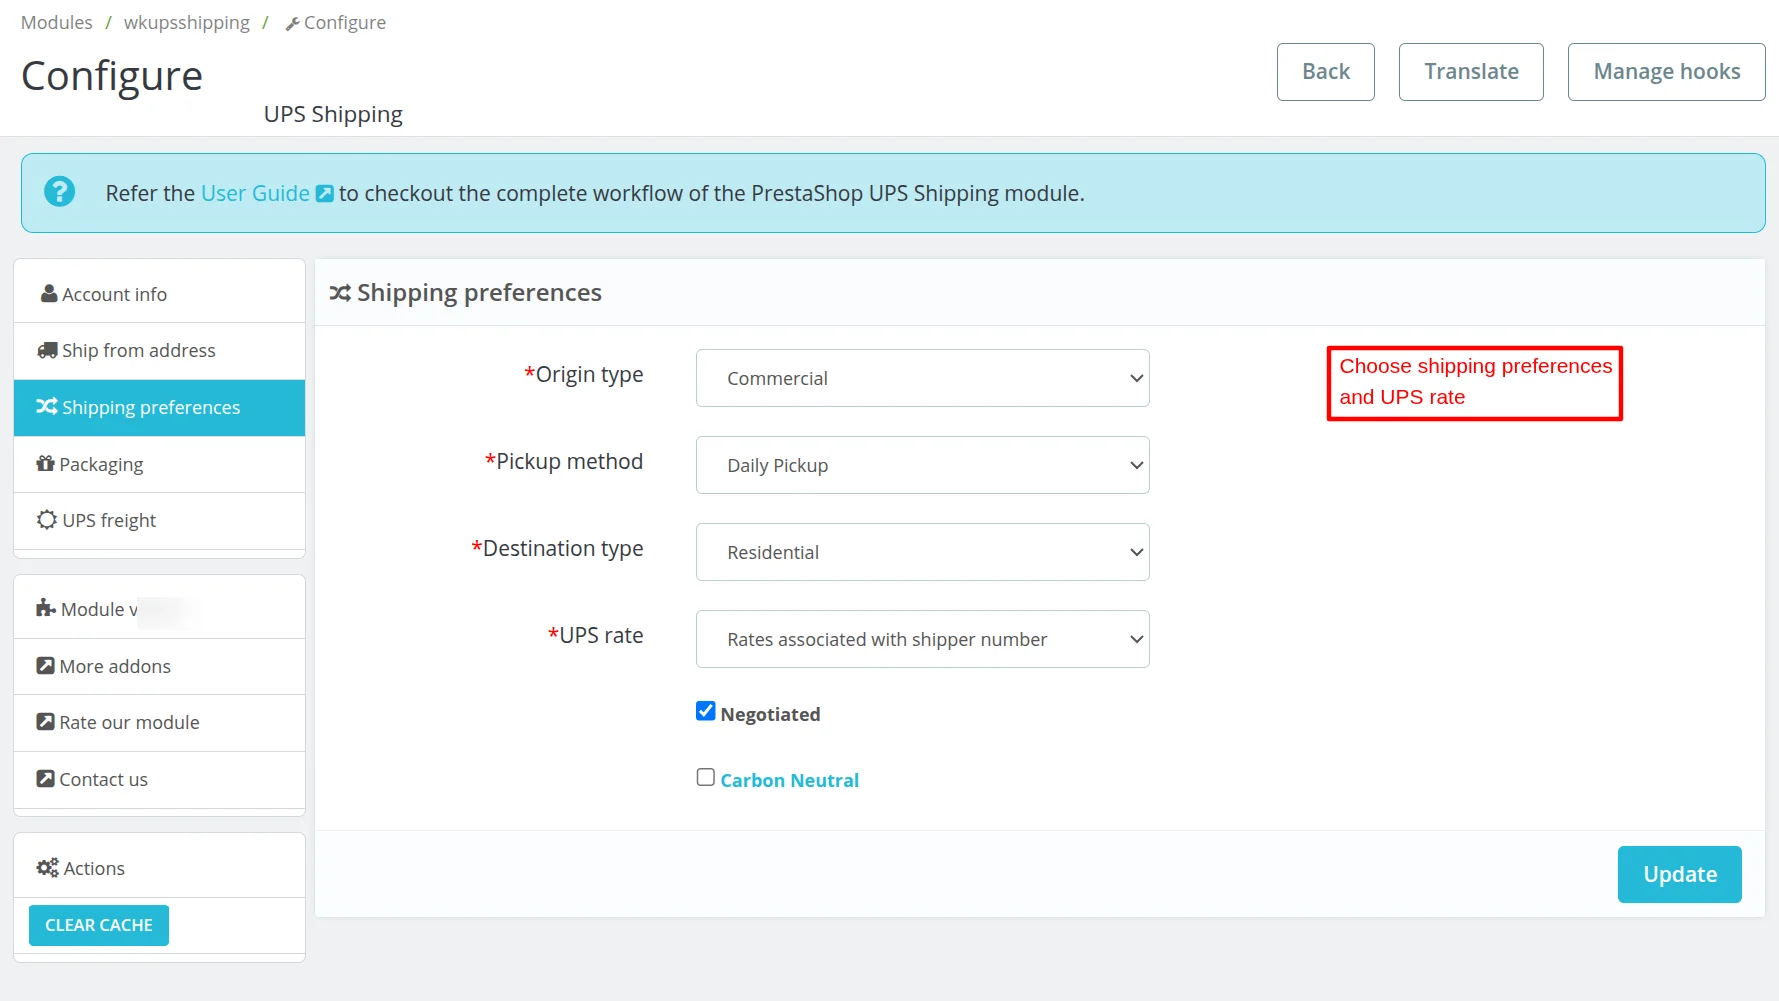
Shipping Preferences
Here, the admin needs to set the shipping preferences.
Packaging
Under Packaging, the admin can:
- Select the packaging type and unit.
- Specify the box dimensions for a single product and a single quantity.
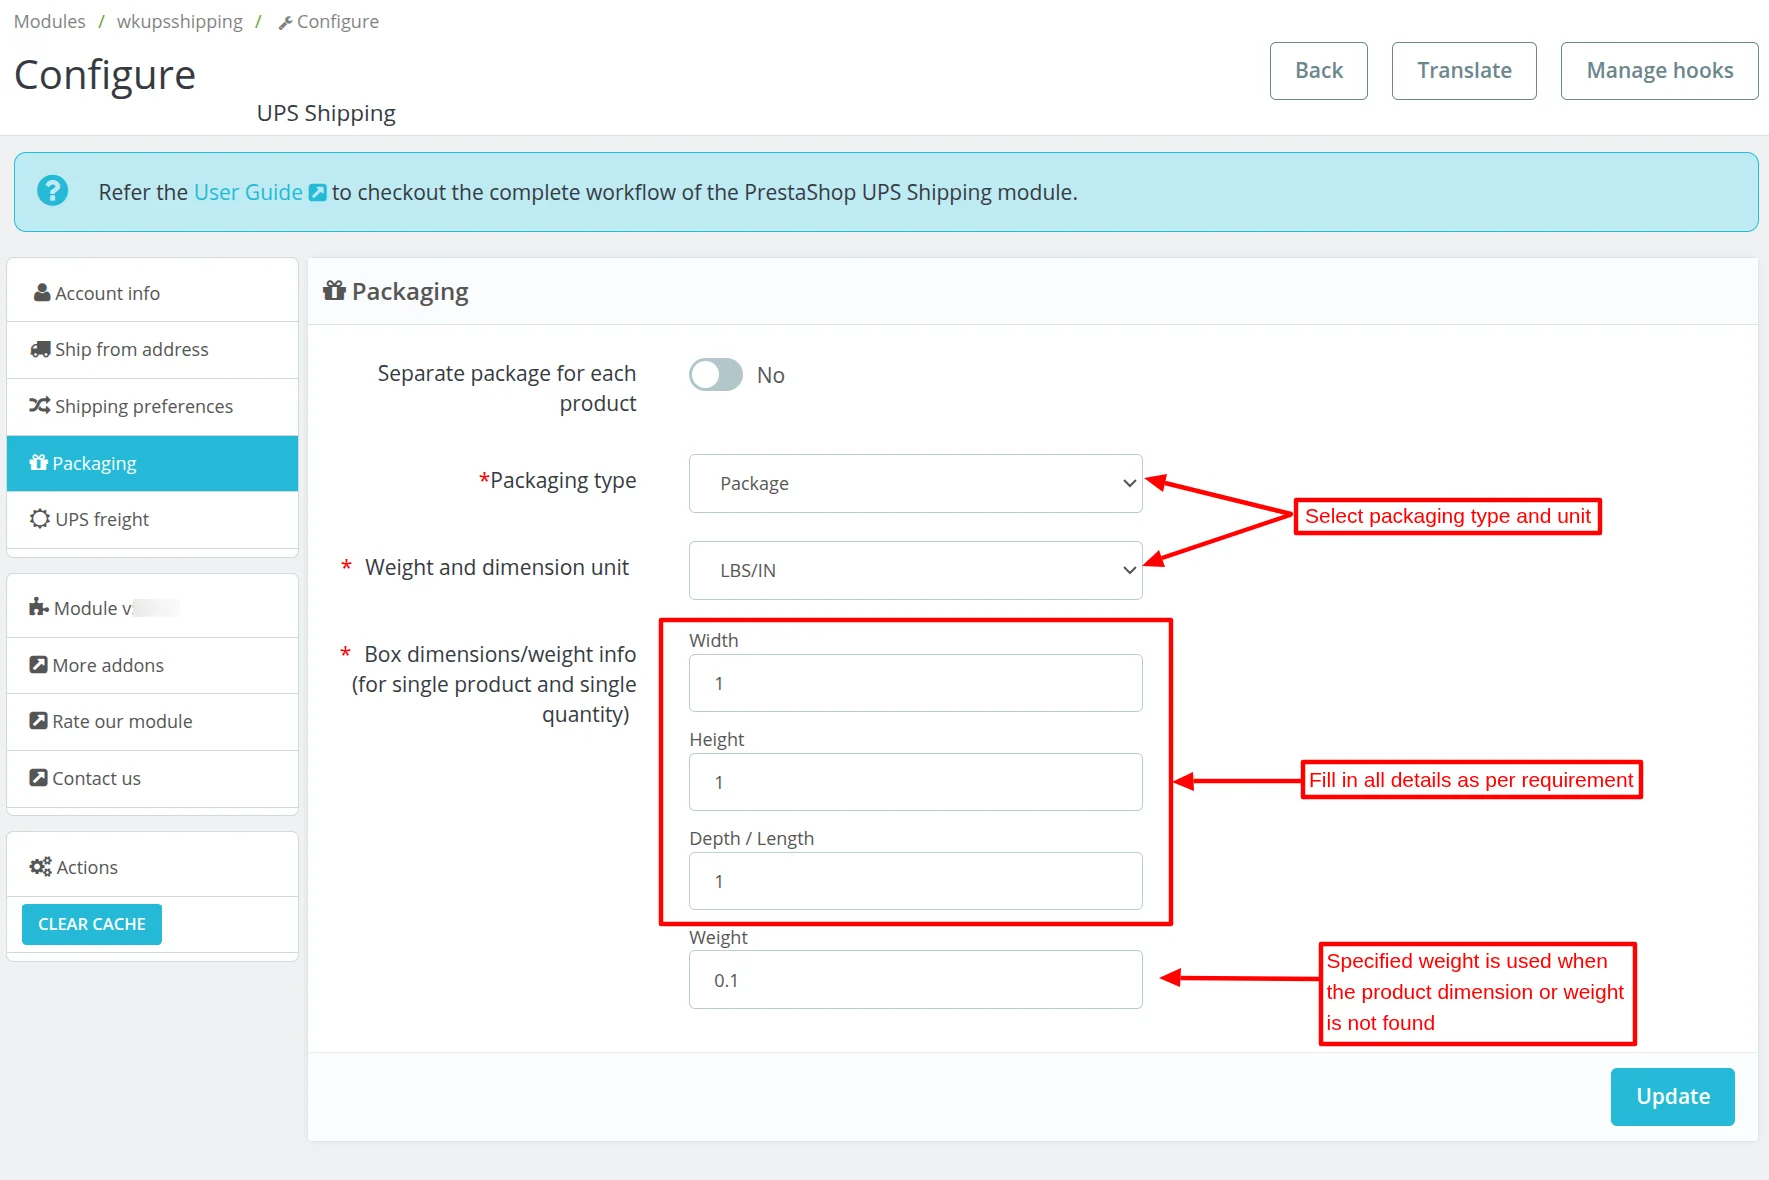
NOTE:
The package dimension provided in the configuration is the default dimension. If any product has its own dimension, then the package dimension will be the same as the product dimension.
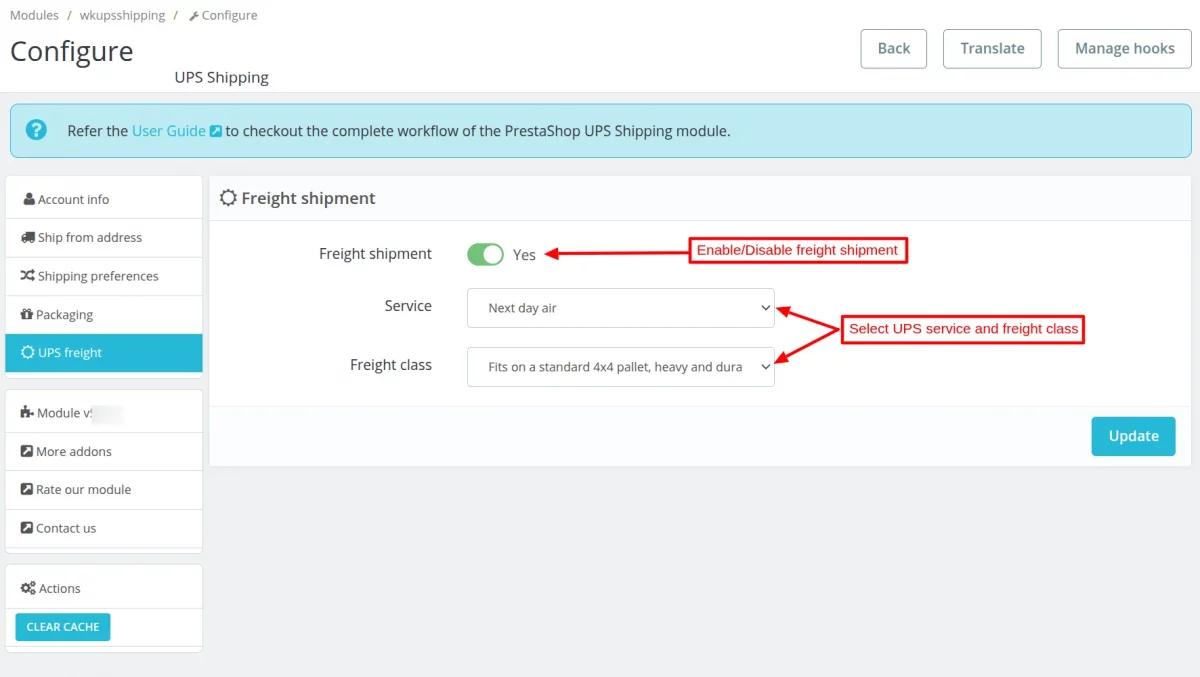
UPS freight
The admin can enable or disable the freight shipment.
Select UPS service and freight class for freight shipment.
After the successful installation of the module, a list of domestic as well as international UPS shipping methods get added to the carriers list.

Front End Workflow
When a customer adds a product to the shopping cart and proceeds to checkout, he can view available UPS Shipping methods with their cost.
On selecting the UPS shipping method, a button appears on the page. Customer can view the access points by clicking on this button.
On Clicking the popup button, a popup appears on the page where a customer can view nearby locations. Customer can select the location from where he can collect his package.
On selecting the location, customer can view details like address and timings of the access point on the Google Maps.

After selecting the location, when a customer proceeds and complete the order he can view the access point details on the order details page.

Similarly, the admin can also view the access point details on the orders page.

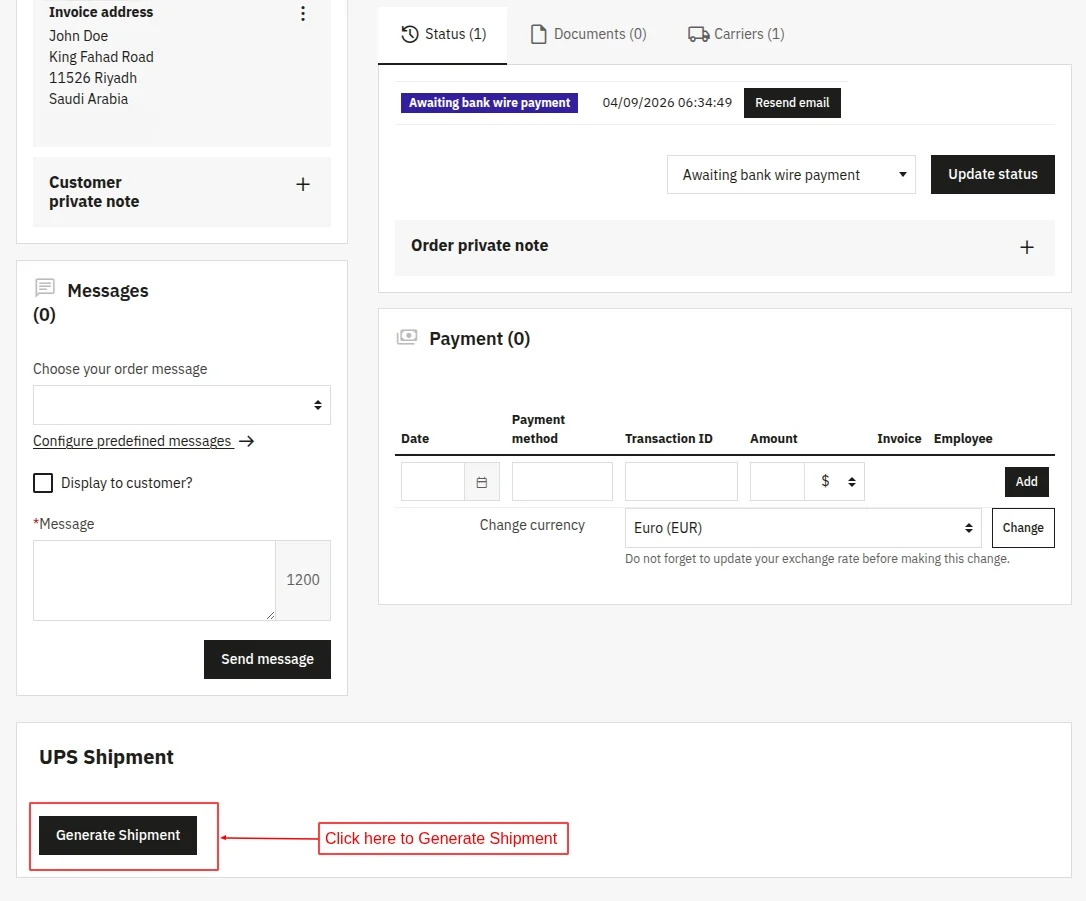
Shipping Label Generation
To generate the label, go to the order details page and navigate to the UPS shipment section. Click on the “Generate Shipment” button to create the shipment.
After that, the shipment will be generated and its details will be displayed in the UPS section. The tracking number will also be visible in the Carrier section on the order details page.
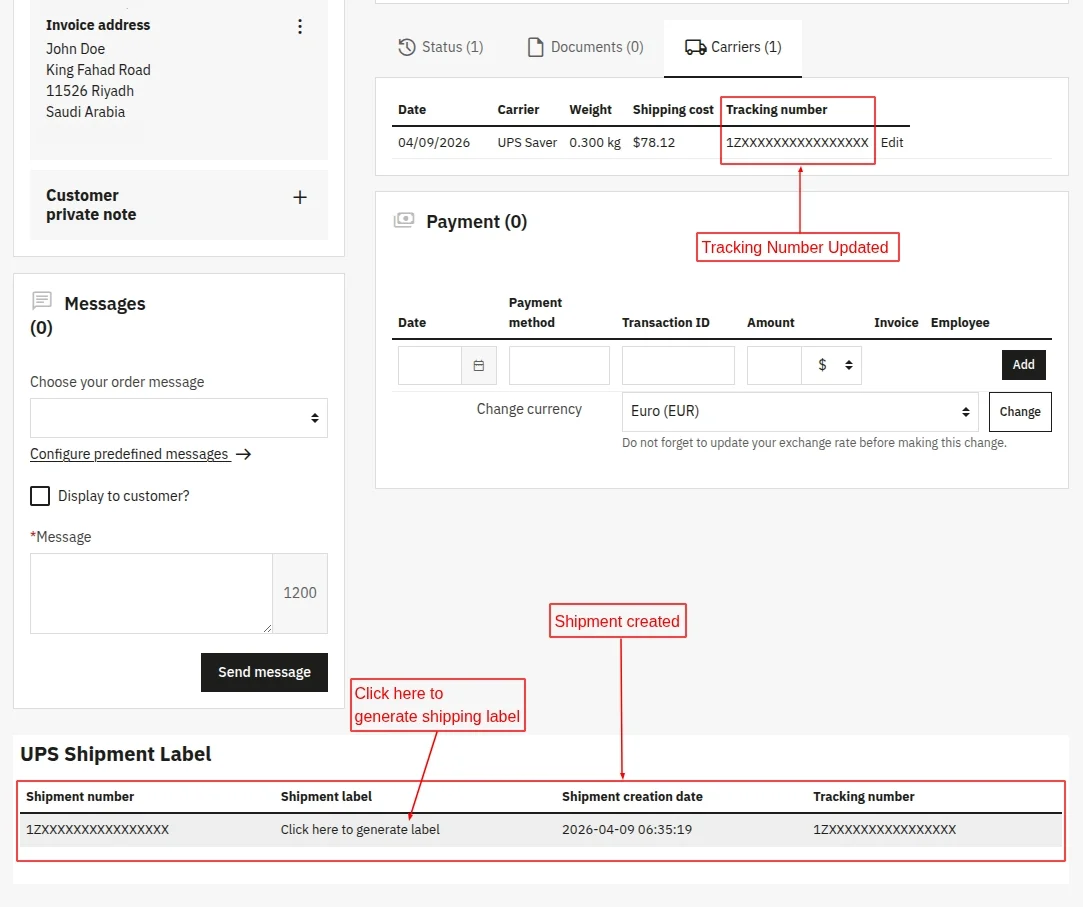
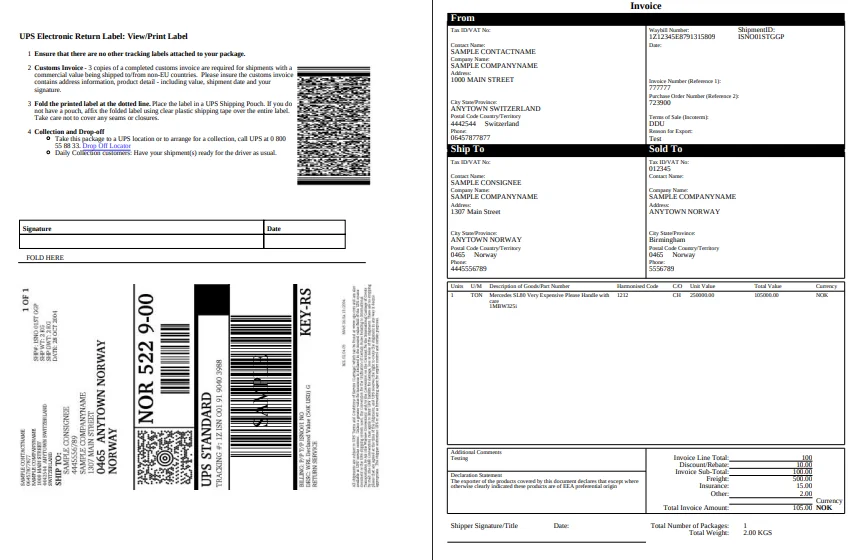
Now, click on the Generate Label option to generate the shipping label. Once the label is generated, it will be downloaded in PDF format. The admin can print the label and attach it to the shipment.
This was all about Prestashop UPS Shipping Module. I hope this document will help you in checking the functionality of the module in a better way.
Also, do let us know about your views in the comments.
Support
For any kind of technical assistance or query, please raise a ticket or send us a mail at [email protected]
Also, please explore our Prestashop development services and a vast range of quality Prestashop addons.
Current Product Version - 5.2.0
Supported Framework Version - 9.x.x, 8.x.x, 1.7.x.x

Does this module calculate the box size needed for multiple items on an order and choose a box size we keep on hand?