Prestashop Marketplace Store Locator allows your vendors to add physical stores and display their locations on Google Maps.
Customers can search the stores and products available with the stores on Google Maps. Vendors can provide store pick-up facility to the customers too.
Auto-detect user location functionality makes it even easier for the customers to locate the nearest stores from their current location.
It helps them to pick up their products from the store if its nearby to their current location. Vendors can allow their customers to pay in the store while picking up the products.
NOTE: Prestashop Marketplace Store Locator module is MultiShop Compatible with PrestaShop Advanced Multi-Vendor Marketplace version 5.4.0/3.4.0 and above.
Features of Prestashop Marketplace Store Locator module
- Admin can allow/disallow the sellers to manage their store status.
- Admin can add a store on Google Maps on behalf of the sellers.
- Add the payment methods for store pickup.
- Display store timings, email, and contact details of a store on Google Maps.
- Sellers can add as many physical stores and display their locations on Google Maps.
- The sellers can also allow store pick up facility for the customers.
- Sellers can provide pay in store facility to the customers to pay in the store while picking up the products.
- Auto Detect user location functionality allows the customers to find the stores nearby to their current location.
- Customers can search the stores on Google Maps by product name.
- A customer can also view the distance of a store from his current location on the store locator page.
- Customers can view all the products available in a particular store.
- Customers can pick up their products from the store.
Note: The admin can not use the module without the google map API key and You have to pay to use Google map service using the link: https://console.cloud.google.com/project/_/billing/enable
Learn more at https://developers.google.com/maps/gmp-get-started).
Obtaining Geolocation Key
To configure this module, you will need a geolocation API key. You can get this API using the following steps:
- Go to: https://console.cloud.google.com
- Login in and go to API’s and Services > Credentials.

- Select API key from the option and Click on create credentials.

- After that you will get the credentials.

In this way, you can easily create geolocation API key & used it to configure our module.
Installation
For installing Prestashop Marketplace Store Locator you need to install Prestashop Advanced Multi Vendor Marketplace module first.
After installing Prestashop Advanced Marketplace module, you can start the installation of Prestashop Marketplace Store Locator.
- Go to Module Manager in Back office and click on ‘upload a module’.
- Now, Drag and drop the module file or select the file from the system.
- In this way, the module installation will be successful.


Module Configuration
After the successful installation of marketplace store locator, admin can configure the module by navigating through Marketplace Management->Manage Store Configuration.

Store
Under “Store” tab, admin can configure map and store settings.

General Configuration

Store Configuration

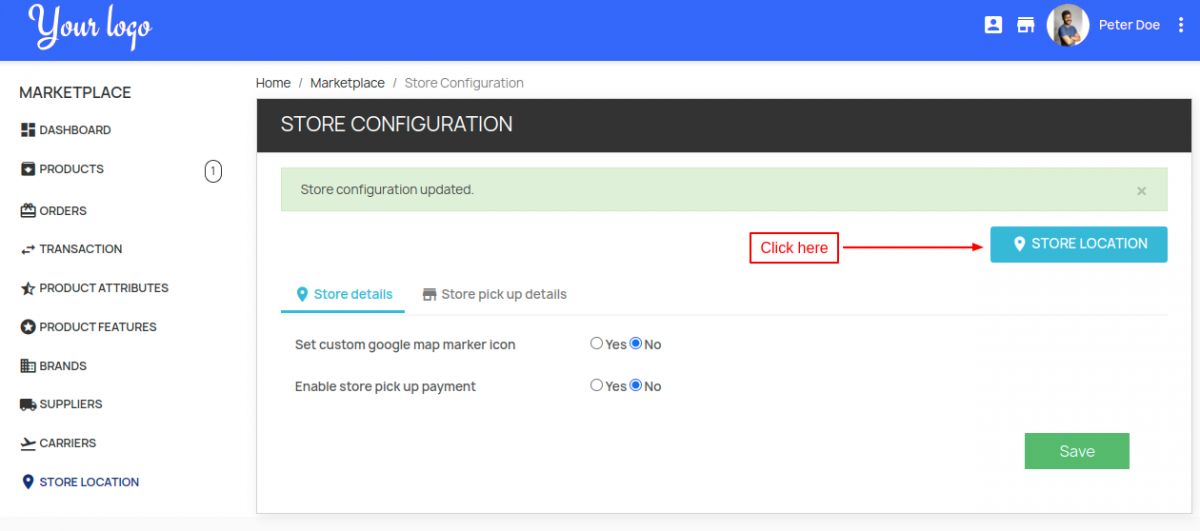
After the installation of the module, a new tab “Store Location” gets available in seller panel. For adding store location, the seller needs to save the store configuration first.

Once seller has saved store configuration, he can now add store. Click on “STORE LOCATION” button.
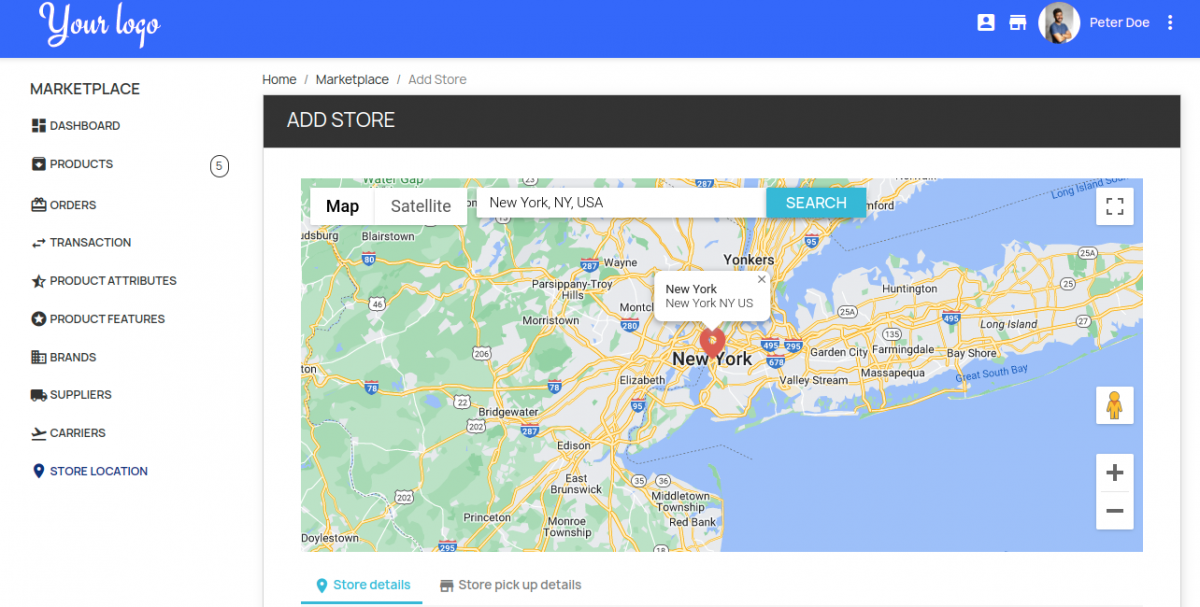
Now, click on “ADD STORE” button to add a new store.


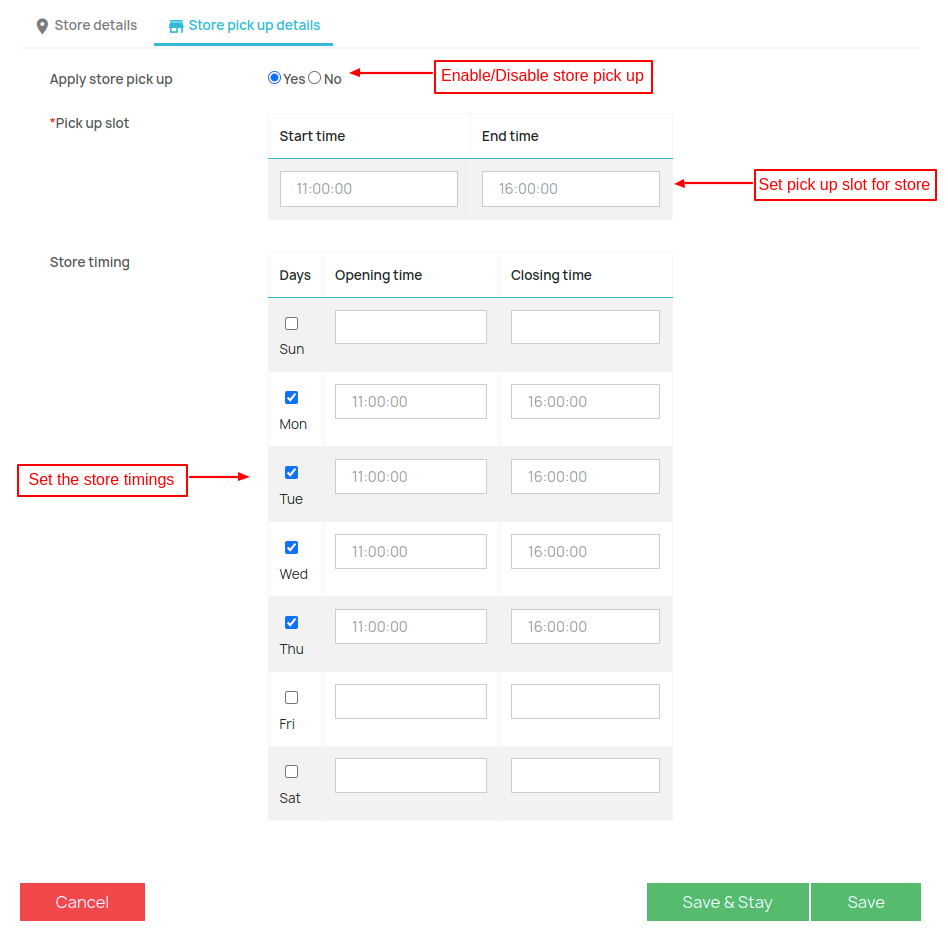
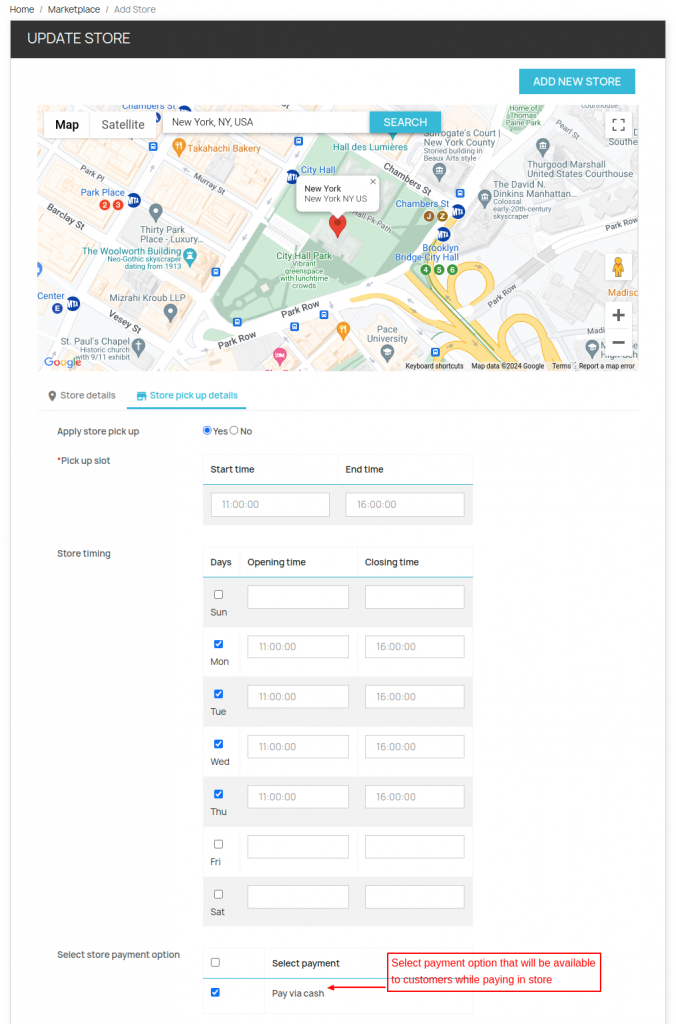
Store Pick up details
After entering all the store details, a seller can set up the store timings under “Store Pick up Details” tab.
Once a seller has saved the store details, he can view it under “Store Location” tab.
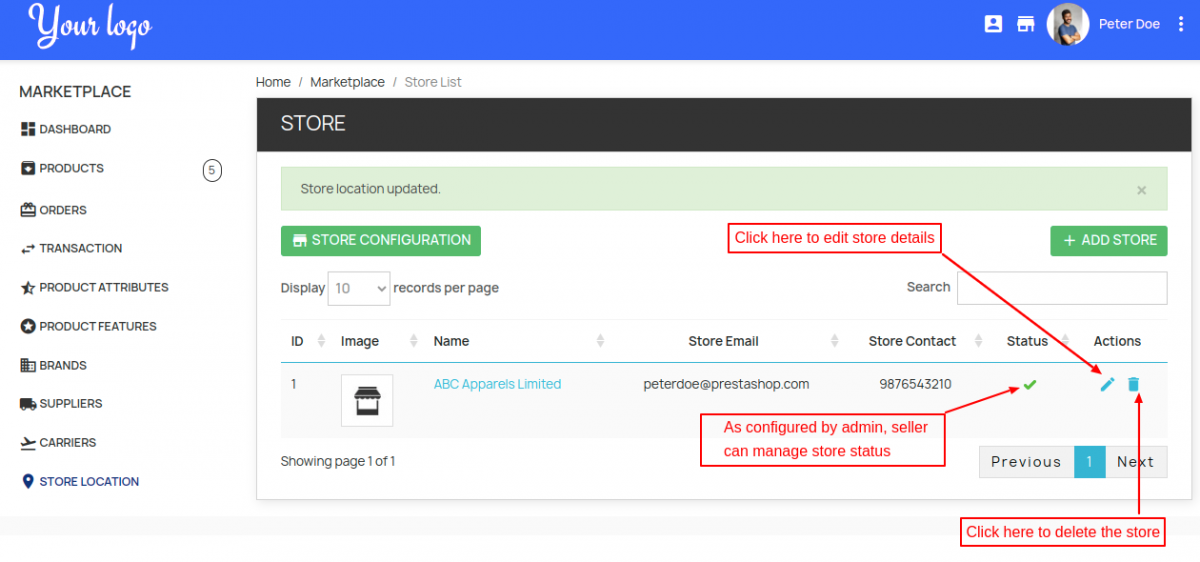
Allow your seller to manage store status to display their stores on Google Maps. The admin needs to approve the seller’s store from the backend in order to show it on Google Maps.

Admin can view seller’s store details by navigating through Marketplace Management->Manage Store Locations.
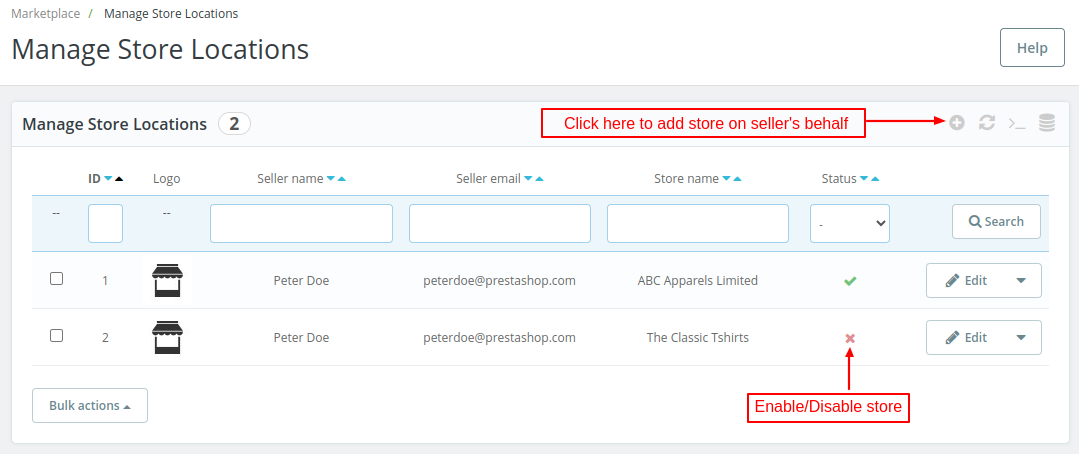
Admin can add a store on behalf of a seller by clicking on Add new store button.

Once the admin enables the store, then the status of the seller’s store will change from ‘Pending’ to ‘Approved’.

Display map on product page
If enabled by admin from the backend, then Google Maps will be displayed on the product page.

When a customer clicks on “Store” button, he is redirected to the store locator page. Here a customer can locate the store on Google Maps.

Display stores on product page
If admin enables it, then the sellers’ store details will display on the product page.

Display map on Home Page

Enable Store Page
Enable this option to let your customers go to store page by clicking on the store’s name on Google Maps. Here, a customer will be able to view all the products of that store.


Display cluster on map
Suppose there are two stores located very close to each other. Then, in this case, a cluster will display on the map. A customer will be able to locate both the stores by clicking on the cluster.

After clicking on a cluster on Google Maps, a customer can view the stores separately as shown below:

At Front End, a customer can view all the sellers’ stores and its details by clicking on ‘Seller Stores’ button.

On clicking the “Seller Stores” tab, you can view all the stores added by the sellers.
Store Pickup
Admin can configure store pickup by navigating through Marketplace Management->Manage Store Configuration->Store Pickup.

Enabling store pick up for a product
To display a store pickup, a seller has to enable store pick up for the products. A seller can enable store pickup for the products by navigating through Product->Edit->Store Pickup.

Store Configuration – Seller’s End
A seller can configure store details and store pickup details by clicking on “Store Configuration” tab under “Store Location”.

Store Details
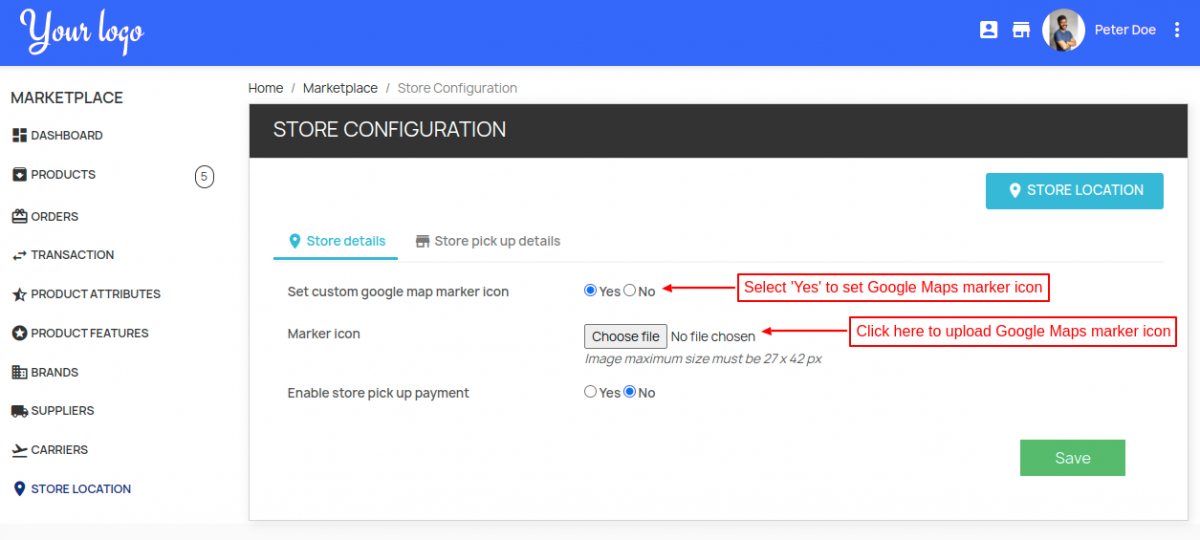
Set Custom Google Maps marker icon
If enabled, then a seller can set a Google Maps marker icon for his store. It will be visible to the customers on Google Maps as shown below:

Store pick up Details
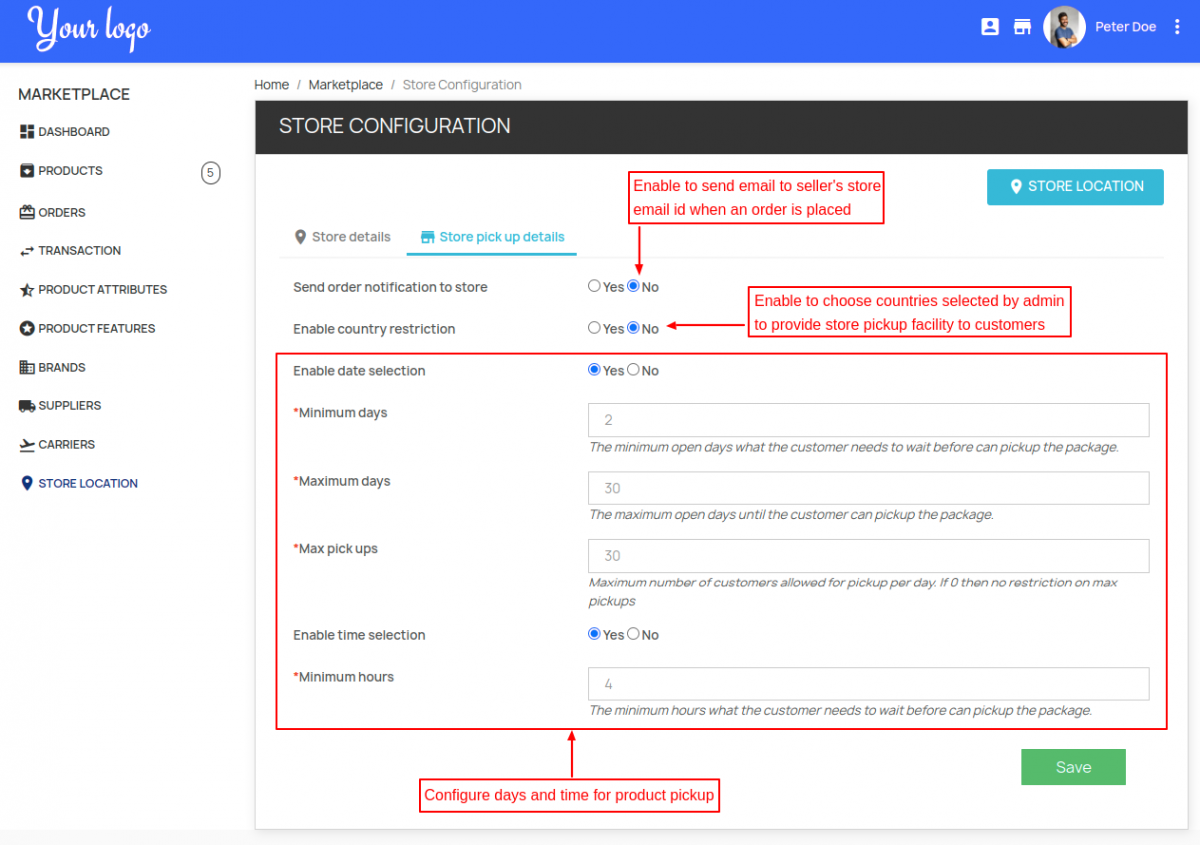
- Enable country restriction – Choose from the countries allowed by admin to provide store pickup facility to customers.
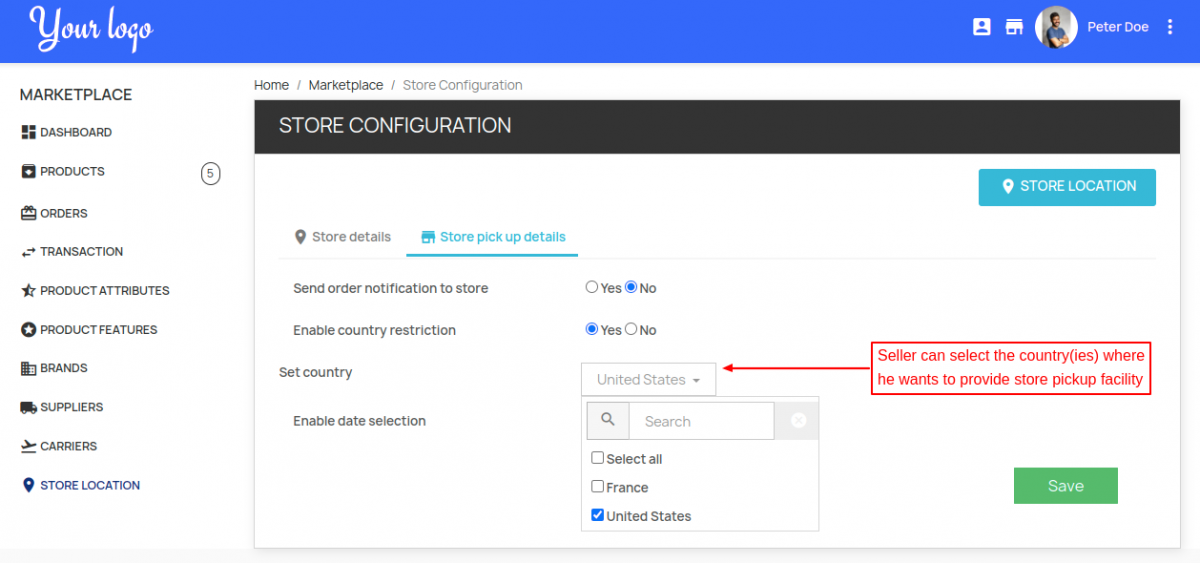
Suppose a customer from France orders a product.

Marketplace store pickup shipping method will not be visible to the customer. It is because store pickup facility is not available in France as per the seller configuration.

Enable Date & Time Selection
- Enable date selection – A seller can set the minimum and the maximum number of days for a product pick up.
- Minimum Days – Set the minimum number of days the customer needs to wait to pick up the products.
- Maximum Days – Set the maximum number of days up to which a customer can pick up the products.
- Max Pickups – Set the maximum number of customers who can pick up their products on a particular day.
Example
Suppose a seller has set a pickup slot of 11:00 AM – 16:00 PM.
The minimum & maximum days are set as 2 and 30. A customer placed an order on 23 June, now he can pick up the products on/after 25 June & before 22 July.
Now while processing an order, a customer has to select marketplace store pick up as the shipping method.

A customer has to click on ‘SELECT STORE’ button to search for a store nearby to his current location.

A customer has to click on ‘Select Store’ button to enter the date of pick up.

After entering the date of pick up, a customer can view store details and pick-up date.

If admin disables “pick up date selection”, then a customer can not select a date for product pickup.


Enable time selection
Here, Set the minimum number of hours a customer needs to wait to pick up the products.
Example
Suppose a seller has set
- Pickup slot of 14:00 – 21:00,
- Store timings as 11:00 – 21:00,
- Minimum and maximum days as 0 and 30, and
- Minimum hours as 4.
Now, a customer places an order on 22nd June. Then, he can pick up the product on 22nd June at/after 18:00 PM as minimum hours for pickup is 4.

After entering the date and time of pick up, a customer can view store details, pick up date, and time.

If seller disables the “pickup time selection” then pickup time will not display at the order page.


Suppose there is a product P1 for which both “store pick up” and “My carrier” shipping is available. And there is product P2 for which only “My carrier” shipping method is available.
Both products are in the cart. Now if a customer wants “store pick up”, then he can do so by clicking on the “Click here” button.

After clicking the button, “store pick up” will apply on product P1 and “My Carrier” will apply on product P2.

Store Pickup Payment
Admin can configure Store pickup payment by navigating through Marketplace Management->Manage Store Configuration->Store Pickup Payment.

Store Pick up Payment – Seller’s End
A seller can enable/disable store pick payment under “Store Details” tab of Store Configuration.
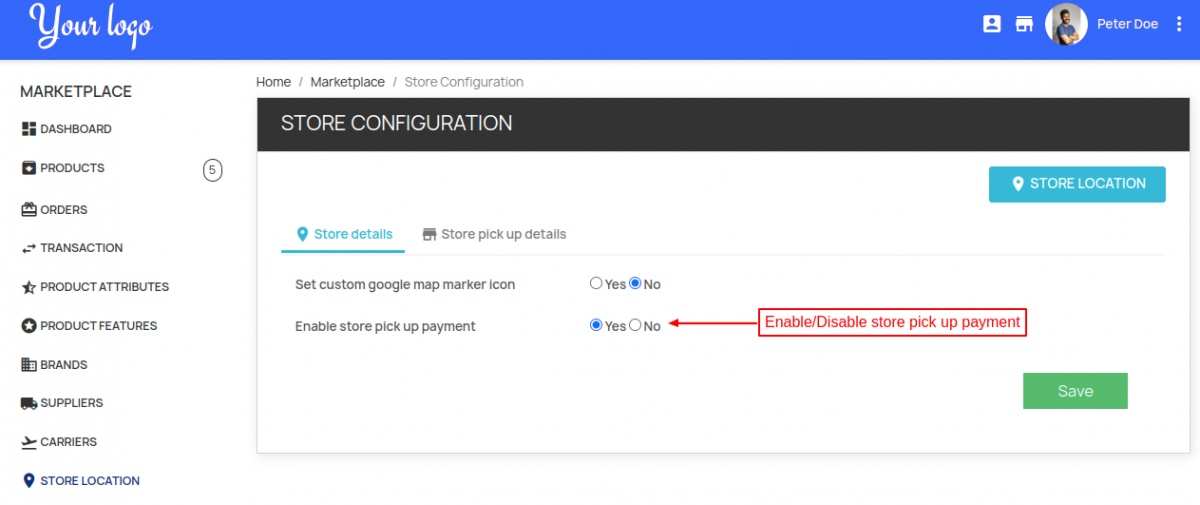
Enable Store Pick up Payment
If enabled, then “Marketplace Pay in Store” payment method will be visible to the customers on the checkout page.

Suppose, there is a product P1 with “Marketplace Pay in Store” payment and a product P2 with another payment method.
Now, a customer can remove the product with another payment method by clicking on the “Click here” button.

After the customer clicks the button, the product unavailable for “Pay in Store” will be no longer in the cart.

Admin can add a new store pickup payment method for the sellers. Sellers can provide this payment to their customers who want to pay in store.

Once saved, admin can view it under “Store Pickup Payment” tab as shown below:

Once admin adds a payment method, then a seller can view it under “Store Pick up Details”.
Store Payment Option will display on:
- The order page while selecting a store for product pick up

- Checkout page under “Payment” tab

- Order details page

- Admin order details page

If a customer has ordered two products from two different stores. Then, he can view the details of both the stores under order details page.

Admin can also view the store details from where the customer has to pick up the products under orders tab.

This was all about Prestashop Marketplace Store Locator Module.
I hope this document will help you in checking the functionality of the module in a better way. And, do let us know about your views in comments.
Support
For any kind of technical assistance or query, please raise a ticket or send us a mail at [email protected]
Also, please explore our Prestashop development services and vast range of quality Prestashop addons.
Current Product Version - 5.3.3
Supported Framework Version - 9.x.x, 8.x.x, 1.7.x.x

Be the first to comment.