WordPress WooCommerce Marketplace Stripe Connect plugin, which works as a payment gateway. Thus, allowing users to can accept payments from all around the world for their e-commerce store.
This plugin can run in both tests and live modes. Hence, in addition, it facilitates the sellers to connect using Stripe Connect.
Using WooCommerce Multi Vendor Subscription, sellers can add subscription products and customers can subscribe to them on a daily, weekly, monthly, or yearly basis.
Note:
- WordPress WooCommerce Marketplace Stripe Connect Plugin is an add-on to WordPress WooCommerce Multi-Vendor Marketplace Plugin.
- To use this plugin you must first install WordPress WooCommerce Multi-Vendor Marketplace Plugin.
- This plugin only supports Standard connect integration.
-
If you require expert assistance or want to develop custom unique functionality,WordPress WooCommerce Marketplace Stripe for your project.
-
This plugin is now compatible with WooCommerce’s latest High-Performance Order Storage (HPOS) and Cart and Checkout block.
Watch the video to understand the extension workflow:-
Features of WordPress WooCommerce Marketplace Stripe Connect
- Working with currencies that Stripe supports
- It supports a 3D secure payment method.
- Better Security as given by Oauth (Open standard for authorization). For creating tokens when receiving card details, so that no information about the card could be received by our own server.
- Email notification of the transaction.
- Support for almost all kinds of cards including Visa, Mastercard, American Express & Discover.
- Works well with WordPress WooCommerce Marketplace.
- The customer makes a payment for the product/s, the payment is automatically split amongst the admin and the sellers involved.
- The customer can save the billing address for future use.
- Check both Test and Live server modes on the payment gateway.
- The Stripe Separate Charge and Transfer API can be used for the Strip transaction(only for USD and Euro Currency types).
- Both the admin and the sellers can process a refund for the orders from their respective panels.
- Both the admin and the seller can perform the auto refund process from their panel via Stripe connect.
- The admin can process transfer reversal manually and it will work automatically on the seller’s end.
- Customers can add new payment method in their My Account section.
- Payment method can also be saved during Checkout for customers.
- Customers can view, delete and save payment methods from My Account section. They can make any payment method as Default for payments.
- It supports Direct Charges,Destination Charges as well as Separate Transfers.
- Seller Dashboard in My Account page with real-time transaction data.
- Admin Dashboard enhancements with refund tracking.
- Refund Management System with reversal data tracking.
- Pagination support for transactions and refunds tables.
- Refunds Overview widget with statistics.
- Real-time analytics and statistics cards.
- Date range picker with preset options.
- Top sellers ranking in admin dashboard.
- Filter system for extensible dashboard components.
- Real-time refund tracking with partial/full refund handling.
- Transfer monitoring for seller payouts including failures and reversals.
NOTE:-
- If you are transferring money with the help strip payment method then it is mandatory that both accounts should be from the same country (for example, both in Australia).
- Stripe supports separate charges and transfers in the following regions: Australia, Brazil, Canada, Europe, Japan, Malaysia, New Zealand, Singapore, and the US.
If you require expert assistance or want to develop custom unique functionality, hire WooCommerce Developers for your project.
Installation of WordPress WooCommerce Marketplace Stripe Connect
The user will get a zip file that needs to be uploaded in the “Add New” menu option in the WordPress admin panel.
So, for this login to WordPress Admin Panel and in the Dashboard hover your mouse over the “Plugins” menu option select the “Add New” option.
After this, the user will see an option on the top of the page that is “Upload Plugin”, click the option to upload the zip file.

On clicking the “Upload Plugin” option, the user will see a “Choose File” button. Thus, click on the button to browse for the zip file as per the image below.

After browsing the file, click on the “Install Now” button so as to install the plugin as per the snapshot.
Once the user installs the plugin, a message “Plugin installed successfully” displays and an “Activate Plugin” is visible to activate the plugin.
So, the user needs to click on the “Activate Plugin” button to activate the plugin.

Plugin Activation
Check how to Activate WooCommerce Plugin through the purchase code and get updates on Webkul Modules directly on the Plugins page
WordPress WooCommerce Marketplace Stripe Connect
First Step: Go to https://dashboard.stripe.com/login and enter your login details.

Second Step: Now, enable the option “View test data” on the side panel if not set to enable already.

Third Step: Click the API Keys menu option on the side panel to see the Publishable key(API Publishable Key).

Now, click the “Reveal test key token” to get your Secret Key(API Key). Clicking the “Reveal test key token” will bring up the – Secret Key(API Key).

Fourth Step: To get the Client Secret key, click on the “Settings” option & navigate to the product settings & to the “Connect Settings” option.
Dashboard-Stripe-Test-1
Fifth Step:- Under Connect settings scroll down to the Integration page & here you can find the Client ID.
https://webkul.com/blog/wordpress-woocommerce-marketplace-stripe-connect/
For redirection, you need to click on + Add URL.
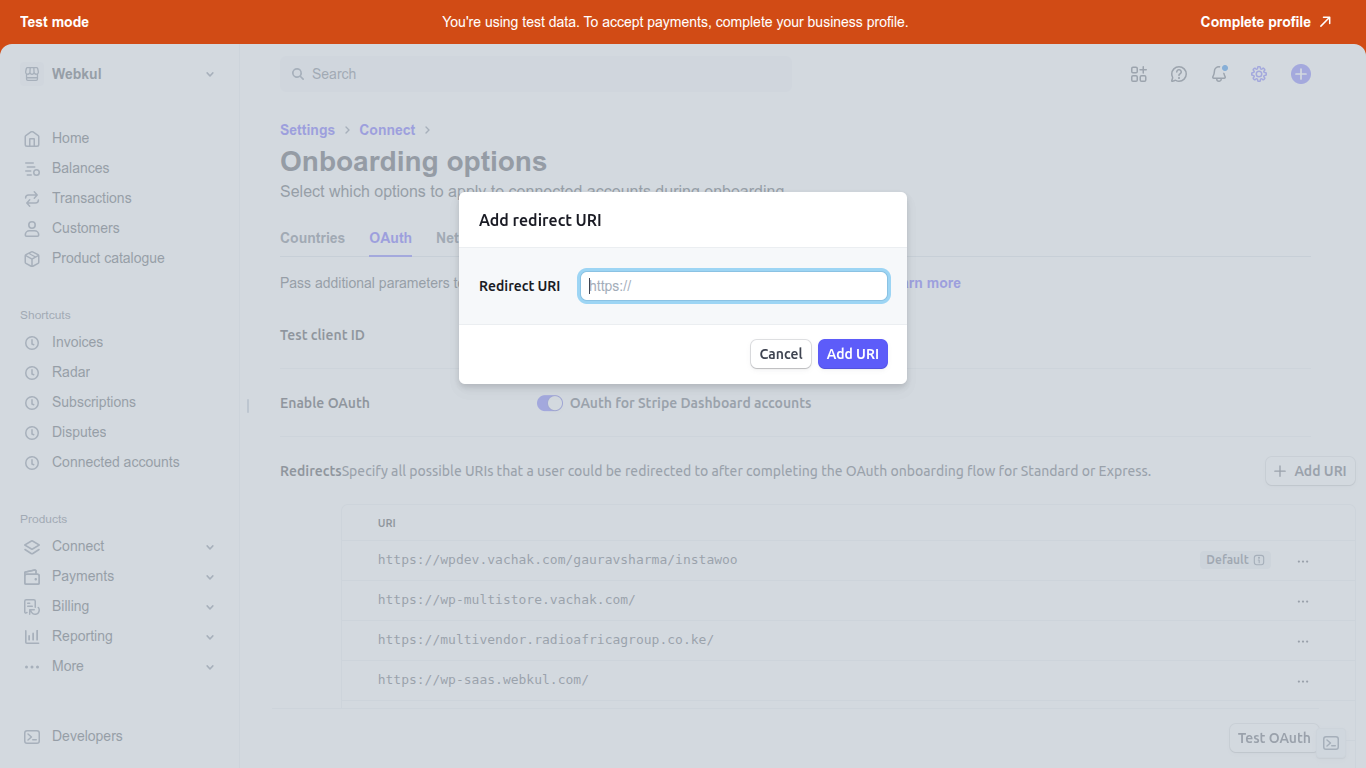
Set the Website URL as – www.example.com
Set the Redirect URL as – www.example.com
Here, you have two keys for the client_Id that are to be used according to the mode –
- Development mode – This client_id is to be used when your site is in testing mode.
- Product mode – This client_id is to be used when your site is in live mode.
Administrator Management of WordPress WooCommerce Marketplace Stripe Connect
After successfully installing Stripe Connect the admin can configure this under “WooCommerce > Settings > Payments”.

Stripe Connect Configuration
Here admin can enable the Credit Cart (Stripe Connect) payment method and can configure it by clicking “Manage”.
Configuration Images


The admin can set the configurations as under:
Enable/Disable – With the help of this option, the admin can enable or disable this plugin.
Title – Enter the title that the customer will see at the time of checkout.
Description – The admin will specify the description which the customer can see on the checkout page.
Test/Live- Here the admin can opt for the test or the live mode of this payment method.
The Stripe Connect-
- Test client_id – Enter Stripe Connect Test Client Id.
- Live client_id – Enter Stripe Connect Live Client Id.
Stripe Test-
- Secret Key – Enter the API Stripe Test Secret Key generated within the Stripe Payment gateway.
- Publishable Key – Enter the API Stripe Test Publishable Key generated within the Stripe Payment gateway.https://webkul.com/blog/wordpress-woocommerce-marketplace-stripe-connect/
Stripe Live-
Secret Key – Enter the API Stripe Live Secret Key generated within the Stripe Payment gateway.
Publishable Key – Enter the API Stripe Live Publishable Key generated within the Stripe Payment gateway.
Sale Method – Select which sale method to use. Authorize Only will authorize the customer’s card for the purchase amount only. Authorize & Capture will authorize the customer’s card and collect funds.
Stripe Charge Type
The admin can select the stripe charge type from the options given in the dropdown list that Use Separate Transfer and Use Destination Charge.
While Using Separate Transfer – When using separate charges and transfers, the platform can collect fees on a charge by reducing the amount it transfers to the destination accounts.
For example, consider a restaurant delivery service transaction that involves payments to the restaurant and to the driver:
- The customer pays a 100 USD charge.
- Stripe collects a 3.20 USD fee and adds the remaining 96.80 USD to the platform account’s pending balance.
- The platform transfers 70 USD to the restaurant’s connected account and 20 USD to the driver’s connected account.
- A platform fee of 6.80 USD remains in the platform account.
Note-
1. Creating separate charges and transfers is only supported when both your platform and the connected account are in the same region: Both in Europe or both in the U.S.
2. The 3D secure payment is only supported with separate transfers.

While Using Direct Charge
Create direct charges when customers transact directly with a connected account, often unaware of your platform’s existence.
You can add an application fee to the charge which is transferred to your platform’s account balance. With direct charges:
- The payment appears as a charge on the connected account, not your platform’s account.
- The connected account’s balance increases with every charge.
- Your account balance increases with application fees from every charge.

While Using Destination Charge
The full charge amount (10.00 USD) is added to the connected account’s pending balance. The application_fee_amount (1.23 USD) is subtracted from the charge amount and is transferred to your platform.
Then, Stripe fees (0.59 USD) are subtracted from the application_fee_amount and the remaining funds (0.64 USD) are added to your platform account’s balance.

After entering all the required details click “Save Changes” to save the details.
Admin Dashboard Features
The admin can access the following dashboard
Analytics & Statistics: Real-time Analytics Cards – View key performance metrics at a glance.
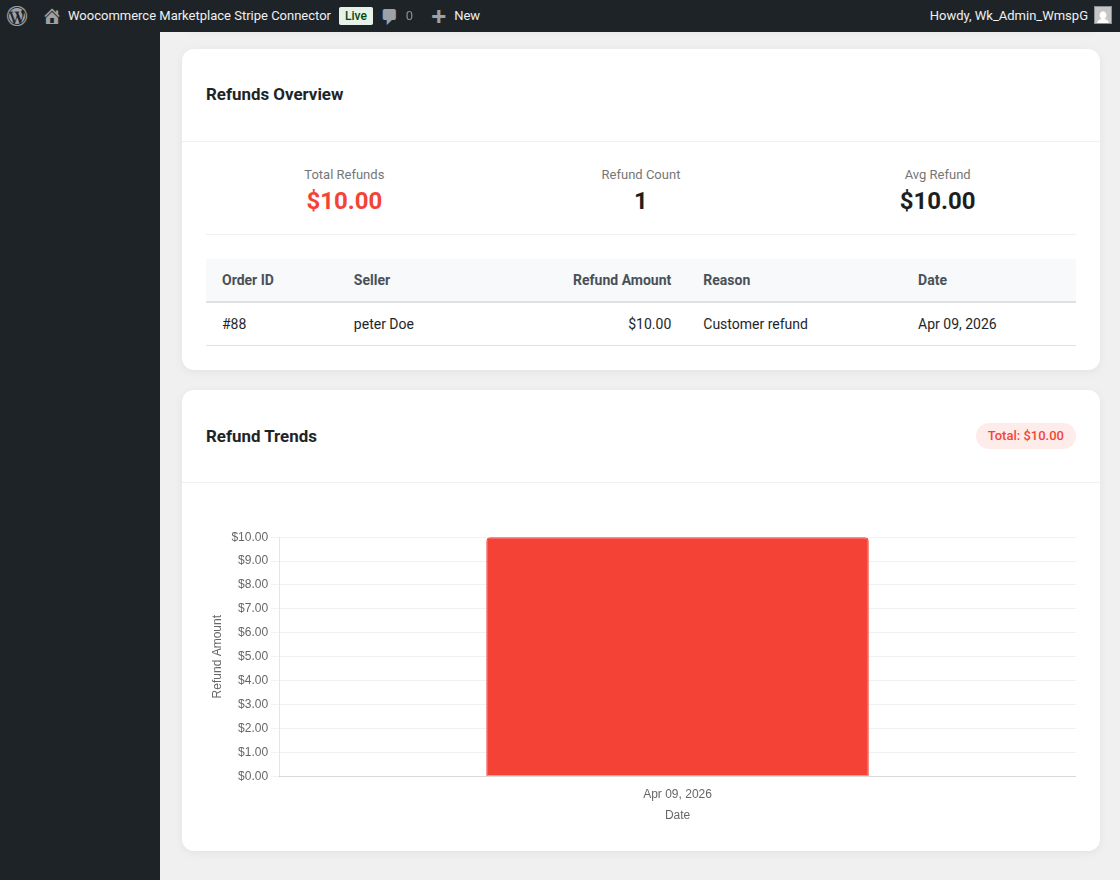
Refunds Overview Widget – Complete statistics of all refunds with graphical representation.
Pagination Support – Navigate through large transaction and refund tables easily.
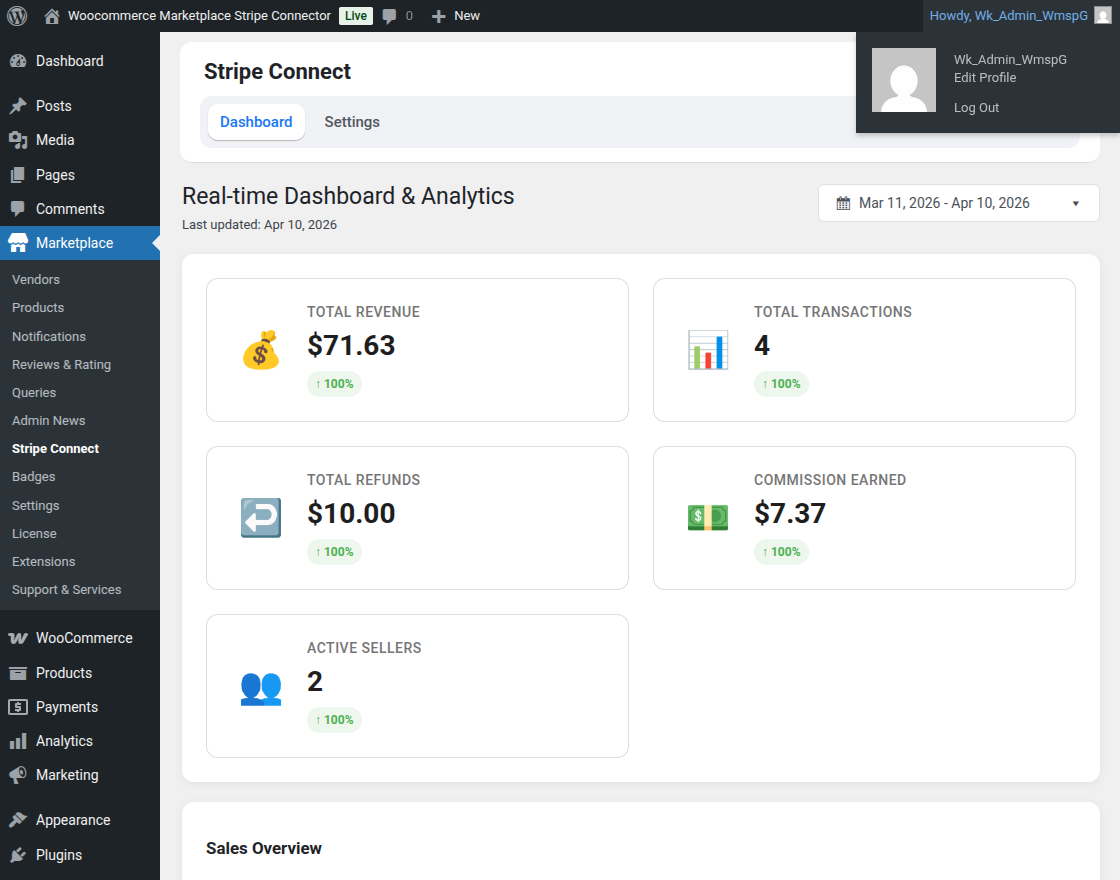
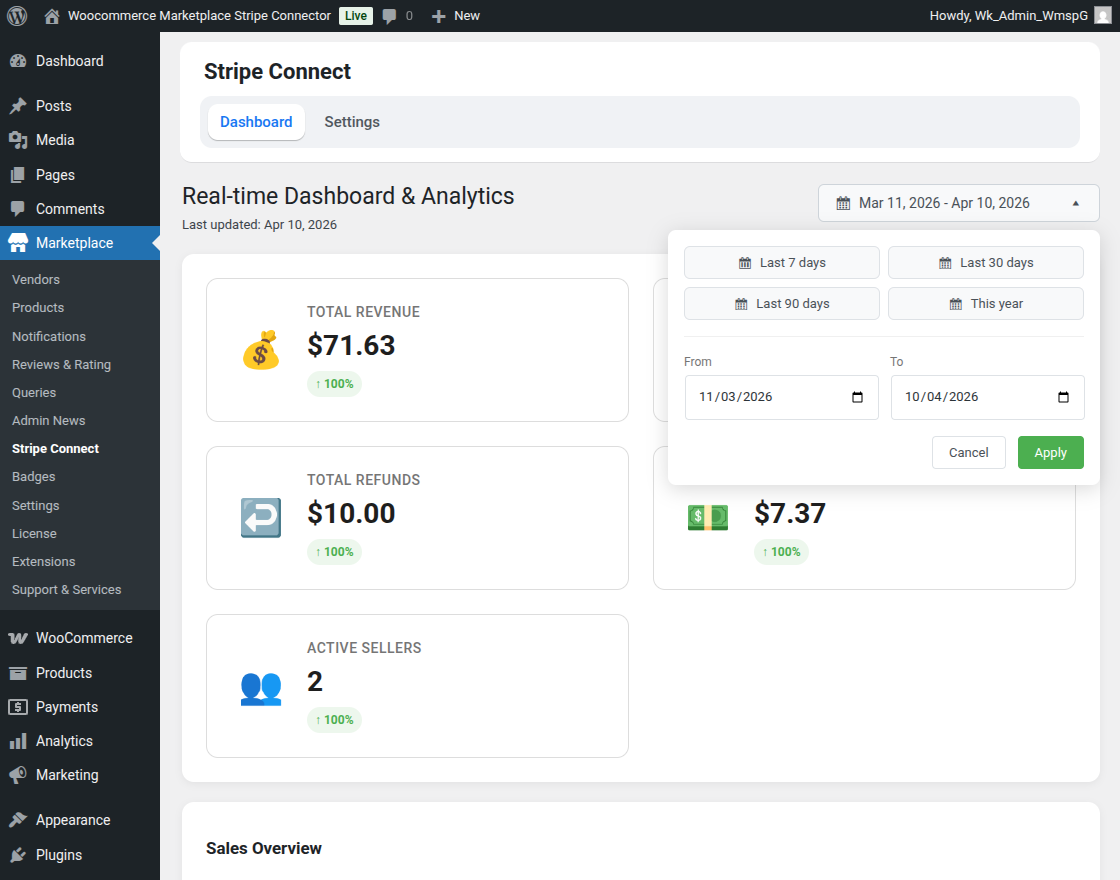
Date Range Picker – Filter data using preset options (Today, This Week, This Month, Last Month, Custom Range).
Filter System – Extensible dashboard components with advanced filtering capabilities.
Top Sellers Ranking: Identify top-performing sellers based on sales data

Refund Tracking: Track both partial and full refunds in real-time. View reversal data for complete transaction history enhanced Refund & Transfer Tracking.
Real-time Refund Tracking: The system supports both partial and full refund handling with real-time tracking.
Complete reversal data tracking for audit trails.
Transfer Monitoring: Admin can monitor seller payouts including failed transfers and reversals.
Automatic tracking via payout.paid and payout.failed webhook events.
Real-time notifications for payout status changes.
Refund Management System: Dedicated refund management interface with reversal data tracking.
Pagination support for refunds table to handle large volumes.
Refund Process: Admin End
In the admin panel, the admin can process a refund. The admin needs to navigate to WooCommerce > Orders and find the order listing.
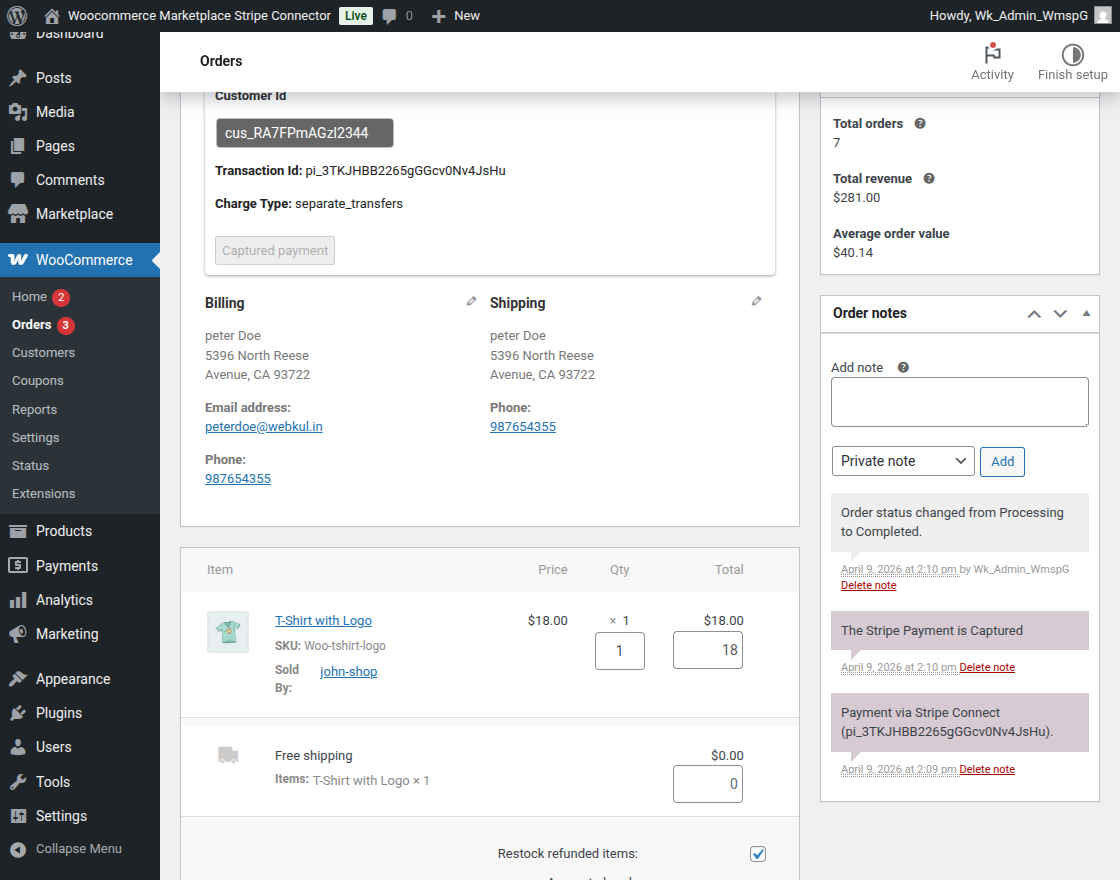
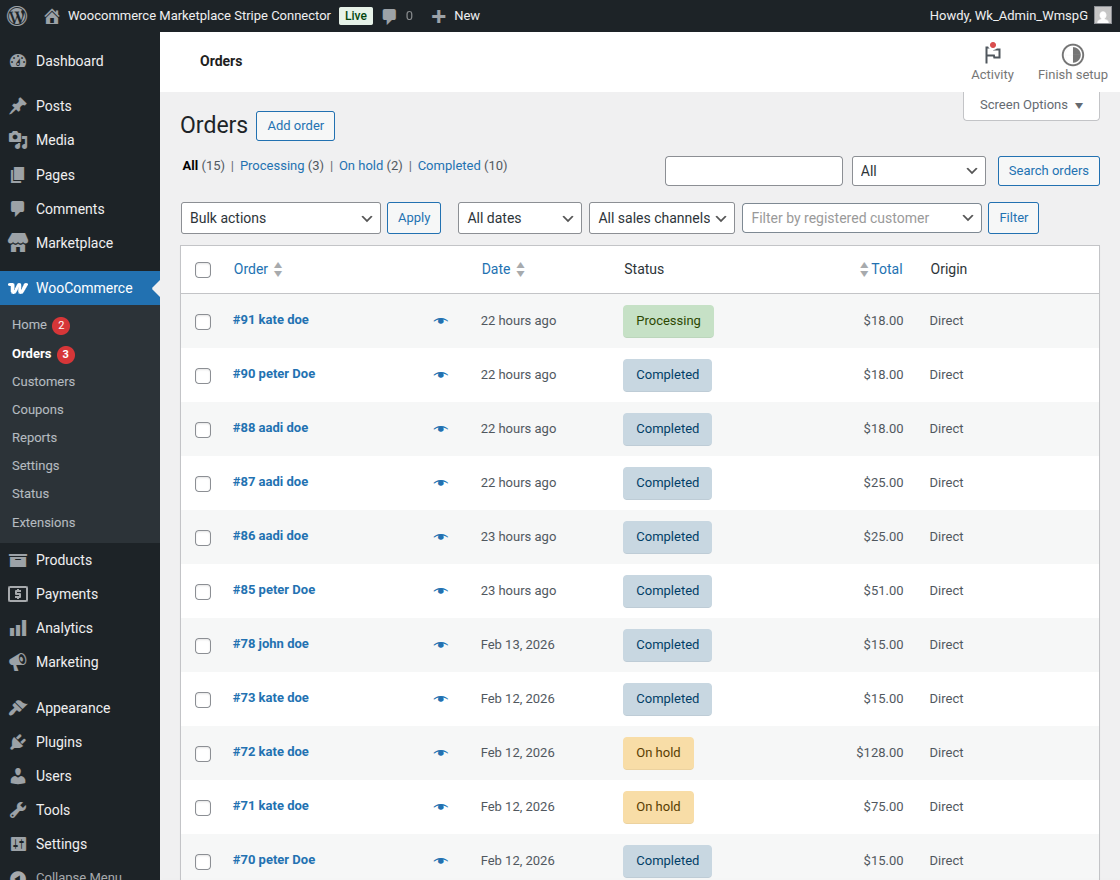 Thereafter, the admin needs to choose the order for which the amount is to be refunded on the order details page.
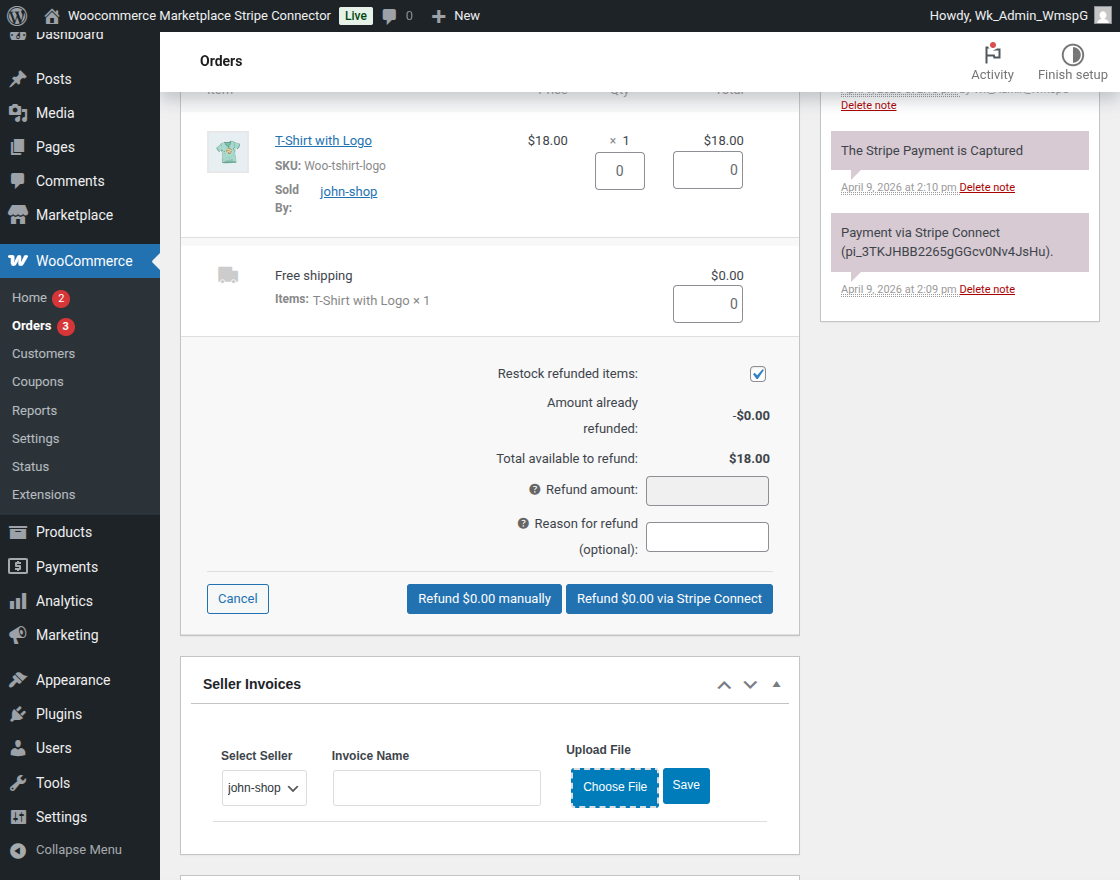
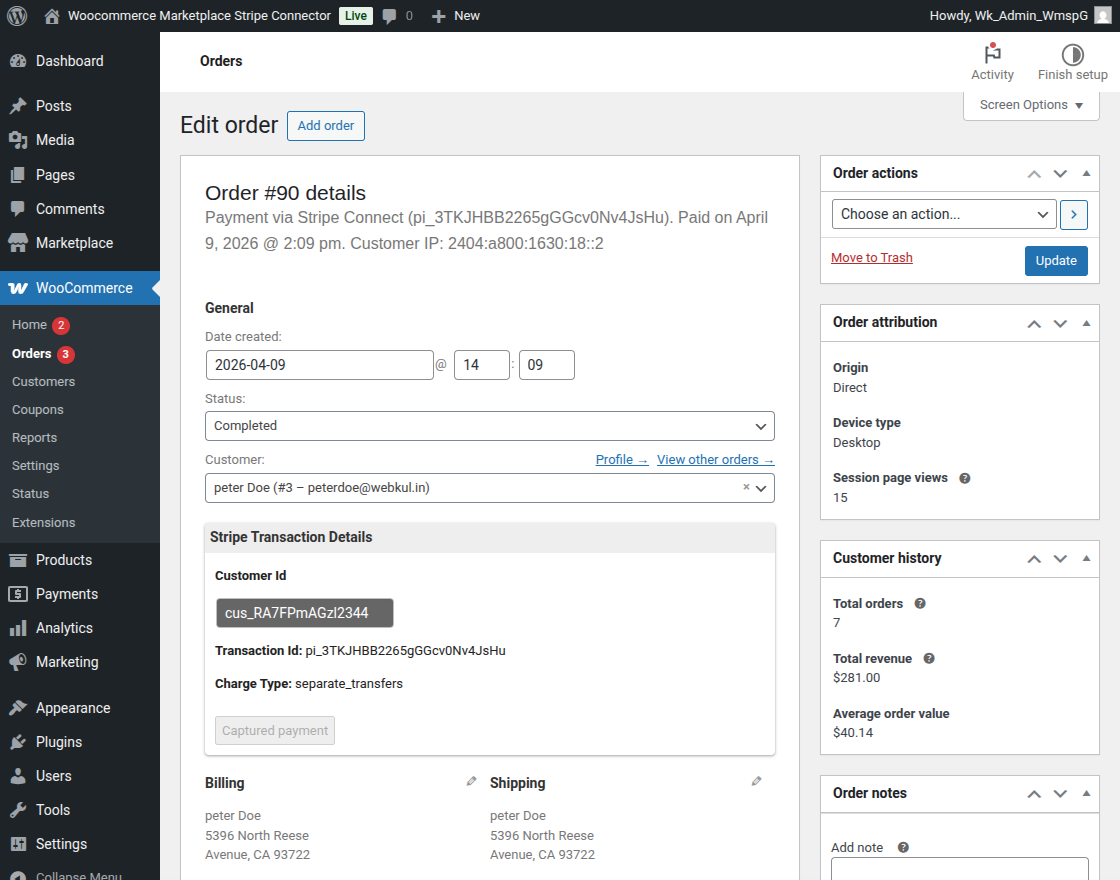 On clicking the Refund button, two more tabs will be visible Refund Manually and Refund via Stripe Connect as shown in the image.
Auto Refund Process-
The admin can process the auto refund via Stripe Connect to the customers from the transaction section.
Furthermore, they can check this on the stripe end as well in all transactions.

Transfer Reversal
At Admin end
The admin can reverse the amount transferred to the seller from Marketplace> select seller> manage> open order> transaction then click on reverse Stripe Transfer to proceed with the transaction.

At Seller End
The seller can reverse the amount transferred to the seller from Marketplace> select seller> manage> open order> transaction then click on reverse Stripe Transfer to proceed with the transaction.

Note: Seller can check the transfer reversal process from both seller frontend and backend.
Seller End Workflow
In the Seller End, the sellers can log in using their login credentials. This shall redirect the sellers to their profile page.
Thereafter, the sellers can simply tap on the Seller Profile tab and add or edit any details as per requirement.
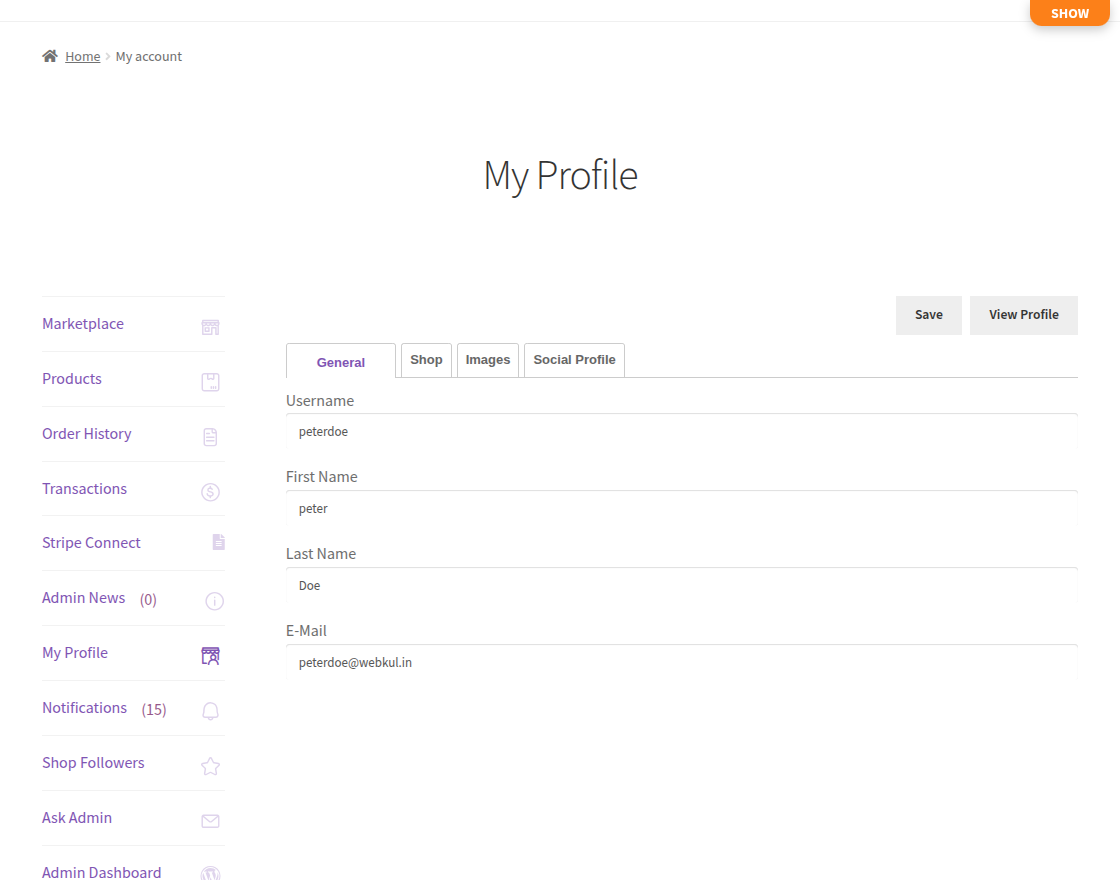
However, the sellers will have to add the Social Profile information as well along with the Personal information under the Seller Profile tab.
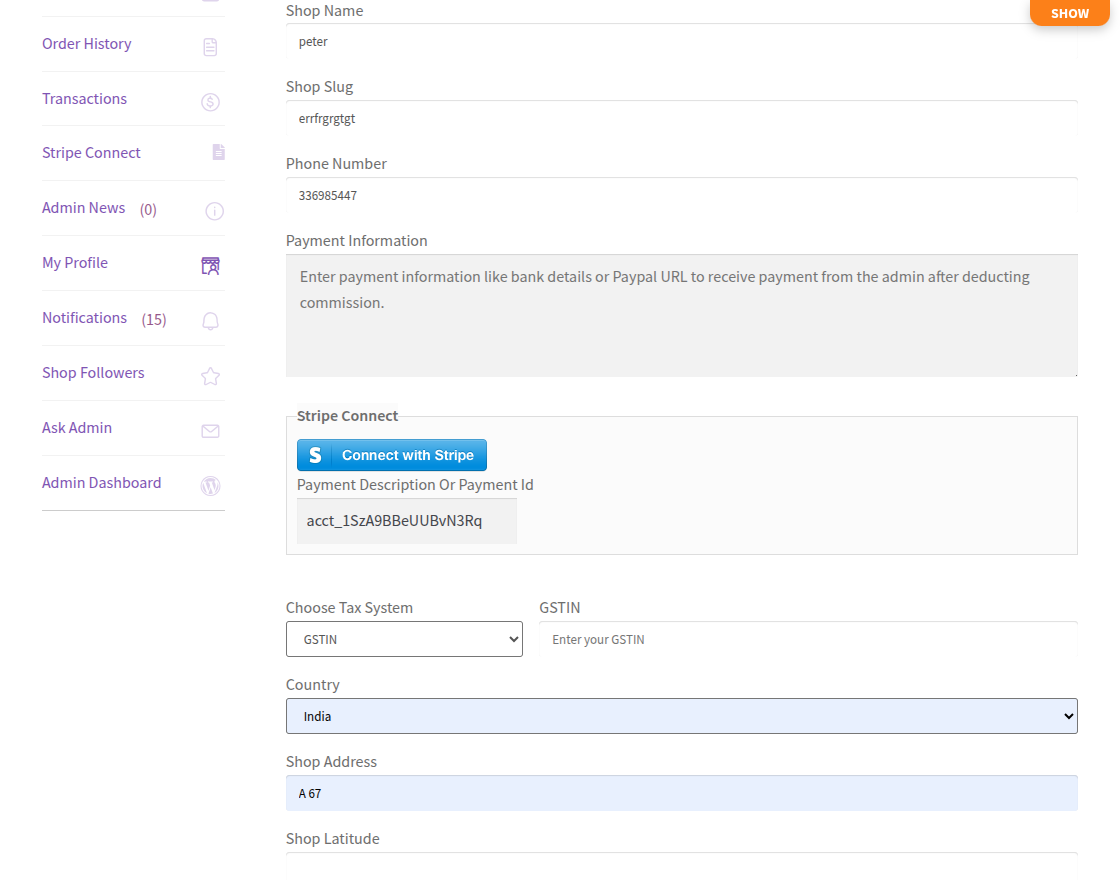
The “Payment Information” section has the “Connect With Stripe” button for the sellers to easily connect with stripe.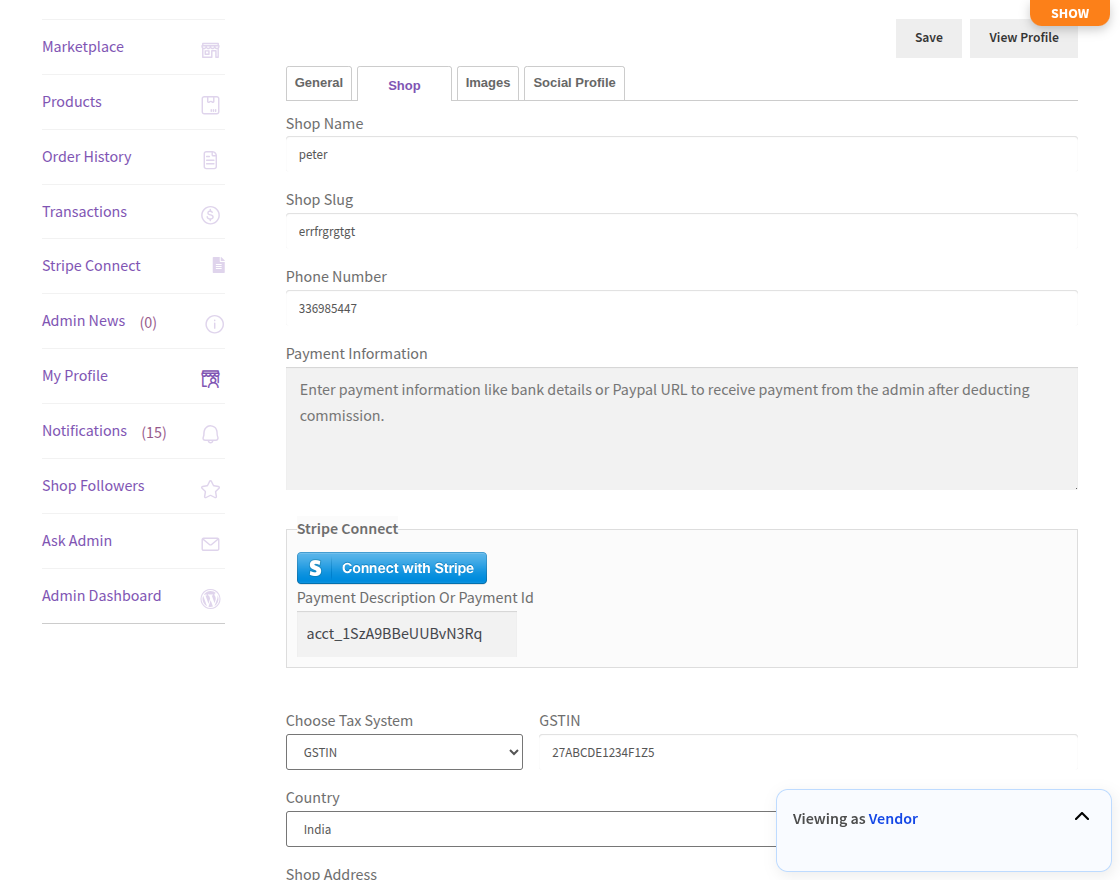
As the seller clicks on the “Connect With Stripe” button, it redirects the seller to another page. Thus, the seller requires to add the details as shown in the image below.
After filling in the details the seller needs to click on the “Authorize Access To This Account” button. Henceforth, the seller can get “Payment Description Or Payment Id“.

This redirects the seller to the “My Profile” page. On this page, the seller can review their account details and confirm the status of their payment integration.
Instead of the “Connect With Stripe” button under the Payment Information section, the seller will now see a message: “Connected successfully”, as shown in the image below.
 The “Connected Successfully” message, thereafter, is replaced with the “Connect With Stripe” button for the sellers to log in to multiple Stripe Accounts.
Seller Dashboard in My Account Page
Sellers can access a dedicated dashboard directly from their My Account page without navigating to separate panels.
To access: Navigate to My Account > Stripe Dashboard
Features available in Seller Dashboard:
- Real-time Transaction Data – View all transactions with current status.
- Payout Status Tracking – Monitor payouts including failed payouts.
- Refund History – Complete refund history with reversal tracking.
- Pagination Support – Easy navigation through transaction tables.
- Transfer Monitoring – Track seller payouts including failures and reversals.


Refund Process: Seller End
The sellers as well can process a refund from their respective panels. The sellers need to navigate to the Order History tab. The admin needs to navigate to the Order History and find the order listing.
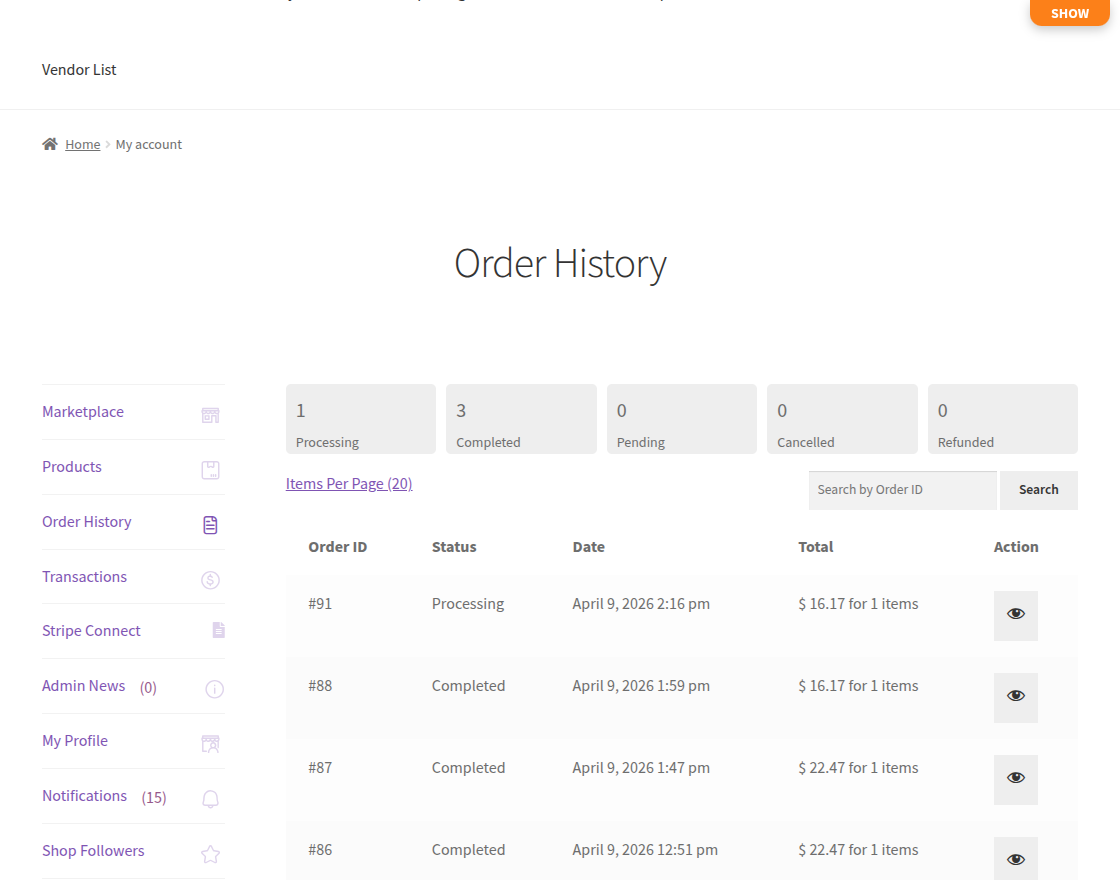
Then the seller must tap on the order and view its details on the order details page as shown in the image.
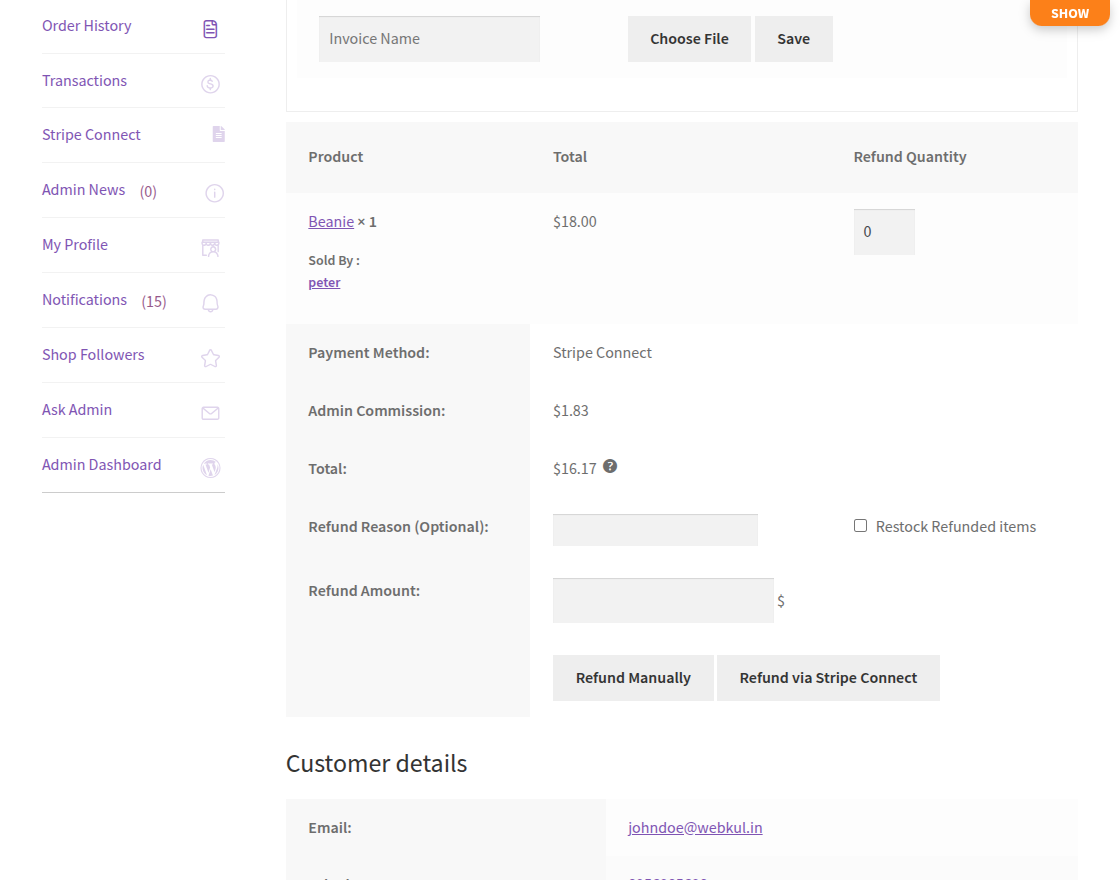
Then the seller must click on the Refund tab. The Refund Manually and Refund via Stripe Connect tab shall be visible as shown in the image below.

Auto Refund Process-
The seller can process the auto refund from their panel to the customer’s requested order refund.
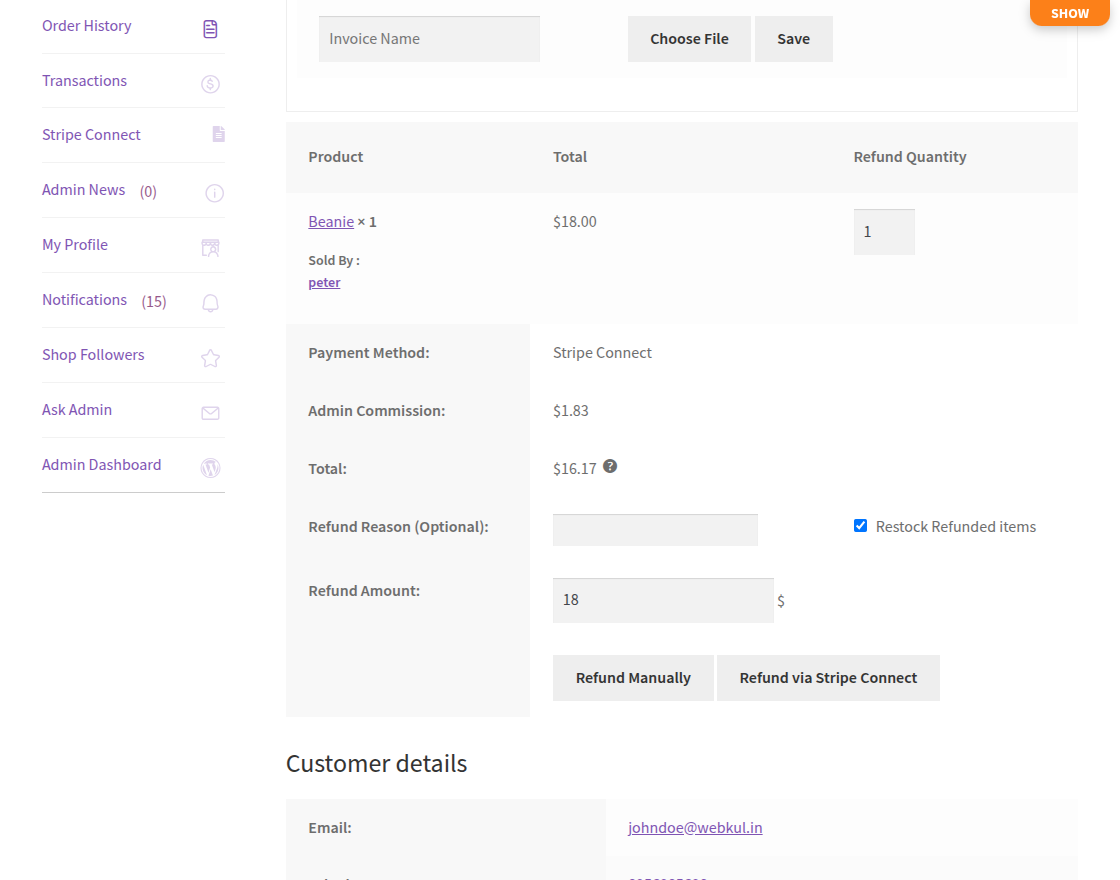
Furthermore, when the seller clicks on refund via Strip Connect the amount will be directly transferred to the customer. This transaction will be displayed on the Stripe Connect page.

Note: The transfer reversal process will be performed automatically at the seller’s end while processing the refund.
Order Workflow
Once the customer adds a product to the cart, they can tap on View Cart and then they’ll be redirected to the Cart as per the below image,
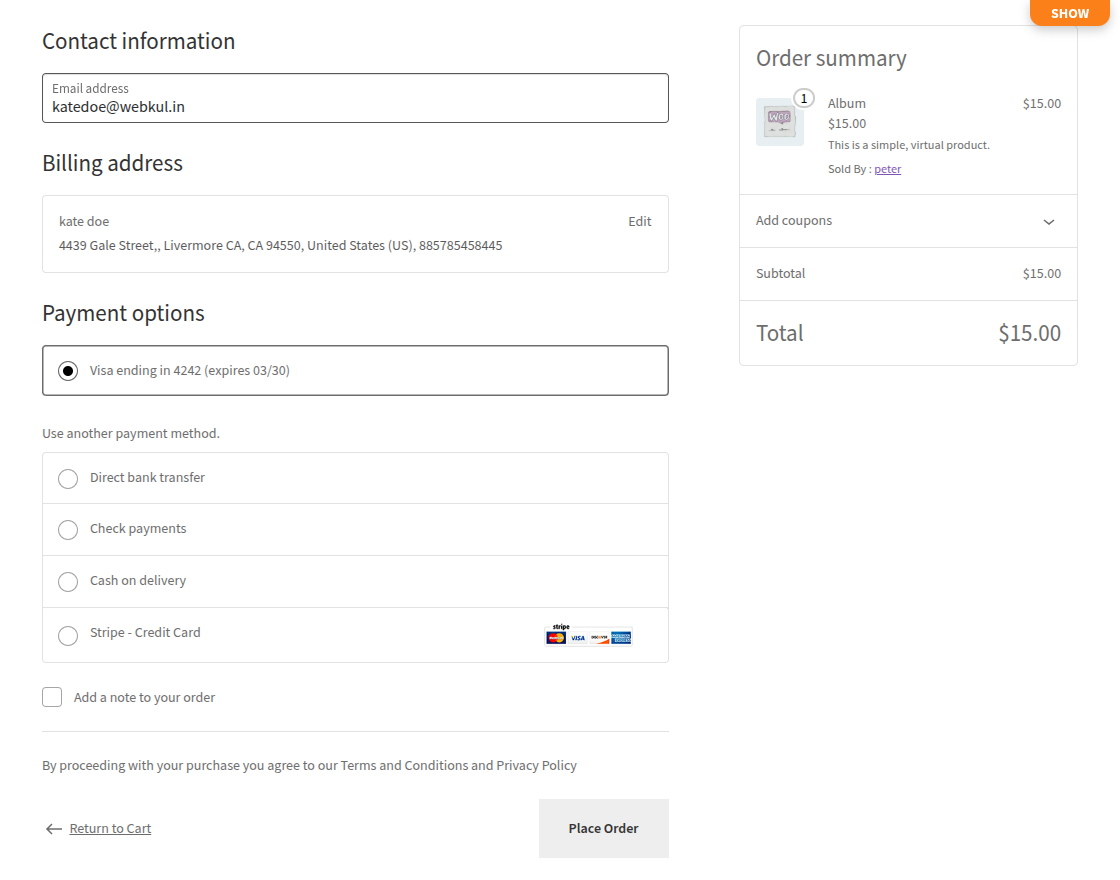
After clicking on Proceed to checkout, the Stripe Connect payment method option is visible on the checkout page to the customers.

The customers select the Stripe Connect option so as to make the payment for the purchase.
The customers will have to add the card details such as card number, choose a card type as –
Master, Visa, or American Express from the dropdown list, Expiration Date, and the CVV details and simply tap on Place Order.
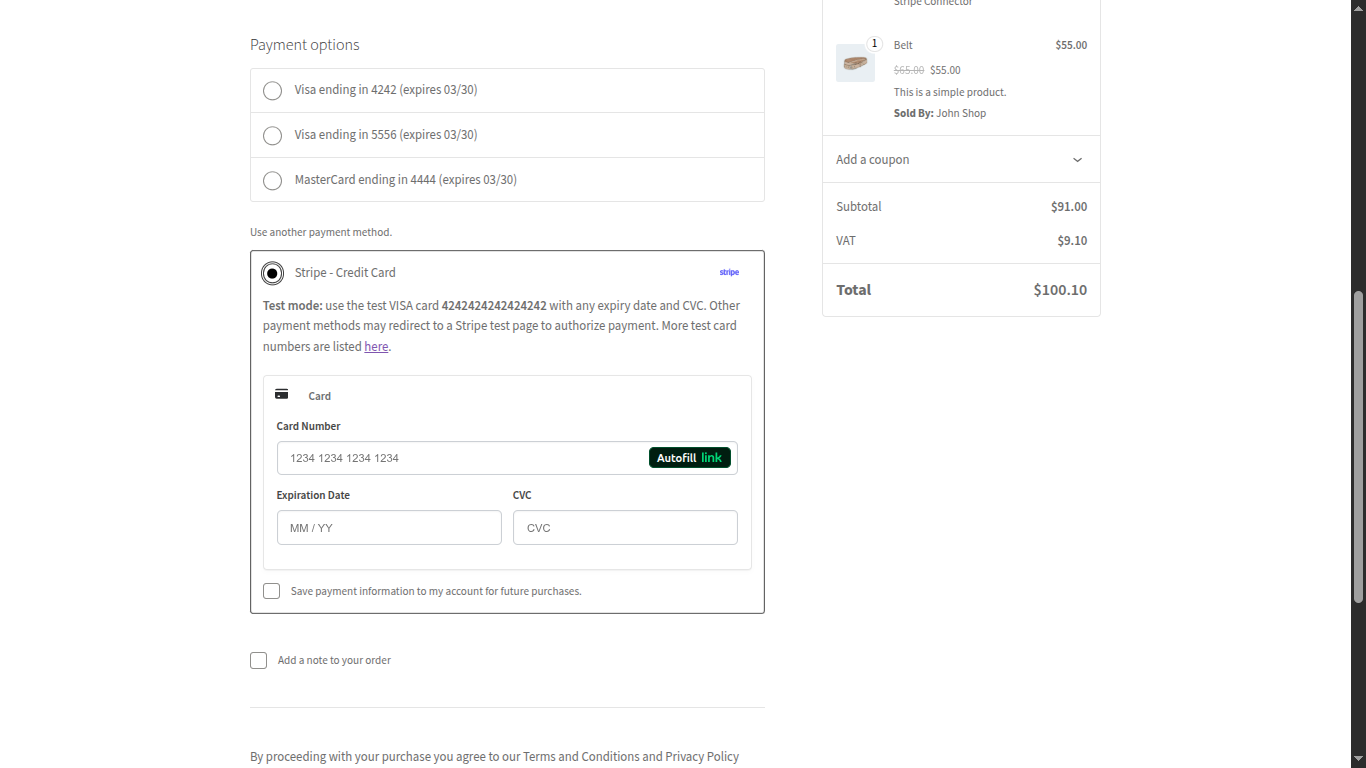
They can also Save the payment information for future purchases by tapping on the checkbox.
3D secure payment method
The customer can also do this checkout with the 3D secure payment method, at the time of the 3D payment method the customer can get a pop-up before the payment is done.
As shown in the image below.
If the customer can complete the authentication by clicking on the “Complete Authentication” button. The order will be placed.

Moreover, once the customer places the order, a confirmation message shall display under the Order Received along with the details of the order as shown in the image below.

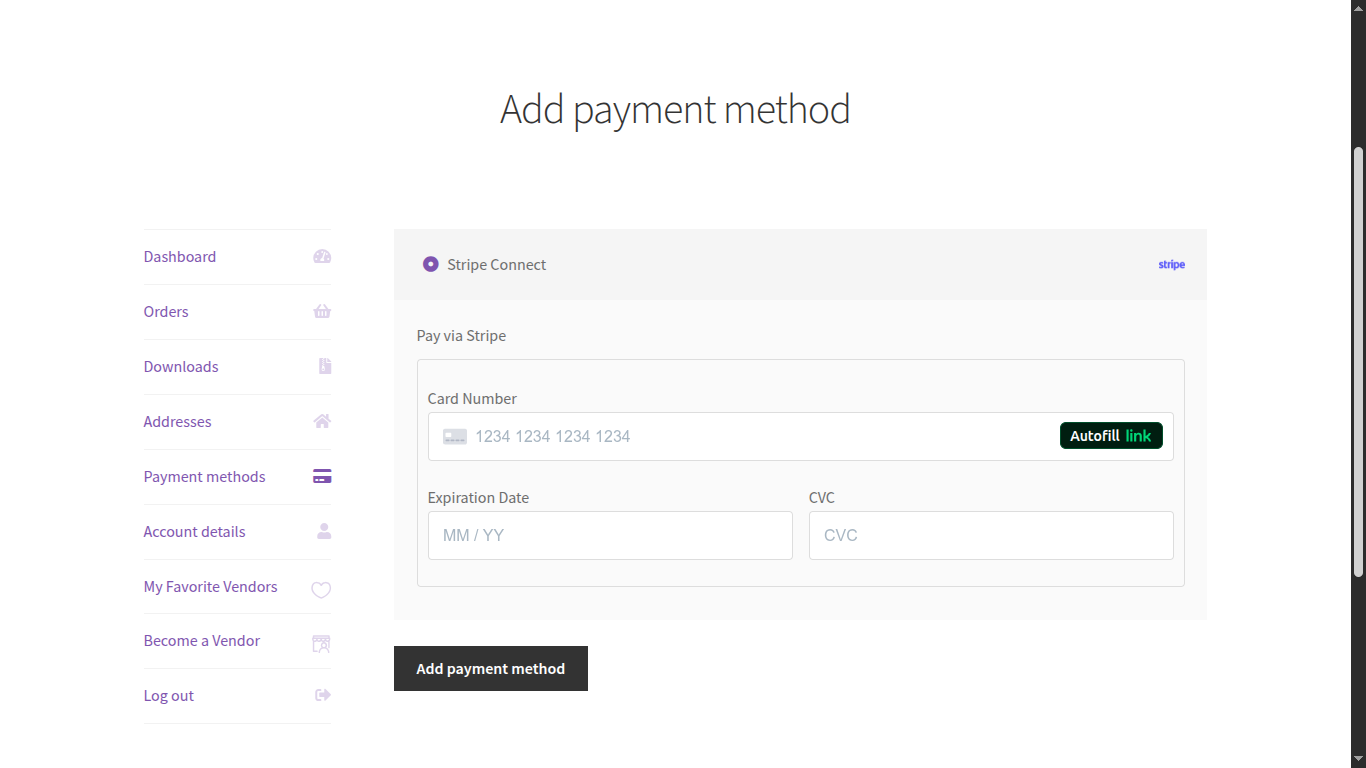
Manage Payment Method
Customers can also manually view and add new payment information by navigating to My Account>Payment Methods.
Here they can view the list of already added Payment information and can Delete them as well.
They can tap on Make Default to make that particular payment method as default for payments.

Next, By tapping on Add Payment Method, customers can add the new payment information,
Stripe Money Transfer
The admin and the sellers can log in to the Stripe accounts using their respective login credentials.
Therein both can view the details of their payment (commission) which is displayed under the Payments option as shown in the image below.
The seller’s commission details will be present in the admin’s Stripe Account.
For instance, in the image below, the amount of USD 524 (including shipping) is the seller’s amount and .
The amount of USD 709 (including shipping) is the admin’s amount which is displayed under the admin’s Stripe account.

In order to view the complete details, the admin needs to click on the amount, for instance, USD 709 which is the admin’s amount.
As the admin clicks on the amount, it redirects the admin to the Payment details page as shown in the image below.

Similarly, the sellers can also view their payments by simply logging in to their Stripe Accounts using their respective login credentials.
As the seller logs in, the seller can view the payment (commission) under the Payments option as shown in the image below.
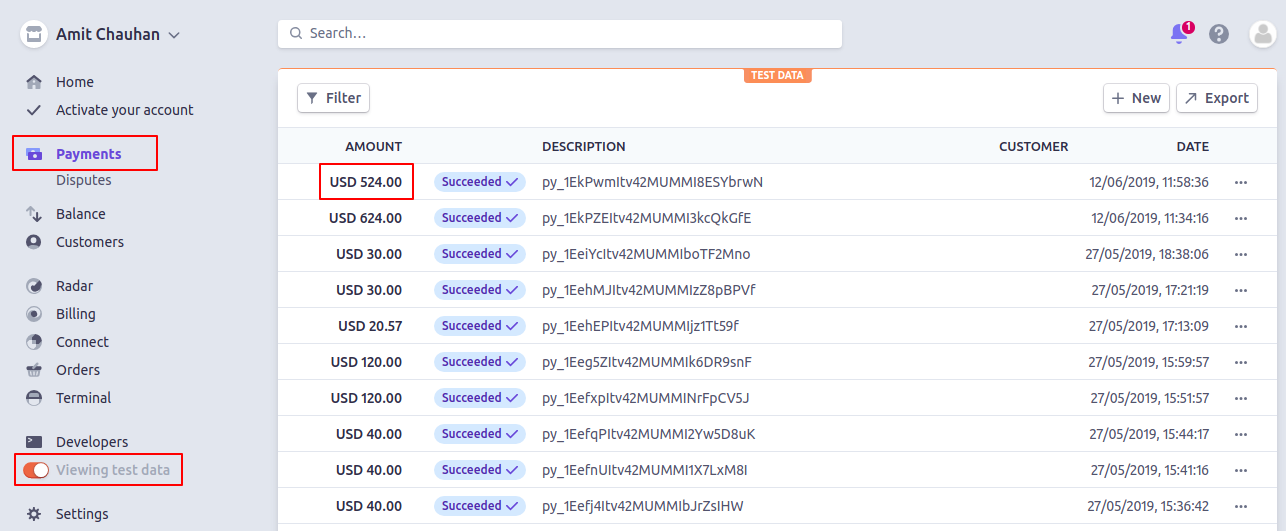
Furthermore, In order to view the details of the order, the seller needs to click on the amount, for instance, USD 524.I
t redirects the seller to the payment details page as shown in the image below.

When ‘Use Stripe Separate Charge and Transfer API for Stripe Payment Gateway’-
Now, if in the admin configuration the above-mentioned field checks the amount will initially added to the admin account.
Then the seller will receive the amount post deduction of the commission, taxes, and another additional amount in the payment. The admin can check the same by navigating to Connect> Transfers.

Hence, here, in this section, the admin can visualize the amount paid to the seller for the order.
Support
For any technical assistance kindly raise a ticket or reach us by email at [email protected]. Thanks for Your Time! Have a Good Day!
Also, discover various solutions to add more features and enhance your online store by visiting the WooCommerce plugins.
Current Product Version - 3.2.0
Supported Framework Version - WordPress: 6.9.4 WooCommerce: 10.9.4 WooCommerce Marketplace: 6.6.0

2 comments
I would request you to share your full requirement at [email protected] so that our team will assist you in a better way.
Thanks
Webkul Team.