WordPress WooCommerce Admin Buyer Chat Plugin is a chat system that helps the admin and the buyer to start a conversation.
This chat plugin establishes real-time direct communication between the admin and the buyers.
Any buyer can start to chat with the admin. Buyers can ask queries related to the product that the admin is selling or any upcoming product information.
The admin can also reply to any buyer about their queries.
Admin can chat with multiple buyers at the same time. A healthy conversation between a buyer and an admin leads to more sales conversions.
Note: This plugin is based on Socket.IO and the user needs to install a node on their server to use the plugin.
Check a brief overview of the plugin –
Features
The Admin buyer Chat system is based on Socket IO.
The Socket IO ensures a reliable, bi-directional communication between the admin and the buyer.
Admin can chat with multiple buyers at the same time.
Now a buyer can chat with the admin. He can ask queries related to the product that the admin is selling or any upcoming products information, and admin can also reply to any buyer about their queries.
This plugin supports multiple chats so the admin can chat with multiple buyers simultaneously.
The admin and buyer can change status to Online, Busy, and Away.
The admin and buyer both can change status to Online, Busy, and Away as per their requirements.
Smiley/Emoticon support for an interactive chat between users.
This feature enables to use of Smiley/Emoticon while a conversation between a buyer and the admin. With the help of Smiley/Emoticon, buyer or admin can express their views in a very interactive way.
Buyer list for the admin.
A list of all the buyers whoever communicates with the admin will be available. He can check the history of chats with the buyers.
Buyer and the admin can view chat message timestamp with the date.
The buyers and the admin can see the time and date for any received or sent a message from their chat account.
Buyers can do instant login from the chat window.
The buyers can log in to their chat window directly from the product page of any seller to start a conversation with him.
The admin and the buyer can view their chat conversation history.
The admin and the buyers can view their chat history from their chat account to get an overview of their last conversations.
Will work with HTTPS enabled websites.
The users can also use the plugin for HTTPS-enabled websites by just adding the server details (Private Key, Certificate Key, Sever CA Bundle File).
Installation
The user will get a zip file which he has to upload in the “Add New” menu option in the WordPress admin panel.
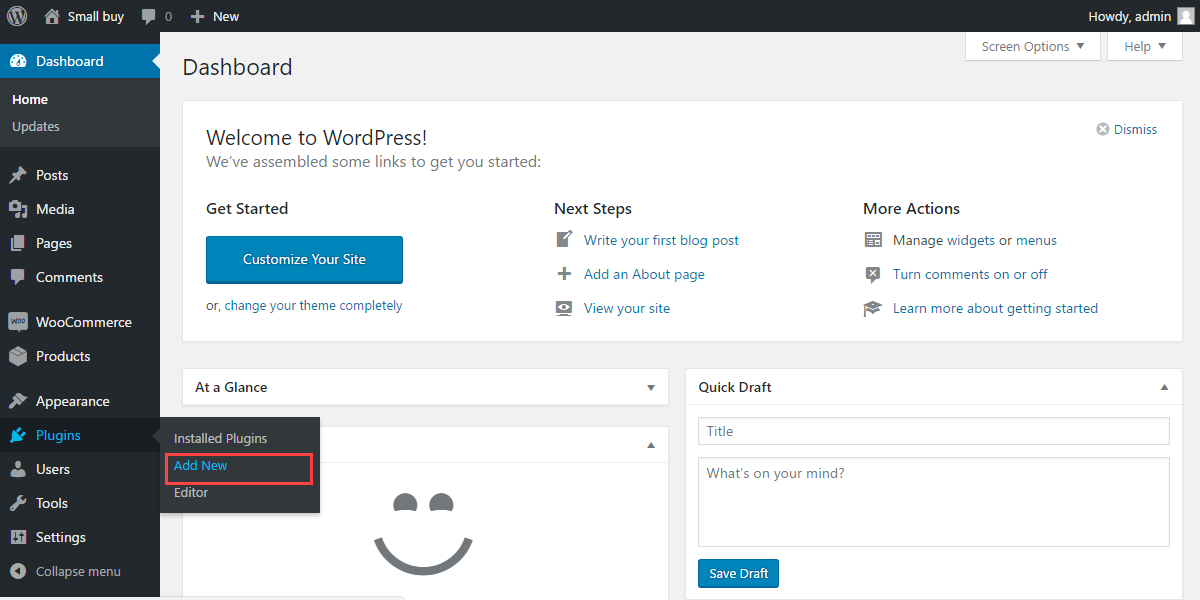
For this login to WordPress Admin Panel and Under the Dashboard hover your mouse over the “Plugins” menu option which brings out a Sub-Menu and then select the “Add New” option.
After this, you will see an option on the top of your page that is “Upload Plugin”, click the option to upload the zip file.

Now, After clicking on the “Upload Plugin” option, below that you will see a button “Choose File” click on the button to browse for the zip file as per the snapshot below.

After browsing the file, click the “Install Now” button to install the plugin as per the snapshot.

Now when the plugin is installed correctly, you will see the success message and an option to activate the plugin. Click on “Activate Plugin” to activate the installed plugin.

After the successful installation, you have to run this command:
Note: Please reach the destined folder in your directory and then run this command.
Note: Please make sure Node is already installed on your server.
Folder path example – cd /home/installation/folder1/wp-content/plugins/woocommerce-admin-buyer-chat/
Command - npm install
After running the command you need to flush the permalink to update the permalink structure. Navigate to Settings > Permalink, select post name and click enter to update the permalink.
Also, discover various solutions to add more features and enhance your online store by visiting the WooCommerce plugins.
Configuration
After successful installation of WordPress Woocommerce Admin Buyer Chat Plugin, the admin can set the configurations under “Admin Buyer Chat”.

The admin can set the configurations for the Server Settings options as mentioned below:-
Host Name: Set the name of the host for the website, like xyz.com.
Port Number: Set the number of the port for the website, like 2083.
Chat Name: Set the chat name which would be visible to the buyer at the frontend.
Receiver Chat Time Text Color: Set the color of the text for the receiver’s chat.
Receiver Chat Background Color: Set the background color for the receiver’s chat.
The Receiver Text color: Set the color of the text for the receiver.
Admin Chat Strip Color: Set the color of the chat strip for the admin chatbox.
Sender Chat Time Text Color: Set the color of the text for the sender chat.
Sender Chat Background Color: Set the background color of the sender’s chat.
Customer Chat Strip Color: Set the strip color of the customer chatbox.
Sender Text Color: Set the color of the text for the sender.
HTTPS Enabled(website): Enable the HTTPS for the website in order to keep the data of the website secure.
- Upload Server Private Key File – here the admin can upload server private key file from your host provider, file extension must be .key.
- Upload Server Certificate Key File – here the admin can upload server certificate key file from your host provider, file extension must be .crt.
- Upload Server CA Bundle File – here the admin can upload server CA Bundle file from your host provider, file extension must be .ca.
Admin-End Management
After Logging in, a chat icon will be available on right side of the page. Admin has to click this icon to slide buyers list out.
In the buyer’s list, all the buyers who have started the chat with the admin will be visible in buyer’s list. In this list buyer’s full name, email address and status will be available.
The admin can click on any buyer’s option to start a chat. The admin can manage multiple chat windows if they are unable to view altogether.
If there are various chat windows are open then the remaining windows will be minimized.
Buyer-End Management
After logging in a buyer can see a chat window. A buyer can start a chat with the admin of the store with the help of that chat window.
For this, he just needs to click on the chat window to start the conversation.
The buyer is also able to change the image of avatar and enters the name as below image.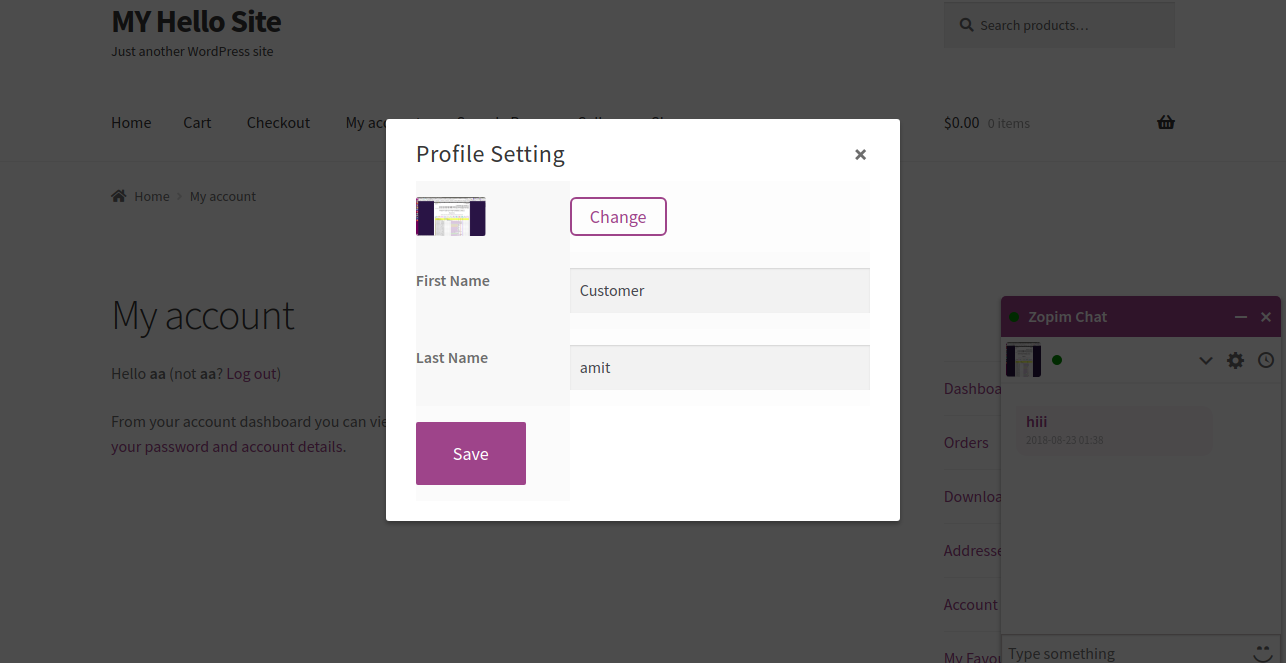
A buyer can change the status to “Online”, “Busy” or “Offline”.
A buyer can also enter the timeline to view the chat history as “Last 24-hrs”, “Last 7-days”, “Last 30-days”, and “Forever”. Initially, it is “Last 24-hrs”. Now a buyer can start the conversation with the admin.
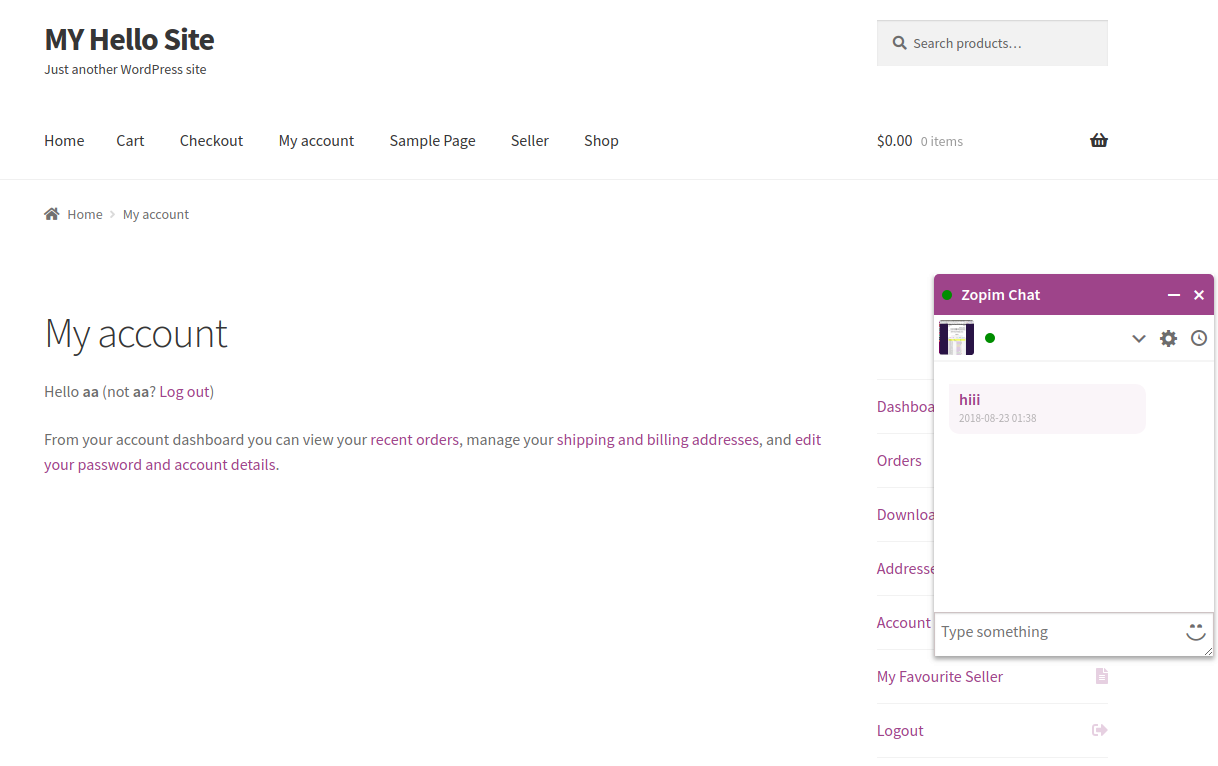
That’s all for the WordPress WooCommerce Admin Buyer Chat Plugin
Support
For any kind of technical assistance, please raise a ticket or send us a mail at [email protected]
You may also check out our exclusive WooCommerce Addons and can also explore our WooCommerce Development Services.
Thanks for Your Time! Have a Good Day!
Current Product Version - 2.1.0
Supported Framework Version - wordpress : 7.0.0, woocommerce : 10.8.1

Be the first to comment.