Warehouse Management System Mobile App for WooCommerce allows warehouse managers to easily manage the orders arrived for delivery at various warehouses through the mobile app.
The warehouse manager can assign totes/bags to the orders by just scanning the barcodes of totes and products.
This Woocommerce Mobile app allows the admin to add multiple warehouses and managers. The admin can also assign warehouse managers to the warehouse.
Also, it allows the admin to view multiple totes/baskets and print barcodes for those totes/baskets.
The admin can also print barcodes for products. The admin can also assign the warehouses and warehouse managers to each order.
Moreover, the app follows the latest technology of Flutter, wherein one can use Dart to build a mobile app.
Note:- After purchasing the plugin, kindly email us with the purchase code of the plugin to [email protected] to get information regarding the mobile application
Check a brief overview of the backend configuration –
Check the working of WMS mobile app in the video mentioned below –
Features
Admin-end features:
- The admin can create multiple managers and warehouses.
- Print barcodes for multiple totes/bags at a time.
- The admin can assign multiple warehouse managers to a single warehouse.
- By uploading a CSV file, the admin can assign multiple products to a warehouse in a particular desired location
- The admin can also create warehouse structure (number of rows, columns, Shelves Per Cluster and racks per shelves).
- The admin can assign multiple products to a warehouse.
- Admin can also assign products to multiple locations.
- Also, the admin can also manage the warehouse architecture by assigning the products to a particular rack of a shelve created.
- Assign warehouse managers and warehouses to various orders.
Warehouse Manager Features:
- The warehouse manager can log-in by using the application.
- Check the status of the order.
- Scan the product barcode and tote barcode.
- The warehouse manager can see the location of a particular product.
- Verify the order by scanning the tote.
- The warehouse manager can see the orders which are assigned by the admin.
- Add multiple totes for a single order.
- The warehouse manager will receive notifications when an order is assigned to them.
Installation
The user will get a zip file which he has to upload in the “Add New” menu option in the WordPress admin panel.
For this login to WordPress Admin Panel and Under the Dashboard hover your mouse over the “Plugins” menu option which brings out a Sub-Menu and then select the “Add New” option.
After this, you will see an option on the top of your page that is “Upload Plugin”, click the option to upload the zip file.
Then click on the “Upload Plugin” option, below that you will see a button “Choose File” click on the button to browse for the zip file as per the snapshot below.
Post browsing the file, click the “Install Now” button to install the plugin as per the snapshot.
Now when the plugin is installed correctly, you will see the success message and an option to activate the plugin. Click on “Activate Plugin” to activate the installed plugin.
Thus, the installation of the WooCommerce Warehouse Management completes.
Admin Configurations
After successfully installing the WooCommerce Warehouse Management module, the admin needs to configure the following features to manage the Warehouse Management System-
- All Managers
- All Warehouses
- Tote/Basket
- Orders
- Configuration
Configuration
After the successful installation of the WooCommerce warehouse management module,
The admin will have to enter API credentials by navigating through the Warehouse management> Configuration> General to set the basic configuration of the module.
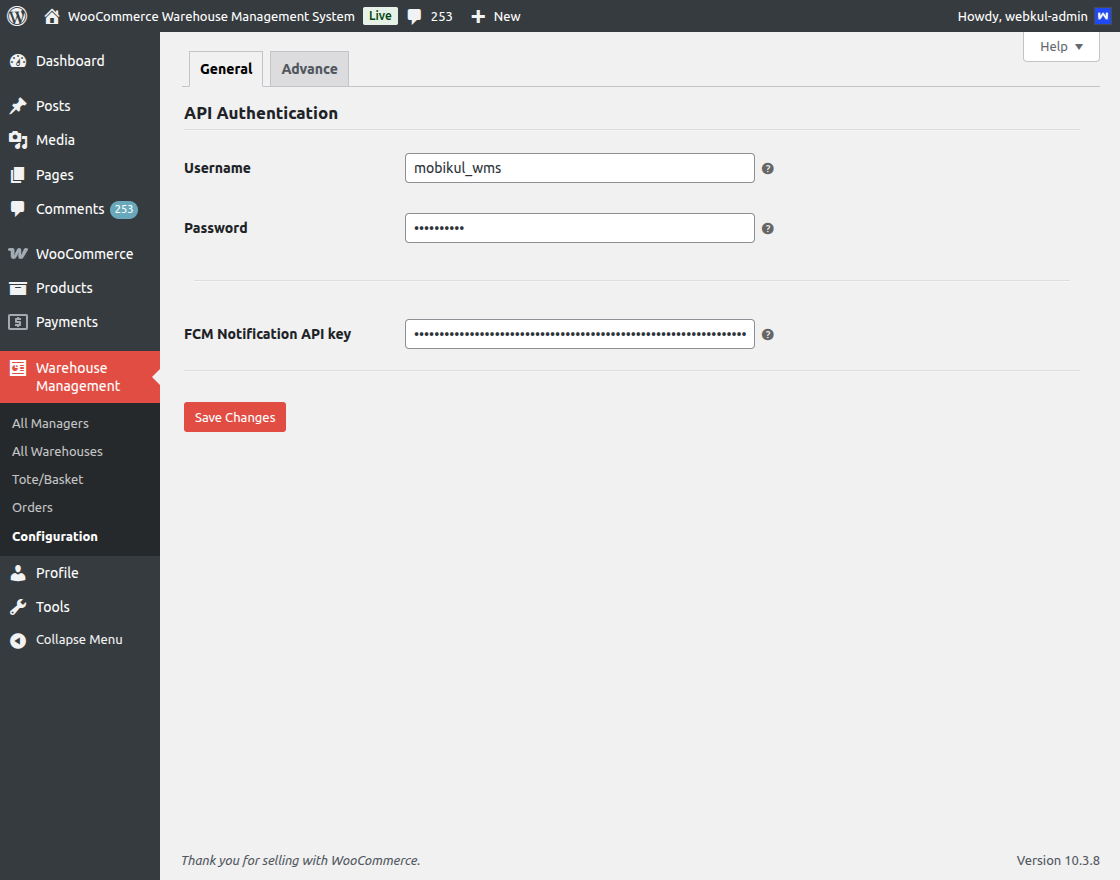
Here, under the general section, the admin will have to enter a few details:
Username: The admin needs to enter the username of WMS APIs.
Password: Enter the password for WMS APIs.
FCM Notification API Key: Enter the server key of your Firebase account. Check this article to know how you can generate the FCM server key.
Uploading products through CSV
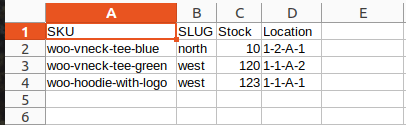
Under the Advance section, the admin can assign products into the warehouse by uploading a CSV file. Here, the admin can choose a CSV file and then click on continue.

The admin can download the sample of the CSV file and can also see the image below for the sample of the CSV file:
After uploading the CSV file, the admin will need to map the CSV file fields to the product fields.
The location entered for each product will be the row, column, shelves, and rack location at which the admin wants to place the product.
Once the product fields are mapped, then the admin will need to click on Run the Importer.
Now, after clicking on Run the Importer, the products in the CSV file can be imported.
All Managers
Here, the admin can search, edit, add and delete multiple warehouse managers created.
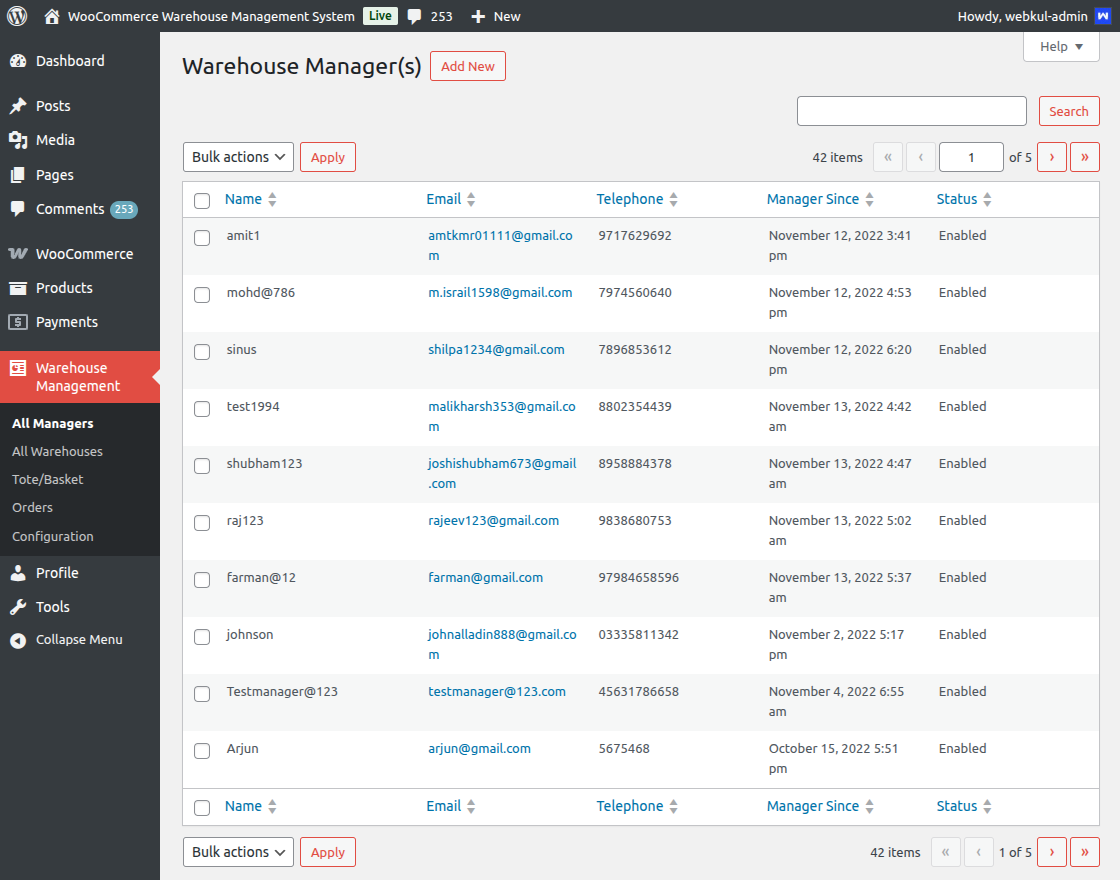
Now the admin can click on Add New and add various warehouse managers as shown in the below image:
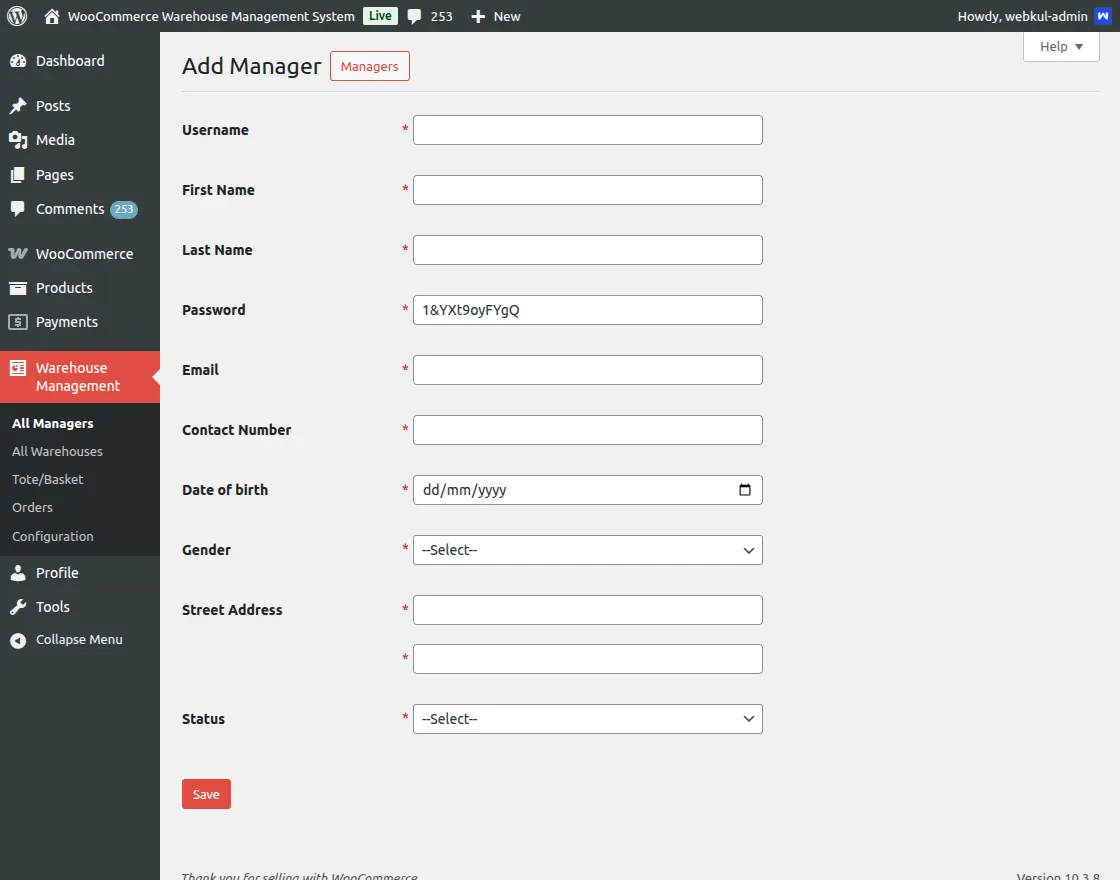
Further, the admin will now have to enter various fields.
- Username: Enter the username of the warehouse manager.
- First Name: The admin can enter the first name of the warehouse manager.
- Last Name: Enter the last name of the warehouse manager.
- Password: Enter the password of the warehouse manager.
- Email: Enter the email ID of the warehouse manager.
- Contact Number: The admin will enter the contact number of the warehouse manager.
- Date of Birth: Select the date of birth of the warehouse manager.
- Gender: Here, the admin will select the gender of the warehouse manager.
- Street Address: Enter the address of the warehouse manager.
- Status: Also, the admin can select the status as enable or disable.
After entering all the fields the admin will have to click on Save.
All Warehouses
Here, the admin can search, edit, add new, delete and can manage various warehouses.
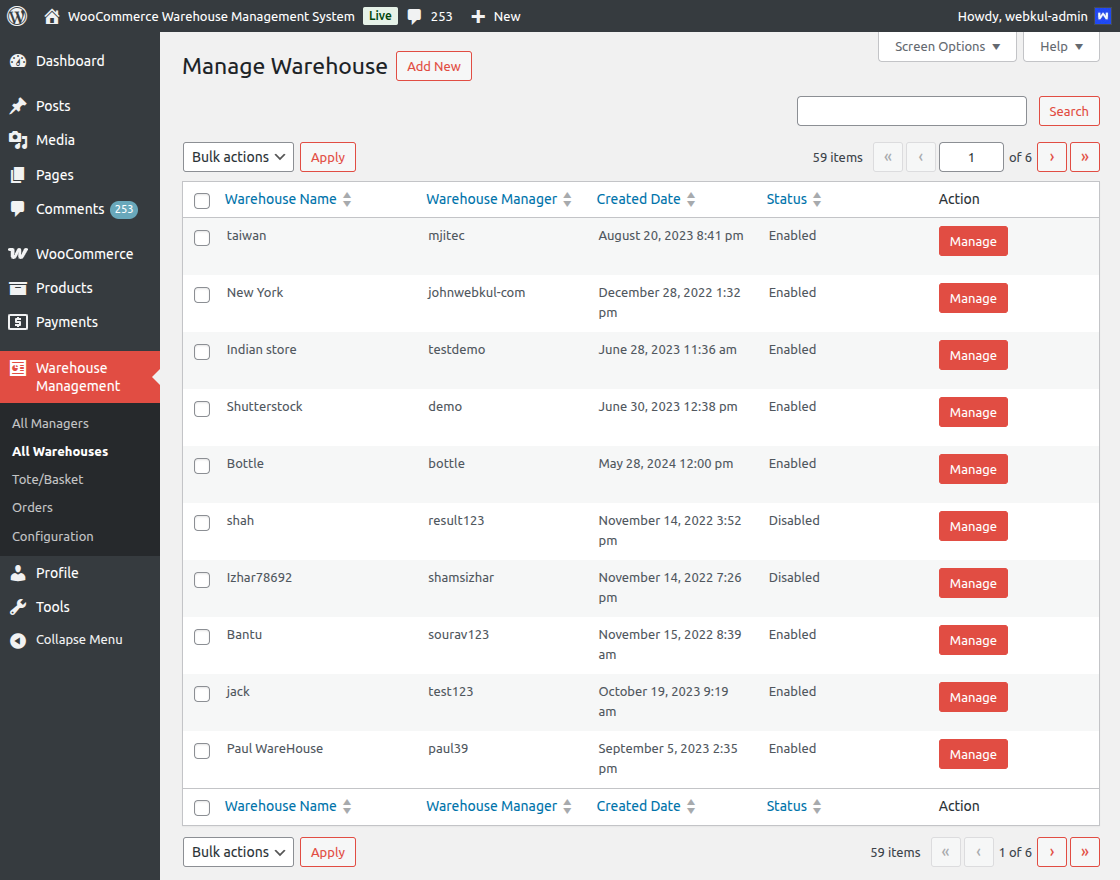
The admin can click on Add New to create new warehouses and an architectural structure for those warehouses.
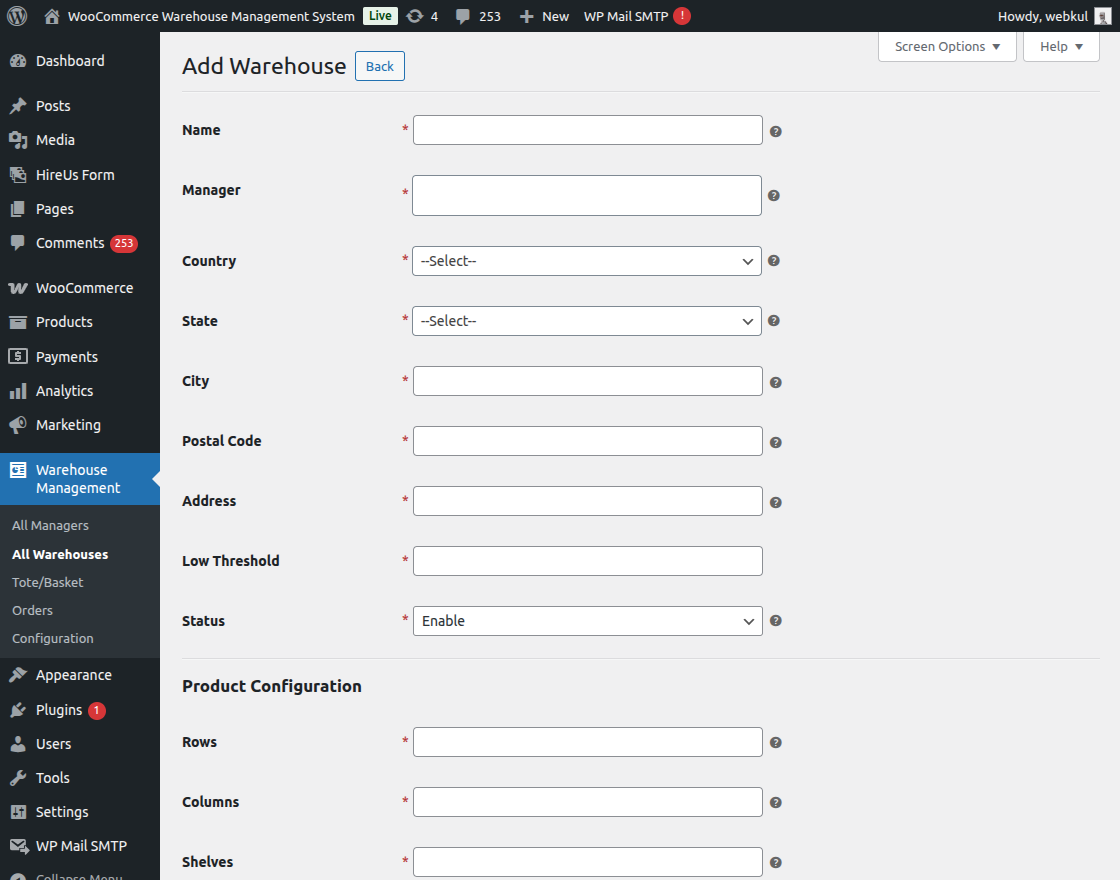
Here, the admin will have to enter various details to add warehouse and architecture structure as described below:
- Name: Enter the name of the warehouse
- Manager: Select the created warehouse manager
- Country: Select the name of the country
- State: Here, the admin can select the state where the warehouse is located.
- City: Enter the city of the warehouse
- Postal Code: Here, the admin will have to enter the postal code
- Address: Enter the address of the warehouse
- Low Threshold: The quantity entered will be set as a threshold after which the admin will be notified if product quantity in the warehouse is low.
- Status: Also the admin can enable or disable the status of the warehouse.
- Rows: Here, the admin will have to enter the number of rows.
- Columns: Enter the number of columns
- Shelves: The admin can enter the number of shelves
- Racks: Enter the number of racks
- Tote/Basket: Here, the admin will have to enter the number of baskets/totes
Also, after entering all the details the admin will have to click on save.
Manage Warehouses
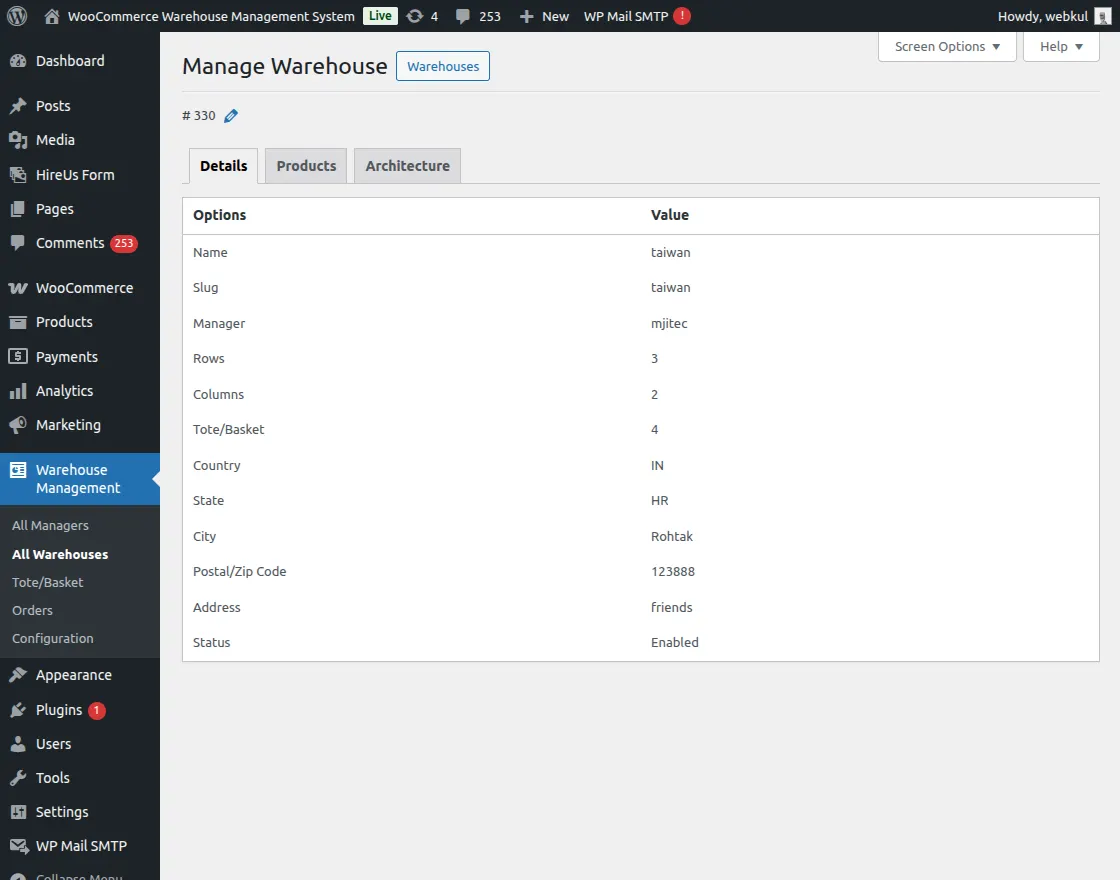
Further, the admin can also manage the warehouse by clicking on manage.
After clicking on manage, the admin can view details of the warehouse and its structure under the details section.
A list of products will show under the products section that includes Product image, name, quantity, location, type of product, actual stock, available stock, and barcode.

The admin can assign quantities to various products. Unassign products, and print barcode in bulk via checkbox, even can edit the products under the products section.
Also, the admin can assign the location for the products. The admin can select a particular row, column, shelves for product and then assign the products to racks.
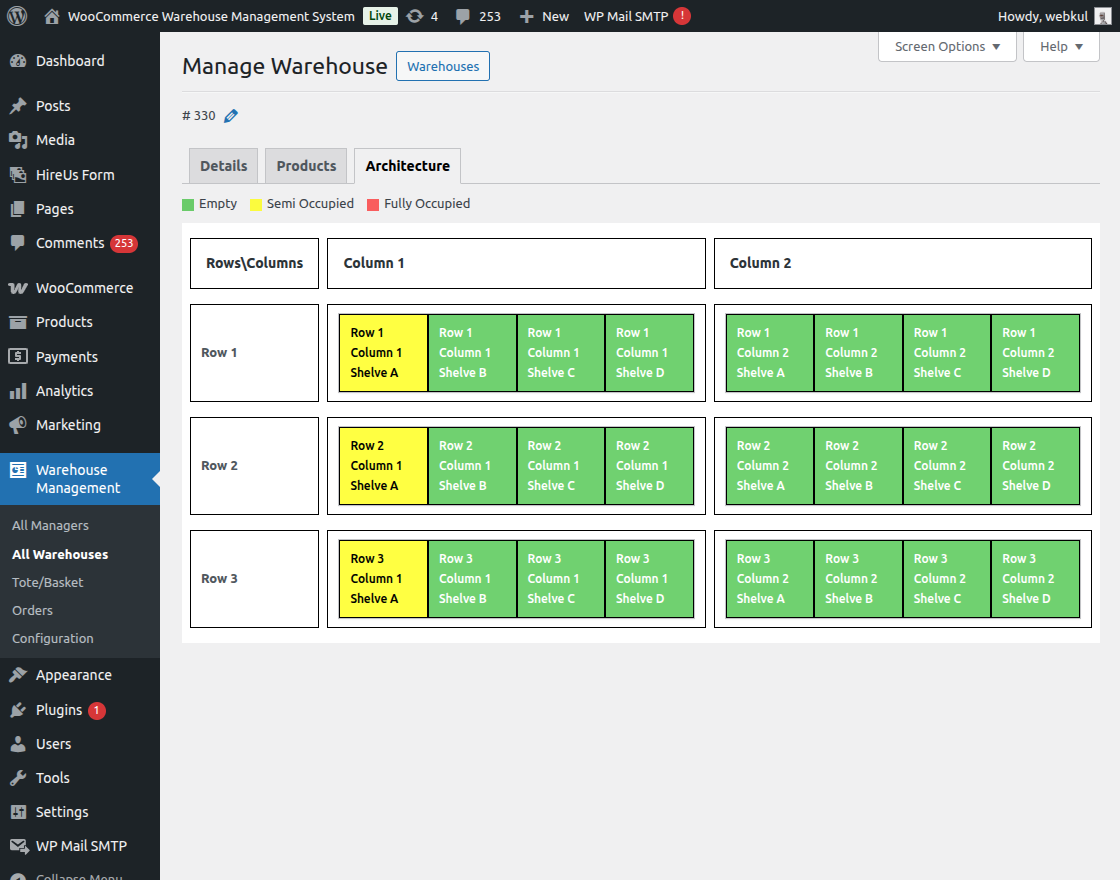
If the shelves are empty, then the color of the shelves will be green.
If the shelves are semi-occupied, then the color will be yellow, and if all the racks of the shelves are fully occupied, then the color of the shelves will be red.
After clicking on the shelf, the admin can assign products to racks. Once the admin clicks on shelve, then a pop-up menu will appear as shown in the image below:

After selecting the products and assigning them quantities, the admin will need to click on Allocate.
After allocating the products in particular racks, the admin can also reassign or deallocate the products from racks.
Now, when the products are allocated, the color of the shelves will change as shown below:
Here, the color of shelf B in row 1 column 1 has become red, which signifies that the shelf is fully occupied.
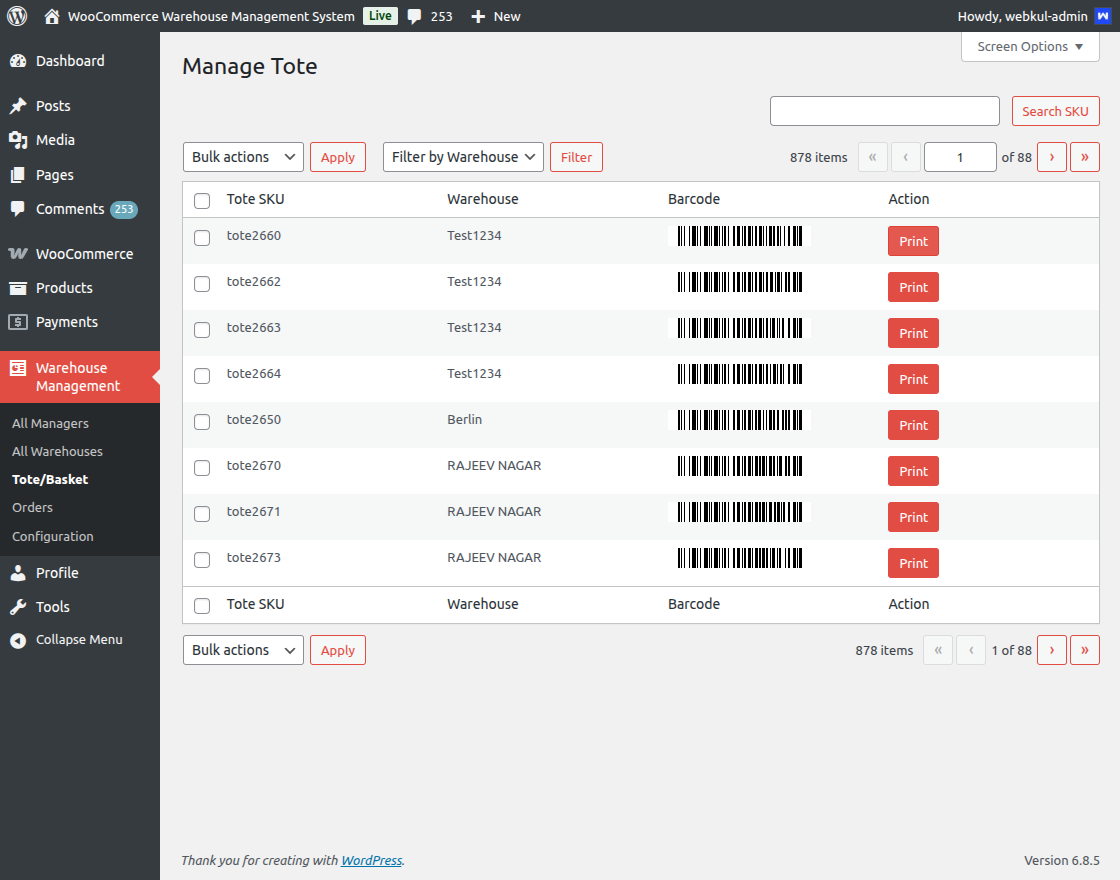
Manage Tote/Basket
In this section, the admin can print barcodes for the products either in bulk or separately. The admin can also search products by SKU and by the warehouse name.
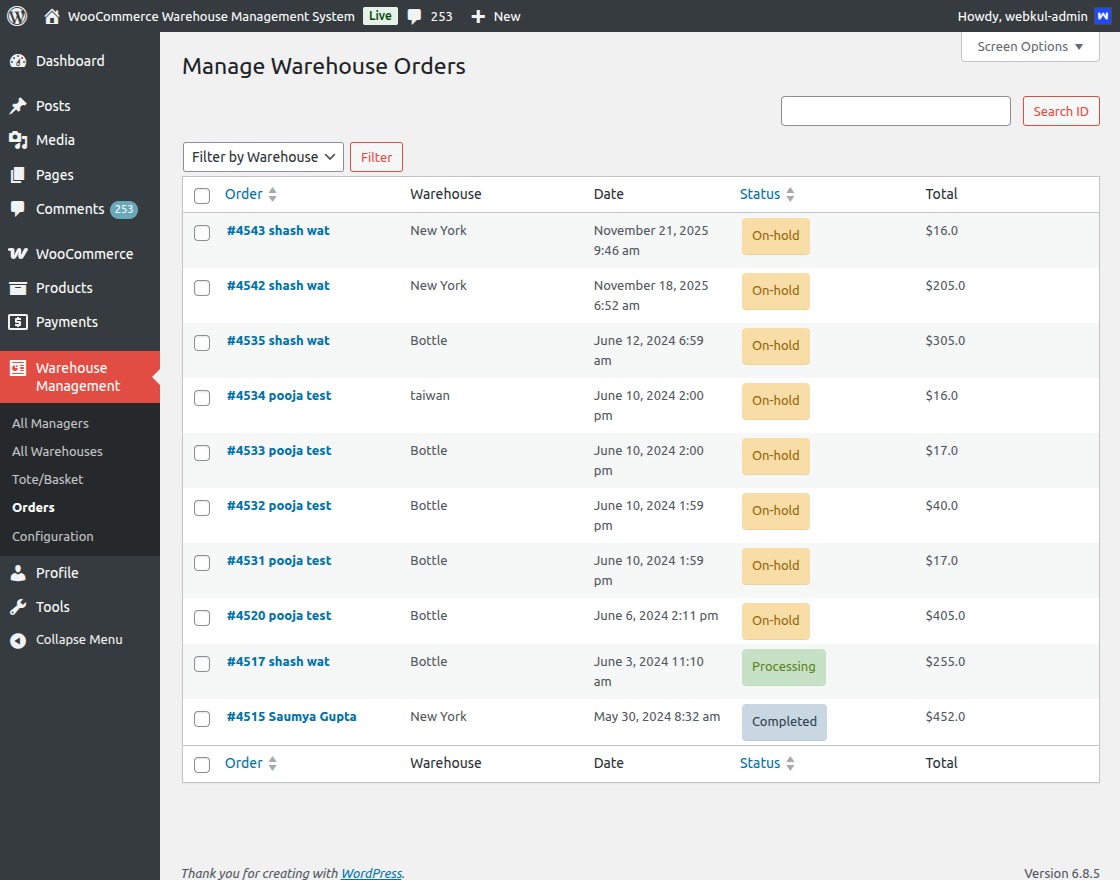
Order Management
Here, the admin can view various orders and can manage orders by assigning a warehouse and a warehouse manager for those orders.
Warehouse Management app
The first screen of the app is called the splash screen. It can be amended from the code end and will appear to the warehouse manager once they open up the WooCommerce warehouse management app.
Also, the warehouse manager needs to enter their Username and Password which was created by the admin, to log in to the application.


After the warehouse manager logs in to the application, they can see the Order List and Verify Option as shown in the image below:

Manage Order List
The warehouse manager of the warehouse will need to click on the order list and can view all the orders.
Further, the various colors of orders signify various statuses as:
When the color is orange, then the order is started, and the warehouse manager has to add a tote by scanning the barcode of the tote. If the color is red, then the order is initiated.
If the color is blue, then the order is picked, if the color is green, then the order is packed.
Each order will show different colors, and each color will signify the status of orders. As shown in the image, the red color shows that the order is initiated.

The warehouse manager can search for the order by entering the order ID as shown in the left image below:
Also, the warehouse manager can filter orders according to their status, as shown in the right image below:


Below is the order list filtered by the order status as initiated:

Scan the Tote
The warehouse manager will receive the notification whenever a new order is assigned to them.
The warehouse manager will click on the order and then add a tote to the order by scanning the barcode after clicking on add.

When clicked on add option ” is clicked, the warehouse manager will have to scan the barcode of the tote in which the product is to be assigned.
The warehouse manager needs to scan the tote to associate it with the order and to add the products to it.
The Warehouse manager can add multiple totes for a single order. Once the tote is added, the success pop-up will appear as “Tote Assigned Successfully”.


Once the tote assignment is complete, the order status will turn to Started i.e., Orange in color.

The warehouse manager can check other locations associated with that product by clicking on the ” view more as shown below in the image.


Scan Products
Once the tote is scanned, product scanning will start by clicking on the specific products available for the orders.
After clicking on the product, the scanner will be visible as shown in the left image below:
Once the scanning is complete, the green tick mark will be visible for the product, and the quantity will also be increased as shown in the right image below:


To add the product quantity, you must scan the product barcode first.
Tapping on the add quantity button will bring you to the next page, where you can increase and decrease the product quantity and pick them.
Once done, the quantity will be reduced from the selected location. The warehouse manager can edit the product quantity as well.


After clicking on the arrow button, the pop-up will be visible to submit the order for verification. With this, the order status will convert to Picked, i.e., Blue in color.


Order Verification
After scanning the tote, the color of the order will be changed. Now, after the warehouse manager has added all the products of the order into the tote, they can scan the tote for verification
Also, the warehouse manager can check that all the desired products are added to the tote or not, and can verify the order by clicking on verify and scanning the same tote again.

When the warehouse manager scans the tote, it will show all the products associated with that order that are in the tote, with the ordered quantity
The warehouse manager can easily verify the tote.


As a result, once the warehouse manager verifies the tote, the status of the assigned order changes to Packed, i.e., Green in color.

The verification will increase the accuracy of order pick, pack, and deliver, and will also decrease the delivery time and order accuracy errors, which leads to the easy processing of all the placed orders.
That’s all for the WooCommerce Warehouse Management System.
WooCommerce Support
If you have any doubts regarding the extension, please email us at [email protected] or create a ticket at our HelpDesk system.
For any technical assistance, please raise a ticket or reach us by mail at [email protected]
Also, Hire WooCommerce Developers for all kinds of services for web and mobile development, plugin development, mobile app, design services, and much more.
If you need custom WordPress Development services, then feel free to reach us and also explore our exclusive range of WordPress WooCommerce Extensions.
Thanks for Your Time! Have a Good Day!
Current Product Version - 1.0.3
Supported Framework Version - WooCommerce 7.0.0

One question about products…
Why is necessary to: Uploading products through CSV ?
All products are already in woocommerce, so do i need to import again al existing products as CSV file?
Thanks
Regards
Radu