Marketplace Event Manager for WooCommerce – The major part of any online store is customers. For this reason, e-commerce sites nowadays, mostly focus on a specific mass.
As to implement better marketing strategies to set a mark in the e-commerce industry
Having said this, we are aware that in today’s era, entertainment has become an essential part of man’s life. People look forward to visiting various events.
Such as live shows, live concerts, music concerts, etc during their leisure hours.
Marketplace Event Manager for WooCommerce extensions come with an interesting feature for admin and the sellers.
Both can add event products for any type of event like live shows, music concerts, etc.
This extension also allows the customers to add the events to the Google Calendars. Customers can purchase event products just like any other product.
This extension reduces the hassle of purchasing tickets for an event in multiple tedious steps. This would keep customers intact to your site, thereby increasing the conversion rates.
NOTES-
- Marketplace Event Manager for WooCommerce module is a marketplace add-on, so you must install Webkul WooCommerce Multi-Vendor Marketplace Plugin first.
- Check the brief overview of the plugin –
- This plugin is now compatible with WooCommerce’s latest High-Performance Order Storage (HPOS) and Cart and Checkout block.
We provide a production version of the plugin. If you want a development version then you can get it at an additional cost. Please contact [email protected] for it.
Features of Event Manager
- The site owner or the admin can add event-type products in the admin panel.
- Events products are created under the E-Tickets product type.
- The admin can enable the stock management for products.
- For event products, the admin can add regular as well as the sale price.
- Start-time, end-time, and event venue details are provided by the admin.
- The custom options are created by the admin for the event tickets.
- Sellers can create event-type products in the seller panel.
- Sellers can add the product details, start-time, end-time, and event venue details.
- Vendor can add custom options for the event tickets.
- The customer can check the nearby events by entering the location under upcoming events.
- The customer can check the event location in google map.
Installation of Event Manager
The user will get a zip file which he has to upload in the “Add New” menu option in the WordPress admin panel.
For this login to WordPress Admin Panel and Under the Dashboard hover your mouse over the “Plugins” menu option.
This which brings a Sub-Menu and then select the “Add New” option.

After this, you will see an option on the top of your page that is “Upload Plugin”, click the option to upload the zip file.

On clicking on the “Upload Plugin” option, below that you will see a button “Choose File”.
Click on the button to browse for the zip file as per the snapshot below.

After browsing the file, click the “Install Now” button to install the plugin as per the snapshot.

Now when the plugin is installed correctly, you will see the success message and an option to activate the plugin.
Click on “Activate Plugin” to activate the installed plugin.

NOTE– Check out how to Activate the WooCommerce Plugin through the purchase code and get updates on Webkul Modules directly on the Plugins page.
Module Translation
To know how to translate the module, you can click here.
Creating Google API Project Credential
To use this plugin, you must have API Project Credentials. Google API Project Credentials are required to configure this plugin.
Please click here to create a new project with your Gmail account.
1st step:
After opening the page, browse to Google Workspace, click on Google Calendar API and tap on Enable.

2nd step:
Next, Click on Credentials and then Create Credentials. Under the dropdown menu, click on API Key.
3rd step:
After clicking on API Key, the key will be generated as per the image below,

4th step:
In the next step, click on Close and then click on Create Credential again to generate OAuth Client ID

5th step:
Fill the OAuth Consent Screen details as asked in the following steps,


6th step:
After filling out the above information, you’ll be redirected to Create OAuth Client ID as per the image below,
7th Step:
Afterwards, from the Application Type dropdown, select Web Application and input a name for the same.

Enter the URL to be redirected to in the Authorized Redirect URL field and click on Create as in the image below,

8th Step
After clicking on Create, the OAuth Client ID will be created,

The above generated credentials will be used in the Admin configuration of the plugin as per the image below,
Sign Up – Twilio Account
To initiate your Twilio account, enter the name and email address. Afterwards, set a password and click on the start your free trial button

After it, a verification email is sent to the registered Email ID

Now, verify the the email by clicking on Confirm Your Email link enclosed within the email.

Next, enter your phone number and click on the Send Verification Code button.

Enter the verification code received on the number provided and then click on the submit button.

After clicking on Submit, a pop up will appear on the screen. Click on the Confirm button to activate the sandbox account as shown below,

Log In – Twilio Account
If you already have a Twilio Account, you can simply login using the registered Email ID and clicking on the Continue button.

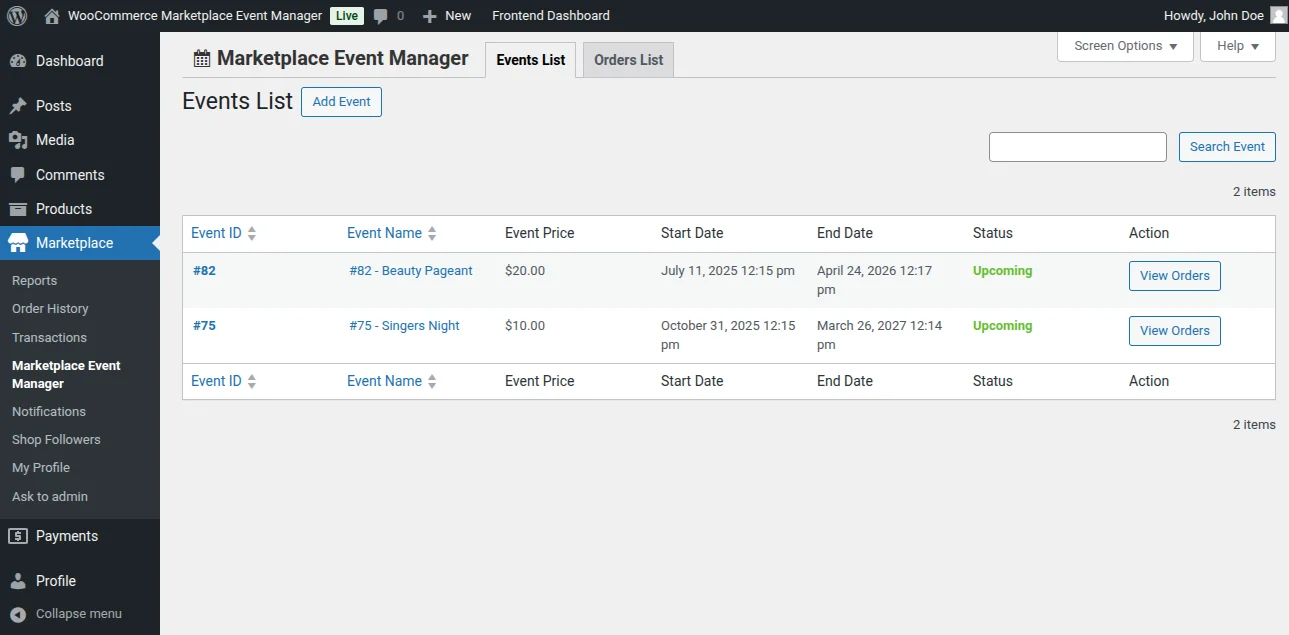
Event Manager- List & Configurations
After successful installation, the admin can configure the Marketplace Event Manager plugin by navigating through Marketplace > Event Manager.
The admin can manage the Events List and Configuration from here.
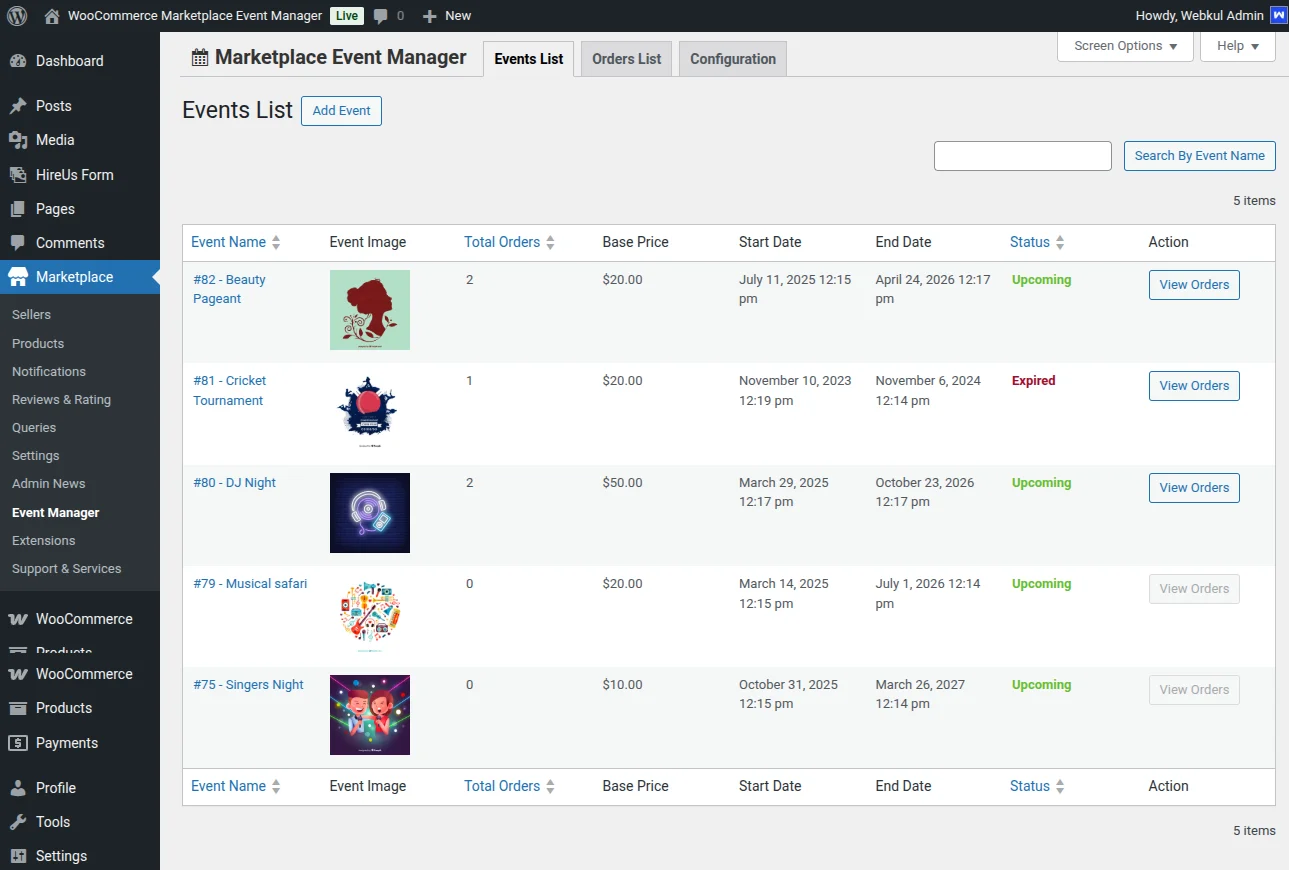
Events List
Under this section, admin can view the list of events and search using the Search bar provided.
They can also create a new event by clicking on the Add Event button.
Configuration
This section has Event Settings, SMS and SMS Template options which can be configured by the admin.
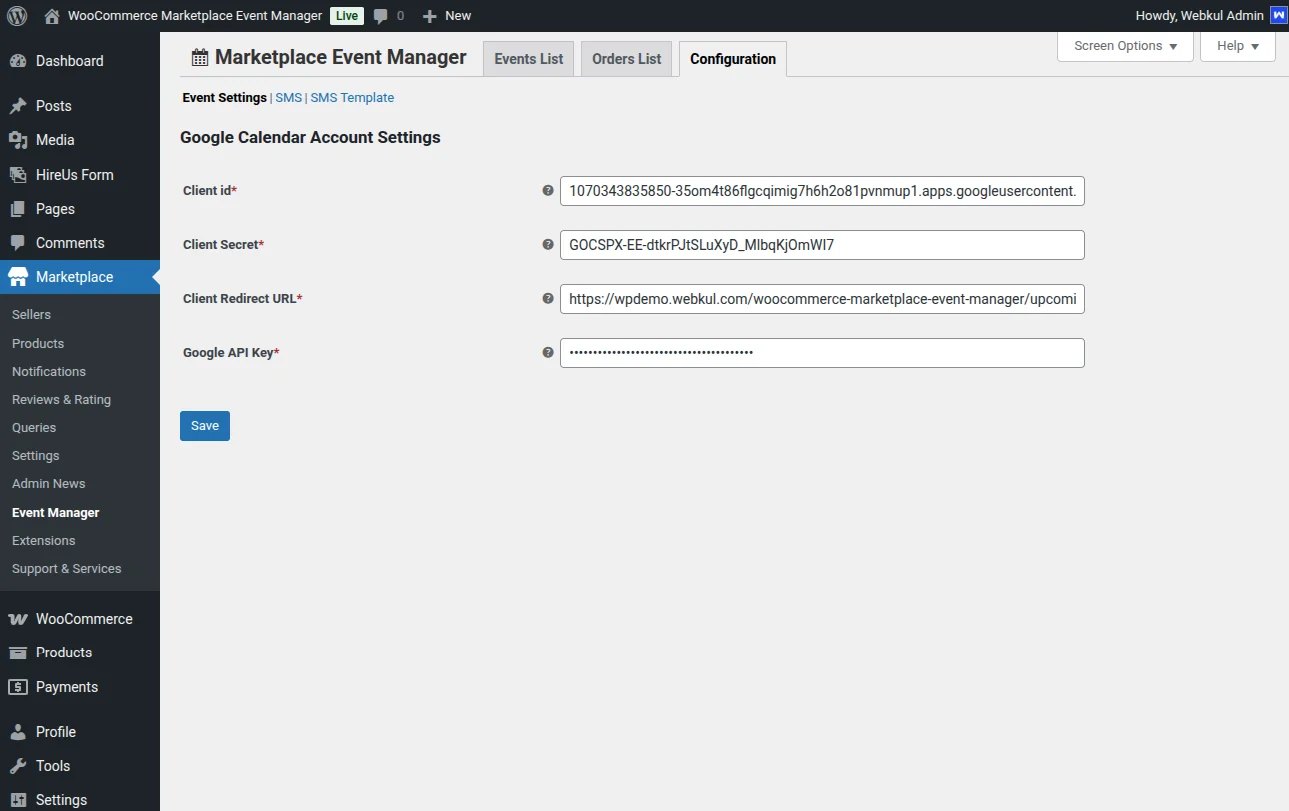
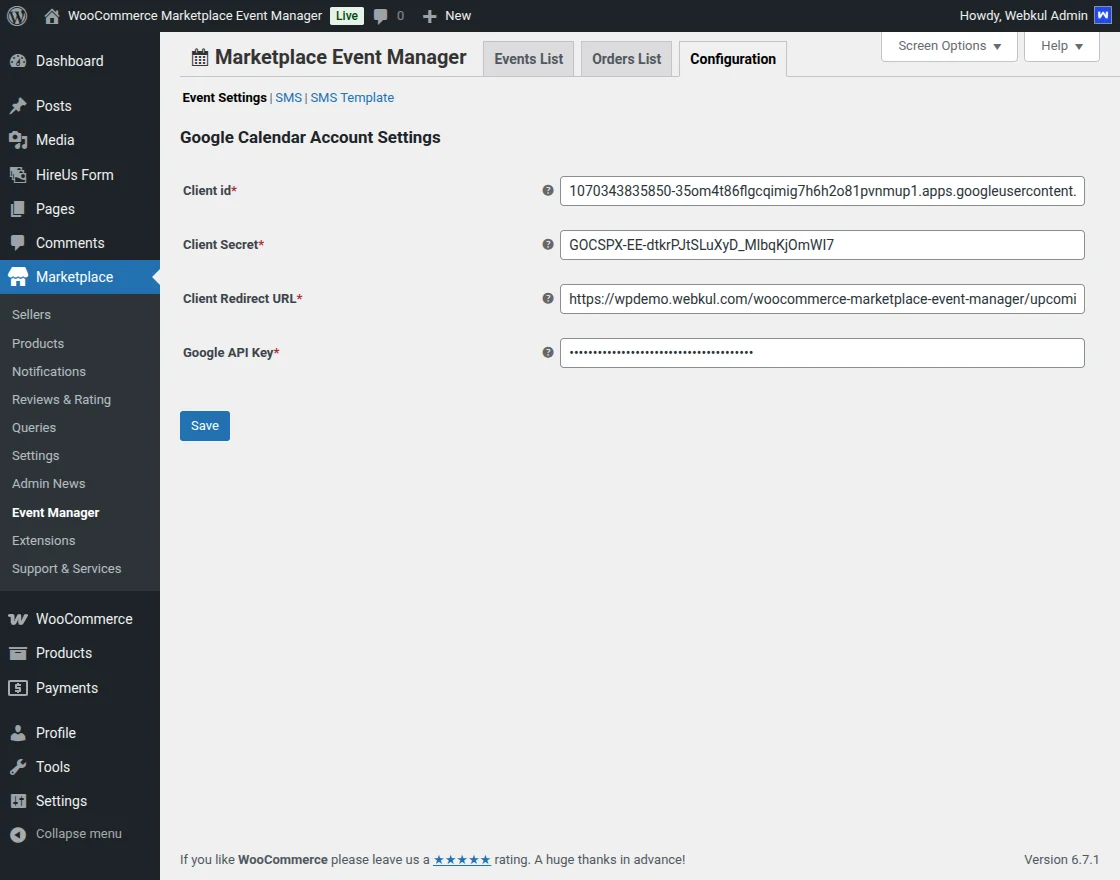
Event Settings – Here the admin will enter the Google API credentials to configure the Google Calendar Account.
The admin can configure the Event Setting credential details as follows:
The Client Id: Enter the client id retrieved from Google.
Client Secret: Enter the client secret key retrieved from Google.
The Client Redirect URL: Enter redirect URL for the upcoming events of the website.
Google API Key: Enter the Google API key generated.
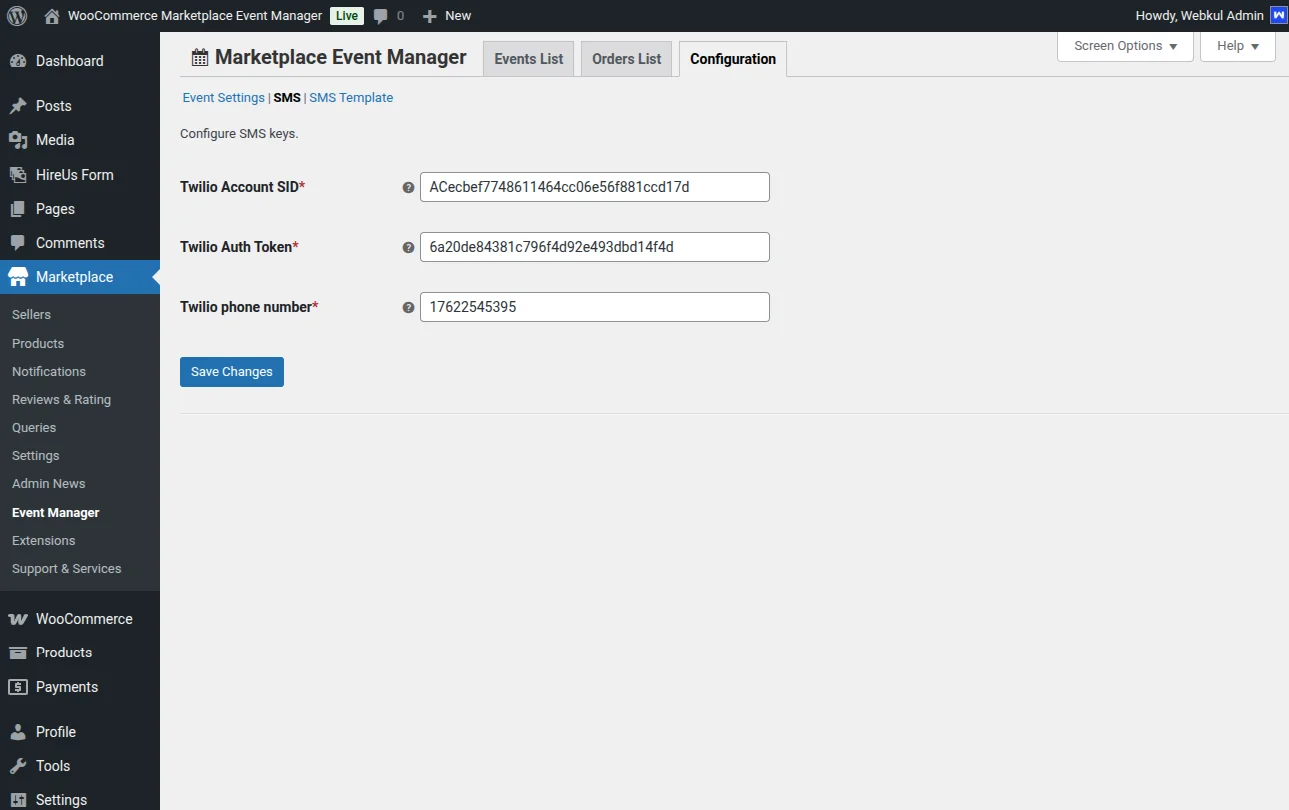
SMS – In this section, the admin will configure the Twilio credentials,
Setup Twilio Account SID: Enter the Twilio account string identifier here.
Twilio Auth Token: Enter the Twilio Authorization token detail here.
Twilio Phone Number: Enter the phone number here.
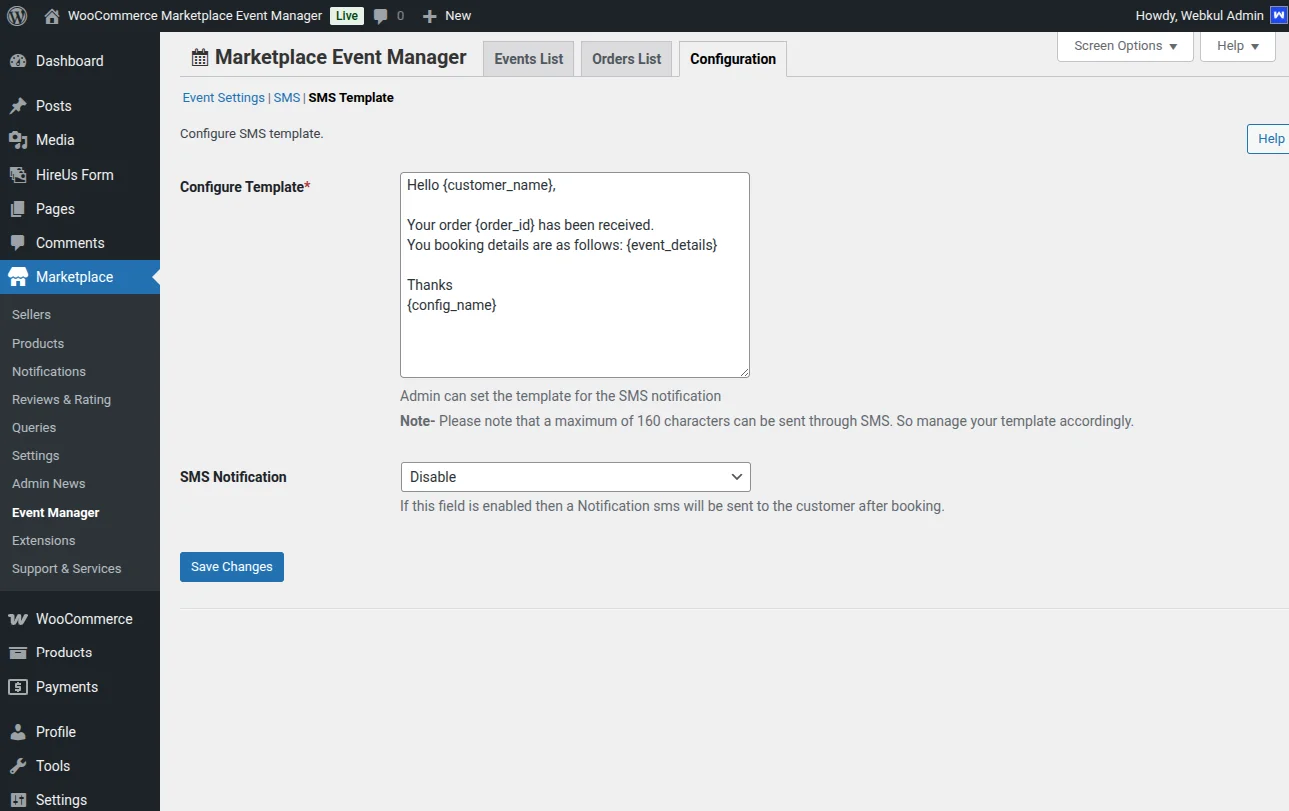
SMS Template – This section is for configuring the SMS template and the SMS notification.
Configure Template: Admin can edit the SMS template as per requirement.
SMS Notification: The SMS notification can be enabled or disabled from the dropdown menu.
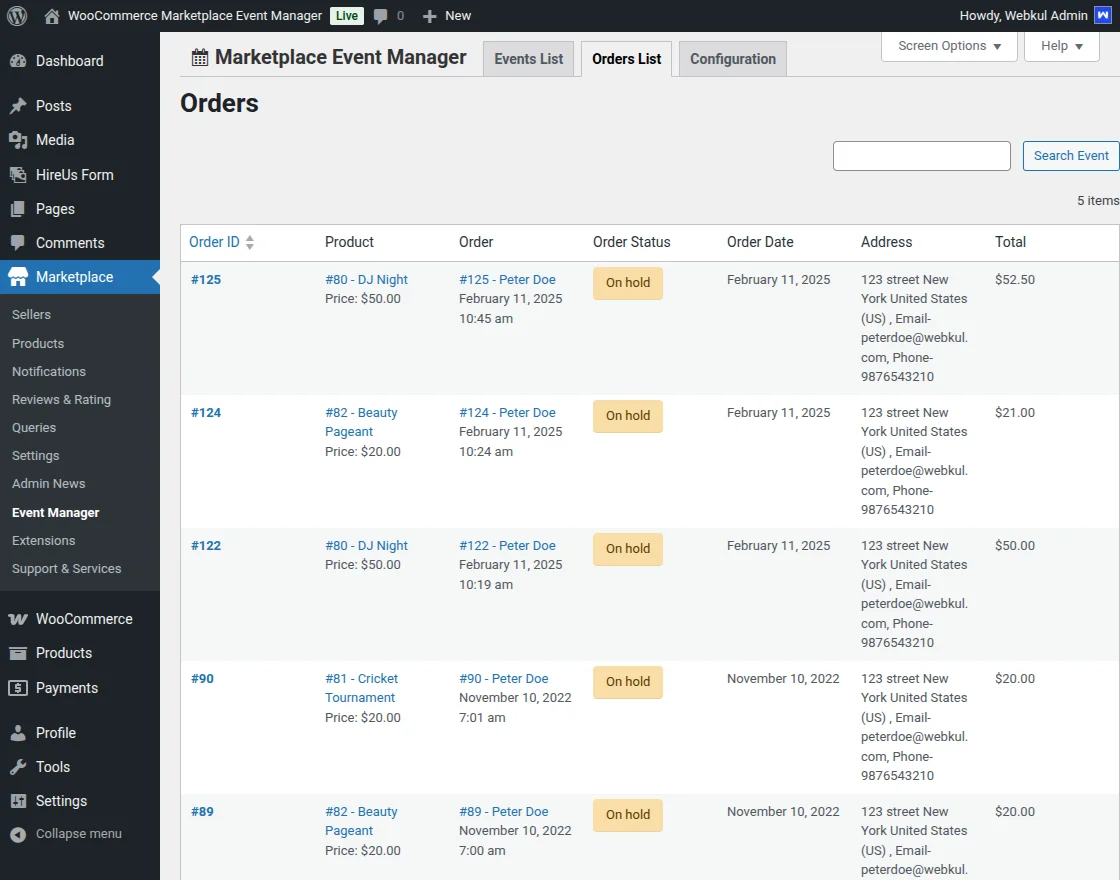
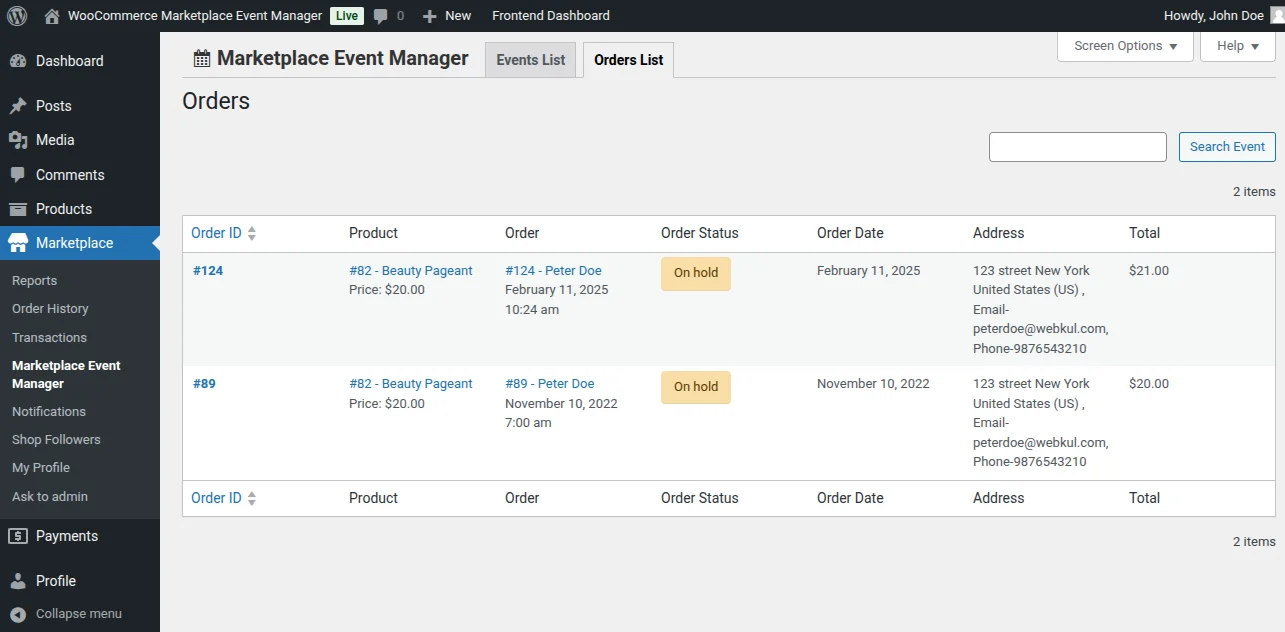
Orders List:
The Orders List feature in the Marketplace Event Manager for WooCommerce allows admins to view and manage orders related to events.
This section displays all event bookings and ticket purchases made by customers.
Admins can easily track order details like customer information, order status, and transaction history.
It helps streamline event management and ensures smooth coordination.
Admin End Management
After configuring the Marketplace Event Manager plugin, the admin can add a new event by adding a new product.
The admin can click on Add New option under Products tab in the admin dashboard.
On the Add New Product page, the admin can view the E Tickets option in the list given against “Product Data”.

The admin will have to choose “E Tickets” against “Product Data”. Additionally, the admin will tick the checkbox for the Virtual product option as shown in the image below.
On clicking the “General” tab option, the admin can provide the ‘Regular Price’ as well as the ‘Sale Price’.
For example, the admin has set the ‘Regular Price’ as 500 and Sale Price as ‘350’ in the image below.
Under the “Inventory > Stock Management” the admin will have to tick the ‘Track stock quantity for this product’ to enable the management of stock at the product level.
Configure Event Details
On clicking the”E Ticket”, the admin can configure the event details as shown in the image below.
The admin can configure the Event details as follows:
Enable terms: Tick ‘Enable terms’ in order to display the data of Event Term option in the frontend.
Event Term: Enter the event term which will be displayed in the front end.
Start time: The admin can add the start time of the event.
End time: Set the end time of the event.
Location: The admin can set the location of the event.
The admin can also provide the custom options for the tickets as shown in the image below.
On clicking the “Custom Options” tab, the admin can add custom options by clicking the ‘Add New Option’ tab.
For example, the admin adds VIP and Premium Tickets custom options, and their price, stock, sort order.
Similarly, the admin can also remove any custom option by clicking on the “Remove” tab.
Seller End Workflow
The seller can add a new product by navigating through Products and tapping on the “+” button in the seller panel in the frontend as shown in the image below.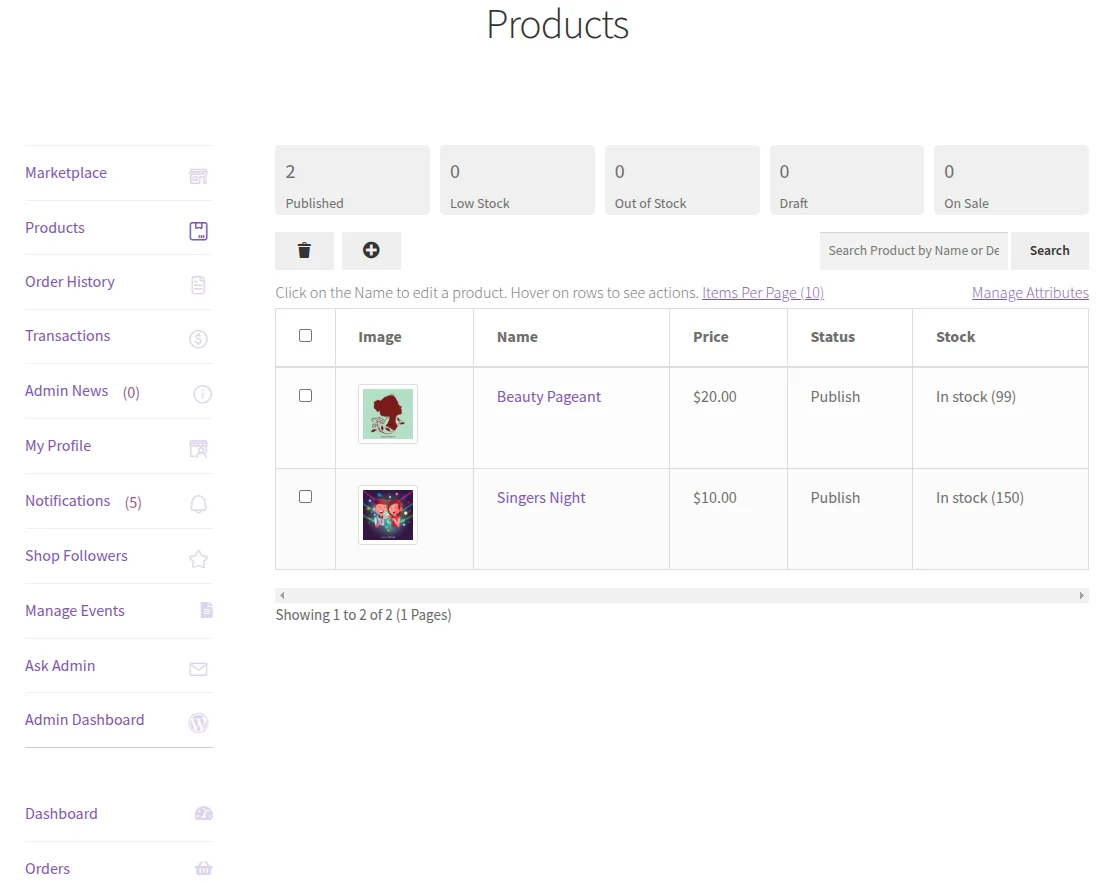
When a seller clicks on the Plus ‘+‘ button, it redirects the user to the Add Product page.
In the Add Product Page, the seller can choose a category/ categories against the “Product Categories” option and Choose Product Type as “E-Tickets” as shown in the image.
On clicking the ‘Next’ button, it redirects the seller to the product details page as shown in the image.
The seller can add the details of the products such as Product Name, Product Image, Product SKU, Regular Price, Sale Price, and Product Short description.
Once the seller fills in the details of the product, the seller can click on the ‘Save’ button to save the product details.
On saving the details of the product details, a message “Product Created Successfully” displays on top of the Page as shown in the image below.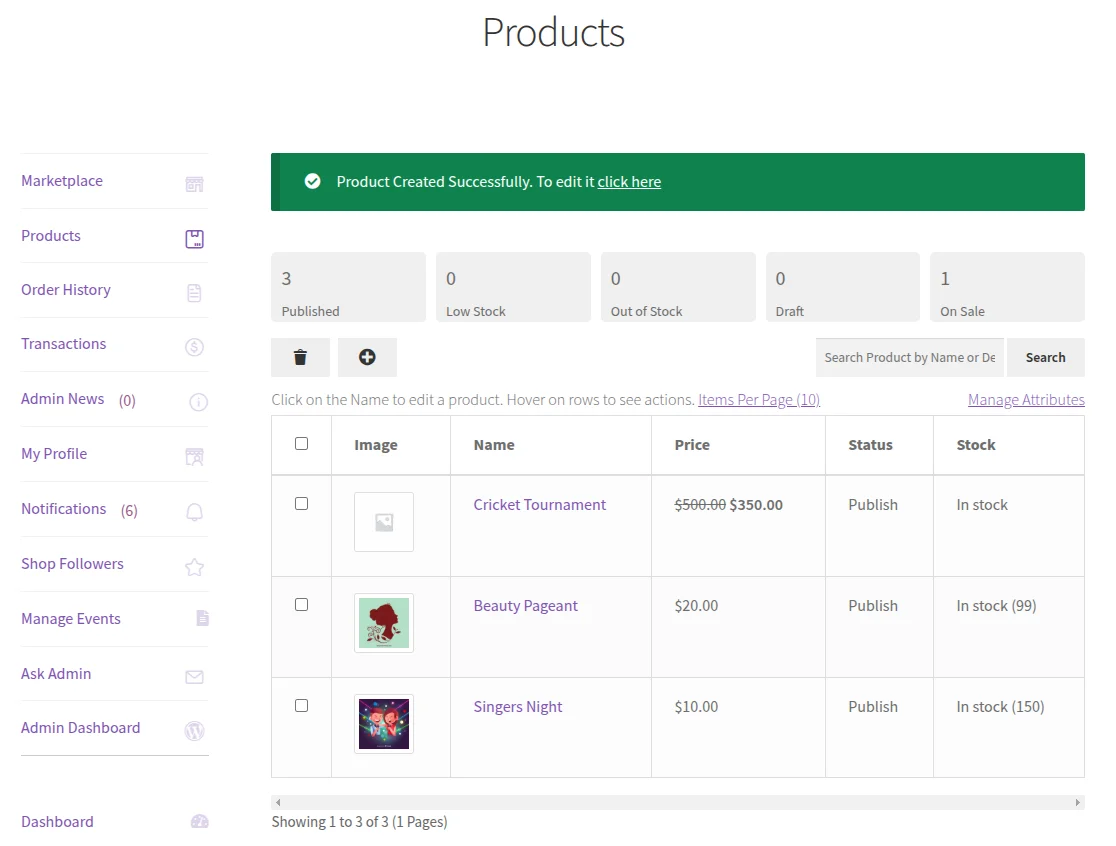
Edit Product
Once the seller creates the product and saves the product details, under “E-Ticket”, in the Edit Product page, the seller can configure the Event details.
The seller can configure the Event details as follows:
Enable Terms:
Tick the ‘Enable Terms’ to enable the Event Term option.
Event Term:
Add the details of the event which will display in the frontend.
Start time:
Mention the start time of the event.
End time:
Mention the end time of the event.
Location:
Mention the venue of the event.
The seller can click on the ‘Update’ button to update the details.
On configuring the event details under Custom Options, the seller can create custom options for the event tickets.
The seller can click on the “Add New Option” tab and create the custom options.
For instance, the seller creates VIP and Premium Tickets custom options, so as to configure the Price, Stock, and Sort Order accordingly, as shown in the image below.
Manage Event
The vendor can also do event management from their end by clicking on the Manage Event button. After clicking, it will display the Events List.
They will be able to view the list of events and also search through them with the help of the given search bar.
The seller will also be able to add a new event directly from this page by clicking on Add Event. It will redirect them to the new product creation page as show above.

Event Orders
The seller can also has an Event Orders where in they can check the details of the orders which they have placed themselves.
By tapping on event orders, a new page will open up where the seller will be able to view the Order number, Date, Status and Order total.
They will also be able to download the invoice of the order.

Seller Backend Workflow
With Marketplace Event Manager, sellers can access both the Events List and Orders List from the backend, similar to the frontend experience.
Events List:
Sellers can view and manage their events from the backend. This feature provides easy access to event details and allows quick updates. As shown in the image below.
Orders List:
Sellers can also track and manage their orders from the backend. They can view order status, customer details, and transaction history for their events. As shown in the image below.
Front End Workflow
The customers can click on the “Upcoming Events” tab and view all the events that are going to occur in the location which the customer enters.

On clicking the “Upcoming Events” tab, the customer will have to enter a location to search for the event
It will be taking place in that area or within the radius that the customer provides in Google Map. 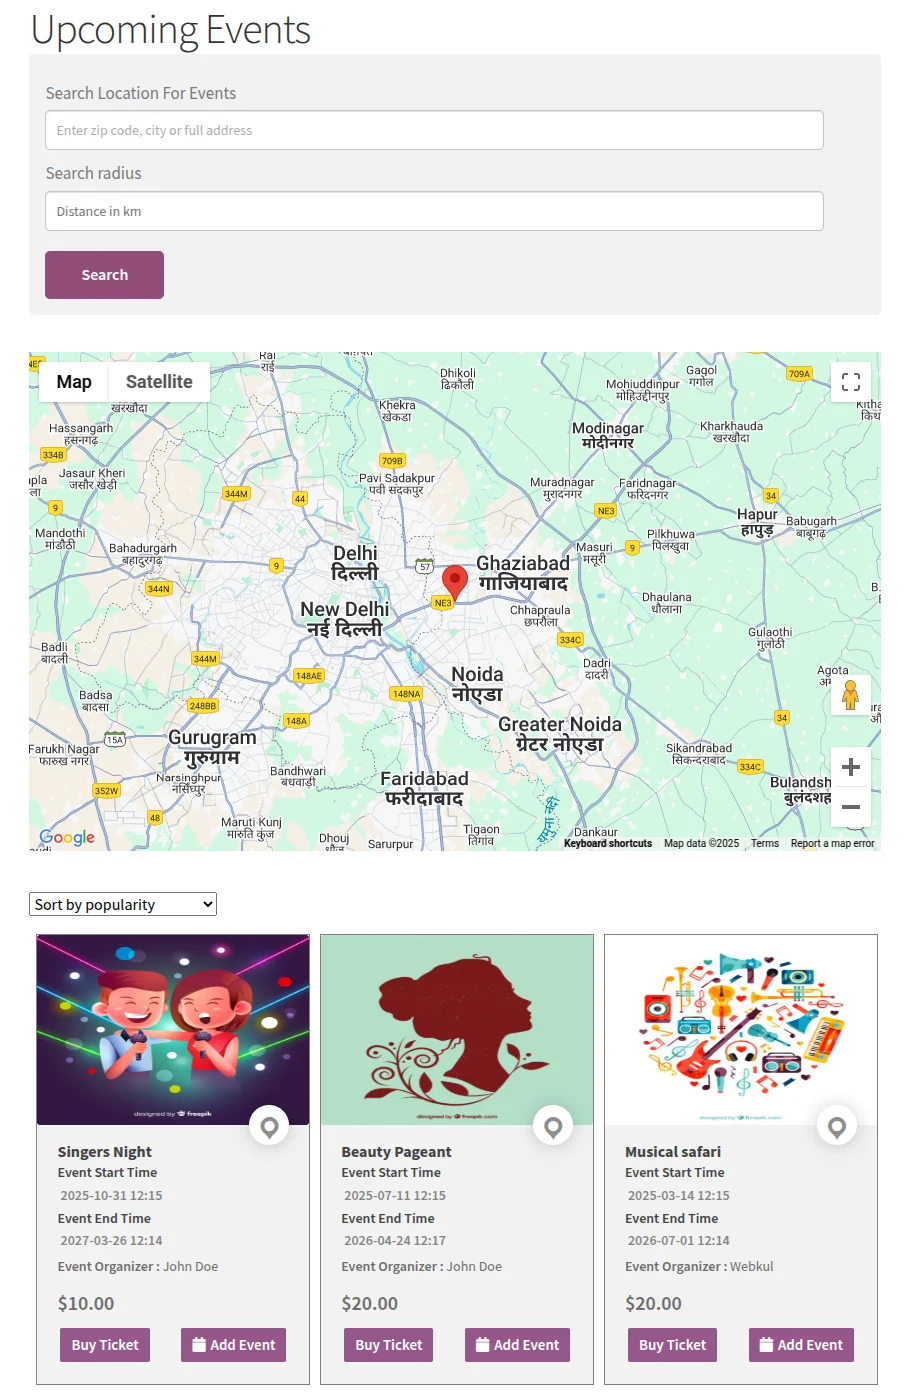
A customer can add the event to the Google Calander by clicking the “Add Event”.


The user clicks on the “Buy Ticket” button to buy tickets for the event.
On clicking the “Buy Ticket” button, it redirects the customer to the event page.
The customer can choose the options from the given list for the tickets and the relative price will display.
The customer can add the product to the cart proceed to check out and buy the tickets for the event.

Support
That’s all for the Marketplace Event Manager for WooCommerce. If you still have any issues, feel free to add a ticket and let us know your views on our Webkul Support System.
Current Product Version - 1.1.0
Supported Framework Version - Woocommerce Marketplace: 6.0.0, Woocommerce: 9.6.1, WordPress: 6.7.1

Be the first to comment.