To keep the customers intact in your store, it is important for entrepreneurs to keep looking for better options, to build an extensive marketplace.
They must strive to incorporate different ways and means to meet this motive as there are multiple options open to them.
WooCommerce Marketplace Vendor Subdomain offers one such option.
The admin may assign a domain or subdomain to the vendors and the vendors can exhibit their products under a separate shop page that completely belongs to them.
Different URLs shall create for each seller under the vendor domain or subdomain.
The customers can directly access the vendor’s sub-domain and buy products without having to visit the marketplace.
Note – This module is now compatible with WooCommerce’s latest feature Cart and Checkout blocks and High-Performance Order Storage (HPOS) feature.
Check how to activate your WooCommerce plugin through the purchase code and how you get updates on Webkul Modules directly on the Plugins page.
Note: This extension is an add-on to Webkul’s WordPress Woocommerce Marketplace Multi-Vendor module.
So, you must first install Webkul’s WordPress Woocommerce Marketplace Multi-Vendor module to make use of this extension.
Watch the video to understand the extension workflow:-
Features
- Admin may assign separate domain names to the vendors.
- Customers can directly purchase products from the vendor’s panel.
- The domain or the sub-domain may be used to display only the vendor’s products.
- Both the admin and vendor’s products will be displayed under the vendor’s domain or the subdomain.
- Allows admin to add prefix with vendor’s sub-domain.
- Wildcard feature for vendor subdomain Declared.
- Now its compatible with HPOS.
Installation
The user will get a zip file that he has to upload in the “Add New” menu option in the WordPress Admin Panel.
For this login to WordPress Admin Panel. Under the Dashboard hover your mouse over the “Plugins” menu option.
This would bring out a Sub-Menu and then select the “Add New” option.
After this, you will see an option on the top of your page that is “Upload Plugin”. Click on the option to upload the zip file.
Furthermore, by clicking on the “Upload Plugin” option, you will see a button “Choose File”. Click on the button to browse for the zip file as per the snapshot below.
After browsing the file, click the “Install Now” button to install the plugin as per the snapshot.
When the plugin is installed correctly, you will see the success message and an option to activate the plugin. Click on “Activate Plugin” to activate the installed plugin.
Backend Management

Enable Subdomain- The admin may set the Enable Subdomain as Enable or Disable, to enable or disable the subdomain for the seller.
Vendor subdomain Prefix- The admin may set the Vendor subdomain Prefix for the seller.
Enable Domain- The Admin may set Enable Domain as Enable or Disable and if both the domain and subdomain name are specified as enable, the priority is given to the domain name.
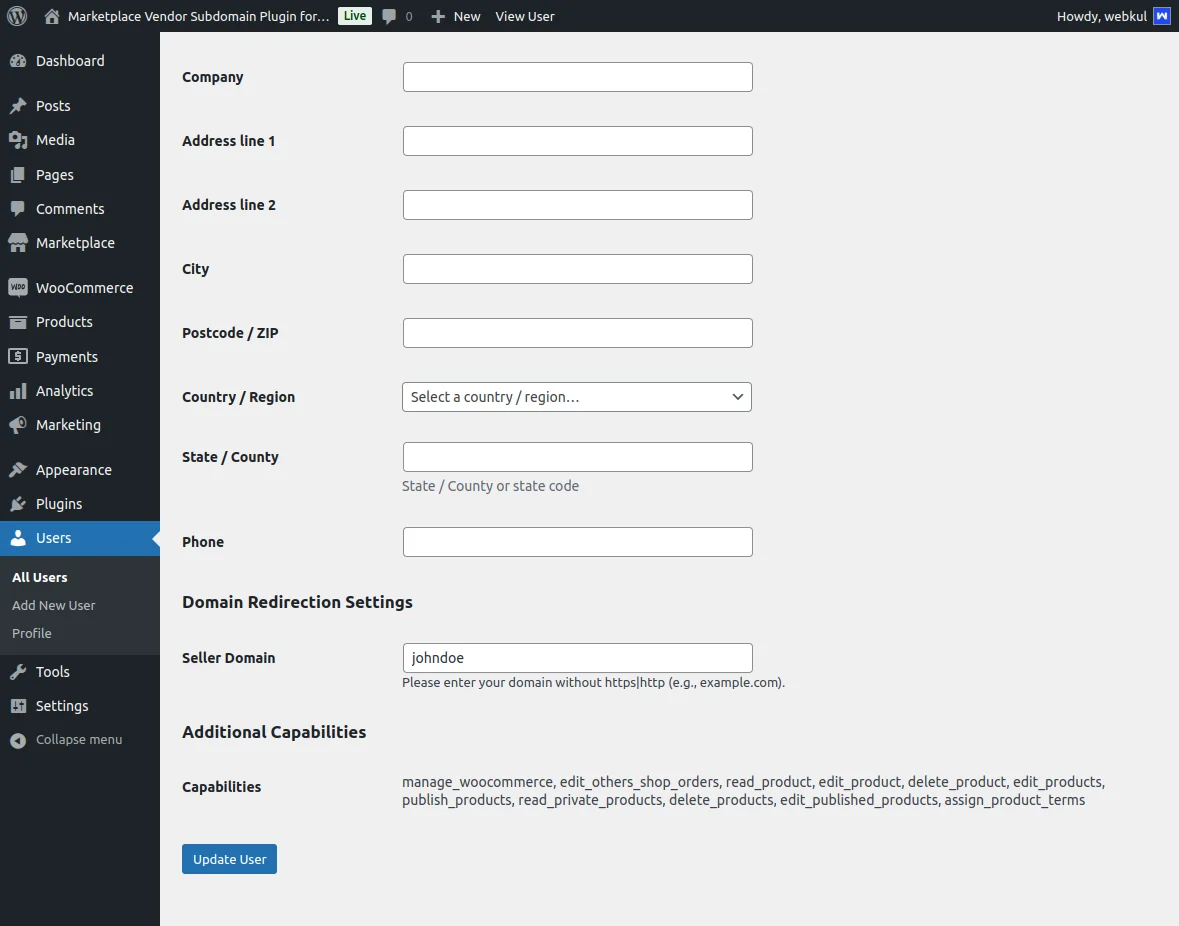
Note: If the Domain Name is set as Enable the Seller Domain option shall be visible under Users>All Users>Domain Redirection Settings.
The domain URL has to be set by the admin for the seller.
 Note – To use this module, Wildcard should be configured and mapped with your root server.
DNS Panel
WooCommerce Vendor Subdomain module allows the vendors to have their own subdomain or domain.
The module creates URLs for each vendor’s page under the vendor’s subdomain or domain.
Let’s say your website has the domain abc.com which is mapped to some IP address X.X.X.X.
And this server has a Webserver running whose document root is pointed to Woocommerce files and directories.
So, if you want to allow vendors to have their own subdomain or domain that can be accessed by the customers directly for purchasing products, then follow the steps mentioned below:
Let’s presume you want to facilitate a vendor (with the keyword newseller) to use a subdomain for its products.
1. DNS panel entry:
1). Create an A entry in your DNS panel for newseller.abc.com and map it your server IP address X.X.X.X
2). Ping and check if newseller.abc.com is resolving to the mapped IP address or not.
2). Configuring Web Servers :
Once DNS entry has been done, configure your webserver to complete subdomain configuration process.
Configuring Apache Web Server:
Add entries in /etc/apache2/sites-available/000-default.conf as:
<VirtualHost *:80>
ServerName newseller.abc.com
ServerAdmin webmaster@localhost
DocumentRoot /path/to/woocommerce/files
</VirtualHost>
Edit above, uncomment ServerName and replace your required domain name with
www.example.com and add ServerAlias with *.domain name as below:
<VirtualHost *:80>
ServerName test.webkul.com
ServerAlias *.test.webkul.com
ServerAdmin webmaster@localhost
DocumentRoot /var/www/html
</VirtualHost>
Configuring Nginx Web Server:
Add entries in /etc/nginx/sites-available/default as:
server {
listen 80;
root /path/to/woocommerce/files;
server_name newseller.abc.com;
index index.html index.htm index.nginx-debian.html;
## Add rest of the Nginx Configuration here ##
}
server {
listen 80 default_server;
listen [::]:80 default_server;
…
root /var/www/html;
# Add index.php to the list if you are using PHP
index index.html index.htm index.nginx-debian.html;
server_name test.webkul.com *.test.webkul.com;
…
}
3). Now hit the URL newseller.abc.com on the browser and check if everything’s working properly or not.
Note: By clicking on this link, you can see the DNS configuration.
Frontend View
The admin configures the Seller Domain under Domain Redirection Settings.
The domain is visible on the front end, for example, here-” https://wordpressdemo.webkul.com/marketplace-vendor-subdomain/product/hoodie-with-zipper/”
This URL is being display on the URL tab. 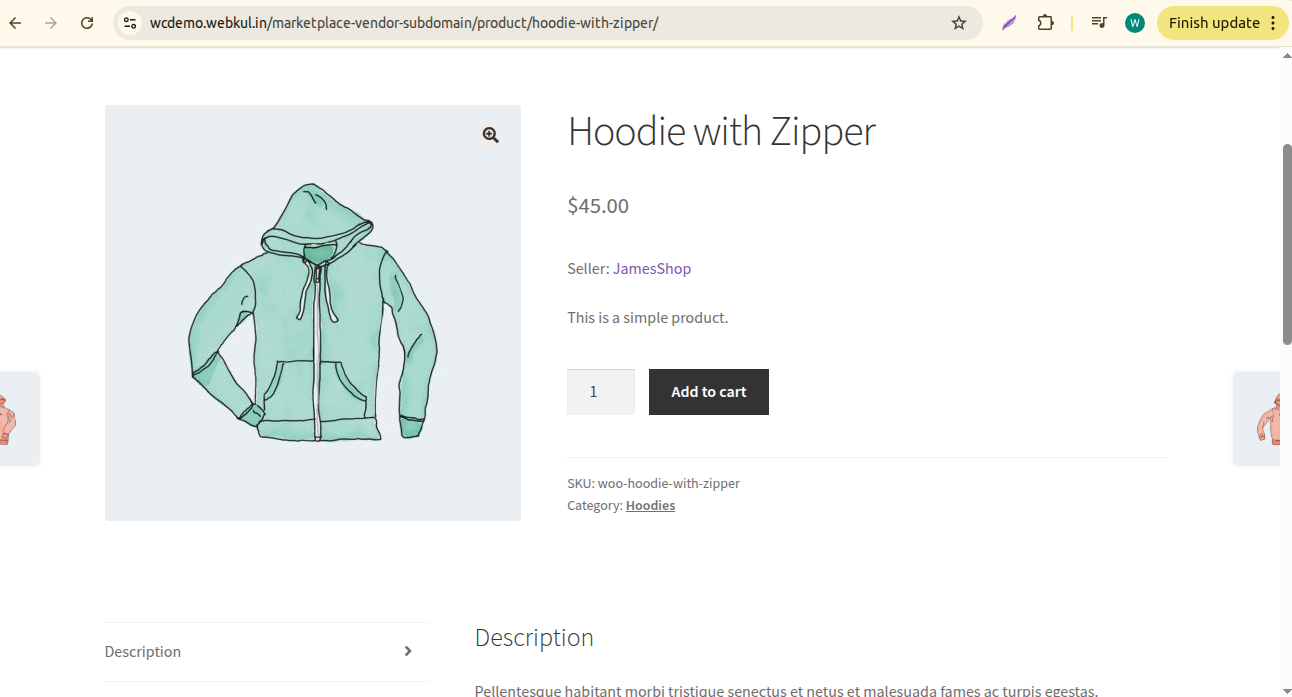
Furthermore, the admin sets Enable Subdomain as Enable and Enable Domain as Disable from the backend.
Then only products that belong to the seller, selected by the buyer, shall display at the “SHOP” page.
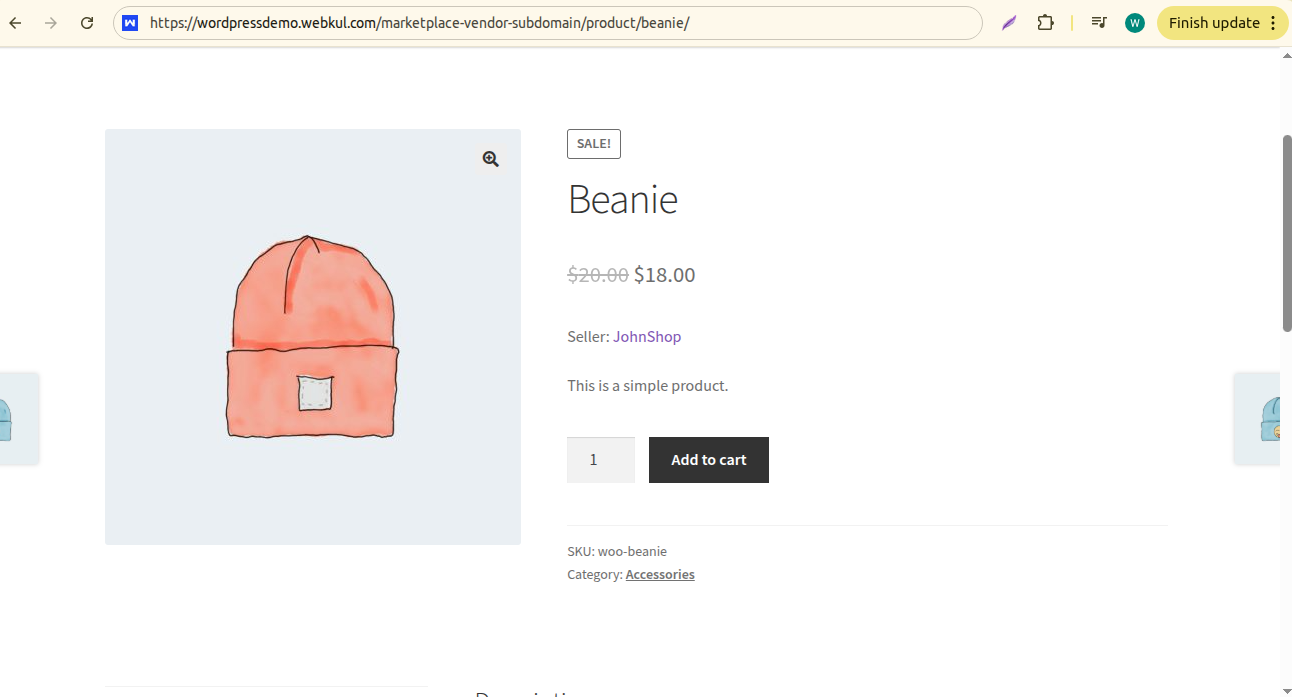
Here, in the image below, the customer has selected the “Long Sleeve Tee” which belongs to the seller “John Shop”.
We can see the subdomain URL. This URL belongs to “John Shop” which is different from the URL when the Domain name is set as Enable.
The customers may choose a particular seller’s product, for example, JohnShop’s product wristwatch as shown in the image below.
Moreover, at the bottom of the page, one can see the subdomain URL which belongs to the vendor- Jhon Shop.
for example- ” https://wordpressdemo.webkul.com/marketplace-vendor-subdomain/product/belt/”.
Furthermore, The customer may simply hover the cursor over Seller- JohnShop and view the URL at the bottom of the page.
For instance- ” https://wordpressdemo.webkul.com/marketplace-vendor-subdomain/product/beanie-with-logo/“
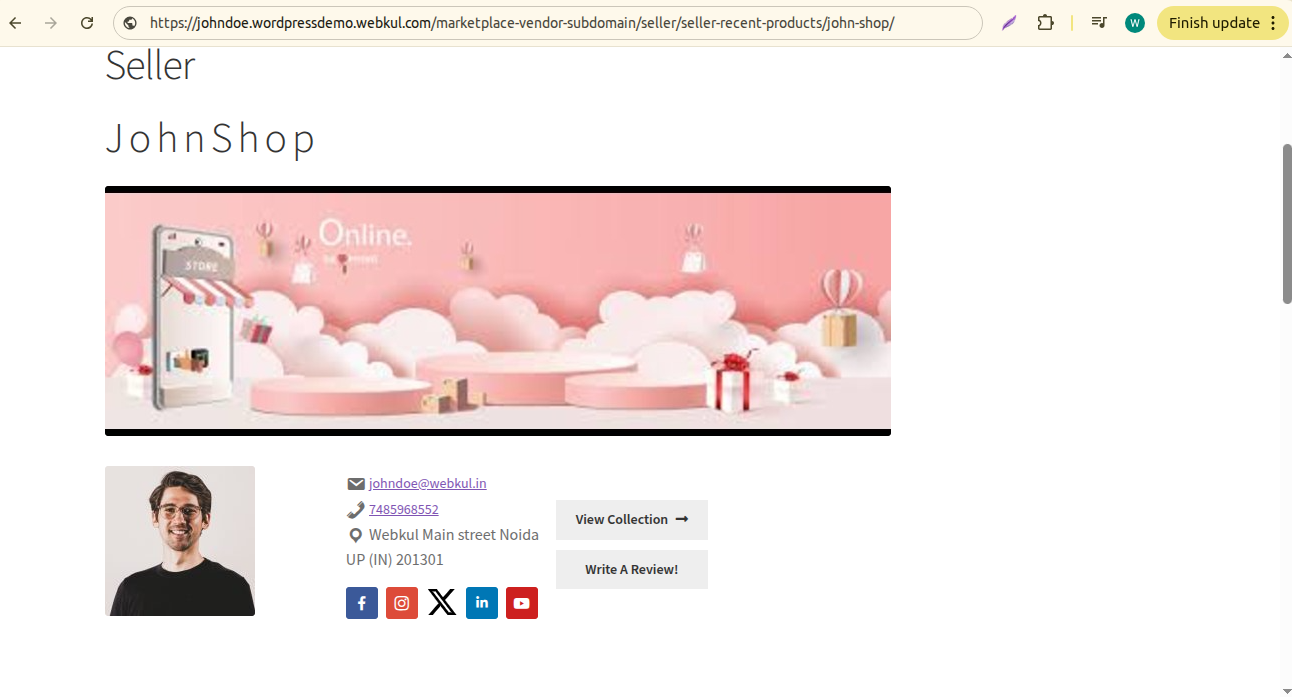
Moreover, on clicking the shop URL- Johnshop, the Seller- Michael Snow’s separate product page shall open.
![]()
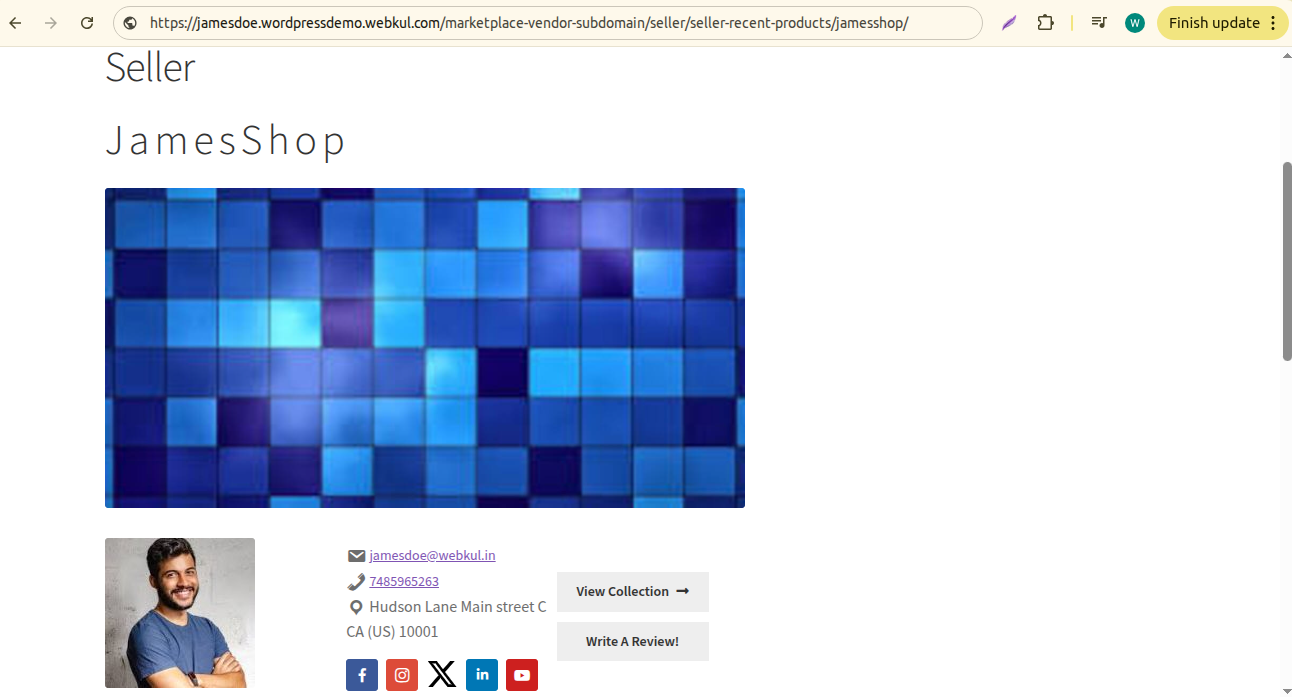
The page displays only JohnShop’s products under the URL- “https://johndoe.wordpressdemo.webkul.com/marketplace-vendor-subdomain/seller/seller-recent-products/james-shop/” which is visible on the URL tab.
That’s all for the Word Press WooCommerce Marketplace Vendor Subdomain.
If you still have any issues, feel free to add a ticket and let us know your views on our Webkul Support System.
Current Product Version - 2.0.2
Supported Framework Version - WordPress: 6.8.x WooCommerce: 10.x.x, WooCommerce Marketplace: 6.4.0

6 comments
Our marketplace vendor sub domain does not work with B2B marketplace plugin. Kindly email us at [email protected] with your full detailed requirement so we can assist you better.
Thanks,
Team Webkul
Also what about Fully Qualified Domain Names? You say “domain or subdomain” but then you do not clarify. If I am offering to vendors to sign up at my marketplace.com, but they want to use their own domain to participate such as shoestore.com, is this possible with your code?
I am really looking for that very application to set up a new marketplace!!
Thanks so much for your help 🙂
Thanks for dropping by and letting us know your concern.
Firstly let me jot down these two points for you to have a clear idea-
In case of adding the Domain, you will have to add the config file of the server for adding the seller URL again and again. The reason being, mapping would take place between the seller and the URL.
In case of sub-domain, you need to add the config file only once, and later it will map dynamically, and you will not have to add the config files again and again.
As per your query, in the second part you have mentioned an example-
“If I am offering to vendors to sign up at my marketplace.com, but they want to use their own domain to participate such as shoestore.com, is this possible with your code?”
Here, you have said “but they want to use their own domain.” As they wish to use their domain, you will have to add the config files.
I hope this answers your query. If you still face any issue, please do let us know at [email protected]
Thanks
Thanks for the query.
The seller is not allowed to select their subdomains at the time of registration due to security reasons.
Also, if the seller is approved, he may ask the admin for the samevia Ask to Admin.
You would better understand and explore this scenario once you purchase the module. For security reasons, this feature cannot be provided to the sellers.
For further queries, please contact us [email protected] so that we can assist you on your queries.