Introduction
Instagram Shop Feed For Woocommerce is a perfect form of advertising the product via social media platform as Instagram.
The plugin gives the power to display Instagram Feeds on the product page, collection page and on a special page dedicated to the Instagram feeds.
Instagram feeds here refer to the post shared by the product user which gives a clear image of the product in real life.
Thus, this will help in increasing the user’s trust over the product and encourage them to purchase the product.
Note:
- It is mandatory to have an Instagram business account connected with a Facebook page.
- The user needs to register for the Facebook developer account and must possess a basic configured Facebook App.
To get a more clear idea of the module, kindly review the video below-
Features – Instagram Shop Feed For Woocommerce
- Admin can easily create the hashtag and assign it to the products.
- The admin can edit the existing tags and fetch images that are using the same tags.
- The attraction of maximum customers as now they can view the products in reality by the images uploaded on Instagram.
- The customer can view related images of the product without the requirement of actually browsing it on Instagram.
- Admin can select the pages(Product page, Shop page, and Dedicated page(Instagram Feed page)) where the tag will be visible.
Installation
The user will get a zip file which he has to upload in the “Add New” menu option in the WordPress admin panel.
For this login to WordPress Admin Panel and Under the Dashboard hover your mouse over the “Plugins” menu option which brings out a Sub-Menu and then select the “Add New” option.
After this, you will see an option on the top of your page that is “Upload Plugin”, click the option to upload the zip file.
By clicking on the “Upload Plugin” option, below that you will see a button “Choose File” click on the button to browse for the zip file as per the snapshot below.
After browsing the file, click the “Install Now” button to install the plugin as per the snapshot.
Now post complete installation of the plugin, you will see the success message and an option to activate the plugin. Click on “Activate Plugin” to activate the installed plugin.
After activating it, the marketplace tab will appear in the admin panel like in the snapshot below.

Update Permalink under “Settings > Permalinks” as “Post name” as in the below snapshot.

Webkul Add-on
Here the admin can check their addons and by clicking on “Setting” they will get an API credential page where they can enter their credentials.
Facebook Developer Registration
Once, you have logged into your Facebook account firstly, go to the Facebook for Developer webpage.

Click Get Started and confirm your email address select developer in the section for About you and complete registration.

Create App – Settings
Right after, completing the registration the user is redirected to the below page. Here, click Create App.

Further, select the Manage Business Integration option and press Continue.

After, entering your App Display Name & App Contact Email click the Create App.

To proceed, the user needs to add the Facebook Login in the section Add products to your App. As a result, the Facebook login will be added to your Products.
Click on the Facebook Login > Settings.

Further, enter your redirect URL in the Valid OAuth Redirect URLs band and Save Changes.
Note: The user can add more than one redirect URLs.

Add Product – Instagram Graph API
Click the Add product icon and then press the Set Up button under the Instagram graph API.

The user will be redirected to the below page.

In order to be able to use this API in Live mode, the user needs to undergo the process of App Review and permissions for the below.
- The Instagram Public Content Access feature.
- The Instagram Basic permission.

Retrieve APP ID & Secret Key
In order to fetch the APP ID & Secret Key just go to the Settings > Basic in the side bar menu of the Facebook for developer Dashboard itself and copy your APP ID & Secret Key.

Connect to Facebook
In order to be able to fetch the images so your Facebook account must be connected. For this the admin can now go to the Instagram Shop Feeds > Settings. Here, save your Facebook APP ID and FB Secret Key and then click Connect to Facebook.

Note : For the Facebook Access Token this will be Fetched automatically, once you have saved app ID, secret key and then connect to facebook. Moreover, the lifetime of access token is nearly 60 Days.
After that in the pop-up window that will appear simply click on Continue to complete the log in.

After login, you can see that you are connected.

Configuration
The admin can now go to the Instagram Shop Feeds tab from where new tags could be created and a list of created tags could be displayed.

To edit the view of the Instagram feed in the front end The admin can go to the Instagram Shop Feeds > Settings select the type of view carouse or list view under the Instagram feed view section and click Save Settings.

The admin can click on Add Instagram Tags in order to create new tags. The admin here needs to fill-
- Instagram Hash tag– The title of the hashtag will be mentioned here.
- Instagram linked Products– The admin can specify the list of product which is linked to the tag.
- Hashtag Visibility– The list of pages here can be mentioned where the hashtag is required to be made visible.
- Hashtag Priority– The admin can set at which priority level the tag is.
- Status– The admin can enable the tag to make it visible and can disable it to hide it.

The admin can now click on the Instagram Shop Feeds page to view the list of tags.
Note-In order to create new tags the admin clicks on Add New.
However, the admin can even edit or delete a tag from here.
Edit And Fetch Images From Tags
After creating the tags, the admin will now fetch images from the tags. For this, the admin will navigate to the Instagram Shop Feeds tab. Further, the admin will click on the Edit button for the particular tag.

After that, the admin move to the tag edit page. Here, the admin will click on the Fetch Image button present at the bottom of the page.

Further, an image popup will appear including the images with the same hashtags. The admin will select desired images among them. And, then the admin will click on the import button.

Finally, the admin will be able to see the list of fetched images. The admin can also take bulk actions like Delete, Enable, and Disable on those images. The list will be visible as shown in the image below:

Frontend
The customer can view these tags on various pages- Product page, Shop page, and Dedicated page(Instagram Feed page).
The images will also appear along with the products in the tag.
Product Page-
The customer can go to any product to which the tag is attached. The customer needs to scroll down and in the Featured Post of buyers from the Instagram section, they can view the attached tags.
These tags contain the image related to the product as getting populated on Instagram handles.
Shop Page(Collection page)-
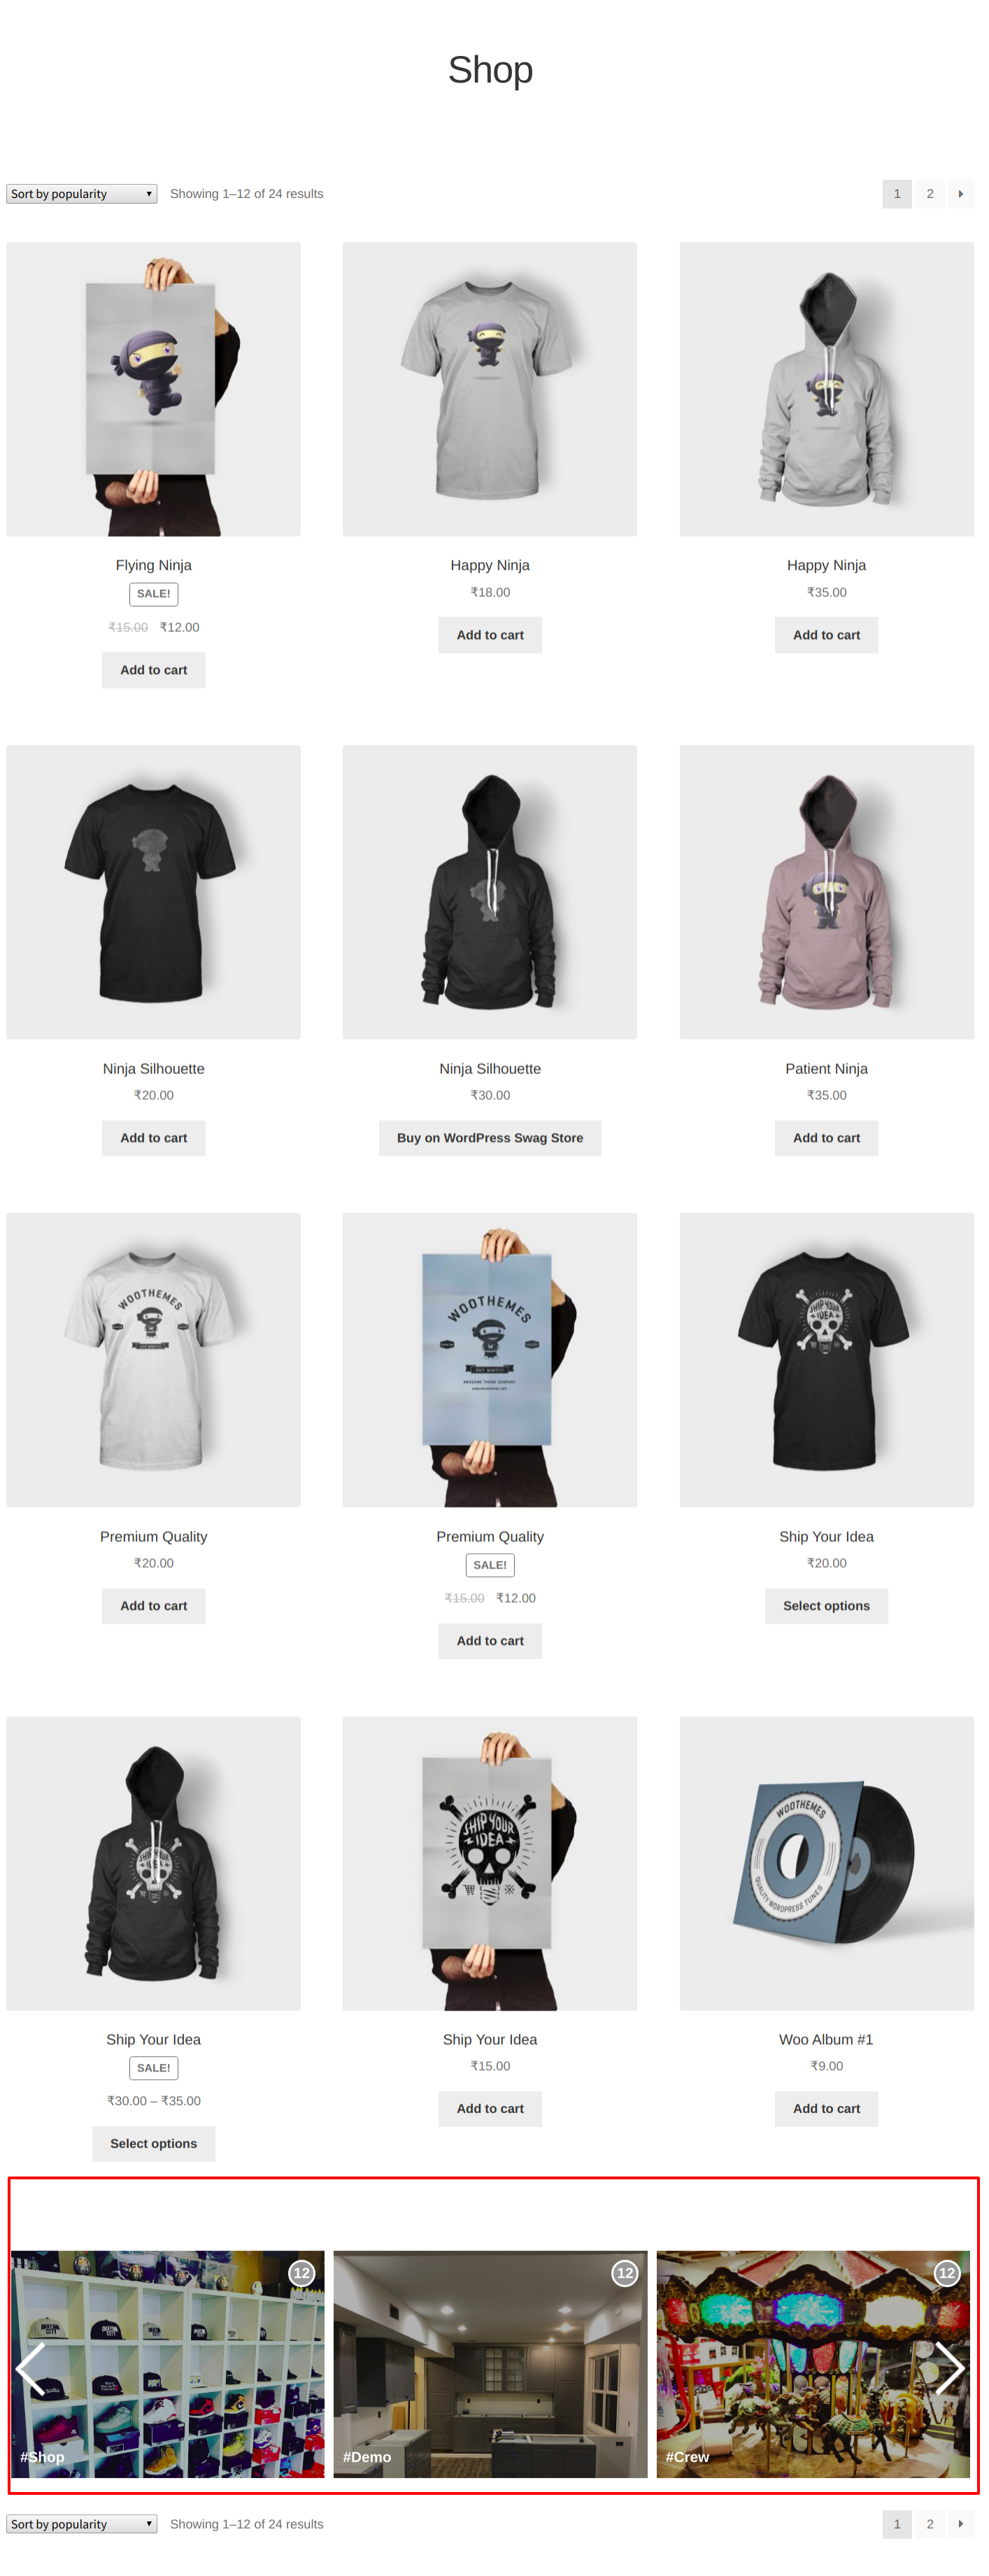
The customer can view the hashtags in this section also in the form of a carousel or list as set by the admin. Now, the customer can click on view product to see the related product to the hashtag.
Dedicated Page(Instagram Feed Page)-
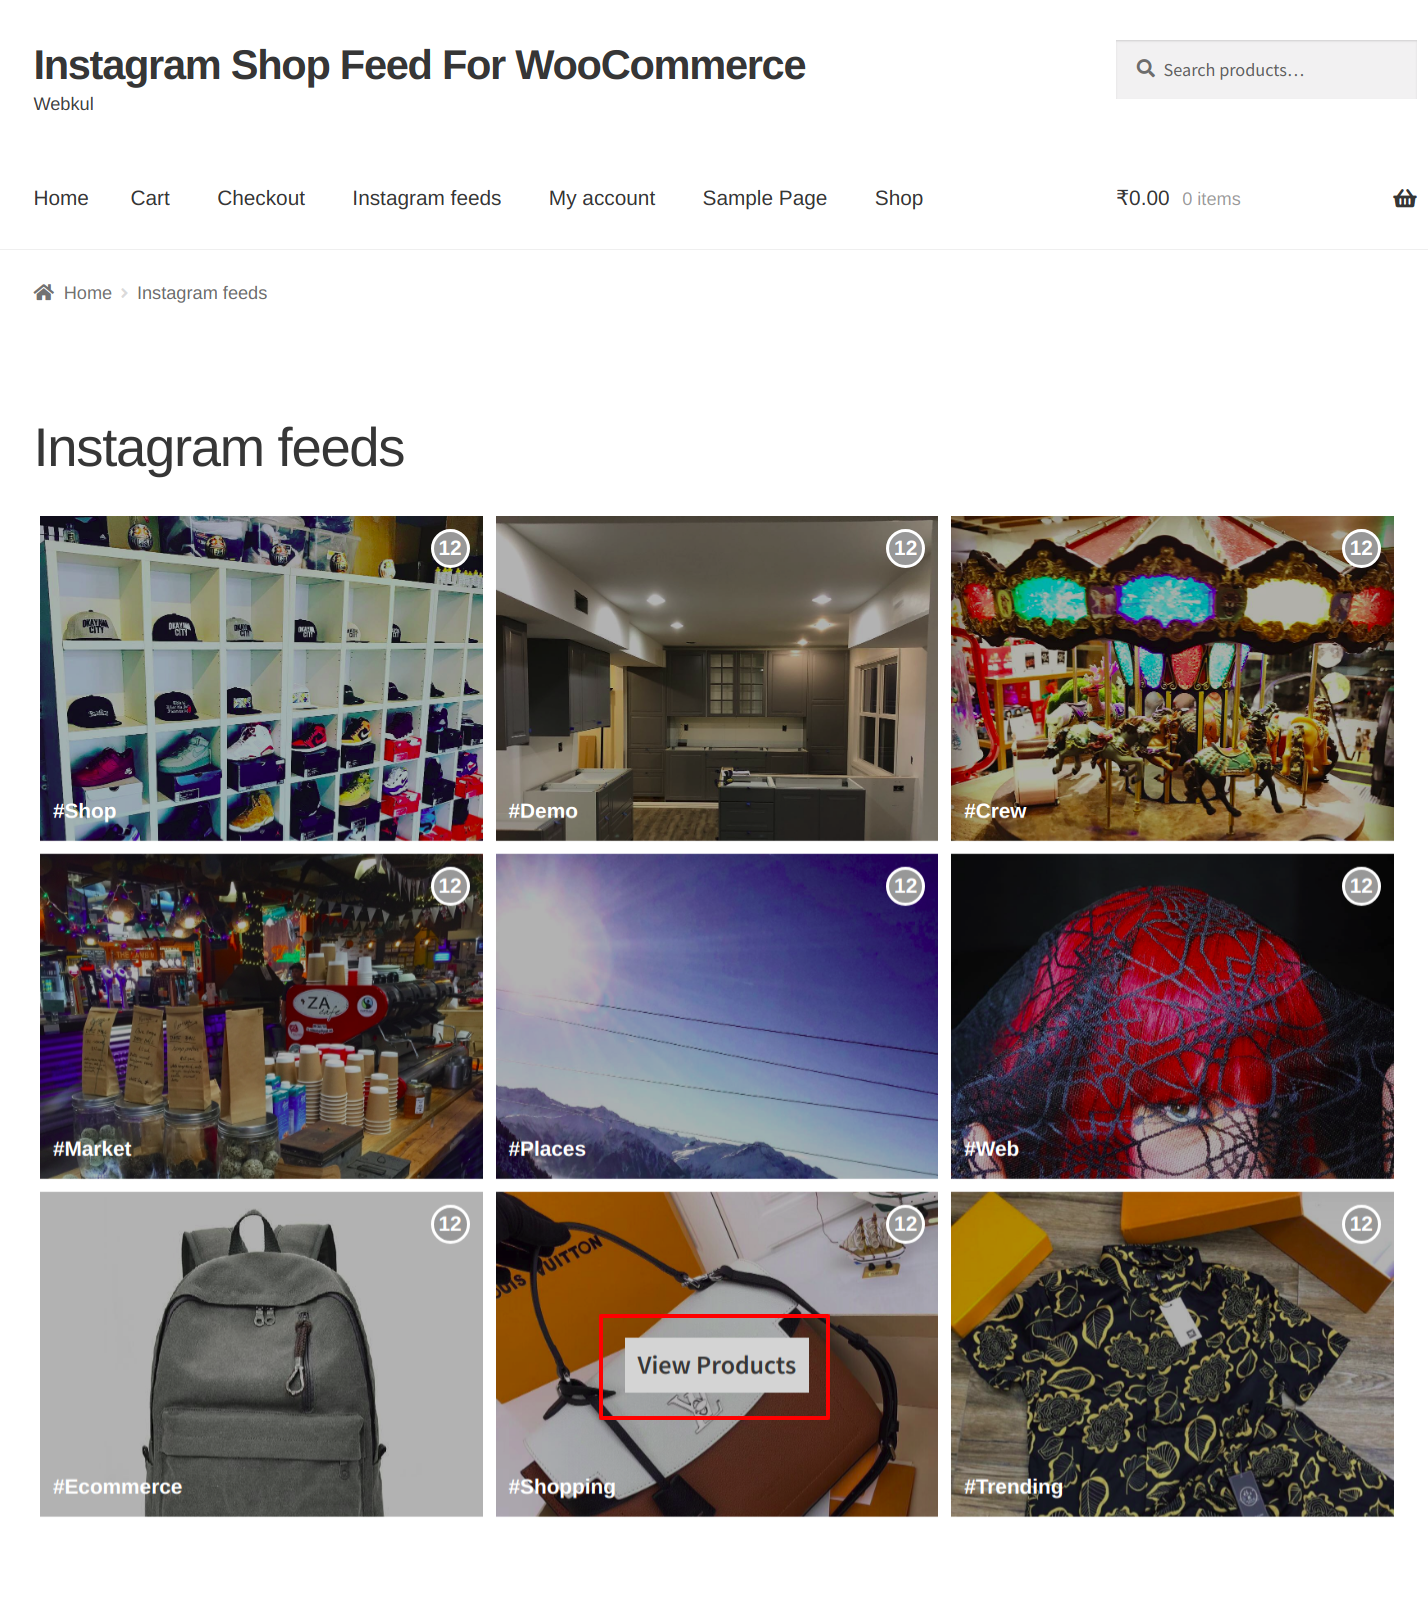
The Instagram Feed Page contains all the tags on the store which are having products associated with them. So, for seeing the products, the customer can click on View Products Button on the tag.
 A pop up will open up with the list of assigned products and images of the product.
Thus, with this module, the store owner can attract more customers by sharing the live images of the product being used by other customers. Through this module, the store owner can share the usability of the product also.
Responsive
The Woocommerce Instagram Shop Feed is compatible with all the screen sizes and can adjust according to Mobile screen, Tablet screen, and Desktop screen.

That’s all for the Instagram Shop Feed For Woocommerce, still, have any issues feel free to add a ticket and let us know your views to make the module better at https://webkul.uvdesk.com
Current Product Version - 1.1.0
Supported Framework Version - WordPress, 6.4.2, WooCommerce, 8.3.1


Be the first to comment.