WooCommerce eBay Connector plugin will integrate your WooCommerce store with the eBay store because managing them separately is enough to sap all of the time and drain profits.
eBay is a multinational e-commerce corporation, that facilitates online consumer-to-consumer and business-to-consumer sales.
Moreover, eBay is one of the largest online marketplaces in the world. It’s a leading website where users can buy and sell their products globally.
Also, one can open the business’s potential by expanding the product presentation to the largest online marketplaces like eBay.
Furthermore, this eBay Connector plugin provides two-way integration which means the admin can sync the products from the WooCommerce site to eBay and vice versa.
Meanwhile, the admin can import information about the products, categories, and orders from eBay to the WooCommerce store.
WooCommerce eBay Integration plugin allows the admin to import customized store categories on the eBay store to the WooCommerce site to keep both stores more uniform.
And, can also export the product from the WooCommerce store to the eBay store.
Further, this will list the items from the WooCommerce site directly onto your eBay account.
The admin can provide the eBay condition & specifications, refund policy, and shipping details for exported products.
Check a brief overview of how to add eBay accounts and the different options that the admin gets after the same.
If you require expert assistance or want to develop custom unique functionality, hire WooCommerce Developers for your project.
Note:
- Now eBay connector works for Multiple stores simultaneously.
- The Connector supports pictures in the following file formats: JPEG, BMP, GIF, TIF, PNG. You can check the list here.
We provide a production version of the plugin. If you want a development version then you can get it at an additional cost. Please contact [email protected] for it.
This plugin is compatible with is now compatible with WooCommerce’s latest features Cart and Checkout blocks and High-Performance Order Storage (HPOS)
Features
- Import simple and variable eBay products in the WooCommerce store.
- Also, import custom-created shop categories from eBay to the WooCommerce store.
- The connector has Automatic Inventory Management functionality.
- Import eBay orders in the WooCommerce store.
- Export simple and variable products from the WooCommerce store to eBay.
- Can map custom-created shop categories on eBay with the WooCommerce store category.
- Admin will update imported product details.
- Admin will configure the return policy details for exported products.
- The product’s SKU, name, description, stock, images, and categories export and import along with the product.
- It also supports product synchronization with eBay conditions and specifications.
- The admin will configure multiple eBay accounts.
- Sandbox mode is available for testing and development.
- Configure default product payment and shipping details.
- The admin will set the events in the Realtime setting for the auto-update of the product.
- Admin will select the process for the auto-update.
- The admin will also configure the International Shipping Service.
- The admin will manage the Real-Time Sync and as well as update the information of the product as per the selected event.
- The count of the products added at the backend can be checked.
- Separate logs for real-time sync events.
We proudly offer seamless support across a wide range of global eBay marketplaces, including eBay Motors, eBay United States, eBay Canada (English and French), eBay UK, eBay Australia, eBay Austria, eBay Belgium (French and Dutch), eBay France, eBay Germany, eBay Italy, eBay Netherlands, eBay Spain, eBay Switzerland, eBay Hong Kong, eBay India, eBay Ireland, eBay Malaysia, eBay Philippines, eBay Poland, and eBay Singapore.
Real Time Synchronization Features
The connector also supports below Real Time Synchronization Features
- Automatic Creation: When a product is created in the eBay store, its updates will reflect in the Woo store. The synced details include the category, description, title, SKU, price, stock, images, and attributes.
The below Real Time Synchronization will work both ways (eBay to Woo store and vice-versa) according to the settings chosen-
- Automatic Update: When a product is edited in the eBay store, the update reflects in the Woo store. The synced details include the category, description, title, SKU, price, stock, images, and attributes.
- Automatic Deletion: When an item is deleted from the eBay store, the change reflects in the Woo store.
Automatic Inventory Management
The WooCommerce eBay Connector features Automatic Inventory Management, streamlining inventory control and reducing manual work.
- When a product is sold or updated on eBay, WooCommerce automatically adjusts its stock.
- If a product goes out of stock on eBay, it is also marked out of stock in WooCommerce.
This automatic inventory sync works both ways, based on the Real-Time Sync settings, ensuring WooCommerce changes also reflect on eBay.
Installation
Firstly, the user will get a zip file which he has to upload in the “Add New” menu option in the WordPress admin panel.

For this, you need to login to WordPress Admin Panel and Under the Dashboard hovers your mouse over the “Plugins” menu option which brings out a Sub-Menu and then selects the “Add New” option.

Further, you will see an option on the top of your page that is “Upload Plugin”, click the option to upload the zip file.
After clicking on the “Upload Plugin” option, below that you will see a button “Choose File” click on the button to browse for the zip file as per the snapshot below.


After browsing the file, click the “Install Now” button to install the plugin as per the snapshot.

Moreover, when the plugin installation is complete correctly, you will see the success message and an option to activate the plugin. Click on “Activate Plugin” to activate the plugin.
Module Activation and Update
Check how to activate your WooCommerce plugin through the purchase code and check how you get updates on Webkul modules directly on the Plugins page.
Module Translation
To know how to translate the module, you can click here.
How to get eBay API credentials?
In order to do the module configuration, you will need to fill in your eBay developer keys (App Id, Cert Id, Dev Id, User ID, Auth Token) from https://developer.ebay.com/.
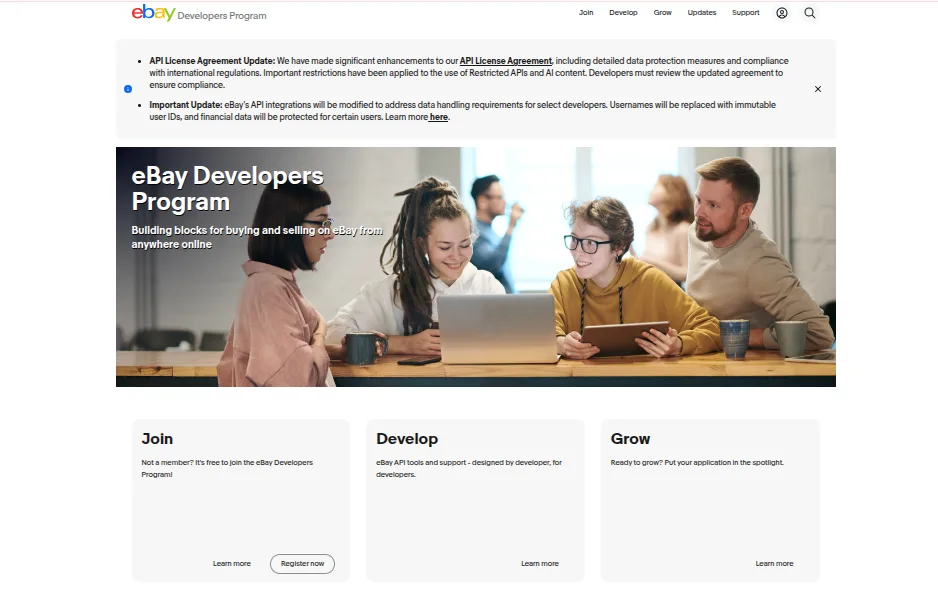
1: Firstly, to create a new account go to developer.ebay.com and click on the sign-in/Join link.
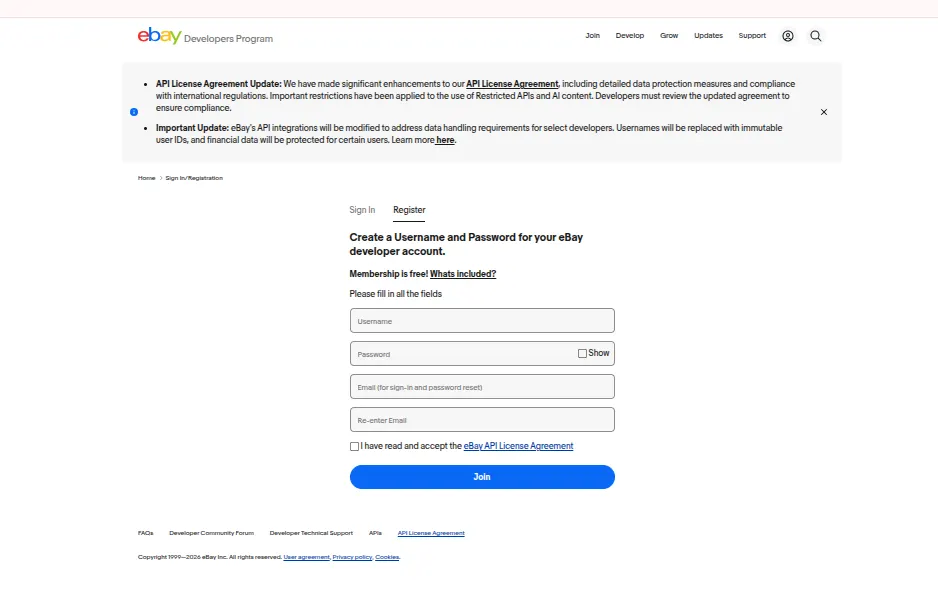
2: Further, create a username and password for your account and then click the join button.
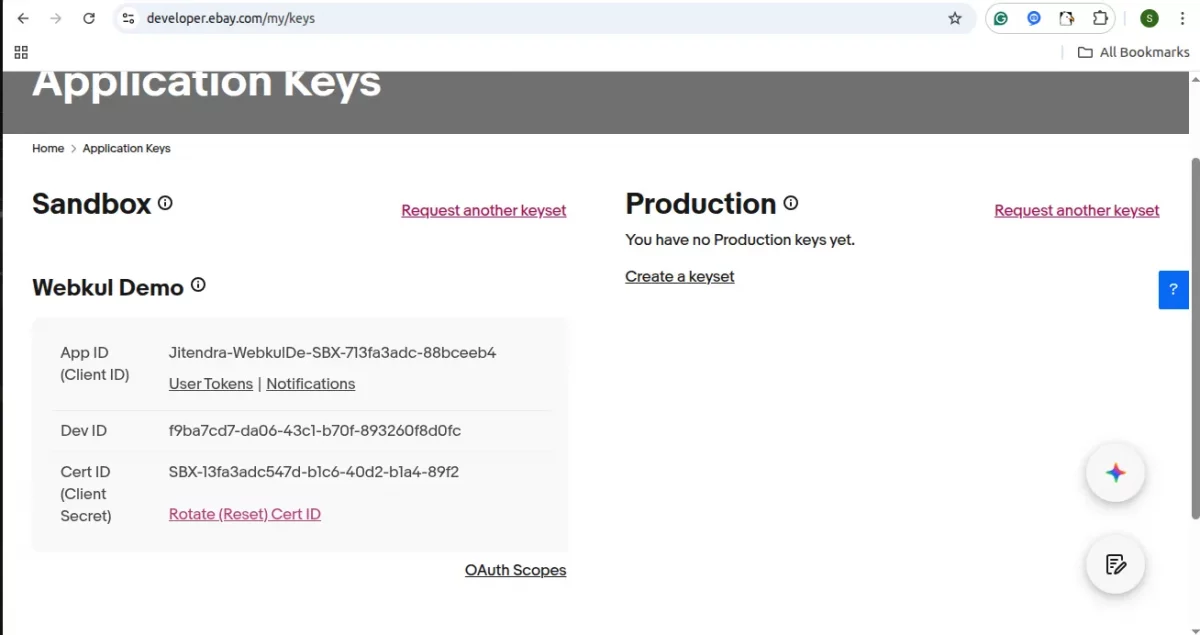
3: After that, you need to create an app. Enter the app name and choose the environment to generate your key set.
Note that app name will not save until you generate the keys.
To use the WooCommerce eBay Connector for real business operations, it is strongly recommended to configure the plugin with a Live (Production) eBay account.
4: Moreover, after clicking on the Create a Keyset link(for the environment you choose), you need to confirm the primary contact for this account first.
Then you can click Continue to Create Keys button.

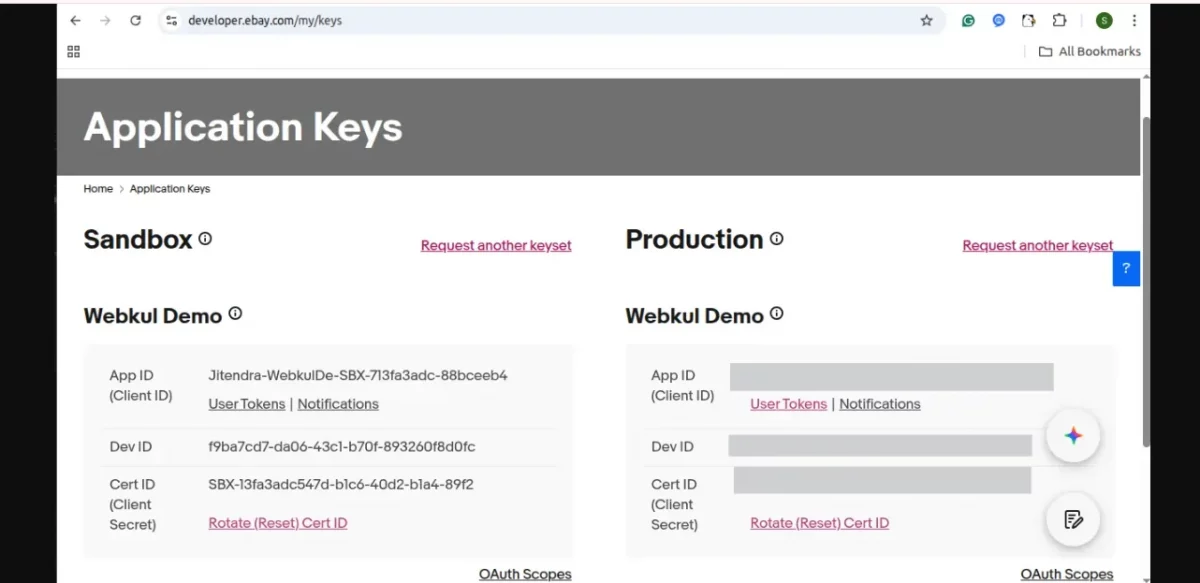
5: Now you can see the chosen environment key. For creating the production keys just click on “Create a Key Set” and you will get your production keys.

6: Further, for generating the User Token go to your Application keys page. In the App ID row of the Production keyset, click the User Tokens to access the Tokens page for your production keyset.
7: After you click on “User Tokens” in the snapshot above, you will see a “Sign in to production” button. Click it to access the production account.

8: After clicking the “Sign in” button, you will see another page where you have to click the “Agree” button.

9:Lastly, you will redirect back and will get the App Token.

Important Note:
The eBay Sandbox account only supports mock data exchange for testing connector functionality. For real product exports, live order imports, and actual business operations, you must connect a Live eBay account(production).
If you do not already have a Sandbox account, you must create one by clicking the “Register a new Sandbox user” link.
This will take you to the Register for Sandbox page where you can create test users for your eBay Sandbox environment.
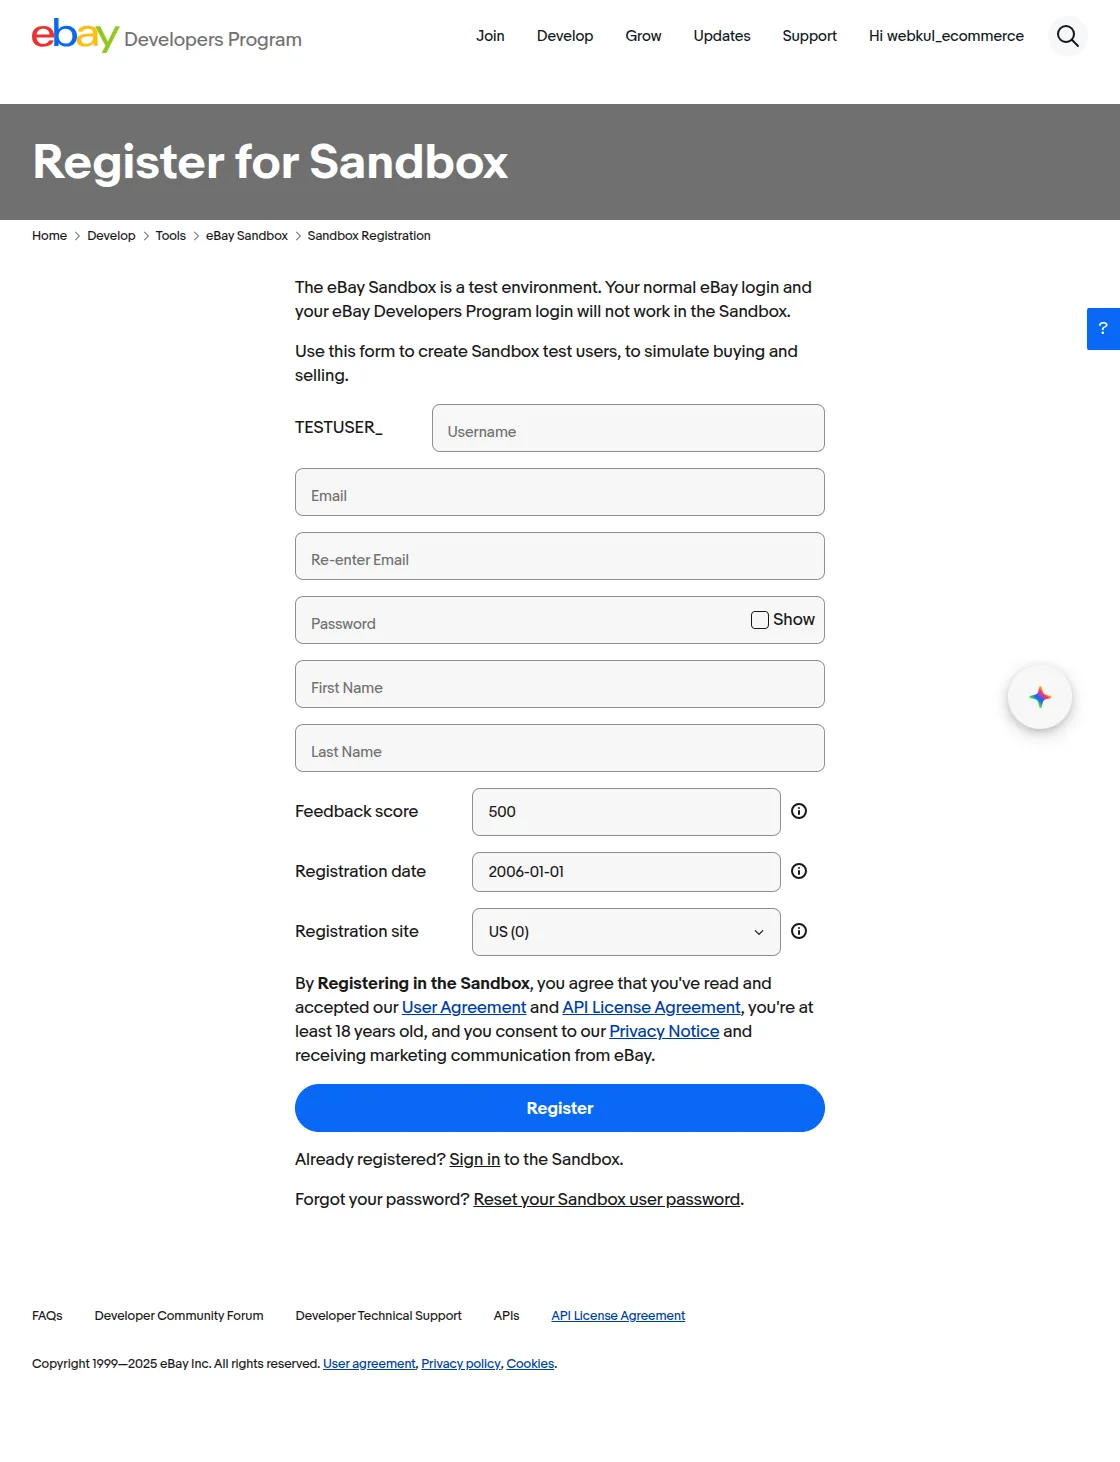
Complete the Registration Form
Fill out the form with the required information.
Review the User Agreement and API License Agreement.
Click Register to create your Sandbox test user.
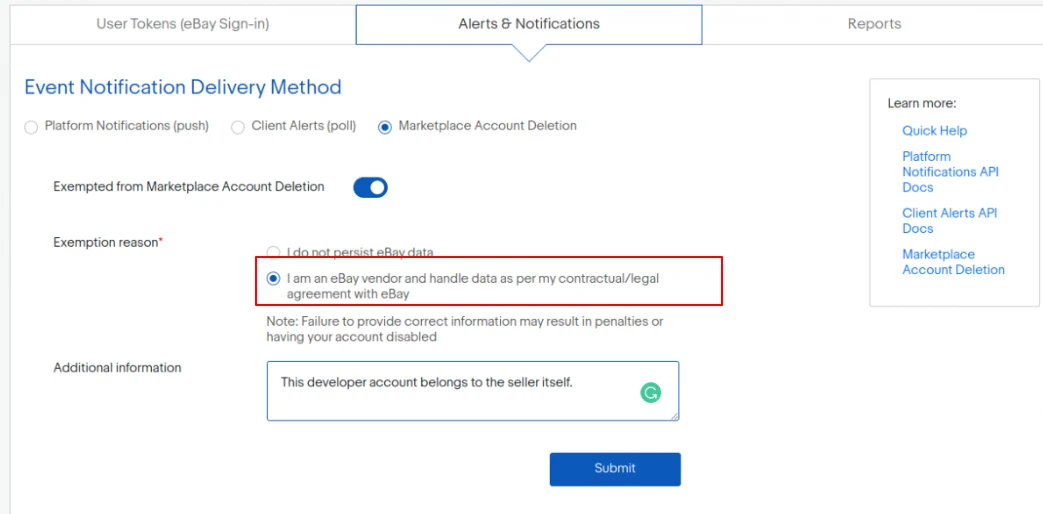
Note – In production mode, select MP account deletion
Subsequently, enter your Sandbox Username and Password.

Module Configuration
After the successful eBay Connector module installation, the admin can configure the module settings.

Workflow
The admin will navigate through the WC Ebay Connector option to add a new eBay account. Here a button Add New will display to the admin.
Add New
After clicking on “Add New”, the admin will navigate to the “Add eBay Account” page.

Here, the admin has to provide:
- Store Name: Enter the store name and this will not get updated once saved in the WooCommerce store.
- Select Global Site: selects the country to which the eBay account belongs.
- Enter eBay User ID, eBay application Token, Developer ID, Application ID, and Certification ID, and select the account type.
Now, the admin will click on the Save Account button to create the account.
Note: The application token ID will fetch automatically once it will get connect.
eBay Account List
Moreover, the admin can view the list of all the created eBay accounts as shown below.

Here, the admin can:
- Edit – edit the eBay account details by clicking on the “Edit” link.
- Delete – remove the existing eBay account from the list by selecting “Delete” from the “Bulk Actions” drop-down list.
eBay Settings
To configure the Account settings, the admin will click on the “eBay Settings” menu option. This will redirect the admin to the eBay Settings page as per the below image.


After that, the following options will be available for module configuration:
GENERAL SETTINGS-
Product Import Settings:
- Default Category: If an eBay category isn’t mapped in WooCommerce, the products are placed in this default category.
- eBay Imported Order Status: Set default order status for the order which will import from eBay.
- Default Product Quantity: Set the default product quantity for a product exported to eBay if the product quantity is zero in the store.
- Email Address for Report of update sync: Enter the Email Address to which the report of every update is sent.
- Pin code of item location: Enter the Pincode of the item location.
- Global shipping: Select yes/no for global shipping depending on the business need.
- Default Condition for Exported Product: If there is no product condition selected already, the default condition selected from here will be applied to the exported products.
- Creative Active listing only: The admin can select Yes, if the admin wants to create the active listing only else select No.
- Create Fixed Price Listing: The admin can select All Products or Fixed Price Products from here.
- Product Image Import: Select the process for product image import either as In the Background where image import process will be carried out in background or During Product Import in which images will be imported the same time as product import.
- Note: For Large number of product import, it is advisable to keep the product image import setting as In the Background to import products at a faster pace.
- Product Import Only from Global Site: If Enabled, only the products that belong to the eBay global site chosen in settings will be imported when performing product import.
Product Export Settings:
- Default Product Quantity: Set the default product quantity to be exported to eBay if the product quantity on store is zero.
- Pin code of Item Location: Enter the pin code of the location of the item.
- Global Shipping: Select Global shipping as Yes or No as per business requirment.
- Default Condition: Select the default condition of the product listing when exported to eBay.It can be set to New, Open Box, Manufacturer Refurbished, Seller Refurbished, Used, and other conditions.
Auto Mapping-eBay Connector:
- Enable Auto Mapping: The admin can enable or disable the category automapping.
Auto Order Import:
Enable Auto Order Import: Select the condition for auto order import: it will execute every 10 minutes and retrieve the order placed within the last 15 minutes.
NOTE: All Products must be imported for real-time order import.
RETURN POLICY – eBay Connector:

- Define Return Policy: Select either Returns Excepted or Not Accepted. This option is for exported products.
- Refund Option: select the refund option as Money Back or Replacement
- Returns Within: Select the return duration for the products being exported.
- Pay By: Select who will pay for the returned product – the seller or the buyer.
- Other Information: Write any information about Return Policy for exported products.
SHIPPING/LISTING SETTINGS- eBay Connector

LISTING OPTIONS
- Default CountryCodeType( Required While Product Export ): Enter the entry code type while the product is exported.
- Listing Duration: Select Good Till Canceled, 1, 3, 5, 7, 10, or 30 days. It is the duration of exported products on eBay.
DISPATCH OPTIONS:
- Dispatch Time: Select the dispatch time for product exports on eBay. Select 1, 2, 3, 4, 5, 10, 15, 20, or 30 days.

INTERNATIONAL SHIPPING SERVICE:
- Shipping Service: Select the international shipping service from the dropdown options.
- Priority: Now enter the priority of that shipping service.
- Cost: Enter the Shipping Amount that applies to the product when sync with eBay.
- Additional Cost: Additional Shipping Amount that apply to the product when sync with eBay
- Ship to Location ( Required While Product Export ): Select the location where the international shipping services are applicable.

DOMESTIC SHIPPING OPTIONS:
- Priority: Enter the shipping service priority.
- Service: Select the shipping service for the WooCommerce product created on eBay.
- Cost: Set the shipping amount that applies to the product when syncs eBay.
- Additional Cost: Additional shipping amount that applies to the product when syncing with eBay. This applies when a customer purchases the same product in additional quantity. And Shipping Service Additional Cost should be less than Shipping Service Cost.
- Time Min: Set minimum shipping time for the exported products.
- Time Max: Set the maximum shipping time for the exported products.
- Free: Select either Yes or No.
Real-Time Sync – eBay Connector
The admin can manage the Real-Time Sync from this tab. Here, the admin can Enable real-time sync to update the web store the same as the eBay store.
The admin can update the product information based on the item created, item revised, item sold-out, or item closed.
Note: For real-time settings, eBay Connector does not work for sandbox credentials.

eBay to WooCommerce Real-Time Sync– The admin has to enable the status for eBay to WooCommerce real-time sync.
Select eBay update events:
According to the selected events, the product details will update in the stores. The available item events are as follows:
- Create: When a product is added on eBay, WooCommerce syncs its category, description, title, SKU, price, stock, images, and attributes.
Auction-type products will import as Simple type products in the WooCommerce store.
- Revised: WooCommerce automatically updates products edited on eBay with all details, including category, title, SKU, price, stock, images, and attributes.
- Sold-out: When an item goes out of stock on eBay, WooCommerce updates its stock accordingly.
- Closed:Deleting an item on eBay automatically reflects in WooCommerce.
- Transaction: When an item is purchased from the eBay store, then the updates will get reflected in the Woo store.
Fields to Update:
Admins select the attributes to update during product updates.
Apply When:
The admin can set the condition for updates: Auto-Synchronization, manual update, or both.
Get email alerts for eBay to WooCommerce Update:
The admin can select if want to receive the emails for the sync status.
Select eBay email alert events: The product information email will get on the basis of the selected event.
WooCommerce Product automatically deletes when the Product ended on eBay:
Admins can enable a Real-time Setting to auto-delete WooCommerce products when the linked eBay listing ends, keeping listings consistent across both platforms.
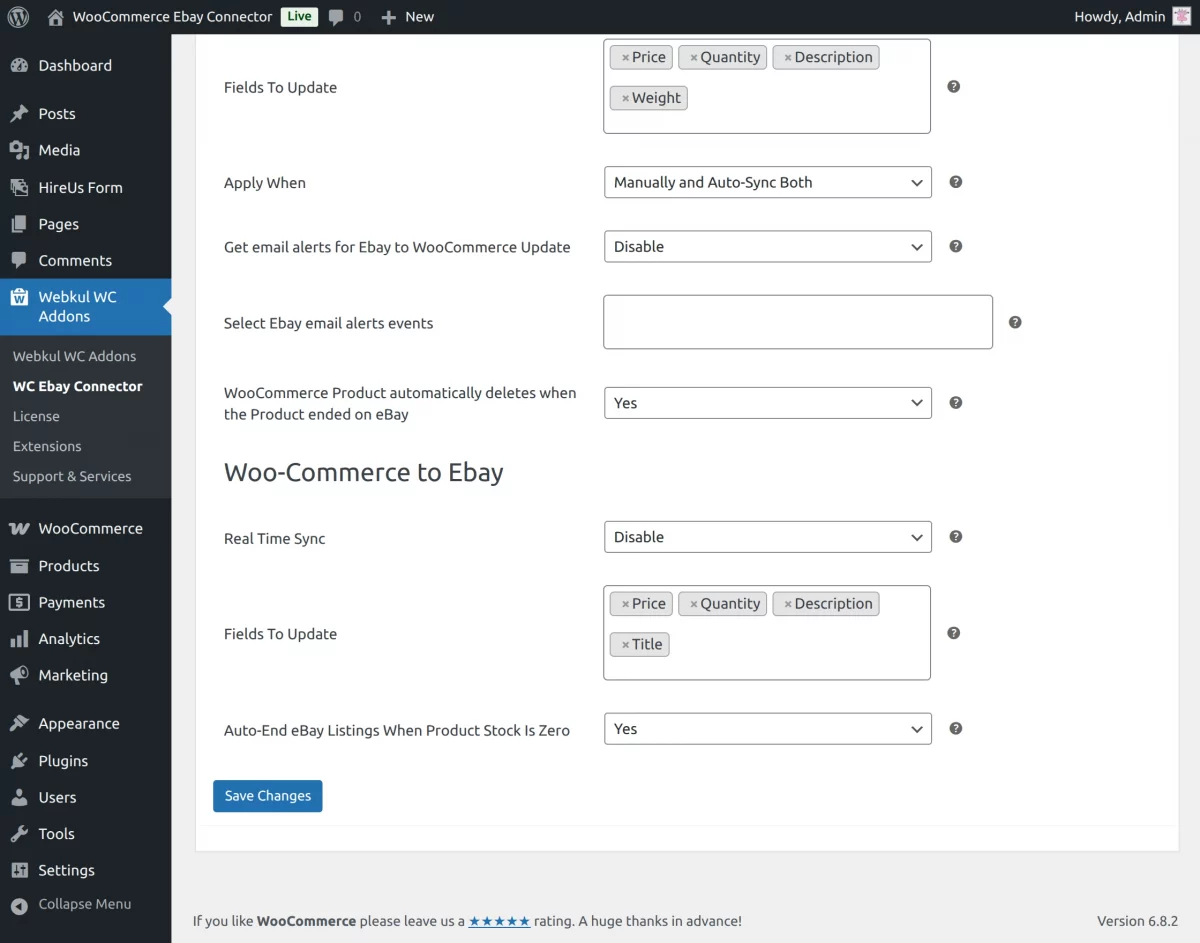
WooCommerce to eBay Real-Time Sync: The admin from here can enable the real-time sync b/w WooCommerce Store & eBay.
(If any updates take place at Woo store end will reflect at the eBay end instantly).
The details that will update are Images, Description, SKU, Title Category, Condition ID, Price, Stock, and Return Policy.
For the Item Sold and Refund, only stock updates will be there.
Note:-
RealTime Sync works for both Simple and Variable products in eBay to Woocommerce Sync.
Only updates on simple products are available during real-time sync from Woocommerce To eBay.
Add Price Rule – eBay Connector
The store admin can add price rules for the WooCommerce products from Add Price Rule tab.
Here, the admin has to make the below information to add the price rule for any product’s import or export.
Product price from- The admin sets the starting price to apply the rule.
Product price to- From here, the admin can set the last price for the applied rule.
Price- The admin can set the price for the price rule.
Operation Type- After that, select the operation type as fixed or percentage.
Operation- Set the price rule operation as increase or decrease.
Price Rule Status- Enable or disable the price rule status.
Price Rule Applicable for- Now, select the price rule applicable for import, export, or none.
Now click on the Save button to create the price rule.

The created price rule for the product will display as shown below.

Bulk Action: A button to Enable, Disable or Delete a created price rule is also provided for mass action.
Furthermore, the admin can make the settings for the below options.
- Manage Categories
- Manage Products
- Map Categories
- Manage Orders
- Export Products
Manage Categories
The admin can import categories so WooCommerce automatically assigns imported products to the mapped category.
As per the image attached below, the admin can see the “Manage Categories”.Here, the admin can see the complete list of the import categories.

The admin will first click on “Create Primary Categories from eBay” to import the categories to the WooCommerce store.

The admin will click on “Import all Node Category of this category” to create the imported categories in the WooCommerce store.

Map Categories
After this, the admin will map the created categories by clicking on the “Map Categories” tab. Under this tab, the admin can see a “Map eBay Primary Categories” tab as per the image.
At the time of mapping, the admin creates the eBay condition & specification as product attributes in WooCommerce.

On clicking the “Map eBay Primary Categories”, the admin will see a new page as per the below image. Mapping of only one category will happen at a time. Also, you cannot map the parent categories.
One needs to select the sub-category for mapping.

After mapping the categories, the admin can view them in the list as per the image.

Category Condition – After mapping the one to one category, the mapped store category’s products will show the field of eBay category condition on the add/edit page.
Later, The conditions provided for the category have to be provided for successfully exporting the products to eBay.

Category Specification -After mapping one to one category, the mapped store category’s products will show the category specification of eBay as global attributes at the add/edit page – product data.
Moreover, the admin can check the eBay category specification based global categories by navigating through the path at the admin panel Products > Attributes

WooCommerce shows the global attribute using the mapped eBay category name.
Further, the above global attribute values have to provide for the mapped eBay category’s product.

- All attributes with mapped store category names in the format – Attribute name[mapped category name] have to be provided with the values by the admin only.

Manage Products
However, the admin can synchronize the products on both stores with the help of this plugin.

Meanwhile, as per the below-attached image, the admin can see the “Import Products From eBay” and “Import Products date-wise” tabs under Manage Products.
Admin can import multiple products according to the dates.
Note: Only products that are currently listed as active on eBay will be imported.
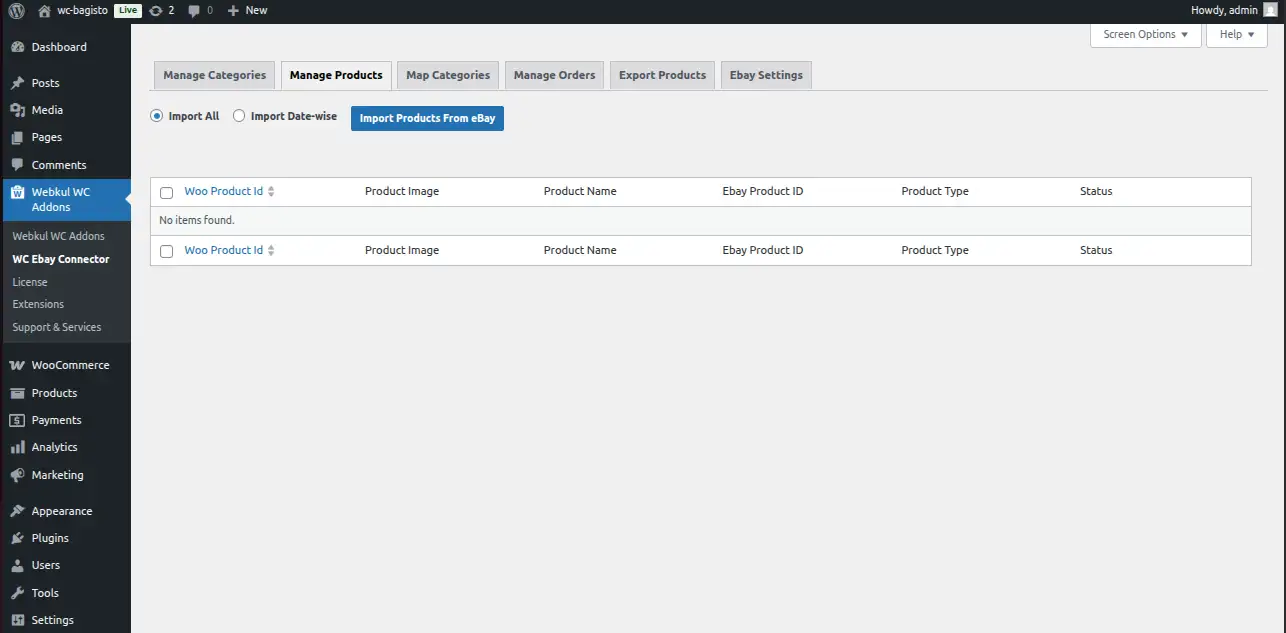
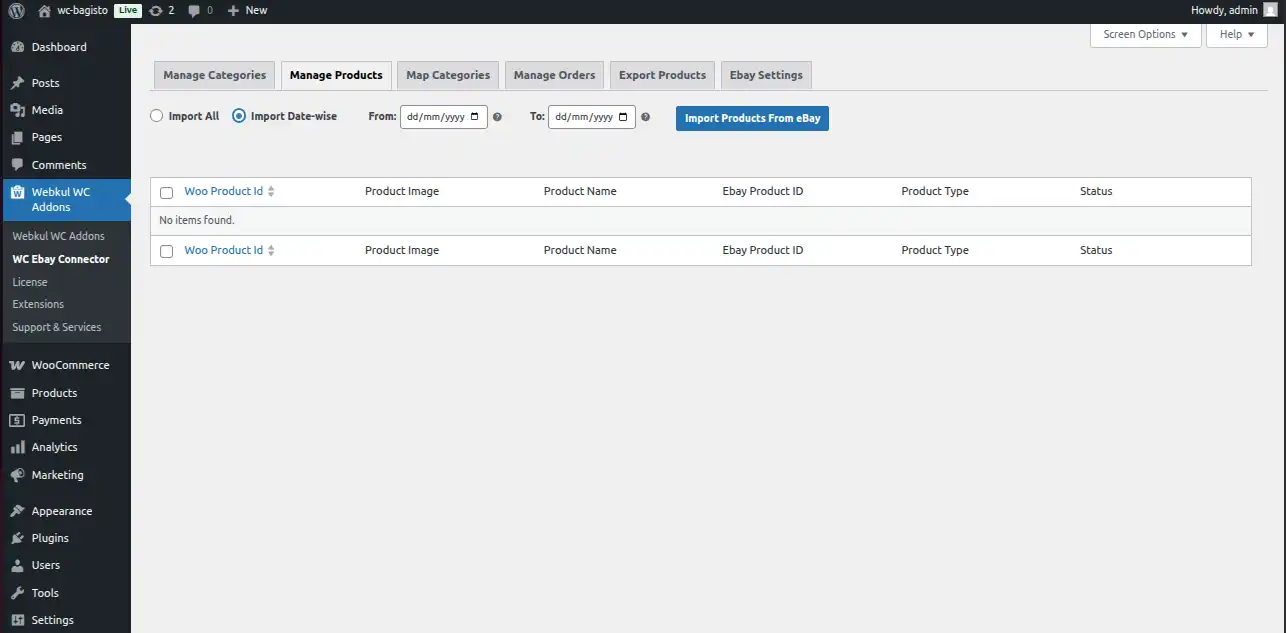
After that, the admin will first click on “Import Products from eBay” to import the products to the WooCommerce store.
Therefore, this will create temporary product data and store it in the WooCommerce store.
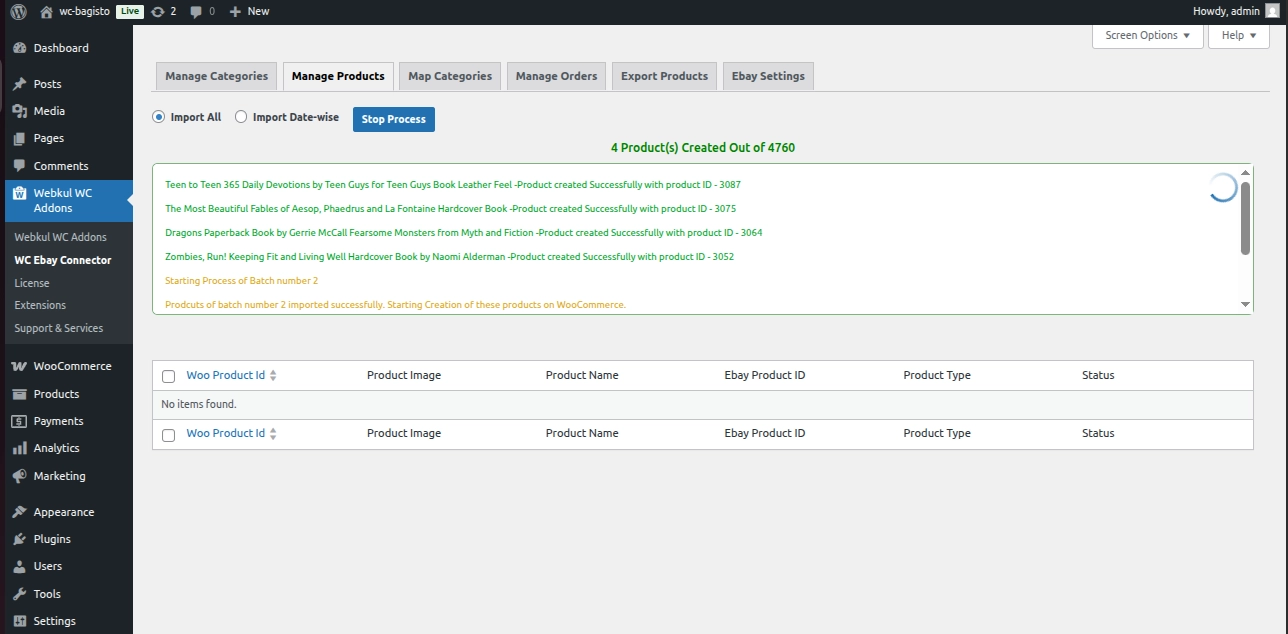
When the products are being imported a background process for the image import is also running.
The admin can also start and stop the product image import process as and when required.

Also, the Product Images will be imported in the background if the Product Image Import is set to In the Background in the Product Import Settings.
Note:
- If category mapping is not done for the eBay product category, then the imported products will be assigned to the default Category as per the configuration.
- Also, if the category mapping is done for the eBay product category, then the imported products will be assigned to the map category.
- If Automapping is enabled then products imported from Ebay Category will be assigned to the Ebay category that was already imported in WooCommerce.
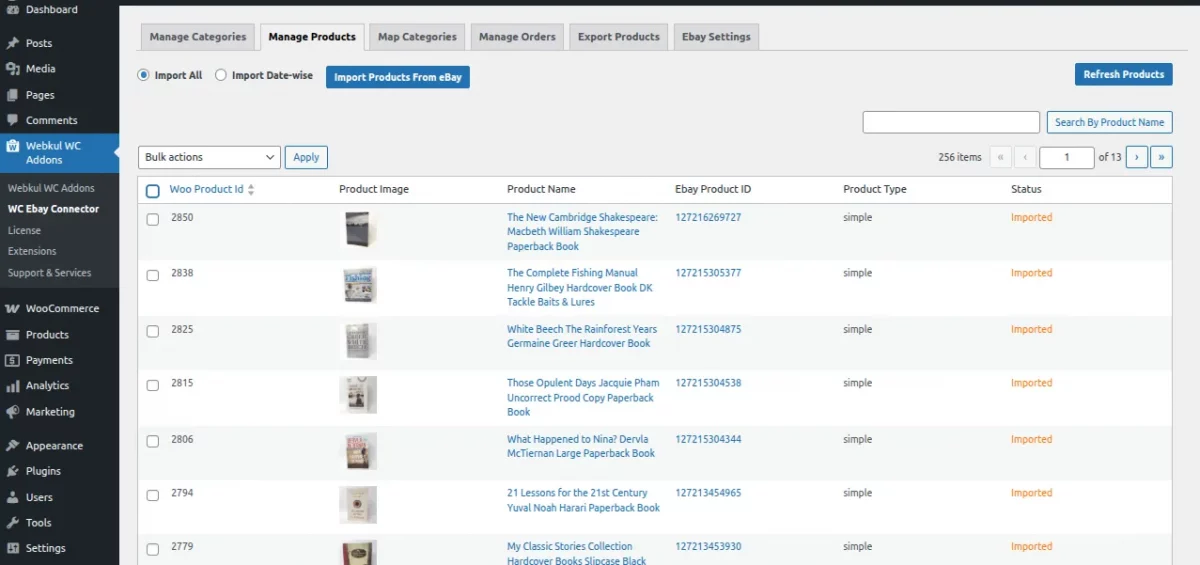
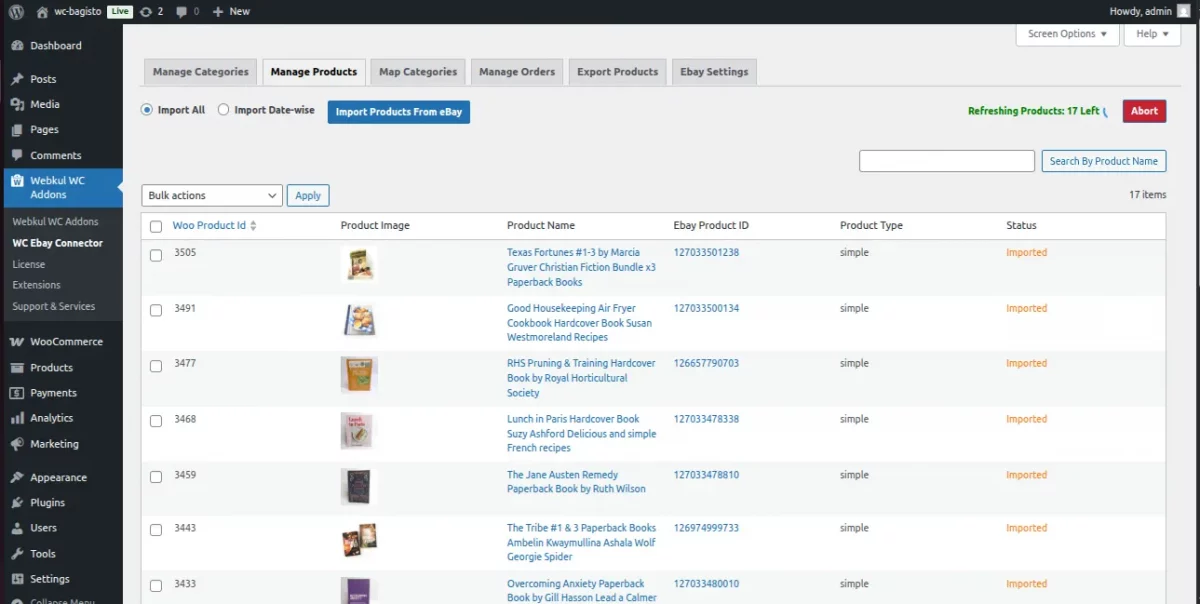
Once the products are added the admin can check the products added as mentioned in the snapshot below:
The “Refresh Product” button on the right lets you update your product information from eBay automatically.
When you click the button, a popup will appear notifying you that this is a time-consuming process.
It advises you to use the “Refresh eBay Products” option only if real-time sync is off or if the products are out of sync, ensuring accurate updates from eBay.
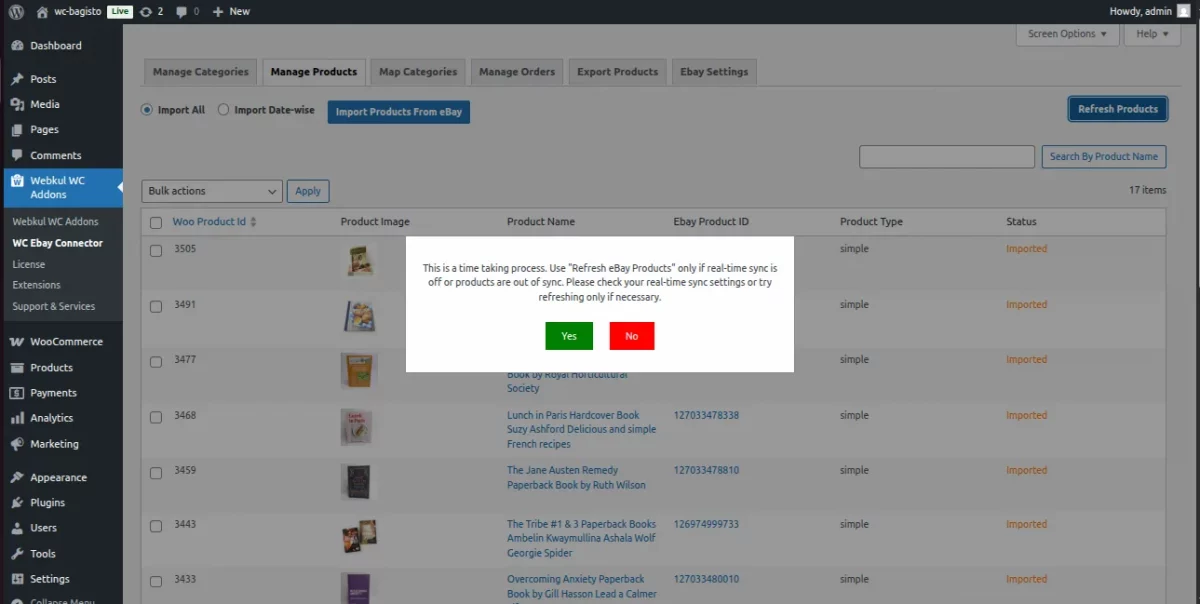
Once you click “Yes,” you can choose to abort the process or your product listings will be updated with the latest details.
Manage Orders
The admin can import the orders from the eBay store to the WooCommerce store with the help of this plugin. As per the below-attached image, the admin will see the tab – “Import Orders from eBay”.

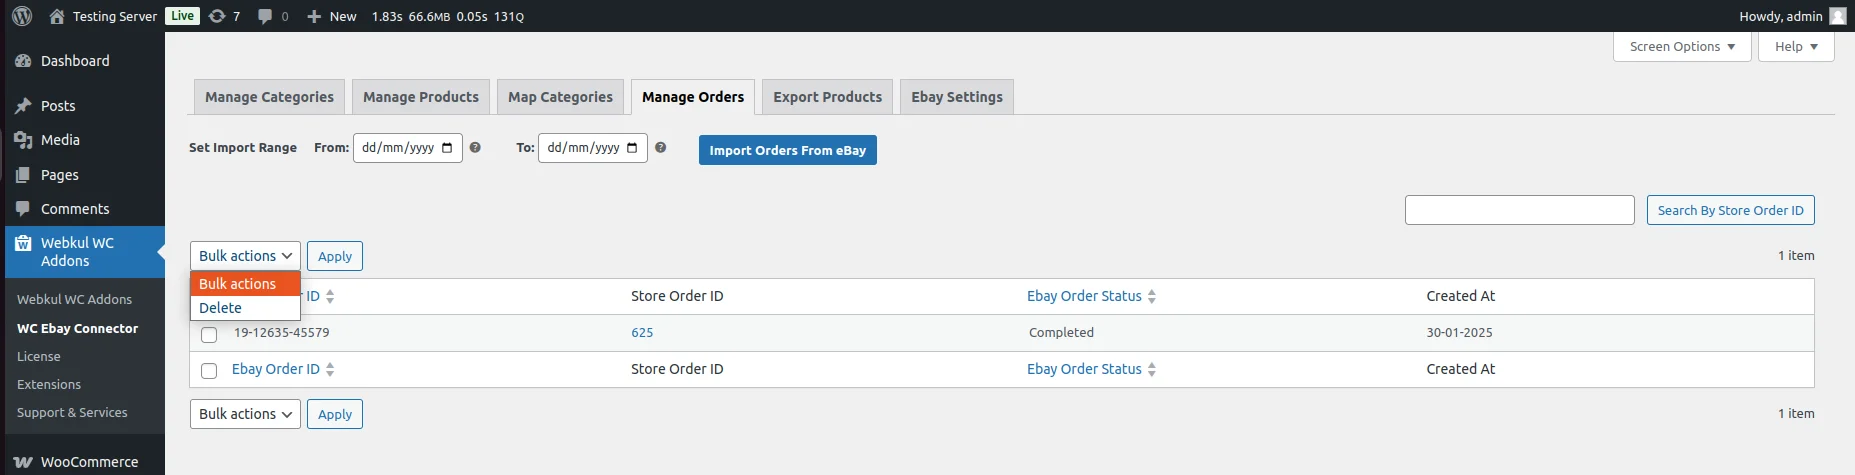
Furthermore, the admin will first click on “Import Orders from eBay” and then the admin has to select “Start Time From” and “Start Time To”.
After that, click on the “Start” button to import the orders to the WooCommerce store.
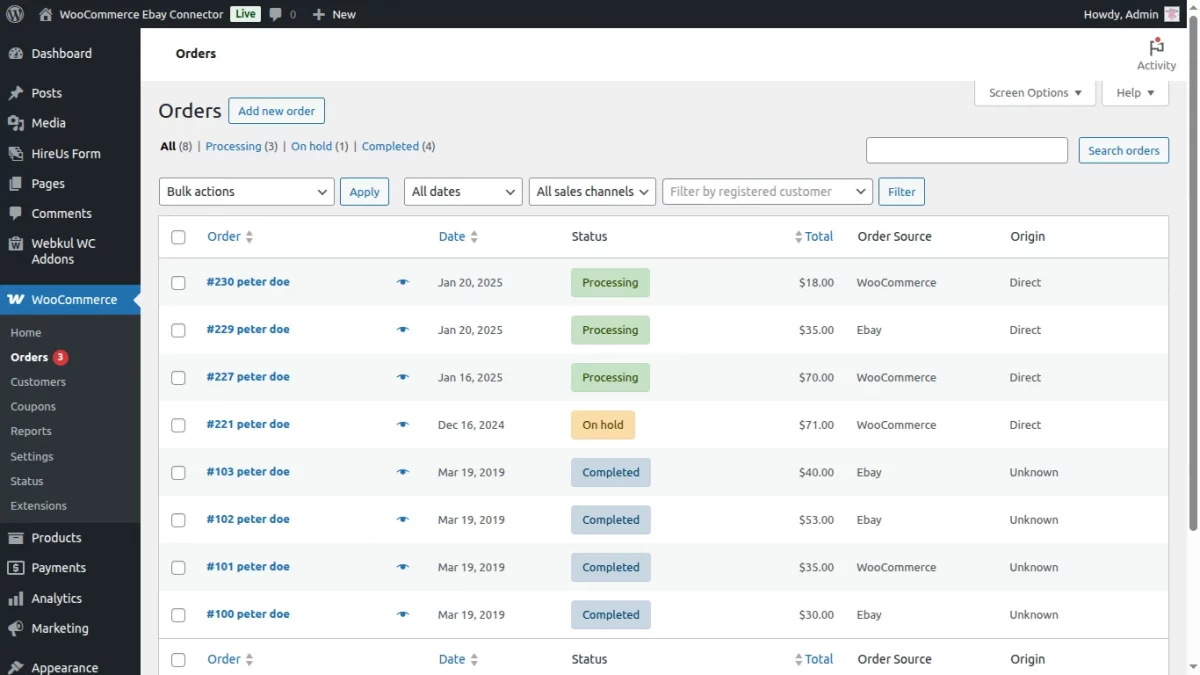
The WooCommerce Orders list now shows an Order Source column to identify if orders come from WooCommerce or eBay, helping admins track orders.
Export Products
However, first, the admin can export the products from the WooCommerce store to the eBay store with the help of this plugin. As per the image below, the admin will see a tab “Export Products”.
To know more, check how to export products to eBay.
Note:- Mapping is compulsory in export product

Furthermore, the admin simply selects the products from the visible product list that the admin wants to export.
Meanwhile, The admin will get the success message for the products that import successfully.
Meanwhile, the below image will show how the export products will be visible at the eBay store.

That’s all for the WooCommerce eBay Connector plugin.
Support
For any technical assistance raise a ticket or reach us by email at [email protected]. Thanks for Your Time! Have a Good Day!
Also, discover various solutions to add more features and enhance your online store by visiting the WooCommerce plugins.
Current Product Version - 3.4.0
Supported Framework Version - WordPress: 6.9 WooCommerce: 10.4.0

7 comments
Yes, the module will work with the latest Woocommerce version 4.1.0.
For further queries, you can mail us at [email protected] and we will for sure assist you. Thanks
I’m looking for an error but without a log it is complex
Enable WordPress debug by setting the WP_DEBUG switch in the wp-config.php file to true, as per the following example:
define( ‘WP_DEBUG’, true );
Enable the generation of the debug log file by adding the following line to the wp-config.php file:
define( ‘WP_DEBUG_LOG’, true );
By default the WordPress debug log file is called debug.log and is created in the /wp-content/ WordPress subdirectory.
Thanks
Thanks